

D I G I T A L P I A N O
P
—
1 0 5
Owner’s Manual
EN

SPECIAL MESSAGE SECTION
This product utilizes batteries or an external power supply (adapter).
DO NOT connect this product to any power supply or adapter other
than one described in the manual, on the name plate, or specifically
recommended by Yamaha.
WARNING: Do not place this product in a position where anyone
could walk on, trip over, or roll anything over power or connecting
cords of any kind. The use of an extension cord is not recommended!
If you must use an extension cord, the minimum wire size for a 25’
cord (or less ) is 18 AWG. NOTE: The smaller the AWG number, the
larger the current handling capacity. For longer extension cords, consult a local electrician.
This product should be used only with the components supplied or; a
cart, rack, or stand that is recommended by Yamaha. If a cart, etc., is
used, please observe all safety markings and instructions that accompany the accessory product.
SPECIFICATIONS SUBJECT TO CHANGE:
The information contained in this manual is believed to be correct at
the time of printing. However, Yamaha reserves the right to change or
modify any of the specifications without notice or obligation to update
existing units.
This product, either alone or in combination with an amplifier and
headphones or speaker/s, may be capable of producing sound levels
that could cause permanent hearing loss. DO NOT operate for long
periods of time at a high volume level or at a level that is uncomfortable. If you experience any hearing loss or ringing in the ears, you
should consult an audiologist.
IMPORTANT: The louder the sound, the shorter the time period before
damage occurs.
Some Yamaha products may have benches and / or accessory
mounting fixtures that are either supplied with the product or as
optional accessories. Some of these items are designed to be dealer
assembled or installed. Please make sure that benches are stable and
any optional fixtures (where applicable) are well secured BEFORE
using.
Benches supplied by Yamaha are designed for seating only. No other
uses are recommended.
NOTICE:
Service charges incurred due to a lack of knowledge relating to how a
function or effect works (when the unit is operating as designed) are
not covered by the manufacturer’s warranty, and are therefore the
owners responsibility. Please study this manual carefully and consult
your dealer before requesting service.
ENVIRONMENTAL ISSUES:
Yamaha strives to produce products that are both user safe and environmentally friendly. We sincerely believe that our products and the
production methods used to produce them, meet these goals. In keeping with both the letter and the spirit of the law, we want you to be
aware of the following:
Battery Notice:
This product MAY contain a small non-rechargeable battery which (if
applicable) is soldered in place. The average life span of this type of battery is approximately five years. When replacement becomes necessary,
contact a qualified service representative to perform the replacement.
This product may also use “household” type batteries. Some of these
may be rechargeable. Make sure that the battery being charged is a
rechargeable type and that the charger is intended for the battery being
charged.
When installing batteries, never mix old batteries with new ones, and
never mix different types of batteries. Batteries MUST be installed correctly. Mismatches or incorrect installation may result in overheating and
battery case rupture.
Warning:
Do not attempt to disassemble, or incinerate any battery. Keep all batteries away from children. Dispose of used batteries promptly and as
regulated by the laws in your area. Note: Check with any retailer of
household type batteries in your area for battery disposal information.
Disposal Notice:
Should this product become damaged beyond repair, or for some reason its useful life is considered to be at an end, please observe all
local, state, and federal regulations that relate to the disposal of products that contain lead, batteries, plastics, etc. If your dealer is unable
to assist you, please contact Yamaha directly.
NAME PLATE LOCATION:
The name plate is located on the bottom of the product. The model
number, serial number, power requirements, etc., are located on this
plate. You should record the model number, serial number, and the
date of purchase in the spaces provided below and retain this manual
as a permanent record of your purchase.
Model
Serial No.
Purchase Date
92-BP (bottom)
P-105 Owner’s Manual
2
PLEASE KEEP THIS MANUAL
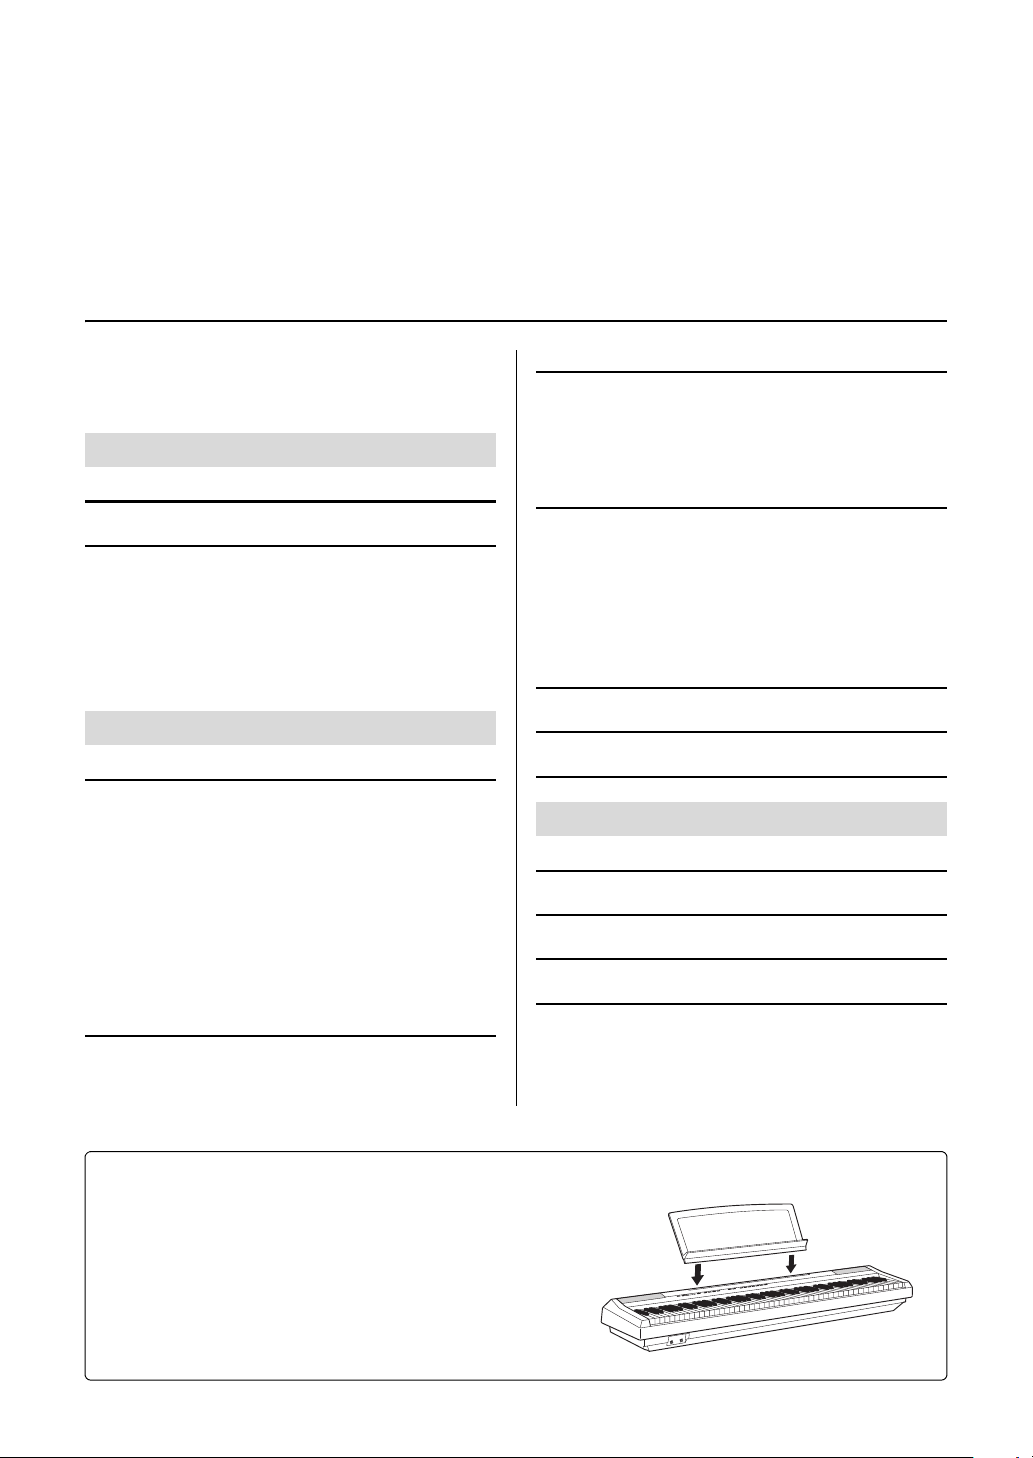
•Music Rest
Insert into the slot
Thank you for purchasing this Yamaha Digital Piano!
We recommend that you read this manual carefully so that you can fully take advantage of the advanced
and convenient functions of the instrument.
We also recommend that you keep this manual in a safe and handy place for future reference.
Contents
Accessories……………………………………………………. 3
About the Manuals ………………………………………….. 4
PRECAUTIONS ……………………………………………… 4
Introduction
Panel Controls and Terminals 6
Setting Up 7
Turning the Power On/Off ………………………………… 7
Setting the Volume………………………………………….. 7
Using Headphones …………………………………………. 7
Connecting External Audio Equipment ………………. 7
Using a Footswitch………………………………………….. 8
Using the Optional Pedal Unit…………………………… 8
Reference
Selecting & Playing Voices 9
Selecting a Voice ……………………………………………. 9
Layering Two Voices (Dual) ……………………………… 9
Splitting the Keyboard (Split) ………………………….. 10
Using the Pianist Styles …………………………………. 10
Playing Duo………………………………………………….. 11
Adding Variations to the Sound – Reverb…………. 12
Setting the Touch Sensitivity…………………………… 12
Transposing the Pitch in Semitones ………………… 13
Fine-Tuning the Pitch…………………………………….. 13
Listening to the Songs 14
Listening to the Demo Songs………………………….. 14
Listening to the Preset Songs …………………………. 14
Using the Metronome/Rhythm 15
Selecting a Beat (Time Signature)…………………….15
Selecting a Rhythm ……………………………………….. 15
Adjusting the Tempo………………………………………. 15
Adjusting the Volume……………………………………… 15
Recording Your Performance 16
Quick Recording ……………………………………………. 16
Recording Independently to Two Parts ……………..16
Changing the Initial Settings of the Recorded Song
Transferring SMF Files Between a Computer
and this Instrument …………………………………….. 17
Deleting the Entire Song…………………………………. 18
..17
Song Playback and Practice 18
Backup Data and Initializing 19
Auto Power Off Function 19
Appendix
Troubleshooting 20
Specifications 20
Preset Song List 21
Quick Operation Guide 22
Accessories
• Owner’s Manual
• AC Power Adaptor*
• Online Member Product Registration**
• Footswitch
* May not be included depending on your particular area. Please check with
** The PRODUCT ID on the sheet will be needed when you fill out the User
your Yamaha dealer.
Registration form.
P-105 Owner’s Manual
3
About the Manuals
Power supply/AC power adaptor
If you notice any abnormality
In addition to this Owner’s Manual, the following Online materials (PDF files) are available.
Computer-related Operations
Contains instructions about computer-related functions.
MIDI Reference
Contains MIDI-related information, such as the MIDI Implementation Chart.
MIDI Basics (only in English, French, German and Spanish)
Contains basic explanations about what MIDI is and can do.
To obtain the documents above, access the Yamaha Manual Library, enter your model name in the Model Name
area, then click [SEARCH].
Yamaha Manual Library
http://www.yamaha.co.jp/manual/
PRECAUTIONS
PLEASE READ CAREFULLY BEFORE PROCEEDING
Please keep this manual in a safe and handy place for future reference.
WARNING
Always follow the basic precautions listed below to avoid the possibility of serious injury or even death from electrical
shock, short-circuiting, damages, fire or other hazards. These precautions include, but are not limited to, the following:
• Do not place the power cord near heat sources such as heaters or radiators. Also,
do not excessively bend or otherwise damage the cord, or place heavy objects on
it.
• Only use the voltage specified as correct for the instrument. The required voltage
is printed on the name plate of the instrument.
• Use the specified adaptor (page 20) only. Using the wrong adaptor can result in
damage to the instrument or overheating.
• Check the electric plug periodically and remove any dirt or dust which may have
accumulated on it.
• This instrument contains no user-serviceable parts. Do not open the instrument
or attempt to disassemble or modify the internal components in any way. If it
should appear to be malfunctioning, discontinue use immediately and have it
inspected by qualified Yamaha service personnel.
• Do not expose the instrument to rain, use it near water or in damp or wet
conditions, place on it any containers (such as vases, bottles or glasses)
containing liquids which might spill into any openings. If any liquid such as
water seeps into the instrument, turn off the power immediately and unplug the
power cord from the AC outlet. Then have the instrument inspected by qualified
Yamaha service personnel.
• Never insert or remove an electric plug with wet hands.
• Do not put burning items, such as candles, on the unit. A burning item may fall
over and cause a fire.
• When one of the following problems occur, immediately turn off the power switch
and disconnect the electric plug from the outlet. Then have the device inspected
by Yamaha service personnel.
— The power cord or plug becomes frayed or damaged.
— It emits unusual smells or smoke.
— Some object has been dropped into the instrument.
— There is a sudden loss of sound during use of the instrument.
P-105 Owner’s Manual
4
DMI-5 1/2
CAUTION
Power supply/AC power adaptor
Always follow the basic precautions listed below to avoid the possibility of physical injury to you or others, or damage
to the instrument or other property. These precautions include, but are not limited to, the following:
• Do not connect the instrument to an electrical outlet using a multiple-connector.
Doing so can result in lower sound quality, or possibly cause overheating in the
outlet.
• When removing the electric plug from the instrument or an outlet, always hold
the plug itself and not the cord. Pulling by the cord can damage it.
• Remove the electric plug from the outlet when the instrument is not to be used for
extended periods of time, or during electrical storms.
• Do not place the instrument in an unstable position where it might accidentally
fall over.
• Before moving the instrument, remove all connected cables, to prevent damage
to the cables or injury to anyone who might trip over them.
• When setting up the product, make sure that the AC outlet you are using is easily
accessible. If some trouble or malfunction occurs, immediately turn off the power
switch and disconnect the plug from the outlet. Even when the power switch is
turned off, electricity is still flowing to the product at the minimum level. When
you are not using the product for a long time, make sure to unplug the power
cord from the wall AC outlet.
• Use only the stand specified for the instrument. When attaching the stand or rack,
use the provided screws only. Failure to do so could cause damage to the internal
components or result in the instrument falling over.
Yamaha cannot be held responsible for damage caused by improper use or modifications to the instrument, or data that is lost or destroyed.
Always turn the power off when the instrument is not in use.
Even when the [ ] (Standby/On) switch is in standby status (power lamp is off), electricity is still flowing to the instrument at the minimum level.
When you are not using the instrument for a long time, make sure you unplug the power cord from the wall AC outlet.
• Before connecting the instrument to other electronic components, turn off the
power for all components. Before turning the power on or off for all components,
set all volume levels to minimum.
• Be sure to set the volumes of all components at their minimum levels and
gradually raise the volume controls while playing the instrument to set the
desired listening level.
• Do not insert a finger or hand in any gaps on the instrument.
• Never insert or drop paper, metallic, or other objects into the gaps on the panel or
keyboard. This could cause physical injury to you or others, damage to the
instrument or other property, or operational failure.
• Do not rest your weight on, or place heavy objects on the instrument, and do not
use excessive force on the buttons, switches or connectors.
• Do not use the instrument/device or headphones for a long period of time at a
high or uncomfortable volume level, since this can cause permanent hearing
loss. If you experience any hearing loss or ringing in the ears, consult a
physician.
Notice
To avoid the possibility of malfunction/ damage to the product,
damage to data, or damage to other property, follow the notices
below.
Handling and Maintenance
• Do not use the instrument in the vicinity of a TV, radio, stereo equipment, mobile
phone, or other electric devices. Otherwise, the instrument, TV, or radio may
generate noise.
• Do not expose the instrument to excessive dust or vibrations, or extreme cold or
heat (such as in direct sunlight, near a heater, or in a car during the day) to
prevent the possibility of panel disfiguration, damage to the internal components
or unstable operation. (Verified operating temperature range: 5° – 40°C, or 41° –
104°F.)
• Do not place vinyl, plastic or rubber objects on the instrument, since this might
discolor the panel or keyboard.
• When cleaning the instrument, use a soft, dry/dry or slightly damp cloth. Do not
use paint thinners, solvents, cleaning fluids, or chemical-impregnated wiping
cloths.
Saving data
• Some types of data (page 19) will be stored in internal memory, and maintained
even if the power is turned off. However, the data could be lost due to malfunction
or incorrect operation. Save important data to a computer. For details, refer to the
Computer-related Operations (page 4).
DMI-5 2/2
Information
About copyrights
• Copying of the commercially available musical data including but not limited to
MIDI data and/or audio data is strictly prohibited except for your personal use.
• This product incorporates and bundles computer programs and contents in which
Yamaha owns copyrights or with respect to which it has license to use others’
copyrights. Such copyrighted materials include, without limitation, all computer
software, style files, MIDI files, WAVE data, musical scores and sound recordings.
Any unauthorized use of such programs and contents outside of personal use is
not permitted under relevant laws. Any violation of copyright has legal
consequences. DON’T MAKE, DISTRIBUTE OR USE ILLEGAL COPIES.
About functions/data bundled with the instrument
• Some of the preset songs have been edited for length or arrangement, and may
not be exactly the same as the original.
About this manual
• The illustrations and LCD screens as shown in this manual are for instructional
purposes only, and may appear somewhat different from those on your
instrument.
• The company names and product names in this manual are the trademarks or
registered trademarks of their respective companies.
P-105 Owner’s Manual
5

Panel Controls and Terminals
!3 !4!2!1!0
!5
qwerty
ui o
C0 C1 C2 C3 C4 C5 C6 C7
A-1
Built-in Speakers
Speakers are built into the instrument at the bottom. Though you can
enjoy playing the instrument even when putting it on a desk or table,
we recommend that you use an optional keyboard stand for better
sound.
Shows the jacks and terminals as seen when viewed from the rear of the instrument.
Introduction
q [ ] (Standby/On) switch………………….. page 7
For turning the power on or setting to standby.
w [MASTER VOLUME] slider………………… page 7
For adjusting the volume of the entire sound.
e [DEMO/SONG] button ………………………page 14
For playing the Demo Songs and the Preset Songs.
r TEMPO [][]/SELECT [][]buttons
……………………………………………………….page 14
For selecting a Song during playback, adjusting the
tempo, and selecting the Song part for recording
and playback.
t [METRONOME/RHYTHM] button……….page 15
For starting or stopping the metronome or rhythm.
y [PIANIST STYLE] button…………………..page 10
For using the Pianist Styles.
u [REC] button ……………………………………page 16
For recording your keyboard performance.
i [PLAY] button ………………………………….page 16
For playing back the recorded performance.
o Voice buttons…………………………………… page 9
For switching the Voice between those printed
above and below each button.
P-105 Owner’s Manual
6
For selecting a Voice or two Voices played simultaneously, such as Piano and Organ.
!0 [USB TO HOST] terminal
For connecting to a computer, allowing you transfer the User Song data as SMF, and transmit MIDI
messages between both devices. For details, refer
to the “Computer-related Operations” and the
“MIDI Reference.”
• Use an AB type USB cable of less than 3 meters. USB
3.0 cables cannot be used.
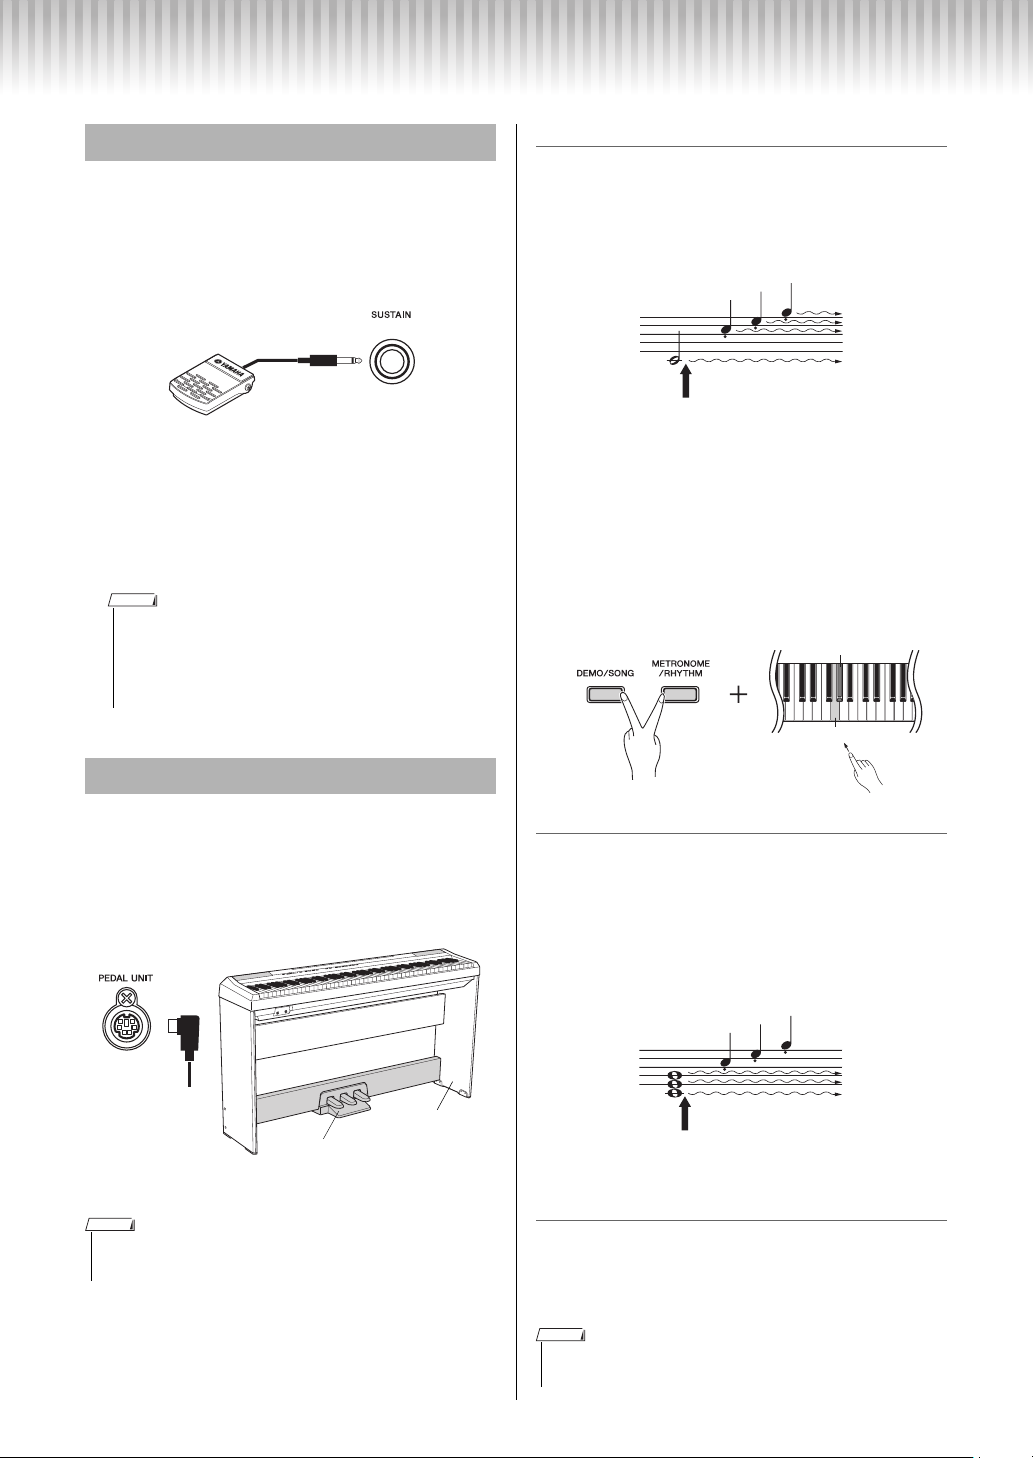
!1 [SUSTAIN] jack ………………………………….page 8
For connecting the included footswitch, an
optional footswitch and foot pedal.
!2 [PEDAL UNIT] jack …………………………….page 8
For connecting an optional pedal unit.
!3 AUX OUT [L/L+R][R] jacks …………………page 7
For connecting external audio equipment.
!4 DC IN jack…………………………………………page 7
For connecting the power adaptor.
!5 [PHONES] jacks ………………………………..page 7
For connecting a set of standard stereo headphones.
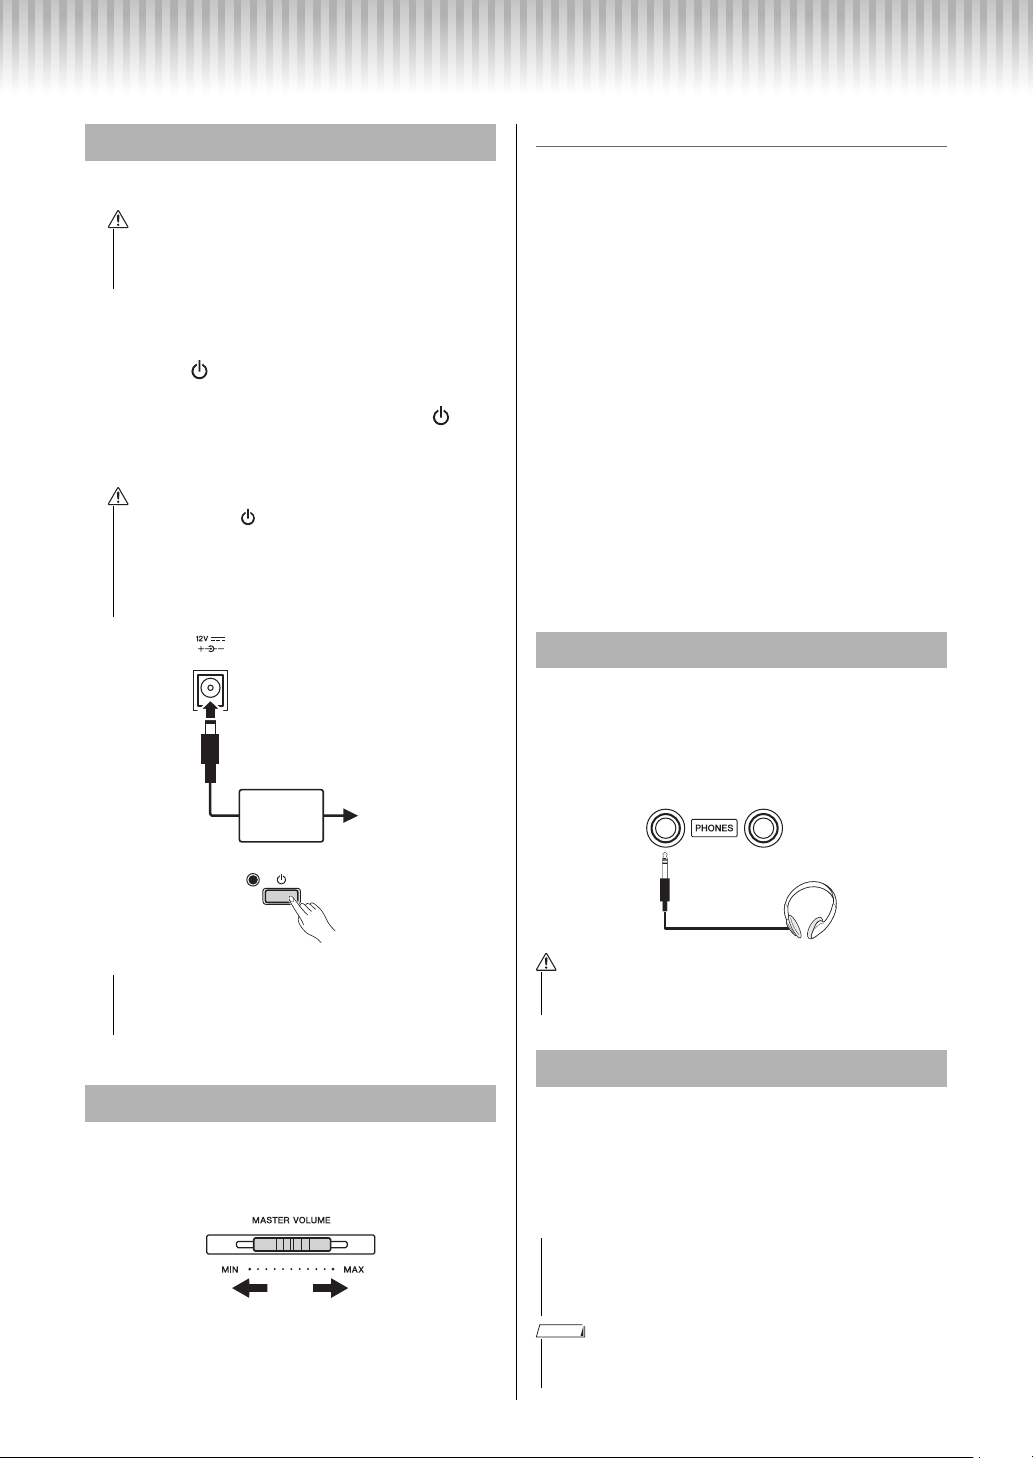
Setting Up
AC pow er
adaptor
AC outlet
1
2
3
Standard stereo
phone plug
Turning the Power On/Off
1 Connect the AC power adaptor to the DC IN jack.
• Use only the specified adaptor (page 20). Using the
wrong adaptor can result in damage to the instrument
or overheating.
2 Plug the AC power adaptor into an AC outlet.
3 Press the [ ] (Standby/On) switch to turn on the
power.
The power lamp located to the left of the [ ]
(Standby/On) switch lights up. To turn off the
power, press this switch again.
• Even when the [ ] (Standby/On) switch is in standby
status (power lamp is off), electricity is still flowing to
the instrument at the minimum level.
When you are not using the instrument for a long time,
make sure you unplug the power cord from the wall AC
outlet.
I.A. Control (Intelligent Acoustic Control)
With this function, the sound quality of this instrument is automatically adjusted and controlled according to the overall volume. Even when the volume is
low, you can hear both low sounds and high sounds
clearly.
To turn on/off the I.A. Control:
While holding down [DEMO/SONG] and [METRONOME/RHYTHM] simultaneously, press the
C#5 key to turn on or D5 to turn off. The default
setting is “on”.
To adjust the I.A. Control Depth:
While holding down [DEMO/SONG] and [METRONOME/RHYTHM] simultaneously, press the
A#4 key to decrease by one, C5 to increase by one,
or B4 to reset to 0 (default). The setting range is
from -3 to +3.
For details on the key assignments, see “Quick Operation Guide” (page 22).
Using Headphones
Since this instrument is equipped with two
[PHONES] jacks, you can connect two sets of standard stereo headphones. If you are using only one set
of headphones, insert a plug into either jack, shutting
off the speakers.
• Note that the power is automatically turned off if this
instrument is not operated for 30 minutes. For details,
see page 19.
Setting the Volume
When you start playing, use the [MASTER VOLUME] slider to adjust the volume of the entire keyboard sound.
• To protect your hearing, avoid listening with the headphones at a high volume level for long periods of time.
Connecting External Audio Equipment
To amplify the instrument’s sound, you can connect a
stereo system to the AUX OUT [L/L+R]/[R] jacks via
the Phone plugs (standard). The volume of the sound
output from those jacks will be adjusted via the
[MASTER VOLUME] slider.
• When the instrument’s sound is output to an external
device, first turn on the power to the instrument, then to
the external device. Reverse this order when you turn the
power off.
NOTE
• Use audio cables and adaptor plugs having no (zero) resistance.
• Use only the [L/L+R] jack for connection with a monaural device.
P-105 Owner’s Manual
7
Setting Up
LP-5A/
LP-5AWH
(optional)
L-85/L-85S/
L-8 5WH
(optional)
If you press and hold the damper pedal here,
all the notes shown will be sustained.
G#4 (off)
G4 (on)
If you press and hold the sostenuto pedal here,
only the notes held at this timing will be sustained.
Using a Footswitch
The [SUSTAIN] jack is for connecting the included
footswitch, which works in the same way as a damper
pedal on an acoustic piano. Also an optional FC3 foot
pedal or FC4/FC5 footswitch can be connected to this
jack. The FC3 lets you use the Half Pedal function.
Half Pedal function (for FC3 and LP-5A/LP5AWH)
If you are playing the piano with sustain and want
a clearer, less muddled sound (especially in the
bass register), let up on your foot from the pedal to
half position or higher.
NOTE
• Do not press the footswitch when turning the power on. Doing this changes
the recognized polarity of the footswitch, resulting in reversed footswitch
operation.
• Make sure that power is OFF when connecting or disconnecting the footswitch or pedal.
Damper (Right) Pedal
Pressing this pedal will sustain notes longer. Releasing this pedal immediately stops (damps) any sustained notes. A “half-pedal” function of this pedal
creates partial sustain effects, depending on how far
down you press the pedal.
Damper Resonance
This function simulates the sustain sound produced
via the damper pedal on a grand piano.
To turn on/off the Damper Resonance:
While holding down [DEMO/SONG] and [METRONOME/RHYTHM] simultaneously, press the
G4 key (on; default) or G#4 key (off).
Using the Optional Pedal Unit
The [PEDAL UNIT] jack is for connecting an
optional LP-5A/LP-5AWH pedal unit. When connecting the pedal unit, make sure to also assemble the unit
on an optional keyboard stand (L-85/L-85S/L85WH).
NOTE
• Make sure that power is OFF when connecting or disconnecting the pedal unit.
• The Damper Resonance cannot be used in Duo (page 11).
P-105 Owner’s Manual
8
Sostenuto (Center) Pedal
If you play a note or chord on the keyboard and press
the sostenuto pedal while the note(s) are held, those
notes will sustain as long as you hold the pedal (as if
the damper pedal had been pressed) but all subsequently played notes will not be sustained. This makes
it possible to sustain a chord, for example, while other
notes are played “staccato.”
Soft (Left) Pedal
The soft pedal reduces the volume and slightly
changes the timbre of notes played while the pedal is
pressed. The soft pedal will not affect notes that are
already playing when it is pressed.
NOTE
• When you select the JAZZ ORGAN or ROCK ORGAN Voice, the Left pedal functions to switch the rotary speed of the rotary speaker.
Selecting & Playing Voices
Reference
Selecting a Voice
Play the keyboard.
2
The instrument has a wide variety of Voices, or instrument sounds, for your enjoyment, including Piano and
Organ.
Press a Voice button once or twice.
1
Pressing the same Voice button repeatedly alternates the on/off status of the lamp, changing
between the Voices whose names are printed
above (lamp off) and below (lamp on) the buttons.
Voice List
Voice Name Description
Sampled from a concert grand piano. It
uses different samples depending on the
GRAND PIANO 1
GRAND PIANO 2
E. PIANO 1
E. PIANO 2
E. PIANO 3
E. PIANO 4
JAZZ ORGAN
PIPE ORGAN
ROCK ORGAN
VIBRAPHONE
STRINGS
HARPSICHORD
WOOD BASS
E. BASS
playing strength and produces smoother
tonal changes. Suitable not only for classical compositions but also for any style
music.
Spacious and clear piano with bright
reverb. Good for popular music.
An electronic piano sound created by FM
synthesis. Good for standard popular
music.
A slightly brighter electronic piano sound
than E. PIANO 1. Good for standard popular music.
Vintage electric piano sound of hammerstruck metallic “tines.” Soft tone when
played lightly, and an aggressive tone
when played hard.
Another vintage electric piano sound different from E. PIANO 3 often heard in rock
and popular music.
A “tonewheel” type electric organ. Often
heard in jazz and rock music.
A typical pipe organ sound (8 feet + 4 feet
+ 2 feet). Good for sacred music from the
Baroque period.
Bright and edgy electric organ sound.
Good for rock music.
Played with relatively soft mallets. The
tone becomes more metallic the harder
you play.
Stereo-sampled, large-scale strings
ensemble with realistic reverb. Try combining this Voice with piano in the Dual
mode.
The definitive instrument for baroque
music. Authentic harpsichord sound, with
plucked strings, no touch response, and
characteristic key-release sound.
An upright bass played fingerstyle. Ideal
for jazz and Latin music.
For a wide range of music styles, jazz,
rock, popular, and more.
• To familiarize yourself with the characteristics of the voices, listen to the
demo songs for each voice (page 14).
• You can shift the Octave as described in the next column (see “Voice 1”).
Layering Two Voices (Dual)
You can play Voices simultaneously across the entire
range of the keyboard. Note that the Voice of the left
side button is designated as Voice 1, while the Voice
of the right side button is designated as Voice 2.
NOTE
• Two Voices of the same button cannot be layered (for example, STRINGS and
HARPSICHORD).
Engage Dual.
1
Press the desired Voice button once or twice
(depending on the desired Voice), then while holding down that button, press the other Voice button
once or twice. When the lamp is off, the Voice
printed above the button is selected; when the
lamp is on, the Voice printed below is selected.
When the buttons are released, Dual is engaged.
The lamp indicates the status of the Voice 1 selection.
Play the keyboard to enjoy the dual
2
sound.
To shift the Octave for each Voice:
To shift Voice 1, simultaneously hold down
[METRONOME/RHYTHM] and press the A4
key to lower by one, B4 to raise by one, or A#4 to
reset to the default setting. For Voice 2, simultaneously hold down [METRONOME/RHYTHM]
and press the C5 key to lower by one, D5 to raise
by one, or C#5 to reset to the default setting. The
setting range is from -3 to +3 for both Voices.
P-105 Owner’s Manual
9
Loading…
View the manual for the Yamaha P-105 here, for free. This manual comes under the category piano’s and has been rated by 6 people with an average of a 8.4.
This manual is available in the following languages: English. Do you have a question about the Yamaha P-105 or do you need help?
Ask your question here
Yamaha P-105 specifications
Below you will find the product specifications and the manual specifications of the Yamaha P-105.
The Yamaha P-105 is a digital piano that offers a range of features and capabilities. With its compact and portable design, it is suitable for both beginners and experienced musicians alike.
The P-105 features 88 weighted keys, providing a realistic and responsive playing experience. It also offers built-in speakers, allowing users to play and enjoy the piano without the need for additional equipment.
In terms of sound quality, the P-105 utilizes Yamaha’s Advanced Wave Memory (AWM) stereo sampling technology, which reproduces the sound of an acoustic piano in a digital format. The piano also includes a range of different voices, including grand piano, electric piano, organ, and strings, allowing users to experiment with different sounds and styles.
The piano is equipped with a variety of connectivity options, including USB and MIDI ports, allowing users to connect to other devices such as computers or music production software. This enables users to record and edit their performances or use the piano as a MIDI controller.
The P-105 also includes a range of additional features, such as a metronome, transpose function, and dual/layer mode, which allows users to combine two different voices for a richer sound.
Overall, the Yamaha P-105 is a versatile and reliable digital piano that offers a range of features and capabilities suitable for musicians of all levels. Its compact and portable design, along with its high-quality sound and connectivity options, make it a popular choice among pianists.
General
| Brand | Yamaha |
| Model | P-105 |
| Product | piano |
| EAN | 0799872757197 |
| Language | English |
| Filetype | User manual (PDF) |
Frequently Asked Questions
Can’t find the answer to your question in the manual? You may find the answer to your question in the FAQs about the Yamaha P-105 below.
Is there a way to transpose the pitch of the piano on the P-105?
Absolutely! The P-105 offers a Transpose function that allows you to shift the pitch of the instrument up or down without affecting your fingering. By using the Transpose button in conjunction with the Up/Down arrow buttons, you can easily transpose the piano to your desired key.
How do I connect my Yamaha P-105 to external speakers?
The P-105 can be connected to external speakers using the headphone output jack on the back of the instrument. Simply connect the audio cable from the headphone output to the input of your desired external speakers or amplification system.
How can I adjust the touch sensitivity of the keys on the P-105?
The P-105 allows you to adjust the touch sensitivity to match your playing preference. To do so, enter the Function Mode and navigate to the «Touch» parameter. From there, you can modify the sensitivity settings to your liking, whether you prefer a lighter or heavier touch response.
Is it possible to record my performances on the P-105?
Yes, the P-105 features a built-in recording feature that enables you to capture and save your performances. To initiate recording, simply press the record button and start playing. Press the record button again to stop recording. You can then save your recording in one of the available memory slots for future playback and analysis.
Can I use headphones with the Yamaha P-105?
Absolutely! The P-105 is equipped with a headphone output for private practice sessions. By plugging in your headphones, you can enjoy playing the piano without disturbing others.
Is the manual of the Yamaha P-105 available in English?
Yes, the manual of the Yamaha P-105 is available in English .
Is your question not listed? Ask your question here
Yamaha P-105 MIDI Reference Guide
MIDI Reference Guide
8 pages
en
Owner’s Manual
28 pages
en
Yamaha P-105 Piano Specification
The Yamaha P-105 is a digital piano designed for musicians seeking authentic acoustic piano feel and sound in a portable format. It features a Graded Hammer Standard (GHS) keyboard with 88 keys, providing a weighted action that simulates the touch of an acoustic piano. This makes it an excellent choice for both beginners and experienced players who require an expressive experience.
The piano is equipped with Yamaha’s PureCF sound engine, delivering high-quality sound sampled from Yamaha’s renowned CFIIIS concert grand piano. This results in a rich, resonant tone that faithfully reproduces the nuances of acoustic piano performance. The P-105 offers a polyphony of 128 notes, allowing for complex passages and expressive dynamics without note dropouts.
In terms of connectivity, the P-105 includes USB to Host functionality, enabling easy connection to computers and iOS devices for music production and educational applications. It also features AUX Line Out jacks for seamless integration with external amplification systems, making it suitable for live performances.
The piano includes various features to enhance practice and performance, such as a built-in metronome, a range of demo songs, and 10 different Voices including electric pianos and organs. It also has dual and split modes, allowing players to combine two Voices or assign different Voices to each hand. The P-105 is compact and lightweight, weighing approximately 26 pounds, which makes it easily portable for gigging musicians.
Overall, the Yamaha P-105 provides a balance of realistic piano feel, high-quality sound, and versatile features, making it a valuable instrument for both home and stage use.
Yamaha P-105 Piano F.A.Q.
To connect your Yamaha P-105 to a computer, you will need a USB to Host cable. Connect the USB end to your computer and the other end to the ‘USB TO HOST’ port on the piano. Install any necessary drivers from Yamaha’s website, and use a DAW (Digital Audio Workstation) to start recording.
First, ensure the power cable is securely plugged into both the outlet and the piano. Check the outlet with another device to confirm it is working. If the piano still does not turn on, check the power cable for any damage. If the problem persists, contact Yamaha support for further assistance.
To perform a factory reset on your Yamaha P-105, turn off the piano. Then, hold down the highest white key while turning the power back on. This will reset all settings to their factory defaults.
Regularly dust the keyboard and body with a soft, dry cloth. Avoid using harsh chemicals. Make sure the piano is placed in a stable, humidity-controlled environment. Check cables and pedals periodically for wear and tear.
Yes, the Yamaha P-105 has a headphone jack located on the front left side of the keyboard. Plug in your headphones to practice privately without disturbing others.
Press the «Function» button, then use the «Transpose» button to adjust the pitch. Use the «+» and «-» keys to raise or lower the pitch in semitone increments.
First, ensure that the keyboard is free of dust and debris. Try resetting the keyboard to factory settings. If the problem persists, the keyboard may need professional cleaning or repair. Contact Yamaha support or a qualified technician.
Press the «Function» button followed by the «Touch» button. Use the «+» and «-» keys to select the desired sensitivity level: Hard, Medium, or Soft.
Yes, the Yamaha P-105 supports a sustain pedal. Connect a compatible pedal to the «SUSTAIN» jack located at the back of the keyboard to use this feature.
To layer sounds on the Yamaha P-105, press and hold the first voice button, then press the second voice button you wish to layer. Both voices will play simultaneously when keys are pressed.
If you are in the market for a digital piano that offers excellent performance without breaking the bank, the Yamaha P-105 might just be the perfect choice for you. This instrument combines advanced technology with a user-friendly design, making it accessible for both beginners and seasoned musicians alike. With an attractive look, incredible sound quality, and a suite of features, the Yamaha P-105 sets itself apart in the crowded market of digital pianos.
Firstly, the main highlight of the Yamaha P-105 is its sound engine. The piano is equipped with the highly acclaimed Pure CF Sound Engine, which is based on samples from Yamaha’s renowned concert grand pianos. This technology allows for rich and expressive sound that can emulate the nuances of an acoustic piano. Additionally, the instrument features 88 weighted keys with a Graded Hammer Standard (GHS) action, which provides an authentic piano feel. The keys are heavier in the lower register and lighter in the higher register, closely mimicking the experience of playing an acoustic piano.
Another notable feature is the integrated stereo speakers, which deliver an impressive sound quality that fills the room. Whether you’re playing at home or performing on stage, the Yamaha P-105 provides the clarity and power needed to engage your audience. Plus, its advanced reverb and chorus effects add depth and richness to your playing, allowing for even more expressiveness.
Portability is yet another strong point of the Yamaha P-105. Weighing in at just under 25 pounds, it is lightweight enough for easy transport, making it a great option for musicians on the go. Its sleek and slim design means it can fit into various spaces, whether you’re setting up at home, in a studio, or in a smaller venue.
The functionality of the Yamaha P-105 doesn’t stop at sound and feel. The user interface is designed for ease of use. With simply laid-out controls, you can adjust settings, select voices, and access features without feeling overwhelmed. Included within its features are USB connectivity options, allowing you to connect the piano to computers and mobile devices. This capability makes it easy to record your performances or use music software for an enhanced playing experience.
In terms of versatility, the Yamaha P-105 comes with a variety of voices and settings. You can choose from over 14 distinct instrument sounds, including electric pianos, organs, strings, and more. This variety ensures that you have the right tone for any genre of music, be it classical, jazz, or pop. Additionally, the dual voice function allows players to layer two sounds together, adding even more creativity to your performance.
Overall, the Yamaha P-105 is a magnificent instrument that excels in many areas. Its combination of quality sound, authentic key action, portability, and user-friendly features make it an excellent investment for anyone passionate about music. Whether you’re a beginner looking for a reliable practice piano or an experienced player seeking versatility and portability, the Yamaha P-105 will not disappoint. Its reasonable price point and high quality make it a standout choice in the realm of digital pianos.
In conclusion, the Yamaha P-105 has everything you could want in a digital piano. From its remarkable sound quality to its ease of use and portability, it stands as a formidable option. Whether you’re practicing at home, performing on stage, or recording in a studio, this piano covers all bases. Investing in the Yamaha P-105 will undoubtedly enhance your musical journey and inspire you to explore the vast world of music.
Related P-105 Manuals and Guides
Type: Owner’s manual
Brand: Yamaha
Category: Musical Instrument
Pages: 52 1.68 Mb
Type: Owner’s manual
Brand: Yamaha
Category: Musical Instrument
Pages: 7 2.37 Mb
Type: Maintenance handbook
Brand: Yamaha
Category: Musical Instrument
Pages: 18
Type: Owner’s manual
Brand: Yamaha
Category: Musical Instrument
Pages: 272 10.4 Mb
Type: Owner’s manual
Brand: Yamaha
Category: Musical Instrument
Pages: 83 1.32 Mb
Type: Owner’s manual
Brand: Yamaha
Category: Musical Instrument
Pages: 87 1.54 Mb
Type: Service manual
Brand: Yamaha
Category: Musical Instrument
Pages: 49
Type: Data list
Brand: Yamaha
Category: Musical Instrument
Pages: 28 0.46 Mb
Type: Owner’s manual
Brand: Yamaha
Category: Musical Instrument
Pages: 54 2.68 Mb
Type: Owner’s manual
Brand: Yamaha
Category: Musical Instrument
Pages: 2
Type: Installation manual
Brand: Yamaha
Category: Musical Instrument
Pages: 22 0.37 Mb
Type: Operation & user’s manual
Brand: Technics
Category: Musical Instrument
Pages: 96
-
Page 1
English F rançais Español Deutsch P or tuguês Italiano Nederlands P olski Русс кий Dansk Sv enska Česky Slovenčina Mag y ar Slovenščina Български Română Latviski Lietuvių k. eesti keel P — 1 0 5 D I G I T A L P I A N O P I A N O N U M E R I Q U E Ц и ф р о в о е ф о р т е п и а н о O wner ’ s Man ual Mo[…]
-
Page 2
2[…]
-
Page 3
P-105 Gebr uikershandleiding 3 Inhoudsopg a v e Accessoires. ……………. …………… ………………. ………. 3 Handleidingen ……………. ……….. …………. …………. …. 4 VOORZICHTIG ……………………………………………………. 4 Inleiding Bediening spaneel en aansl uitingen 6 Configura tie 7 Het i[…]
-
Page 4
4 P-105 Ge bruikershandl eiding Naast deze gebruikershandleiding zijn de volgende online materialen (PDF-bestanden ) beschikbaar . Computer -related Operations (Computerger elateerde handelingen) Bev at instructies voor computer gerelateerde functies. MIDI Reference (MIDI-naslaginf orma tie) Bev at informatie die betrekking heeft op MI DI, zoals he[…]
-
Page 5
5 P-105 Gebr uikershandleiding V OORZICHTIG Volg altijd de hierna vermelde algem ene voorzorgsmaatregelen op om licham elijk letsel bij uzelf en anderen of beschadiging van het instrument en andere eigendommen te voorkomen. Deze maatregelen houden in, maar zijn niet beperkt tot: • Sluit het instrument niet via een verde elstekker aan op het stopc[…]
-
Page 6
P-105 Ge bruikershandl eiding 6 Bedieningspaneel en aansluitingen q [ ] (Standby/O n)-schak elaar ………… pagina 7 V oor het in- of uitschakelen of het inschake len van stand-by . w [MAS TER V OLUME]-schuif……………. . pagina 7 V oor het instellen v a n het v olume van het totale geluid. e [DEMO/SONG]-knop ………….. ……….. pagi[…]
-
Page 7
P-105 Gebr uikershandleiding 7 C onf iguratie 1 Sluit de netadapter aan op de DC IN-aansluiting. 2 Sluit de netadapter aan op een stopcontact. 3 D ruk op de schakelaar (Standby/On) [ ] om het instrument aan te zetten. De PO WER-indicator links van de schakelaar (Standby/On) [ ] licht op. Als u het instrument wilt uitzetten, drukt u nogma als op dez[…]
-
Page 8
Configuratie P-105 Ge bruikershandl eiding 8 De [SUST AIN]-aansluiting wordt gebruikt voor het aansluiten van de meegele verde voetschakelaar , die op dezelfde manier werkt als een demperpedaal op een akoestische piano. U kunt ook een optioneel FC3- voetpedaal of een FC4/FC5-voetschakelaar via deze aansluiting aansluiten. Met de FC3 kunt u de half-[…]
-
Page 9
P-105 Gebr uikershandleiding 9 Referentie Select er en en spelen v an v oices Het instrument beschikt over een breed scala aan voices, of instrumentgeluiden, v o or uw plezier , inclusief piano en orgel. 1 Druk één of tw ee keer op een V oice-knop. Door meerdere malen op dezelfde V oice-knop te drukken, wijzigt de aan/uit-status v an het lampje e[…]
-
Page 10
Selecteren en spelen van voices P-105 Ge bruikershandl eiding 10 De balans tu ssen twee v oices aanpassen: Houd [METR ONOME/RHYTHM] ingedrukt en druk op de toets E5 om één omlaag te gaan, op F#5 om één omhoog te gaan of op F5 om de standaardwaarde te herstellen. Het instellingsbereik is van -6 tot +6 voor beide voices. Instellingen hoger dan de[…]
-
Page 11
Selecteren en spelen van voices P-105 Gebr uikershandleiding 11 3 Speel een akkoor d met uw linker hand om het afspelen v an de pianiststijl t e star ten. Speel met uw rechterhand een melodie bij de akkoorden die u speelt. Het tempo wijzigen: In principe is dit hetzelfde als metronoomtempo (pagina 15). Daarnaast kunt u het tempo wijzigen door de to[…]
-
Page 12
Selecteren en spelen van voices P-105 Ge bruikershandl eiding 12 Dit instrument beschikt ov er verschillende rev e rbtypen die ext ra diepte en e xpressi e aan het geluid toev oegen voor een realistisc he akoestische am biance. Hoewel het geschikte rev erbtype automatisch opgeroepen wordt als u een van de v oices, songs en pianiststijlen selecteert[…]
-
Page 13
Selecteren en spelen van voices P-105 Gebr uikershandleiding 13 U kunt de toonhoogte van het volledige toetsenbord omhoog of omlaag verschuiv en in stappen van halve noten, zodat het spelen in moeilijke toonsoorten wordt ver gemakkelijkt en u een voudig de toonhoogte v an het toetsenbord kunt aanpasse n aan het bereik van een zanger of andere instr[…]
-
Page 14
P-105 Ge bruikershandl eiding 14 De songs beluist er en Er is voorzien in demonstratiesongs voor alle v oic es van het instrument. 1 Houd [DEMO/SONG] ingedrukt en druk één of twee k eer op een van de gew enste v oice-knoppen. L aat verv olg ens de knoppen los om het afspelen te sta rten. Door meerdere malen op dezelfde V oice-knop te drukken, wij[…]
-
Page 15
P-105 Gebr uikershandleiding 15 Metr onoom/Ritme gebr uik en De metronoom is handig als u wilt oefenen m et een exact tempo. Het metronoomgeluid beschikt over verschillende ritmes en het con ventionele klikgeluid. 1 Druk op [METR ONOME/RHYTHM] om de metr onoom te starten. 2 Druk opnie uw op [METRO NOME/ RHYTHM] om de metr onoom te st oppen. Houd [M[…]
-
Page 16
P-105 Ge bruikershandl eiding 16 Uw spel opnemen U kunt uw spel opnemen als een gebruikerssong in SMF- indeling. Er kunnen maximaal twee gedeelten (L en R) apart opgenomen worden. 1 V oor dat u begint met opnemen, maakt u een ins telling zoals voice en tel. Omdat sommige instellingen nie t kunnen worden gewijzigd nadat de opnamemodus is ingesteld, […]
-
Page 17
Uw spel opnemen P-105 Gebr uikershandleiding 17 Om het r echt ergedeelte op t e nemen ([R]): Om het linker g edeelte op t e nemen ([L]): Na een tijdje knippert het lampje [REC] in het huidige tempo. Indien nodig kunt u h et tempo instellen (pagina 15). Als er al data zijn opgenomen voor de ander e partij: De data va n deze partij worden afgespeeld […]
-
Page 18
Uw spel opnemen P-105 Ge bruikershandl eiding 18 1 Druk op [REC] om de Opname geree d- modus te ac tiver en. Het lampje [REC] gaat knipperen. 2 Houd [PLA Y] ingedrukt en druk op [REC] zoda t beide lampjes knipper en. Om deze status af te sluiten, drukt u op een andere knop zoals [DEMO/SONG]. 3 Druk op [REC], [P LA Y], [L] of [R] om de data va n de […]
-
Page 19
P-105 Gebr uikershandleiding 19 Een bac k-up mak en v an data en initialiser en De volgende data w orden behouden als back-updata, zelfs als u de computer uitzet. Back-updata Metronoom/Ritme volume, Metronoom/ Ritme selectie (tel- of ritmenummer), aanslagge voeligheid, afstellen, splitpunt, pianiststijlvolume, automatisch uitschakelen, resonantiede[…]
-
Page 20
P-105 Ge bruikershandl eiding 20 Appendix P r ob lemen oplossen Specif icaties Afmetingen (B x D x H) • 1326 x 295 x 1 63 mm Gewich t • 1 1,7 kg T oetsenborden • 88 toetsen (A -1 – C7) • GHS-toetsenbor d (Graded Hammer St andard) • Aanslaggev oeligheid (Har d/Medium/Sof t/Fix ed) Vo i c e • 14 v ooraf ingestelde v oices • Polyf onie[…]
-
Page 21
21 Preset Song List / Liste des morceaux prédéfinis / Lista de canciones predeterminadas / List e der Preset-Songs / Lista de músicas predefinidas / Elenco delle preset song / Preset- songoverzicht / Lista wst ę pnie zdefiniowanych utworów / Список встроенных ме л о дий / Liste over forprogrammerede melodier / Lista öve[…]
-
Page 22
22 A-1 B-1 C0 D0 E0 F0 G0 A0 B0 C1 D1 E1 F1 G1 A1 B1 C2 D2 E2 F2 G2 A2 B2 C3 D3 E3 F3 G3 A3 B3 C4 D4 E4 F4 G4 A4 B4 C5 D5 E5 F5 G5 A5 B5 C6 D6 E6 F6 G6 A6 B6 C7 A # -1 C # 0 D # 0 F # 0 G # 0 A # 0 C # 1 D # 1 F # 1 G # 1 A # 1 C # 2 D # 2 F # 2 G # 2 A # 2 C # 3 D # 3 F # 3 G # 3 A # 3 C # 4 D # 4 F # 4 G # 4 A # 4 C # 5 D # 5 F # 5 G # 5 A # 5 C […]
-
Page 23
23 A-1 B-1 C0 D0 E0 F0 G0 A0 B0 C1 D1 E1 F1 G1 A1 B1 C2 D2 E2 F2 G2 A2 B2 C3 D3 E3 F3 G3 A3 B3 C4 D4 E4 F4 G4 A4 B4 C5 D5 E5 F5 G5 A5 B5 C6 D6 E6 F6 G6 A6 B6 C7 A # -1 C # 0 D # 0 F # 0 G # 0 A # 0 C # 1 D # 1 F # 1 G # 1 A # 1 C # 2 D # 2 F # 2 G # 2 A # 2 C # 3 D # 3 F # 3 G # 3 A # 3 C # 4 D # 4 F # 4 G # 4 A # 4 C # 5 D # 5 F # 5 G # 5 A # 5 C […]
-
Page 24
24 Information for Users on Collection and Disposal of Old Equipment This symbol on the products, packag ing, and/or acco mpanying documen ts means that used electrical and e lectronic prod ucts should not be mixed with general hou sehold waste. For proper treatment, reco very and recycling of old p roducts, please t ake them to applicable collecti[…]
-
Page 25
25 Informações par a usuários sobre a coleta e o descarte de equip amentos antigos Este símbolo, exibido em prod utos, pacote s e/ou em documen tos auxiliare s, significa que os produtos elét ricos e eletrôni cos usa dos não devem se r misturados ao lixo doméstico geral. Para trata mento, recupera ção e reciclage m apropriados d e produto[…]
-
Page 26
26 Oplysninger til brugere om indsamling og bort skaffelse af gammelt udstyr Dette symbol på produkter , emballage o g/eller medfølg ende dokumenter angiver , at brugte elektriske og elektroniske produkter ik ke må bort skaffes sammen med de t øvrige husholdni ngsaffald. Aflever gam le produkter p å egnede indsam lingssteder fo r at sikre korr[…]
-
Page 27
27 Információ a felhasználók számára a régi készül ékek begy ű jtésér ő l és le selejtezésér ő l Ha ez az ábra l átható a termék en, annak csomagol ásán és/vagy a mell ékelt kiadványokon, a kkor a használt elektromos vagy el ektro nikus termék(ek)et nem szabad az ált alános háztartási hulladékkal együtt kidobni. K[…]
-
Page 28
28 Inform ā cija lietot ā jiem par vec ā apr ī kojuma sav ā kšanu un likvid ē šanu Šis simbols uz produktiem, to iepakojuma un/vai p avadošajiem dokumentiem nor ā da, ka nolietotos elektriskos u n elektroniskos produktu un b aterijas nevajadz ē tu jaukt ar visp ā r ē jiem m ā jsaimniec ī bas atkritumiem. Lai pareizi apstr ā d ā tu[…]
-
Page 29
29 The model number , serial number , power requirements, etc., may be found on or near the name plate, whi ch is at the bottom of the unit. Y ou should note this serial number in the space provided below and ret ain this manual as a permanent record of your purchase to aid identification in the eve nt of theft. Model No. Serial No. (bottom_en_ 01)[…]
-
Page 30
30 Modellnummer , serienummer , strömförsörjning osv . finns på eller i närheten av namneti ketten som sitter på enhetens undersida. Du bör anteckna serienumret i utrymmet nedan och förvara den här bruksanvis ningen som ett bevis på ditt köp och för att underlätt a identifiering i händelse av stöld. Modellnumme r Serienummer (bottom_[…]
-
Page 31
31 OBSER VERA! Apparaten k opplas inte ur väx el str ömskällan (nätet) så länge som den ar ansluten till väggut taget, även om själv a apparaten har stängts av . AD V ARSEL: Netspændingen til det te appar at er IKKE afbrudt, sålænge n etledningen sidder i en stikkont akt, som er tændt — også sel vom der er slukk et på apparatets a[…]
-
Page 32
[…]
-
Page 33
CAN AD A Y amaha Canada Music Ltd. 135 Milner A venue, Scarborough, Ontario, M1S 3R1, Canada T el: 416-298-1311 U . S.A. Y amaha Corporation of America 6600 Orangethorpe A ve., Buena Park, Calif. 90620, U.S.A. T el: 714-522-9011 MEXICO Y amaha de México S.A. de C.V . Calz. Javier Rojo Gómez #1149, Col. Guadalupe del Moral C.P . 09300, México, D.[…]
-
Page 34
ZA70850 U.R.G., Digital Musical Instruments Division © 2012 Yamaha Corporation 205POTY*.*-01A0 Printed in China Yamaha Global Site http://www.yamaha.com/ Yamaha Manual Library http://www.yamaha.co.jp/manual/[…]