
Номер по каталогу: L30250-F600-C421,L30250-F600-C420
Заводской номер: S30817-S7710-A307,S30817-S7710-A107
цвет-carbon black(черный)
Инструкция UNIFY OpenScape Desk Phone IP 35G Eco
Современный эргономичный дизайн, разъем для гарнитуры и компактный формфактор делают этот настольный телефон идеальным решением для менеджеров и операторов контакт-центров.
Новинка 2015 г.: Настольный IP-телефон UNIFY OpenScape Desk Phone IP 35G Eco text/icon может похвастаться высокими стандартами экологичности как в плане материалов, использованных при его производстве, так и в плане значительно сниженного энергопотребления.
Технические характеристики UNIFY OpenScape Desk Phone IP 35G Eco text/icon:
Стандартный набор функций телефонии
Три программируемые клавиши (предустановлены)
Десять фиксированных клавиш: Сообщения, Настройки, Динамик, Выкл. Микр., Перевод, Удержание, Гарнитура, Конференция, Громче, Тише.
Многолинейность: 3 линии
Журнал вызовов, телефонная книга
Кодеки G.722, G.729, G.711
Протокол SIP
Высокое качество звука по запатентованной технологии AudioPresence™
Кодирование речи
Поддержка DLS для инсталляции и обслуживания
Поддержка LLDP-MED и IEEE 802.1x
Интерфейс на русском языке
4 угла наклона для корпуса телефона
Дисплей 2×34 символа
Полнодуплексная громкая связь и разъем для гарнитуры
Индикация новых сообщений и линейных клавиш
Настенный монтаж без дополнительных устройств
LAN коммутатор / 100bT Ethernet и Gigabit Ethernet
IEEE 802.3af PoE – Класс 1
Операционная система Linux
User Manual OpenScape Desk Phone IP 35G HFA
OpenScape Desk Phone IP 35 G HFA
OpenScape Business
User Guide
A31003-D3530-U101-1-7619
Our Quality and Environmental Management Systems are
implemented according to the requirements of the ISO9001 and
ISO14001 standards and are certified by an external certification
company.
Copyright © Unify GmbH & Co. KG <03/2014>
Hofmannstr. 51, 81379 Munich/Germany
All rights reserved.
Reference No.: A31003-D3530-U101-1-7619
The information provided in this document contains merely general descriptions or
characteristics of performance which in case of actual use do not always apply as
described or which may change as a result of further development of the products.
An obligation to provide the respective characteristics shall only exist if expressly agreed in
the terms of contract.
Availability and technical specifications are subject to change without notice.
Unify, OpenScape, OpenStage and HiPath are registered trademarks of Unify GmbH & Co. KG.
All other company, brand, product and service names are trademarks or registered trademarks
of their respective holders.
unify.com
Important information
3
Important information
For safety reasons, the telephone should only be supplied with power:
7
• using the original power supply unit.
Part number: L30250-F600-C14x (x: 1=EU, 2=UK, 3=US) or
• in a LAN with PoE (Power over Ethernet), which complies with the IEEE 802.3af
standard.
7
Never open the telephone or a key module. Should you encounter any problems,
consult your administrator.
7
Use only original accessories. The use of other accessories may be hazardous
and will render the warranty, extended manufacturer's liability and the CE marking invalid.
Trademarks
The device conforms to the EU Directive 1999/5/EC as attested by the CE marking.
All electrical and electronic products should be disposed of separately from the municipal waste stream via designated collection facilities appointed by the government
or the local authorities.
The correct disposal and separate collection of your old appliance will help prevent
potential negative consequences for the environment and human health. It is a precondition for reuse and recycling of used electrical and electronic equipment.
For more detailed information about disposal of your old appliance, please contact
your city office, waste disposal service, the shop where you purchased the product or
your sales representative.
The statements quoted above are only fully valid for equipment that is installed and
sold in the countries of the European Union and is covered by the European Directive
2002/96/EC. Countries outside the European Union may have other regulations regarding the disposal of electrical and electronic equipment.
4
Important information
Location of the telephone
• The telephone should be operated in a controlled environment with an ambient temperature between 5°C and 40°C.
• To ensure good speakerphone quality, the area in front of the microphone (front right) should be
kept clear. The optimum speakerphone distance is 50 cm.
• Do not install the telephone in a room where large quantities of dust accumulate; this can considerably reduce the service life of the telephone.
• Do not expose the telephone to direct sunlight or any other source of heat, as this is liable to
damage the electronic components and the plastic casing.
• Do not operate the telephone in damp environments, such as bathrooms.
Software update
During a software update, the phone must not be disconnected from the power supply unit,
the LAN line or the phone line.
An update action is indicated by messages on the display and/or by flashing LEDs.
Product support on the Internet
Information and support for our products can be found on the Internet at:
http://www.unify.com.
Technical notes, current information about firmware updates, frequently asked questions and lots
more can be found on the Internet at:
http://wiki.unify.com/.
Contents
5
Contents
Important information . . . . . . . . . . . . . . . . . . . . . . . . . . . . . . . . . 3
Trademarks . . . . . . . . . . . . . . . . . . . . . . . . . . . . . . . . . . . . . . . . . . . . . . . . . . . . . . . . . . . . . . . . . 3
Location of the telephone . . . . . . . . . . . . . . . . . . . . . . . . . . . . . . . . . . . . . . . . . . . . . . . . . . . . . . . 4
Software update . . . . . . . . . . . . . . . . . . . . . . . . . . . . . . . . . . . . . . . . . . . . . . . . . . . . . . . . . . . . . 4
Product support on the Internet. . . . . . . . . . . . . . . . . . . . . . . . . . . . . . . . . . . . . . . . . . . . . . . . . . 4
General information . . . . . . . . . . . . . . . . . . . . . . . . . . . . . . . . . 10
About this manual . . . . . . . . . . . . . . . . . . . . . . . . . . . . . . . . . . . . . . . . . . . . . . . . . . . . . . . . . . . 10
Service . . . . . . . . . . . . . . . . . . . . . . . . . . . . . . . . . . . . . . . . . . . . . . . . . . . . . . . . . . . . . . . . . . . 10
Intended use . . . . . . . . . . . . . . . . . . . . . . . . . . . . . . . . . . . . . . . . . . . . . . . . . . . . . . . . . . . . . . . . 11
Telephone type . . . . . . . . . . . . . . . . . . . . . . . . . . . . . . . . . . . . . . . . . . . . . . . . . . . . . . . . . . . . . 11
Speakerphone quality and display legibility . . . . . . . . . . . . . . . . . . . . . . . . . . . . . . . . . . . . . . . 11
Voice encryption . . . . . . . . . . . . . . . . . . . . . . . . . . . . . . . . . . . . . . . . . . . . . . . . . . . . . . . . . . . . 11
Multi-line telephone, executive/secretary functions. . . . . . . . . . . . . . . . . . . . . . . . . . . . . . . . . . . 12
Group functions . . . . . . . . . . . . . . . . . . . . . . . . . . . . . . . . . . . . . . . . . . . . . . . . . . . . . . . . . . . 12
Getting to know the OpenScape Desk Phone . . . . . . . . . . . . . 13
The user interface of your OpenScape Desk Phone IP 35G . . . . . . . . . . . . . . . . . . . . . . . . . . . 13
Navigation keys . . . . . . . . . . . . . . . . . . . . . . . . . . . . . . . . . . . . . . . . . . . . . . . . . . . . . . . . . . . 15
Programmable function keys . . . . . . . . . . . . . . . . . . . . . . . . . . . . . . . . . . . . . . . . . . . . . . . . . 15
Dialpad . . . . . . . . . . . . . . . . . . . . . . . . . . . . . . . . . . . . . . . . . . . . . . . . . . . . . . . . . . . . . . . . . . 16
Display . . . . . . . . . . . . . . . . . . . . . . . . . . . . . . . . . . . . . . . . . . . . . . . . . . . . . . . . . . . . . . . . . . . 16
Idle mode . . . . . . . . . . . . . . . . . . . . . . . . . . . . . . . . . . . . . . . . . . . . . . . . . . . . . . . . . . . . . . . . 16
Mailbox . . . . . . . . . . . . . . . . . . . . . . . . . . . . . . . . . . . . . . . . . . . . . . . . . . . . . . . . . . . . . . . . . . . . 17
Messages. . . . . . . . . . . . . . . . . . . . . . . . . . . . . . . . . . . . . . . . . . . . . . . . . . . . . . . . . . . . . . . . 17
Voicemail . . . . . . . . . . . . . . . . . . . . . . . . . . . . . . . . . . . . . . . . . . . . . . . . . . . . . . . . . . . . . . . . 17
Call list. . . . . . . . . . . . . . . . . . . . . . . . . . . . . . . . . . . . . . . . . . . . . . . . . . . . . . . . . . . . . . . . . . . . . 18
Menu . . . . . . . . . . . . . . . . . . . . . . . . . . . . . . . . . . . . . . . . . . . . . . . . . . . . . . . . . . . . . . . . . . . . . 19
Settings . . . . . . . . . . . . . . . . . . . . . . . . . . . . . . . . . . . . . . . . . . . . . . . . . . . . . . . . . . . . . . . . . 19
Telephone user menu . . . . . . . . . . . . . . . . . . . . . . . . . . . . . . . . . . . . . . . . . . . . . . . . . . . . . . 20
Control and monitoring function . . . . . . . . . . . . . . . . . . . . . . . . . . . . . . . . . . . . . . . . . . . . . . . . 20
Ports on the underside of the phone . . . . . . . . . . . . . . . . . . . . . . . . . . . . . . . . . . . . . . . . . . . . . . 21
Using network ports more efficiently . . . . . . . . . . . . . . . . . . . . . . . . . . . . . . . . . . . . . . . . . . . 21
Basic functions. . . . . . . . . . . . . . . . . . . . . . . . . . . . . . . . . . . . . 22
Accepting a call . . . . . . . . . . . . . . . . . . . . . . . . . . . . . . . . . . . . . . . . . . . . . . . . . . . . . . . . . . . . . . 22
Accepting a call via the handset . . . . . . . . . . . . . . . . . . . . . . . . . . . . . . . . . . . . . . . . . . . . . . 22
Accepting a call via the loudspeaker
(speakerphone mode) . . . . . . . . . . . . . . . . . . . . . . . . . . . . . . . . . . . . . . . . . . . . . . . . . . . . . . 23
Accepting a call via the headset . . . . . . . . . . . . . . . . . . . . . . . . . . . . . . . . . . . . . . . . . . . . . . 23
Switching to speakerphone mode . . . . . . . . . . . . . . . . . . . . . . . . . . . . . . . . . . . . . . . . . . . . . . . 23
Switching to the handset . . . . . . . . . . . . . . . . . . . . . . . . . . . . . . . . . . . . . . . . . . . . . . . . . . . . . . . 24
Open listening in the room during a call . . . . . . . . . . . . . . . . . . . . . . . . . . . . . . . . . . . . . . . . . . 24
Turning the microphone on and off . . . . . . . . . . . . . . . . . . . . . . . . . . . . . . . . . . . . . . . . . . . . . . 24
Ending the call. . . . . . . . . . . . . . . . . . . . . . . . . . . . . . . . . . . . . . . . . . . . . . . . . . . . . . . . . . . . . . 24
Making calls . . . . . . . . . . . . . . . . . . . . . . . . . . . . . . . . . . . . . . . . . . . . . . . . . . . . . . . . . . . . . . . . 25
Off-hook dialing . . . . . . . . . . . . . . . . . . . . . . . . . . . . . . . . . . . . . . . . . . . . . . . . . . . . . . . . . . . 25
On-hook dialing . . . . . . . . . . . . . . . . . . . . . . . . . . . . . . . . . . . . . . . . . . . . . . . . . . . . . . . . . . . 25
Dialing with the headset connected . . . . . . . . . . . . . . . . . . . . . . . . . . . . . . . . . . . . . . . . . . . . 25
Dialing with repdial keys . . . . . . . . . . . . . . . . . . . . . . . . . . . . . . . . . . . . . . . . . . . . . . . . . . . . 26
6
Contents
Redialing a number . . . . . . . . . . . . . . . . . . . . . . . . . . . . . . . . . . . . . . . . . . . . . . . . . . . . . . . . . . 26
Rejecting calls . . . . . . . . . . . . . . . . . . . . . . . . . . . . . . . . . . . . . . . . . . . . . . . . . . . . . . . . . . . . . . 26
Calling a second party (consultation) . . . . . . . . . . . . . . . . . . . . . . . . . . . . . . . . . . . . . . . . . . . . . 27
Switching to the held party (alternating). . . . . . . . . . . . . . . . . . . . . . . . . . . . . . . . . . . . . . . . . 27
Transferring a call . . . . . . . . . . . . . . . . . . . . . . . . . . . . . . . . . . . . . . . . . . . . . . . . . . . . . . . . . 27
Forwarding calls . . . . . . . . . . . . . . . . . . . . . . . . . . . . . . . . . . . . . . . . . . . . . . . . . . . . . . . . . . . . . 28
Using variable call forwarding . . . . . . . . . . . . . . . . . . . . . . . . . . . . . . . . . . . . . . . . . . . . . . . . 28
Using call forwarding no reply (CFNR) . . . . . . . . . . . . . . . . . . . . . . . . . . . . . . . . . . . . . . . . . 29
Call forwarding in the event of telephone failure (CFSS) . . . . . . . . . . . . . . . . . . . . . . . . . . . . 30
Call forwarding in the carrier network and
forwarding multiple subscriber numbers (MSN) (not for U.S.) . . . . . . . . . . . . . . . . . . . . . . . . 31
Using callback . . . . . . . . . . . . . . . . . . . . . . . . . . . . . . . . . . . . . . . . . . . . . . . . . . . . . . . . . . . . . . . 32
Saving a callback . . . . . . . . . . . . . . . . . . . . . . . . . . . . . . . . . . . . . . . . . . . . . . . . . . . . . . . . . . 32
Accepting a callback . . . . . . . . . . . . . . . . . . . . . . . . . . . . . . . . . . . . . . . . . . . . . . . . . . . . . . . 32
Viewing and deleting a saved callback . . . . . . . . . . . . . . . . . . . . . . . . . . . . . . . . . . . . . . . . . 33
Enhanced phone functions . . . . . . . . . . . . . . . . . . . . . . . . . . . 34
Accepting calls . . . . . . . . . . . . . . . . . . . . . . . . . . . . . . . . . . . . . . . . . . . . . . . . . . . . . . . . . . . . . 34
Picking up a specific call for your colleague . . . . . . . . . . . . . . . . . . . . . . . . . . . . . . . . . . . . . 34
Accepting calls via the headset . . . . . . . . . . . . . . . . . . . . . . . . . . . . . . . . . . . . . . . . . . . . . . . 34
Using the speakerphone . . . . . . . . . . . . . . . . . . . . . . . . . . . . . . . . . . . . . . . . . . . . . . . . . . . . 35
Accepting calls from the entrance telephone and opening the door . . . . . . . . . . . . . . . . . . . 35
Making calls . . . . . . . . . . . . . . . . . . . . . . . . . . . . . . . . . . . . . . . . . . . . . . . . . . . . . . . . . . . . . . . . 37
En-bloc sending/correcting numbers . . . . . . . . . . . . . . . . . . . . . . . . . . . . . . . . . . . . . . . . . . 37
Using the caller list . . . . . . . . . . . . . . . . . . . . . . . . . . . . . . . . . . . . . . . . . . . . . . . . . . . . . . . . . 38
Calling a subscriber from the personal phonebook . . . . . . . . . . . . . . . . . . . . . . . . . . . . . . . . 39
Calling a subscriber from the corporate directory . . . . . . . . . . . . . . . . . . . . . . . . . . . . . . . . . 39
Calling a subscriber from the internal system phonebook . . . . . . . . . . . . . . . . . . . . . . . . . . . 39
Using the LDAP directory from the system phonebook . . . . . . . . . . . . . . . . . . . . . . . . . . . . . 40
Making calls using system speed-dial numbers. . . . . . . . . . . . . . . . . . . . . . . . . . . . . . . . . . . 42
Dialing with speed-dial keys. . . . . . . . . . . . . . . . . . . . . . . . . . . . . . . . . . . . . . . . . . . . . . . . . . 42
Talking to your colleague with a speaker call . . . . . . . . . . . . . . . . . . . . . . . . . . . . . . . . . . . . 43
Talking to your colleague with discreet calling . . . . . . . . . . . . . . . . . . . . . . . . . . . . . . . . . . . . 44
Automatic connection setup (hotline) . . . . . . . . . . . . . . . . . . . . . . . . . . . . . . . . . . . . . . . . . . . 44
Reserving a trunk . . . . . . . . . . . . . . . . . . . . . . . . . . . . . . . . . . . . . . . . . . . . . . . . . . . . . . . . . . 44
Assigning a station number (not for U.S.) . . . . . . . . . . . . . . . . . . . . . . . . . . . . . . . . . . . . . . . 45
Associated dialing/dialing aid . . . . . . . . . . . . . . . . . . . . . . . . . . . . . . . . . . . . . . . . . . . . . . . . . 45
During a call . . . . . . . . . . . . . . . . . . . . . . . . . . . . . . . . . . . . . . . . . . . . . . . . . . . . . . . . . . . . . . . . 46
Using call waiting (second call) . . . . . . . . . . . . . . . . . . . . . . . . . . . . . . . . . . . . . . . . . . . . . . . 46
Preventing and allowing call waiting
(automatic camp-on) . . . . . . . . . . . . . . . . . . . . . . . . . . . . . . . . . . . . . . . . . . . . . . . . . . . . . . . 47
Turning the call waiting tone on and off . . . . . . . . . . . . . . . . . . . . . . . . . . . . . . . . . . . . . . . . . 47
Saving a number . . . . . . . . . . . . . . . . . . . . . . . . . . . . . . . . . . . . . . . . . . . . . . . . . . . . . . . . . . 47
Parking a call . . . . . . . . . . . . . . . . . . . . . . . . . . . . . . . . . . . . . . . . . . . . . . . . . . . . . . . . . . . . . 48
Holding external calls . . . . . . . . . . . . . . . . . . . . . . . . . . . . . . . . . . . . . . . . . . . . . . . . . . . . . . . 49
Conducting a conference . . . . . . . . . . . . . . . . . . . . . . . . . . . . . . . . . . . . . . . . . . . . . . . . . . . . 50
Activating tone dialing/DTMF suffix dialing . . . . . . . . . . . . . . . . . . . . . . . . . . . . . . . . . . . . . . 51
Recording a call . . . . . . . . . . . . . . . . . . . . . . . . . . . . . . . . . . . . . . . . . . . . . . . . . . . . . . . . . . . 52
Transferring a call after a speaker call announcement in a group . . . . . . . . . . . . . . . . . . . . . 52
Sending a trunk flash . . . . . . . . . . . . . . . . . . . . . . . . . . . . . . . . . . . . . . . . . . . . . . . . . . . . . . . 53
If you cannot reach a destination . . . . . . . . . . . . . . . . . . . . . . . . . . . . . . . . . . . . . . . . . . . . . . . 53
Call waiting (camp-on) . . . . . . . . . . . . . . . . . . . . . . . . . . . . . . . . . . . . . . . . . . . . . . . . . . . . . . 53
Busy override - joining a call in progress . . . . . . . . . . . . . . . . . . . . . . . . . . . . . . . . . . . . . . . . 53
Using night answer . . . . . . . . . . . . . . . . . . . . . . . . . . . . . . . . . . . . . . . . . . . . . . . . . . . . . . . . . . . 54
Contents
7
Programming the function keys . . . . . . . . . . . . . . . . . . . . . . . . 55
Configuring function keys . . . . . . . . . . . . . . . . . . . . . . . . . . . . . . . . . . . . . . . . . . . . . . . . . . . . . 55
Overview of functions. . . . . . . . . . . . . . . . . . . . . . . . . . . . . . . . . . . . . . . . . . . . . . . . . . . . . . . 56
Programming a procedure key . . . . . . . . . . . . . . . . . . . . . . . . . . . . . . . . . . . . . . . . . . . . . . . . . . 58
Configuring repdial keys . . . . . . . . . . . . . . . . . . . . . . . . . . . . . . . . . . . . . . . . . . . . . . . . . . . . . . . 59
Deleting function key programming. . . . . . . . . . . . . . . . . . . . . . . . . . . . . . . . . . . . . . . . . . . . . . 59
Displaying and assigning call charges . . . . . . . . . . . . . . . . . . . 60
Displaying call charges (not for U.S.) . . . . . . . . . . . . . . . . . . . . . . . . . . . . . . . . . . . . . . . . . . . . 60
Displaying call charges for another telephone (not for U.S.). . . . . . . . . . . . . . . . . . . . . . . . . . . 60
Dialing with call charge assignment . . . . . . . . . . . . . . . . . . . . . . . . . . . . . . . . . . . . . . . . . . . . . 61
Privacy/security . . . . . . . . . . . . . . . . . . . . . . . . . . . . . . . . . . . . 62
Voice encryption . . . . . . . . . . . . . . . . . . . . . . . . . . . . . . . . . . . . . . . . . . . . . . . . . . . . . . . . . . . . 62
Displaying status . . . . . . . . . . . . . . . . . . . . . . . . . . . . . . . . . . . . . . . . . . . . . . . . . . . . . . . . . . 62
Notes on voice encryption . . . . . . . . . . . . . . . . . . . . . . . . . . . . . . . . . . . . . . . . . . . . . . . . . . . 63
Turning ringer cutoff on and off . . . . . . . . . . . . . . . . . . . . . . . . . . . . . . . . . . . . . . . . . . . . . . . . . 63
Activating/deactivating "Do not disturb" . . . . . . . . . . . . . . . . . . . . . . . . . . . . . . . . . . . . . . . . . . . 64
Caller ID suppression . . . . . . . . . . . . . . . . . . . . . . . . . . . . . . . . . . . . . . . . . . . . . . . . . . . . . . . . 64
Monitoring a room . . . . . . . . . . . . . . . . . . . . . . . . . . . . . . . . . . . . . . . . . . . . . . . . . . . . . . . . . . . 65
Trace call – identifying anonymous callers (not for U.S.) . . . . . . . . . . . . . . . . . . . . . . . . . . . . . 65
Locking the telephone to prevent unauthorized use . . . . . . . . . . . . . . . . . . . . . . . . . . . . . . . . . . 66
Locking another telephone to prevent unauthorized use . . . . . . . . . . . . . . . . . . . . . . . . . . . . . 66
Saving your PIN code . . . . . . . . . . . . . . . . . . . . . . . . . . . . . . . . . . . . . . . . . . . . . . . . . . . . . . . . . 67
More functions/services . . . . . . . . . . . . . . . . . . . . . . . . . . . . . . 68
Appointment reminder function . . . . . . . . . . . . . . . . . . . . . . . . . . . . . . . . . . . . . . . . . . . . . . . . . 68
Saving a timed reminder . . . . . . . . . . . . . . . . . . . . . . . . . . . . . . . . . . . . . . . . . . . . . . . . . . . . 68
Using timed reminders . . . . . . . . . . . . . . . . . . . . . . . . . . . . . . . . . . . . . . . . . . . . . . . . . . . . . . 69
Sending a message . . . . . . . . . . . . . . . . . . . . . . . . . . . . . . . . . . . . . . . . . . . . . . . . . . . . . . . . . 69
Creating and sending a message . . . . . . . . . . . . . . . . . . . . . . . . . . . . . . . . . . . . . . . . . . . . . 69
Viewing and editing incoming messages . . . . . . . . . . . . . . . . . . . . . . . . . . . . . . . . . . . . . . . . 70
Leaving an advisory message. . . . . . . . . . . . . . . . . . . . . . . . . . . . . . . . . . . . . . . . . . . . . . . . . . 70
Deleting advisory messages . . . . . . . . . . . . . . . . . . . . . . . . . . . . . . . . . . . . . . . . . . . . . . . . . 71
Displaying the number of waiting calls/overload display . . . . . . . . . . . . . . . . . . . . . . . . . . . . . . 71
Using another telephone like your own for a call . . . . . . . . . . . . . . . . . . . . . . . . . . . . . . . . . . . 71
Using a mobile phone number at a random phone . . . . . . . . . . . . . . . . . . . . . . . . . . . . . . . . . . . 72
Logging on to the "guest telephone" . . . . . . . . . . . . . . . . . . . . . . . . . . . . . . . . . . . . . . . . . . . 72
Moving the connection to the next telephone . . . . . . . . . . . . . . . . . . . . . . . . . . . . . . . . . . . . 73
Logging off from the "guest telephone" . . . . . . . . . . . . . . . . . . . . . . . . . . . . . . . . . . . . . . . . . 73
Fax details and message on answering machine . . . . . . . . . . . . . . . . . . . . . . . . . . . . . . . . . . . 73
Resetting services and functions
(system-wide cancelation for a telephone) . . . . . . . . . . . . . . . . . . . . . . . . . . . . . . . . . . . . . . . . . 74
Activating functions for another telephone . . . . . . . . . . . . . . . . . . . . . . . . . . . . . . . . . . . . . . . . 74
Using system functions from outside
DISA (Direct Inward System Access) . . . . . . . . . . . . . . . . . . . . . . . . . . . . . . . . . . . . . . . . . . . . . 75
Using functions in ISDN via code dialing (keypad dialing) . . . . . . . . . . . . . . . . . . . . . . . . . . . . . 76
Controlling connected computers/programs/telephone data service . . . . . . . . . . . . . . . . . . . . . 77
Communicating with PC applications over a CSTA interface . . . . . . . . . . . . . . . . . . . . . . . . . . . 78
Controlling relays (only for HiPath 3000) . . . . . . . . . . . . . . . . . . . . . . . . . . . . . . . . . . . . . . . . . 78
Sensors (HiPath 33x0/35x0 only) . . . . . . . . . . . . . . . . . . . . . . . . . . . . . . . . . . . . . . . . . . . . . . . . 79
Paging persons (not for U.S.) . . . . . . . . . . . . . . . . . . . . . . . . . . . . . . . . . . . . . . . . . . . . . . . . . . 79
8
Contents
Phonebooks . . . . . . . . . . . . . . . . . . . . . . . . . . . . . . . . . . . . . . . 80
Personal phonebook . . . . . . . . . . . . . . . . . . . . . . . . . . . . . . . . . . . . . . . . . . . . . . . . . . . . . . . . . 80
Creating a new contact . . . . . . . . . . . . . . . . . . . . . . . . . . . . . . . . . . . . . . . . . . . . . . . . . . . . . 80
Editing a contact . . . . . . . . . . . . . . . . . . . . . . . . . . . . . . . . . . . . . . . . . . . . . . . . . . . . . . . . . . 80
Deleting a contact . . . . . . . . . . . . . . . . . . . . . . . . . . . . . . . . . . . . . . . . . . . . . . . . . . . . . . . . . 81
Deleting all contacts . . . . . . . . . . . . . . . . . . . . . . . . . . . . . . . . . . . . . . . . . . . . . . . . . . . . . . . . 81
Searching for a contact . . . . . . . . . . . . . . . . . . . . . . . . . . . . . . . . . . . . . . . . . . . . . . . . . . . . . 82
Corporate directory . . . . . . . . . . . . . . . . . . . . . . . . . . . . . . . . . . . . . . . . . . . . . . . . . . . . . . . . . . . 83
Searching for a contact . . . . . . . . . . . . . . . . . . . . . . . . . . . . . . . . . . . . . . . . . . . . . . . . . . . . . 83
Advanced phonebook editing. . . . . . . . . . . . . . . . . . . . . . . . . . . . . . . . . . . . . . . . . . . . . . . . . 84
Quick search . . . . . . . . . . . . . . . . . . . . . . . . . . . . . . . . . . . . . . . . . . . . . . . . . . . . . . . . . . . . . 85
Making calls in the team/executive/secretary configuration. . . 86
Lines . . . . . . . . . . . . . . . . . . . . . . . . . . . . . . . . . . . . . . . . . . . . . . . . . . . . . . . . . . . . . . . . . . . . . . 86
Line utilization . . . . . . . . . . . . . . . . . . . . . . . . . . . . . . . . . . . . . . . . . . . . . . . . . . . . . . . . . . . . 86
Line seizure . . . . . . . . . . . . . . . . . . . . . . . . . . . . . . . . . . . . . . . . . . . . . . . . . . . . . . . . . . . . . . 86
Line/trunk keys . . . . . . . . . . . . . . . . . . . . . . . . . . . . . . . . . . . . . . . . . . . . . . . . . . . . . . . . . . . . . 87
Accepting calls with the trunk keys . . . . . . . . . . . . . . . . . . . . . . . . . . . . . . . . . . . . . . . . . . . . 87
Dialing with trunk keys . . . . . . . . . . . . . . . . . . . . . . . . . . . . . . . . . . . . . . . . . . . . . . . . . . . . . . 87
Placing a call on hold on a trunk key and retrieving the held call . . . . . . . . . . . . . . . . . . . . . 88
Making calls on multiple lines alternately . . . . . . . . . . . . . . . . . . . . . . . . . . . . . . . . . . . . . . . . 88
MULAP conference release . . . . . . . . . . . . . . . . . . . . . . . . . . . . . . . . . . . . . . . . . . . . . . . . . . 88
Direct station selection keys . . . . . . . . . . . . . . . . . . . . . . . . . . . . . . . . . . . . . . . . . . . . . . . . . . . . 89
Using DSS keys to accept calls . . . . . . . . . . . . . . . . . . . . . . . . . . . . . . . . . . . . . . . . . . . . . . . 89
Calling a team member directly . . . . . . . . . . . . . . . . . . . . . . . . . . . . . . . . . . . . . . . . . . . . . . . 89
Transferring a call in progress . . . . . . . . . . . . . . . . . . . . . . . . . . . . . . . . . . . . . . . . . . . . . . . 90
Picking up a call for another team member . . . . . . . . . . . . . . . . . . . . . . . . . . . . . . . . . . . . . . 90
Forwarding calls on trunks . . . . . . . . . . . . . . . . . . . . . . . . . . . . . . . . . . . . . . . . . . . . . . . . . . . . 90
Transferring calls directly to the executive phone . . . . . . . . . . . . . . . . . . . . . . . . . . . . . . . . . . . . 92
Using team functions . . . . . . . . . . . . . . . . . . . . . . . . . . . . . . . . 93
Activating/deactivating a group call. . . . . . . . . . . . . . . . . . . . . . . . . . . . . . . . . . . . . . . . . . . . . . . 93
Picking up a call for another member of your team. . . . . . . . . . . . . . . . . . . . . . . . . . . . . . . . . . . 95
Ringing group . . . . . . . . . . . . . . . . . . . . . . . . . . . . . . . . . . . . . . . . . . . . . . . . . . . . . . . . . . . . . . 95
Uniform Call Distribution (UCD) . . . . . . . . . . . . . . . . . . . . . . . . . . . . . . . . . . . . . . . . . . . . . . . . . 96
Special functions in the LAN . . . . . . . . . . . . . . . . . . . . . . . . . . 98
Leaving hunt group/group call. . . . . . . . . . . . . . . . . . . . . . . . . . . . . . . . . . . . . . . . . . . . . . . . . . . 98
Setting up "follow me" call forwarding . . . . . . . . . . . . . . . . . . . . . . . . . . . . . . . . . . . . . . . . . . . . . 99
Using night answer . . . . . . . . . . . . . . . . . . . . . . . . . . . . . . . . . . . . . . . . . . . . . . . . . . . . . . . . . . 100
Ringing group . . . . . . . . . . . . . . . . . . . . . . . . . . . . . . . . . . . . . . . . . . . . . . . . . . . . . . . . . . . . . . 101
Controlling relays (only for HiPath 3000) . . . . . . . . . . . . . . . . . . . . . . . . . . . . . . . . . . . . . . . . . 102
Opening a door . . . . . . . . . . . . . . . . . . . . . . . . . . . . . . . . . . . . . . . . . . . . . . . . . . . . . . . . . . . . 102
Contents
9
Individual phone configuration . . . . . . . . . . . . . . . . . . . . . . . 103
Setting contrast . . . . . . . . . . . . . . . . . . . . . . . . . . . . . . . . . . . . . . . . . . . . . . . . . . . . . . . . . . . . 103
Audio . . . . . . . . . . . . . . . . . . . . . . . . . . . . . . . . . . . . . . . . . . . . . . . . . . . . . . . . . . . . . . . . . . . . 103
Setting the ringer mode . . . . . . . . . . . . . . . . . . . . . . . . . . . . . . . . . . . . . . . . . . . . . . . . . . . . 103
Adjusting audio settings . . . . . . . . . . . . . . . . . . . . . . . . . . . . . . . . . . . . . . . . . . . . . . . . . . . . 104
Adjusting the receiving volume during a call . . . . . . . . . . . . . . . . . . . . . . . . . . . . . . . . . . . . 104
Adjusting the ring volume. . . . . . . . . . . . . . . . . . . . . . . . . . . . . . . . . . . . . . . . . . . . . . . . . . . 104
Adjusting the ringer pitch . . . . . . . . . . . . . . . . . . . . . . . . . . . . . . . . . . . . . . . . . . . . . . . . . . . 104
Adjusting the attention ring volume . . . . . . . . . . . . . . . . . . . . . . . . . . . . . . . . . . . . . . . . . . . 104
Adjusting the speakerphone to the room acoustics . . . . . . . . . . . . . . . . . . . . . . . . . . . . . . . 105
Language for system functions . . . . . . . . . . . . . . . . . . . . . . . . . . . . . . . . . . . . . . . . . . . . . . 105
Setting local ring tones. . . . . . . . . . . . . . . . . . . . . . . . . . . . . . . . . . . . . . . . . . . . . . . . . . . . . 106
Setting headset port use . . . . . . . . . . . . . . . . . . . . . . . . . . . . . . . . . . . . . . . . . . . . . . . . . . . . . . 107
Changing the user password . . . . . . . . . . . . . . . . . . . . . . . . . . . . . . . . . . . . . . . . . . . . . . . . . . 108
Network information . . . . . . . . . . . . . . . . . . . . . . . . . . . . . . . . . . . . . . . . . . . . . . . . . . . . . . . . . 109
Testing the phone . . . . . . . . . . . . . . . . . . . . . . . . . . . . . . . . . 110
Testing the phone's functionality . . . . . . . . . . . . . . . . . . . . . . . . . . . . . . . . . . . . . . . . . . . . . . . 110
Checking the key assignment . . . . . . . . . . . . . . . . . . . . . . . . . . . . . . . . . . . . . . . . . . . . . . . . . 110
Differing display views in a HiPath 4000 environment . . . . . . 111
Web interface. . . . . . . . . . . . . . . . . . . . . . . . . . . . . . . . . . . . . 112
General . . . . . . . . . . . . . . . . . . . . . . . . . . . . . . . . . . . . . . . . . . . . . . . . . . . . . . . . . . . . . . . . . . 112
Launching the web interface . . . . . . . . . . . . . . . . . . . . . . . . . . . . . . . . . . . . . . . . . . . . . . . . . . . 112
Administrator Pages. . . . . . . . . . . . . . . . . . . . . . . . . . . . . . . . . . . . . . . . . . . . . . . . . . . . . . . 112
User Pages . . . . . . . . . . . . . . . . . . . . . . . . . . . . . . . . . . . . . . . . . . . . . . . . . . . . . . . . . . . . . 113
User menu . . . . . . . . . . . . . . . . . . . . . . . . . . . . . . . . . . . . . . . . . . . . . . . . . . . . . . . . . . . . . . 114
Fixing problems . . . . . . . . . . . . . . . . . . . . . . . . . . . . . . . . . . . 115
Responding to error messages . . . . . . . . . . . . . . . . . . . . . . . . . . . . . . . . . . . . . . . . . . . . . . . . 115
Contact partner in case of problems . . . . . . . . . . . . . . . . . . . . . . . . . . . . . . . . . . . . . . . . . . . . . 116
Troubleshooting . . . . . . . . . . . . . . . . . . . . . . . . . . . . . . . . . . . . . . . . . . . . . . . . . . . . . . . . . . . 116
Care and cleaning instructions . . . . . . . . . . . . . . . . . . . . . . . . . . . . . . . . . . . . . . . . . . . . . . . . 116
Labeling keys . . . . . . . . . . . . . . . . . . . . . . . . . . . . . . . . . . . . . . . . . . . . . . . . . . . . . . . . . . . . . 116
Local user menu . . . . . . . . . . . . . . . . . . . . . . . . . . . . . . . . . . 117
Opening the user menu on the phone. . . . . . . . . . . . . . . . . . . . . . . . . . . . . . . . . . . . . . . . . . . . 117
User menu display . . . . . . . . . . . . . . . . . . . . . . . . . . . . . . . . . . . . . . . . . . . . . . . . . . . . . . . . . 117
Index . . . . . . . . . . . . . . . . . . . . . . . . . . . . . . . . . . . . . . . . . . . 119
Overview of functions and codes (alphabetical) . . . . . . . . . . 124
10
General information
General information
About this manual
This document contains general descriptions of the technical options, which may not always be
available in individual cases. The required features must therefore be individually defined in the
terms of the contract.
If a particular function on your phone is not available to you as described, this may be due to one
of the following reasons:
• The function is not configured for you and your telephone. Please contact your system
administrator.
• Your communication platform does not feature this function. Please contact your Unify sales
partner for information on how to upgrade.
This user guide is intended to help you familiarize yourself with the OpenScape Desk Phone and
all of its functions. It contains important information on the safe and proper operation of the
OpenScape Desk Phone. These instructions should be strictly complied with to avoid operating
errors and ensure optimum use of your multifunctional telephone.
These instructions should be read and followed by every person installing, operating or
programming the OpenScape Desk Phone.
For your own protection, please read the section dealing with safety in detail. Follow the
safety instructions carefully in order to avoid endangering yourself or other persons and to
prevent damage to the unit.
These operating instructions are designed to be simple and easy to understand, providing clear
step-by-step instructions for operating the OpenScape Desk Phone.
Administrative tasks are dealt with in a separate manual. The Quick Reference Guide contains
quick and reliable explanations of frequently used functions.
Service
The Unify service department can only help you if you experience problems or defects with
the phone itself.
Should you have any questions regarding operation, your specialist retailer or network
administrator will gladly help you.
For queries regarding connection of the telephone, please contact your network provider.
If you experience problems or defects with the phone, please dial the service number for your
country.
General information
11
Intended use
The OpenScape Desk Phone is a desktop or wall-mounted unit designed for voice transmission
and for connection to a LAN. Any other use is regarded as unintended.
Telephone type
The identification details (exact product designation and serial number) of your telephone can be
found on the nameplate on the underside of the base unit.
Specific details concerning your communication platform can be obtained from your administrator.
Please always have this information to hand when you contact our service department regarding
faults or problems with the product.
Speakerphone quality and display legibility
• To ensure good speakerphone quality, the area in front of the microphone (front right) should be
kept clear. The optimum speakerphone distance is 50 cm.
• Proceed as follows to optimize display legibility:
– Turn the phone to tilt the display to ensure you have a frontal view of the display and avoid
light reflexes.
– Adjust the contrast as required Æ Page 103.
Voice encryption
On OpenScape Business (from R 4), your OpenScape Desk Phone IP 35 G supports voice encryption from software release 3 (V1 R0.xxxx). This allows you to use your
OpenScape Desk Phone to conduct calls without the risk of eavesdropping. Voice transmission is
encrypted and then decrypted again on the call partner's phone and vice versa.
If "Secure Mode" is enabled on your phone and a connection is established to a phone that does
not support voice encryption, the call is not encrypted and is thus not secure.
Your administrator can define in your communication system whether you are notified of unencrypted calls and how Æ Page 63.
12
General information
Multi-line telephone, executive/secretary functions
Your OpenScape Desk Phone IP 35 G is a "multi-line telephone". This means that multiple lines
can be configured by your administrator, which is not the case with single-line phones. Each line
is assigned an individual phone number that you can use to make and receive calls.
The programmable keys function as line keys on multi-line phones Æ Page 87.
When using a multi-line phone to make and receive calls, certain particularities must be taken into
account Æ Page 87 ff.
The executive-secretary configuration is a special case. This is a multi-line telephone with special
features (e.g. "Ring transfer" and "Pick up call"), configured especially for executive/secretary use
Æ Page 86 ff.
Group functions
For even more efficient telephone functionality, your administrator can configure various team
functions such as call pickup, hunt groups and call distribution groups.
Getting to know the OpenScape Desk Phone
13
Getting to know the OpenScape Desk Phone
The following sections describe the most frequently used controls and displays.
The user interface of your
OpenScape Desk Phone IP 35G
7
2
3
4
3
1
5
3
6
3
14
Getting to know the OpenScape Desk Phone
1
You can make and receive calls as normal using the handset.
2
The display provides intuitive support for telephone operation (two lines with up to 33
characters each).
The function keys (cannot be reprogrammed) allow you to call up the following frequently
used functions during a call:
3
Messages: Open the mailbox Æ Page 17.
Settings: Open the menu Æ Page 19.
Speaker: Activate/deactivate the speakerphone function.
Headset: Activate/deactivate the headset function.
Vol.+ and Vol.-: Increase/reduce the volume of the loudspeaker/headset; set the contrast
lighter and darker.
Mute: Activate/deactivate the microphone. This function is useful to prevent the other party
from listening in under certain circumstances, for example when consulting with someone
else in the room or in case of annoying background noise.
Transfer: Transfer a call to another subscriber.
Conference: Enable access to the conference functions.
Hold: Hold or retrieve the active call.
4
You can use the navigation keys to open the idle menu Æ Page 16 for example or to scroll
forward or back in menus or execute an action.
5
The dialpad can be used to enter phone numbers and write text.
Depending on how they are programmed, you can use the keys as follows:
• Function keys
• Repdial/Direct station selection key
6
7
Each key can be programmed with one function. You can also use the preassigned functions:
• Release Call
• Redial
• Call List
Incoming calls and new voicemails are visually signaled via the call display.
Getting to know the OpenScape Desk Phone
15
Navigation keys
This control allows you to move between input fields, navigate in lists and menus or open the idle
menu. You use the OK button to confirm options and launch functions:
Key
Functions when key is pressed
Open the idle menu Æ Page 16 or browse back in the menu.
b
Open the idle menu Æ Page 16 or browse back in the menu.
d
Open the idle menu Æ Page 16 or browse forward in the menu.
k
Perform action
Programmable function keys
Your OpenScape Desk Phone IP 35G has three fixed function keys (with LED), which you can
reprogram with different functions or phone numbers at any time.
Preassignment of function keys:
• Release Call
• Redial
• Call List can include the following entries (depending on the configuration):
Unanswered calls?, internal or external, or all external calls, both answered
and unanswered.
Depending on how they are programmed, you can use the keys as follows:
• Function keys Æ Page 55
• Repdial keys Æ Page 59
Each key can be programmed with one function.
The status of a function is shown by the LED display for the corresponding function key.
You will find information on the labeling of the function keys on Æ Page 116
Meaning of LED displays on function keys
LED
S
T
R
1
Meaning of function key
Off
The function is deactivated.
Flashing1
Indicates the function status.
On
The function is activated.
In this manual, flashing keys are identified by this icon, regardless of the flashing interval. The flashing interval represents different statuses, which are described in detail in the corresponding sections of the manual.
16
Getting to know the OpenScape Desk Phone
Dialpad
You can only use the digits 1 to 9 and 0 as well as the * and # characters when dialing a number.
In cases where text input is possible, you can use the dialpad to input text, punctuation and special
characters in addition to the digits 0 to 9 and the hash and asterisk symbols. To do this, press the
numerical keys repeatedly.
Example: To enter the letter "h", press the number 4 key on the keypad twice.
To enter a digit in an alphanumerical input field, hold down the relevant key.
Alphabetic labeling of dial keys is also useful when entering vanity numbers (letters associated
with the phone number's digits as indicated on the telephone spell a name, e.g. 0700 - PATTERN
= 0700 - 687837).
Display
Your OpenScape Desk Phone IP 35G comes with a black-and-white LCD display. Adjust the
contrast to suit your needs (Æ Page 103).
Idle mode
If there are no calls taking place or settings being made, your OpenScape Desk Phone IP 35G
is in idle mode.
Example:
Time
10:59
220870
Wed 08 01.14
Business f
Date
Open the idle menu
Own phone number
Idle menu
Press one of the navigation keys b d Æ Page 15 in idle mode to open the idle menu.
You can call up various functions here. The idle menu includes selected functions from the
Program/Service menu Æ Page 19.
The idle menu may contain the following entries:
•
•
•
•
•
•
•
•
•
•
•
•
•
•
Caller list
Forwarding on
Lock phone
DND on1
Advisory msg. on
Ringer cutoff on
Send message
View sent message2
View callbacks3
Phonebook (system phonebook)
HF answerback on
Suppress call ID
Waiting tone off
DISA internal
1. Must be activated by the administrator.
2. Only appears when there are messages that the recipient has not yet viewed.
3. Only appears if callback requests are saved.
Getting to know the OpenScape Desk Phone
17
Mailbox
Depending on your communication platform and its configuration (consult your administrator), you
can use the Messages key to access messages from services such as HiPath Xpressions in
addition to messages received.
Messages
You can send short text messages to individual internal stations or groups. In idle mode
(Æ Page 16), the following signals alert you to the presence of new messages:
• Messages The key LED lights up.
• "Messages received" is displayed.
Press the Messages key.
Example:
Caller ID
Msg. from: Coco, Chanel
Text?
f
Function menu
Display message
For a description of how to edit the entries Æ Page 70.
Voicemail
Press the Messages key.
If your system is appropriately configured, you can call the voice mailbox directly and immediately
play back the messages saved.
If your telephone is connected to a voicemail system (such as Entry Voice Mail), the Messages key
will also light up to alert you to any messages that have arrived.
An appropriate message also appears on the display (for instance, in Entry Voice Mail: "X new
messages").
To listen to your voicemail, follow the instructions on the display.
18
Getting to know the OpenScape Desk Phone
Call list
If you are unable to accept an external or internal call, the call attempt is stored in the caller list.
Answered calls can also be saved (consult your administrator).
Your telephone stores up to ten calls in chronological order. Each call is assigned a time stamp.
The oldest entry not yet deleted in the list is displayed first. Multiple calls from the same caller do
not automatically generate new entries in the caller list. Instead, only the most recent time stamp
for this caller is updated and its number incremented.
The caller list is automatically displayed Æ Page 38 in the idle menu Æ Page 16.
Callers with suppressed numbers cannot be saved in the call list.
Information is displayed regarding the caller and the time at which the call was placed.
Example:
Caller ID
10168 PETER
Busy
21.02.
16:25 f
Function menu
Time
Date
Telephone status during a call attempt
For a description of how to edit the call lists Æ Page 38.
Getting to know the OpenScape Desk Phone
19
Menu
Use the Settings menu key to access the following options:
•
•
•
•
•
Program/Service menu for your communication system
Personal (local phonebook)
Corporate (corporate directory)
User (local telephone settings for users)
Administrator (local telephone settings for administrators)
The menu key LED remains red as long as you are in this menu.
D
!
!
Next feature?
Program/Service?
Changeover?
Follow-me?
Call forw. - follow me?
5097
l
f
f
f
f
m
Menu title
Further entries are available
Settings
You can use the Settings option to access your communication system's extensive functions.
Example:
Menu title
Service
Destinations?
Feature settings?
PIN / COS?
Calls?
More features
f
f
f
f
m
Further entries are available
The menu structure consists of several levels. The first line in this structure shows the menu
currently selected while the remaining lines show the options for this menu. The arrow next to an
entry indicates the availability of additional options for this entry.
Opening the Settings
Press the Settings menu key, choose the Program/Service menu using the b d keys and
confirm with k.
20
Getting to know the OpenScape Desk Phone
Telephone user menu
You can configure settings for your OpenScape Desk Phone here.
Opening the user menu
To access: Press the Settings key. Select the "User" option with the b d keys and confirm
with k.
If necessary, enter the user password Æ Page 108.
The menu structure contains several levels.
You can also configure some of the settings using the web interface Æ Page 112 of your
OpenScape Desk Phone.
Control and monitoring function
A control or monitoring function can be activated on your phone for service purposes by remote
maintenance.
Control function
Your administrator has the option to activate and deactivate features of the phone via remote
maintenance. During maintenance, the handset, microphone, loudspeaker and headset are
deactivated. You are additionally informed on the display that the control function is active.
Monitoring function
In order to detect malfunctioning of a phone, for example, your administrator can install a
monitoring function. You can use your phone as normal during monitoring. However you will first
be informed about the operation with a message on the display and prompted to allow monitoring.
Getting to know the OpenScape Desk Phone
21
Ports on the underside of the phone
Network switch
Handset
PC
Headset
Country-specific cable
Power supply unit (if necessary)
Using network ports more efficiently
The OpenScape Desk Phone IP 35G has a built-in Ethernet switch. This means that you can connect a PC to the LAN directly via the phone. The option for connecting the telephone and PC must
first be activated on the telephone by your administrator.
Network switch
OpenScape Desk Phone IP 35G
PC
Using this connection option saves one network port for each switch used and requires fewer or
shorter network cables when arranged correctly.
22
Basic functions
Basic functions
Please read the introductory chapter "Getting to know the
OpenScape Desk Phone IP" Æ Page 13 carefully before performing any
of the steps described here on your phone.
Accepting a call
Special default ring signaling is set for your telephone:
• When you receive an internal call, your telephone rings once every four
seconds (single-tone sequence).
• When you receive an external call, your telephone rings twice in rapid
succession every four seconds (dual-tone sequence).
• When you receive a call from the entrance telephone, your telephone rings
three times in rapid succession every four seconds (triple-tone sequence).
• If a call is waiting, you hear a short tone (beep) every six seconds.
Your administrator can adjust the ring cadence for external and internal
calls for you. In other words, different ring cadences can be set for
different internal callers.
The number or the name of the caller appears on the display.
Accepting a call via the handset
The phone rings. The caller appears on the screen1.
^
if nec. Vol.+ or Vol.-
Lift the handset.
Raise or lower the volume. Keep pressing the key until the desired volume is set.
1. Pay attention to the notes on voice encryption Æ Page 63.
Basic functions
23
Accepting a call via the loudspeaker
(speakerphone mode)
Suggestions for using speakerphone mode:
• Tell the other party that you are using speakerphone mode.
• The speakerphone works best at a low receiving volume.
• The ideal distance between the user and the telephone in speakerphone mode
is about 50 cm (approx. 20 inches).
The phone rings. The caller appears on the screen1.
Speaker
if nec. Vol.+ or Vol.-
Press the key shown. The LED lights up.
Raise or lower the volume. Keep pressing the key until the desired volume is set.
Accepting a call via the headset
Prerequisite: A headset is connected.
Make sure your headset port is set up properly Æ Page 107.
The phone rings. The Headset key flashes.
Headset
if nec. Vol.+ or Vol.-
Press the key shown.
Adjust the call volume.
Switching to speakerphone mode
Prerequisite: You are conducting a call via the handset.
Speaker \
if nec. Vol.+ or Vol.-
Hold down the key and replace the handset. Then release the key and continue
the call.
Adjust the call volume. Keep pressing the key until the desired volume is set.
U.S. mode
If the country setting is set to U.S. (consult your administrator), you do not have
to hold down the loudspeaker key when replacing the handset to switch to
speakerphone mode.
Speaker
]
if nec. Vol.+ or Vol.-
Press the key shown.
Replace the handset. Proceed with your call.
Adjust the call volume. Keep pressing the key until the desired volume is set.
1. Pay attention to the notes on voice encryption Æ Page 63.
24
Basic functions
Switching to the handset
Prerequisite: You are conducting a call in speakerphone mode.
^ and [
Lift the handset. Proceed with your call.
Open listening in the room during a call
You can let other people in the room join in on the call. Let the other party know
that you have turned on the speaker.
Prerequisite: You are conducting a call via the handset.
Activating
Speaker
Press the key shown. The LED lights up.
Deactivating
Speaker
Press the key shown. The LED goes out.
Turning the microphone on and off
To prevent the other party from listening in while you consult with someone in
your office, you can temporarily switch off the handset microphone or the
handsfree microphone. You can also switch on the handsfree microphone to
answer an announcement via the telephone speaker (speaker call Æ Page 35).
Deactivating the microphone
Mute
Press the "Mute" key.
Activating the microphone
Mute
Press the illuminated "Mute" key.
Ending the call
Release Call
Press the key shown.
or
Speaker
Press the illuminated key.
or
\
Replace the handset.
Basic functions
25
Making calls
Off-hook dialing
^
j
Lift the handset.
Internal calls: Enter the phone number.
External calls: Enter the external code and the phone number1.
The called party does not answer or is busy:
\
Replace the handset.
On-hook dialing
j
Internal calls: Enter the phone number.
External calls: Enter the external code and the phone number1.
Your system may also be programmed so that you have to press the
"internal" key before you dial the internal number.
You then do not have to enter an external code to call the external party
(automatic trunk seizure/prime line is not active; consult your
administrator).
The other party answers with speaker:
^
or
Lift the handset.
On-hook dialing: Speakerphone mode.
The called party does not answer or is busy:
Speaker
Press the key shown. The LED goes out.
Dialing with the headset connected
Prerequisite: The headset is connected.
j
Headset
Internal calls: Enter the phone number.
External calls: Enter the external code and the phone number.
The headset key lights up.
The connection is set up as soon as your input is complete1.
Make sure your headset port is set up properly Æ Page 107.
1. Pay attention to the notes on voice encryption Æ Page 63.
26
Basic functions
Dialing with repdial keys
Prerequisite: You have saved a number on a repdial key Æ Page 59.
S
Press the key with the saved number1.
If the number is saved at the second level, press the "Shift" key first.
You can also press the repdial key during a call and automatically initiate
a callback Æ Page 27.
Redialing a number
The last ten external phone numbers dialed are stored automatically.
If this feature is configured (consult your administrator), account codes
entered are also saved Æ Page 61.
You can redial them simply by pressing a key.
Displaying and dialing saved station numbers
Prerequisite: The Redial key is not reprogrammed.
Redial
Press the key shown.
Next?
Keep confirming until the phone number you want appears.
Call?
Select and confirm the option shown1.
Rejecting calls
You can reject calls you do not wish to take. The call is then signaled on another
definable telephone (consult your administrator).
Prerequisite: The Release Call key is not reprogrammed. The phone rings. The
caller appears on the screen.
Release Call
Press the key shown.
If a call cannot be rejected, your telephone will continue to ring. The message
"currently not possible" is displayed (e.g. in the case of recalls).
1. Pay attention to the notes on voice encryption Æ Page 63.
Basic functions
27
Calling a second party (consultation)
You can call a second party while a call is in progress. The first party is placed
on hold.
Confirm the option shown.
Consultation?
j
Call the second party1.
Return to the first party, the second party does not answer:
Confirm the option shown.
Return to held call?
or
End the consultation:
Select and confirm the option shown.
Quit and return?
Switching to the held party (alternating)
Select and confirm the option shown1.
Toggle/Connect?
Combining the call parties in a three-party conference
Select and confirm the option shown.
Conference?
or
Conference
Press the key shown.
If voice encryption is not activated or not available on a conference party's
phone, the entire conference is not secure. It may be indicated that the call
is not secure. For more information on conferences, see Æ Page 50.
Leaving a conference
Select and confirm the option shown.
Leave conference?
Transferring a call
If the person you are speaking to wants to speak to another colleague of yours,
you can transfer the call to that colleague.
Confirm the option shown.
Consultation?
j
Enter the number of the party to whom you want to transfer the call.
[
Announce the call, if necessary.
Transfer
\
Press the key shown. The person you were speaking with is now connected to
the desired party.
Replace the handset.
or
Transfer?
Select and confirm the option shown2.
1. Pay attention to the notes on voice encryption Æ Page 63.
2. ”Differing display views in a HiPath 4000 environment” Æ Page 111
28
Basic functions
Forwarding calls
Using variable call forwarding
You can immediately forward internal or external calls to different internal or
external telephones (destinations). (External destinations require special
configuration in the system.)
When call forwarding is active, a special dial tone sounds when you lift the
handset.
If DID DTMF is active (consult your administrator), you can also forward
calls to this destination.
Destinations: Fax = 870, DID = 871, Fax-DID = 872.
If you are a call forwarding destination, your display will show the number
or the name of the originator on the upper line and that of the caller on the
lower line.
Special features must be taken into consideration if your telephone
operates with system networking via LAN Æ Page 99!
Prerequisite: The Forward key is not reprogrammed.
Forward
Press the key shown.
or
d
Open the idle menu Æ Page 16.
Forwarding on?
Select and confirm the option shown.
1=all calls?
Confirm the option shown.
or
Select and confirm the option shown.
2=external calls only?
or
Select and confirm the option shown.
3=internal calls only?
j
Enter the destination number.
Save?
Confirm the option shown.
K 100168
The call forwarding symbol as well as the phone number and possibly also the
forwarding destination name are displayed.
Deactivating call forwarding
Forward
or
d
Forwarding off
Press the key shown.
Open the idle menu Æ Page 16.
Select and confirm the option shown.
Basic functions
29
Using call forwarding no reply (CFNR)
Calls that are not answered after three rings (=default, can be adjusted by
administrator) or that are received while another call is ongoing can be
automatically forwarded to a specified telephone.
Settings
Program/Service?
l
Open the menu Æ Page 19.
Select and confirm the option shown.
Select and confirm the option shown.
*495=CFNR on?
j
Enter the destination number.
• Enter the internal station number for internal destinations
• Enter the external code and the external station number for external
destinations
Confirm the option shown.
Save?
Deactivating call forwarding no reply
Settings
Program/Service?
l
Open the menu Æ Page 19.
Select and confirm the option shown.
#495=CFNR off?
Select and confirm the option shown.
Delete?
Confirm the option shown.
or
Exit
Select and confirm to return to idle mode and not deactivate call forwarding.
If CFNR is activated, "CFNR on" appears briefly on the display after you
hang up.
30
Basic functions
Call forwarding in the event of telephone failure
(CFSS)
If configured (consult your administrator), you can define an internal or external
call forwarding destination that activates in the event of telephone failure.
Settings
Program/Service?
l
Open the menu Æ Page 19.
Select and confirm the option shown.
Select and confirm the option shown.
*9411= CFSS on?
j
Enter the destination number.
Confirm the option shown.
Save?
Deactivating call forwarding/deleting a destination:
Settings
Program/Service?
l
Open the menu Æ Page 19.
Select and confirm the option shown.
#9411= CFSS off?
Select and confirm the option shown.
Delete?
Confirm to deactivate and delete the forwarding destination.
or
Select and confirm to return to idle mode and not deactivate call forwarding.
Exit?
Changing the forwarding destination (if call forwarding is active):
Settings
Program/Service?
l
*9411
Select and confirm the option shown.
Enter the code.
Confirm the option shown.
Change?
j
Save?
Open the menu Æ Page 19.
Change the destination phone number.
Confirm the option shown.
Basic functions
31
Call forwarding in the carrier network and
forwarding multiple subscriber numbers (MSN)
(not for U.S.)
If this function has been configured (consult your administrator), you can forward
calls to your assigned multiple subscriber number MSN (DID number) directly
within the carrier network.
For example, you can forward your phone line to your home phone after
business hours.
Settings
Program/Service?
l
Open the menu Æ Page 19.
Select and confirm the option shown.
Trunk FWD on?
Select and confirm the option shown.
1=immediate?
Select and confirm the required type of call forwarding.
or
Select and confirm the option shown.
2=on no answer?
or
Select and confirm the option shown.
3= on busy?
j
Enter your DID number.
j
Enter the destination number (without the external code).
Confirm the option shown.
Save?
Deactivating call forwarding
Select and confirm the option shown.
Trunk FWD off?
Confirm the displayed call forwarding type.
j
Enter your DID number.
32
Basic functions
Using callback
You can request a callback if the internal station called is busy or if nobody
answers. This also applies for external calls via ISDN exchanges. This feature
saves you from having to make repeated attempts to reach the user.
You receive a callback:
• When the other party is no longer busy
• When the user who did not answer has conducted another call
When configured (consult your administrator), all callback requests are
automatically deleted overnight.
Saving a callback
Prerequisite: You have reached a busy line or no one answers.
Confirm the option shown.
Callback?
Accepting a callback
Prerequisite: A callback was saved. Your telephone rings and the following
message appears on the display "Callback: ...“.
^
Lift the handset.
or
Speaker
Press the key shown. The LED lights up.
or
Answer?
Select and confirm the option shown.
You hear a ring tone1.
1. Pay attention to the notes on voice encryption Æ Page 63.
Basic functions
33
Viewing and deleting a saved callback
d
Open the idle menu Æ Page 16.
View callbacks?
Select and confirm the option shown1.
Next callback?
Select and confirm to display additional entries.
Deleting a displayed entry
Confirm the option shown.
Delete?
Ending retrieval
Select and confirm the option shown.
Exit?
or
Settings
Press the key shown. The LED goes out.
or
Speaker
Press the key shown. The LED goes out.
1. ”Differing display views in a HiPath 4000 environment” Æ Page 111
34
Enhanced phone functions
Enhanced phone functions
Accepting calls
Picking up a specific call for your colleague
You hear another telephone ring.
Settings
Program/Service?
l
Open the menu Æ Page 19.
Select and confirm the option shown.
More features?
Select and confirm the option shown.
*59=Pickup - directed?
Select and confirm the option shown1.
if nec.
Next?
Select and confirm until the required station is displayed.
Accept call?
Confirm the option shown.
or
j
If you know the number of the telephone that is ringing, enter it directly2.
Accepting calls via the headset
Prerequisite: The headset is connected.
Headset
The LED flashes when a call is received. Press the key shown. Conduct call.
Ending the call:
Headset
Press the key shown. The key LED extinguishes2.
Make sure your headset port is set up properly Æ Page 107.
1. ”Differing display views in a HiPath 4000 environment” Æ Page 111
2. Pay attention to the notes on voice encryption Æ Page 63.
Enhanced phone functions
35
Using the speakerphone
A colleague addresses you directly over the speaker with a speaker call.
You hear a tone before the announcement. The other party’s name or station
number appears on the screen. You can conduct the call with the handset or in
speakerphone mode.
^
Lift the handset and answer the call.
or
Press the "OK" key to confirm your selection and answer the call.
Mute off?
If handsfree answerback is enabled (see below), you do not need to
switch on the microphone - you can answer directly. You can answer immediately in speakerphone mode.
If handsfree answerback is disabled (default setting), follow the procedure
described above. Placing a speaker call to a colleague Æ Page 43.
Enabling and disabling handsfree answerback
d
Open the idle menu Æ Page 16.
Select and confirm the option shown.
HF answerback on?
or
Select and confirm the option shown.
HF answerback off?
Accepting calls from the entrance telephone and
opening the door
If an entrance telephone has been programmed, you can use your telephone to
speak to someone at the entrance telephone and to activate a door opener.
If you have the proper authorization (consult your administrator), you can activate the door opener, enabling visitors to open the door themselves by entering
a 5-digit code (e.g. using a DTMF transmitter or the keypad installed).
Speaking to visitors via the entrance telephone
Prerequisite: Your telephone rings.
^
Lift the handset within thirty seconds. You are connected to the entrance telephone immediately.
or
^
j
Lift the handset after more than thirty seconds.
Dial the entrance telephone number.
36
Enhanced phone functions
Opening the door from your telephone during a call from the
entrance telephone
Confirm the option shown.
Open door?
Opening the door from your telephone without calling the entrance
telephone
Settings
Program/Service?
l
Open the menu Æ Page 19.
Select and confirm the option shown.
Select and confirm the option shown.
*61=Open door?
j
Dial the entrance telephone number.
Special features must be taken into consideration if your telephone operates with system networking via LAN Æ Page 102!
Opening the door with a code (at the door)
j
After ringing the bell, enter the five-digit code (using the keypad or a DTMF
transmitter). Depending on how the door opener has been programmed, a doorbell call signal may or may not be forwarded.
Activating the door opener
Settings
Program/Service?
l
Open the menu Æ Page 19.
Select and confirm the option shown.
Select and confirm the option shown.
*89=Door opener on?
j
Dial the entrance telephone number.
j
Enter the five-digit code. Default code = "00000".
or
3=change password?
Select the displayed function and press "OK" to change the code.
1=enable with ring?
Select and confirm the option shown.
or
You can also open the door without a doorbell ring.
2=enable without ring?
Deactivating the door opener
Settings
Program/Service?
#89=Door opener off?
l
Open the menu Æ Page 19.
Select and confirm the option shown.
Select and confirm the option shown.
Enhanced phone functions
37
Making calls
En-bloc sending/correcting numbers
If this feature is configured (consult your administrator), a connection is not
attempted immediately when a station number is entered. This means that you
can correct the number if necessary.
The station number is only dialed at your specific request.
j
Internal calls: Enter the phone number.
External calls: Enter the external code and the phone number.
Dialing entered/displayed numbers
^
Lift the handset.
or
Confirm the option shown1.
Call?
Correcting numbers entered
A station number can only be corrected as it is being entered. Station
numbers stored for number redial, for example, cannot be corrected.
Select and confirm the option shown.
The last digit entered in each case is deleted.
Delete number?
j
Enter the required digit(s).
Canceling en-bloc sending
Select and confirm the option shown.
Cancel?
or
Speaker
Press the key shown. The LED goes out.
1. Pay attention to the notes on voice encryption Æ Page 63.
38
Enhanced phone functions
Using the caller list
Detailed information as well as a sample display entry are provided on
Æ Page 18.
Retrieving the caller list
d
Caller list?
Prerequisite: Your administrator has set up a caller list for your telephone.
Open the idle menu Æ Page 16.
Confirm the option shown1.
or
Call List
Press the illuminated key to open the call list.
The latest entry is displayed, see the example on Æ Page 18.
To view other calls, confirm each subsequent display.
Next?
Ending retrieval
Select and confirm the option shown.
Previous?
or
Settings
Press the key shown. The LED goes out.
or
Speaker
Press the key shown. The LED goes out.
Displaying the call time
Time/date sent?
Prerequisite: You have retrieved the caller list and the selected call is displayed
Æ Page 18.
Select and confirm the option shown.
Dialing a station number from the caller list
Call?
Prerequisite: You have retrieved the caller list and the selected call is displayed.
Select and confirm the option shown2.
The caller is automatically deleted from the caller list when a connection
is finally set up.
Removing an entry from the caller list
Prerequisite: You have retrieved the caller list and the selected call is displayed.
Delete?
Confirm the option shown.
1. ”Differing display views in a HiPath 4000 environment” Æ Page 111
2. Pay attention to the notes on voice encryption Æ Page 63.
Enhanced phone functions
39
Calling a subscriber from the personal phonebook
Settings
Personal
f
Niels, Bohr
f
Open the menu Æ Page 19.
Select and confirm to open the local phonebook.
Select and confirm the relevant entry. The connection is set up (see also
Æ Page 80).
Calling a subscriber from the corporate directory
Prerequisite: You have searched for and selected a subscriber in the corporate
directory Æ Page 83.
Niels, Bohr
f
Confirm the subscriber. The connection is set up.
Calling a subscriber from the internal system
phonebook
The internal system phonebook of your communication system contains all station numbers and system speed-dial numbers assigned to a name. Consult your
administrator to find out if one was configured for your system.
Prerequisite: Names have been assigned to the station numbers stored in the
system.
^
Lift the handset.
or
Speaker
Press the key shown. The LED lights up.
Confirm the option shown.
Directory?
if nec.
If several phonebooks have been configured:
Confirm the option shown.
1=internal?
The first entry is displayed on the screen.
Vol.+ or Vol.-
Scroll to next or previous entry.
or
Select and confirm the option shown.
Scroll Next?
or
Select and confirm the option shown.
Scroll Previous?
or
j
Enter the name you want to find, or just the first few letters, using the keypad
Æ Page 16.
if nec.
Select and confirm each letter to be deleted. The last letter entered is deleted. If
all letters are deleted, the first entry in the phonebook will be displayed again.
Delete Character?
if nec.
Delete Line?
Select and confirm the option shown. All entered letters are deleted and the first
entry in the phonebook is displayed again.
40
Enhanced phone functions
The entry you wish to dial appears on the screen
Select and confirm the option shown1.
Call?
Using the LDAP directory from the system
phonebook
If configured (consult your administrator), you can search for directory data in
the LDAP database via the system phonebook of the communication system
and dial the number of any subscriber you find there.
Prerequisite: The LDAP search feature has been configured in the system.
^
Lift the handset.
or
Speaker
Press the key shown. The LED lights up.
Confirm the option shown.
Directory
if nec.
If several phonebooks have been configured in the system:
Select and confirm the option shown.
2=LDAP?
j
if nec.
Enter the name you wish to search for using the keypad (max. 16 characters)
Æ Page 16.
Partial entries are accepted, for example "Mei" for Meier.
If configured (consult your administrator), you can also search for last name and
first name. To separate last name and first name by a space, enter "0". Partial
entries are accepted, for example "Mei P" for "Meier Peter".
if nec.
Delete Character?
Select and confirm each letter to be deleted. The last letter entered is deleted.
In large databases, the results of the search may be incomplete if too few
characters are entered Æ Page 41.
Search?
Confirm the option shown.
The name is searched for. This may take a few seconds.
1. Pay attention to the notes on voice encryption Æ Page 63.
Enhanced phone functions
41
The result is displayed
If only one name is found, it is displayed.
Confirm the option shown.
Call?
If several names are found (max. 50), the first name is displayed.
Vol.+ or Vol.-
Scroll to the next or previous entry.
or
Confirm the option shown.
Scroll Next?
or
Scroll Previous?
Select and confirm the option shown.
Call?
Select and confirm the option shown1.
If no name is found
If your search does not yield any name corresponding to your query, you can
extend the range of the search, for example by deleting characters.
Select and confirm the option shown.
For further procedure, see above.
Modify search?
If too many names are found
If more than the maximum of 50 names are found corresponding to your query,
only an incomplete list of results can be displayed.
You can view these results, select any of the names or change the search
(e.g. narrow the search by entering more characters).
In this case it is advisable to narrow down the search so that all
corresponding names can be displayed.
Confirm to view the incomplete list.
For further procedure, see above.
Show matches?
or
Modify search?
Narrow down the search.
Select and confirm in order to change the search.
For further procedure, see above.
1. Pay attention to the notes on voice encryption Æ Page 63.
42
Enhanced phone functions
Making calls using system speed-dial numbers
Prerequisite: You know the system speed-dial numbers (consult your
administrator).
Settings
Program/Service?
l
Open the menu Æ Page 19.
Select and confirm the option shown.
Select and confirm the option shown1.
*7=Use speed dialing?
j
if nec.
j
Enter a three-digit speed-dial number2.
Suffix dialing
If necessary, you can suffix-dial additional digits (for example, the user's
extension) at the end of the saved station number.
If this feature is configured, a suffix is automatically dialed (for example, "0" for
the exchange) if no entries are made within 4 or 5 seconds.
Dialing with speed-dial keys
Prerequisite: You have configured speed-dial keys Æ Page 42.
Settings
Program/Service?
l
Open the menu Æ Page 19.
Select and confirm the option shown.
Select and confirm the option shown[1].
*7=Use speed dialing?
)
j
Press the key shown.
Press the required speed-dial key2.
Configuring a speed-dial key
You can program the keys 0 to 9 with ten frequently used phone
numbers.
Settings
Program/Service?
l
Open the menu Æ Page 19.
Select and confirm the option shown.
*92=Change speed dial?
Select and confirm the option shown[1].
Change?
Confirm the option shown.
)
j
Press the required speed-dial key. If the key is already in use, the programmed
phone number appears on the screen.
Confirm the option shown.
Change
j
Save
Press the key shown.
First enter the external code and then the external station number.
Confirm the option shown.
1. ”Differing display views in a HiPath 4000 environment” Æ Page 111
2. Pay attention to the notes on voice encryption Æ Page 63.
Enhanced phone functions
or
43
If you make a mistake:
Previous?
Select and confirm the option shown. This deletes all numbers entered.
Next?
Confirm the option shown.
or
Select and confirm the option shown.
Change?
or
Select and confirm the option shown.
Delete?
or
Select and confirm the option shown.
Exit?
Talking to your colleague with a speaker call
You can make a speaker announcement through a loudspeaker if connected
(consult your administrator) or to an internal user with a system telephone
without any action on their part.
d
Open the idle menu Æ Page 16.
Select and confirm the option shown.
*80=Speaker call?
j
Enter the phone number.
Responding to a speaker call Æ Page 35.
44
Enhanced phone functions
Talking to your colleague with discreet calling
If this function has been configured (consult your administrator), you can join an
ongoing call conducted by an internal user on a system telephone with display.
You can listen in unnoticed and speak to the internal user without being overheard by the other party (discreet calling).
^
)945
j
Lift the handset.
Enter the code.
Enter your internal station number.
Your administrator can protect your telephone against discreet calling.
Automatic connection setup (hotline)
If this function is configured (consult your administrator), the system automatically sets up a connection to a preset internal or external destination.
^
Lift the handset.
Depending on the setting, the connection is either set up immediately or only
after a preset period of time (= hotline after a timeout).
Reserving a trunk
If configured (consult your administrator), you can reserve an occupied line for
yourself. When the line is free, you receive a call and a note on the display.
Prerequisite: "Currently busy" appears on the display.
Confirm the option shown.
Reserve trunk
Reserved line is free:
^
j
Your telephone rings. "Trunk is free" appears on the display.
Lift the handset. You will hear the dial tone.
Enter the external phone number.
Enhanced phone functions
45
Assigning a station number (not for U.S.)
If this function has been configured (consult your administrator), you can
selectively assign a specific number (DID number) to your telephone before
making an external call. The assigned number then appears on the called party's
display.
Settings
Program/Service?
l
Open the menu Æ Page 19.
Select and confirm the option shown.
Select and confirm the option shown.
*41=Temporary MSN?
j
Enter the DID number you wish to use.
j
Dial the external number.
Associated dialing/dialing aid
If this function has been configured (consult your administrator), you can use a
dialing aid to dial numbers and set up calls for your telephone.
The operating procedure depends on whether the dialing aid is connected to the
S0 bus or the a/b (T/R) port.
You can also use your system telephone as a dialing aid for other telephones.
Dialing aid on the S0 bus
On the PC, select a destination and start dialing.
^
The speaker on your telephone is switched on. Lift the handset when the other
party answers.
Dialing aid at the a/b (T/R) port
On the PC, select a destination and start dialing.
"Lift the handset" appears on the PC screen.
^
Lift the handset.
Dialing aid from your telephone for another telephone:
Settings
Program/Service?
l
Open the menu Æ Page 19.
Select and confirm the option shown.
Select and confirm the option shown.
*67=Associated dialing?
j
Enter the internal station number ("Call for:").
j
Enter the number you wish to dial.
46
Enhanced phone functions
During a call
Using call waiting (second call)
Callers can still reach you while you are conducting another call. A signal alerts
you to the waiting call.
You can ignore or accept the second call.
When you accept the waiting call, you can either end the first call or place it on
hold and resume the call later on.
You can also block the second call or the signal tone Æ Page 47.
Prerequisite: You are conducting a phone call and hear a tone (approx. every
six seconds).
Ending the first call and answering the waiting call
\
^
Replace the handset. Your phone rings1.
Answer the second call. Lift the handset.
Placing the first call on hold and answering the second call
Select and confirm the option shown1.
Call waiting?
You are connected to the second caller. The first party is placed on hold.
Ending the second call and resuming the first one
Confirm the option shown.
Quit and return?
or
hz 23189 Coco
\
Replace the handset.
Recall the first party.
^
Lift the handset.
1. Pay attention to the notes on voice encryption Æ Page 63.
Enhanced phone functions
47
Preventing and allowing call waiting
(automatic camp-on)
If this function has been configured (consult your administrator), you can prevent
or allow a second call Æ Page 46 from being signaled by automatic camp-on
during an ongoing call.
Settings
Program/Service?
l
Open the menu Æ Page 19.
Select and confirm the option shown.
Select and confirm the option shown1.
#490=Call wait.trm.off?
or
Select and confirm the option shown.
*490=Call wait.trm.on?
Turning the call waiting tone on and off
You can suppress the call waiting tone (approx. every six seconds) for second
calls. A single special dial tone then alerts you to the waiting call.
Activating
d
Open the idle menu Æ Page 16.
Select and confirm the option shown.
Waiting tone off?
Deactivating
d
Waiting tone on?
Open the idle menu Æ Page 16.
Select and confirm the option shown.
Saving a number
You can save your call partner's station number for subsequent redialing from
the caller list Æ Page 38.
Prerequisite: You are conducting a call.
Save number?
Select and confirm the option shown.
1. ”Differing display views in a HiPath 4000 environment” Æ Page 111
48
Enhanced phone functions
Parking a call
You can park up to ten internal and/or external calls. Parked calls can be
displayed and picked up on another telephone. This feature is useful,
for example, if you want to continue a call at another phone.
Prerequisite: You are conducting a call.
Settings
Program/Service?
l
Open the menu Æ Page 19.
Select and confirm the option shown.
Select and confirm the option shown.
*56=Park a call?
0 ... 9
Enter the number of the park position (0 - 9) and make a note of it. If the park
position number you entered is not displayed, it is already in use; enter another
one.
Retrieving a parked call
Prerequisite: One or more calls have been parked. The phone is idle.
Settings
Program/Service?
l
Open the menu Æ Page 19.
Select and confirm the option shown.
Select and confirm the option shown1.
Retrieve call?
0 ... 9
Enter the park position number you noted earlier.
If the park position number you enter is not in use, you cannot retrieve the call.
If a parked call is not picked up, after a specific period of time the call is
returned to the telephone from where it was parked (recall).
1. ”Differing display views in a HiPath 4000 environment” Æ Page 111
Enhanced phone functions
49
Holding external calls
If you have programmed a hold key on your phone Æ Page 55, you can put
external calls on hold.
All other stations can then pick up the call on the assigned line.
Hold
Press the key shown.
The message of the relevant trunk appears (e.g. 801); note the trunk number.
If available, the LED of the assigned trunk key flashes slowly.
Held on line: 801
if nec.
\ or Release Call
Replace the handset or press the key shown.
Depending on the configuration, this may be necessary so other members can
also pick up the call on hold.
Picking up a call on hold
Prerequisite: One or more calls are on hold. The phone is idle.
Settings
Program/Service?
l
Open the menu Æ Page 19.
Select and confirm the option shown.
Select and confirm the option shown.
Retrieve line
or
S
j
If the "Retrieve" key Æ Page 55 is available, press it.
Enter the noted trunk number.
or
T
If there is a "Line:" key available for the relevant trunk, the LED flashes slowly.
Press the key shown.
50
Enhanced phone functions
Conducting a conference
In a conference call, you can talk to as many as four other parties at the same
time. These may be internal or external users.
You can only add parties to or remove them from a conference if you
initiated the conference.
j
Start conference?
f
j
Conference?
l
Call the first party.
Select and confirm the option shown.
Call the second party. Announce the conference.
Select and confirm the option shown.
or
Conference
Press the key shown.
A tone sounds every 30 seconds to indicate that a conference is in progress
(can be disabled, consult your administrator).
If voice encryption is not activated or not available on a conference party's
phone, the entire conference is not secure. It may be indicated that the call
is not secure Æ Page 63.
If the second party does not answer
Confirm the option shown.
Return to held call?
Adding up to five parties to a conference
Confirm the option shown.
Add party?
j
Call the new party. Announce the conference.
Select and confirm the option shown.
Conference?
or
Conference
Press the key shown.
Enhanced phone functions
51
Removing parties from the conference
View conf parties?
Select and confirm the option shown. The first party is displayed.
Next?
Confirm as often as required until the desired party appears.
Remove party?
Select and confirm the option shown.
If a participant who was connected to the conference via an unencrypted
line leaves, the conference remains unsecured.
Leaving a conference
Select and confirm the option shown.
Leave conference?
or
\
Replace the handset if this feature is configured (consult your administrator).
Ending a conference
Select and confirm the option shown.
End conference?
or
\
Replace the handset if this feature is configured (consult your administrator).
Removing the central office party from the conference
Select and confirm the option shown.
Drop last conf. party?
Activating tone dialing/DTMF suffix dialing
You can transmit dual-tone multifrequency (DTMF) signals to control devices
such as an answering machine or automatic information system.
Settings
Program/Service?
l
Open the menu Æ Page 19.
Select and confirm the option shown.
Select and confirm the option shown.
*53=DTMF dialing?
j
You can use the keys 0 through 9, * and # to transmit DTMF
signals.
Ending the call also deactivates DTMF suffix dialing.
Your system may be configured so that you can start DTMF suffix dialing
immediately after setting up a connection.
52
Enhanced phone functions
Recording a call
If configured (consult your administrator for details), you can record an active
call.
Prerequisite: You are on a call, the "Recording" key is configured Æ Page 55.
S
Press the "Recording" key. The LED lights up.
You and the other party hear an announcement that recording has started and
as long as recording is still running, you hear an acoustic signal approx. every
15 seconds.
During recording, it is not possible to add further call parties.
Stopping recording
R
Press the illuminated "Recording" key. The LED goes out.
Listening to a recording
Playback of the recording depends on the voice recording system used
(see the relevant user manual).
Transferring a call after a speaker call announcement
in a group
If this function has been configured (consult your administrator), you can use a
speaker call (announcement Æ Page 43) to announce a call in progress to a
group of users Æ Page 93.
Once a member of the group has accepted the call request, you can transfer the
waiting party.
Prerequisite: You are conducting a call.
Confirm the option shown. The other party is placed on hold.
Consultation?
d
Press the key shown.
Select and confirm the option shown.
*80=Speaker call?
j
Enter the group's station number.
[
Announce the call.
When a member of the group answers the call Æ Page 35, you are connected
to this party.
\
Replace the handset.
or
Transfer?
Select and confirm the option shown1.
If the connection between the two other parties is not established within 45
seconds, the call from the first party returns to you (=recall).
1. ”Differing display views in a HiPath 4000 environment” Æ Page 111
Enhanced phone functions
53
Sending a trunk flash
To activate ISDN-type services and features through the network carrier's
analog trunks or those of other communication platforms (such as "consultation
hold"), you must send a signal to the trunks before dialing the service code or
telephone number.
Prerequisite: You have set up an external connection.
Settings
Program/Service?
l
Open the menu Æ Page 19.
Select and confirm the option shown.
Select and confirm the option shown.
*51=Trunk flash?
j
Enter the service code and/or telephone number.
If you cannot reach a destination
Call waiting (camp-on)
Prerequisite: You have dialed an internal number and hear a busy signal. It is
important that you reach the called party.
Camp-on
Wait (approx. 5 seconds) until "Camp-on" appears on the display and the busy
tone is followed by the ring tone.
The called party can then respond Æ Page 46.
The called party can prevent this automatic call waiting Æ Page 47.
If this feature is configured (consult your administrator), you will hear the
ring tone and the message "Camp-on" is immediately displayed.
Busy override - joining a call in progress
This function is only available if it has been configured (consult your
administrator).
Prerequisite: You have dialed an internal number and hear a busy signal. It is
important that you reach the called party.
Override?
Select and confirm the option shown.
The called party and person to whom this party is talking hear an alerting tone
every two seconds.
If the called party has a system telephone with display, the following appears on
the screen: "Override: (Number or name)".
You can now start talking.
54
Enhanced phone functions
Using night answer
When night answer mode is active, for example during a lunch break or after
office hours, all external calls are immediately forwarded to a specific internal
telephone (night station). The night station can be defined by your administrator
(= standard night answer service) or by you (= temporary night answer service).
Special features must be taken into consideration if your telephone
operates with system networking via LAN Æ Page 100!
Activating
Night answer on?
Select and confirm the option shown.
*=default?
Press the "OK" dialog key to confirm (= standard night answer service).
or
*
Enter the code (= standard night answer service).
or
j
Save?
Enter the destination number (= temporary night answer service).
Confirm the option shown.
Deactivating
Night answer off?
Select and confirm the option shown.
The administrator can also configure an "automatic night answer service".
The automatic night answer service activates at specific times for your
telephone depending on how it is programmed.
You can deactivate the automatic night answer service or replace it with a night
answer service you configured (see above).
Programming the function keys
55
Programming the function keys
You can program frequently used functions, station numbers or procedures onto
the function keys on your OpenScape Desk Phone IP 35 G or key module.
Configuring function keys
Please see also the information on Æ Page 15.
A list of all available functions is displayed, see the overview Æ Page 56.
Example: Programming the Shift key
Settings
Program/Service?
l
Select and confirm the option shown.
Select and confirm the option shown.
*91=Prog. feature key
S
Press the key shown.
Confirm the option shown.
Change key
More features
Open the menu Æ Page 19.
g
Select and confirm the option shown.
Confirm the option shown.
Shift key
if nec.
Select and confirm the option shown.
Save incomplete
Some functions (e.g. with "Call forwarding") can be saved even if they are
incomplete. This means that when later initiating the function by pressing the
button, further inputs are required.
Confirm the option shown.
Exit
or
Another key
Select and confirm the option shown.
The label appears automatically and cannot be changed for the Shift key. It can
be changed for all other functions.
The LED displays show the status of the function Æ Page 15 and Æ Page 56.
56
Programming the function keys
Overview of functions
The functions are split into the following menus:
•
•
•
•
•
Destinations
Control Relay
PIN and Authorization
Calls
More Features
The available functions depend on your configuration. If a function is
missing, consult your administrator.
Saved function LED messages
S
R
Call forwarding, Forwarding - trunk, Forward line, Night answer, Do not
disturb, Telephone lock, Advisory message, Ringer cutoff, HF answerback
on/off, Join/leave group, Caller ID suppression, Call wait.trm., Waiting tone
off, Ring transfer, Recording, Door opener on/off, Control relay (only for
HiPath 3000), Ringing group on, Shift key, UCD (Available on/off, Work on/
off), Night answer on/off, MULAP privacy release:
Saved function is not activated.
Saved function is activated.
S
R
Callback:
You have no entry for callback.
You have an entry for callback.
S
R
T
S
R
T
Repdial key (internal), direct station select:
Party not on a call.
Party is on a call or has activated DND.
Flashing quickly - I'm being called, please accept.
Flashing slowly - another party is being called and has not yet accepted the call.
Call key, General call key, Trunk key, MULAP key, Temporary MSN:
No call via the corresponding trunk.
Active call via the corresponding trunk.
Flashing quickly - call on the corresponding trunk, call pickup is possible by
pressing the key.
Flashing slowly - a call is placed on hold on the relevant trunk.
Programming the function keys
S
R
Trunk group key:
At least one trunk is free.
All lines in this trunk group are occupied.
S
R
View call charges:
No chargeable calls have been set up since the last check.
Chargeable calls have been set up since the last check.
T
Call forwarding, Forward line:
Flashing slowly - your line is a call forwarding destination.
S
R
Fax/answering machine details:
No fax received or no message on the answering machine.
Fax received or message on the answering machine.
S
View the number of calls:
No waiting callers.
T
S
R
T
57
Flashing quickly - callers waiting (certain number is exceeded).
Flashing slowly - callers waiting (certain number is reached).
Data I/O service:
No connection to an application.
Active connection to an application.
Flashing slowly - connection to an application is temporarily interrupted.
The following functions programmed on keys do not have a LED function:
Repdial key (external), Procedure key, Trace call, Speed dial, Clear, Lock all
phones, Send message, Directory (1=internal, 2=LDAP), Call waiting, Toggle/
Connect, Conference, Speaker call, Retrieve line, Reserve trunk, Release trunk,
Temporary phone, Override, Park a call, Pickup - directed, Pickup - group,
Account code, Show call charges, Page, Answer page, Timed reminder, Open
door, DTMF dialing, Recall key, Room monitor, Hold key, Consult internal,
Consultation, Associated dial, Associated serv., Tel. data service, Mobile login,
Discreet call.
58
Programming the function keys
Programming a procedure key
Numbers and functions that require further input, i.e. which contain several
operating steps, can be saved on a key on your telephone. The relevant
administrator must have granted the appropriate authorization.
For example the function "Associated dialing" Æ Page 45 together with the
required input (phone number of the phone for which the call is to be made +
phone number to be dialed) can be saved on a key.
Numbers that require further input can also be saved.
Please see also the information on Æ Page 15.
Settings
Program/Service?
l
Open the menu Æ Page 19.
Select and confirm the option shown.
Select and confirm the option shown.
*91=Prog. feature key
S
Press the key shown.
Confirm the option shown.
Change key
More features
g
Select and confirm the option shown.
Procedure key
g
Select and confirm the option shown.
j
Enter procedure. Example: *67 231 123456
*67
Code for associated dialing
231
Number of the phone for which the call should be made
12345
if nec. S
The number to be dialed.
Press the "Pause" key to enter pauses (a "P" appears on the display).
Confirm the option shown.
Save
or
If you make a mistake:
Previous
Select and confirm the option shown. This deletes all numbers entered.
Exit
Confirm the option shown.
or
Another key
Select and confirm the option shown.
Select the saved procedure by pressing the key.
Procedures with activatable/deactivatable functions are activated by
pressing the key once and deactivated by pressing it again.
You can press the procedure key during a call to automatically send the
saved digits as DTMF signals Æ Page 51. For display messages when
saving procedures, see Æ Page 115.
Programming the function keys
59
Configuring repdial keys
You can also program internal and external station numbers at the second level.
The LED function is not available for internal station numbers at the second
level. A "Shift" key Æ Page 55 has to be configured in order to program the
second level.
Please see also the information on Æ Page 15.
Settings
Program/Service?
l
Open the menu Æ Page 19.
Select and confirm the option shown.
Select and confirm the option shown.
*91=Prog. feature key
S
Press the key shown.
Confirm the option shown.
Change key
if nec.
Select and confirm the option shown.
+=Next level
Destinations
g
Confirm the option shown.
Confirm the option shown.
Repdial key
j
Enter the phone number.
If you make a mistake:
Previous
Select and confirm the option shown. This deletes all numbers entered.
Exit
Confirm the option shown.
or
Select and confirm the option shown.
Another key
You dial the saved number by pressing the key Æ Page 26.
You can also save a number during a call.
Deleting function key programming
Settings
Program/Service?
l
Select and confirm the option shown.
Select and confirm the option shown.
*91=Prog. feature key
S
Clear key
Open the menu Æ Page 19.
Press the key shown.
Select and confirm the option shown.
60
Displaying and assigning call charges
Displaying and assigning call charges
Displaying call charges (not for U.S.)
For the current call:
Call charges are shown by default on the display when a call ends.
If you want to display call charges as they occur during a chargeable call, your
administrator must request this option from the network operator.
Call charge display must be requested from the network operator and configured
by the relevant administrator.
Depending on the setting, call charges are displayed during or after a call.
Depending on the network operator, free external calls are also displayed.
The message "Free of Charge" appears on the screen either before or during
the call.
If the cost indication facility has not been installed, the display will show the
dialed number and/or the duration of the telephone call.
If a call is forwarded, call charges are assigned to the destination of the
call transfer operation.
For all calls and for the last call
Connection charges for the last chargeable call made are displayed first.
After five seconds, the accumulated connection charge (total) is displayed.
Settings
Program/Service?
l
Open the menu Æ Page 19.
Select and confirm the option shown.
Select and confirm the option shown1.
*65=Show call charges?
Displaying call charges for another
telephone (not for U.S.)
If configured (consult your administrator), you can also display and print
information on chargeable calls for other phones (such as a pay phone).
Prerequisite: You have programmed the function "Show call charges" on a key
Æ Page 55.
The LED lights up to indicate that you have conducted a chargeable call since
the last time you viewed the charges.
S
Press the "Call Charges" key. Chargeable calls are displayed.
Next
Press to display further chargeable calls.
Print
Select and confirm the option shown.
or
Delete
Select and confirm the option shown.
1. ”Differing display views in a HiPath 4000 environment” Æ Page 111
Displaying and assigning call charges
or
Select and confirm the option shown.
Add'l information
or
Select and confirm the option shown.
Exit
Dialing with call charge assignment
You can assign external calls to certain projects.
Prerequisite: Your administrator has defined account codes for you.
Settings
Program/Service?
l
Open the menu Æ Page 19.
Select and confirm the option shown.
Select and confirm the option shown.
*60=Account code?
j
if nec. (
Enter the account code.
Press this key.
or
Confirm the option shown.
#=Save?
Required depending on the configuration; consult your administrator.
j
Enter the external phone number.
You can also enter the account code during an external call.
61
62
Privacy/security
Privacy/security
Voice encryption
Please see also the explanations on Æ Page 11.
Displaying status
in call mode
During calls, you can check if your call is secure.
If a key is configured with the "Security call status" function, this illuminates if the
call is secure.
5170
m
Select and confirm the option shown.
or
S
Press the "Security call status" key (if configured).
The call is secure.
1086
or
The call is not secure.
1087
in idle status
You can see whether voice encryption is active on your phone from the display
when the phone is in idle mode.
d
Security status
m
Open the idle menu Æ Page 16.
Select and confirm the option shown.
Voice encryption is activated for your telephone.
Secure client
or
Standard client
Voice encryption is not activated for your telephone.
Privacy/security
63
Notes on voice encryption
Your administrator can define in the communication system whether and how
you are notified of unencrypted calls. You will then receive a warning tone and/
or a message on the display when you accept a call, accept a consultation call
or are connected to a conference.
Z
Warning tone
and/or
Display for an unencrypted call.
Standard call
or
Display for an encrypted call.
Secure call
Turning ringer cutoff on and off
If you do not wish to take calls, you can activate the ringer cutoff function. Calls
are only identified by one ring signal and they are shown on the display.
Activating
d
Ringer cutoff on?
Open the idle menu Æ Page 16.
Select and confirm the option shown1.
Deactivating
d
Ringer cutoff off?
Open the idle menu Æ Page 16.
Select and confirm the option shown.
1. ”Differing display views in a HiPath 4000 environment” Æ Page 111
64
Privacy/security
Activating/deactivating "Do not disturb"
If you do not wish to take calls, you can activate do not disturb. Internal callers
hear the busy tone, external callers are connected to another phone, which you
can specify (consult your administrator).
Activating
d
Open the idle menu Æ Page 16.
Select and confirm the option shown.
DND on?
Deactivating
d
Open the idle menu Æ Page 16.
Confirm the option shown.
DND off?
When you lift the handset, you will hear a special tone (continuous
buzzing) reminding you that "Do not disturb" is activated.
Authorized internal callers automatically override the DND feature after
five seconds.
Caller ID suppression
You can prevent your station number or name from appearing on the displays of
external parties you call. The feature remains active until you deactivate it.
Activating
d
Open the idle menu Æ Page 16.
Select and confirm the option shown.
Suppress call ID?
Deactivating
d
Restore caller ID?
Open the idle menu Æ Page 16.
Select and confirm the option shown.
Your administrator can activate/deactivate caller ID suppression for all
phones.
Privacy/security
65
Monitoring a room
You can use a phone to monitor a room. This function must be enabled on the
monitoring phone.
When you call this phone, you can immediately hear what is happening in that
room.
Activating the telephone to be monitored
Settings
Program/Service?
l
Open the menu Æ Page 19.
Select and confirm the option shown.
Select and confirm the option shown.
*88=Room monitor?
You can either leave the telephone in speakerphone mode or lift the handset and
leave it directed towards the noise source.
Deactivating the telephone to be monitored
Settings
Press the illuminated key. The LED goes out.
or
\
Replace the handset.
Monitoring the room
j
Enter the internal station number of the phone located in the room that you wish
to monitor.
Trace call – identifying anonymous callers
(not for U.S.)
You can identify malicious external callers. You can record the caller's phone
number during a call or for up to 30 seconds after a call. You should not hang up
in the process.
Settings
Program/Service?
*84=Trace call?
l
Open the menu Æ Page 19.
Select and confirm the option shown.
Select and confirm the option shown.
If the trace is successful, the transmitted data is stored by your network
operator. Consult your administrator.
66
Privacy/security
Locking the telephone to prevent
unauthorized use
You can prevent unauthorized parties from accessing certain functions on your
phone during your absence, for example you can prevent external phone
numbers being dialed or your mailbox being accessed. Consult your
administrator to determine which functions are locked.
Locking the phone
d
Open the idle menu Æ Page 16.
Select and confirm the option shown.
Lock phone?
or
Select and confirm the option shown.
Unlock phone?
j
Enter code (telephone lock) Æ Page 67.
When the phone is locked, a special dial tone sounds when the handset
is lifted. Internally, users can make calls as normal.
Your phone can also be locked or unlocked by an authorized party
Æ Page 66.
Unlocking the phone
d
Open the idle menu Æ Page 16.
Select and confirm the option shown.
Unlock phone
j
Enter code (telephone lock) Æ Page 67.
Locking another telephone to prevent
unauthorized use
If configured (consult your administrator), you can lock and unlock other
telephones to prevent unauthorized access.
If a phone user locks his or her phone and forgets the PIN code, you can use
this function to unlock the phone.
Settings
Program/Service?
l
Open the menu Æ Page 19.
Select and confirm the option shown.
Select and confirm the option shown.
*943=Lock all phones?
j
Enter the internal station number of the phone you wish to lock/unlock.
Confirm the option shown.
*=lock phone?
or
#=unlock phone?
Select and confirm the option shown.
Privacy/security
67
Saving your PIN code
Enter a PIN code to use the functions
• for locking the telephone to prevent unauthorized use Æ Page 66
• for using another telephone like your own Æ Page 71
You can save this code.
Settings
Program/Service?
l
Open the menu Æ Page 19.
Select and confirm the option shown.
Confirm the option shown.
*93=Change PIN?
j
Enter the current five-digit code.
If you have not yet set a code, use "00000" the first time.
j
Enter the new code.
j
Re-enter the new code.
If you forget your code, consult your administrator, who can reset your
code to "00000".
68
More functions/services
More functions/services
Appointment reminder function
You can configure your phone to call you to remind you about appointments
Æ Page 69.
You must save the required call times. You can enter a single appointment that
will take place in the next twenty-four hours or you can enter a daily recurring
appointment.
Saving a timed reminder
Settings
Program/Service?
l
Open the menu Æ Page 19.
Select and confirm the option shown.
Confirm the option shown.
*46=Timed reminder on?
j
if nec. 2 or 7
Enter a 4-digit time such as 0905 for 9.05 (= 9.05 a.m.) or 1430 for 14.30
(= 2.30 p.m.).
If the selected language is "US English" (Settings Æ Page 105) you can enter
the code 2 for "am" or 7 for "pm" (default = "am").
Confirm the option shown.
One time only?
or
Daily?
Select and confirm the option shown.
Save?
Confirm the option shown.
Deleting and checking a saved appointment
Settings
Program/Service?
l
Open the menu Æ Page 19.
Select and confirm the option shown.
#46=Timed reminder off?
Confirm the option shown.
Delete?
Confirm the option shown.
or
Exit?
Select and confirm the option shown.
More functions/services
69
Using timed reminders
Prerequisite: You have saved a reminder Æ Page 68. The saved time arrives.
The phone rings. The appointment time is displayed.
Reminder at 1200
Speaker
Press the key twice.
or
^\
Lift the handset and replace it again.
If you do not answer the timed reminder, it is repeated five times and then
deleted.
Sending a message
You can send short text messages to individual stations or groups of stations
with system telephones.
Creating and sending a message
d
Open the idle menu Æ Page 16.
Select and confirm the option shown.
Send message?
j
0=Please call back?
Enter the internal station number of the recipient or group.
Select predefined text (can be changed by the administrator) and confirm.
or
0 ... 9
Enter the code directly.
The code is shown on your display with the corresponding message.
or
Select and confirm the option shown.
Enter message text?
j
Text entry (up to 24 characters) Æ Page 16.
Confirm the option shown.
Send?
Transmitted text messages are saved as callback requests on system
telephones with no display and on ISDN, pulse or tone dialing telephones.
Displaying and deleting messages you have sent
d
Prerequisite: The recipient has not yet accepted a sent message.
Open the idle menu Æ Page 16.
View sent message?
Select and confirm the option shown.
Message sent?
Confirm the option shown.
The text message is displayed.
Delete?
Select and confirm the option shown.
The message is deleted.
70
More functions/services
Viewing and editing incoming messages
Pay attention to the notes on Æ Page 17.
Messages
The LED lights up. Press the key shown.
or
f
View messages?
Confirm the option shown.
The sender's caller ID appears on the display.
Confirm the option shown.
Message sent?
The text message appears on the display.
Viewing the transmission time
Confirm the option shown.
Time/date sent?
Calling the sender
Select and confirm the option shown.
Call sender?
Deleting messages
Select and confirm the option shown.
Delete?
Leaving an advisory message
You can leave messages/advisory messages on your phone's display for
internal callers who wish to contact you in your absence.
When you receive a call, the message appears on the caller's display.
d
Open the idle menu Æ Page 16.
Advisory msg. on?
Select and confirm the option shown.
0=Will return at:
Select predefined text (can be changed by the administrator) and confirm.
or
0 ... 9
Enter the code directly.
The code is shown on your display with the corresponding message.
Predefined messages with a colon can be completed by entering a digit.
or
Select and confirm the option shown.
Enter message text?
j
Save?
Enter message (up to 24 characters) Æ Page 16.
Confirm the option shown.
More functions/services
71
Deleting advisory messages
d
Open the idle menu Æ Page 16.
Select and confirm the option shown.
Advisory msg. off?
Displaying the number of waiting calls/
overload display
You can show the number of external waiting calls on the display if you
programmed a key with "View number of calls" Æ Page 55.
R
Press the "Calls in Q" key.
If the number of waiting calls exceeds a preset limit while you are conducting
another call (overload), the LED on the key lights up.
• LED off: There are no waiting calls.
• LED is flashing slowly: The set limit has been reached.
• LED is flashing quickly: The limit has been exceeded (overload).
Using another telephone like your own for a
call
Other parties can temporarily use your phone like their own for an outgoing call.
Settings
Open the menu Æ Page 19.
Program/Service?
l
Select and confirm the option shown.
PIN and Authorization?
f
Select and confirm the option shown.
Select and confirm the option shown1.
*508=Temporary Phone?
j
Enter the number of the other user.
j
Enter the other user's code Æ Page 67.
if nec.
If the other user has not set a PIN, he or she is prompted to do so on his or her
phone.
Change PIN?
j
Dial the external number.
This state is canceled as soon as the call is ended.
1. ”Differing display views in a HiPath 4000 environment” Æ Page 111
72
More functions/services
Using a mobile phone number at a random
phone
You can program a mobile phone number that was set up especially for you by
your administrator at a system-based OpenScape Desk Phone of your choice.
The original "guest telephone" setting is deactivated. The mobile phone number
remains available until you log off from the "guest telephone".
Logging on to the "guest telephone"
Log on to the "guest telephone" with a mobile phone number.
Prerequisite: You received a mobile phone number and, where applicable, a
password (consult your administrator).
j
Enter the code for "Mobile Login (Log on)", (see Æ Page 124).
You see the prompt "New number".
j
Enter the mobile phone number.
You are prompted to enter the "Code for nnn" (e.g. 834):
if nec. j
Enter the password and confirm.
or
#
Press the key shown.
or
Entry complete
Confirm the option shown.
The logon procedure begins.
Your mobile phone number will appear on the left of the display when you are
correctly logged on Æ Page 16.
You can no longer see the original user settings for the "guest telephone" but you
can now use your mobile connection. Entries are only temporarily saved in the
call lists and personal phonebook, in other words they are no longer there the
next time you log on.
More functions/services
73
Moving the connection to the next telephone
If you want to move your connection from the first "guest telephone" to a second
"guest telephone", log on to the second "guest telephone" in the usual fashion
(see Æ Page 72).
The message "Log off successful" is output on the first "guest telephone".
The second "guest telephone" is now blocked. You can now use the second
"guest telephone" in the same way as the first one.
Logging off from the "guest telephone"
j
Enter the code for "Mobile Login (Log off)", (see Æ Page 124).
The logoff procedure begins.
The "guest telephone" is now available again with its original phone number,
features and functions.
Your old and new telephone are the first telephones at each connection. The
telephones are in idle state.
The following procedure is carried out on the new phone.
Settings
Program/Service?
l
Relocate
Open the menu Æ Page 19.
Select and confirm the option shown.
Select and confirm the option shown.
j
Enter own station number.
j
Enter code (telephone lock) Æ Page 67.
(Not necessary if you have not set a code.)
Complete relocate
Confirm the option shown.
If you exchange numbers of different system phones, programmed keys
are replaced with the default assignment.
You can however connect your phone to a different port and then carry out
the procedure.
Fax details and message on answering
machine
If a fax or answering machine is connected to your system and you have
assigned the "Fax details" function to a programmable key Æ Page 55, the key
lights up when a fax or a message has been received.
Deactivating signaling
R
Press the illuminated "Fax service" key. The LED goes out.
74
More functions/services
Resetting services and functions
(system-wide cancelation for a telephone)
A general reset procedure is available for initiated functions. The following
functions are deleted, if enabled:
•
•
•
•
•
•
•
•
•
•
Settings
Program/Service?
l
Forwarding on
Advisory msg. on
Ringing group on
Hunt group off
Suppress caller ID
Waiting tone off
DND on
Ringer cutoff on
Received messages
View callbacks
Open the menu Æ Page 19.
Select and confirm the option shown.
Select and confirm the option shown1.
#0=Reset services?
Activating functions for another telephone
If configured (consult your administrator), you can activate and deactivate the
following functions for other phones (associated service):
•
•
•
•
•
•
•
•
•
•
Settings
Program/Service?
l
Do not disturb, code *97/#97 Æ Page 64
Call forwarding, code *11, *12, *13/#1 Æ Page 28
Lock and unlock phone, code *66/#66 Æ Page 66
Ringing group, code *81/#81 Æ Page 93
Leave message/advisory message, code *69/#69 Æ Page 70
Group call, code *85/#85 Æ Page 93
Reset services and functions, code #0 Æ Page 74
Control relays, code *90/#90 Æ Page 78
Night answer, code *44/#44 Æ Page 54
Timed reminders, code *46/#46 Æ Page 68
Open the menu Æ Page 19.
Select and confirm the option shown.
Confirm the option shown.
*83=associated serv?
j
Enter the internal station number of the phone for which you wish to activate the
function.
j
Enter code (for example, *97 for "Do not disturb on").
For any additional input, follow the instructions on your display.
1. ”Differing display views in a HiPath 4000 environment” Æ Page 111
More functions/services
75
Using system functions from outside
DISA (Direct Inward System Access)
If configured (consult your administrator), you can use an external phone like an
internal station to set up an outgoing external connection via the system. You
can also activate or deactivate the following system functions:
•
•
•
•
•
•
•
•
•
•
•
•
•
•
•
•
•
Reset services and functions, code #0 Æ Page 74
Call forwarding, code *1/#1 Æ Page 28
Lock and unlock phone, code *66/#66 Æ Page 66
Save your PIN code, code *93 Æ Page 67
Send a message, code *68/#68 Æ Page 69
Leave message/advisory message, code *69/#69 Æ Page 70
Ringing group, code *81/#81 Æ Page 93
Group call, code *85/#85 Æ Page 93
Caller ID suppression, code *86/#86 Æ Page 64
Camp-on tone, code *87/#87 Æ Page 47
Open door, code *61 Æ Page 36
Release door opener, code *89/#89 Æ Page 36
Control relays, code *90/#90 Æ Page 78
Do not disturb, code *97/#97 Æ Page 64
Ringer cutoff, code *98/#98 Æ Page 63
Dial using speed dial, code *7 Æ Page 42
Associated service, code *83 Æ Page 74
Prerequisite: Your phone supports tone dialing (DTMF) or you can switch your
phone to tone dialing. The phone is not connected to the system.
j
Establish a connection to the system. Enter the station number (consult your
administrator).
j
Wait for the continuous tone (if necessary, switch phone to tone dialing) and
enter the internal number assigned to you and the corresponding PIN code.
#
j
Enter the code (only required if programmed in the system).
Wait for the dial tone and enter the code for example, *97 for Do not disturb on.
If necessary, make further entries; refer also to the user guide for dial pulse/
DTMF phones.
or
j
Dial the external number.
You can only perform one function/establish one outgoing connection at a
time.
The connection is cleared as soon as the function is successfully
activated.
In the case of an external call, the connection is cleared as soon as one
of the call partners hangs up.
76
More functions/services
Using functions in ISDN via code dialing
(keypad dialing)
If authorized (consult your administrator), you can access ISDN functions in
some regions using codes.
Settings
Program/Service?
l
Open the menu Æ Page 19.
Select and confirm the option shown.
Confirm the option shown.
*503=Keypad dialing?
j
Enter the required trunk number (consult your administrator).
j
Enter a code for the required ISDN function (consult your administrator).
Contact your network provider to find out which ISDN functions can be
code-operated in your country.
Unify GmbH & Co. KG shall not be liable for damages/costs that may be
incurred by fraudulent activities or remote operation (such as toll fraud).
More functions/services
77
Controlling connected computers/programs/
telephone data service
If this function has been configured (consult your administrator), you can control
connected computers or programs running on them, such as hotel services or
information systems, from your telephone.
Prerequisite: You have set up a connection.
Settings
Program/Service?
l
Open the menu Æ Page 19.
Select and confirm the option shown.
Confirm the option shown.
*42=Tel. data service?
For entering data, you are guided by the connected computer. However, depending on the configuration (consult your administrator), you have to enter your
data in one of the following ways:
Input in en-bloc mode:
0 ... 9
#
Enter data.
Complete entry.
or
Confirm the option shown.
Entry complete?
or
Input in online mode:
The connected computer processes your entries directly.
#
0 ... 9
Enter the code.
Enter data.
78
More functions/services
Communicating with PC applications over a
CSTA interface
If configured (consult your administrator), you can use your phone to
communicate with PC applications (CSTA = Computer Supported
Telecommunications Applications). You send information to the application and
receive information from the application, for example, via your phone display.
*494
j
Vol.+ Vol.- 0 ... 9 d
Enter the code.
Enter the three-digit ID for the application you wish to control.
Use the relevant keys to communicate with the application.
Temporarily interrupting communication with the application
^
T
The phone rings. You accept the call.
The "Data I/O" key flashes: Communication with the application was
automatically interrupted.
Resuming communication with the application
T
Press the flashing "Data I/O" key. The LED lights up.
Ending communication with the application
Select and confirm the relevant CSTA message.
or
^\
Lift the handset and replace it again.
Controlling relays (only for HiPath 3000)
If this function has been configured (consult your administrator), you can use up
to four relays to enable/disable different devices (such as a door opener).
Depending on how you program the relays, you can activate and deactivate
them manually or configure them to activate and deactivate automatically (after
timeout).
Special features must be taken into consideration if your telephone
operates with system networking via LAN Æ Page 102!
Select and confirm the option shown.
*90=Control relay on?
or
#90=Control relay off?
1 ... 4
Select and confirm the option shown.
Enter the relay.
More functions/services
79
Sensors (HiPath 33x0/35x0 only)
If configured (consult your administrator), sensors are able to recognize signals,
call your phone and display an appropriate message on the screen.
Paging persons (not for U.S.)
If radio paging equipment (PSE) is connected to your system (consult your
administrator), you can locate people via their pocket receivers.
Pocket receivers signal a call request to the person you want to page. This
person can then answer the page at the nearest phone.
Paging persons
To ensure that you can be found, you must have enabled a ringing group
Æ Page 95, call forwarding Æ Page 28 or call forwarding-no answer (service
engineer) to the internal station number of your PSE.
A call request is signaled automatically.
Answering the page from the nearest telephone
^
*59
j
Lift the handset.
Enter the code.
Enter own station number.
80
Phonebooks
Phonebooks
Personal phonebook
The personal phonebook is restricted to 100 entries.
Creating a new contact
z
Settings
You can create contacts more conveniently via the web interface Æ Page 112.
Open the menu Æ Page 19.
Personal
f
Select and confirm to open the local phonebook.
New contact ?
f
Select and confirm the option shown.
j
Fill in the three fields
• Last name
• First name
• Number
accordingly.
Save & exit
l
Select and confirm to save the phonebook entry.
Editing a contact
z
Settings
You can edit contacts more conveniently via the web interface Æ Page 112.
Open the menu Æ Page 19.
Personal
f
Select and confirm to open the local phonebook.
Niels, Bohr
f
Select and confirm the relevant entry.
Details
f
Select and confirm the option shown.
Last name
f
Select and confirm, for example the "Last name" field.
j
Save & exit
l
Change and confirm.
Select and confirm the option shown.
Phonebooks
81
Deleting a contact
z
Settings
You can delete contacts more conveniently via the web interface Æ Page 112.
Open the menu Æ Page 19.
Personal
f
Select and confirm to open the local phonebook.
Niels, Bohr
f
Select and confirm the relevant entry.
Delete
f
Select and confirm the option shown.
Delete?
f
Confirm the option shown.
or
Cancel ?
f
Select and confirm to cancel the process.
Deleting all contacts
z
Settings
You can delete contacts more conveniently via the web interface Æ Page 112.
Open the menu Æ Page 19.
Personal
f
Select and confirm to open the local phonebook.
Delete all ?
f
Select and confirm the option shown.
Delete all entries ?
f
Confirm the option shown.
or
Cancel ?
f
Select and confirm to cancel the process.
82
Phonebooks
Searching for a contact
Settings
Open the menu Æ Page 19.
Personal
f
Select and confirm to open the local phonebook.
Merkel, Angela
f
The last entry used is displayed.
j
Enter the first letter of the name you are searching for, e.g. K.
U
J K L5 (Abc)
Kirsch, Erika
f
The first name found with the initial letter K is displayed after a short time. If you
are looking for a name that begins with Kr, also enter the second letter in the
search field:
UK
(5)
p q r s7ß(abc)
Kramer, Elisabeth
f
The first name with the initial letters Kr is displayed.
You can also browse the phonebook with the navigation keys until you reach the
required party Æ Page 15.
Phonebooks
83
Corporate directory
The corporate directory is an LDAP database. You can search the database for
contact entries if you can access this database over your network and your
access was correctly configured by your administrator.
You can search for contacts using the name (simple search) or different criteria
for an entry (advanced search), for example job title or address.
Searching for a contact
Settings
Open the menu Æ Page 19.
Corporate phonebook
f
Select and confirm to open the company-wide "Corporate phonebook" directory.
Find
f
Select and confirm the option shown.
The following 11 search fields can be used:
•
•
•
•
•
•
•
•
•
•
•
Last name
f
j
Find
f
Last name
First name
Office 1
Office 2
Mobile
Home
Company
Address 1
Address 2
Professional role
E-mail
Select and confirm the required search field (e.g. "Last name").
Enter a search text. If you for example only enter the first letter of the last name,
all entries with this initial letter are displayed.
Select and confirm when you have completed one or more search fields. The
search begins. If the entry you searched for is found, you can dial or view the
entry details.
84
Phonebooks
Advanced phonebook editing
Viewing entries
Prerequisite: You found and selected an entry (see above).
Details
f
Select and confirm the option shown. All fields of the entry are displayed.
Resetting the search fields
Prerequisite: The search fields are listed.
Delete
f
Select and confirm the option shown. You can now enter new search criteria for
a search.
Defining a qualifier before a search
Prior to a search, you can select which qualifiers should also appear in the
output list.
Qualifier
f
Select and confirm the option shown. You may choose between the following
criteria:
•
•
•
•
•
•
•
•
•
•
bdk
Back
l
No qualifier
Job function
Address 1
Email
Business 1
Mobile
Business 2
Private
Company
Address 2
Select and confirm the desired qualifier.
Select and confirm to close the list.
Phonebooks
85
Quick search
Settings
Corporate phonebook
f
Open the menu Æ Page 19.
Select and confirm to open the company-wide phonebook.
U
E n t e r t h e n a m e (Abc)
j
Enter the first letter of the name you are looking for, e.g. "K".
UK
J KL5 (Abc)
Kirsch, Erika
f
If you do not enter any further characters, all available names with the corresponding initial letter are displayed after a predefined period of time or after
pressing = to confirm.
UKr
p q r s7ß(abc)
You can restrict the output by entering the second and other letters.
The # key is used to switch between letters and numbers.
The b d keys are used to delete individual characters.
You can control the search individually by entering extended characters.
To select extended characters, first press the * key.
Rule list:
Character
#
*
Description
Searches for the exact string before the extended character.
Wildcard. This searches for the character entered and all
possible subsequent characters.
You enter this character by selecting it in the extended characters.
86
Making calls in the team/executive/secretary configuration
Making calls in the team/executive/
secretary configuration
If configured (consult your administrator), you belong to a team of subscribers
with multiple lines (MultiLine Æ Page 12). Your phone features trunk keys
(MULAP keys) Æ Page 87.
Lines
A distinction is made between primary and secondary lines. Each of these line
types can be used on a private or shared basis Æ Page 86.
Primary line
All multi-line telephones have a primary line. This line can be reached in the
usual manner via your public phone number. Incoming calls to your number are
signaled on this line.
Secondary line
A secondary line on your phone is used as a primary line by another subscriber.
Your primary line, which is configured on another telephone, simultaneously
functions as the secondary line on that telephone.
Line utilization
Private line
A line that is used by a single telephone. This line cannot be used as a
secondary line by another telephone.
Shared line
A line that is configured on multiple telephones. The line status is displayed for
all telephones that share this line (if configured). If, for example, a shared line is
being used by a telephone, a status message indicating that this line is busy is
displayed on all other telephones that share this line.
Direct call line
A line with a direct connection to another telephone.
You can see the status of the line from the LED display.
Line seizure
Line seizure must be configured (consult your administrator). If automatic line
seizure is configured, a trunk is automatically assigned when you lift the handset
or press the speaker key.
Making calls in the team/executive/secretary configuration
87
Line/trunk keys
The programmable keys on multi-line phones function as line or trunk keys.
Every key programmed as a "Trunk key" (key label: Transfer Trk) corresponds
to one trunk with the result that you can configure up to eight trunks in
OpenScape Desk Phone IP 35 G.
As a team member, you can independently program the following functions on
keys Æ Page 55:
• Direct station select
• Join/leave group
(not available on executive phone in an executive / secretary team)
• Ring transfer: On/Off
(only in an executive/secretary team)
You can also program a key with the function "Forward Line" (call forwarding) for
each line.
LED displays on trunk keys
LED
S
Off
T
Flashing1
R
On
1
Meaning
– The line is in idle mode.
– Incoming call on the line.
– Hold reminder is activated.
– The line is on "Hold".
– The line is busy.
In this manual, flashing keys are identified by this icon, regardless of the flashing interval. The
flashing interval represents different statuses, which are described in detail in the corresponding
sections of the manual.
Accepting calls with the trunk keys
Prerequisite: Your phone rings and/or a trunk key flashes quickly.
if nec. T
^
or
Press the trunk key that is flashing quickly.
(not necessary for automatic trunk seizure/prime line is not active).
Lift the handset.
On-hook dialing: Speakerphone mode.
Dialing with trunk keys
if nec. S
j
^
or
Press the free trunk key you wish to use to establish the connection
(not necessary for automatic trunk seizure/prime line is not active).
Dial the phone number.
If the party answers: Lift the handset.
On-hook dialing: Speakerphone mode.
88
Making calls in the team/executive/secretary configuration
Placing a call on hold on a trunk key and retrieving
the held call
Prerequisite: You are conducting a call via one of your group's trunks.
The "Hold" key has been programmed on your telephone Æ Page 55.
Holding
S
Press the "Hold" key.
if nec.
\ or s
Replace the handset or press the disconnect (release) key.
Depending on the configuration (consult your administrator), this may be
necessary so other team members can also pick up the call on hold.
T
Retrieving the call
Press the trunk key that is flashing slowly.
Making calls on multiple lines alternately
Prerequisite: You are conducting a call via one of your group's trunks. Another
trunk key is flashing.
T
Press the flashing line key. The first call party is on hold on the other trunk.
T
Press the trunk key that is flashing slowly. The second call party is on hold.
You can switch between lines as often as you wish. Press the trunk key flashing
slowly each time.
MULAP conference release
If configured (consult your administrator), you can program a key on your phone
with the function "MULAP Privacy Release" Æ Page 55. The default label is
"Priv Release".
If you program this key, you do not have to use the menu to set up a conference.
Your team partner only has to press the flashing trunk key associated with your
trunk on his or her phone to immediately join the conference.
[
S
You are conducting a call.
Press the "Priv Release" key. The LED lights up.
Up to three team members can now join the conference.
Prerequisite: The trunk on which you are speaking is configured on the other
phone as a trunk key.
T
Press the flashing line key.
Making calls in the team/executive/secretary configuration
89
Direct station selection keys
Each team member has a direct station selection key for every other team
member.
This means that each team member can be reached directly by other team
members at the touch of a button.
Understanding LED messages on DSS keys
S
LED on the DSS key is off - the team member is not conducting a phone call.
or
R
LED on the DSS key is lighting – the team member is conducting a phone call
or has activated do not disturb.
or
T
LED on the DSS key is flashing quickly - a call has arrived for you and needs
to be answered.
or
T
LED on the DSS key is flashing slowly – a caller is trying to reach another
member of your team, who has not yet answered.
Using DSS keys to accept calls
Prerequisite: Your telephone rings or the DSS key flashes.
if nec. T
^
or
Press the flashing DSS key.
This is not necessary if you are called directly (DSS key flashes quickly).
Lift the handset.
On-hook dialing: Speakerphone mode.
Calling a team member directly
S
Press the DSS key.
or
R
^
or
If the team member you wish to reach is conducting another call, the DSS key
on your telephone lights. You can still make the call in this case.
If the party answers: Lift the handset.
On-hook dialing: Speakerphone mode.
90
Making calls in the team/executive/secretary configuration
Transferring a call in progress
S
\
Press the DSS key and announce the call if necessary.
Replace the handset.
or
s
Press the key shown.
Picking up a call for another team member
T
^
or
Press the flashing DSS key or trunk key.
Lift the handset.
On-hook dialing: Speakerphone mode.
Forwarding calls on trunks
You can immediately forward internal and/or external calls to your lines to
different internal or external telephones (destinations) (external destinations are
also possible if the system is configured accordingly).
Activating call forwarding for one trunk activates the function for all trunk keys
assigned to this trunk in your group.
Settings
Program/Service?
l
Forward Line: ON
Open the menu Æ Page 19.
Select and confirm the option shown.
Select and confirm the option shown.
or
S
If available, press the "CFW MULAP" key. (You have programmed a key with the
incomplete " CFW MULAP" function, excluding the call forwarding type and
destination Æ Page 55).
S
Press the required line key.
or
j
1=all calls
Enter the required trunk number.
Select and confirm the option shown.
or
2=external calls only
Select and confirm the option shown.
or
3=internal calls only
Select and confirm the option shown.
j
Save
Enter the destination number.
Confirm the option shown.
or
S
If available, press the "CFW MULAP" key. (You have stored the call forwarding
type and destination on the "CFW MULAP" key Æ Page 55.)
Making calls in the team/executive/secretary configuration
91
Deactivating call forwarding
Settings
Program/Service?
l
Forward Line: Off
Open the menu Æ Page 19.
Select and confirm the option shown.
Select and confirm the option shown.
R
Press the required line key.
or
j
Enter the required trunk number.
or
R
If available, press the "CFW MULAP" key.
If you have activated call forwarding for a trunk, a special dial tone sounds
when the line is seized.
Understanding LED messages on the "CFW MULAP" key
S
The LED on the "CFW MULAP" key is off – call forwarding is not active for this
trunk.
or
R
The LED on the "CFW MULAP" key lights up – call forwarding is active for this
trunk.
or
T
The LED on the "CFW MULAP" key flashes slowly - the trunk is the destination
of call forwarding.
92
Making calls in the team/executive/secretary configuration
Transferring calls directly to the executive
phone
Normally, all calls for the executive are audibly signaled only by the secretary
phone.
You can set audible signaling so calls are only signaled acoustically by the
executive phone or by a second phone assigned to it.
Prerequisite: There is a key programmed with the function "Ring Transfer" on
your phone. The default label is "Ring xfer".
Activating
S
Press the "Ring xfer" key. The LED lights up.
or
Settings
Program/Service?
l
Ring Transfer: On
Open the menu Æ Page 19.
Select and confirm the option shown.
Select and confirm the option shown.
S
Press the required line key.
or
j
Enter the required trunk number.
Deactivating
R
Press the "Ring xfer" key. The LED goes out.
or
Settings
Program/Service?
l
Ring Transfer: Off
Open the menu Æ Page 19.
Select and confirm the option shown.
Select and confirm the option shown.
S
Press the required line key.
or
j
Enter the required trunk number.
Using team functions
93
Using team functions
If configured (consult your administrator), your telephone is part of a team. The
team consists of internal phones that are able to use certain functions.
Activating/deactivating a group call
Special features must be taken into consideration if your telephone
operates with system networking via LAN Æ Page 98!
If configured (consult your administrator), you belong to one or more groups of
stations, which can be reached via hunt group or group call station numbers.
Incoming calls are signaled one after the other (= hunt group) or simultaneously
(= group call) on all phones in the group, until a group member answers the call.
Each station in the group can still be reached via its own station number.
You can activate and deactivate the audible signal for a hunt group, group call
or individual trunks in a group.
You are part of a hunt group or call group
d
Leave group?
Open the idle menu Æ Page 16.
Select and confirm the option shown1.
or
Select and confirm the option shown.
Join group?
S or R
Press the "Group call" key.
1. ”Differing display views in a HiPath 4000 environment” Æ Page 111
94
Using team functions
You belong to multiple groups
d
Open the idle menu Æ Page 16.
Select and confirm the option shown[1].
Leave group?
or
Select and confirm the option shown.
Join group?
S or R
Press the "Group call" key.
If an "X" appears between group/trunk number (such as 301) and group name,
the audible tone is active for this group or trunk.
301 X Group name
or
301 Group name
No "X" means that the audible tone is deactivated.
Next?
Confirm the option shown. The next group/trunk number is displayed with a
group name.
or
Select and confirm the option shown1.
The audible tone for the group/trunk displayed is deactivated.
Leave group?
or
Select and confirm the option shown[1].
The audible tone for the group/trunk displayed is activated.
Join group?
or
Select and confirm the option shown.
The audible tone for all groups and trunks is deactivated.
#=Leave all groups?
or
*=Rejoin all groups?
Select and confirm the option shown.
The audible tone for all groups and trunks is activated.
If you have activated the audible tone for another group/trunk or
deactivated the audible tone for all groups/trunks you belong to, you will
hear a special dial tone when you lift the handset.
1. ”Differing display views in a HiPath 4000 environment” Æ Page 111
Using team functions
95
Picking up a call for another member of your
team
You can use your own telephone to pick up calls for other telephones in your
team, even while on a call (call pickup groups; consult your administrator).
Prerequisite: Your telephone rings briefly. "Call for:" appears on the upper
display line with the station number or name of the originator; the station number
or name of the caller appears on the lower line.
Confirm the option shown.
Pickup - group?
Ringing group
You can have calls for your telephone signaled audibly at up to five other internal
phones. The phone that answers the call first receives the call.
Special features must be taken into consideration if your telephone
operates with system networking via LAN Æ Page 101!
Saving, displaying and deleting telephones for the ringing group
Settings
Program/Service?
*81=Ringing group on?
l
Open the menu Æ Page 19.
Select and confirm the option shown.
Select and confirm the option shown.
Follow the display prompts (enter the internal station number).
If your phone belongs to a ringing group, your display will show the station
number or the name of the initiator on the upper line and that of the caller
on the lower line.
Removing all telephones in a call ringing group
Ringing group off?
Select and confirm the option shown.
96
Using team functions
Uniform Call Distribution (UCD)
If configured (consult your administrator), you may belong to a group of stations
(agents), to which calls are distributed.
An incoming call is always assigned to the agent idle the longest.
Logging on and off at the beginning and end of your shift
Settings
Program/Service?
l
Open the menu Æ Page 19.
Select and confirm the option shown.
UCD?
Select and confirm the option shown.
*401=Log on?
Confirm the option shown.
or
Select and confirm the option shown.
#401=Log off?
j
To log on, enter your identification number ("Agent:"). Consult your administrator
to find out what it is.
Logging on and off during your shift
Settings
Open the menu Æ Page 19.
Program/Service?
l
Select and confirm the option shown.
UCD?
f
Select and confirm the option shown.
Confirm the option shown.
#402=Not available?
or
*402=Available?
Select and confirm the option shown.
Using team functions
97
Requesting and activating work time
You can request/activate work time to ensure you have enough time to wrap up
the last call. Your phone is excluded from call distribution for a set period or until
you log back on.
Settings
Program/Service?
l
Open the menu Æ Page 19.
Select and confirm the option shown.
UCD?
Select and confirm the option shown.
*403=Work on?
Confirm the option shown.
or
Select and confirm the option shown.
#403=Work off?
Turning the night service on and off for UCD
Settings
Program/Service?
l
Open the menu Æ Page 19.
Select and confirm the option shown.
UCD?
Select and confirm the option shown.
*404=UCD night on?
Confirm the option shown.
or
Select and confirm the option shown.
#404=UCD night off?
Display the number of waiting calls
Settings
Program/Service?
l
Open the menu Æ Page 19.
Select and confirm the option shown.
UCD?
Select and confirm the option shown.
*405=Calls in queue?
Confirm the option shown.
98
Special functions in the LAN
Special functions in the LAN
If your telephone is operating in an environment in which multiple HiPath 3000/
OpenScape Business and/or OpenScape Office MX/LX systems are
interconnected via a LAN (Local Area Network, such as a proprietary PC
network), you are conducting a call via the LAN (PC network).
In this instance, you must note certain particularities for some functions. These
are described in this section.
Leaving hunt group/group call
Prerequisite: You are part of a hunt group/group call Æ Page 93 in another
HiPath 3000/OpenScape Business or OpenScape Office MX/LX.
d
Open the idle menu Æ Page 16.
Select and confirm the option shown.
DISA internal?
j
k or #
j
k or #
Enter the (DISA) call number of the other HiPath 3000/OpenScape Business or
OpenScape Office MX/LX.
Confirm your entry.
Enter the (DISA) station number of your phone.
Confirm your entry.
Select and confirm the option shown.
Leave group?
or
Select and confirm the option shown.
Join group?
You belong to multiple groups associated with another
HiPath 3000/OpenScape Business or OpenScape Office MX/LX
j
Enter the group number for "directed joining/leaving".
Special functions in the LAN
99
Setting up "follow me" call forwarding
You can activate/deactivate call forwarding Æ Page 28 for your phone from
other phones in the LAN.
d
Open the idle menu Æ Page 16.
Select and confirm the option shown.
DISA internal?
j
k or #
j
k or #
(DISA) station number of your HiPath 3000/OpenScape Business or
OpenScape Office MX/LX.
Confirm your entry.
Enter the (DISA) station number of your phone.
Confirm your entry.
Activating
d
Open the idle menu Æ Page 16.
Forwarding on?
Select and confirm the option shown.
1=all calls?
Confirm the option shown.
or
Select and confirm the option shown.
2=external calls only?
or
Select and confirm the option shown.
3=internal calls only?
j
Enter the destination phone number.
Confirm the option shown.
Save?
Deactivating
d
Forwarding off?
Open the idle menu Æ Page 16.
Select and confirm the option shown.
100
Special functions in the LAN
Using night answer
If authorized (consult your administrator), you can define telephones in other
HiPath 3000/OpenScape Business or OpenScape Office MX/LX
communication platforms as the night answer Æ Page 54.
d
Open the idle menu Æ Page 16.
Select and confirm the option shown.
DISA internal?
j
k or #
j
k or #
Enter the (DISA) number of the HiPath 3000/OpenScape Business or
OpenScape Office MX/LX to which the night answer phone is connected.
Confirm your entry.
Enter the (DISA) station number of the phone you wish to use to activate/
deactivate night answer.
Confirm your entry.
Activating
d
Open the idle menu Æ Page 16.
Select and confirm the option shown.
Night answer on?
j
Enter the destination number (= temporary night answer service).
Confirm the option shown.
Save?
Deactivating
d
Night answer off?
Open the idle menu Æ Page 16.
Select and confirm the option shown.
Special functions in the LAN
101
Ringing group
You can have calls for your telephone signaled audibly at external telephones or
at telephones in other HiPath 3000/OpenScape Business or
OpenScape Office MX/LX communication platforms Æ Page 95.
Saving, displaying and deleting telephones for the ringing group
Settings
Program/Service?
l
Open the menu Æ Page 19.
Select and confirm the option shown.
*81=Ringing group on?
Select and confirm the option shown.
Add to ringing group?
Select and confirm the option shown.
or
Select and confirm the option shown.
Add another station?
or
Select and confirm, then follow the operating instructions.
Display/remove?
j
Enter the phone number.
#=Entry complete?
Confirm the option shown.
Save?
Confirm the option shown.
Exit?
Select and confirm the option shown.
Removing all telephones in a call ringing group
d
Ringing group off?
Open the idle menu Æ Page 16.
Select and confirm the option shown.
102
Special functions in the LAN
Controlling relays (only for HiPath 3000)
If this feature is configured (consult your administrator), you can also control relays
Æ Page 78 in other HiPath 3000 communication platforms.
d
Open the idle menu Æ Page 16.
Select and confirm the option shown.
DISA internal?
j
k or #
j
k or #
Enter the (DISA) station number of the HiPath 3000 where you wish to control
the relay.
Confirm your entry.
Enter the (DISA) station number of the phone you wish to use to control the
relay.
Confirm your entry.
Confirm the option shown.
*90=Control relay on?
or
Select and confirm the option shown.
#90=Control relay off?
1 ... 4
Enter the relay.
Opening a door
If this feature is configured (consult your administrator), you can also activate the
door opener Æ Page 36 in other HiPath 3000/OpenScape Business or
OpenScape Office MX/LX communication platforms.
d
Open the idle menu Æ Page 16.
Select and confirm the option shown.
DISA internal?
j
k or #
j
k or #
Enter the (DISA) station number of the HiPath 3000/OpenScape Business or
OpenScape Office MX/LX where you wish to control the relay.
Confirm your entry.
Enter the (DISA) station number of the phone you wish to use to control the door
opener.
Confirm your entry.
Select and confirm the option shown.
Door opener?
jZ
Dial the entrance telephone number.
Individual phone configuration
103
Individual phone configuration
Setting contrast
The display has four contrast levels that you can set according to your light
conditions.
Vol.+ or Vol.-
Press one of the keys shown in idle mode.
Select and confirm the option shown.
Display contrast?
Vol.+ or Vol.-
k
Change the display contrast. Press the key repeatedly until the desired level is
obtained.
Save.
Audio
Setting the ringer mode
You can use the two ringer mode options
• HiPath
• Local ringer
to decide how the ring tone is generated on the telephone. With the setting
"HiPath", the system sends the ring tone type and the dependent ring tone,
which you can adjust subsequently Æ Page 104.
If "Local ringer" is selected, the system sends the ring tone type and you select
which ring tone is required for the respective ring tone type in the "Local ringers"
menu Æ Page 106.
z
Settings
User ?
f
if nec. j
You can also configure the following setting via the web interface Æ Page 112.
Open the menu Æ Page 19.
Select and confirm the option shown.
Enter and confirm the user password.
Ringer ?
f
Select and confirm the option shown.
Ringer mode ?
f
Select and confirm the option shown.
HiPath?
f
Select and confirm the option shown.
or
Local.ringer ?
f
Select and confirm the option shown.
Option = Save & exit?
f
Select and confirm the option shown.
104
Individual phone configuration
Adjusting audio settings
The ringer mode "HiPath" is set. The OpenScape Business sends the ring tone
type and the ring tone setting to your telephone.
Optimize the audio settings on your OpenScape Desk Phone IP 35 G for your
work environment and according to your personal requirements.
Adjusting the receiving volume during a call
You are conducting a call.
Vol.+ or Vol.-
k
Raise or lower the volume. Keep pressing the key until the desired volume is set.
Save.
Adjusting the ring volume
Vol.+ or Vol.-
Press one of the keys shown in idle mode Æ Page 16.
Confirm the option shown.
Ring volume?
Vol.+ or Vol.-
k
Raise or lower the volume. Keep pressing the key until the desired volume is set.
Save.
Adjusting the ringer pitch
Vol.+ or Vol.-
Press one of the keys shown in idle mode Æ Page 16.
Select and confirm the option shown.
Ring tone?
Vol.+ or Vol.-
k
To adjust the ringer pitch: Keep pressing the keys until the desired pitch is set.
Save.
Adjusting the attention ring volume
If you are part of a team with trunk keys, other calls can be signaled acoustically
in the team during a call. You will hear the attention ring.
Vol.+ or Vol.-
Press one of the keys shown in idle mode Æ Page 16.
Select and confirm the option shown.
Attention Ring Vol.
Vol.+ or Vol.-
k
Raise or lower the volume. Keep pressing the key until the desired volume is set.
Save.
Individual phone configuration
105
Adjusting the speakerphone to the room acoustics
To help the other party understand you clearly while you are talking into the
microphone, you can adjust the telephone to the acoustics in your environment:
"T0343 Quiet room", "T0344 Normal room" and "T0345 Noisy room."
Vol.+ or Vol.-
Press one of the keys shown in idle mode Æ Page 16.
Select and confirm the option shown.
Speakerphone mode?
Vol.+ or Vol.-
k
To set the room type: Keep pressing these keys until the setting you want
appears on the screen.
Save.
Language for system functions
Settings
Open the menu Æ Page 19.
Program/Service?
l
Select and confirm the option shown.
More features?
f
Select and confirm the option shown.
*48= Select language?
Select and confirm the option shown.
15=Spanish?
Select the language you wish to use (e. g. "Spanish") and confirm.
106
Individual phone configuration
Setting local ring tones
Selecting and configuring the call type
The ringer mode "Local ringer" is set. Different ring tone types are sent by the
OpenScape Business/HiPath 3000. Not all of the following types will necessarily
be used in your system configuration:
• 1: Internal
• External Call
• Attention Ringer
Select the required call type and adjust to suit your requirements.
z
Settings
User
f
if nec. j
You can also configure the following setting via the web interface Æ Page 112.
Open the menu Æ Page 19.
Select and confirm the option shown.
Enter and confirm the user password.
Ringer ?
f
Select and confirm the option shown.
Local ringers ?
f
Select and confirm the option shown.
1: Internal ?
f
For instance, select "1: Internal" and confirm the option shown.
ABC.wav
f
Select the required ringer file[1] or "pattern". You will hear the associated ring
tone melody. Confirm the current ringer file.
Settings for the ring tone "pattern"
If you selected "Pattern" as the ring tone, you can still make settings for the
pattern melody and the pattern sequence:
Pattern melody
f
Select and confirm the option shown.
4
f
Select the required pattern melody between 1 and 8 (e.g. 4). You will hear the
associated Ringer melody. Confirm the selected Ringer melody.
Pattern sequence
f
Select and confirm the option shown.
2
f
Select the required Ringer sequence between 1 and 6 (e.g. 2).You will hear the
set Ringer melody with the selected Ringer sequence. Confirm the selected setting.
Option = Save & exit?
Select and confirm the option shown.
1. The phone displays the current setting
Individual phone configuration
107
Setting headset port use
Here you set whether you are using a wired or cordless DECT headset.
z
Settings
User
f
if nec. j
You can also configure the following setting via the web interface Æ Page 112.
Open the menu Æ Page 19.
Select and confirm the option shown.
Enter and confirm the user password.
Audio
f
Select and confirm the option shown.
Settings
l
Select and confirm the option shown.
Headset socket
f
Select the option shown.
Wired headset
l
Select and confirm the relevant option1 shown in the context menu:
• Wired headset
• Cordless headset
• Conference unit
Option = Save & exit?
l
Select and confirm the option shown.
1. The phone displays the current setting
108
Individual phone configuration
Changing the user password
Your User password allows you to protect your user-defined settings.
z
Settings
f
User
if nec. j
The User password can also be modified via the web interface Æ Page 112.
Open the menu Æ Page 19.
Select and confirm the option shown.
Enter and confirm the user password.
Change user password
f
Select and confirm the option shown.
Current Password
l
Select and confirm the option shown.
j
Enter the current password (at least six characters) and confirm your entry.
f
Select and confirm the option shown.
j
Enter the new password (at least six characters) and confirm your entry.
New user password
Select and confirm the option shown.
Confirm new user password f
Option = Save & exit?
j
Enter and confirm the new password once more.
l
Select and confirm the option shown.
Individual phone configuration
109
Network information
This overview in the user area of the menu provides you with information about
the IP address of the phone and the HTML address of the web interface. It also
provides real-time data about the network activity of the phone.
Settings
User
f
if nec. j
Network information
f
Open the menu Æ Page 19.
Select and confirm the option shown.
Enter and confirm the user password.
Select and confirm the option shown. You can browse the following overview:
IP address: Displays the IP address or name that was assigned to the phone in
the network.
WBM URL: HTTP address of the web interface. This address is specified in the
address line of the Internet browser and is used to call the web interface of the
phone in the browser.
LAN/PC byte input: The network or PC interface data packets received are
illustrated dynamically as columns.
LAN/PC byte output: The network or PC interface data packets sent are
illustrated dynamically as columns.
LAN/PC autonegotiated: [Yes|No]: Displays whether the network or PC
interface data transfer rate is set to automatic (Yes) or manual (No).
LAN/PC port speed: [10|100|1000] Mbit/s: Data transfer rate of the network or
PC interface. If an interface is not in use, Link down is displayed.
110
Testing the phone
Testing the phone
Testing the phone's functionality
You can test your phone's functionality.
Prerequisite: The phone is in idle mode.
Settings
Open the menu Æ Page 19.
Program/Service?
l
Select and confirm the option shown.
More features?
f
Select and confirm the option shown.
Select and confirm the option shown.
*940=Phone test?
If everything is functioning correctly:
•
•
•
•
All LEDs on the phone flash (only the menu key LED is continuously lit)
Your station number is displayed
All pixels are active on the display
The ring tone is audible
Checking the key assignment
You can check the key assignment on your phone to determine which functions
are assigned to which keys.
Settings
Program/Service?
l
Prog. feature key
Select and confirm the option shown.
Select and confirm the option shown.
S
Exit
Open the menu Æ Page 19.
Press any key. The key assignment is displayed.
Select and confirm the option shown.
Differing display views in a HiPath 4000 environment
111
Differing display views in a
HiPath 4000 environment
Depending on the system configuration, some functions may not always be
offered in the display as described in this document.
In addition, display texts may differ from those described in this document
depending on the system configuration.
The following table provides an overview:
HiPath 3000/OpenScape Business
OpenScape Office
display
Program/Service
Transfer
View callbacks
Pickup - directed
Caller list
Use speed dialing
Change speed dial
Call waiting trm.
Call wait.trm. on/off
Ringer cutoff on/off
Join/leave group
HiPath 4000 display
Description
Service menu?
Transfer?
Show callback destinations?
Directed pickup
Call list/log?
Use speed dialing?
Speed dial?
Second call release?
Second call on/off?
Ringer cutoff on/off?
Hunt group on/off?
Æ
Æ
Æ
Æ
Æ
Page 19
Page 27
Page 33
Page 34
Page 38
Æ Page 42
Æ Page 47
Æ Page 63
Æ Page 93
112
Web interface
Web interface
General
You can configure a number of settings for your phone via the web interface. Communication is
via a secure HTTPS connection. Access to the web interface must be activated by your
administrator.
Launching the web interface
For more information about the IP address, the web interface address and how to connect
the telephone to the network, refer to the section entitled "Network information" Æ Page 109.
To launch the interface, open a web browser and enter the following:
https://[IP address of the phone]
[IP address of the phone] is the IP address of your phone.
or
https://[Name of the phone]
[Name of the phone] that was assigned by the administrator.
You might receive a certificate notification from the browser. Follow the instructions to
download the certificate.
You will be prompted to configure a user password Æ Page 108 the first time you call up the
web interface. You must log in with this password in future every time you want to open the
User Pages.
Administrator Pages
This area lets you configure settings for administering your phone and the network environment.
Access to the Administrator Pages is protected by the admin password. For further information,
consult your administrator or refer to the administration manual.
Web interface
113
User Pages
The web interface homepage opens once you have entered and confirmed the phone's IP
address.
1. Click a menu heading to display the individual menu entries. Click the menu heading again to
close the menu.
2. Click a menu entry to open the corresponding form.
3. Make the desired changes.
4. Click the corresponding button to save or discard your changes.
Button functions
•
•
•
•
•
"Login": Log in to the phone after you have entered the user password
"Submit": Apply changes
"Reset": Reset original values
"Refresh":Update the values
"Logout": Log out from the phone
114
Web interface
User menu
All settings in the user menu of the web interface can also be made via the user menu on the
telephone.
User Pages
User login V Æ Page 108
Authentication V Æ Page 108
– Old password
– User password V Æ Page 108
– Confirm password
Ringer
– Ringer mode (V Æ Page 103)
– HiPath
– Local ringer
– Local ringers V Æ Page 106
– Name
– 1: Internal
– Ringer file
– Pattern melody
– Pattern sequence
– External Call
– Ringer file
– Pattern melody
– Pattern sequence
– Attention Ringer
– Ringer file
– Pattern melody
– Pattern sequence
Audio
– Settings
– Headset socket (V Æ Page 107)
Phonebook
– Contact list V Æ Page 80
– New contact V Æ Page 80
– Last name
– First name
– Number
– Delete all contacts V Æ Page 81
– Confirm delete
Fixing problems
115
Fixing problems
Responding to error messages
Incorrect input
Possible causes:
Station number is incorrect.
Possible reactions:
Enter correct station number.
Not authorized
Possible causes:
Locked function selected.
Possible reactions:
Apply to the administrator for authorization for relevant function.
Currently not possible
Possible causes:
Dialed a non-existent station number. Called phone is unplugged.
Possible reactions:
Enter correct station number. Call this station again later.
Invalid station number
Possible causes:
Dialed your own station number.
Possible reactions:
Enter correct station number.
116
Fixing problems
Contact partner in case of problems
Consult your administrator if a fault persists for more than five minutes, for
example.
Troubleshooting
Pressed key does not respond:
Check if the key is stuck.
Telephone does not ring:
Check whether the "Do not disturb" function is activated on your telephone
(Æ Page 64). If so, deactivate it.
You cannot dial an external number:
Check whether your telephone is locked.
If the phone is locked, enter your PIN to unlock it Æ Page 66.
To correct any other problems:
First consult your administrator. If the problem still cannot be resolved, the
administrator has to contact Customer Service.
Care and cleaning instructions
• Never spray the phone with liquids as the penetrating fluids can lead to
malfunctions or may damage the device.
• Clean the phone with a soft and slightly damp cloth.
• Do not use substances such as alcohol, chemicals, household cleaners or
solvents, as these substances can lead to surface damage or cause the
coating to peel.
Labeling keys
The following options are available for labeling keys of the
OpenScape Desk Phone IP 35 G with the functions or numbers assigned to
them:
Labeling
• By hand:
Labeling strips are supplied with your OpenScape Desk Phone IP 35 G. Note
the function or name in the white field on the strip and insert the strip on your
OpenScape Desk Phone IP 35 G.
• With a computer via the Internet:
You can find the "online labeling tool" together with the user interface at
http://wiki.unify/index.php/Key_Labelling_Tool.
• Select the appropriate key labeling tool in your language. You can use the tool
online via the browser or you can download it for local use.
Local user menu
117
Local user menu
Opening the user menu on the phone
To open the user menu, press the Settings key.
Select the User menu option. You are prompted to enter the User password Æ Page 108. Confirm
this with OK. The options of the user menu are available.
User menu display
The majority of settings that can be made via the user menu on the phone can also be made via
the web interface Æ Page 112.
Changes are usually confirmed using the Save & exit option or discarded using the Exit (no save)
option.
! User
! Ringer?
– Local Ringers?
– 1: 1: Internal
– Option = Save & exit
– Name = 1: Internal
– Ringer sound = Ring file
– Pattern melody = 2
– Pattern sequence = 2
– 2: External Call
– Option = Save & exit
– Name = External Call
– Ringer sound = Ring file
– Pattern melody = 2
– Pattern sequence = 2
– 3: Attention Ringer
– Option = Save & exit
– Name = Attention Ringer
– Ringer sound = Ring file
– Pattern melody = 2
– Pattern sequence = 2
– Ringer mode?
– Option = Save & exit
– Mode = HiPath
– Local.ringer?
– Back?
Æ Page 106
Æ Page 103
! Audio?
– Settings?
– Headset socket
– Wired headset
– Cordless headset
– Conference unit
Æ Page 107
118
Local user menu
Change user password?
–
–
–
–
Current password =
New user password =
Confirm password =
Option = Save & exit
Æ Page 108
Network information?
–
–
–
–
–
–
–
–
–
–
–
–
–
Option = Exit
Phone address =
Æ Page 109
Web address =
IPv4 address =
LAN RX =
LAN TX =
PC RX =
PC TX =
LAN autonegotiated = Yes
LAN information = 10 Mbps full duplex
PC autonegotiated = Yes
PC information = Link down
Back?
Index
Index
A
Absence text ............................................................ 70
Leaving ................................................................. 70
Activating door opener ............................................. 36
Administrator ............................................................ 19
Advisory message
Delete .................................................................... 71
Agents ...................................................................... 96
Announcement ......................................................... 43
Answering machine .................................................. 73
Assigning a DID number .......................................... 45
Associated dialing/dialing aid ................................... 45
Associated service ................................................... 74
Attention ring volume ............................................. 104
Automatic call waiting
Preventing/allowing ............................................... 47
Automatic connection setup ..................................... 44
Automatic trunk seizure/prime line is not active ....... 25
C
Call
Accepting .............................................................. 22
Directed pickup ..................................................... 34
Distributing ............................................................ 96
Ending ................................................................... 24
Entrance telephone ............................................... 35
Forwarding ............................................................ 28
Forwarding in a team ............................................ 90
Forwarding MSN in CO ......................................... 31
In a team with trunk keys ...................................... 87
Parking .................................................................. 48
Picking up in a group ............................................ 95
Picking up in a team .............................................. 90
Placing on hold ..................................................... 49
Recording .............................................................. 52
Rejecting ............................................................... 26
Retrieving from hold .............................................. 49
Retrieving from park .............................................. 48
Transferring ..................................................... 27, 90
Transferring after announcement .......................... 52
Using DSS keys in a team .................................... 89
Call charge assignment ........................................... 61
Call charges
For another phone ................................................ 60
For your phone ...................................................... 60
Call duration ............................................................. 60
Call forwarding ......................................................... 28
In the event of telephone failure ............................ 30
MSN in CO ............................................................ 31
Call list ..................................................................... 18
119
Call request .............................................................. 18
Call signal ................................................................ 22
Call volume ...................................................... 22, 104
Call waiting .............................................................. 53
Accepting .............................................................. 46
Tone off ................................................................. 47
Call waiting tone on/off ............................................ 47
Callback ................................................................... 32
Caller ID suppression ............................................... 64
Caller list, using ........................................................ 38
Calling a second party ............................................. 27
Calls in queue .................................................... 71, 96
CE marking ................................................................ 3
Central telephone lock ............................................. 66
CFNR ....................................................................... 29
Charges
For another phone ................................................ 60
For your phone ..................................................... 60
Checking the key assignment ................................ 110
Cleaning information .............................................. 116
Code dialing in ISDN ................................................ 76
Code lock
Central .................................................................. 66
For phone ............................................................. 66
Company ................................................................. 19
Conference .............................................................. 27
Connection options .................................................. 21
Connection setup
Automatic .............................................................. 44
Consultation ............................................................. 27
Control relays ........................................................... 78
Corporate directory .................................................. 83
CSTA ....................................................................... 78
D
Details, fax ............................................................... 73
Dialed number, editing ............................................. 37
Dialing
Dialing aid ............................................................. 45
En-bloc .................................................................. 37
From the caller list ................................................ 38
From the internal phonebook ................................ 39
From the LDAP database ..................................... 40
Internal / external .................................................. 25
On-hook ................................................................ 25
Using redial ........................................................... 26
Using repdial keys ................................................ 26
Using speed dialing .............................................. 42
Dialing aid
S0 bus ................................................................... 45
Dialing external calls ................................................ 25
Dialing internal calls ................................................. 25
Dialing the CO ......................................................... 25
Dialpad ..................................................................... 16
Differences ............................................................... 11
120
Direct Inward System Access .................................. 75
Direct station select ............................................ 56, 89
Directory
LDAP ..................................................................... 83
Local phonebook
New contact ....................................................... 80
Directory LDAP ........................................................ 40
DISA ......................................................................... 75
Discreet calling ......................................................... 44
Display contrast ..................................................... 103
Display views for
HiPath 4000 environment ................................... 111
Distributing calls ....................................................... 96
Do not disturb ........................................................... 64
Door opener ............................................................. 36
DTMF suffix dialing (tone dialing) ............................. 51
E
Editing a dialed number ........................................... 37
Editing number ......................................................... 37
En-bloc dialing ......................................................... 37
Encrypted call .......................................................... 62
Entrance telephone .................................................. 35
External code ........................................................... 25
F
Fax details ................................................................ 73
Forwarding ............................................................... 28
Multiple subscriber number (MSN) ....................... 31
Forwarding MSN in CO ............................................ 31
Forwarding multiple subscriber number (MSN) ........ 31
Function key
Programmable ...................................................... 15
Functions
For another phone on/off ...................................... 74
Programming a key ............................................... 55
Resetting ............................................................... 74
Using from externally ............................................ 75
G
General information ................................................. 10
Group call ................................................................. 93
Index
H
Handsfree answerback ............................................ 35
Disabling ............................................................... 35
Enabling ................................................................ 35
Headset ................................................................... 34
HiPath 3000
Control relays ...................................................... 102
Relays ................................................................. 102
HiPath 5000
Group call ............................................................. 98
Hunt group ............................................................ 98
Night answer ....................................................... 100
Opening a door ................................................... 102
Ringing group ..................................................... 101
Setting up "follow me" call forwarding ................... 99
Holding ..................................................................... 49
In the team ............................................................ 88
Hot line ..................................................................... 44
Hotline delayed ........................................................ 44
Hunt group ............................................................... 93
I
Idle mode ................................................................. 16
Important information ................................................. 4
Incoming calls .......................................................... 18
Internal phonebook .................................................. 39
IP telephony ............................................................. 98
K
Keypad dialing ......................................................... 76
Keys
Assigning .............................................................. 55
Programming ........................................................ 55
Save incomplete ................................................... 55
L
LAN telephony ......................................................... 98
LDAP ....................................................................... 83
LDAP directory ......................................................... 40
LED displays
DSS keys .............................................................. 15
Function keys ........................................................ 15
Line/trunk keys ...................................................... 87
LED messages, understanding .................... 56, 89, 91
Line key ................................................................... 87
Line utilization .......................................................... 86
Location of the telephone .......................................... 4
Locking/unlocking .................................................... 66
Loudspeaker ............................................................ 23
Index
121
M
P
Making mobile calls .................................................. 71
Menu ........................................................................ 19
Message (text)
Answering ............................................................. 70
Deleting/viewing .................................................... 69
Receiving .............................................................. 70
Sending ................................................................. 69
Microphone .............................................................. 24
MULAP keys, trunk keys .......................................... 86
MULAP privacy release ........................................... 88
MultiLine phone ........................................................ 12
Parking a call ........................................................... 48
Personal ................................................................... 19
Personal identification number ................................. 67
Phone
Locking ................................................................. 66
Locking another .................................................... 66
Locking/unlocking ................................................. 66
Locking/unlocking centrally ................................... 66
Setting ................................................................. 103
Testing ................................................................ 110
Using another phone like your own ...................... 71
Phone settings ....................................................... 103
Picking up (call) .................................................. 34, 95
PIN ........................................................................... 67
PIN, saving .............................................................. 67
Primary line .............................................................. 86
Private line ............................................................... 86
Procedure
Programming a key ............................................... 58
Product name .......................................................... 11
Product variants ....................................................... 11
Program/Service menu ............................................ 19
Programmable function key ..................................... 15
Programming free keys ............................................ 55
Programming your telephone ................................. 103
Project calls ............................................................. 61
Project code, account code ..................................... 61
N
Name plate ............................................................... 11
Night answer ............................................................ 54
Non-secure call .................................................. 11, 62
O
Open listening .......................................................... 24
Opening a door ........................................................ 36
Using a code ......................................................... 36
OpenScape Desk Phone IP 35 G
Speakerphone mode ............................................. 23
Adjusting the room acoustics ........................... 105
Tips .............................................................. 11, 23
Operating instructions ................................................ 3
Operating steps
Programming a key ............................................... 58
Outgoing calls .......................................................... 18
Overload indication .................................................. 71
Override ................................................................... 53
Q
Quick search ............................................................ 85
122
Index
R
S
Radio paging equipment (PSE) ............................... 79
Recall ....................................................................... 52
Receiving volume ............................................. 22, 104
Recording ................................................................. 52
Redialing a number .................................................. 26
From the caller list ................................................. 38
Relays ...................................................................... 78
Reserve trunk ........................................................... 44
Reserving trunk ........................................................ 44
Resetting functions .................................................. 74
Resetting services .................................................... 74
Ring tone ................................................................ 104
Ring transfer
In an executive/secretary team ............................. 92
Ring volume ........................................................... 104
Ringer cutoff ............................................................. 63
Ringing group ........................................................... 95
Room monitor .......................................................... 65
Room monitoring ...................................................... 65
Safety notes ............................................................... 3
Searching for a contact ...................................... 82, 83
Second call
Accepting .............................................................. 46
Allowing ................................................................ 47
Preventing ............................................................. 47
Second level ............................................................ 26
Secondary line ......................................................... 86
Secure call ......................................................... 11, 62
Connection status ................................................. 63
Encrypted call ....................................................... 62
Tips ....................................................................... 63
Unencrypted call ................................................... 62
Sensors .................................................................... 79
Serial number .......................................................... 11
Setting headset port ............................................... 107
Settings .................................................................. 103
Settings on your telephone .................................... 103
Shared line ............................................................... 86
Shift .......................................................................... 26
Shift key ................................................................... 26
SingleLine phone ..................................................... 12
Speaker call ............................................................. 43
Speakerphone distance ............................................. 4
Speakerphone mode
Adjusting the room acoustics .............................. 105
Function ................................................................ 23
Setting the volume .............................................. 105
Tips ................................................................. 11, 23
Special dial tone ...................................................... 64
Speed dial
Dialing ................................................................... 42
Saving station speed dialing ................................. 42
Suffix dialing ......................................................... 42
System .................................................................. 42
Station number
Assigning .............................................................. 45
Correcting ............................................................. 37
Deactivating display .............................................. 64
Saving ................................................................... 59
Suppression .......................................................... 64
Station speed dialing ............................................... 42
Suffix dialing
Automatic .............................................................. 42
DTMF tone dialing ................................................ 51
System speed dialing ............................................... 42
System-wide cancelation ......................................... 74
Index
123
T
V
Telephone data service ............................................ 77
Telephone maintenance ........................................ 116
Telephone test ....................................................... 110
Temporary phone ..................................................... 71
Testing the phone's functionality ............................ 110
Testing the telephone ............................................ 110
Three-party conference ............................................ 27
Timed reminder ........................................................ 68
Timed reminder, answering ..................................... 69
Toggle/connect ........................................................ 27
In the team ............................................................ 88
Tone dialing ............................................................. 51
Trace call ................................................................. 65
Transferring (call) ............................................... 27, 90
After announcement .............................................. 52
Troubleshooting ..................................................... 116
Trunk flash ............................................................... 53
Trunk seizure, automatic .......................................... 25
Variable call forwarding ............................................ 28
Voice encryption ................................................ 11, 62
Connection status ................................................. 63
Encrypted call ....................................................... 62
Tips ....................................................................... 63
Unencrypted call ................................................... 62
U
Unanswered calls ..................................................... 18
Unencrypted call ................................................ 62, 63
Uniform Call Distribution .......................................... 96
User ......................................................................... 19
User interface
OpenScape Desk Phone IP 35G .......................... 13
User password ....................................................... 108
User support ............................................................ 10
Using Ethernet switches .......................................... 21
Using network ports more efficiently ........................ 21
W
Waiting calls ............................................................. 71
Web interface ................................................. 112, 117
Wrap-up time ........................................................... 97
124
Overview of functions and codes (alphabetical)
Overview of functions and codes
(alphabetical)
The following table lists all available functions, as shown on the display. If configured (consult your
administrator), functions can be activated interactively (select and confirm) or via the Program/
Service menu (select and confirm or enter a code).
Functions
(=display)
Account code
Advisory msg. on
Advisory msg. off
... Interact- ... Via the
ively
Program/Service menu
Settings Æ Page 19
bd
;
;
Associated dialing
Associated services
Call waiting
Waiting tone off
Waiting tone on
;
;
;
Call wait.trm.on
Call wait.trm.off
Callback
View callbacks/delete
Caller list
Save number
Conference
Start conference
Add party
End conference
View conf parties
Remove party
Drop last conf. party
Consultation
Return to held call
Quit and return
Transfer/Pick up call
Control Relay On
(only for HiPath 3000)
Control Relay Off
(only for HiPath 3000)
Data I/O service
;
;
;
bd
;
;
;
;
;
;
;
;
;
;
;
;
;
... With
key
Code
*60
*69
X
X
#69
X
*67
X
*83
*55
*87
X
#87
X
*490
X
#490
X
*58
X
X
X
#58
#82
X
;
;
*82
*3
X
;
;
#3
;
;
;
;
;
;
;
;
;
;
;
X
;
*491
X
;
;
*0
*0
;
*90
X
#90
X
*494
X
;
Overview of functions and codes (alphabetical)
Functions
(=display)
125
... Interact- ... Via the
ively
Program/Service menu
Settings Æ Page 19
bd
bd
... With
key
Code
Directory
1=internal
2=LDAP
DISA
DISA internal
Discreet calling
DND on
DND off
;
*54
*54
;
;
;
;
Door opener
Door opener on
Door opener off
DTMF dialing
;
;
;
;
;
Forwarding on
1=all calls
2=external calls only
3=internal calls only
Forwarding off
;
;
;
;
;
;
CFNR on
CFNR off
Trunk FWD on
Trunk FWD off
;
;
HF answerback on
HF answerback off
Hotline
Join group
Leave group
Rejoin all groups
Leave all groups
Lock phone
Unlock phone
Change PIN
X
X
*61
X
*89
X
#89
X
*53
X
;
*1
*11
*12
*13
X
#1
X
*495
X
#495
X
*64
X
#64
X
;
;
;
;
;
;
;
;
X
X
X
X
;
;
;
;
;
;
;
Keypad dialing
Lock all phones
X
X
#97
Headset
Answer call
X
;
;
En-bloc dialing
Dialing
*47
*945
*97
X
;
;
;
X
;
*96
#96
X
;
*85
X
#85
X
*85*
X
#85#
X
*503
*943
*66
X
#66
X
;
;
;
;
;
;
;
;
*93
X
126
Overview of functions and codes (alphabetical)
Functions
(=display)
... Interact- ... Via the
ively
Program/Service menu
Settings Æ Page 19
bd
bd
... With
key
Code
Mobile Login (log off)
#9419
X
Mobile Login (log on)
*9419
X
*52
X
#52
X
X
;
;
*44
#44
X
*62
X
;
;
*59
*56
X
;
Mute on
Mute off
Night answer on
Night answer off
Override
;
;
;
;
;
Page
Answer page (not for U.S.)
Park call
Retrieve call
Phone test
Pickup - directed
Pickup - group
Pick up call
;
;
Show call charges (own phone)
;
;
;
#56
X
;
*940
*59
*57
X
;
*65
X
Query call charges (third-party phone)
Redial
Reject calls
X
;
;
X
Release
Reserve trunk
X
;
Reset services
Retrieve line
Ring Transfer: On
Ring Transfer: Off
Ringer cutoff on
Ringer cutoff off
;
;
Ringing group on
Ringing group off
Room monitor
Select language
Send message
View sent message
View messages
;
;
;
;
;
;
;
;
;
;
;
;
;
;
;
;
X
#0
X
*63
*502
X
#502
X
*98
X
#98
X
*81
X
#81
X
*88
*48
*68
X
#68
X
#68
X
X
X
Mailbox
X
Shift
X
Speaker call
;
*80
X
Overview of functions and codes (alphabetical)
Functions
(=display)
Suppress caller ID
Restore caller ID
Telephone data service
Temporary MSN (not for U.S.)
127
... Interact- ... Via the
ively
Program/Service menu
Settings Æ Page 19
bd
;
;
;
Temporary phone
Timed reminder on
Timed reminder off
Toggle/connect
Trace call
Transferring
Trunk flash
;
;
bd
;
;
;
;
;
Log off
Available
Not available
Work on
Work off
UCD night on
UCD night off
Calls in queue
Use speed dialing
Change speed dialing (station)
Code
*86
X
#86
X
*42
X
;
;
;
*41
*508
*46
#46
X
*2
*84
X
X
;
*51
X
;
*401
X
#401
X
*402
X
#402
X
*403
X
#403
X
X
;
*404
#404
X
X
;
*405
*7
*92
Uniform Call Distribution
Log on
... With
key
;
;
;
;
;
;
;
;
X
X
X
X
FAQ: Types of Manuals and Their Contents
Unify OpenScape Desk Phone IP 35G Manuals come in various types, each serving a specific purpose to help users effectively operate and maintain their devices. Here are the common types of Unify OpenScape Desk Phone IP 35G User Guides and the information they typically include:
- User Manuals: Provide comprehensive instructions on how to use the device, including setup, features, and operation. They often include troubleshooting tips, safety information, and maintenance guidelines.
- Service Instructions: Designed for technicians and repair professionals, these manuals offer detailed information on diagnosing and repairing issues with the device. They include schematics, parts lists, and step-by-step repair procedures.
- Installation Guides: Focus on the installation process of the device, providing detailed instructions and diagrams for proper setup. They are essential for ensuring the device is installed correctly and safely.
- Maintenance Manuals: Provide guidance on routine maintenance tasks to keep the device in optimal condition. They cover cleaning procedures, part replacements, and regular servicing tips.
- Quick Start Guides: Offer a concise overview of the essential steps needed to get the device up and running quickly. They are ideal for users who need immediate assistance with basic setup and operation.
Each type of Unify OpenScape Desk Phone IP 35G instruction is designed to address specific needs, ensuring users have the necessary information to use, maintain, and repair their devices effectively.
Related Instructions for Unify OpenScape Desk Phone IP 35G:
1
OpenStage M3 EX
Safety notes Unify OpenStage M3 EX User Manual (Safety notes), @17ND45
104
1489
254
2
OpenStage 60 T
147
498
110
3
OpenScape 4000
165
495
95
4
OpenScape DECT Phone S6 Base
50
605
103
5
OpenScape Desk Phone CP400T
130
165
29
7
OpenStage 15 SIP
2
464
89
8
OpenScape CP700
24
93
19
9
OpenStage SL4 professional HiPath Cordless IP
Operation & user’s manual OpenStage SL4 professional HiPath Cordless IP (Telephone Accessories ePDF Manual, #3X41B4)
80
1316
224
10
OpenScape SL6
93
277
67
IP Phone Devices by Other Brands:
|
Cisco 524SG — Unified IP Phone VoIP Quick Reference Card User Guide: Cisco 524SG — Unified IP Phone VoIP (V984B7, Upd.03rd Nov 2024) Americas Headquarters 03 Nov 2024 | 2 |
|
|
Yealink Yealink SIP-T41P Quick Installation Manual PDF User Manual (@C4C82E), Yealink Yealink SIP-T41P IP Phone (Sat 11.2024) Accessing the web user interface: 23 Nov 2024 | 2 |
|
|
Cisco 7800 Series Quick Start Manual 7800 Series Quick start manual — 4R3891 Cisco IP Phone 7800 Series 29 Sep 2024 | 2 |
|
|
Innovaphone IP110 Technical Specifications IP110 Technical specifications — 238JR6 P u r e I P — T e l e p h o n y 09 Sep 2024 | 4 |
Categories:
Telephone Accessories
Racks & Stands
IP Phone
Office Equipment
Cell Phone
Handsets

OpenScape Desk Phone CP200
OpenScape Voice

Ссылочный номер: A31003-C1000-U100-2-7619
Информация, представленная в данном документе, содержит только общие описания или
функциональные характеристики, которые в конкретном случае применения не всегда
проявляются в описанной форме или которые могут изменяться вследствие дальнейшего
совершенствования продуктов. Требуемые функциональные характеристики являются
обязательными только в том случае, если они были явно согласованы при заключении договора.
Производитель оставляет за собой право на изменение возможностей поставки и
технические изменения без предварительного уведомления.
Unify, OpenScape, OpenStage and HiPath являются зарегистрированными торговыми
марками Unify Software и Solutions GmbH & Co. KG. Все другие названия компаний, марок,
продуктов и услуг являются торговыми марками или зарегистрированными торговыми
марками соответствующих владельцев
Наши системы управления качеством и природоохранных
мер осуществлены в соответствии с требованиями
стандартов ISO9001 и ISO14001, и сертифицированы
сторонней сертификационной компанией.
В целях безопасности, телефон следует подключать к электросети только:
при помощи оригинального блока питания.
Ссылочный номер: L30250-F600-C14x (x: 1=EU, 2=US, 3=UK) или
в локальной сети при помощи передачи питания по кабелю Ethernet,
соответствующему стандарту IEEE 802.3af.
Никогда не вскрывайте телефон или клавишный модуль. В случае
возникновения каких-либо проблем, обратитесь к своему администратору.
Используйте только оригинальные аксессуары. Использование других
дополнительных приспособлений может быть опасным и привести к
прекращению действия гарантии, расширенной ответственности
производителя и маркировки СЕ.
Соответствие оборудования директивам ЕС подтверждено маркировкой
СЕ. Данный сертификат соответствия и, где это применимо, иные
существующие сертификаты соответствия, а также дальнейшую
информацию о нормативах, ограничивающих использование веществ
или влияющих на сертификаты веществ, применяемых в изделиях,
можно найти на сайте Unify Expert WIKI по ссылке
http://wiki.unify.com в разделе «Сертификаты соответствия».
Все электрические и электронные изделия должны утилизироваться
отдельно от муниципального потока отходов через специализированные
пункты сбора, назначенные правительством или местными властями.
Корректная утилизация и раздельный сбор старого оборудования помогут
избежать потенциальных негативных последствий для окружающей среды
и здоровья людей. Это непременное условие для повторного
использования и переработки бывшего в употреблении электрического и
электронного оборудования.
Для получения более подробной информации по утилизации старого
оборудования свяжитесь с офисом в Вашем городе, сервисом по
утилизации отходов, магазином, где вы приобрели изделие, или с Вашим
торговым представителем.
Приведенные выше утверждения действительны только для
оборудования, установленного и проданного в странах Европейского
Союза, и соответствующего Европейской Директиве 2002/96/ЕС. В странах,
не входящих в Евросоюз, могут существовать иные нормативы
относительно утилизации электрического и электронного оборудования.
Расположение телефона
Телефон следует использовать в контролируемой обстановке с температурой
окружающей среды от 5°С до 40°С.
Чтобы обеспечить хорошее качество громкоговорителя, зона вокруг микрофона (справа

спереди) должна быть свободной. Оптимальное расстояние до громкоговорителя
составляет 50 см.
Не устанавливайте телефон в помещении, где собирается много пыли; это может
значительно сократить срок службы телефона.
Не подвергайте телефон воздействию прямых солнечных лучей или других источников
тепла, поскольку это может повредить электронные компоненты и пластмассовый
корпус.
Не используйте телефон во влажной среде, например, в ванной комнате.

Техническая поддержка в сети Интернет
Информацию и техническую поддержку наших изделий можно получить в сети Интернет:
http://www.unify.com.
Технические примечания, текущую информацию об обновлениях оборудования, часто
задаваемые вопросы и многое другое можно найти в сети Интернет по ссылке:
http://wiki.unify.com
Специализированная защита окружающей среды
В рамках стратегии в отношении продукта компания Unify нацелена вывести на рынок
продукты, безвредные для окружающей среды, принимая во внимание весь жизненный
цикл изделия. Unify стремится получить соответствующие экологические знаки для своих
продуктов, в случае если программы экологических знаков разрешают производить
квалификацию отдельных продуктов Unify.

Содержание
Важная информация……………………………………………………3
Торговые марки………………………………………………………………………………………………………3
Расположение телефона…………………………………………………………………………………………..4
Техническая поддержка в сети Интернет……………………………………………………………………….4
Специализированная защита окружающей среды……………………………………………………………4
Общие сведения……………………………………………………….11
О данном руководстве пользователя…………………………………………………………………………..11
Значки, используемые в руководстве…………………………………………………………………….11
Обслуживание……………………………………………………………………………………………………….12
Использование по назначению…………………………………………………………………………………..12
Тип телефона………………………………………………………………………………………………………..12
Качество динамика и читаемость дисплея…………………………………………………………………….12
Знакомство с Настольным телефоном OpenScape CP200…….13
Пользовательский интерфейс Вашего Настольного телефона OpenScape CP200…………………….13
Кнопки навигации………………………………………….………………………………………………….15
Программируемые функциональные клавиши…………………..……………………………………..16
Панель набора………………………………………………………………………………………………..17
Дисплей……………………………………………………………………………………………………………….19
Режим ожидания………………………………………………………………………………………………19
Отображение в строке состояния для регулировки звука…………….………………………………20
Изображения экрана, зависящие от содержания ………….………………………………………….21
Голосовая почта………………………………………………………………………………………..……22
Регистрация вызовов……………………………………………………………………………………………….23
Дополнительные замечания по регистрации вызовов……………………………………………….23
Настройки……………………………………………..……………………………………………………………..24
Телефонные книги……………………………………………….…………………………………………………24
Настройки пользователя………………………..………………………………………………………….25
Функции контроля и мониторинга……………………………………………………………………………….26
Разъемы на нижней стороне телефона………………………………………………………….……………27
Более эффективное использование сетевых портов…………………………………………………27

Базовые функции……………………………………………………28
Принятие вызова……………………………………………………………………………..………28
Принятие вызова при помощи трубки…………………………………………………….….28
Принятие вызова при помощи громкой связи………………………………………………28
Принятие вызова при помощи наушников…………………………………………………..29
Прямой ответ на вызов………………………………………………………………………………30
Принятие вызова………………………………………………………………………………..30
Принятие удерживаемого вызова…………………………………………………………….31
Переключение с трубки на режим громкой связи……………………………………………..…32
Переключение с режима громкой связи на трубку……………………………………………….32
Открытое прослушивание разговора……………………………………………………………….32
Включение/выключение микрофона….…………………………………………………………….33
Завершение вызова……………………………………………………………………………………33
Групповой вызов………………………………………………………………………………………..34
Прослушивание голосовой почты……………………………………………………………..……36
Управление вызовом (второе предупреждение)…………………………………………………37
Два вызова одновременно……………………………………………………………………..37
В процессе набора номера……………………………………………………………………..38
Осуществление вызовов……………………………………………………………………………..38
Набор номера при снятой трубке……………………………………………………………….38
Набор номера при положенной трубке………………………………………………………..39
Мгновенный набор………………………………………………………………………………..40
Набор при помощи функций горячей или теплой линии……………………………………40
Повторный набор……………………………………………………………………………………….41
Консультация партнера……………………………………………………………………………….42
Завершение вызова-консультации………………………………………………………….….42
Переключение на удерживаемый вызов (чередование)………………………………..….43
Удержание и возврат попеременно или одновременно……………………………………43
Соединение собеседников………………………………………………………………………44
Ответный звонок……………………………………………………………………………………….45
Запрос ответного звонка………………………………………………………………………..45
Принятие ответного звонка…………………………………………………………………….45
Разрешение ответных звонков…………………………………………………………………46
Ответный вызов на пропущенный звонок…………………………………………………………47
Переадресация вызовов……………………………………………48
Стандартная переадресация вызовов……………………………………………………………48
Использование переадресации……………………………………………………………….49
Включение и отключение мгновенной переадресации……………………………………49
Сохранение телефонных номеров назначения для переадресации…………………..50
Копирование и вставка телефонных номеров назначения………………………………51
Присваивание номеров назначения для переадресации…………………………………52
Включение и отключение переадресации…………………………………………………..53
Задание продолжительности звонка перед переадресацией при отсутствии ответа.54
Переадресация по типу вызовов…………………………………………………………………..55
Меню переадресации……………………………………………………………………………55
Использование переадресации……………………………………………………………………55
Включение или отключение мгновенной переадресации…………………………………56
Сохранение телефонных номеров назначения для переадресации……………………57
Предварительная настройка или изменение номеров назначения…………………….58
Копирование и вставка телефонных номеров назначения………………………………59
Присваивание номеров назначения для типа вызова…………………………………….60
Включение и отключение переадресации…………………………………………………..60
Цепочка переадресации…………………………………………………………………………61

Программируемые клавиши……………………………….62
Перечень доступных функций……………………………………………………………………….62
Программирование клавиши…………………………………………………………………………63
Активирование программирования……………………………………………………………63
Начало программирования……………………………………………………………………..64
Программирование расширенных функций……………………………………………………….64
Повторный набор нажатием кнопки…………………………………………………………..64
Разговор……………………………………………………………………………………………65
Настройка фиксированной клавиши переадресации………………………………………66
Настройка переменной клавиши переадресации…………………………………………..67
Использование клавиш……………………………………………………………………………….68
Пример 1: Вызов сохраненного номера………………………………………………………68
Пример 2: Включение/отключение ожидания вызова……………………………………..68
Пример 3: Немедленный вызов……………………………………………………………….68
Сброс настроек клавиш……………………………………………………………………………….69
Расширенные функции телефона………………………………….70
Входящие вызовы……………………………………………………………………………………..70
Перенаправление вызова………………………………………………………………………..70
Отклонение вызова………………………………………………………………………………..71
Настройка переадресации вызова………………………………………………………………72
Удержание вызова…………………………………………………………………………………74
Включение и отключения напоминания об удержании……………………………………..75
Ожидание вызова (второй вызов)……………………………………………………………….79
Переадресация вызова……………………………………………………………………………83
CTI-вызовы………………………………………………………………………………………….86
Осуществление вызовов……………………………………………………………………………..88
Набор номера при помощи выбранной клавиши набора……………………………………88
Вызов абонента из местной телефонной книги……….………………………………………88
Вызов абонента из корпоративного каталога………………………………………………….88
Набор номера из списка……………….………………………………………………………….89
Использование задержки при автонаборе…………………………………………………….89
Конференция……………………………………………………………………………………………92
Местная конференция…………………………………………………………………………….92
Системная конференция………………………………………………………………………….94
Телефонные книги и разговоры…………………………..96
Персональная телефонная книга…………………………………………………………………..96
Создание нового контакта………………………………………………………………………..96
Редактирование контакта…………………………………………………………………………96
Удаление контакта…………………………………………………………………………………97
Удаление всех контактов…………………………………………………………………………97
Поиск контакта……………………………………………………………………………………..98
Корпоративный каталог………………………………………………………………………………99
Поиск контакта……………………………………………………………………………………..99
Расширенное редактирование телефонной книги………………………………………….100
Быстрый поиск…………………………………………………………………………………….101
Регистрация вызовов………………………………………………………………………………..103
Набор записи………………………………………………………………………………………103
Удаление всех записей………………………………………………………………………….103
Регистрация вызовов – включение/отключение…………………………………………….104

Многопроводная линия……………………………………106
Линейные клавиши…………………………………………………………………………………..106
Первичная линия………………………………………………………………………………….106
Вторичная линия………………………………………………………………………………….106
Фантомная линия…………………………………………………………………………………106
Использование линий……………………………………………………………………………106
Светодиоды………….…………………………………………………………………………….107
Входящие вызовы……………………………………………………………………………………107
Ответ на вызовы для первичной линии………………………………………………………107
Ответ на вызовы для вторичной линии………………………………………………………107
Осуществление вызовов……………………………………………………………………………108
Занятие линии вручную………………………………………………………………………….108
Автоматическое занятие линии………………………………………………………………..108
Набор последнего набранного номера……………………………………………………….109
Переадресация вызовов для первичной линии……………………………………………..109
В процессе вызова……………………………………………………………………………………110
Осуществление и принятие вызовов на однопроводной линии………………………….110
Осуществление и принятие вызовов на многопроводной линии…………………………110
Удержание линии…………………………………………………………………………………111
Линии с функциями горячей или теплой линии……………………………………………..111
Соединение………………………………………………………………………………………..112
Клавиша прямого выбора терминала…………………………………………………………….113
Вызов абонента напрямую……………………………………………………………………..113
Ответ на вызов……………………………………………………………………………………113
Перенаправление вызова абонента прямого выбора терминала……………………….114
Светодиоды для клавиш прямого выбора терминала……………………………………..114
Настройки для Многопроводной линии (клавиатура)………………………………………….115
Установка времени для отложенного вызова……………………………………………….115
Настройка звонка для линий………………………….………………………………………..116
Предпросмотр линии…………………………………………………………………………….117
Сброс данных для линии…………………..……………………………………………………118
Защита от несанкционированного доступа/безопасность……119
Отключение звонка или настройка звукового сигнала…………………………………………119
Включение и отключение звонка или установление сигнала……………………………..119
Временное отключение звонка для входящих вызовов и его включение………………120
Не беспокоить…………………………………………………………………………………………120
Включение функции «не беспокоить» при помощи клавиши……………………………..120
Включение функции «не беспокоить» при помощи главного меню………………………120
Разрешение функции «не беспокоить»……………………………………………………….121
Безопасность…………………………………………………………………………………………..122
Пароль пользователя……………………………………………………………………………122
Блокировка телефона……………………………………………………………………………125

Функция мобильности………………………………………127
Варианты мобильности……………………………………………………………………………...127
Вход и выход на одном и том же телефоне………………………………………………….127
Вход и выход на разных телефонах……………………………………………………………127
Передача заданных пользователем настроек и данных……………………………………127
Вход и выход на одном и том же телефоне…………………………………………………….…128
Вход в телефон…………………………………………………………………………………….128
Выход из телефона………………………………………………………………………………..129
Вход и выход на разных телефонах………………………………………………………………..130
Вход с принудительным выходом на удаленном телефоне………………………………..130
Вход с принудительным отложенным выходом на удаленном телефоне……………….131
Индивидуальная настройка телефона…………………132
Экран…………………………………………………………………………………………………….132
Регулировка контрастности ………..……………………………………………………………132
Дата и время…………………………………………………………………………………………..133
Установка времени……………………………………………………………………………….133
Установка даты…………………………………………………………………………………….133
Настройка перехода на летнее время………………………………………………………..134
Автоматический переход на летнее время…………………………………………………..135
Формат отображения времени…………………………………………………………………135
Формат отображения даты………………………………………………………………………136
Аудио……………………………………………………………………………………………………..137
Громкости……………………………………………………………………………………………137
Настройки……………………………………………………………………………………………138
Особые сигналы вызова………………………………………………………………………….141
Звук и уведомление при незащищенном речевом соединении……………………………142
Звук клавиш………………………………………………………………………………………………143
Настройка языка и страны…………………………………………………………………………….144
Выбор языка……..………………………………………………………………………………..144
Настройки в зависимости от страны…………………………………………………………..146
Информация сети………………………………………………………………………………..147
Информация о сети…………………………………………………………………………………….148
Сброс данных пользователя………………………………………………………………………….148
Активация сброса…………………………………………………………………………………148
Индивидуальные настройки ,влияющие на потребление энергии…………………………….148

Запись вызова……………………………………………….149
Режимы записи…………………………………………………………………………………….…..149
Объяснения записи…………………………………………………………………………………….150
Записываемые вызовы…………………………………………………………………………..150
Незаписываемые вызовы……………………………………………………………………….150
Расширенные функции………………………………………………………………………….150
Следующие функции не поддерживаются…………………………………………………..150
Советы по записи………………………………………………………………………………..150
Многопроводная линия………………………………………………………………………….151
Запись вызовов…………………………………………………………………………………………151
Автоматическая запись вызова………………………………………………………………..151
Ручная запись вызова…………………………………………………………………………..151
Запись вызова с Автозапуском………………………………………………………………..152
Управление записью вызова…………………………………………………………………..152
Консультация в процессе записи вызова…………………………………………………….153
Второй вызов в процессе записи вызова…………………………………………………….153
Запись вызова при чередовании………………………………………………………………154
Ваш вызов удерживается или разъединился………………………………………………..154
Создание конференции в процессе записи………………………………………………….154
Добавление участников конференции в процессе записи………………………………..155
Ваш вызов добавлен в конференцию в процессе записи…………………………………155
Удержание линии вручную в процессе записи……………………………………………..155
Диагностические данные……………………………………………………………………………..157
Веб-интерфейс (WBM)……………………………………160
Общие сведения………………………………………………………………………………………160
Запуск веб-интерфейса……………………………………………………………………………..160
Настройки администратора……………………………………………………………………..160
Страницы пользователя…………………………………………………………………………161
Меню пользователя………………………………………………………………………………162
Решение проблем…….……………………………………165
Забота о Вашем телефоне…………………………………………………………………………165
Устранение неполадок………………………………………………………………………………165
Свяжитесь с партнером в случае возникновения проблем…………………………………..165
Маркировка клавиш………………………………………………………………………………….166
Ремонт и концепция переработки, улучшение рабочих
характеристик………………………………………………..166
Переработка и утилизация оборудования в семействе телефонов OpenScape………….166
Надежность ремонта и поставка запасных деталей…………………………………………….167
Улучшение рабочих характеристик…………………………………………………………………167
Локальное меню пользователя…………………………..168
Открытие меню пользователя на телефоне………………………………………………………168
Отображение меню пользователя…………………………………………………………………..168
Функции клавиш….…………………………………………………………………………………177
Указатель……………………………………………………..179

Общие сведения
О данном руководстве пользователя
В данном документе содержится общее описание дополнительного оснащения, которое не всегда
может быть в наличии в некоторых случаях. Поэтому требуемые характеристики следует
обозначать отдельно в рамках договора.
Если определенная функция на Вашем телефоне недоступна для Вас, в соответствии с описанием,
причиной этого может быть одна из следующих:
Данная функция не настроена для Вас и Вашего телефона. Пожалуйста, свяжитесь с Вашим
системным администратором.
Ваша коммуникационная платформа не поддерживает данную функцию. Пожалуйста, свяжитесь
с Вашим торговым партнером для получения информации о том, как усовершенствовать ее.
Данное руководство пользователя должно помочь Вам познакомиться с Настольным телефоном
OpenScape CP200 и всеми его функциями. Здесь содержится важная информация для безопасной
и корректной эксплуатации Настольного телефона OpenScape CP200. Данные рекомендации
следует строго соблюдать, чтобы избежать ошибок в работе и обеспечить оптимальное
использование Вашего многофункционального телефона в сети.
Весь персонал, устанавливающий, эксплуатирующий или программирующий Настольный телефон
OpenScape CP200, должен прочитать и придерживаться данного руководства пользователя.
Данное руководство по эксплуатации простое и легкое для понимания, и предоставляет четкие
пошаговые инструкции для работы с настольным телефоном OpenScape CP200.
Значки, используемые в данном руководстве
Настройки
Операции и настройки, которые можно осуществить как через телефон, так и через вебинтерфейс, обозначаются иконкой и ссылкой на страницу.
Относится к операции или настройке, выполняемой через телефон.
Относится к операции или настройке, выполняемой через веб-интерфейс.

Обслуживание
Отдел обслуживания компании Unify Software and Solutions GmbH & Co. KG может помочь
Вам только в том случае, если у Вас возникли проблемы или неисправности с самим
телефоном. Если у Вас есть вопросы касательно эксплуатации, Ваш продавец-консультант
или системный администратор будут рады Вам помочь.
По вопросам, касающимся подключения телефона, свяжитесь с Вашим поставщиком
сетевых услуг
Если у Вас возникли проблемы или выявлены дефекты телефона, наберите, пожалуйста,
номер сервисной службы в Вашей стране.
Использование по назначению
Настольный телефон OpenScape CP200 представляет собой настольный аппарат,
предназначенный для передачи голоса и подключения к локальной сети. Его также можно
использовать в качестве абонентского устройства. Любое иное использование считается
применением не по назначению.
Тип телефона
Идентификационные данные (точное наименование изделия и серийный номер) Вашего
телефона можно найти в табличке на нижней части корпуса. Дополнительные данные,
касающиеся Вашей информационной платформы, можно получить у администратора.
Пожалуйста, имейте эту информацию под рукой, когда связываетесь с отделом
обслуживания для решения вопросов по неисправностям и проблемам с изделием.
Качество динамика и читаемость дисплея
Чтобы обеспечить хорошее качество динамика, зона перед телефоном (спереди справа)
должна быть свободна. Оптимальное расстояние составляет 50 см.
Чтобы оптимизировать читаемость экрана, выполните следующее:
— Отрегулируйте контрастность в соответствии с требованиями → страница 132.
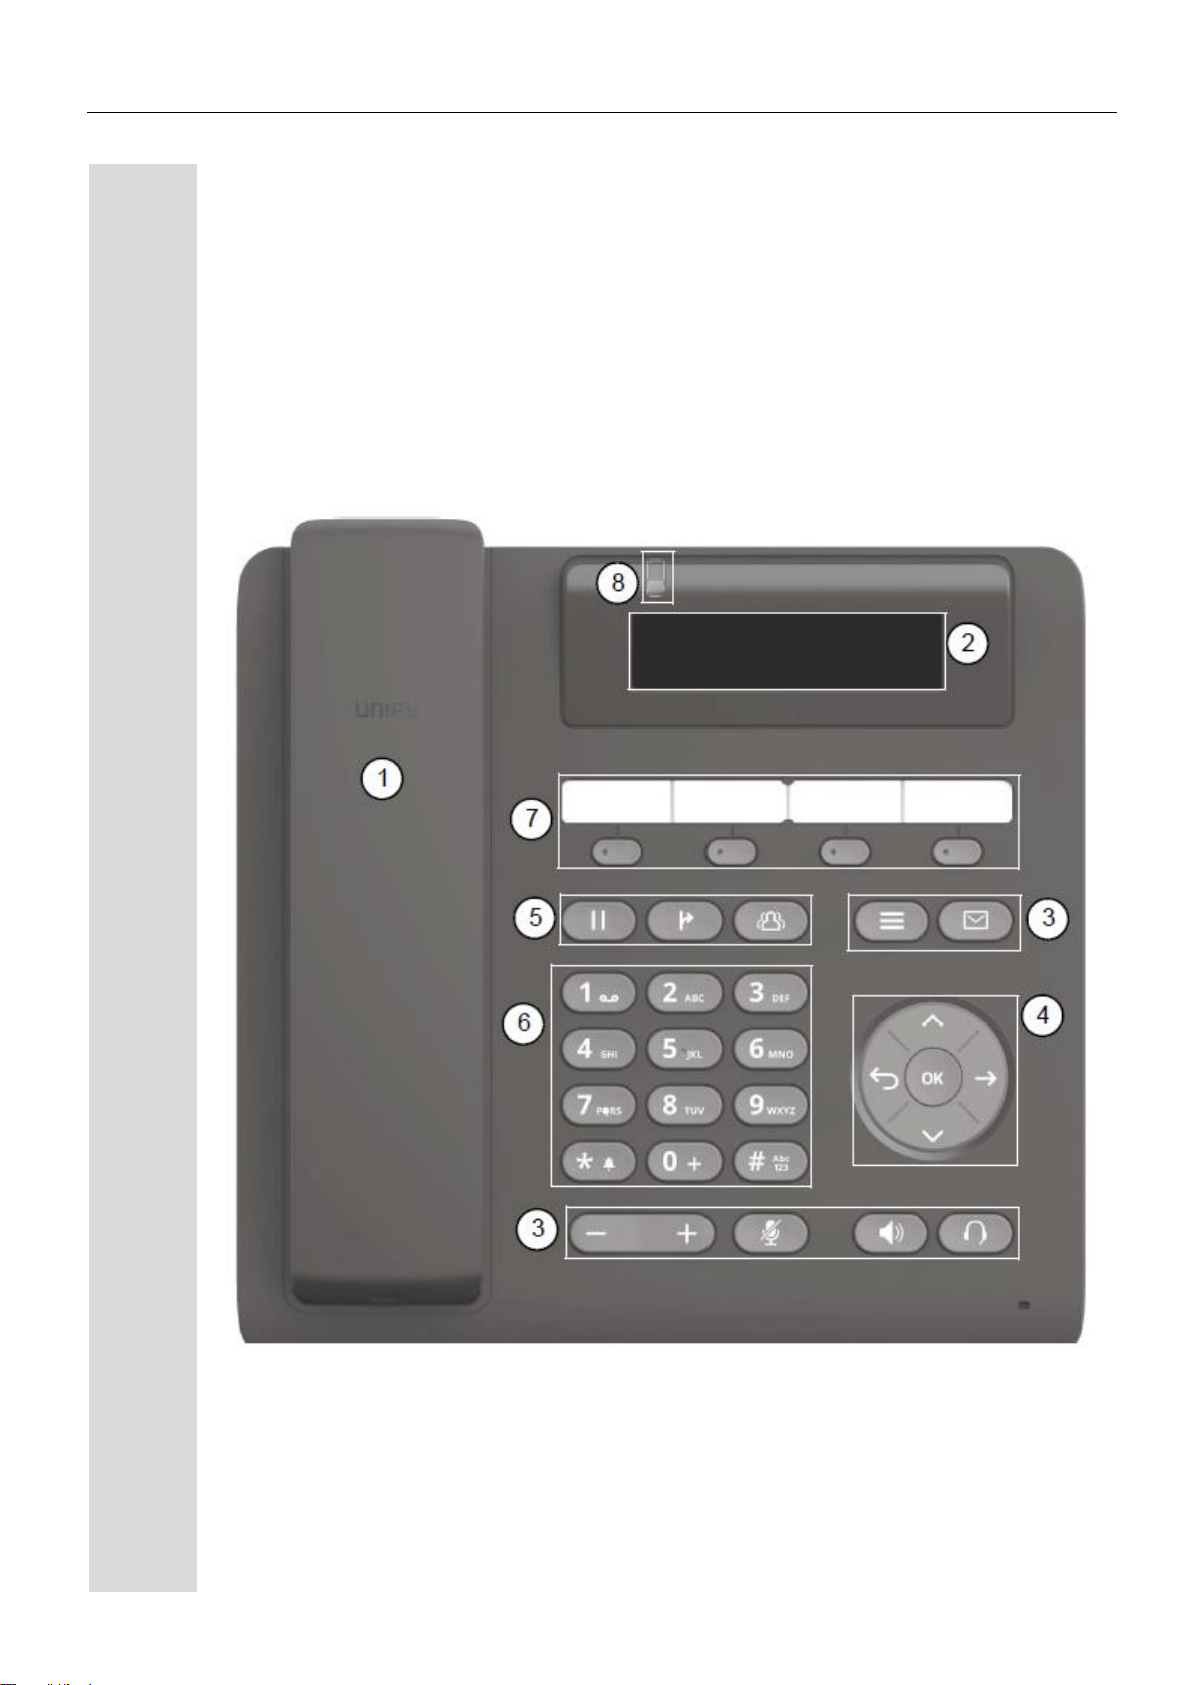
Знакомство с настольным телефоном OpenScape
CP200
В следующих разделах описаны наиболее часто используемые кнопки управления и
изображения на экране.
Пользовательский интерфейс Вашего Настольного
телефона OpenScape CP200
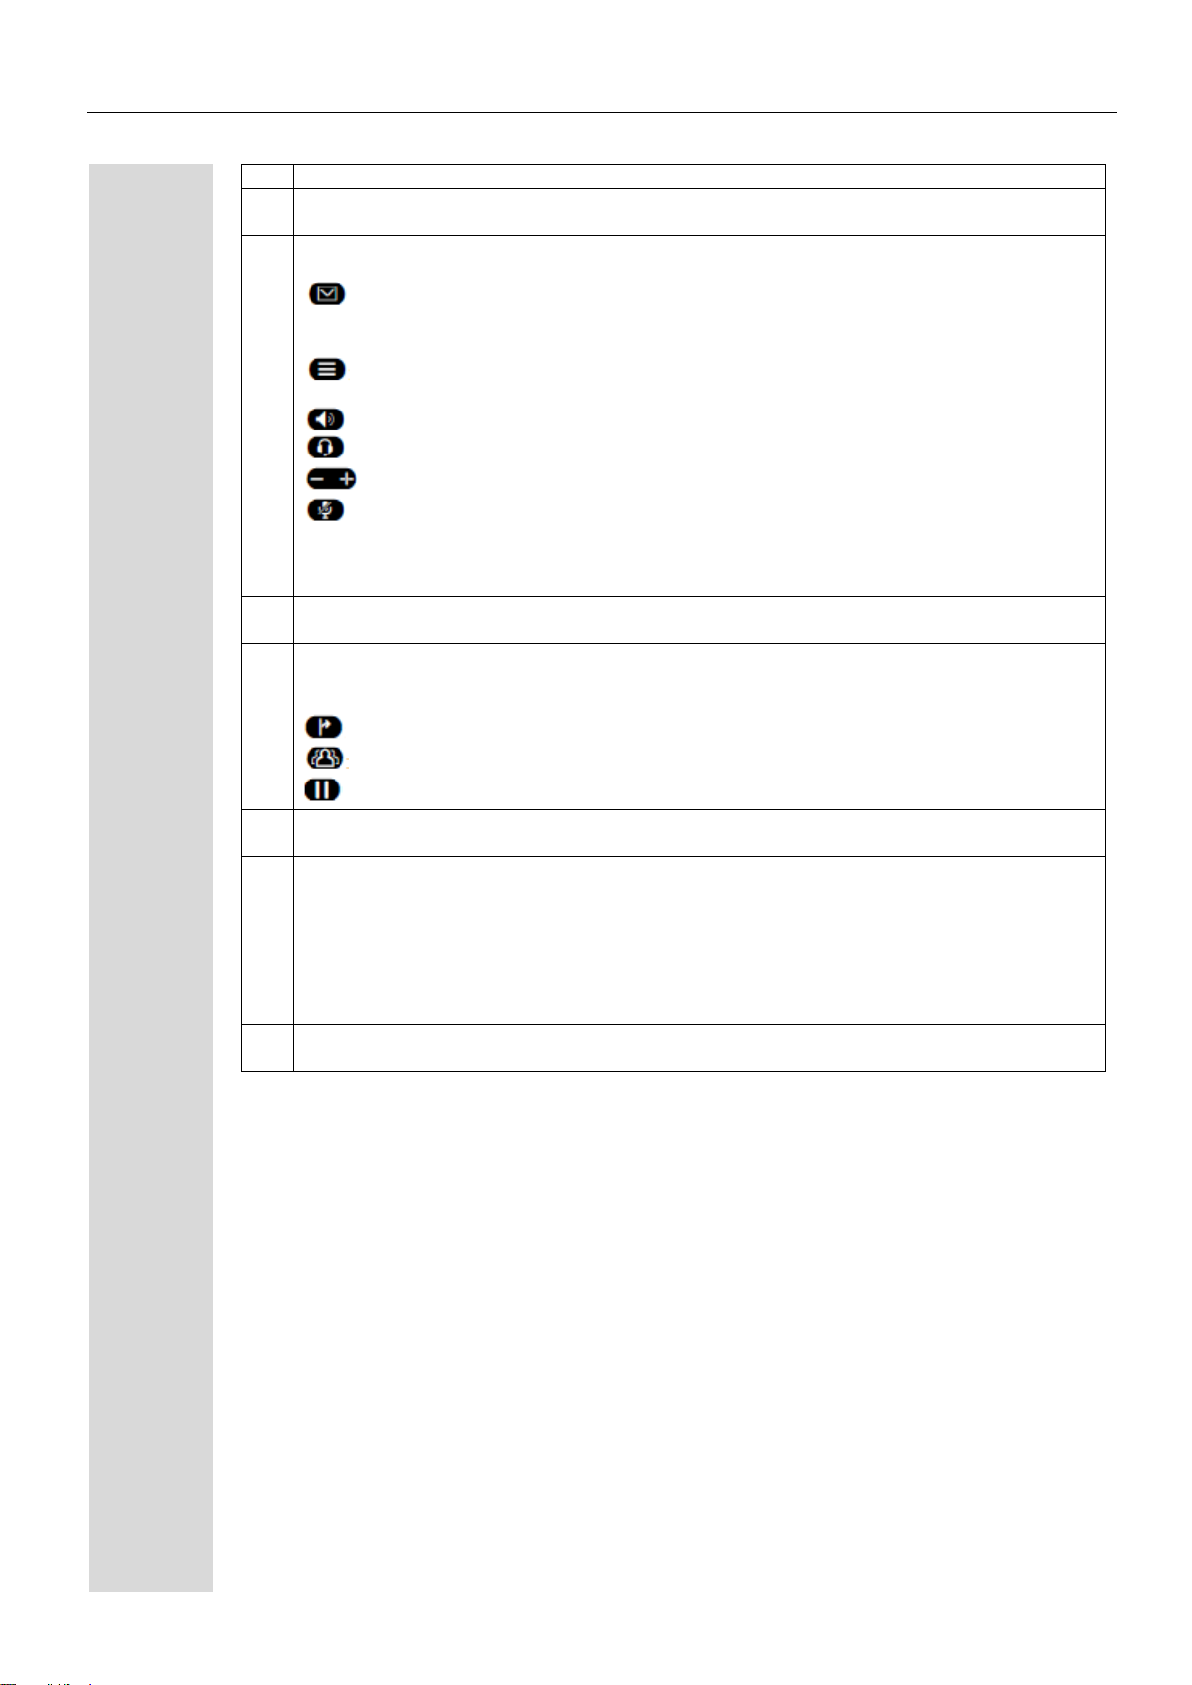
Вы можете осуществлять и принимать вызовы как обычно при помощи трубки.
Графический дисплей позволяет интуитивно работать с телефоном (две строки с
33 символами в каждой)
Функциональные клавиши (неизменяемые) позволяют Вам вызывать следующие
часто используемые функции в процессе вызова:
: Предоставляет доступ к списку вызовов, включая пропущенные вызовы,
набранные номера, принятые и переадресованные вызовы, и позволяет управлять
голосовой почтой.
: Предоставляет доступ к меню пользователя для местного управления
настройками телефона.
: Включает/отключает функцию громкой связи.
: Включает/отключает функцию наушников.
: Увеличивает/уменьшает громкость динамика/наушников → страница 20.
: Включает/отключает микрофон. Данная функция используется, чтобы
собеседник не мог Вас слышать при определенных обстоятельствах, например,
когда Вы консультируетесь с кем-то в комнате, или в случае раздражающего шума
на заднем плане.
Используйте кнопки навигатора, чтобы удобно пролистывать различные функции
Вашего телефона, приложения и меню настроек.
Функциональные клавиши (могут быть перепрограммированы администратором
через веб-интерфейс) позволяют Вам вызывать следующие часто используемые
функции в процессе вызова:
: Переадресация вызова другому абоненту.
: Доступ к функциям конференции.
: Удержать или возобновить активный вызов.
Номеронабиратель можно использовать для ввода номеров телефона и набора
текста
Вы можете настроить свой телефон, присваивая номера телефонов и функции
программируемым клавишам.
Значения, установленные по умолчанию:
Журнал (список вызовов)
Телефонная книга
Переадресация
Повторный набор номера
Входящие вызовы и новые голосовые сообщения визуально обозначаются при
помощи светодиодного индикатора
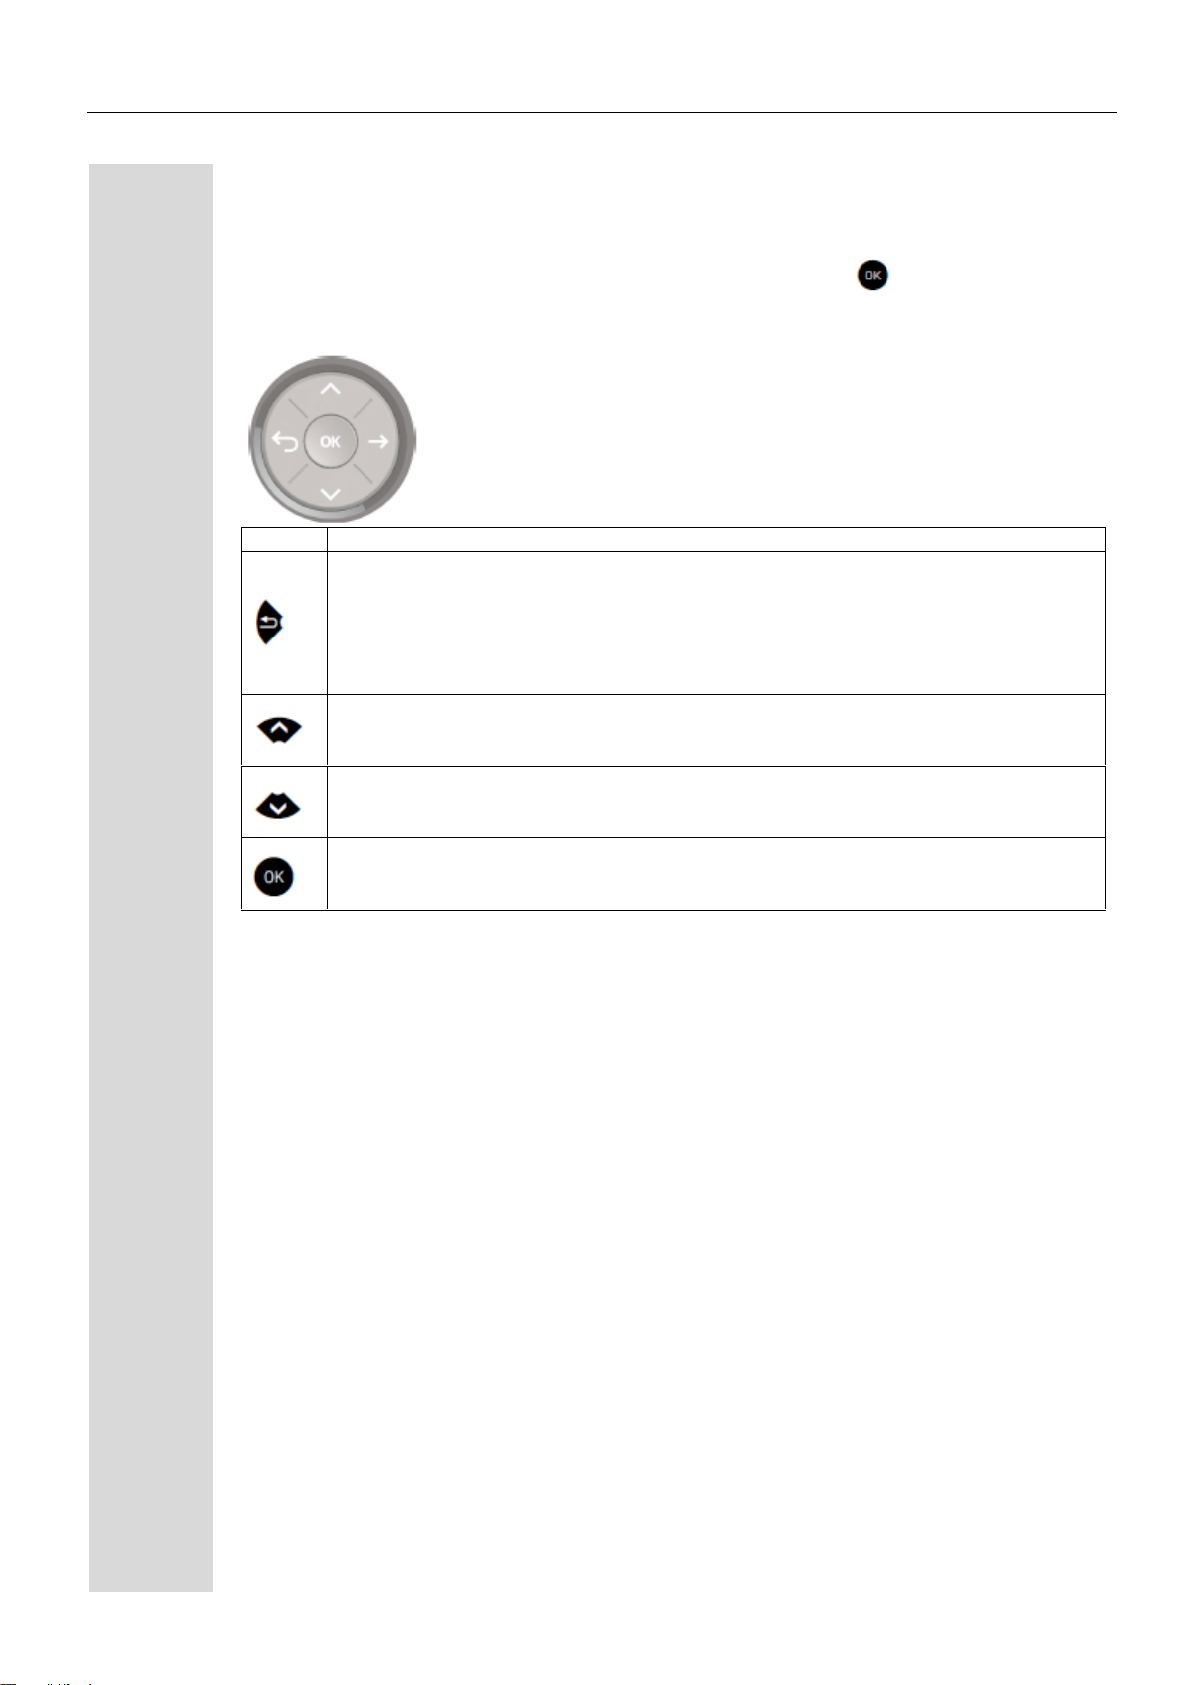
Кнопки навигации
Эта кнопка управления позволяет Вам перемещаться между полями ввода и
ориентироваться в списках и меню. Используйте кнопку , чтобы подтвердить
выбранную опцию или запустить функцию.
Функция при нажатии кнопки
В списках и меню:
Возвращается на один уровень вверх
При выбранной записи:
Отмена действия
В полях ввода:
Удаление символа слева от курсора
В списках и меню:
Листает вверх
Нажмите и удерживайте: Переход к началу списка/меню.
В списках и меню:
Листает вниз
Нажмите и удерживайте: Переход к концу списка/меню.
Выбранная запись:
Выполняет действие
Подтверждение выбора.
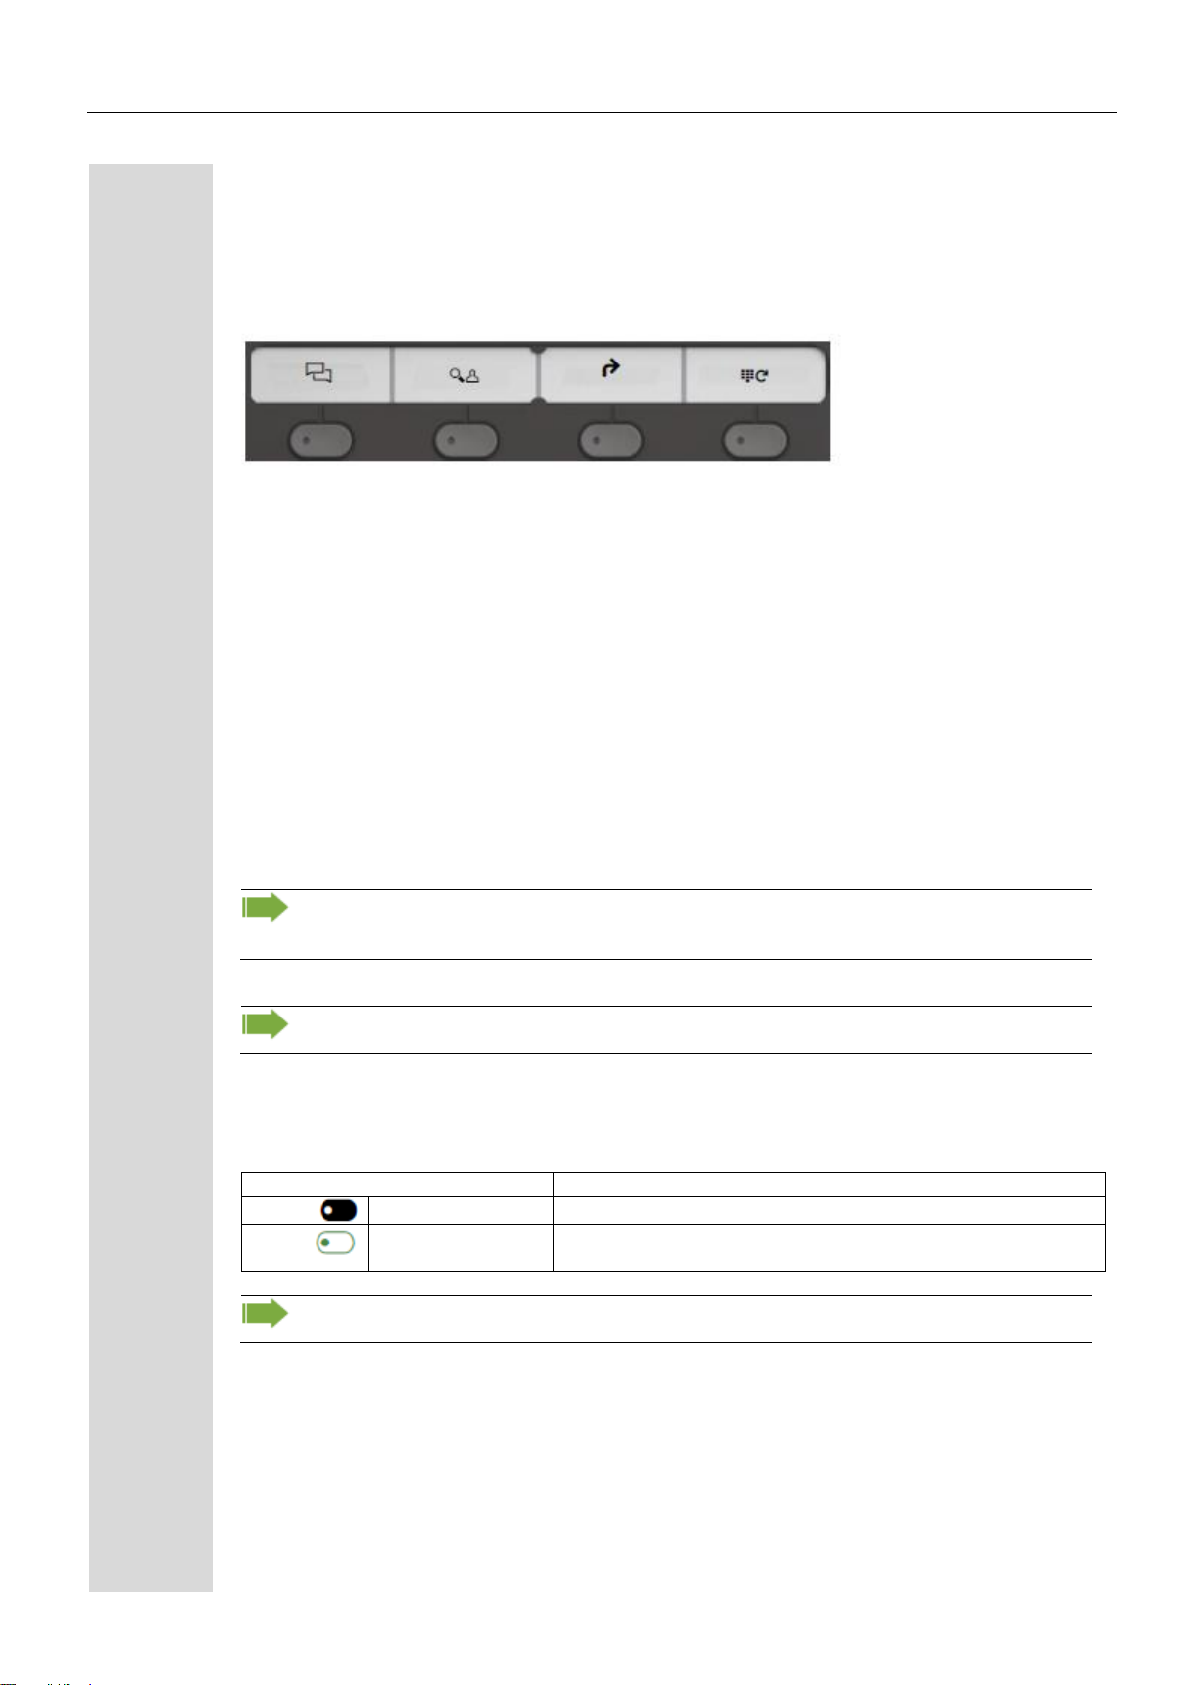
Программируемые функциональные клавиши
На Вашем настольном телефоне OpenScape CP200 имеется четыре фиксированные
функциональные клавиши (со светодиодами), которые можно в любое время
перепрограммировать на другие функции или телефонные номера.
Значки представляют следующие функции:
Журнал
Телефонная книга
Переадресация
Повторный набор номера
В зависимости от того, как они запрограммированы, Вы можете использовать эти клавиши
следующим образом:
Функциональные клавиши → страница 62
Клавиши быстрого набора → страница 64
Функцию можно запрограммировать для каждой клавиши, так же как и номер телефона на
втором уровне.
Состояние функции отображается светодиодом для соответствующей функциональной
клавиши.
Линейные клавиши и клавиши прямого выбора терминала могут быть
запрограммированы только администратором через меню
программы/обслуживания.
Информацию по маркировке функциональных клавиш Вы найдете на → странице
166.
Значение светодиодов функциональных клавиш.
Значение функциональной клавиши
Некоторые программируемые клавиши многолинейных телефонов можно
настроить в качестве линейных клавиш → страница 106.
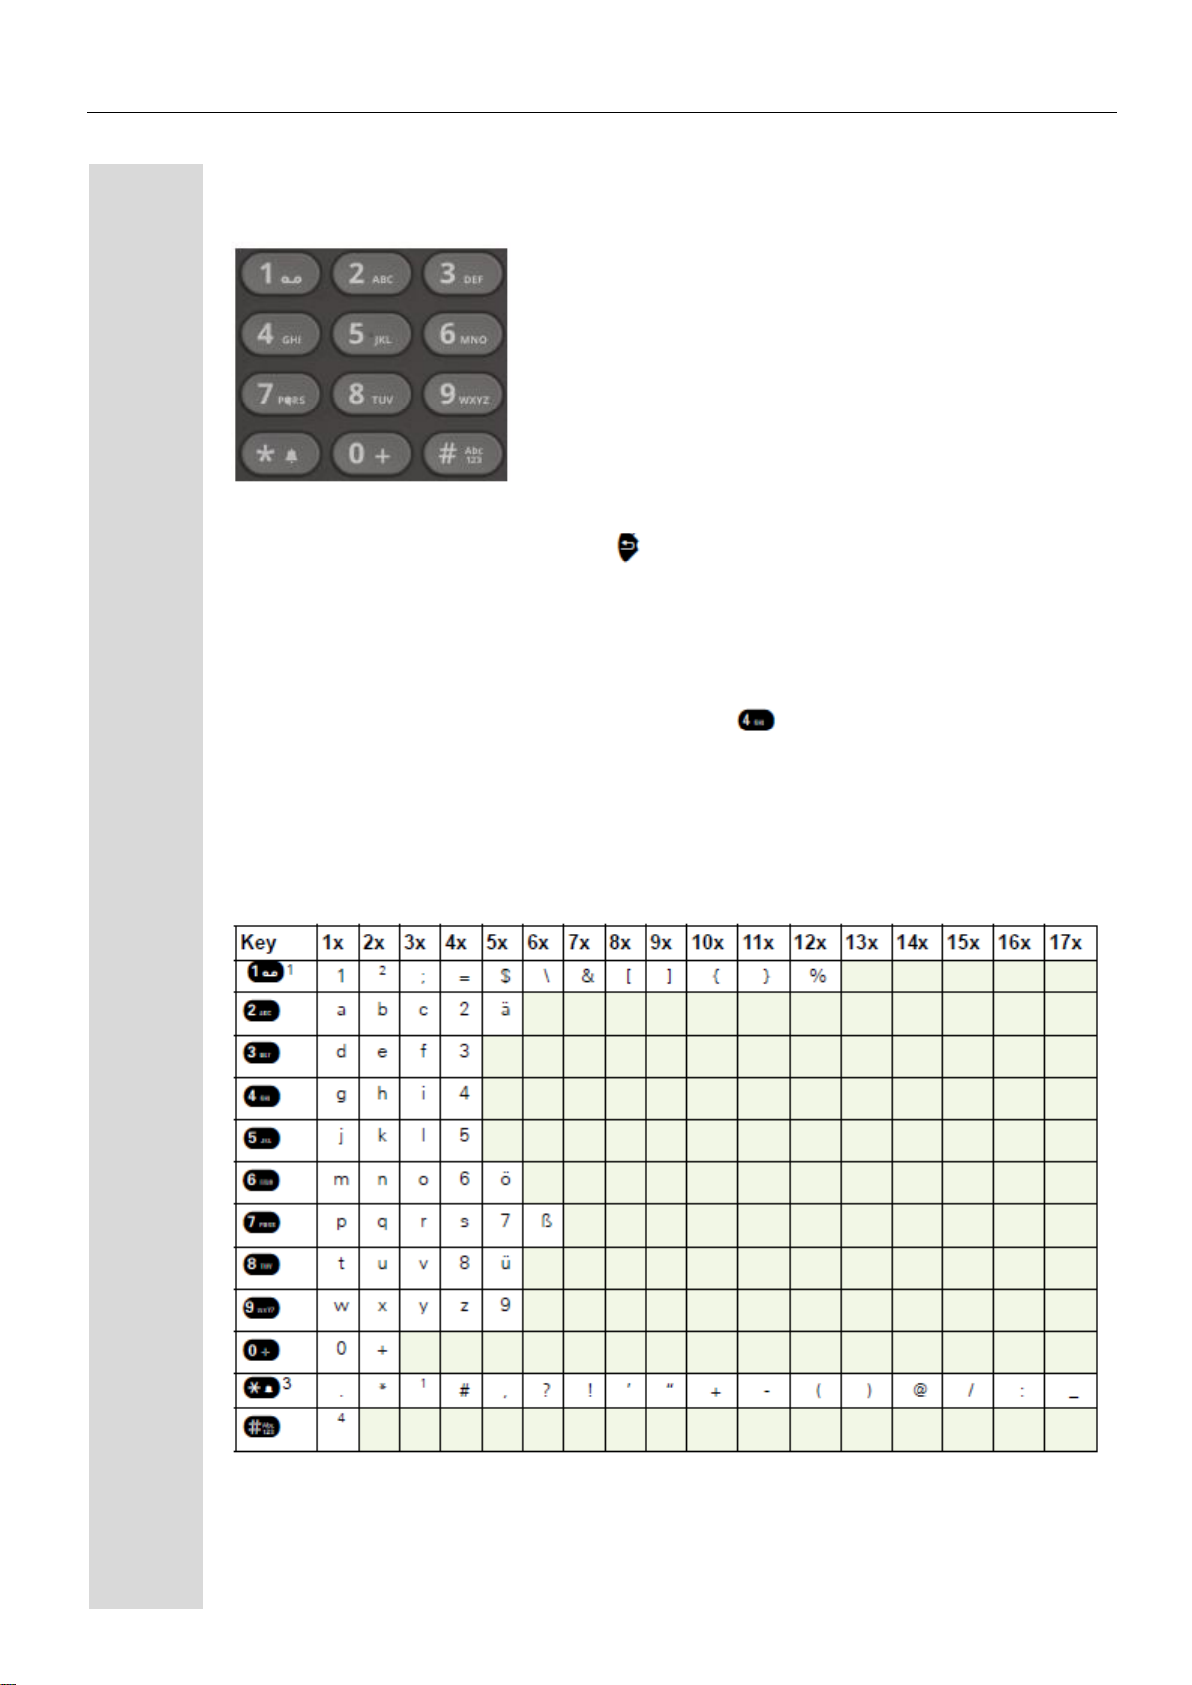
Номеронабиратель
Вы можете использовать только цифры от 1 до 9 и 0, а также символы * и # при наборе
номера. Чтобы удалить цифру, нажмите .
В случаях, когда возможен ввод текста, например, для ввода пароля пользователя, Вы
можете использовать панель набора для ввода текста, в дополнение к цифрам и
упомянутым специальным символам. Для этого нажмите кнопку с цифрой несколько раз
подряд.
Пример: Чтобы ввести букву «h», нажмите кнопку на панели набора дважды. При
вводе текста все доступные символы для нажимаемой кнопки и выбранный символ
отображаются ненадолго.
Сводная таблица символов (зависит от текущих языковых
настроек)
1 Специальные символы (не в режиме 123)
2 Пробел
3 Расширенные символы
4 Переключение между строчными и прописными буквами и вводом чисел

Многофункциональные клавиши:
Функция при наборе текста
Печать специальных
символов
Отключение звонка → страница 119
Переключение между
заглавными и строчными
буквами и цифровым вводом
Активация блокировки телефона → страница
125
Печать специальных
символов (не в режиме 123)
Буквенная маркировка на кнопках также применяется при вводе «красивых» телефонных
номеров (буквы связаны с цифрами номера телефона, как указано в написании номера,
например, 0700-PATTERN = 0700 – 687837).
Текстовый редактор
Дополнительные опции доступны в текстовом редакторе. Он используется при
программировании назначения переадресации, к примеру. Здесь вы можете, например,
свободно перемещать курсор и копировать или вставлять текст.
Вы можете выбрать дальнейшие функции редактора при помощи навигатора и
подтвердить каждую кнопкой :
ОК: Применяет изменения и закрывает редактор
Delete (Удалить): Удаляет символы справа налево
Cancel (Отменить): Сбрасывает изменения и выходит из редактора
Mode (Режим) (для переключения может также использоваться #):
— 123: Только цифры
— АБВ: Только заглавные буквы
— Абв: Первая буква заглавная, последующие буквы строчные
— абв: Только строчные буквы
Move cursor left (Переместить курсор влево): Перемещает курсор влево.
Move cursor right (Переместить курсор вправо): Перемещает курсор вправо.
Copy (Копировать): Копирует все содержимое в буфер обмена.
Paste (Вставить): Вставляет все содержимое из буфера обмена в положении курсора.
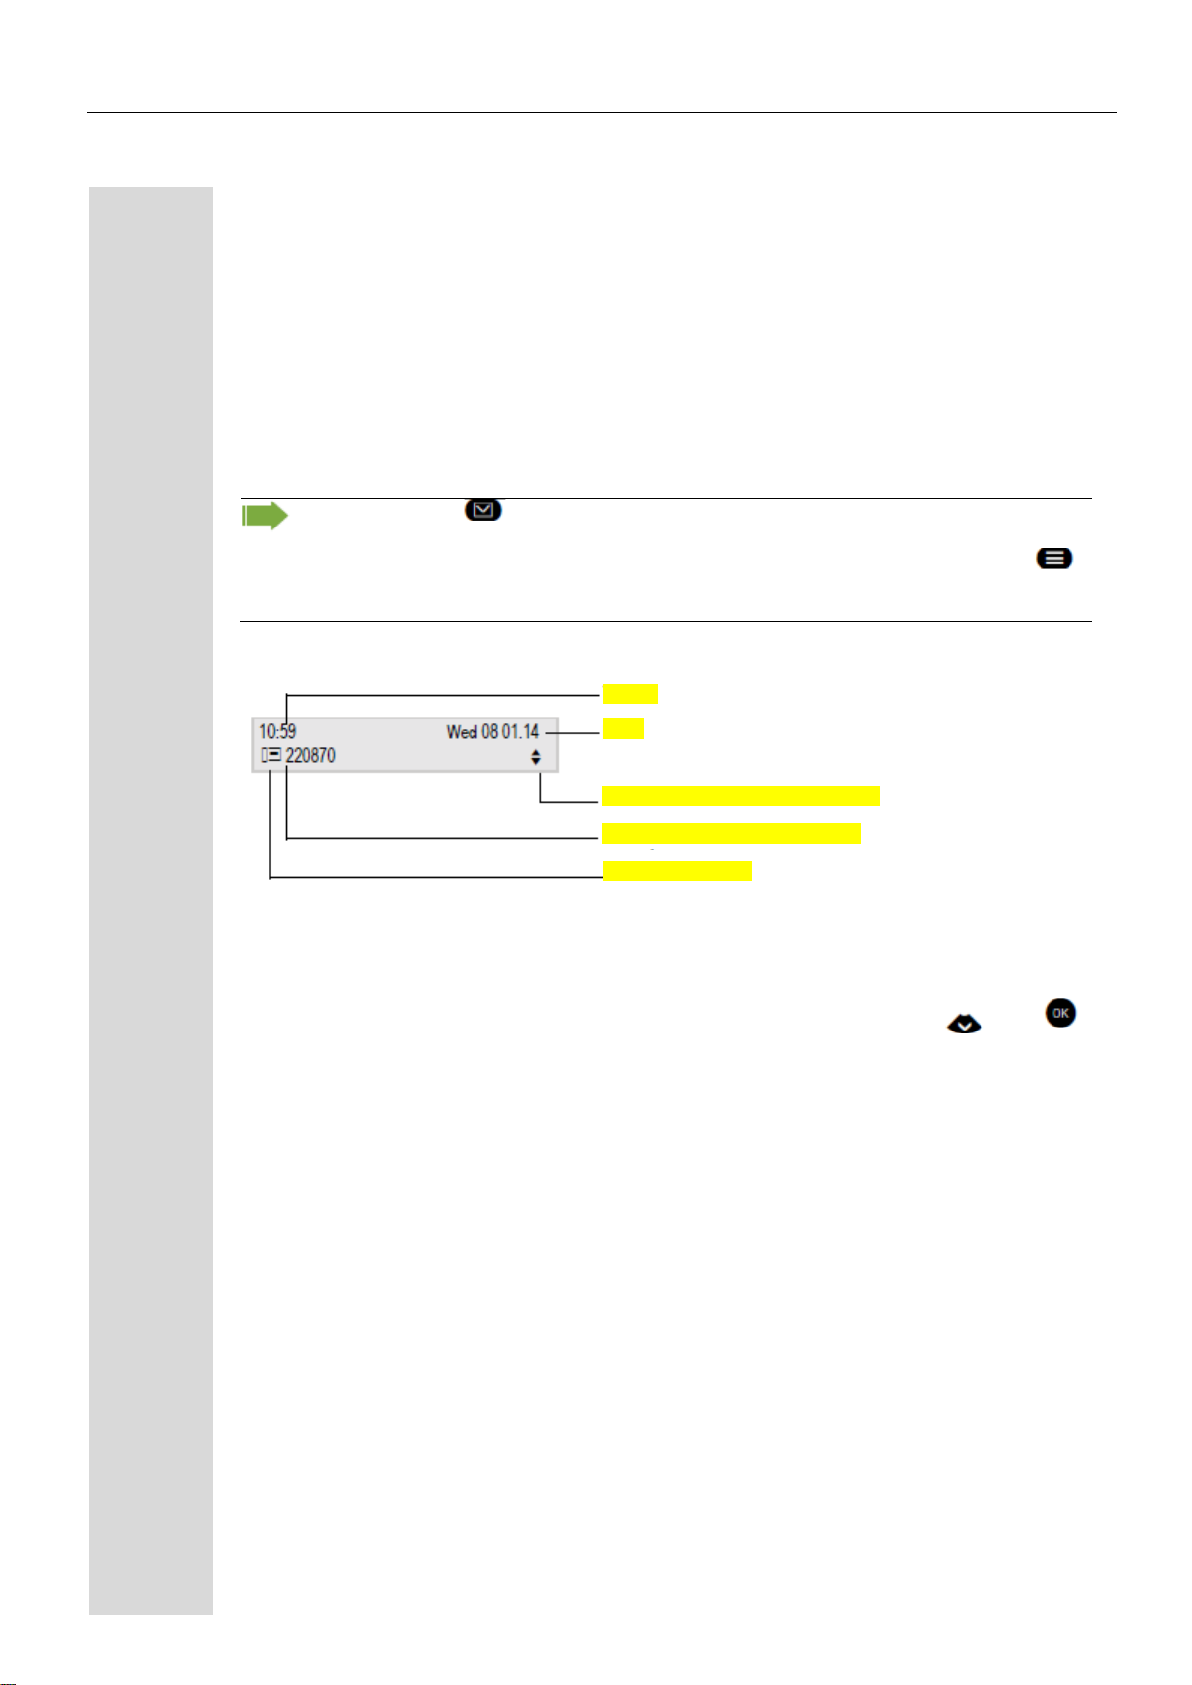
Дисплей
Ваш настольный телефон OpenScape CP200 оснащен черно-белым ЖК дисплеем.
Отрегулируйте контрастность в соответствии с Вашими потребностями (→ страница 132).
Режим ожидания
Если нет никаких вызовов, и не осуществляется настройка телефона, настольный телефон
OpenScape CP200 находится в режиме ожидания.
Нажмите кнопку , чтобы вернуться, например, к экрану в режиме ожидания из
списка вызовов (→ страница 22). На экран режима ожидания можно выйти снова
через меню Программы/Обслуживание (→ страница 24) при помощи кнопки .
Вы также можете настроить клавишу «Показать экран телефона» для обоих этих
случаев (см. → страница 62), чтобы снова выйти на экран режима ожидания.
Пример:
Меню режима ожидания
Меню режима ожидания открывается при нажатии кнопок навигации или в
режиме ожидания → страница 15. Здесь Вы можете вызвать различные функции. Записи
могут быть разными.
В меню режима ожидания могут быть следующие записи:
Повторный набор х?
Отключить звонок?
Включить режим «Не беспокоить»?
Выполнить вход в телефон?
Отменить обратные вызовы?
Прямой перхват
Назад?
Открыть меню режима ожидания
Собственный номер телефона
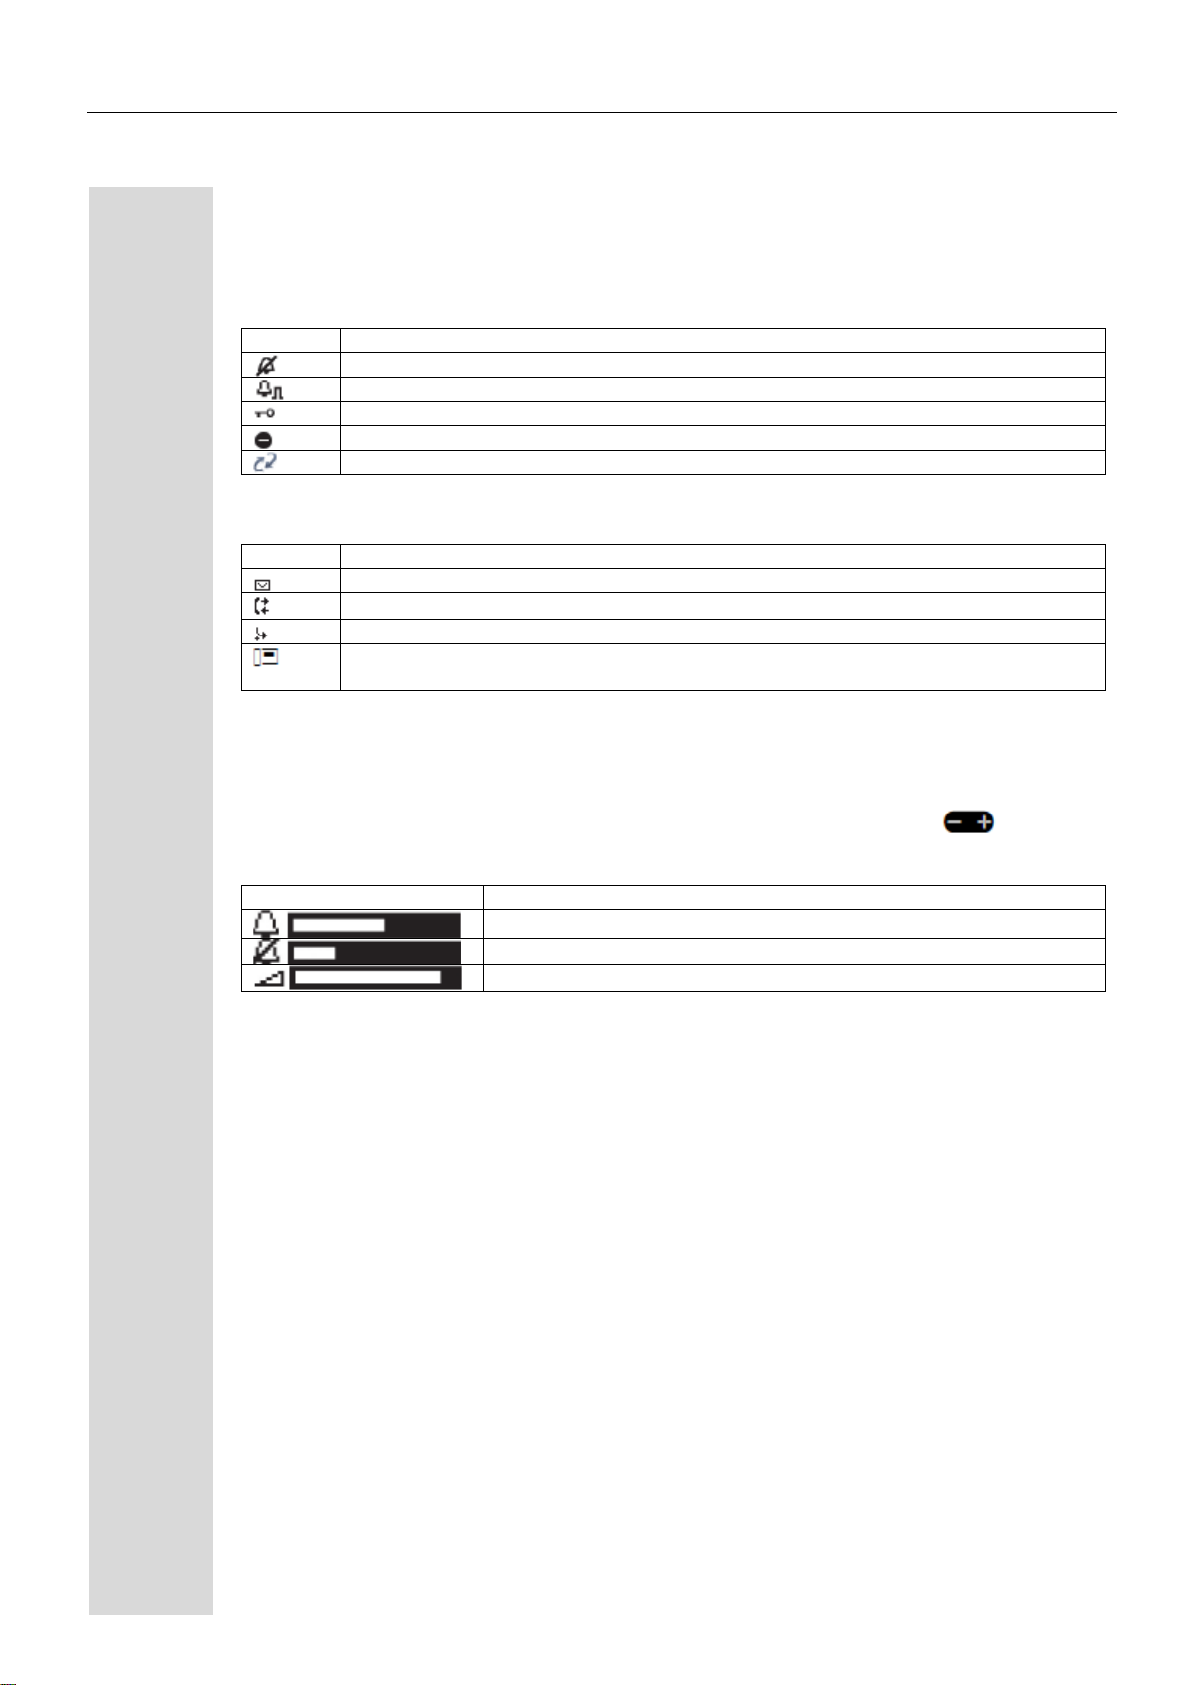
Значки дисплея в режиме ожидания
В первой линии отображаются время, день недели и дата, помимо значков для различных
ситуаций и опций:
Звонок установлен на сигнал.
Активирована функция «Не беспокоить».
Временный пользователь зарегистрирован на телефоне.
Ваше внимание могут привлечь события во второй строке:
Вы получили новое голосовое сообщение.
В список вызовов были добавлены новые записи.
Переадресация вызовов активирована.
Справочный значок перед собственным номером телефона (заменяется,
например, на переадресацию вызовов или значок мобильности).
Отображение строки состояния для регулировки громкости
При регулировке громкости звонка, трубки и динамика при помощи кнопки , Вы
увидите следующее изображение в строке состояния:
Громкость звонка в 10-ти уровнях
Громкость звонка в 10-ти уровнях, звонок отключен
Громкость трубки или динамика в 10-ти уровнях
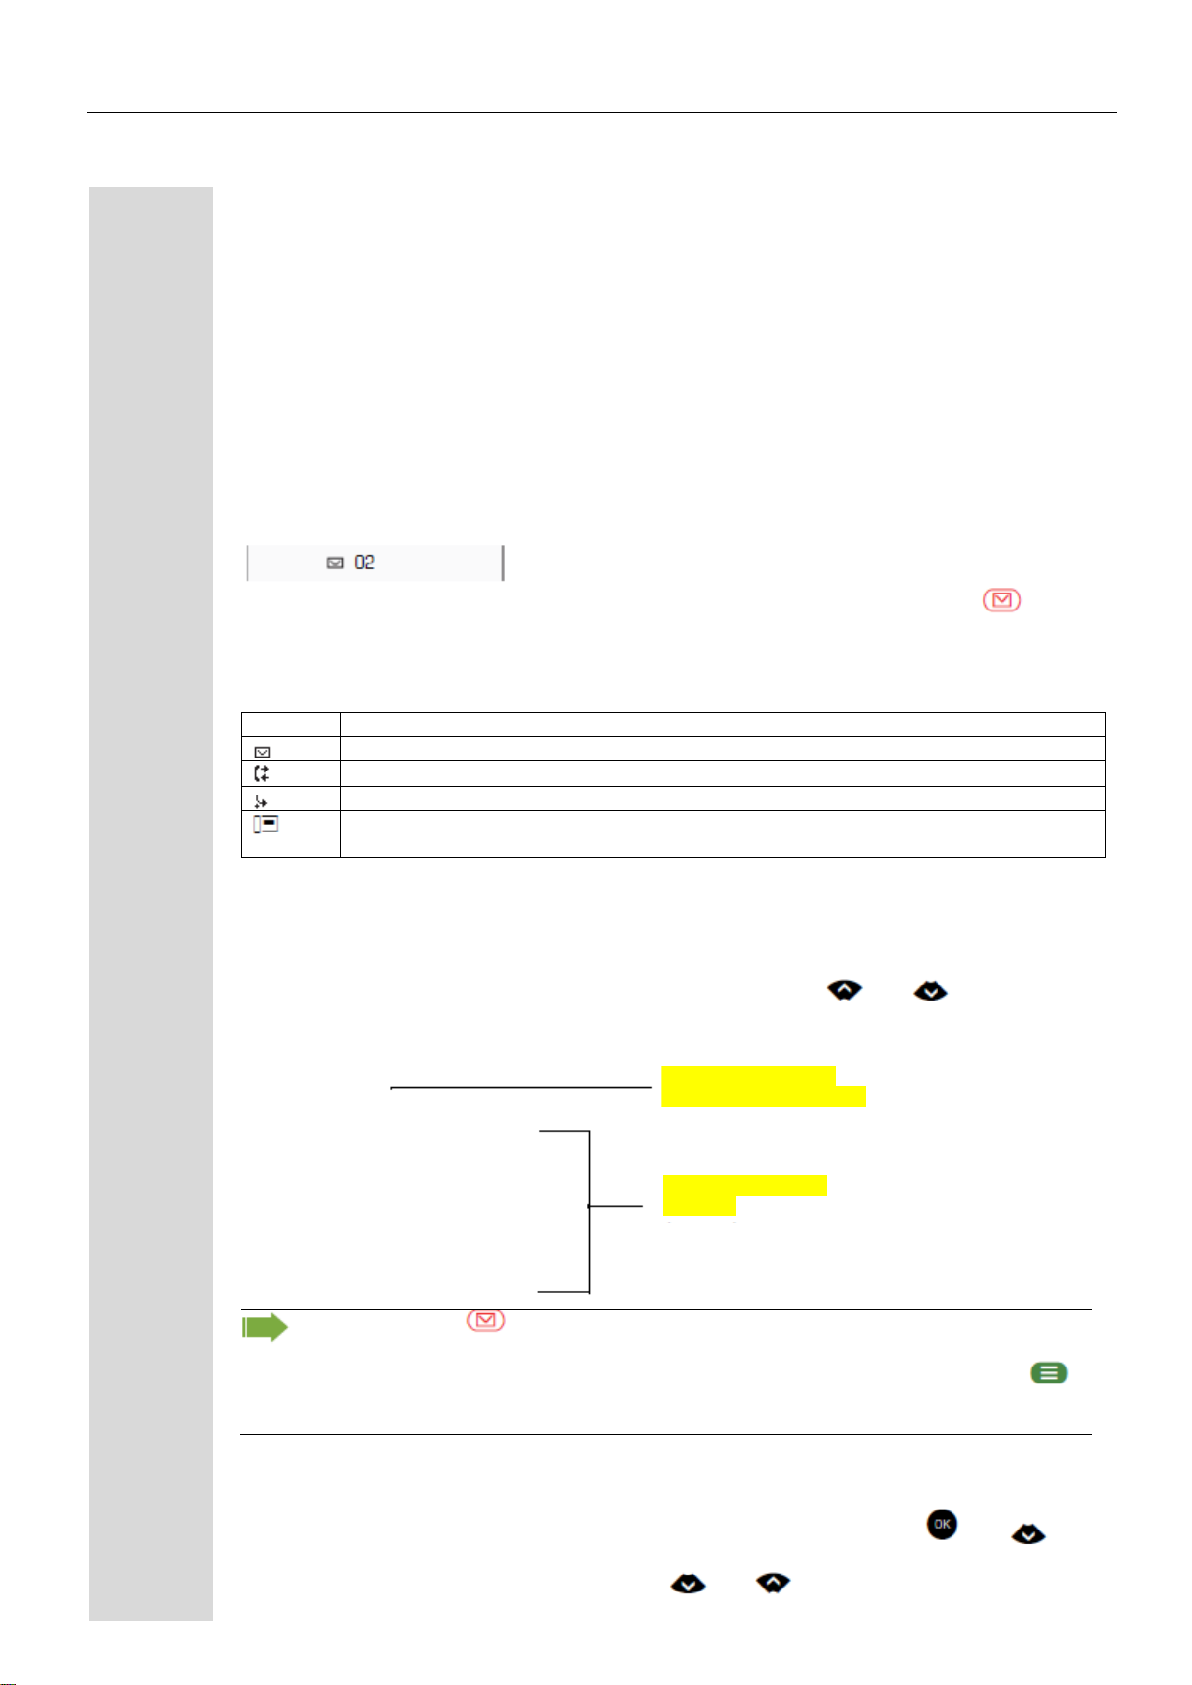
Изображения экрана, зависящие от содержания
В зависимости от ситуации, на графическом дисплее Вашего Настольного телефона
OpenScape CP200 будет отображаться разное содержание, на которое можно ответить
интуитивно.
Информация о текущих событиях
Следующие значки появляются по центру дисплея, когда телефон находится в режиме
ожидания, и обращают Ваше внимание на текущие свойства или события.
Пример: Вы пропустили два вызова за время отсутствия.
У Вас два новых голосовых сообщения, которые можно открыть, нажав кнопку →
страница 23.
Значки для событий
Вы получили новое голосовое сообщение.
В список вызовов были добавлены новые записи.
Переадресация вызовов активирована.
Значок состояния перед собственным номером телефона (заменяется,
например, на переадресацию вызовов или значок мобильности).
Контекстное меню
Если около записи во второй строке появляется стрелка, доступно контекстное меню,
опции которого можно выбрать при помощи кнопок навигации или (→ страница
15). Диапазон доступных функций зависит от ситуации.
Нажмите кнопку , чтобы вернуться назад, например, к интерфейсу телефона
из списка вызовов (→ страница 22). В интерфейс телефона можно зайти снова из
меню Программа/Обслуживание (→ страница 24) при помощи клавиши .
Однако Вы можете настроить клавишу «Показать экран телефона» для обоих
случаев (→ страница 62), чтобы снова выйти на экран интерфейса телефона.
Контекстное меню в режиме ожидания
Вы получаете следующие функции (если они активны) нажатием кнопок или .
Текущая функция отображается во второй строке экрана. Другие функции скрыты и могут
быть выбраны при помощи кнопок навигации или .
Первая запись меню
(выбранная при вызове)
Другие опции меню
(скрыты)
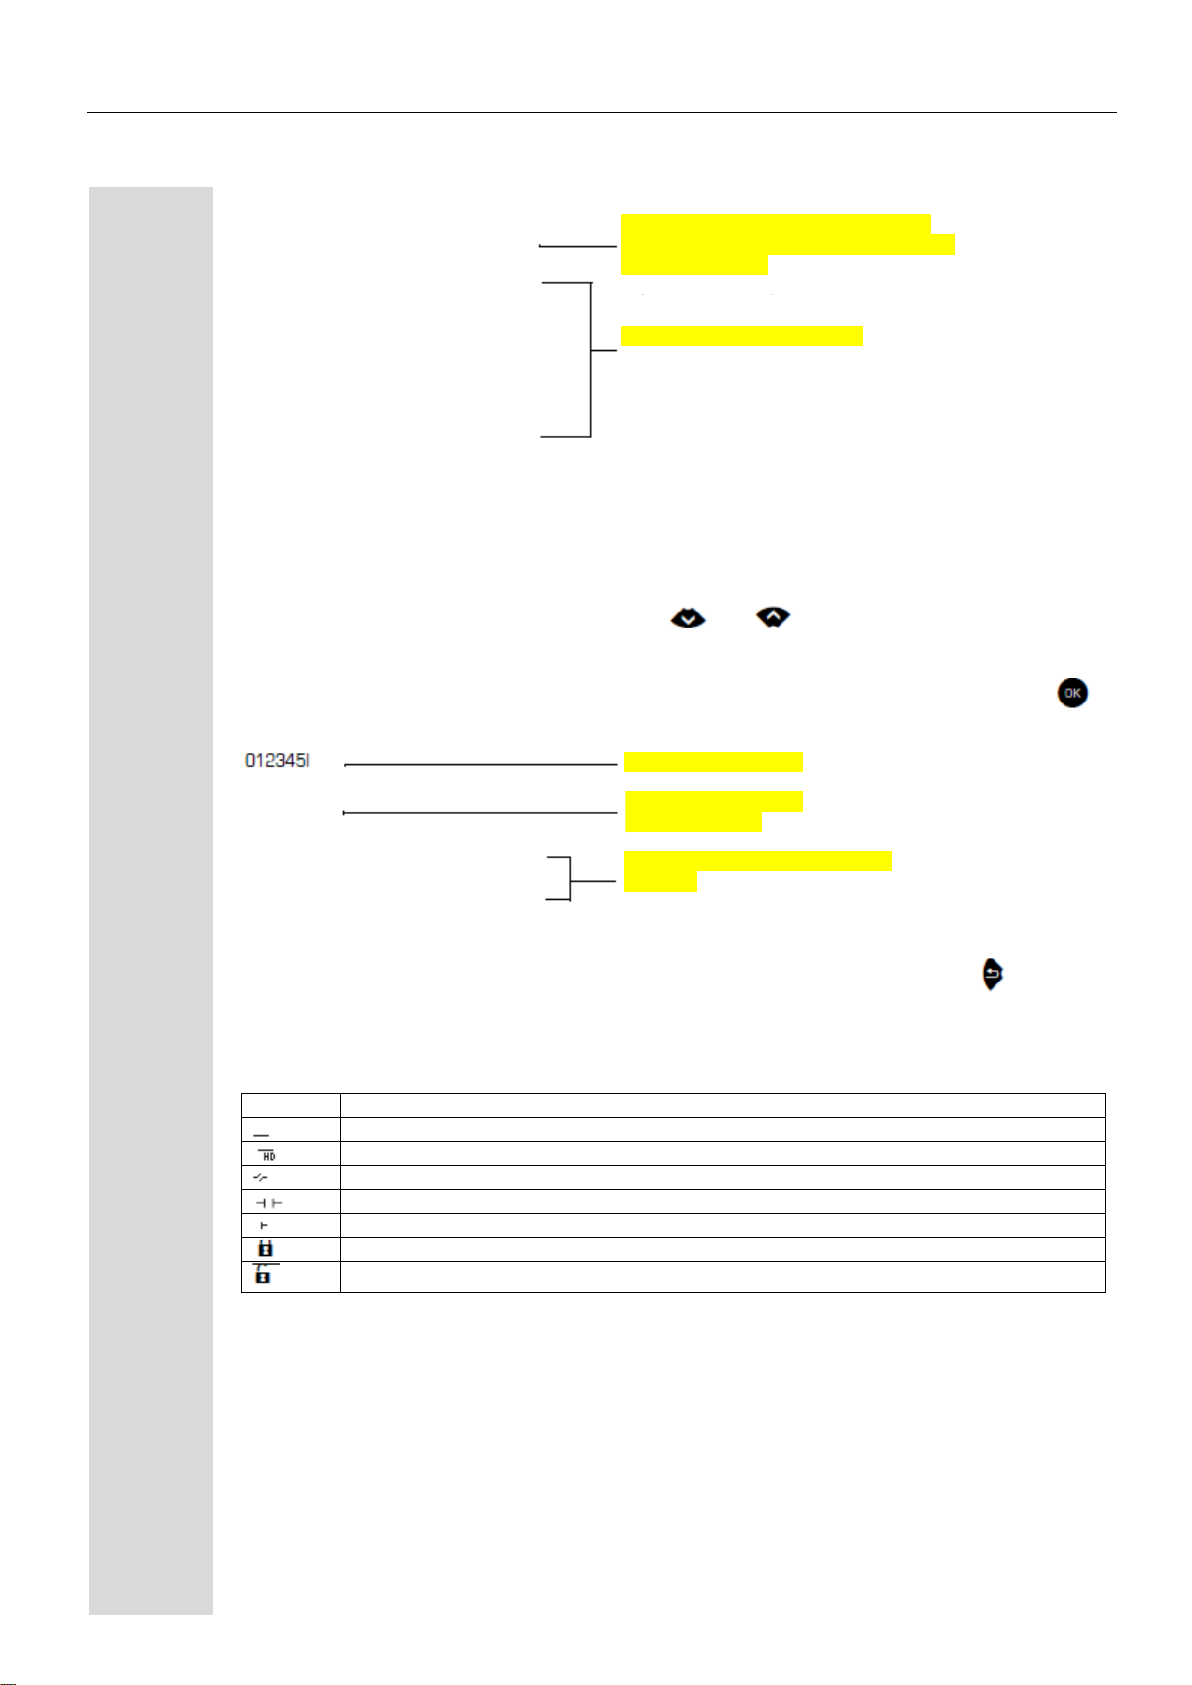
Функции в процессе вызова
Во многих рабочих ситуациях Вам будут предложены соответствующие функции или
справки во второй строке экрана. Другие доступные функции остаются скрытыми и могут
быть выбраны при помощи кнопок навигации или .
Пример: Вы начинаете звонок-консультацию. Во второй строке отображается первая из
трех зависимых функций. Найдите соответствующую функцию и подтвердите кнопкой .
Меню с функциями закрывается автоматически после того, как Вы выполнили действие.
Чтобы удалить сообщения, содержащие только информацию, нажмите кнопку .
Значки в процессе вызова
Высококачественное голосовое соединение (G.722).
Вы поставили вызов на удержание (например, для консультации).
Ваш собеседник поставил вызов на удержание.
Голосовое соединение защищено.
Голосовое соединение незащищено.
Голосовая почта
Если настроена (свяжитесь с администратором), эта функция дает Вам доступ к системе
почтового ящика, например, HiPath Xpressions.
Если Ваша система настроена должным образом, активация данной функции откроет меню
для голосовых сообщений → страница 36.
Первая запись (выбранная, когда вы
вызываете меню, если Вы уже набрали
номер телефона)
Другие опции меню (скрыты)
Первая линия экрана
Вторая линия экрана
(текущая опция)
Прочие возможные опции меню
(скрыты)
ВЫКЛЮЧИТЬ РЕЖИМ «НЕ БЕСПОКОИТЬ»

Регистрация вызовов
Следующие списки вызовов хранятся в разделе Регистрация вызовов, и могут быть
найдены при помощи функциональной клавиши «Вызовы» (→ страница 16):
Пропущенные (х)? Пропущенные вызовы
Набранные (х): Набранные номера (с соединением или без соединения)
Принятые (х): Отвеченные вызовы
Переадресованные (х): Переадресованные вызовы
Количество пропущенных вызовов и непроверенных вызовов отображается на дисплее в
режиме ожидания. Пропущенные вызовы не сохраняются и не отображаются, если
Регистрация вызовов отключена → страница 104.
Функция регистрации вызовов должна быть активирована, чтобы отображать
списки вызовов → страница 104. Регистрация вызовов также должна быть
активна для функции повторного набора последнего номера. Если регистрация
вызовов отключена, при нажатии функциональной клавиши будет отображаться
сообщение «Функция клавиши недоступна».
В каждом списке вызовов может содержаться до 30 записей. При достижении предела
самые старые записи в списке перезаписываются. Несколько вызовов с одного номера
показываются в списке только один раз.
Следующие данные сохраняются, например, для пропущенных вызовов:
Номер телефона/имя, в зависимости от доступных данных
Количество попыток вызова
Время последней попытки вызова, для каждого звонящего в списке, относительно
текущего дня, в ином случае – дата последней попытки вызова.
Администратор может произвести особые настройки для пропущенных вызовов. Для
обозначения новых пропущенных вызовов,
Светодиод функциональной клавиши мигает или
Загорается дисплей или
Светодиод функциональной клавиши мигает и загорается светодиод сигнала
Вы также получаете сообщение на дисплее
Записи можно сохранить только в том случае, если идентификатор звонящего
отображается как имя, номер или и то, и другое. Если идентификатор звонящего не
передается, вызов сохраняется как «Неизвестный».
Вы можете удалить все записи в соответствующем списке вызовов → страница 103. После
выбора записи, Вы можете мгновенно набрать этот номер, подтвердив его → страница 89.
Дополнительные примечания по регистрации вызовов
О пропущенных вызовах не оповещается, если регистрация вызовов отключена →
страница 104.
Если пропущенные вызовы для данного соединения были приняты другими
абонентами, эти вызовы не появятся в списке Пропущенные (х), или будут отмечены в
соответствии с настройками регистрации вызовов → страница 105.
Переадресованные вызовы всех типов регистрируются в списке «Переадресованные
(х)», а не в списке «Пропущенные (х)». Это не зависит от того, как определен параметр
для пропущенных вызовов.

Настройки
Нажмите кнопку , чтобы открыть меню Настройки.
Пользователя
Администратора
Пользователь
Опции настроек, представленные здесь, позволяют Вам настроить телефон в соответствии
с Вашими индивидуальными требованиями.
Администратор
После ввода пароля администратора, данное меню становится доступным для
соответствующего администратора.
Вы можете использовать кнопки навигации для переключения между меню, как описано на
→ странице 15.
Телефонные книги
Нажмите функциональную клавишу под надписью Телефонные книги, чтобы открыть
телефонную книгу. В данном меню содержатся следующие записи:
Личная
Вы можете создать собственную местную телефонную книгу в разделе Личная,
содержащую до 100 записей → страница 96. Данные для абонента включают фамилию,
имя и номер телефона.
Корпоративная телефонная книга
Если у вас есть возможность пользоваться корпоративным каталогом, вы можете
использовать функциональную клавишу телефонной книги и клавишу для поиска
абонентов → страница 99. Необходимым условием для этого является настройка
соответствующего доступа вашим администратором. Вы можете настроить отдельную
функциональную клавишу для открытия корпоративного каталога.

Настройки пользователя
В меню Пользователь (см. → страница 168) расположены опции настроек, позволяющие
вам настроить телефон в соответствии с вашими требованиями.
Выберите меню при помощи кнопок навигации:
«Дата и время» → страница 133
«Звуки» → страница 137
«Настройка» , например, → страница 121 или → страница 70
«Телефон» → страница 132
«Местоположение» → страница 137
«Безопасность» → страница 122 или → страница 125
«Информация сети» → страница 147
«Диагностическая информация» → страница 157
«Сброс» → страница 148
Если Вы находитесь в одном из этих меню или подменю, в зависимости от ситуации, у вас
есть следующие варианты выхода из меню:
Сохранить и выйти (если вы совершили настройку и хотите сохранить ее)
Выйти (отменить изменения) (если вы произвели настройку, которую не хотите в
итоге использовать, или если вы не хотите выбрать ни одну из опций)
Назад (если вы хотите выйти из главного меню или подменю)
Нажмите и удерживайте клавишу для выхода из текущего уровня меню.
Вы можете выйти из меню, нажав клавишу , и вернуться в режим ожидания →
страница 19.
Прерывание редактирования в меню
Вы можете прервать редактирование в меню, например, чтобы позвонить кому-то или
ответить на звонок. Нажав клавишу , вы вернетесь в тот раздел меню, из которого
вышли.
Однако, это возможно только в течение ограниченного периода времени, который задается
администратором при помощи настройки времени неактивности. Если заданное время
прошло, вам потребуется заново ввести ваш пароль при открытии меню и вручную перейти
в нужный раздел меню.
Прерывание редактирования:
Нажатием клавиши вы прерываете редактирование, выходите из меню и
возвращаетесь в режим ожидания → страница 19.
Если вы получаете вызов в процессе редактирования и отвечаете на него, вы
автоматически меняете экран вызова (см. также → страница 22)
Чтобы вернуться в режим редактирования в меню, снова нажмите клавишу .

Информация о сети
Информация об IP-адресе или имени, присвоенному телефону в сети, и, следовательно,
HTML-адрес веб-интерфейса.
Информацию о телефоне см. → страница 147.
Для получения дополнительных данных о значениях информации сети,
перечисленных здесь, свяжитесь с администратором.
Диагностические данные
Предоставляет информацию по всем важным настройкам телефона. Может оказать
значительную помощь в сложных ситуациях → страница 157.
Сброс телефона
Персональные настройки, произведенные через меню телефона или веб-интерфейс,
можно сбросить до заводских настроек → страница 148.
Функции управления и мониторинга
Функцию управления или мониторинга можно активировать на Вашем телефоне в целях
удаленного технического обслуживания.
Функция управления
Ваш администратор может активировать или деактивировать функции телефона через
удаленное обслуживание. В процессе технического обслуживания трубка, микрофон,
громкоговоритель и наушники не активны. Вы дополнительно получите уведомление на
дисплее о том, что функция управления активна.
Функция мониторинга
Чтобы определить неисправность в телефоне, к примеру, ваш администратор может
установить функцию мониторинга. Вы можете пользоваться телефоном как обычно в
процессе мониторинга. Однако сначала Вы получите уведомление об операции через
сообщение на дисплее и запрос на разрешение мониторинга.
Если Ваш администратор активировал функцию на вашем телефоне, который постоянно
передает технические данные на сервер, вы увидите мигающий значок в верхней
строчке дисплея.
Активация тестового вызова
В случае проблем с соединением с конкретным направлением, администратор может
попросить Вас ввести код активации перед номером абонента, который может
использоваться для запуска отслеживания данных вызова на телефоне. Код активации,
который Вам предоставит администратор, начинающийся со звездочки с последующими
тремя цифрами и решеткой в конце, необходимо вводить перед фактическим номером
телефона. В конце вызова данные, связанные с вызовом посылаются для дальнейшего
анализа на сервер системы передачи данных, который затем передает их «Менеджеру
OpenScape Voice Trace»
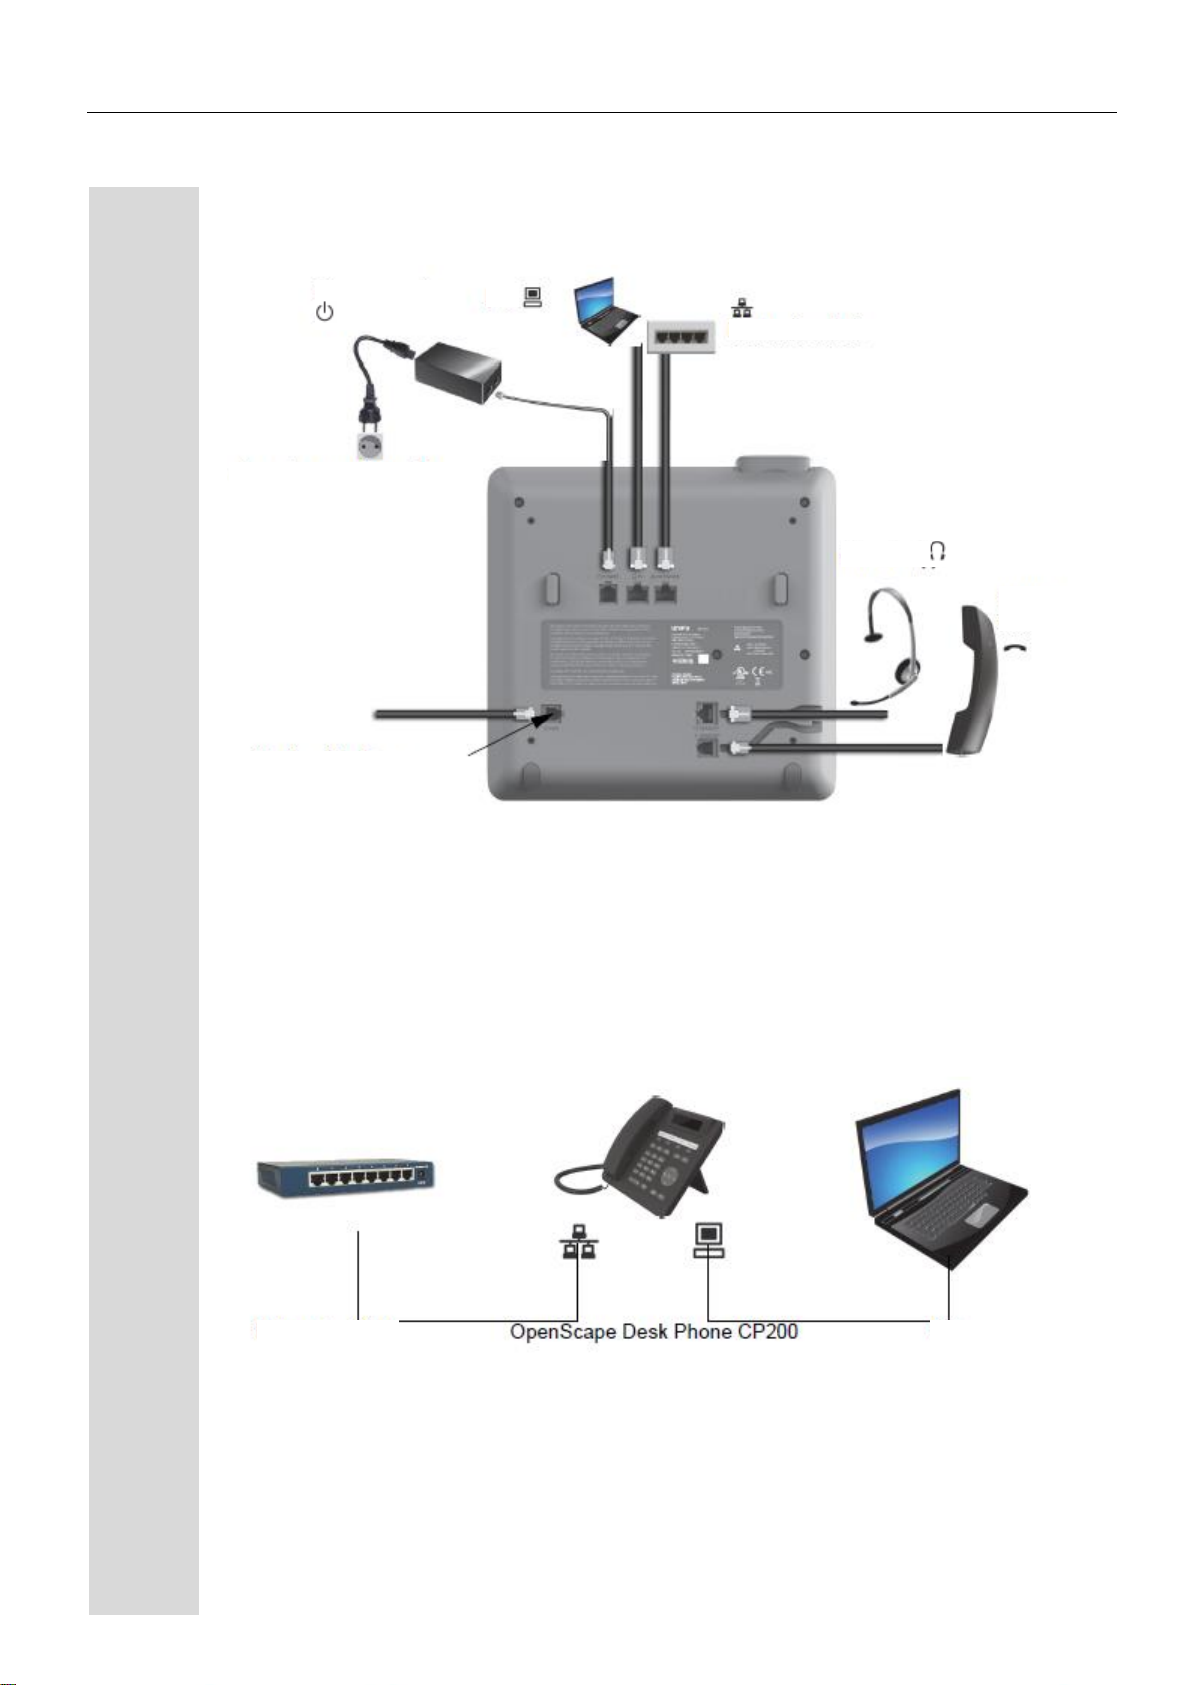
Разъемы на нижней стороне телефона
Более эффективное использование сетевых портов
Настольный телефон OpenScape CP200 имеет встроенный коммутатор Ethernet. Это
означает, что Вы также можете подключить ПК через порт LAN напрямую к порту LAN через
телефон. Возможность подключения телефона и ПК должен сначала активировать на
телефоне Ваш администратор
Использование этого варианта подключения позволяет освободить один сетевой порт для
каждого используемого коммутатора и уменьшить длину сетевых кабелей, при правильном
подключении.
Кабель, специфический для
страны
Трубка
Служебный интерфейс

если необходимо
или
если необходимо
Пожалуйста, внимательно прочитайте вводные главы
«Знакомство с Вашим OpenScape CP200» → страница 13 перед
выполнением с Вашим телефоном каких-либо шагов, описанных
далее.
Принятие вызова
Телефон звонит, если звонок включен. Светодиодный индикатор также
мигает. При передаче информация о вызывающем абоненте (имя, номер
телефона) появляется на дисплее.
Если Вы установили мелодию → страница 138 или звонок →
страница 116 на Вашем телефоне, возможно, Ваш администратор
установил по умолчанию другой сигнал, в зависимости от типа
вызова (например, внешний или внутренний вызов).
Любые настройки, которые в этот момент осуществляются на
телефоне, будут прерваны входящим вызовом. Вы можете
использовать кнопку в любой момент, чтобы вернуться в ту
точку структуры меню, где Вы были прерваны, если не истек
период действия пароля.
Принятие вызова при помощи трубки
Телефон звонит. Звонящий отображен на экране.
Если номер телефона хранится в памяти местного телефона,
присвоенное ему имя отображается на экране (должно быть
активировано администратором).
Поднимите трубку.
Отрегулируйте громкость вызова.
Принятие вызова при помощи громкой связи
Телефон звонит. Звонящий отображен на экране.
Клавиша мигает зеленым.
Подтвердите указанную опцию.
Клавиша загорится зеленым цветом.
Нажмите указанную кнопку. Кнопка загорится. Режим громкой связи
активирован.
Отрегулируйте громкость вызова.
Предложения по использованию громкой связи
Отрегулируйте громкость вызова при активном режиме громкой связи.
Оптимальное расстояние между пользователем и динамиком
телефона составляет 50 см.
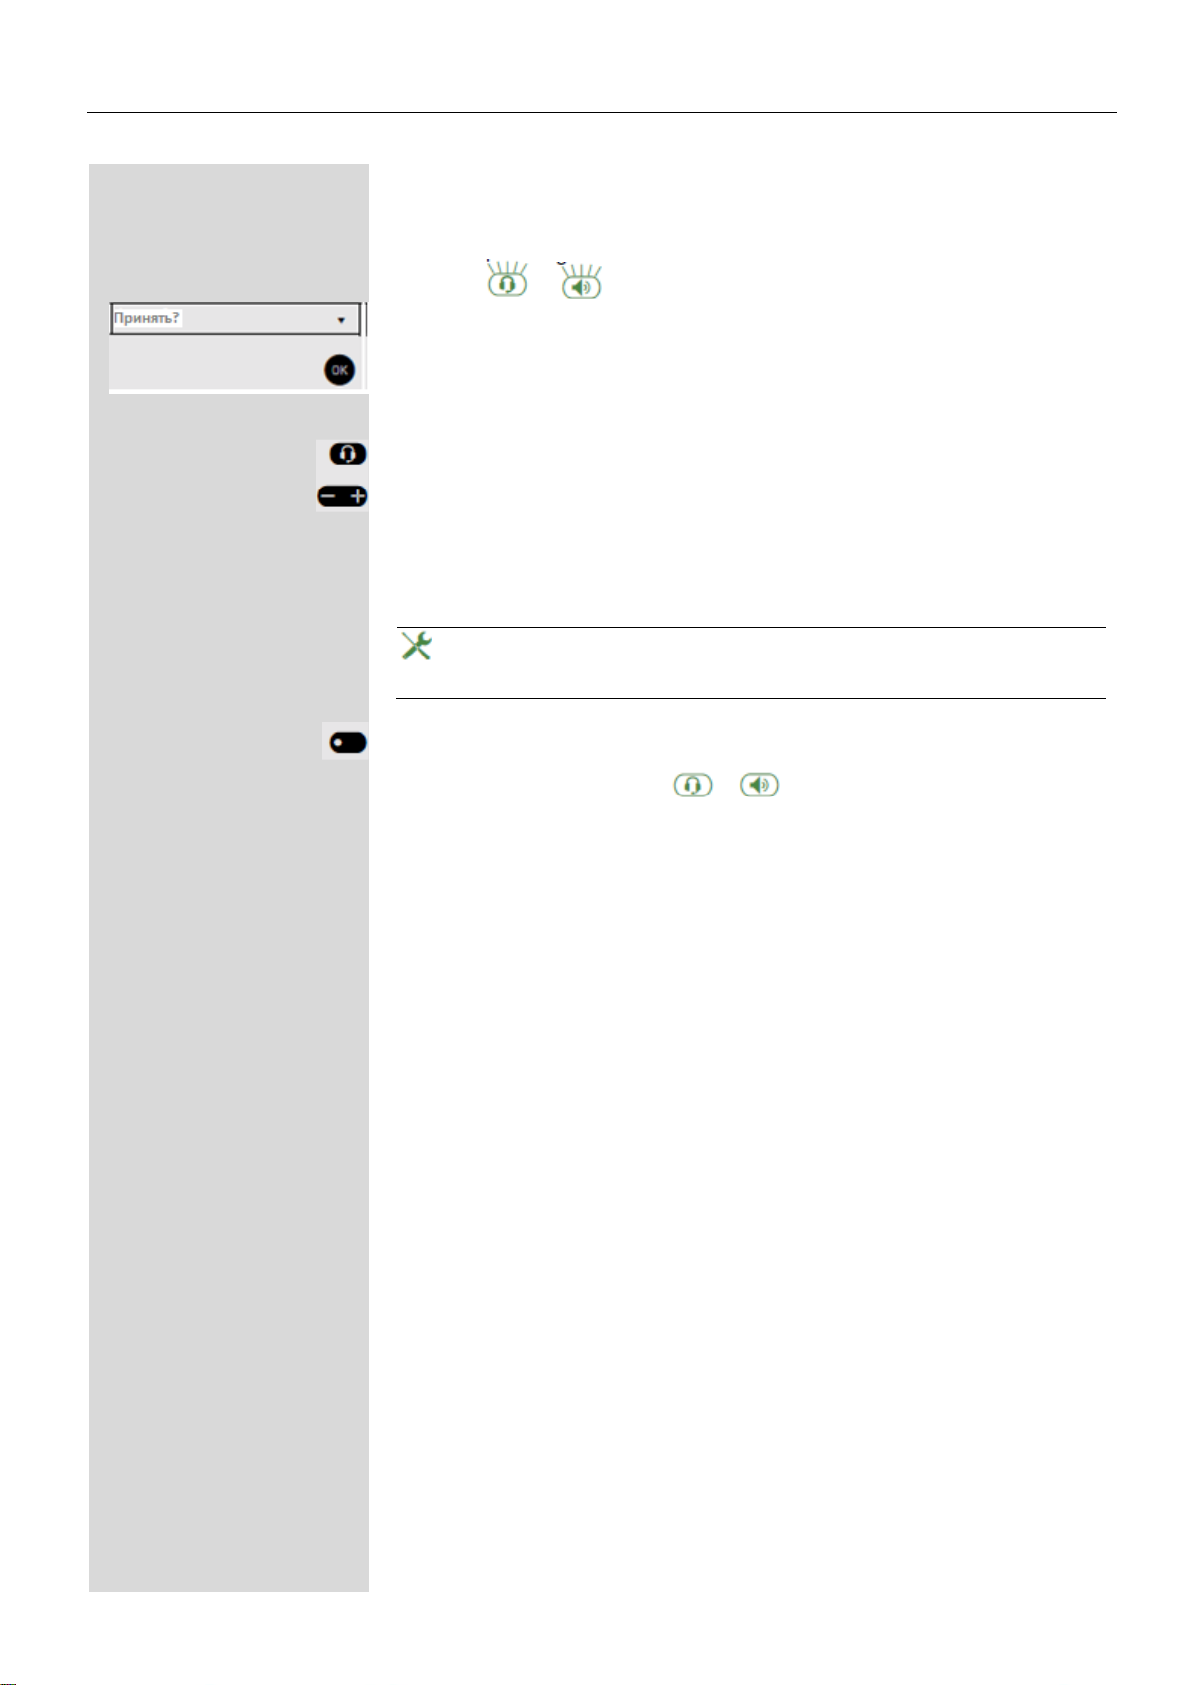
Принятие вызова при помощи наушников
Телефон звонит. Звонящий отображен на экране.
Клавиши и мигают зеленым.
Подтвердите указанную опцию.
Нажмите указанную клавишу. Клавиша загорится. Наушники
активированы.
Отрегулируйте громкость вызова.
Автоматический ответ на вызов через наушники
Администратор дополнительно настроил клавишу для функции
«Авто-наушники» (тональный сигнал усовершенствованной
системы внутренней связи) (→ страница 62).
Нажмите функциональную клавишу «Авто-наушники», чтобы активировать
автоматический ответ на вызовы.
Загорятся зеленым клавиши и .
В наушниках будет слышен короткий звуковой сигнал о вызове, и будет
установлено соединение.
Если Вы хотите снова вручную отвечать на вызовы, отключите функцию
автоматического ответа при помощи клавиши «Авто-наушники». Обе
кнопки погаснут.
Loading…
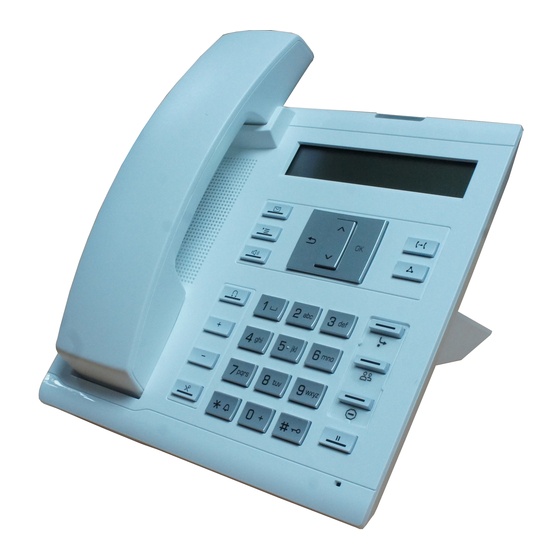
-
Contents
-
Table of Contents
-
Troubleshooting
-
Bookmarks
Quick Links
OpenScape Desk Phone IP 35G SIP
OpenScape Desk Phone IP 35G Eco SIP
OpenScape Voice
User Guide
A31003-D3530-U106-2-7619
Need help?
Do you have a question about the OpenScape IP 35G SIP and is the answer not in the manual?
Questions and answers
Related Manuals for Unify OpenScape IP 35G SIP
Summary of Contents for Unify OpenScape IP 35G SIP
-
Page 1
OpenScape Desk Phone IP 35G SIP OpenScape Desk Phone IP 35G Eco SIP OpenScape Voice User Guide A31003-D3530-U106-2-7619… -
Page 2
Availability and technical specifications are subject to change without notice. Unify, OpenScape, OpenStage and HiPath are registered trademarks of Unify GmbH & Co. KG. All other company, brand, product and service names are trademarks or registered trademarks of their respective holders. -
Page 3: Important Information
Important information Important information For safety reasons, the telephone should only be supplied with power: • using the original power supply unit. Part number: L30250-F600-C14x (x: 1=EU, 2=UK, 3=US) or • in a LAN with PoE (Power over Ethernet) which complies with the IEEE 802.3af standard.
-
Page 4: Location Of The Telephone
An update action is indicated by messages on the display and/or by flashing LEDs. Product support on the Internet Information and support for our products can be found on the Internet at: http://www.unify.com/. Technical notes, current information about firmware updates, frequently asked questions and lots more can be found on the Internet at:…
-
Page 5: Table Of Contents
Contents Contents Important information ……. . . 3 Trademarks …………..3 Location of the telephone .
-
Page 6
Contents Ending a call …………. . . 38 Group call . -
Page 7
Contents Using programmed keys …………75 Example 1: Calling saved number . -
Page 8
Contents During calls …………..121 Making and receiving calls on a single line . -
Page 9
Contents Using abbreviated dialling ……….. . . 151 Call tracing . -
Page 10
Contents Setting the language and country ……….181 Selecting a language . -
Page 11: General Information
General information General information About this manual This document contains general descriptions of the technical options, which may not always be available in individual cases. The respective features must therefore be individually defined in the terms of the contract. If a particular function on your phone is not available to you, this may be due to one of the following reasons: •…
-
Page 12: Service
General information Service The service department of Unify GmbH & Co. KG can only help you if you experience problems or defects with the phone. Should you have any questions regarding operation, your specialist re- tailer or network administrator will gladly help you. For queries regarding connection of the tele- phone, please contact your network provider.
-
Page 13: Getting To Know Your Openscape Desk Phone Ip 35G/35G Eco
Getting to know your OpenScape Desk Phone IP 35G/35G Eco Getting to know your OpenScape Desk Phone IP 35G/35G Eco The following sections describe the most frequently used operating elements and the displays on your OpenScape Desk Phone IP 35G/35G Eco. The user interface of your OpenScape Desk Phone IP 35G/35G Eco…
-
Page 14
Getting to know your OpenScape Desk Phone IP 35G/35G Eco With the Handset, the user can pick up and conduct calls in the usual manner. The Display provides intuitive support for telephone operation and allows the user to con- trol the phone settings via the local User menu (the display offers two lines with up to 33 characters each). -
Page 15: Navigation Keys
Getting to know your OpenScape Desk Phone IP 35G/35G Eco Navigation keys These are used to manage most of your phone’s functions and display. Function when key is pressed In lists and menus: • One level back Entry selected: • Cancel action In input fields: •…
-
Page 16: Trunk Keys (On Multi-Line Phones Only)
Getting to know your OpenScape Desk Phone IP 35G/35G Eco Meaning of LED displays on function keys Meaning of function key The function is deactivated. Flash- Indicates the function status. The function is activated. In this manual, flashing keys are identified by this icon, regardless of the flashing interval. The flashing interval repre- sents different statuses, which are described in detail in the corresponding sections of the manual.
-
Page 17
Getting to know your OpenScape Desk Phone IP 35G/35G Eco Line utilisation • Private line: A line that is used by a single telephone. This line cannot be used as a secondary line by another telephone. • Shared line: A line that is configured on multiple telephones. The line status is displayed for all telephones that share this line. -
Page 18: Keypad
Getting to know your OpenScape Desk Phone IP 35G/35G Eco Keypad You can only use the digits 1 to 9 and 0 as well as the * and # characters when dialling a number. To delete digits press In situations where text input is possible, for example, when entering the user password, you can also use the dial keys to enter text in addition to the digits and special characters mentioned.
-
Page 19
Getting to know your OpenScape Desk Phone IP 35G/35G Eco Multi-function keys Function during text input Function when held down Write special characters. Deactivate/activate the ringtone Switch between upper and lower case Activate/deactivate the telephone lock. Write special characters (not in 123 mode) Alphabetic labeling of dial keys is also useful when entering vanity numbers (letters associated with the phone number’s digits as indicated on the telephone spell a name, e.g. -
Page 20: Display
Getting to know your OpenScape Desk Phone IP 35G/35G Eco Display Your OpenScape Desk Phone IP 35G/35G Eco comes with a black-and-white LCD display. Adjust the contrast to suit your needs ( Page 167). Idle mode If there are no calls taking place or settings being made, your OpenScape Desk Phone IP 35G/ 35G Eco is in idle mode.
-
Page 21
Getting to know your OpenScape Desk Phone IP 35G/35G Eco Icons in the idle display In the first line, the time, weekday and date are displayed in addition to icons for different situations and options: Icon Explanation The ringtone is deactivated. The phone lock is activated. -
Page 22: Context-Dependent Displays
Getting to know your OpenScape Desk Phone IP 35G/35G Eco Context-dependent displays Depending on the situation at hand, the display on your OpenScape Desk Phone IP 35G/35G Eco phone displays different content, to which you can respond intuitively. Information on actual events The following icons appear centered on the display when your phone is idle and signal current properties or events.
-
Page 23
Getting to know your OpenScape Desk Phone IP 35G/35G Eco Idle display context menu You receive the following functions (if activated) by pressing the navigation keys . The current funtion is displayed in the second display line. The other functions are hidden and can be selected using the navigation keys First entry (selected when you call up Redial {1} 1234… -
Page 24: Messages
Getting to know your OpenScape Desk Phone IP 35G/35G Eco Messages Entries in the call lists and messages in your mailbox system (if configured) are known as records. The LED on the Messages key flashes to signal new missed calls or messages Page 16.
-
Page 25: Additional Notes On Call Lists
Getting to know your OpenScape Desk Phone IP 35G/35G Eco You can delete all the entries in the respective call list Page 115. After selecting an entry, you can dial it immediately by confirming Page 98. Additional notes on call lists •…
-
Page 26: Program/Service Menu
Getting to know your OpenScape Desk Phone IP 35G/35G Eco Program/Service menu Press the Settings key to open the Program/Service menu. This menu contains the following en- tries: • Personal • Corporate • Settings – User – Admin Personal You can create your own local phonebook under Personal containing up to 100 entries Page 98.
-
Page 27: User Settings
Getting to know your OpenScape Desk Phone IP 35G/35G Eco User settings In the User menu (see Page 205), settings options are provided that allow you to adapt the tele- phone to your individual requirements. Select a menu using the navigation keys: •…
-
Page 28
Getting to know your OpenScape Desk Phone IP 35G/35G Eco Network information Information about the IP address or name which was assigned to the phone in the network and therefore the HTML address of the web interface. View information on the phone Page 185 … -
Page 29: Control And Monitoring Function
Getting to know your OpenScape Desk Phone IP 35G/35G Eco Control and monitoring function A control or monitoring function can be activated on your phone for service purposes by remote maintenance. Control function The administrator has the option to activate and deactivate features of the phone via remote main- tenance.
-
Page 30: Ports On The Underside Of The Phone
Getting to know your OpenScape Desk Phone IP 35G/35G Eco Ports on the underside of the phone Using network ports more efficiently OpenScape Desk Phone IP 35G/35G Eco has a built-in Ethernet switch. This means that you can also connect a PC with a Gigabit LAN connection to the LAN directly via the phone. The telephone- PC connection option must first be activated on the telephone by administrator.
-
Page 31: Basic Functions
Basic functions Basic functions Please read the introductory chapter «Getting to know your OpenScape Desk Phone IP 35G/35G Eco» Page 13 carefully before performing any of the steps described here on your phone. Secure voice transmission Prerequisite: The secure voice communication option must be activated by your administrator.
-
Page 32: Answering A Call
Basic functions Answering a call Your OpenScape Desk Phone IP 35G/35G Eco rings with the tone signal set when an incoming call is received. If transmitted, calling party information (name, phone number) appears on the display. If you have set a pattern melody Page 174 on your phone, it is possible …
-
Page 33: Answering A Call Via The Headset
Basic functions Suggestions for using speakerphone mode: • Tell the other party that speakerphone mode is active. • Adjust the call volume while speakerphone mode is active. • The ideal distance between the user and the phone in speakerphone mode is about 50 cm.
-
Page 34: Directed Pickup
Basic functions Directed pickup You can pick up a call signalled at an absent coworker’s phone. If a colleague has placed a call on hold on his multi-line phone you can also pick up this call. Accept call Prerequisite: You know the coworker’s internal phone number and the function is configured for you in OpenScape Voice.
-
Page 35: Picking Up The Held Call
Basic functions Picking up the held call Prerequisite: Your colleague has placed a call on hold on their multiline phone Page 122. You know the coworker’s internal phone number and the function is configured for you in OpenScape Voice. Select and confirm the option shown in the idle phone’s context menu.
-
Page 36: Switching From Handset To Speakerphone Mode
Basic functions Switching from handset to speakerphone mode Make note of the two different processes depending on the country setting. The default country setting is US. Activate, if necessary, your preferred setting Page 175. Prerequisite: You are conducting a call via the handset and the microphone and loudspeaker functions have been activated by administrator.
-
Page 37: Switching From Speakerphone Mode To The Handset
Basic functions Switching from speakerphone mode to the handset Prerequisite: You are conducting a call in speakerphone mode. Lift the handset. The Speaker LED goes out. Open listening You can let other people in the room join in on the call. Let the other party know that you have turned on the loudspeaker.
-
Page 38: Activating/Deactivating The Microphone
Basic functions Activating/deactivating the microphone To prevent the other party from listening in while you consult with someone in your office, you can temporarily switch off the handset microphone or the hands- free microphone. Prerequisite: You are conducting a call. Deactivating the microphone Mute Press the key shown.
-
Page 39: Group Call
Basic functions Group call Your administrator can incorporate multiple telephones in a call pickup group. If your telephone belongs to a pickup group, you can also accept calls intended for other members of the group. A group call is displayed on the phone. administrator may have made the follow- ing settings for signalling: Telephone status Ring on group call = Yes Ring on group call = No…
-
Page 40
Basic functions Picking up a group call with the call pickup key Prerequisite: The Call pickup key is configured (per default one of the program- mable function keys already is set to Pick up). Your administrator has set up the group call such that it is only displayed through flashing of the Pick up key. -
Page 41
Basic functions Picking up a group call The pop-up menu opens: Confirm. Pickup call? Lift the handset (only if the appropriate function is set by your administrator) Pick up Press the key with the «Call pickup» function or press it again if call answering was initiated via the key. -
Page 42: Listening To Voicemail
Basic functions Listening to voicemail To use this function, you need to have a voice mailbox set up on your communi- cation platform for voicemails (see Page 24). The Messages key flashes to indicate new messages and the F icon appears on the display.
-
Page 43: Call Control (2Nd Alert)
Basic functions Call control (2nd alert) To ensure that you do not miss any important calls, administrator can configure a key (2nd alert) that blinks when a call is waiting, for instance, when you are dialling a number or when two calls come in simultaneously. Call control does not work on multi-line phones Two calls simultaneously Prerequisite: The 2nd alert key is set up and «call waiting»…
-
Page 44: During Dialling
Basic functions During dialling Note that when you set up call control, the «Busy when dialling» Page 102 function will be disabled. The exception is if you dial a number during a Consult Page 48. Prerequisite: The «2nd alert» key is set up and «call waiting» is permitted Page 90).
-
Page 45: Making Calls
Basic functions Making calls If you selected the option «Busy When Dialling» Page 102, you will not be interrupted by an incoming call. In this case, the caller hears the busy signal. You can also use enhanced functions, such as call lists or the personal or cor- porate directory, in order to call a subscriber Page 98.
-
Page 46: On-Hook Dialling
Basic functions On-hook dialling The connection is set up with on-hook dialling via the loudspeaker (speaker- phone mode). Speaker Press the key shown. Enter the station number. If necessary correct input using the navigation keys Page 16. Press the key shown or wait until the dial delay expires (see Page 100).
-
Page 47: Immediate Dialling
Basic functions Immediate dialling Immediate dialling should only be activated if administrator has configured and approved a dial plan. Immediate dialling is deactivated by default. For this reason after entering the number you must either confirm the «Dial» option or wait until the dial delay ex- pires to set up the connection.
-
Page 48: Redial
Basic functions Redial You must have activated the call journal in order to use the call list. This also applies for redialling the last number dialled Page 116. If the call journal is disabled, you will be shown the message «Key function unavai- lable»…
-
Page 49: Ending A Consultation Call
Basic functions Confirm. Consult? Start conference Select and confirm the option shown in the context menu for the call connection Conference when you intend to set up a conference with the new participant. You can also use an already configured Conference key in this instance. Enter and confirm the second party’s phone number.
-
Page 50: Switching To The Held Party (Alternating)
Basic functions Switching to the held party (alternating) Prerequisite: You are conducting a consultation call Page 48 or have accept- ed a second call Page 87. Select and confirm the option shown. Alternate? In the first display line, the phone number or name and the duration of the active connection are displayed.
-
Page 51: Connecting Parties
Basic functions Connecting parties You can connect the first party with the party you consulted, clearing down your connection to both parties in the process. Prerequisite: You are conducting a consultation call Page 48 and call joining is allowed Page 51.
-
Page 52: Callback
Basic functions Callback You can request a callback if the station called is busy or if nobody answers. You receive the callback as soon as the other party’s line becomes free. This option is only available if both you and your administrator has activat- ed the function ( Page 54).
-
Page 53: Responding To A Callback
Basic functions Responding to a callback Prerequisite: A callback was requested. Your phone rings and the station infor- mation appears on the screen. Accepting a callback Select and confirm the option shown. Accept Rejecting a callback Prerequisite: The Reject function has been activated by administrator. Select and confirm the option shown.
-
Page 54: Permitting A Callback
Basic functions Permitting a callback Prerequisite: The Callback function has been activated by administrator. You can also configure this setting via the WBM interface Page 198. Settings Press the key shown. Select and confirm the option shown. Settings Confirm the option shown. User if nec.
-
Page 55: Calling Back Missed Calls
Basic functions Calling back missed calls Calls received while you are absent are indicated by a message on the idle dis- play ( Page 21). The Messages function key also illuminates if administrator has set the option to do this. Missed calls are logged in the missed calls list.
-
Page 56: Call Forwarding
Call forwarding Call forwarding Depending on the settings made by administrator, standard call forwarding may be configured for the phone or alternatively a forwarding call by type option that is supported by OpenScape Voice Page 62. Standard call forwarding You can forward calls for your phone to another phone.
-
Page 57: Activate Or Deactivate Immediate Forwarding
Call forwarding Activate or deactivate immediate forwarding Prerequisite: Ideally you have configured the Forward key for «Variable call for- warding» (see Page 74). Otherwise you have to configure the settings for call forwarding via the user menu ( Page 79). It is recommended to configure the …
-
Page 58: Saving Destination Phone Numbers For Call Forwarding
Call forwarding Saving destination phone numbers for call forwarding You can also enter the call forwarding settings via the user menu Page 79) or via the WBM interface Page 198. Forward Press the key shown. The pop-up menu opens: The message: «Set forward on to»…
-
Page 59: Copy And Insert Destination Phone Numbers
Call forwarding Copy and insert destination phone numbers The current destination phone number for a call forwarding type is copied. For example, the current destination phone number for Any Call should also become the current destination phone number for No reply ({1}s). Forward Press the key shown.
-
Page 60: Assign A Destination Phone Number For Call Forwarding
Call forwarding Assign a destination phone number for call forwarding Prerequisite: At least one destination phone number has already been saved. Forward Press the key shown. The pop-up menu opens: The message: «Set forward on to» is displayed with the last forwarding destination used and you are offered the following options: •…
-
Page 61: Defining The Ring Duration Before Call Forwarding On No Reply
Call forwarding Uncond’l: 3339 (deactivated is the default setting) Busy: 3335 No reply ({1}s): 3336 and confirm your selection. Here for example Uncond’l. Select and confirm the option shown. Call forwarding is activated. This type of Turn on: call forwarding is deactivated with Turn off.
-
Page 62: Call Forwarding By Call Type
Call forwarding Call forwarding by call type If use of system-assisted functions has been enabled by administrator and the Ext/int Forwardingfunction activated, call forwarding by cal type functionality will be available to you. Forwarding in this case is dependent on the forwarding type and additionally on the call type.
-
Page 63: Using Call Forwarding
Call forwarding Using call forwarding The following functions are available for activating and deactivating call forward- ing and configuring it in accordance with your requirements: • ”Activating or deactivating immediate call forwarding” Page 63 • ”Saving destination phone numbers for call forwarding” Page 64 …
-
Page 64: Saving Destination Phone Numbers For Call Forwarding
Call forwarding Saving destination phone numbers for call forwarding You can alternatively enter the call forwarding settings via the user menu Page 79) or also using the WBM interface Page 198. Forward Press the key shown. The pop-up menu opens. The message: «Set forward on to»…
-
Page 65: Preconfiguring Or Changing Destination Phone Numbers
Call forwarding If the destination phone numbers for Any Call are assigned or changed, this call forwarding has priority and both external and internal calls are forwarded to this destination phone number. Settings Press the illuminated key to open the call view. Call forwarding for the selected call type is activated.
-
Page 66: Copying And Pasting Destination Phone Numbers
Call forwarding Copying and pasting destination phone numbers The current destination phone number for a call type is copied. For example, the current destination phone number for Any Call should also become the current destination phone number for Internal. Forward Press the key shown.
-
Page 67: Assigning A Destination Phone Number To A Call Type
Call forwarding Assigning a destination phone number to a call type Prerequisite: At least one destination phone number has already been saved. Forward Press the key shown. The pop-up menu opens: Select and confirm the option shown. Edit call forwarding? Select and confirm the forwarding type (here for instance Unconditional).
-
Page 68: Call Forwarding Chain
Call forwarding You can also activate all three call types. The call type Any Call has priority in this case and all calls are forwarded to the defined destination phone number. Call forwarding for the call types External and Internal can be activated at the same time.
-
Page 69: Programmable Keys
Programmable keys Programmable keys The phone features a range of functions that can, if required, be stored on pro- grammable keys. The phone comes with three preprogrammed programmable keys — Forward, Pick up and DND. All of which can be programmed on two separate levels. To one of the keys you should assign the «Shift»…
-
Page 70: Programming A Key
Programmable keys Programming a key You can also configure this setting via the WBM interface Page 198. Access the programming mode Directly via the function key Prerequisite: Must be activated by administrator. Press and hold one of the three keys Forward, Pick up or DND, which is to be as- signed a function, until the programming prompt is displayed.
-
Page 71: Select Key To Be Programmed
Programmable keys Select key to be programmed Select and confirm the option shown to program the first level. Normal Select and confirm the option shown to program the second level. Shifted Select and confirm the required function in the list (e. g. Do not disturb). Do not disturb Select and confirm the option shown.
-
Page 72: Feature Toggle
Programmable keys Feature toggle You can also program keys via the WBM interface Page 198. Only available for hunt group functions ( Page 152). Press and hold one of the three keys Forward, Pick up or DND, which is to be as- signed the function, until the programming prompt is displayed.
-
Page 73: Configuring A Fixed Forwarding Key
Programmable keys Configuring a fixed forwarding key You can also program keys via the WBM interface Page 198. Press and hold one of the three keys Forward, Pick up or DND, which is to be as- signed a function, until the programming prompt is displayed. If the prompt is not displayed or a programmed function is not executed, you can only launch key programming via the user menu (consult your ad- ministrator about the current setting).
-
Page 74: Configuring A Variable Call Forwarding Key
Programmable keys Configuring a variable call forwarding key With the «Variable call forwarding» key you can. • Immediately activate or deactivate the call forwarding for «All calls» Page 57 • Edit the call forwarding Page 58 The Forward key should be used ideally. You can also program keys via the WBM interface Page 198.
-
Page 75: Using Programmed Keys
Programmable keys Using programmed keys The use of programmed functions depends on the phone’s status. The relevant display appears once you have pressed a key. Example 1: Calling saved number Prerequisite: The idle menu is displayed on the graphic display. Press one of the three keys Forward, Pick up or DND with the saved contact.
-
Page 76: Resetting Programmable Keys
Programmable keys Resetting programmable keys Here you can reset keys you configured back to factory settings (see also Page 186). Settings Press the key shown. Select and confirm the option shown. Settings Confirm. User if nec.j Enter and confirm the user password. Select and confirm the option shown to switch to the Reset user data menu.
-
Page 77: Enhanced Phone Functions
Enhanced phone functions Enhanced phone functions Incoming calls Deflecting a call Using call deflection Prerequisite: An incoming call is displayed or signalled. «Deflect» must be al- lowed. Select and confirm the option shown. Deflect If a destination phone number is stored ( Page 77), you can select and confirm 089008844 …
-
Page 78: Rejecting A Call
Enhanced phone functions Entering a destination phone number is not mandatory when call deflec- tion is active. If you want to deflect an incoming call, you are prompted to enter a destination phone number if there is none stored. Deflecting to a DSS number A call can be deflected to a direct station selection (DSS) subscriber using the DSS key, if the key is configured and the deflect function is activated by your ad- ministrator…
-
Page 79: Configuring Call Forwarding
Enhanced phone functions Configuring call forwarding You can also enter the call forwarding settings via the Forwarding key Page 57). You can also configure this setting via the WBM interface Page 198. Settings Press the key shown. Select and confirm the option shown. Settings Select and confirm the option shown.
-
Page 80: Setting Alerts
Enhanced phone functions Setting alerts Use the Call forward alerts menu to enable and disable visual and audible alerts for call forwarding (not possible with the Forwarding key). You can also configure this setting via the WBM interface Page 198. …
-
Page 81: Placing A Call On Hold
Enhanced phone functions Placing a call on hold You can use this function to place an ongoing call on hold, for instance, to pre- vent the other party overhearing a conversation with a colleague in the same room. Prerequisite: You are conducting a call. Select and confirm the option shown in the connections’s context menu.
-
Page 82
Enhanced phone functions Held call wait status After placing a call on hold, you can replace the handset and then decide whe- ther to retrieve the call or disconnect. Prerequisite: You placed a call on hold and replaced the handset or pressed the loudspeaker key in speakerphone mode. -
Page 83: Activating/Deactivating The Hold Reminder Tone
Enhanced phone functions Activating/deactivating the hold reminder tone You can also configure this setting via the WBM interface Page 198. Settings Press the key shown. Select and confirm the option shown. Settings Select and confirm the option shown. User if nec.j Enter and confirm the user password.
-
Page 84
Enhanced phone functions Setting the hold reminder time Use the «Hold reminder» function to set the time after which you want to receive an automatic reminder about a held call. The minimum value is 3, that is, the reminder is output after three minutes. The maximum value is 99 minutes. -
Page 85
Enhanced phone functions Activating/deactivating Hold and hang-up This function works in the following call scenarios: • You have placed a call manually on hold and hang up. • You are conducting a consultation call and the second call partner hangs up. •… -
Page 86
Enhanced phone functions Music on hold If the Music on hold option is active, music is played back when you are placed on hold by another party. You can also configure this setting via the WBM interface Page 198. Settings Press the key shown. -
Page 87: Call Waiting (Second Call)
Enhanced phone functions Call waiting (second call) You can accept a second incoming call in the course of an ongoing call. The call- er hears the on-hook signal while you hear a call-waiting signal tone. A bell ap- pears on the display and next to it the phone number of the caller is shown. You can ignore or accept the second call.
-
Page 88
Enhanced phone functions Ignoring second call Prerequisite: You are conducting a call and call waiting is allowed ( Page 90). Select and confirm the option shown. Ignore? The caller still hears the on-hook signal. You can subsequently Accept, Reject or Deflect the second call. -
Page 89
Enhanced phone functions Deflecting a second call Prerequisite: You are conducting a call and call waiting is allowed ( Page 90). Select and confirm the option shown. Deflect? If a destination phone number is stored ( Page 77), you can select and confirm … -
Page 90
Enhanced phone functions Allowing call waiting If the Call waiting (second call) function is deactivated, a caller hears the busy signal if you are already conducting a call. You can also configure this setting via the WBM interface Page 198. … -
Page 91
Enhanced phone functions Toggling associate Set the «Toggle associate» function to Yes if you want to connect to a second or pickup call by hanging up. You can also configure this setting via the WBM interface Page 198. Settings Press the key shown. -
Page 92: Transferring A Call
Enhanced phone functions Transferring a call You can transfer your current call to another party with or without consultation. Prerequisite: You are conducting a call. The options «Allow Call Transfer» and «Transfer on Ring» were selected ( Page 94). Transfer without consultation You can choose between easy transfer via Transfer key or blind transfer via menu.
-
Page 93: Transferring With Consultation
Enhanced phone functions Transferring with consultation You can announce a call to a recipient before transferring it. You again can choose between easy transfer via Transfer key or transfer via menu. Easy transfer Transfer Press the key shown. Enter the phone number of the second party to whom you want to transfer the call and confirm.
-
Page 94
Enhanced phone functions Allowing call transfer You can also configure this setting via the WBM interface Page 198. Settings Press the key shown. Select and confirm the option shown. Settings Select and confirm the option shown. User if nec.j Enter and confirm the user password. -
Page 95
Enhanced phone functions Allowing «Transfer on Ring» If this option is allowed, you can activate call transfer by replacing the handset even before the called party answers. You can also configure this setting via the WBM interface Page 198. Settings Press the key shown. -
Page 96: Cti Calls
Enhanced phone functions CTI calls Beep on auto-answer Speakerphone mode automatically activates on your phone if you use a CTI ap- plication such as Outlook to dial a number when Auto-answer is active. If Auto- answer is not active, the phone rings first and you have to press the loudspeaker key or lift the handset to set up the call.
-
Page 97
Enhanced phone functions Beep on auto-reconnect You can reconnect a held call both via the CTI application and via the phone. A beep sounds when you toggle between an active call and a held call when the function is active. Prerequisite: The option was programmed by your administrator. -
Page 98: Making Calls
Enhanced phone functions Making calls Dialling with the DDS key You can program frequently used phone numbers on programmable keys Page 69). If you press a direct destination selection key briefly, the associat- ed contact or phone number appears and dialling is initiated. Prerequisite: A direct destination key is programmed Page 69.
-
Page 99
Enhanced phone functions Messages Press the key shown. If the «Voice mail» menu is displayed immediately, press the Back key to return to the next higher menu. Select and confirm the option shown. Calls Select and confirm the option shown. Dialled Select and confirm the appropriate list entry. -
Page 100: Using Autodial Delay
Enhanced phone functions Using autodial delay A number is automatically dialled after a set delay starting from the entry of the number’s last digit. The autodial delay can be used: • when dialling in idle mode • Consultation • when transferring an answered call. The delay can be reduced by performing one of the following activities: •…
-
Page 101
Enhanced phone functions Settings for autodial delay The setting does not affect automatic emergency number dialling. If you select Autodial delay, you must either confirm the «Dial» option, press the loudspeaker key or wait until the autodial delay expires to set up a call when di- alling with the handset on hook. -
Page 102
Enhanced phone functions Allowing «Busy When Dialling» If you activate this function, an incoming call received while you are performing dialling is rejected. The caller then hears the busy signal. You can also configure this setting via the WBM interface Page 198. -
Page 103: Conference
Enhanced phone functions Conference Local conference This type of conference is also referred to as a three-party conference. It in- volves up to three participants. Prerequisite: You are conducting a consultation call Page 48 or have accept- ed a second call Page 87, and the conference function is active Page 104.
-
Page 104
Enhanced phone functions Ending a local conference Prerequisite: The «”Allowing joining in a local conference” Page 105» func- tion is activated. Select and confirm the option shown in the menu. Both call partners remain con- Exit Conf? nected. You are disconnected from the conference call. Speaker Replace the handset or, if you are in speakerphone mode, press the loudspeak- er key. -
Page 105
Enhanced phone functions Allowing joining in a local conference You can use this option to decide whether or not your call partners are allowed to join calls after you exit the conference call. You can also configure this setting via the WBM interface Page 198. -
Page 106: System-Based Conference
Enhanced phone functions System-based conference This type of conference is also referred to as a large conference. It can include from 3 up to 16 parties (depending on the setting in OpenScape Voice). Prerequisite: You are conducting a consultation call Page 48 or you have ac- …
-
Page 107: Leaving A Conference
Enhanced phone functions Add party Prerequisite: You are conducting a consultation call and the conference is on hold. Conference Select and confirm the option shown in the consultation call’s context menu. The party is added to the conference. Only the conference and all current partici- pants are now displayed.
-
Page 108: Phonebooks And Call Lists
Phonebooks and call lists Phonebooks and call lists Personal directory The personal directory is restricted to 100 entries. If you have configured a key for the local personal directory, you can also open the phonebook using this key Page 69). …
-
Page 109: Deleting A Contact
Phonebooks and call lists Deleting a contact You can delete contacts more conveniently via the WBM interface Page 198. Settings Press the key shown. Confirm to open the local phonebook. Personal Select and confirm the relevant entry. Niels, Bohr Select and confirm the option shown.
-
Page 110: Searching For A Contact
Phonebooks and call lists Searching for a contact Settings Press the key shown. Confirm to open the local phonebook. Personal The last entry used is displayed on the screen. Angela, Merkel Enter the initial letter of the name you are searching for, for instance K. L5 (Abc) The first name found with the initial letter K is displayed after a short time.
-
Page 111: Corporate Directory
Phonebooks and call lists Corporate directory The corporate directory is an LDAP database. It can be accessed via your net- work if access has been configured correctly by administrator. You can search for contacts using the name (simple search) or different criteria for an entry (advanced search), for example job title or address.
-
Page 112: Enhanced Editing Functions In The Phonebook
Phonebooks and call lists Enhanced editing functions in the phonebook Viewing entries Prerequisite: You found and selected an entry (see above). Select and confirm the option shown. All fields of the entry are displayed. Details Resetting the search fields Prerequisite: The search fields are listed. Select and confirm the option shown.
-
Page 113: Quick Search
Phonebooks and call lists Quick search Settings Press the key shown. Select and confirm to open the corporate Phone book. Corporate Press the configured «Corporate» key for the corporate directory ( Page 69). E n t e r t h e n a m e (Abc) Enter the initial letter of the name you are looking for, for instance «K».
-
Page 114
Phonebooks and call lists Rule list: Character Description Searches for the exact string before the special character. You can enter the first and last name separated by a comma. A search is carried out for the last name (possibly using a wildcard) and the «first»… -
Page 115: Call Lists
Phonebooks and call lists Call lists For a detailed description of the different call lists, refer to Page 24. The func- tion must be activated in order to view and manage call lists Page 116, other- wise the menu option «Calls» is not offered. Dialling an entry Messages Press the key shown.
-
Page 116: Call Journal
Phonebooks and call lists Call journal Activating/deactivating the call journal The function can be disabled in order to prevent unauthorised third parties gain- ing information on the other party involved in the call from the call lists. No further calls or conversations are then logged. The function is always activated by de- fault.
-
Page 117: Logging Missed Calls
Phonebooks and call lists Logging missed calls This function has two entries, each with two options for managing missed calls: • Answered elsewhere • Delete entry All missed called intended for this line are logged and new missed calls are dis- played.
-
Page 118: Making Calls With Multiple Lines
Making calls with multiple lines Making calls with multiple lines You can use your OpenScape Desk Phone IP 35G/35G Eco as a multi-line phone. If you have any questions regarding how to configure your OpenScape DeskPhone IP 35G phone as a multi-line phone, please contact your adminis- trator.
-
Page 119: Making Calls
Making calls with multiple lines Using the line keys Press the flashing line key. Speakerphone mode. Confirm. Speakerphone mode. Accept? Making calls You must seize a line before you can make calls on a multi-line telephone. Trunk seizure can be configured on an individual basis. Your administrator can determine if the lines on your telephone can be automatically seized and with which priority.
-
Page 120: Dialling The Last Dialled Number
Making calls with multiple lines Dialling the last dialled number Regardless of the line used, the last number dialled on your telephone is dis- played for redialling in the selected number’s context menu. ^ or Speaker Lift the handset or press speakerphone key. Press the required line key ( Page 119).
-
Page 121: During Calls
Making calls with multiple lines During calls Making and receiving calls on a single line If you only use one line on your multi-line telephone to make calls, and you re- ceive calls on the same line, the phone operates in the same way as a single- line telephone: •…
-
Page 122: Putting A Line On Hold
Making calls with multiple lines Putting a line on hold On a multiline telephone you can use the line keys to place calls on hold. Prerequisite: You are conducting a call. Press the call-line key. • The LED line key flashes. •…
-
Page 123: Lines With Hot Or Warm Line Function
Making calls with multiple lines Lines with hot or warm line function Your administrator can configure a hot or warm line for the primary and second- ary line. The function is activated when on • The Primary line you pick up the phone’s handset or press the line or loudspeaker key •…
-
Page 124: Connecting
Making calls with multiple lines Connecting A station of a line trunk group is on a call. It’s primary line is configured as a sec- ondary line on your phone. This line now has the status «busy.» You can connect to the call by pressing the illuminated key for this line (see also Page 16).
-
Page 125: Direct Station Selection Keys
Making calls with multiple lines Direct station selection keys Apart from line keys, administrator can also configure direct station selection (DSS) keys. You can use a DSS key to call an internal station directly, pick up calls for this station or forward calls directly to it. Calling a station directly You cannot use DSS if the user is on another call (flashing LED).
-
Page 126: Call Pickup
Making calls with multiple lines Call pickup You can pick up calls for another DSS station. If a call is waiting on their line, the LED flashes. Indirect pickup Prerequisite: The auto-answer function must be deactivated Page 96. Press the DSS key. The call is routed to your primary line and rings. ^ or Speaker Lift the handset or press speakerphone key.
-
Page 127: Deflecting A Call To A Dss Station
Making calls with multiple lines Deflecting a call to a DSS station Prerequisite: The deflect function must be approved for DSS keys. For informa- tion on the current setting, see Page 78. If you receive a call on one of your lines, you can immediately deflect it to the DSS station.
-
Page 128: Settings For Multiline (Keyset)
Making calls with multiple lines Settings for MultiLine (Keyset) The details for each keyset line contain supplementary information for the user. The following uneditable fields are displayed: • Address – Displays the phone number for the line • Ringtone on/off –…
-
Page 129: Setting The Ringtone For Lines
Making calls with multiple lines Setting the ringtone for lines If special ringtones have been configured by service personal for lines, you can adjust these here to suit your requirements. You can also configure this setting via the WBM interface Page 198.
-
Page 130: Line Preview
Making calls with multiple lines Selecting the pattern melody The following setting is only effective if you selected «Pattern» under the ringer option. Select and confirm the option shown and then select the required pattern melody Ringer melody=2 between 1 and 8 (e.g. 4). You will immediately hear the corresponding Ringer melody.
-
Page 131: Rollover For A Line
Making calls with multiple lines Rollover for a line Your administrator can determine how rollover calls are to be signalled. Only the relevant line key blinks. You hear a special advisory tone via the currently active microphone and the corresponding line key blinks. The ringer melody set sounds briefly (approx.
-
Page 132: Privacy/Security
Privacy/security Privacy/security Activating and deactivating the ringer Activating and deactivating the ringer permanently You can deactivate the ringer if you do not want to be disturbed by your phone ringing. The ringer can also be deactivated while the phone is ringing. Hold down the key in idle mode or even when it rings until the «Ringer off»…
-
Page 133: Deactivating The Ringer Temporarily For Incoming Calls And Reactivating It
Privacy/security Deactivating the ringer temporarily for incoming calls and reactivating it If you are disturbed on an important call by the phone ringing, for example, you can deactivate the ringer temporarily and then activate it again. Press the key briefly. The ringer is deactivated. Now press the key again briefly.
-
Page 134: To Allow Do Not Disturb (Dnd)
Privacy/security To allow Do Not Disturb (DND) You can also configure this setting via the WBM interface Page 198. Settings Press the key shown. Select and confirm the option shown. Settings Select and confirm the option shown. User if nec.j Enter and confirm the User password.
-
Page 135: Security
Privacy/security Security User password Your User password protects your individual configurations, including your lan- guage settings. You can also use the User password to lock your telephone Page 138. The administrator may have configured the following settings: • The password is deactivated: You do not have the option of configuring user settings.
-
Page 136
Privacy/security Select and confirm the option shown. New user password Enter a new password (at least six characters) and confirm (text entry, see Page 18). Select and confirm the option shown. Confirm new user password Enter the new password again and confirm with OK. Select and confirm the option shown. -
Page 137
Privacy/security Deactivating the user password You can deactivate the phone’s password prompt if a password has already been configured. The deactivation of the password prompt does not affect the WBM interface Page 198 or CTI applications that use a password prompt. … -
Page 138: Phone Locking
Privacy/security Phone locking You can lock your phone to protect it against unauthorised access. In this way, no one can make calls or change your user settings unless they know your user password. If an emergency number has been entered on the phone by administrator, «emergency call»…
-
Page 139
Privacy/security Unlocking the phone The following is displayed: Phone locked. There are two options available for unlocking the phone: • User unlock • Admin unlock Select and confirm if you know the user password. You are prompted to enter User unlock? the user password. -
Page 140: Mobility
Mobility Mobility Prerequisite: Your phone is configured to support mobility by administrator. A DLS server is available in the LAN and its address is entered in the phone. Mobility scenarios When you log on to your phone, or any other mobility-enabled phone, the follow- ing scenarios are possible: Logging on and off at the same phone •…
-
Page 141: Logging On And Off At The Same Phone
Mobility Logging on and off at the same phone Logging on to the phone Prerequisite: No other mobility user is logged on. Logon via a key If a program key is configured for Mobility. Press the «Mobility» program key. Logon via the context menu Select from the idle display context menu ( Page 20) and confirm.
-
Page 142: Logging Off From The Phone
Mobility Logging off from the phone Prerequisite: You are logged on as a mobility user. Logoff via key If a program key is configured for Mobility. Press the «Mobility» program key. Logon via the context menu Select and confirm Page 20 the option shown in the idle display context menu. …
-
Page 143: Logging On At Different Telephones
Mobility Logging on at different telephones An attempted login is rejected if the user is already logged on to another phone and «Logon with forced logoff» is disabled for the mobility user. Logging on with forced logoff at a remote phone If the user is already logged on at another phone and the remote phone is busy, the logon is rejected.
-
Page 144: Logging On With Forced, Delayed Logoff At A Remote- Phone
Mobility Logging on with forced, delayed logoff at a remote- phone If the remote phone is busy and your administrator enabled «Forced logoff during call» with a set timeout, forced logoff does not occur until this timeout expires. Logon via a key If a program key is configured for Mobility.
-
Page 145: Openscape Voice Functions
OpenScape Voice functions OpenScape Voice functions The OpenScape Voice supports a number of functions that you can activate and deactivate from your phone. On multi-line telephones, the full scope of OpenScape Voice functions is only available for the primary line. Feature toggle key You can pick a programmable key and program it as a feature toggle key for ac- tivating the «make line busy»…
-
Page 146: Making Anonymous Calls
OpenScape Voice functions Making anonymous calls Your administrator decides whether or not your caller ID (name and phone num- ber) is displayed on a called party’s station. Anonymous calling is when your data is not transmitted. The settings configured can be deactivated, however, for specific calls.
-
Page 147: Temporarily Activating Anonymous Calling For The Next Call
OpenScape Voice functions Temporarily activating anonymous calling for the next call If your administrator activated caller ID transmission for your phone, you can de- activate this setting for the next call as follows: Lift the handset. Enter the code (see the table of codes Page 163).
-
Page 148: Creating A List For Selective Calls
OpenScape Voice functions Creating a list for selective calls For call acceptance You can create a list of the phone numbers from which you are willing to accept calls (also known as a selection list). Your administrator knows how long this list may be in the OpenScape Voice used on site in your facility.
-
Page 149: For Call Rejection
OpenScape Voice functions For call rejection As for selective call acceptance, you can create a selection list with the phone numbers of parties from whom you are not willing to accept calls. Your adminis- trator knows how long this list may be in the OpenScape Voice used on site in your facility.
-
Page 150: Anonymous Calls
OpenScape Voice functions Anonymous calls Rejecting You can reject all calls from parties that activated a data protection feature (for example, caller ID suppression) to prevent their phone number from being transmitted. In this case, you are not informed that a call was rejected. Lift the handset.
-
Page 151: Using Abbreviated Dialling
OpenScape Voice functions Using abbreviated dialling Abbreviated dialling gives you access to a central list of frequently dialled phone numbers. You can dial a specific phone number by simply entering a digit string. As these are three-digit numbers, you can store up to 1000 phone numbers. This list is stored centrally and managed by your administrator.
-
Page 152: Hunt Group Functions
OpenScape Voice functions Hunt group functions To ensure optimum handling of specific calls, your telephone can be assigned to a pickup group Page 39 and/or a hunt group. Your administrator can incorporate multiple telephones in a hunt group. If your telephone is assigned to a hunt group, OpenScape Voice forwards calls for the members of your group in accordance with specific rules defined by your admin- istrator.
-
Page 153: Marking The Last Line In The Hunt Group Chain
OpenScape Voice functions Marking the last line in the hunt group chain Sets the «stop hunt» line in the hunt group chain. The system will stop looking for a free line in the hunt group chain after it reaches this line. Activating Lift the handset.
-
Page 154: Reachability
OpenScape Voice functions Reachability You can make either serial calls or simultaneous calls on several sites. The fea- tures for this are • Serial call • Parallel call Prerequisite: The administrator has configured the respective feature for your main number in OpenScape Voice. Serial call Managing number lists/activating serial call Before the serial call number can be activated, a serial call list much be created.
-
Page 155: Parallel Call
OpenScape Voice functions Parallel call Managing number lists/activating parallel call Before the parallel call feature can be activated, a parallel call list must be cre- ated. This can be prepared either by administrator or you can create it yourself later. Up to six numbers can be entered in the list for sites on which incoming calls including your main number should be signalled sequentially.
-
Page 156: Parking A Call
OpenScape Voice functions Parking a call If you have answered a call for a colleague and cannot forward it to him, you can park the call. Call park You are conducting the call. Let the other party know, e.g. that you are trying to connect him.
-
Page 157: Silent Monitoring
OpenScape Voice functions Silent Monitoring If this function has been configured by administrator and enabled for the desti- nation phone, you can join an active call of an internal station and listen in un- noticed (muted) or with the knowledge of the target station (active). Active silent monitoring Station A and B are on a call.
-
Page 158: Muted Silent Monitoring
OpenScape Voice functions Muted silent monitoring Station A and B are on a call. You want to monitor a call but so that neither station notices. internal station A Your phone internal or external station B • You can hear station A but cannot talk to him because he cannot hear you •…
-
Page 159: One-Way Intercom And Two-Way Intercom Function
OpenScape Voice functions One-way Intercom and Two-way Intercom function With One-way Intercom or Two-way Intercom, the loudspeaker or speakerphone function of a destination phone is activated automatically when the connection is established. Use of these functions is conceivable for example between an executive and secretary or between a doctor and receptionist.
-
Page 160: One-Way Intercom
OpenScape Voice functions One-way Intercom From your phone, you can directly call any team member whose telephone has a loudspeaker. One-way Intercom with variable input of member number Lift the handset. Enter the code for One-way Intercom (see code table Page 163) followed by …
-
Page 161: Announcing The Local Phone Number
OpenScape Voice functions Announcing the local phone number You can use this function in order, for example, to identify the phone number of a phone in a conference room if it is not indicated on the display. Lift the handset. Enter the code for «Announcing the local phone number»…
-
Page 162: Picking Up Out-Of-Hours Calls
OpenScape Voice functions Picking up out-of-hours calls If your switchboard is no longer attended after a certain time, an out-of-hours call function can be configured on one or more phones for this period. For example, if you hear one of the phones that has an out-of-hours call function configured ringing when the office is closed, you can pick up the call early from your phone.
-
Page 163: Code Table For Openscape Voice Functions
OpenScape Voice functions Code table for OpenScape Voice functions Ask your administrator to enter the latest codes in the following table. Print this page as an overview. Function Code Description Making anonymous calls off Page 146 Making anonymous calls on Page 146 …
-
Page 164: Impact Levels
Impact Levels Impact Levels Communication in the PSN (Public Sector Network) is split into areas of different Impact Levels (IL). The Impact Level dictates how you as a user should conduct the telephone call in question. It is described below how to determine whether your call partner belongs to a lower Impact Level when the connection is being established or has been established.
-
Page 165: Answering A Second Call
Impact Levels Answering a second call The phone rings with the defined ringtone for second calls with a lower IL. The caller is shown with a special icon and the advisory «Lower IL». Lift the handset. You can also answer the call if appropriate using the loudspeaker key or via the headset.
-
Page 166: Conducting A Call With A Lower Impact Level
Impact Levels Conducting a call with a lower Impact Level If you have answered a call with a lower IL, this will be documented on the dis- play. Conducting a call You are connected with the partner from a lower Impact Level (IL) zone. The ad- visory «Lower IL»…
-
Page 167: Individual Phone Configuration
Individual phone configuration Individual phone configuration Display Setting contrast The display has multiple contrast levels that you can set according to your light conditions. You can also configure this setting via the WBM interface z Page 198. Settings Press the key shown. Select and confirm the option shown.
-
Page 168: Date And Time
Individual phone configuration Date and time This function allows you to select one of three different display modes for the date and manually set the time if necessary. You can also configure these settings via the WBM interface Page 198. …
-
Page 169
Individual phone configuration Settings Press the key shown. Select and confirm the option shown. Settings Select and confirm the option shown. User if nec.j Enter and confirm the user password. Select and confirm the option shown. Date and time? Select and confirm the option shown. The time set is displayed. Daylight saving = No Confirm. -
Page 170: Automatic Daylight Saving Time
Individual phone configuration Automatic daylight saving time The Auto DST setting is provided for information purposes and can only be changed by your administrator. You can also access this information via the WBM interface Page 198. Settings Press the key shown. Select and confirm the option shown.
-
Page 171: Date Display Format
Individual phone configuration Date display format You can also configure this setting via the WBM interface Page 198. Settings Press the key shown. Select and confirm the option shown. Settings Select and confirm the option shown. User if nec.j Enter and confirm the user password.
-
Page 172: Audio
Individual phone configuration Audio Volumes Use this selection to set the following volumes: • Loudspeaker • Ringer • Handset • Headset • Handsfree • Rollover You can also configure this setting via the WBM interface Page 198. Example: Handset: Settings Press the key shown.
-
Page 173: Settings
Individual phone configuration Settings Room character To ensure that the other party can hear you properly in speakerphone mode, you can adjust the phone to the room acoustics by choosing one of the following room character conditions: «Normal», «Echoing», «Muffled» . You can also configure this setting via the WBM interface Page 198.
-
Page 174
Individual phone configuration Pattern melody You can also configure this setting via the WBM interface Page 198. Prerequisite: You have choosen the «pattern» ringtone, see Page 173. Settings Press the key shown. Select and confirm the option shown. Settings Select and confirm the option shown. -
Page 175
Individual phone configuration Pattern sequence You can also configure this setting via the WBM interface Page 198. Prerequisite: You have choosen the «pattern» ringtone, see Page 173. Settings Press the key shown. Select and confirm the option shown. Settings Select and confirm the option shown. -
Page 176
Individual phone configuration Headset socket Enter the type of headset here. You can also configure this setting via the WBM interface Page 198. Settings Press the key shown. Select and confirm the option shown. Settings Select and confirm the option shown. User if nec.j Enter and confirm the user password. -
Page 177: Special Ringers
Individual phone configuration Special ringers This feature allows up to four different incoming call types to have a special ring- tone so you will hear different ringtones when receiving a call depending on who is calling. You can assign special ringtones to following call types: •…
-
Page 178
Individual phone configuration Settings for the «Pattern» ringtone type If you selected «pattern» as the ringtone type, you can make further settings for the pattern melody and pattern sequence: Select and confirm the option shown. Pattern melody Select the required pattern melody between 1 and 8 (e. g. 4). You will immedi- ately hear the corresponding Ringer melody. -
Page 179: Tone And Indication With An Unsecured Voice Connection
Individual phone configuration Tone and indication with an unsecured voice connection Use this option to activate an alerting tone that you hear when a secure voice connection with the party you are currently talking to ceases to be secure. The message «Nonsecure connection»…
-
Page 180: Key Click
Individual phone configuration Key click You can configure whether a key click should be audible when a key is pressed. You can also decide whether this should apply for all keys or only for the keys on the keypad. In addition, you can adjust the click volume or disable the sound. You can also configure this setting via the WBM interface Page 198.
-
Page 181: Setting The Language And Country
Individual phone configuration Setting the language and country Selecting a language Use this menu option to select the language for operator prompting. You can also configure this setting via the WBM interface Page 198. Settings Press the key shown. Select and confirm the option shown.
-
Page 182
Individual phone configuration You may choose from the following languages: 1. Bahasa Indonesia 2. Bahasa Malaysia 3. Brasileiro 4. Català Ceština 6. Cymraeg 7. Dansk 8. Deutsch 9. Eesti keel 10.English 11. English(US) 12.Español 13.Français 14.Hrvatski 15.Italiano 16.Latviešu Valoda 17.Lietuviø Kalba 18.Magyar 19.Nederlands 20.Norsk… -
Page 183: Country-Specific Settings
Individual phone configuration Country-specific settings Adapt your phone settings to suit the relevant country-specific conditions (for example, transmission parameters). You can also configure this setting via the WBM interface Page 198. Settings Press the key shown. Select and confirm the option shown. Settings Select and confirm the option shown.
-
Page 184: Alarm On Changing The Il
Individual phone configuration Alarm on changing the IL If a call switches from a higher to a lower IL (Impact Level), this will be indicated by the pop-up text Changing the IL. You can also configure this setting via the WBM interface Page 198.
-
Page 185: Network Information
Individual phone configuration Network information This overview in the user area of the Service menu provides you with information about the IP address of the phone and the HTML address of the WBM interface. It also provides real-time data about the network activity of the phone. Settings Press the key shown.
-
Page 186: Resetting User Data
Individual phone configuration Resetting user data The following user-specific settings changed via the phone menu or the WBM interface can be reset to factory settings. • Display contrast • Language setting • Audio settings – Volumes – Settings • Call lists –…
-
Page 187: Call Recording
Call recording Call recording A central voice recorder is installed in the network for recording calls to which your telephone connects in order to record the current voice traffic. The recorder records the entire voice flow of two or more participants. You should configure a recording button in order to simplify handling of manual call recording Page 69.
-
Page 188: Explanations Of Recording
Call recording Explanations of recording Recordable calls A recordable call is any call that has a call connection status on the telephone. This can be any incoming or outgoing call. It is immaterial here whether a call is set up directly via the telephone or via an application. •…
-
Page 189: Enhanced Functions
Call recording Enhanced functions: 1. A conference can be set up or cleared down during recording. 2. A consultation can be performed during recording. 3. Call transfer is also available during recording. 4. A second call can be accepted during recording. The following features are not supported: 1.
-
Page 190: Manual Call Recording
Call recording Manual call recording Activating or deactivating call recording when the telephone is in idle mode. Prerequisite: Manual mode is selected. The recording button is configured and indicates the status. Select the option shown in the telephone’s context menu to enable the option. Recording on or disable the option.
-
Page 191: Controlling Call Recording
Call recording Controlling call recording Starting call recording manually during a call Prerequisite: Manual mode or AutoStart is selected. You are conducting a call. Recording has not started. The recording button LED is not lighting. You are conducting a call (see also Page 188).
-
Page 192: Consultation During Call Recording
Call recording Consultation during call recording Prerequisite: You are conducting a call. Recording has started. The recording button LED is lighting. You initiate a consultation – your main call is placed on hold as a result while the consultation is being performed. The recording is paused while you initiate the consultation.
-
Page 193: Call Recording While Alternating
Call recording Call recording while alternating Prerequisite: You have an active or held consultation or second call. Recording has started. The recording button LED is lighting. You are connected with the second party. You hear a beep and the recording symbol is shown in the line for the second call.
-
Page 194: Setting Up A Conference During Recording
Call recording Setting up a conference during recording Prerequisite: You are conducting a consultation call Page 48 or you have ac- cepted a second call Page 87 and the «System conference» feature was con- figured by the administrator. Recording has started. The main call is placed on hold.
-
Page 195: Your Call Is Included In A Conference During The Recording
Call recording Your call is included in a conference during the recording. Prerequisite: You are conducting a call that is being recorded. You are to be in- cluded in a conference by your call partner. You are placed on hold while the conference is being set up.
-
Page 196: Diagnostic Information
Diagnostic information Diagnostic information This information overview in the user area of the service menu provides you with information on the current configuration of the telephone: Settings Press the key shown. Select and confirm the option shown. Settings Select and confirm the option shown. User Enter and confirm the user password.
-
Page 197
Diagnostic information Diagnostic.information route.1.mask: None route.2.ip: None route.2.gateway: None route.2.mask: None mac-address: 0001e32c680c discovery.mode: Manual dhcp.reuse: Nein lan.port.type: pc.port.status: None pc.port.type: pc.port.autoMDIX: Nein vlan.id: qos.layer.2: qos.layer.2.voice: qos.layer.2.signalling: None qos.layer.2.default: qos.layer.3: qos.layer.3.voice: qos.layer.3.signalling: lldp.med.operation:… -
Page 198: Web Interface (Wbm Interface)
Web interface (WBM interface) Web interface (WBM interface) General You can configure a number of settings for your phone via the web interface. Communication is via a secure HTTPS connection. Access to the web interface must be activated by administrator. Calling up the WBM interface For more information on the IP address, the web interface address, and how to connect the telephone to the network, refer to the section entitled «Network information»…
-
Page 199: User Pages
Web interface (WBM interface) User pages The WBM interface homepage opens once you have entered and confirmed the phone’s IP ad- dress. 1. Click a menu heading to display the individual menu entries. Click the menu heading again to close the menu. 2.
-
Page 200: User Menu
Web interface (WBM interface) User menu All settings that you can make via the web interface’s user menu can also be made via the phone’s user menu User Pages User login V Page 135 Date and Time – Local time V Page 168 …
-
Page 201
Web interface (WBM interface) – to V Page 60 – Direct destination V Page 57 – Forward on no reply allowed V Page 60 – to V Page 60 – Direct destination V Page 57 –… -
Page 202
Web interface (WBM interface) – Key click – Volume – Off – Low – Medium – High – Keys – Keypad only – All keys Locality – Country V Page 183 – Language V Page 181 – Date format V Page 171 … -
Page 203: Fixing Problems
Fixing problems Fixing problems Caring for your telephone • Never allow the telephone to come into contact with colouring, oily or aggressive agents. • Always use a damp or antistatic cloth to clean the telephone. Never use a dry cloth. •…
-
Page 204: Labeling Keys
• With a computer via the Internet: You can find the «online labeling tool» together with the user interface at http://wiki.unify.com/wiki/KLT • Select the appropriate key labeling tool in your language. You can use the tool online via the browser or you can download it for local use.
-
Page 205: Local User Menu
Local user menu Local user menu Opening the user menu on the phone To open the user menu, press the Settings key. On the Settings tab, select the User menu option. You are prompted to enter the User password Page 135. …
-
Page 206
Local user menu – Ringer melody = 2 Page 174 –1? –2? –3? –4? –5? –6? –7? –8? –Return? – Ringer tone sequence= 1 Page 175 –1? –2? –3? –4? –5? –6? –Return? – Room character = Normal Page 173 … -
Page 207
Local user menu –Save & Exit –Exit (Discard Changes) – Special 1 –Available? –Ringtone? –Pattern melody? –Pattern sequence? –Save & Exit –Exit (Discard Changes) – Special 2 –Available? –Ringtone? –Pattern melody? –Pattern sequence? –Save & Exit –Exit (Discard Changes) – Special 3 –Available? –Ringtone? –Pattern melody? -
Page 208
Local user menu –Default destination = Page 77 –Deflect to DSS = Yes/No Page 78 –Save & Exit –Exit (Discard Changes) – Forwarding? (call forwarding by type, see Page 62) –Settings? – Any call: 12345 Page 60 … -
Page 209
Local user menu – Audible alerts = No Page 80 – On? – Return? – Forwarding party = Display last Page 68 – Display first? – Display last? – Return? – Save & Exit – Exit (Discard Changes) –… -
Page 210
Local user menu –12? –13? –14? –15? –Return? – Hold and hang-up = Yes Page 85 –Yes –No – Music on hold = Yes Page 86 –No? –Return? – Allow conferences =Yes Page 104 –No? –Return? – Secure call alert = Yes Page 179 … -
Page 211
Local user menu – Include – Return? –Delete entry = When called – Manually – Return? –Save & Exit –Exit (Discard Changes) – Return? Phone? – Display? – Contrast = Page 167 – Save & Exit – Exit (Discard Changes) –… -
Page 212
Local user menu – 24 hour? – 12 Hour (AM/PM)? – Return? – Save & Exit – Exit (Discard Changes) Security? – Change user password? Page 135 – Current password = – New user password = – Confirm New user password = –… -
Page 213: Key Functions
Local user menu Key functions Normal You can program the following functions on the Normal of the function keys: • Selected dialling • Repeat dialling • CF unconditional • CF no reply • CF busy • CF unconditional — any •…
-
Page 214
Local user menu Shifted You can program the following functions on the Shifted of the function keys: • Selected dialling • Repeat dialling • Alternate • Blind transfer call • Transfer call • Deflecting • Conference • Repertory dial • Show phone screen •… -
Page 215: Index
Index Index Call forwarding information ……..120 Call list …………..55 Call lists …………108 Call log …………..24 Numerics Call recording alternating …………193 2nd alert …………..43 automatic …………189 AutoStart …………. 190 call types …………. 188 conference …………194 consultation …………
-
Page 216
Index Date and time …………168 Idle mode …………..20 Date format …………171 Immediate dialing ……….47 Daylight saving …………168 Important information ……….4 Deleting entries …………117 Incoming calls Destination phone number ……..57 multi-line ………….. 118 Dial plan …………100 Intercom ………….. -
Page 217
Index Normal dialing …………47 Quick search …………113 One-way Intercom ……….159 Reachability …………154 Open listening …………37 Redial …………… 48 OpenScape Voice ……….145 Redialing «last caller redial» function ……..48 multi-line ………….. 120 accepting anonymous calls ……… 150 Repdial keys ………… -
Page 218
Index Unlocking the phone ……….139 Variable call forwarding ……..57 User interface OpenScape Desk Phone IP 35G ……13 User password …………135 Using Ethernet switches ……….. 30 Warm line …………..47 Using network ports more efficiently ……30 for lines …………… 123 Web interface ……….198…