
Хорошее руководство по эксплуатации
Законодательство обязывает продавца передать покупателю, вместе с товаром, руководство по эксплуатации Ultimate speed ULG 3.8 B1 — IAN 274400. Отсутствие инструкции либо неправильная информация, переданная потребителю, составляют основание для рекламации в связи с несоответствием устройства с договором. В законодательстве допускается предоставлении руководства в другой, чем бумажная форме, что, в последнее время, часто используется, предоставляя графическую или электронную форму инструкции Ultimate speed ULG 3.8 B1 — IAN 274400 или обучающее видео для пользователей. Условием остается четкая и понятная форма.
Что такое руководство?
Слово происходит от латинского «instructio», тоесть привести в порядок. Следовательно в инструкции Ultimate speed ULG 3.8 B1 — IAN 274400 можно найти описание этапов поведения. Цель инструкции заключается в облегчении запуска, использования оборудования либо выполнения определенной деятельности. Инструкция является набором информации о предмете/услуге, подсказкой.
К сожалению немного пользователей находит время для чтения инструкций Ultimate speed ULG 3.8 B1 — IAN 274400, и хорошая инструкция позволяет не только узнать ряд дополнительных функций приобретенного устройства, но и позволяет избежать возникновения большинства поломок.
Из чего должно состоять идеальное руководство по эксплуатации?
Прежде всего в инструкции Ultimate speed ULG 3.8 B1 — IAN 274400 должна находится:
— информация относительно технических данных устройства Ultimate speed ULG 3.8 B1 — IAN 274400
— название производителя и год производства оборудования Ultimate speed ULG 3.8 B1 — IAN 274400
— правила обслуживания, настройки и ухода за оборудованием Ultimate speed ULG 3.8 B1 — IAN 274400
— знаки безопасности и сертификаты, подтверждающие соответствие стандартам
Почему мы не читаем инструкций?
Как правило из-за нехватки времени и уверенности в отдельных функциональностях приобретенных устройств. К сожалению само подсоединение и запуск Ultimate speed ULG 3.8 B1 — IAN 274400 это слишком мало. Инструкция заключает ряд отдельных указаний, касающихся функциональности, принципов безопасности, способов ухода (даже то, какие средства стоит использовать), возможных поломок Ultimate speed ULG 3.8 B1 — IAN 274400 и способов решения проблем, возникающих во время использования. И наконец то, в инструкции можно найти адресные данные сайта Ultimate speed, в случае отсутствия эффективности предлагаемых решений. Сейчас очень большой популярностью пользуются инструкции в форме интересных анимаций или видео материалов, которое лучше, чем брошюра воспринимаются пользователем. Такой вид инструкции позволяет пользователю просмотреть весь фильм, не пропуская спецификацию и сложные технические описания Ultimate speed ULG 3.8 B1 — IAN 274400, как это часто бывает в случае бумажной версии.
Почему стоит читать инструкции?
Прежде всего здесь мы найдем ответы касательно конструкции, возможностей устройства Ultimate speed ULG 3.8 B1 — IAN 274400, использования отдельных аксессуаров и ряд информации, позволяющей вполне использовать все функции и упрощения.
После удачной покупки оборудования/устройства стоит посвятить несколько минут для ознакомления с каждой частью инструкции Ultimate speed ULG 3.8 B1 — IAN 274400. Сейчас их старательно готовят или переводят, чтобы они были не только понятными для пользователя, но и чтобы выполняли свою основную информационно-поддерживающую функцию.
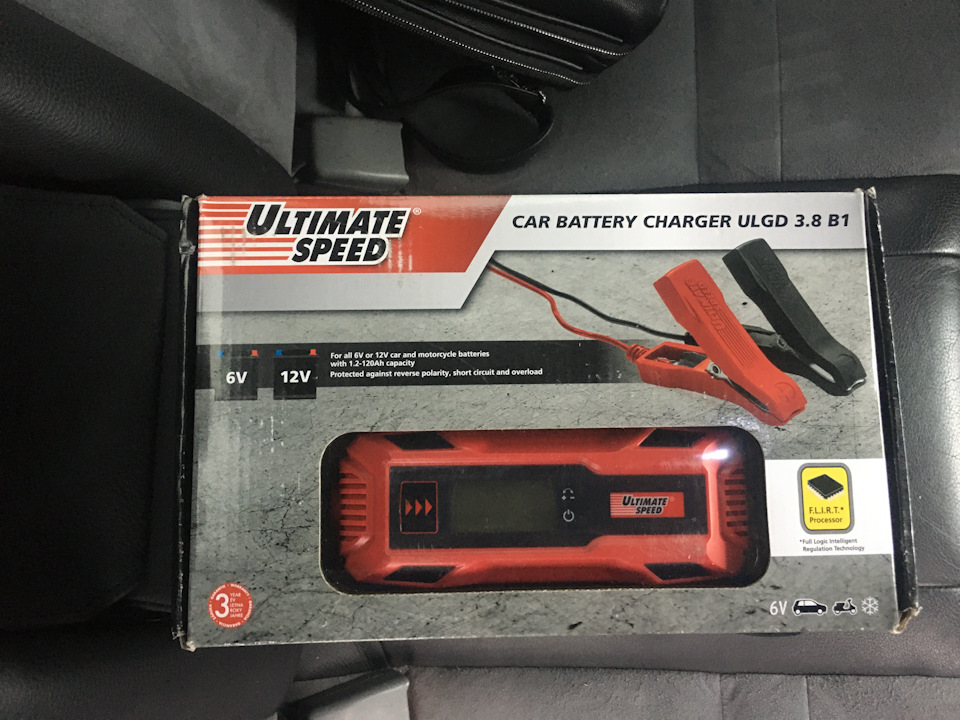
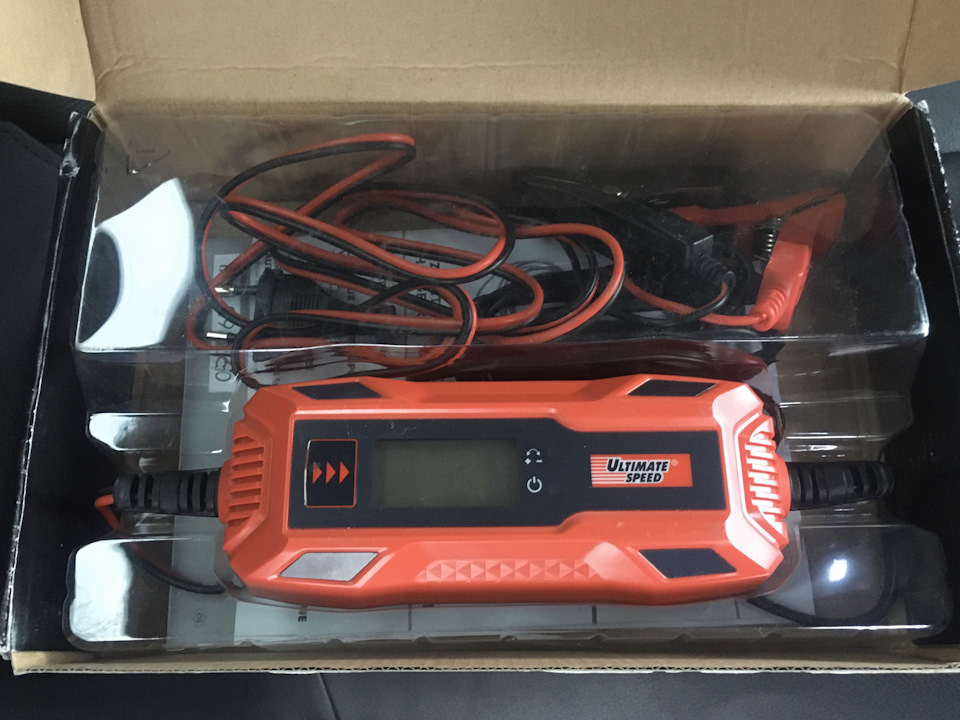
Всем доброго дня суток. Теперь у меня новый помощник в гараже. Интеллектуальное зарядное устройство ULTIMATE SPEED® Kfz-Batterieladegerät ULGD 3.8 B1 от немецкой компании, предназначено для зарядки свинцово-кислотных батарей автомобилей типов WET, MF, AGM и GEL с питанием постоянного тока, напряжением 6 и 12 В и емкостью батарей до 120 Ач. Зарядка проводится импульсным зарядным током в 4 А и имеет 9 степеней зарядки аккумулятора.
Во время работы, зарядное устройство должно быть защищено от прямых действий воды, грязи, снега, а также агрессивных химических веществ. Данная модель поддерживает функцию защиты от короткого замыкания, перегрева, неправильного подключения и искр, с общей степенью защиты устройства IP20.
Индикация этапов зарядки отображается на LCD-дисплее. ULGD 3.8 B1 поддерживает функцию памяти и восстановления батареи с встроенным тестером с отображаемым вольтажом.
Данная модель отличается высоким качеством сборки и надежностью конструкции и может использоваться при температуре окружающей среды от -20°C до +50 °С.
Основные особенности:
Интеллектуальное зарядное устройство
Емкость аккумулятора до 120 Ач
Световая индикация зарядки
Функция памяти
Функция восстановления батареи
Встроенный тестер батареи с функцией отображения вольтажа
LCD-индикатор
Общая степень защиты устройства IP20
Защита от неправильного подключения
Защита от короткого замыкания
Защита от перегрева
Всем добра и мира!

Запчасти на фото: 298760
Предлагаем вам документ Руководство по эксплуатации на ULTIMATE SPEED ULG 3.8 A1 — 7: PDF файл 724 Kb, 51 страниц.
Руководство по эксплуатации ULG 3.8 A1 — 7 — читать онлайн или скачать бесплатно. Также, вы можете задать любой вопрос про ULTIMATE SPEED ULG 3.8 A1 — 7.
Скачать файл Руководство по эксплуатации ULTIMATE SPEED ULG 3.8 A1 — 7
Размер файла: 724 Kb
Кол-во страниц: 51
Просмотров: 30264
Тип файла: Portable Document Format (PDF)

Читать онлайн ULTIMATE SPEED ULG 3.8 A1 — 7 Руководство по эксплуатации
BATTERY CHARGER ULG 3.8 A1
BATTERY CHARGER
Operation and Safety Notes
ÎNCĂRCĂTOR BATERIE AUTO
Instrucţiuni de utilizare şi de siguranţă
BATTERIELADEGERÄT
Bedienungs- und Sicherheitshinweise
PUNJAČ BATERIJA
Upute za posluživanje i za Vašu sigurnost
ЗАРЯДНО УСТРОЙСТВО ЗА
АВТОМОБИЛНИ АКУМУЛАТОРИ
Инструкции за обслужване и безопасност
7
Before reading, unfold the page containing the illustrations and familiarise yourself with all functions of the
device.
Prije nego što pročitate tekst, otvorite stranicu sa slikama i upoznajte se na osnovu toga sa svim funkcijama
uređaja.
Înainte de a citi instrucţiunile, priviţi imaginile şi familiarizaţi-vă cu toate funcţiile aparatului.
Преди да прочетете отворете страницата с фигурите и след това се запознайте с всички функции
на уреда.
Klappen Sie vor dem Lesen die Seite mit den Abbildungen aus und machen Sie sich anschließend mit allen
Funktionen des Gerätes vertraut.
GB Operation and Safety Notes Page 5
HR Upute za posluživanje i za Vašu sigurnost Stranica 13
RO Instrucţiuni de utilizare şi de siguranţă Pagina 23
BG Инструкции за обслужване и безопасност страница 33
DE / AT / CH Bedienungs- und Sicherheitshinweise Seite 43
A
1 3 4 52
B
9
16
15 14 13
10
678
1112
12
C

Table of contents
Introduction
Proper Use ………………………………………………………………………………………………………Page 6
Delivery Contents …………………………………………………………………………………………….Page 6
Component description ……………………………………………………………………………………Page 6
Technical Data ………………………………………………………………………………………………..Page 7
Safety
Safety information ……………………………………………………………………………………………Page 7
Product features……………………………………………………………………………………………….Page 9
Operation
Connection ……………………………………………………………………………………………………..Page 9
Disconnecting ………………………………………………………………………………………………….Page 9
Select charging mode ………………………………………………………………………………………Page 9
Reset / deleting settings …………………………………………………………………………………….Page 10
Switching between modes 1, 2, 3 and 4 …………………………………………………………..Page 10
Mode 1 „6 V“ (7. 3 V / 0. 8 A) ………………………………………………………………………… Page 10
Mode 2
Mode 3
Mode 4
Regenerating / charging empty (used, overcharged) 12 V batteries ……………………Page 11
Protective function of the device ………………………………………………………………………..Page 11
Overheating protection ……………………………………………………………………………………Page 11
„12 V“ (14. 4 V / 0. 8 A) …………………………………………………………………Page 10
„12 V“ (14. 4 V / 3. 6 A) ……………………………………………………………….Page 10
„12 V” (14. 7 V / 3. 8 A) ………………………………………………………………..Page 10
Maintenance and care ………………………………………………………………………..Page 11
Service ………………………………………………………………………………………………………….Page 11
Warranty …………………………………………………………………………………………………….Page 11
Disposal ……………………………………………………………………………………………………….Page 12
Declaration of conformity / Manufacturer ………………………………Page 12
5 GB
Introduction
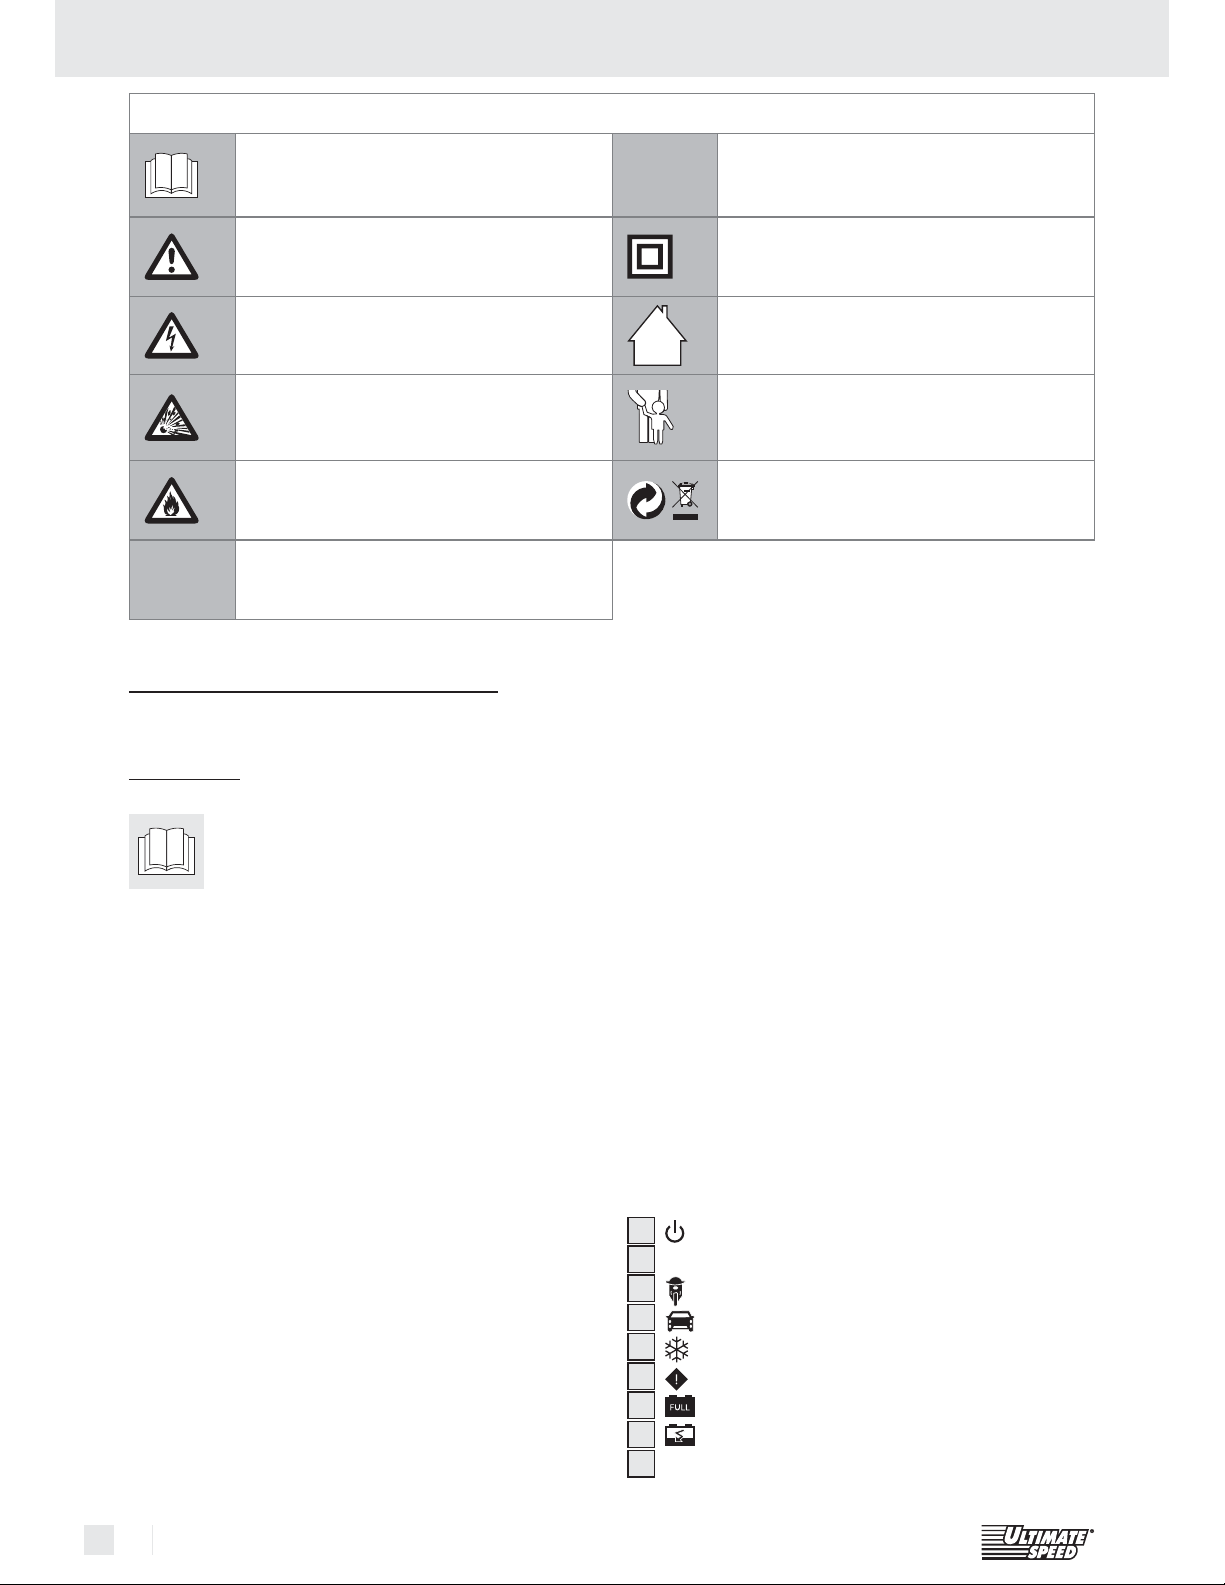
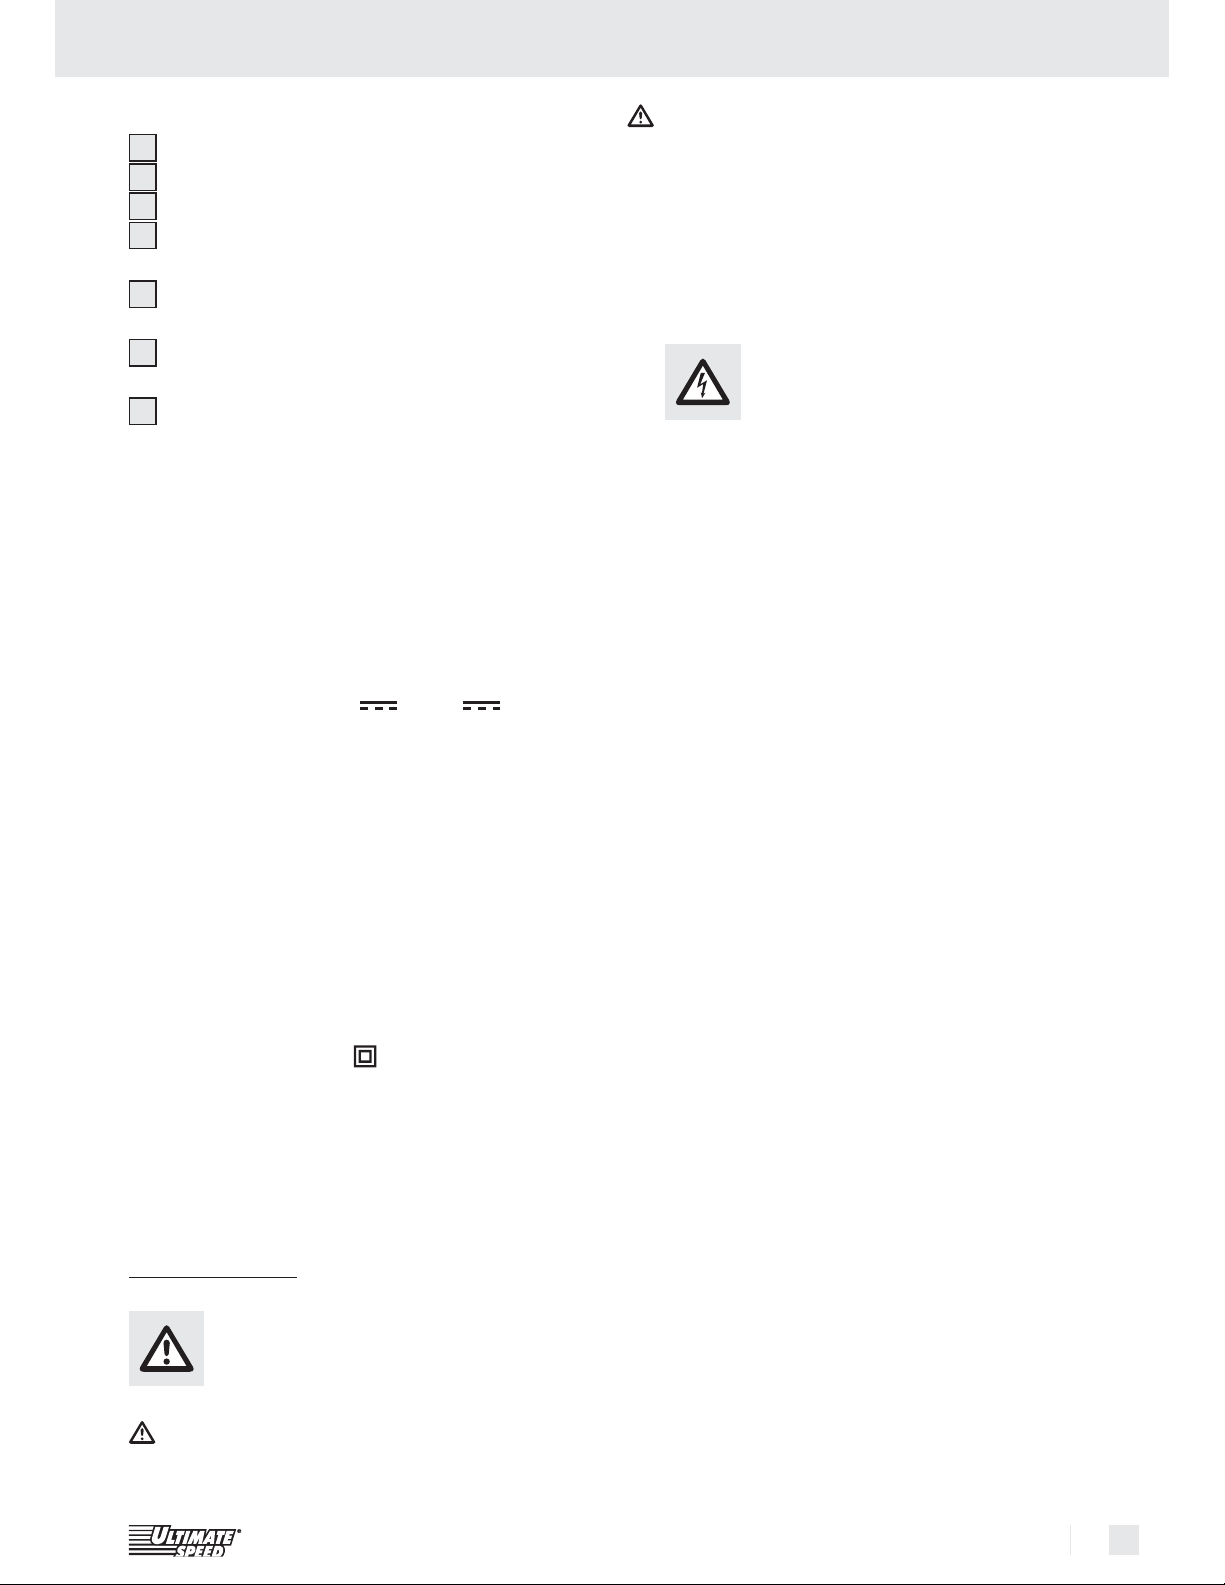
The following pictograms are used in these operating instructions / on the device:
Read instruction manual!
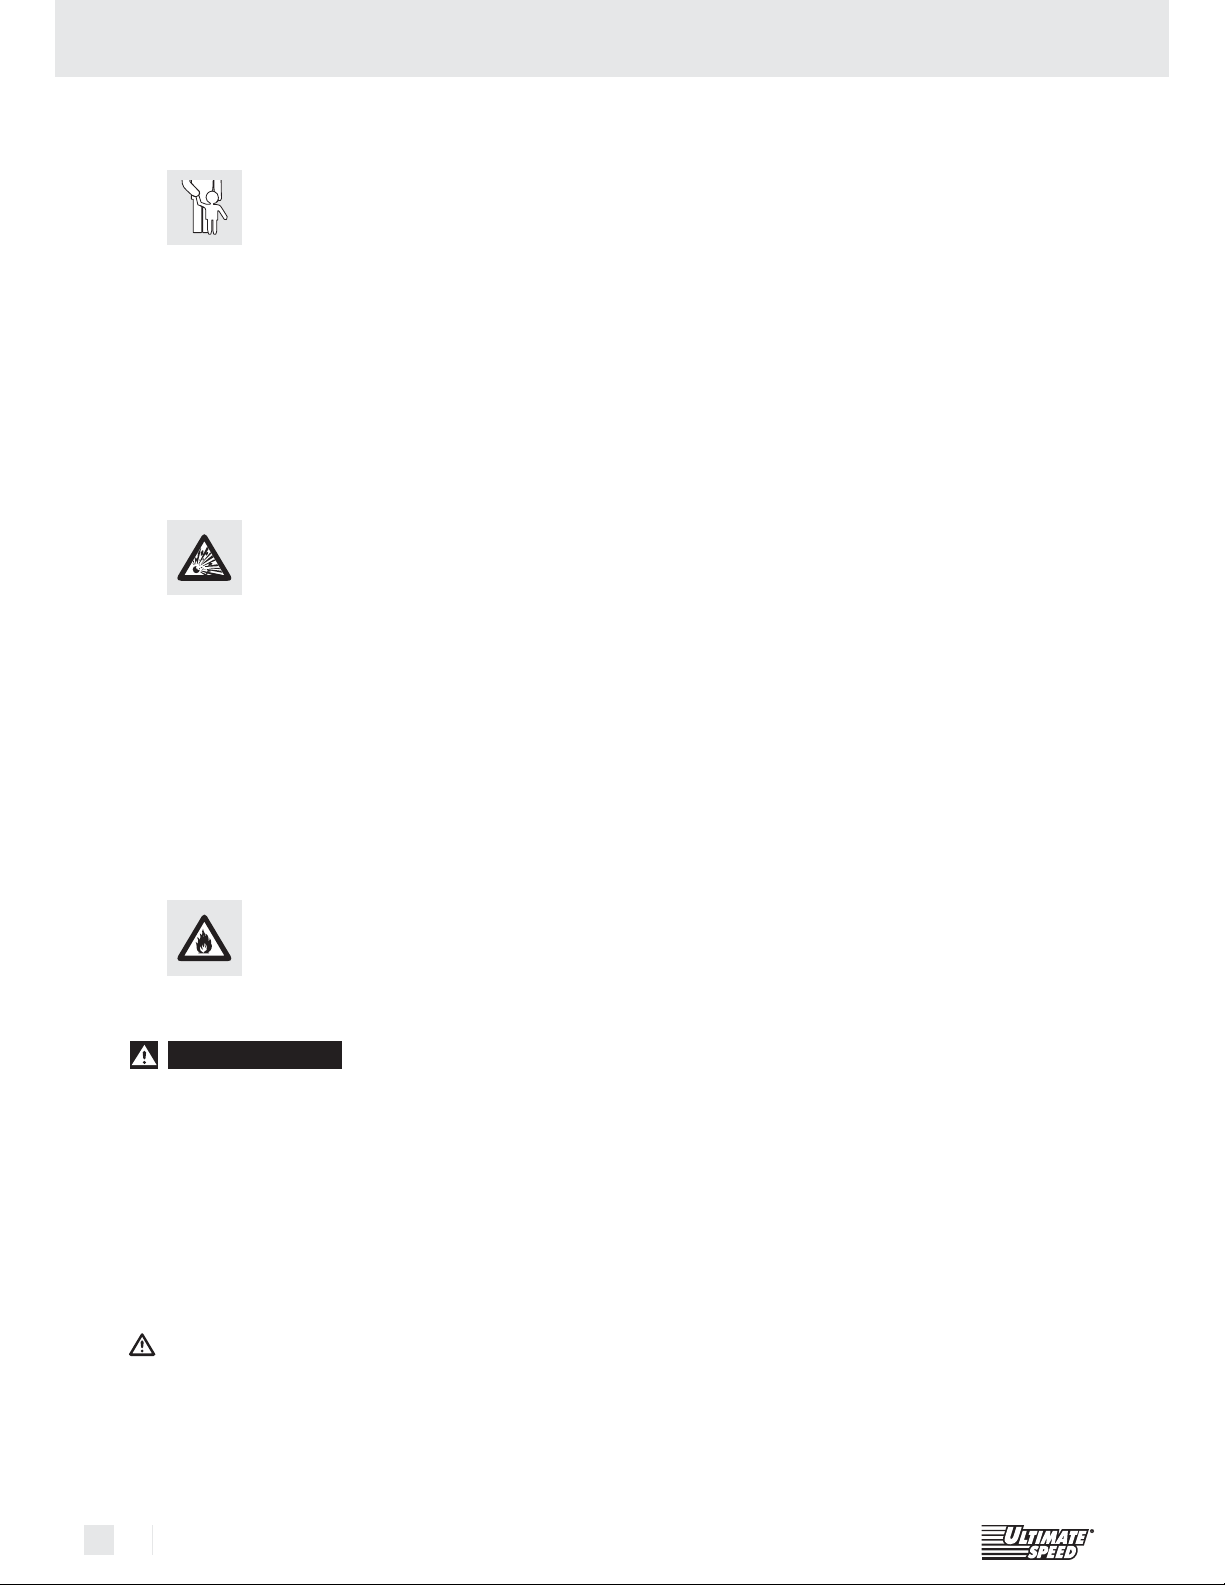
Observe caution and safety notes! Safety class II
Caution – electric shock!
Danger to life!
Risk of explosion!
Risk of fire!
W
Watts (Effective power)
Battery charger ULG 3.8 A1
V
Volt (AC)
~
For indoor use only!
Keep children away from
electrical devices!
Check that the device, mains lead
and plug are in good condition!
laid down. The appliance is not meant for commercial use.
Introduction
Please carefully read these operating
instructions and fold out the page with
the illustrations. Keep these operating
instructions in a safe place and hand them over to
anyone to whom you pass on the appliance.
Proper Use
The ULTIMATE SPEED ULG 3.8 A1 is a battery
charger with a pulse trickle charge mode and is
suitable for charging and maintenance charging of
the following 6 V or 12 V lead rechargeable batteries with wet cell or gel electrolyte:
t 7XJUIBDBQBDJUZPG»IUP»I
t 7XJUIBDBQBDJUZPG»IUP»I
t 7XJUIBDBQBDJUZPG»IUP»I
You can also used it to regenerate completely discharged batteries. The battery charger has protective
circuits to prevent sparking and overheating. Any incorrect or improper use leads to loss of the warranty.
The manufacturer takes no responsibility for damage
arising out of usage that is contrary to the instructions
(s)
Delivery Contents
Check the appliance and all accessories for damage
immediately after unpacking. Do not put a defective
appliance or parts into operation.
1 Charger ULTIMATE SPEED ULG 3.8 A1
2 Quick / contact clamps (1 red, 1 black)
1 Operating manual
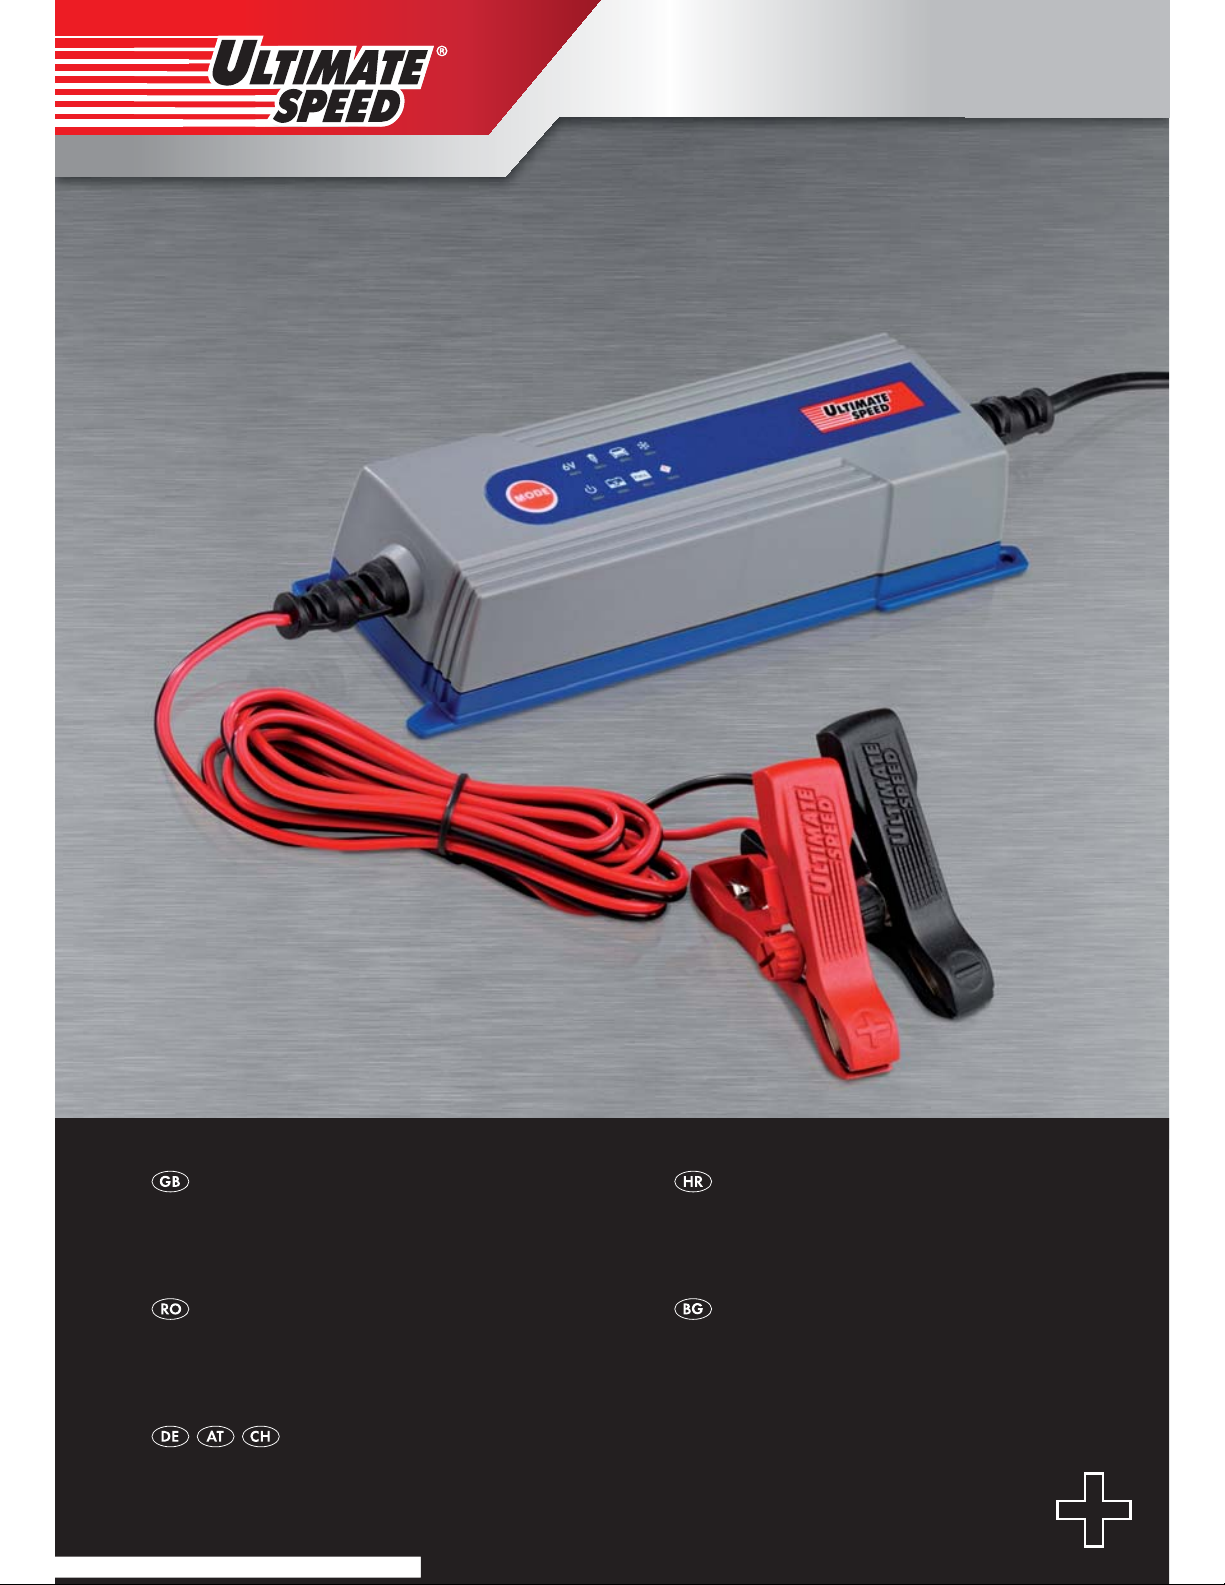
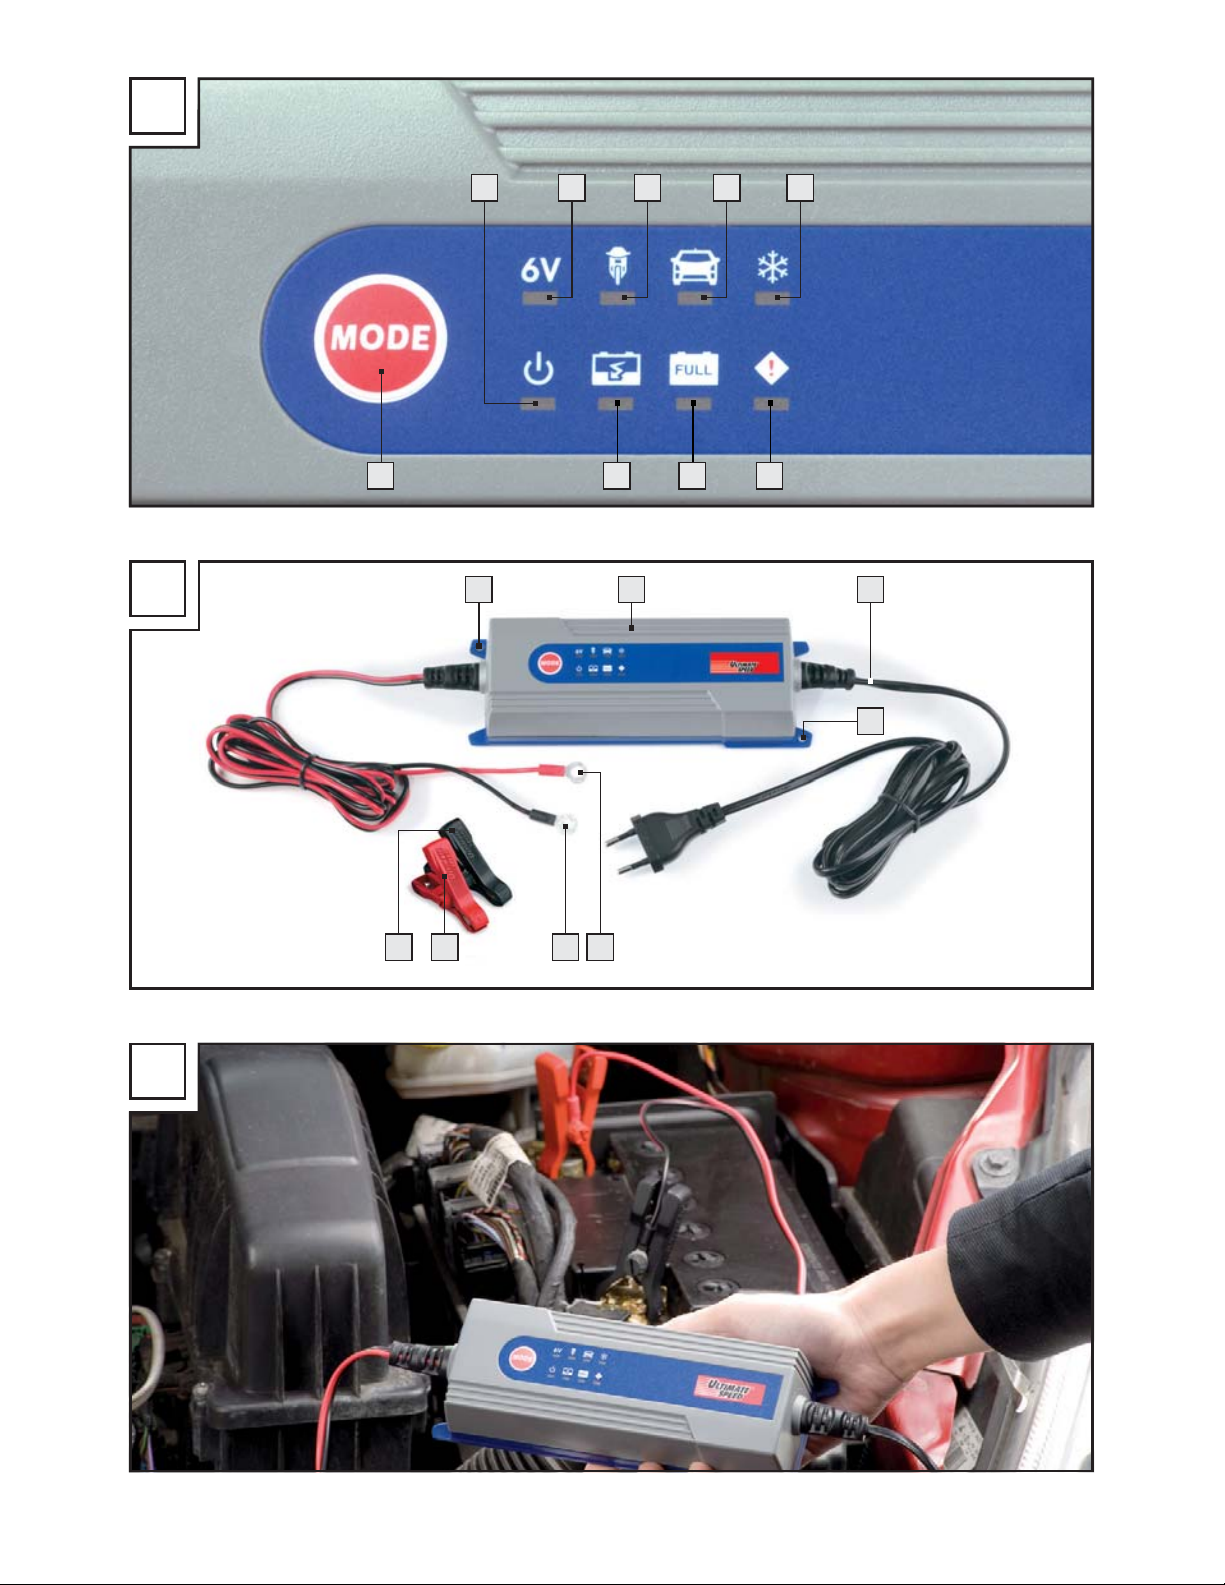
Component description
see Fig. A:
1
LED display (standby)
2
„6 V“ LED display „Mode 1“
3
LED display „Mode 2“
4
LED display „Mode 3“
5
LED display „Mode 4“
6
7
8
LED display „Charging process active“
9
LED display „incorrect polarity / fault“
LED display „fully charged“
Selection button „MODE“
6 GB
Introduction / Safety
see Fig. B:
10
Charging station
11
Mains lead
12
Mounting holes
13
„+“-Pole connection cable (red), incl. ring shoe
14
„–“-Pole connection cable (black), incl. ring shoe
15
„+“-Pole quick-contact terminal (red), incl. red
fixing screw
16
„–“-Pole quick-contact terminal (black), incl.
black fixing screw
Technical Data
Input voltage: 220 — 230 — 240 V ~
50 / 60 Hz
Power consumption: 60 W
Reverse current*: < 5 mA (no AC input)
Nominal output voltage: 6 V
/ 12 V
Nominal output current: 0.8 A / 3.8 A
Charging voltage: 7.3 V or 14.4 V or 14.7 V
Charging current: 0.8 A ± 10 %
3.8 A ± 10 %
Battery type: 6 V lead-acid battery
1.2 Ah — 14 Ah
12 V lead-acid battery
1.2 Ah — 120 Ah
Housing protection type: IP 65 (dust-proof,
water-proof)
Safety class: II /
* = Return current is the current used by the
charging station battery, when no mains
current is connected.
Safety
Safety information
DANGER! Avoid danger to life and limbs
caused by improper use!
CAUTION! Do not operate the appliance
with a damaged cable, power cord or
plug. A damaged power cord causes danger
to life by electric shock.
If damaged, have the power cord repaired by
authorised and trained technicians only! Please
contact the service department for your country!
PROTECT YOURSELF FROM
AN ELECTRIC SHOCK! When
connecting the charging station, use
a screwdriver and a spanner with an insulated
handle!
DANGER OF ELECTRIC SHOCK! Do not
operate the vehicle if you are charging a battery
while it is still in the vehicle! Switch off the ignition and park the vehicle. Apply the parking
brake (e.g. in cars) or secure with a mooring
rope (e.g. electric boat)!
DANGER OF ELECTRIC SHOCK! Disconnect
the battery charger from the mains before you
make or break the connections to the battery.
— First connect the clamp that is not connected
to vehicle bodywork, then connect the other
clamp to the vehicle bodywork at a point
away from the battery and the fuel line. After
this is done, you can connect the battery
charger to the mains.
— After charging, disconnect the battery charger from the mains. Then disconnect the clamp
attached to the vehicle bodywork before you
disconnect the clamp from the battery.
DANGER OF ELECTRIC SHOCK! Handle
the connecting cables („–“ and „+“) by their
insulated areas only!
DANGER OF ELECTRIC SHOCK! Ensure
that there is complete protection from moisture
at the connections to the battery and at the
mains outlet socket!
DANGER OF ELECTRIC SHOCK! Carry out
the mounting, maintenance and cleaning of the
battery charger only when it is disconnected
from mains!
DANGER OF ELECTRIC SHOCK! After
completion of the charging and maintenance
charging process on a battery mounted in a
vehicle, first disconnect the negative connection
cable (black) of the battery charger from the
negative terminal of the battery.
Do not leave small children
unattended with the battery
charger! Children are too young
to assess the possible dangers associated with
7 GB
Safety
electrical devices. Children should be supervised
in order to ensure that they do not play with
the device.
Children or persons who lack the knowledge or
experience to use the device or whose physical,
sensory or intellectual capacities are limited
must never be allowed to use the device without
supervision or instruction by a person responsible for their safety.
reaction! Gaseous hydrogen can leak from
the battery during the charging and discharging
process. Oxyhydrogen gas is an explosive mixture
of gaseous hydrogen and oxygen. The result is
the so-called oxyhydrogen reaction upon contact with open fire (flames, embers or sparks)!
Carry out the charging or discharging procedure in a wellventilated room protected from
the weather. Make sure that there are no sources of open fire (flames, embers or sparks) in the
vicinity when charging or discharging batteries!
or combustible substances, e.g. petrol or solvents!
WARNING!
AVOID FLAMES AND SPARKS! Ensure
that there is adequate ventilation during the
charging process.
Stand the battery on a well ventilated surface
while charging. Otherwise the device could be
damaged.
DANGER OF EXPLOSION! Ensure that the
positive terminal connection cable does not come
into contact with a fuel line (e.g. petrol line)!
DANGER OF CHEMICAL BURNS! Protect
your eyes and skin against chemical
burns caused by acid (sulphuric acid)
upon contact with the battery! Wear:
Acid-resistant glasses, clothing and gloves! If
your eyes or skin come into contact with sulphuric
acid, rinse the affected part of the body with
plenty of clear running water and seek immediate medical assistance!
Avoid causing an electrical short-circuit when
connecting the battery charger to the battery.
EXPLOSION HAZARD!
Protect yourself from a highly explosive oxyhydrogen gas
RISK OF EXPLOSION OR FIRE!
Ensure that the use of the battery
charger cannot ignite any explosive
EXPLOSIVE GASES!
Connect the minus pole connecting cable only
to the minus pole of the battery or to the car
body. Connect the plus pole connecting cable
only to the plus pole of the battery!
Before connecting to the mains, make sure that
the mains current is equipped with standard
230 V ~ 50 Hz, PEN conductor, a 16 A fuse and
a residual-current circuit-breaker! Otherwise the
device could be damaged.
Do not place the battery charger near fire, heat,
or subject it to prolonged temperatures of over
50 °C! The output from the battery charger
drops automatically in high temperatures.
Avoid damaging any lines carrying fuel, electricity
brake fluid, hydraulic oil or water. Be particularly
careful not to cause damage when mounting the
charger in place with screws! Failure to observe
this advice risks loss of life or injury!
Use only the supplied original manufacturer’s
parts with the battery charger!
Do not allow any objects to cover the battery
charger! Otherwise the device could be damaged.
Protect the electrical contacts of the battery
against short-circuiting!
Use the battery charger only for charging and
maintenance charging of undamaged 6 V / 12 V
lead batteries (wet cell or gel electrolyte)!
Otherwise damage to property could occur.
Do not use the battery charger for charging or
maintenance charging of disposable batteries.
Otherwise damage to property could occur.
Do not use the battery charger for charging or
maintenance charging of damaged or frozen
batteries! Otherwise damage to property
could occur.
Before connecting the charging station, read
the information on battery maintenance in the
operating instructions of the battery! Otherwise
personal injury and / or damage to the device
could occur.
Before connecting the charging station to a
battery permanently installed in a vehicle, read
the information on electrical safety and maintenance in the operating instuctions of the vehicle!
Otherwise personal injury and / or damage to
the device could occur.
,
8 GB
Safety / Operation
Unplug the charger from the mains supply when
not being used! This also benefits the environment.
Consider how much electricity is consumed,
even in standby mode.
Remain alert at all times and always watch what
you are doing. Always proceed with caution
and do not use the battery charger if you cannot concentrate or feel unwell.
Product features
This appliance has been designed for charging a
variety of SLA batteries (sealed lead acid batteries),
as mainly used in cars, motorbikes and several other
vehicles. They may be of types e.g. WET (with liquid
electrolyte), GEL (with mit gel-type electolyte) or AGM
(absorbed glass mat) batteries. A special design of
the appliance (also named „three-phase-charging
strategy“) enables the recharging of the batttery to
almost 100 % of its original capacity. Connecting
the battery for a long period to the battery charger
is also a good way of ensuring that your battery is
kept in optimum condition.
Operation
WARNING!
Before you carry out any work
on the battery charger always pull the mains
plug out of the mains socket.
WARNING!
DANGER OF ELECTRIC
SHOCK! DANGER OF DAMAGE TO
PROPERTY! DANGER OF INJURY! Ensure
that you do not strike electrical cables, gas or
water pipes when you are drilling into the wall.
If necessary, check the wall using a suitable
detector before you drill.
You may find it convenient to attach the battery
charger on to a board or a wall. Screw the two
screws through the mounting holes
12
into the
board or wall.
Connection
Before starting the charging or discharging
procedure on a permanently installed battery
in a vehicle, first disconnect the minus pole connecting cable (black) of the vehicle from the
minus pole of the battery. The minus pole of the
battery is usually connected to the car body.
Then disconect the plus pole connecting cable
(red) of the vehicle from the plus pole of the
battery.
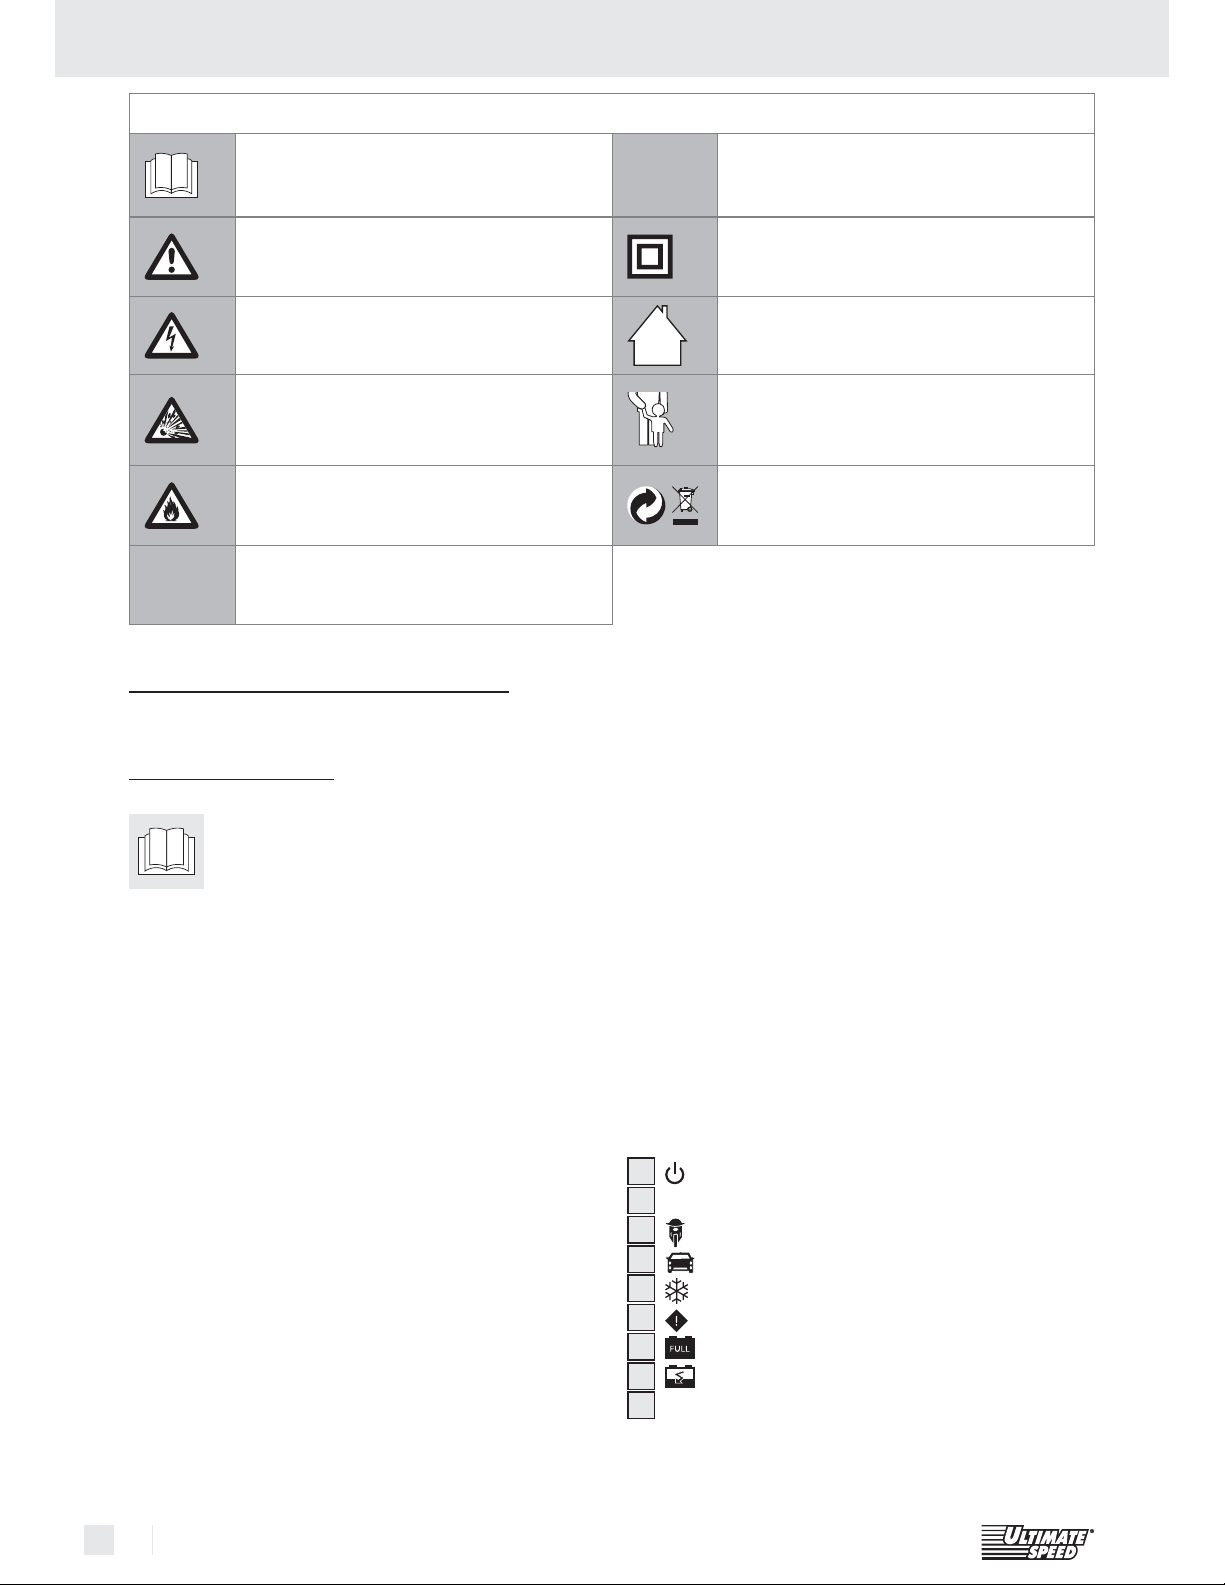
First attach the „+“ quick-release clamp (red)
15
of the battery charger to the „+“ terminal of the
battery (see Fig. C).
Attach the „–“ quick-release clamp (black)
16
of the battery charger to the „–“ terminal of
the battery (see Fig. C).
Connect the mains lead
11
of the battery
charger to an electrical power outlet socket.
Disconnecting
Disconnect the appliance from the power supply.
Detach the „–“ quick-release clamp (black)
16
from the „–“ terminal of the battery.
Detach the „+“ quick-release clamp (red)
15
from the „+“ terminal of the battery.
Reconnect the plus pole connecting cable of
the vehicle to the plus pole of the battery.
Reconnect the minus pole connecting cable of
the vehicle to the minus pole of the battery.
Select charging mode
You can select different charging modes for charging
different batteries at different ambient temperatures.
In comparison with conventional battery charging
stations, this appliance has a special function for
reusing an empty battery or rechargeable battery.
You can recharge an empty battery / rechargeable
battery. Safe charging is ensured by means of a
protection function against incorrect connection and
short circuiting. Due to the installed electronics, the
charging station does not begin operation directly
after connecting the battery, but only starts after a
charging mode has been selected.
This avoids sparking, which often occurs when
connecting. The battery charger is controlled by an
internal MCU (Micro-Computer Unit).
9 GB
Operation
Reset / deleting settings
After connection to the power supply, the appliance
automatically returns to its basic setting and remains
in STANDBY mode
Switching between modes 1,
2, 3 and 4
Press the MODE selection button 9 the appro-
priate number of times.
The device switches between charging modes in
the following order: Standby
„6 V“, MODE 2
, MODE 3 , MODE 4
and then repeats the cycle
NOTE: If you press the selector button
mode automatically switches over to the next mode
and begins operation in that mode.
, MODE 1
9
, charging
Mode 2 „12 V“ (14.4 V / 0.8 A)
This mode is suitable for charging 12 V lead-acid
batteries with a capacity less than 14 Ah.
Press the selection button MODE
9
, to activate
mode 2. After completion of this process, the
appropriate LED indicator
3 lights up.
Then if you do not take any further action, the
electronic control and the LED indicator
automatically switches on and starts the charging process. If the procedure runs without any
problems, the LED display
8 remains on
during the entire charging process, until the
battery is fully charged. When the battery is
fully charged, LED display
LED display
8 goes out. The device now
7 lights up and
switches automatically into maintenance charging mode.
8
NOTE: However, if a battery is not disconnected
from the charging station after a full charge, the
appliance remains in trickle-charge mode, even if
the user switches over to another mode. This protects the battery from being damaged.
Mode 1 „6 V“ (7.3 V / 0.8 A)
This mode is suitable for charging 6 V lead-acid
batteries with a capacity less than 14 Ah.
Press the selection button MODE
9
, to select
mode 1. After doing so, the corresponding LED
display „6 V“
2
lights up. If you do not activate
an-other process afterwards, the electronic system will automatically start the charging process
together with the LED display
8 at (with a
current of) 0.8 A ± 10 %. If the procedure runs
without any problems, the LED display
remains on during the entire charging proc
til the battery is fully charged at 7.3 V / ±
8
ess,
0.25 V.
When the battery is fully charged, LED display
7 lights up and LED display 8 goes
out. The device now switches automatically into
maintenance charging mode.
un-
Mode 3 „12 V“ (14.4 V / 3.6 A)
This mode is mainly suitable for charging 12 V
lead-acid batteries with a capacity greater than
14 Ah under normal conditions.
Press the selection button MODE
9
, to activate
mode 3. Then if you do not take any further action, the electronic control and the LED indicator
4 switches on and starts the charging
process. If the process runs without any problems,
the LED indicator
8 remains on during the
whole charging process until the battery is
charged. When the battery is fully charged, the
LED indicator
7 and the die LED indicator
8 go out. The device now switches auto-
matically into maintenance charging mode.
Mode 4 „12 V” (14.7 V / 3.8 A)
This mode is used for charging 12 V lead-acid batteries with a capacity greater than 14 Ah under
cold conditions or for charging some AGM (Absorbent Glass Mat) batteries with a capacity greater
than 14 Ah.
10 GB
Operation / Maintenance and care / Service / Warranty
Press the MODE selection button 9 to select
mode 4. As you select the desired mode, the
appropriate LED indicator
mediately. If you take no further action, the electronic control switches on after a preset delay
to begin the charging process. In this mode the
charging current is the same as in “mode 3”. If
the process runs without any problems, the LED
indicator
switches on and remains in this state until the
battery is charged. As soon as this point is
reached, the battery charger switches to maintenance charging mode. Now the LED indicator
8 goes out and the LED indicator 7
lights up to indicate the present status.
Regenerating / charging
8 lights up, the electronic control
5 lights up im-
empty (used, overcharged)
12 V batteries
The battery charger detects the battery voltage automatically once the battery charger is connected
to a battery and the charging process has started.
It changes to pulse charging mode if the voltage is
in the range of 7.5 V ± 0.5 to 10.5 V ± 0.5 V.
This pulse charging process is continued until the
battery voltage has increased to 10.5 V ± 0.5 V.
As soon as this state is reached, the battery charger
switches into the normal charging mode that you
selected earlier.
Now the battery can be charged quickly and safely.
Most empty batteries can be charged and used
again using this procedure.
Overheating protection
If the appliance becomes too hot during charging,
the power output is automatically reduced. This
protects the appliance from damage.
Maintenance and care
WARNING!
on the battery charger always pull the mains
plug out of the mains socket.
The appliance is maintenance-free.
Switch off the appliance.
Clean the plastic surfaces of the device with a
dry cloth. Do not under any circum-stances use
solvents or other aggressive cleaning agents.
Service
WARNING!
repaired at the service centre or by
qualified specialist personnel using
original manufacturer parts only. This
will ensure that your device remains safe to use.
WARNING!
needs to be replaced, always have
the replacement carried out by the
manufacturer or its service centre. This
will ensure that your device remains safe to use.
Warranty
Before you carry out any work
Have your device
If the plug or lead
Protective function of the device
If a unexpected situation should occur, such as short
circuiting, battery voltage below 7.5 V, open circuit
or reversed connection of the output terminals, the
charging station deactivates the electronic system
and immediately switches back to basic position to
avoid damage. If you do not activate any settings,
the system will remain in STANDBY mode. With the
inverse connection of the output clamps the LED
display „incorrect polarity / fault“
additionally.
6
lights up
The warranty for this appliance is for 3
years from the date of purchase. The appliance has been manufactured with care
and meticulously examined before delivery. Please retain your receipt as proof
of purchase. In the event of a warranty
claim, please make contact by telephone
with our Service Department. Only in this
way can a post-free despatch for your
goods be assured.
11 GB

Warranty / Disposal / Declaration of conformity / Manufacturer
The warranty covers only claims for material and
maufacturing defects, but not for transport damage,
for wearing parts or for damage to fragile components, e.g. buttons or batteries. This product is for
private use only and is not intended for commercial
use.
The warranty is void in the case of abusive and improper handling, use of force and internal tampering not carried out by our authorized service branch.
Your statutory rights are not
by this warranty.
The warranty period will not be extended by repairs
made unter warranty. This applies also to replaced
and repaired parts. Any damage and defects extant
on purchase must be reported immediately after
unpacking the appliance, at the latest, two days after
the purchase date. Repairs made after the expiration
of the warranty period are subject to payment.
GB
DES UK LTD
Tel.: 0871 5000 700 (£ 0.10 / minute)
e-mail: support.uk@kompernass.com
restricted in any way
Disposal of batteries
As the end user you have a duty to
recycle or properly dispose of all your
used batteries. Batteries containing
environmentally polluting substances are labelled
with the adjacent symbols to indicate that they must
not be disposed of with household refuse. The abbreviations for the critical heavy metals are: Cd =
cadmium, Hg = mercury, Pb = lead
Take exhausted batteries to a local authority approved disposal facility or back to the retailer. By doing
this you will be complying with the legal requirements
and making an important contribution to protecting
the environment.
Declaration of conformity /
Manufacturer
We, Kompernaß GmbH, the person responsible for
documents: Mr Felix Becker, Burgstr. 21, D-44867
Bochum, Germany, hereby declare that this product
complies with the following standards, normative
documents and EU directives:
Disposal
The packaging is wholly composed of envi-
ronmentally-friendly materials that can be
disposed of at a local recycling centre.
Do not dispose of electrical
appliances in household waste.
In accordance with European Directive
2002 / 96 / EC on used electrical and electronic
appliances and its implementation in national law,
used power tools must be collected separately and
recycled in an ecologically compatible manner.
return the tool via the available collection facilities.
Information on options for disposing of electrical
appliances after their useful life can be obtained
from your local or city council.
Please
EC Low-Voltage Directive
(2006 / 95 / EC)
Electromagnetic Compatibility
(2004 / 108 / EC)
Product designation:
Battery charger ULG 3.8 A1 ULTIMATE SPEED
Date of manufacture (DOM): 06 — 2010
Serial number: IAN 53350
Bochum, 31.05.2010
Hans Kompernaß
— Managing Director —
We reserve the right to make technical modifications
in the course of product development.
12 GB

Popis sadržaja
Uvod
Uporaba u skladu sa namjenom …………………………………………………………………….Stranica 14
Obim isporuke ………………………………………………………………………………………………Stranica 14
Opis dijelova ………………………………………………………………………………………………..Stranica 14
Tehnički podaci …………………………………………………………………………………………….Stranica 15
Sigurnost
Sigurnosne upute ………………………………………………………………………………………….Stranica 15
Osobine proizvoda ……………………………………………………………………………………….Stranica 17
Rukovanje
Priključivanje ………………………………………………………………………………………………… Stranica 17
Odvajanje…………………………………………………………………………………………………….Stranica 17
Odabir modusa punjenja ………………………………………………………………………………Stranica 17
Reset / brisanje postavki ……………………………………………………………………………….. Stranica 18
Prespajanje između modusa 1,2, 3 i 4 …………………………………………………………..Stranica 18
Modus 1 „6 V“ (7,3 V / 0,8 A) ……………………………………………………………………….Stranica 18
Modus 2
Modus 3
Modus 4
Prazne (istrošene, prepunjene) baterije od 12 V obnoviti / napuniti ………………….Stranica 19
Zaštitna funkcija uređaja ……………………………………………………………………………….Stranica 19
Zaštita od pregrijavanja ………………………………………………………………………………..Stranica 19
„12 V“ (14,4 V / 0,8 A) ………………………………………………………………Stranica 18
„12 V“ (14,4 V / 3,6 A) …………………………………………………………….. Stranica 18
„12 V“ (14,7 V / 3,8 A) ………………………………………………………………Stranica 19
Održavanje i servisiranje ………………………………………………………………. Stranica 19
Servis ………………………………………………………………………………………………………….Stranica 19
Jamstveni list………………………………………………………………………………………….Stranica 19
Zbrinjavanje ………………………………………………………………………………………….. Stranica 20
Izjava o konformitetu / Proizvođač ………………………………………….Stranica 21
13 HR
Uvod
U ovim uputama za uporabu / na uređaju rabi se slijedeće prikaze:
Čitati upute za rukovanje!
Obratiti pažnju na upozoravajuće
i sigurnosne upute!
Čuvajte se strujnog udara!
Opasnost po život!
Opasnost od eksplozije!
Opasnost od požara!
W
W (Efektivna snaga)
Punjač baterija ULG 3.8 A1
V
Volt (Imjenični napon)
~
Zaštitna klasa II
Isključivo namijenjeno za uporabu
u unutarnjim prostorijama!
Držite djecu podalje od
električnog uređaja!
Materijal ambalaže i uređaj zbrinite
na način neškodljiv za okoliš!
korištenja uređaja protivnog njegovoj namjeni. Uređaj nije namijenjen za uporabu u komercijalne svrhe.
Uvod
Molimo pažljivo pročitajte upute za ru-
kovanje, te u tu svrhu otvorite stranu sa
ilustracijama. Brižljivo sačuvajte upute
za uporabu, te je priložite kada uređaj dajete trećim
osobama.
Uporaba u skladu sa namjenom
ULTIMATE SPEED ULG 3.8 A1 je uređaj za punjenje baterija s punjenjem zbog održavanja impulsa,
koji je prikladan za punjenje i punjenje zbog održavanja slijedećih olovnih akumulatora (baterije)
od 6 V ili 12 V, sa elektrolitskom otopinom ili gelom:
t 7LBQBDJUFUPE»IEP»I
t 7LBQBDJUFUPE»IEP»I
t 7LBQBDJUFUPE»IEP»I
Nadalje možete potpuno ispražnjene baterije obnoviti. Uređaj za punjenje baterija opremljen je sa
zaštitnim spojem protiv stvaranja iskri ili pregrijavanja. Svaki nenamjenski ili nestručan način uporabe
dovodi do gubitka prava iz jamstva. Proizvođačne
preuzima odgovornost od štete nastale uslijed
Obim isporuke
Neposredno nakon raspakiranja kontrolirajte cjelokupan obim isporuke i uređaj sa svim dijelovima na
oštećenost. Defektan uređaj ili defektne dijelove ne
puštajte u pogon.
1
Uređaj za punjenje ULTIMATE SPEED ULG 3.8 A1
2 Priključni steznici za brzi kontakt
(1 crveni, 1 crni)
1 Upute za rukovanje
Opis dijelova
Vidite prikaz A:
1
LED-prikaz (Pripravnost)
2
„6 V“ LED-prikaz „Modus 1“
3
LED-prikaz „Modus 2“
4
LED-prikaz „Modus 3“
5
LED-prikaz „Modus 4“
6
LED-prikaz „polni priključak / pogreška“
7
LED-prikaz „potpuno napunjen“
8
LED-prikaz „postupak punjenja aktivan“
9
Gumb za odabir „MODE“
14 HR
Uvod / Sigurnost
Vidite prikaz B:
10
Uređaj za punjenje
11
Mrežni kabel
12
Bušenje za pričvršćenje
13
„–“-Polni priključni kabel (crveni),
uklj. prstenasti držač
14
„–“-Polni priključni kabel (crni),
uklj. prstenasti držač
15
„+“-Polni brzokontaktni priključni steznik
(crveni), uklj. crveni vijak za učvršćavanje
16
„–“-Polni brzokontaktni priključni steznik (crni),
uklj. crni vijak za učvršćavanje
Tehnički podaci
Ulazni napon: 220 — 240 V ~ 50 / 60 Hz
Primanje snage: 60 W
Povratna struja*: < 5 mA (bez AC-ulaza)
Nazivni izlazni
napon: 6 V
/ 12 V
Nazivna izlazna
struja: 0,8 A / 3,8 A
Napon punjenja: 7,3 V ili 14,4 V ili 14,7 V
Struja punjenja: 0,8 A ± 10 %
3,8 A ± 10 %
Tip baterije: 6 V-olovna — kiselinska — baterija
1,2 Ah — 14 Ah
12 V-olovna — kiselinska — baterija
1,2 Ah — 120 Ah
Vrsta zaštite kućišta: IP 65 (zaštićeno od prodiranja
prašine, nepromočivo)
Zaštitna klasa: II /
* = Povratna struja označava struju, koju uređaj
za punjenje potroši iz akumulatora, kada nije
priključeno napajanje iz strujne mreže.
Sigurnost
Sigurnosne upute
OPASNOST! Izbjegnite opasnost od oz-ljeđi-
vanja i opasnost po život uslijed nestručno
rukovanje uređajem!
OPREZ! Ne rukujte uređajem kada je
oštećen kabel, mrežni kabel ili mrežni
utikač. Oštećeni mrežni kabel uzrokuje opa-
snost po život uslijed strujnog udara.
Dajte mrežni kabel j u slučaju oštećenja na
popravak isključivo ovlaštenom i obučenom
stručnom osoblju! U slučaju popravke kvara se
povežite sa servisnom ispostavom Vaše države!
ZAŠTITITE SE OD STRUJNOG
UDARA! Prilikom priključivanja ure-
đaja za punjenje koristite odvijače i
ključeve sa izoliranim zaštitnim rukohvatom!
OPASNOST OD STRUJNOG UDARA!
Ako je baterija čvrsto montirana u vozilu, osigurajte da vozilo nije u pogonu! Isključite električno paljenje i namjestite vozilo na poziciju
parkiranja, s nategnutom ručnom kočnicom
(npr. osobno vozilo) ili vezano konopom (npr.
električni čamac)!
OPASNOST OD STRUJNOG UDARA!
Prije zatvaranja ili otvaranja spojeva prema
bateriji, odvojite uređaj za punjenje baterije od
mreže.
— Priključite prvo priključnu stezaljku, koja nije
priključena na karoseriji. Priključite drugu priključnu stezaljku podalje od baterije i benzin
skog
voda na karoseriji. Tek nakon toga priključite
uređaj za punjenje baterije na opskrbnu mrežu.
— Nakon punjenja, odvojite uređaj za punjenje
baterije od opskrbne mreže. Tek nakon toga
odvojite priključnu stezaljku od karoserije.
Nakon toga odvojite priključnu stezaljku od
baterije.
OPASNOST OD STRUJNOG UDARA!
Zahvaćajte priljučne kabele polova („–“ i „+“)
isključivo na izoliranom dijelu!
OPASNOST OD STRUJNOG UDARA!
Obvezno spriječite bilo kakav dodir s vlagom
tijekom priključenja na bateriju i utičnicu strujne
mreže!
OPASNOST OD STRUJNOG UDARA!
Instalirajte, redovito održavajte i njegujte uređaj
za punjenje baterija samo kad nije priključen na
strujnu mrežu!
OPASNOST OD STRUJNOG UDARA!
Ako je u vozilu stalno priključena baterija, odvojite nakon punjenja i punjenja zbog održavanja,
15 HR
Sigurnost
prvo priključni kabel minus pola (crno) uređaja
za punjenje baterija od minus pola baterije.
nemogu ocijeniti moguću opasnost pri rukovanju
s električnim uređajima. Potrebno je nadzirati
djecu, kako se nebi igrala s uređajem.
Djeci ili osobama, koje nemaju znanje o stroju
ili iskustvo u ophođenju s istim, ili čije su tjelesne, senzorične ili umne sposobnosti ograničene, nije dozvoljeno koristiti stroj, bez nadzora
ili upute od osobe koja je zadužena za njihovu
sigurnost.
prilikom procesa punjenja strujati iz baterije.
Praskavi plin je eksplozivna mješavina vodika i
kisika u plinovitom stanju. Prilikom kontakta sa
otvorenim izvorima plamena (plamen, žar ili
iskre) dolazi do takozvane reakcije praskavog
plina! Postupak punjenja baterije treba biti
izveden u zaštićenoj prostoriji, koja je dostatno
prozračena. Osigurajte, da prilikom postupka
punjenja baterije u blizini ne bude prisutan
izvor plamena (plamen, iskra ili žar)!
otapala tijekom uporabe uređaja za punjenje
baterija nemogu zapaliti!
UPOZORENJE!
PLINOVI! IZBJEGAVAJTE STVARANJE
PLAMENA I ISKRI! Osigurajte pri punjenju
dostatno prozračivanje.
Postavite bateriju tijekom postupka punjenja na
dostatno prozračenu površinu. Uređaj bi se
inače mogao oštetiti.
OPASNOST OD EKSPLOZIJE! Osigurajte
da priključni kabel plus pola ne dolazi u dodir
sa vodom goriva (npr. benzinski vod)!
OPASNOST OD NAGRIZANJA! Zaštitite
oči i kožu od nagrizanja uslijed kiseline
(sum-porne) prilikom kontakta sa baterijom! Rabite: zaštitne očale, odjeću i ruka-
vice otporne na kiselinu! Ukoliko oči ili koža dođu
u dodir sa sumpornom kiselinom, zahvaćeni
Ne ostavljajte djecu nikad
bez nadzora u blizini uređaja
za punjenje baterija! Djeca
OPASNOST OD EKSPLOZIJE!
Zaštitite se od reakcije praskavog plina! Plinoviti vodik može
OPASNOST OD EKSPLOZIJE I
POŽARA! Osigurajte, da se eksplo-
zivne ili zapaljive tvari npr. benzin ili
EKSPLOZIVNI
dio tijela isperite velikom količinom bistre vode i
neizostavno se obratite liječniku za pomoć!
Izbjegavajte električni kratki spoj pri priključenju
uređaja za punjenje baterija na bateriju. Priključite kabel za minus-pol isključivo na odgovarajući
pol (minus) akumulatora, odnosno na karoseriju. Priključite kabel za plus-pol isključivo na
odgovarajući pol (plus) akumulatora!
Prije priključivanja na mrežni napon osigurajte,
da mrežna struja bude propisno opremljena sa
230 V ~ 50 Hz, uzemljenim nultim provodnikom,
osiguračem od 16 A i Fi-osiguračem (zaštitnim
osiguračem)! Uređaj bi se inače mogao oštetiti.
Ne izlažite uređaj za punjenje baterija vatri,
vrućini ili dugotrajnom utjecaju temperature
iznad 50 °C! Izlazna snaga uređaja za punjenje baterija automatski opadne na većim temperaturama.
Ne oštetite vodove za gorivo, struju, sustav
kočnica, hidraulike, vode, ili pri montaži uređaja za punjenje baterija vijcima! Inače prijeti
opasnost po život i od ozljeda!
Rabite uređaj za punjenje baterija isključivo sa
dostavljenim originalnim dijelovima!
Ne prekrivajte uređaj za punjenje baterija s
predmetima! Uređaj bi se inače mogao oštetiti
Zaštitite površine električnih kontakata od
kratkog spoja!
Rabite uređaj za punjenje baterija isključivo za
punjenje i punjenje zbog održavanja neoštećenih olovnih baterija od 6 V / 12 V (s elektrolitskom
otopinom ili gelom)! U suprotnom slučaju moglo
bi prouzročiti materijalnu štetu.
Ne rabite uređaj za punjenje baterija za punje-
nje i punjenje zbog održavanja baterija koje
se puni ponovo. U suprotnom slučaju moglo bi
prouzročiti materijalnu štetu.
Ne rabite uređaj za punjenje baterija za punje-
nje i punjenje zbog održavanja oštećene ili
zamrznute baterije! U suprotnom slučaju moglo
bi prouzročiti materijalnu štetu.
Prije priključivanja uređaja za punjenje se
informirajte o servisiranju akumulatora, i to na
temelju njegovih uputa za rukovanje! Inače prijeti opasnost od ozljede i / ili opasnost, da se
ošteti uređaj.
Prije priključivanja uređaja za punjenje na ba-
teriju stalno priključenu u vozilu se informirajte
16 HR

Sigurnost / Rukovanje
o pridržavanju načela električne sigurnosti i
održavanja, i to na temelju uputa za rukovanje
vozilom! Inače prijeti opasnost od ozljede i / ili
opasnost, da se ošteti uređaj.
Također iz razloga zaštite okoliša, odvojite
punjač od struje u slučaju nekorištenja! Vodite
računa o tome, da se i tijekom standby-pogona
troši struja.
Budite uvijek pozorni i vodite računa o tome
što radite. Uvijek razumno postupajte i ne stavljajte uređaj za punjenje baterija u pogon, ako
niste koncentrirani ili ako se ne osjećate dobro.
Osobine proizvoda
Ovaj uređaj je koncipiran za punjenje mnoštva
SLA-akumulatora (zapečaćenih akumulatora sa
olovom i kiselinom), koji se uglavnom koriste u
osobnim automobilima, motociklima i nekim drugim
vozilima. Ovi akumulatori mogu na primjer biti
WET-akumulatori (sa tekućim elektrolitom), GEL-baterije (sa elektrolitom u obliku gela) ili AGM-baterije
(sa matama, koje absorbiraju elektrolit). Posebna
koncepcija uređaja (poznata i pod nazivom “Trostupanjska strategija punjenja”) omogućava ponovno
punjenje baterije gotovo do 100 % njenog kapaciteta.
Nadalje moguće je dugotrajno priključenje baterije
s uređajem za punjenje baterija, kako bi istu po
mogućnosti uvijek održavali u optimalnome stanju.
Priključivanje
Prije postupka punjenja i održavanja punjenja
akumulatora stalno priključenog u vozilu prvo
odvojite minus-priključni kabel (crni) vozila od
minus-pola baterije. Minus-pol baterije po pravilu je povezan sa karoserijom vozila.
Nakon toga odvojite plus-priključni kabel (crve-
ni) vozila od plus-pola baterije (akumulatora).
Tek nakon toga prikopčajte brzokontaktnu
priključnu stezaljku „+“-pola (crveno)
15
uređaja
za punjenje baterija na „+“-pol baterije (vidite
prikaz C).
Prikopčajte brzokontaktnu priključnu stezaljku
„-“-pola (crno)
16
uređaja za punjenje baterija
na „-“-pol baterije (vidite prikaz C).
Priključite mrežni kabel
11
uređaja za punjenje
baterija na utičnicu.
Odvajanje
Odvojite uređaj od mrežnog napajanja.
Skinite brzokontaktnu priključnu stezaljku „-“-
pola (crno)
16
sa „-“-pola baterije.
Skinite brzokontaktnu priključnu stezaljku „+“-
pola (crveno)
15
sa „+“-pola baterije.
Plus-polni priključni kabel vozila ponovo
priključite na plus-pol baterije.
Minus-polni priključni kabel vozila ponovo
priključite na minus-pol baterije.
Rukovanje
UPOZORENJE!
Prije izvođenja bilo radova
na uređaju, uvijek prethodno izvucite utikač iz
utičnice.
UPOZORENJE!
OPASNOST OD
STRUJNOG UDARA! OPASNOST OD
MATERIJALNE ŠTETE! OPASNOST OD
OZLJEDA! Osigurajte da ne zahvatite vod
struje, plina ili vode tijekom bušenja i uvijanja
vijaka u zid. Prije bušenja ispitajte zid pomoću
tragača vodova.
Montirajte uređaj za punjenje baterija eventu-
alno na dasku ili zid. Za to zavijte dva vijka
kroz pričvrsne bušotine
12
na dasku ili u zid.
Odabir modusa punjenja
Za punjenje različitih baterija na različitim okolnim temperaturama možete birati različite moduse punjenja.
U usporedbi sa konvencionalnim uređajima za
punjenje baterija ovaj uređaj raspolaže specijalnom
funkcijom za ponovnu uporabu prazne baterije /
praznog akumulatora. Potpuno ispražnjenu bateriju / potpuno ispražnjen akumulator ponovo možete
napuniti. Zaštita od
kog spoja omogućava
pogrešnog priključivanja i krat-
siguran postupak punjenja.
Pomoću ugrađene elektronike uređaj za punjenje
ne stupa u pogon neposredno nakon priključivanja
baterije, nego tek nakon što je odabran modus za
punjenje.
17 HR
Loading…
Русский
- Bedienungsanleitung Ultimate speed ulg 12b3
- Ultimate speed ulg 12b3 User Manual
- Manual Usuario Ultimate speed ulg 12b3
- Mode d’emploi Ultimate speed ulg 12b3
- Istruzioni Ultimate speed ulg 12b3
- инструкция Ultimate speed ulg 12b3
- Ultimate speed ulg 12b3の取扱説明書
- Handleiding Ultimate speed ulg 12b3
- Manual de uso Ultimate speed ulg 12b3
Вам нужна инструкция? Мы поможем Вам ее найти и сэкономить Ваше время.
- 48 stron
- 0.81 mb
Изделие Ultimate speed ulg 12b3, а также другие, которыми Вы пользуетесь ежедневно, наверняка вы получили в комплекте с инструкцией обслуживания. Из опыта наших пользователей мы знаем, что большинство из Вас не уделили этому особого внимания. Большая часть инструкций, сразу же после покупки попадает в корзину для мусора вместе с коробкой — это ошибка. Ознакомьтесь с информацией, касающейся инструкции Ultimate speed ulg 12b3, которая поможет Вам в будущем сэкономить нервы и избежать головной боли.
Важная подсказка — не забывайте хотя бы раз прочитать инструкцию Ultimate speed ulg 12b3
Если вы не хотите каждый раз читать информационные брошюры, касающиеся, тех или Ultimate speed ulg 12b3 иных изделий, достаточно, прочитать их раз — сразу же после покупки устройства. Вы получите основное знания, касающиеся поддержания изделия Ultimate speed ulg 12b3 в хорошем эксплуатационном состоянии, так, чтобы без проблем достигнуть его планируемого цикла работы. Затем инструкцию можно отложить на полку и вернуться к ней только в случае, если вы не уверены, правильно ли проводится техобслуживание изделия. Правильный уход является необходимым элементом Вашего удовольствия Ultimate speed ulg 12b3.
Раз в году пересмотрите шкафчик, в котором держите инструкции для всех устройств, — выбросите те, которыми вы уже не пользуетесься. Это поможет Вам сохранять порядок в своей домашней базе инструкций обслуживания.
Summary of Contents for Ultimate speed ulg 12b3
Что находится в инструкции Ultimate speed ulg 12b3? Почему стоит ее прочитать?
- Гарантия и подробности, касающиеся техобслуживания изделия
Хорошей идеей будет прикрепить чек к странице инструкции. Если что-то плохое случится во время использования Ultimate speed ulg 12b3, у вас будет комплект документов, необходимый для гарантийного ремонта. В этой части инструкции вы найдете информацию об авторизованных сервисных центрахUltimate speed ulg 12b3 а также, как самостоятельно правильно ухаживать за оборудованием — так, чтобы не потерять гарантийных прав. - Указания по монтажу и Setup
Не терять нервов и времени на самостоятельную попытку установки и первого запуска изделия. Воспользуйтесь рекомендациями производителя Ultimate speed ulg 12b3 чтобы правильно запустить изделие, без лишнего риска повреждения оборудования. - Информация, касающаяся дополнительных запчастей (входящих в комплект а также являющихся опцией)
Пересматривая эту часть документа вы сможете проверить, доставлен ли ваш Ultimate speed ulg 12b3 с полним комплектом аксессуаров. Вы также сможете узнать, какие дополнительные запчасти или аксессуары для Ultimate speed ulg 12b3 Вы сможете найти и докупить к своему устройству. - Troubleshooting
Самые частые проблемы, касающиеся Ultimate speed ulg 12b3 и методы их решения. Это очень полезная часть руководства по обслуживанию — она позволит Вам сэкономить много времени на поиск решений. 90% проблем с Ultimate speed ulg 12b3 повторяется у многих пользователей. - Требования, касающиеся питания и энергетический класс
Информация, касающаяся количества потребляемой энергии, а также рекомендации, касающиеся установки и питания Ultimate speed ulg 12b3. Прочитайте, чтобы оптимально пользоваться Ultimate speed ulg 12b3 и не использовать большего количества ресурсов, нежели это необходимо для правильной работы изделия. - Специальные функции Ultimate speed ulg 12b3
Здесь вы можешь узнать, как персонализировать изделие Ultimate speed ulg 12b3. Вы узнаете, какие дополнительные функции могут помочь Вам удобно использовать продукт Ultimate speed ulg 12b3 а также, какие функции Вашего устройства оптимальны для выполнения конкретной деятельности.
Как видите в инструкции вы найдете информацию, которая реально поможет Вам в использовании Вашего изделия. Стоит с ней ознакомиться, чтобы избежать разочарований, возникающих из более короткого, нежели предусматривалось, периода исправности изделия Ultimate speed ulg 12b3. Если все же вы не хотите копить инструкции в своем доме, наш сайт поможет Вам в этом — вы должны найти у нас руководство по обслуживанию большинства из своих устройств, а также Ultimate speed ulg 12b3.