
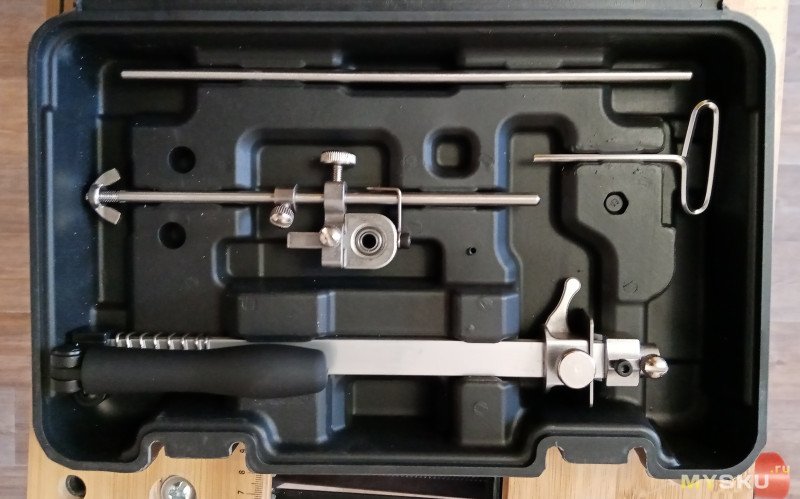
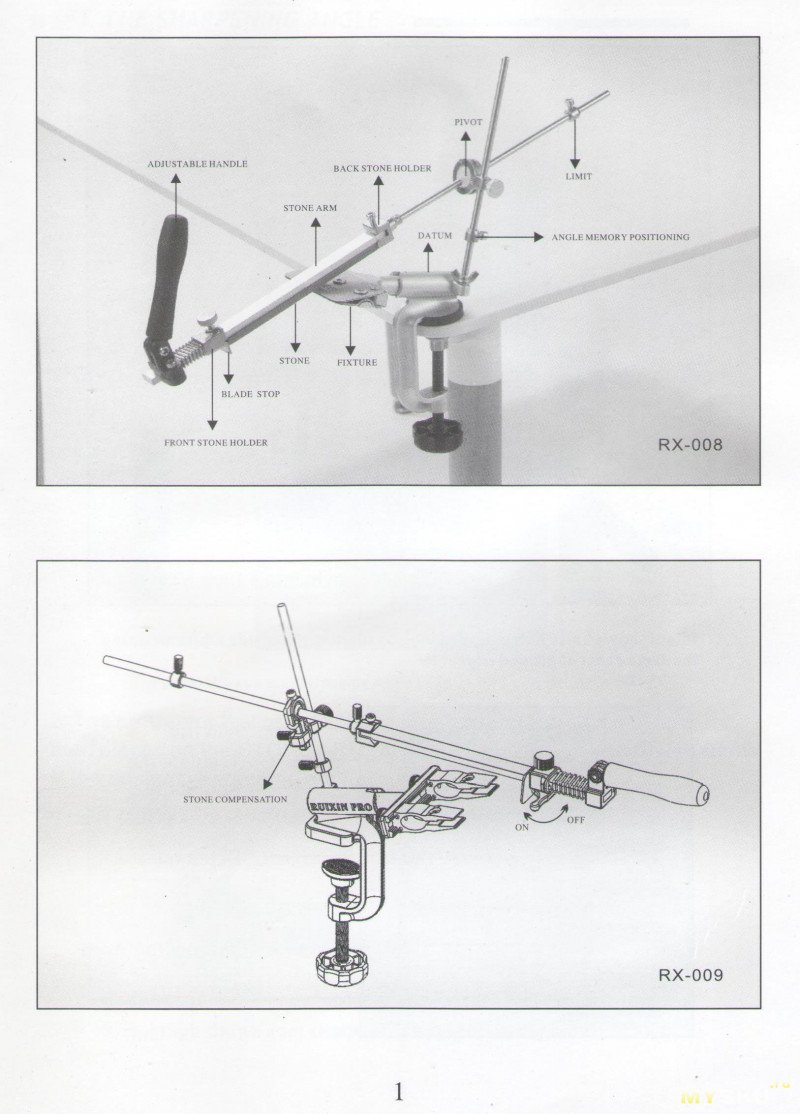
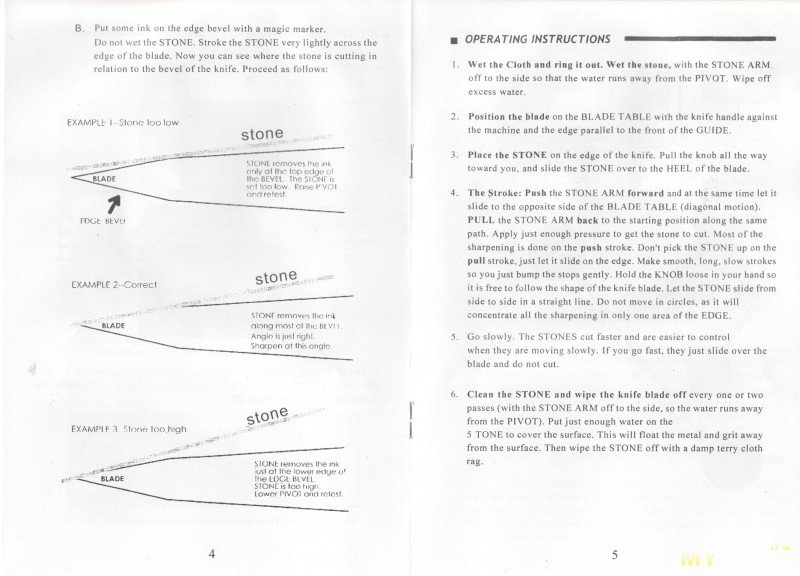
RUIXIN PRO RX-008 Knife Sharpener Kit

Part 1. SETUP RX-008 KNIFE SHARPENER
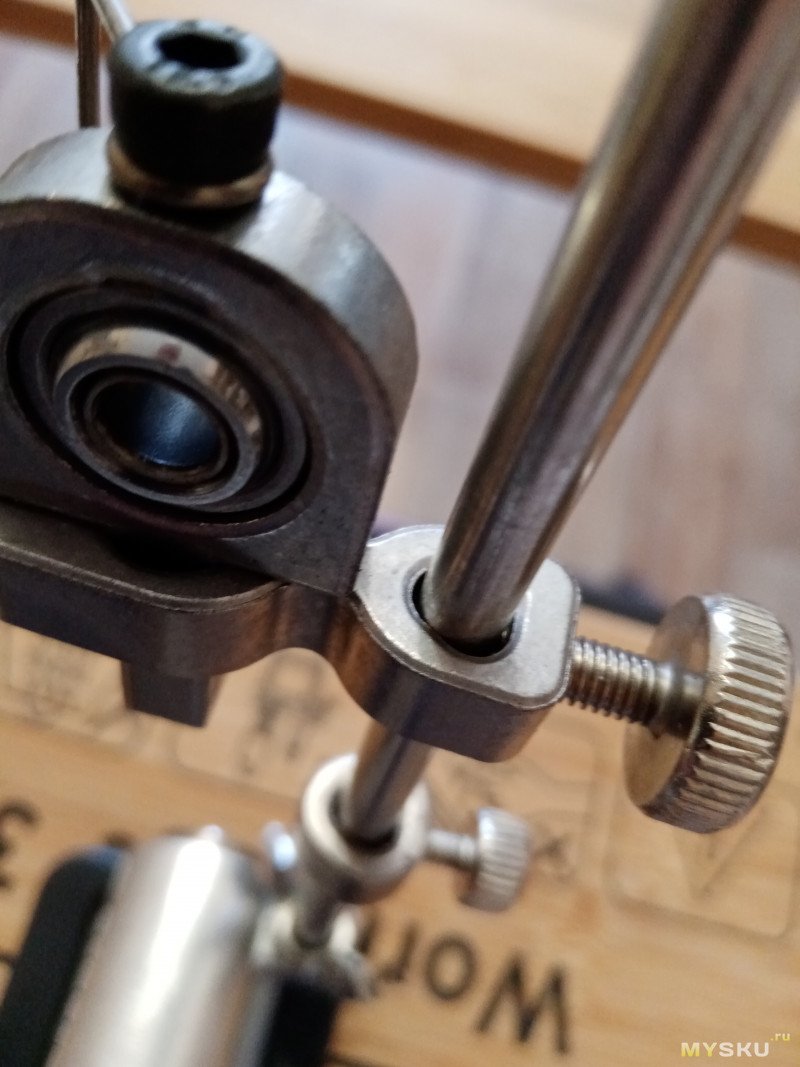
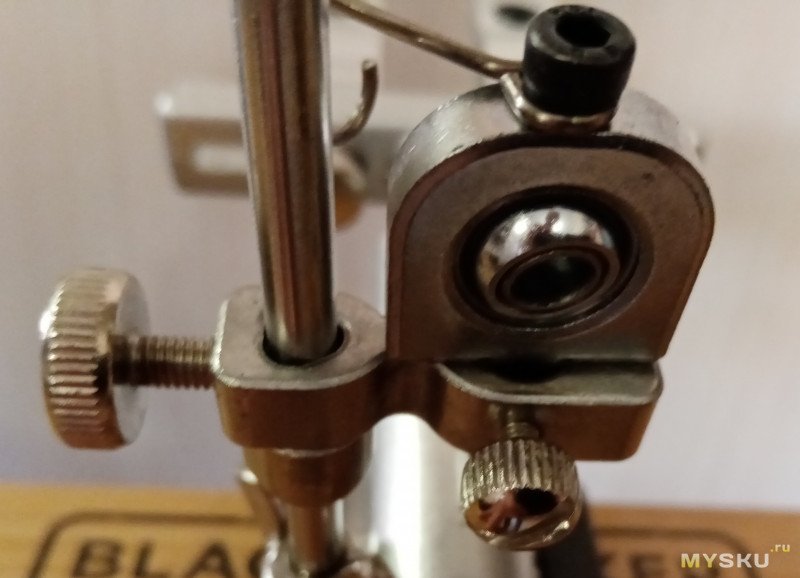
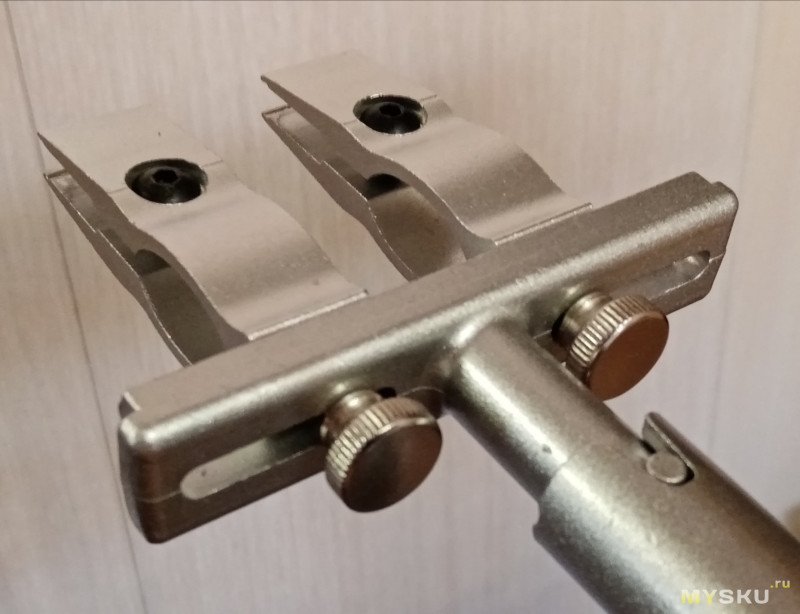
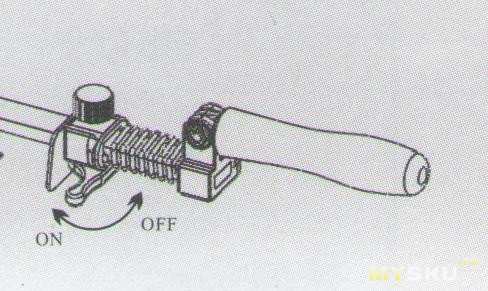
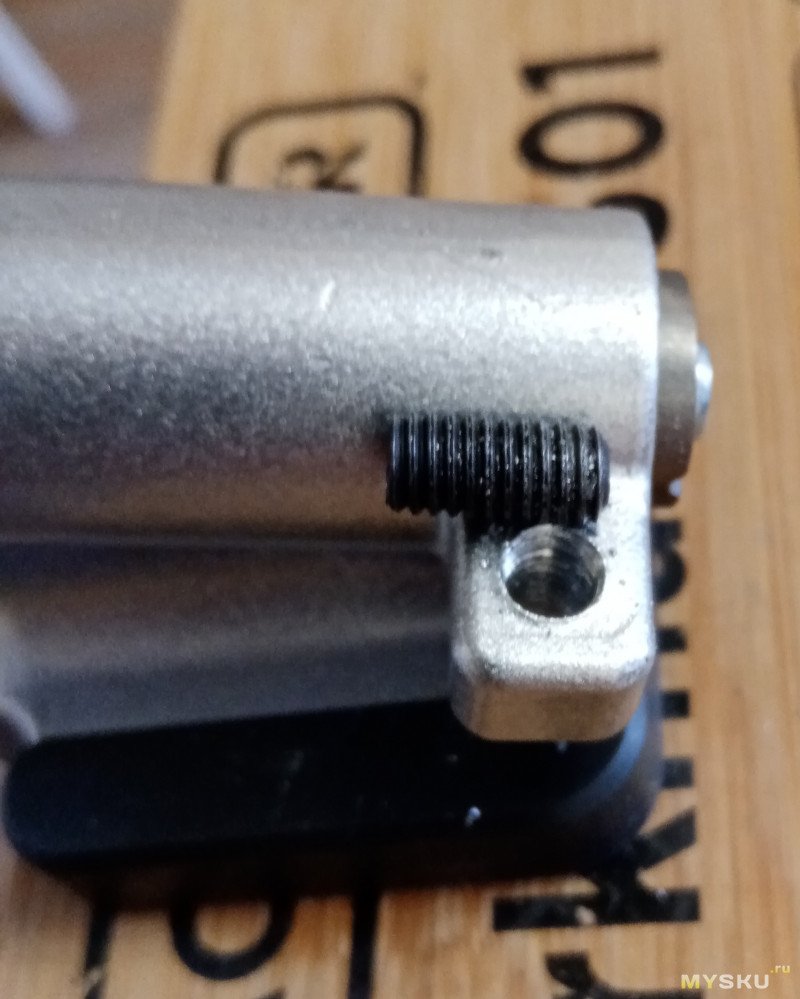
- Assemble the whetstone bracket and connect the rod (In order to prevent loosen while sharpening, you can use a screwdriver to tighten it) ( Figure 1)

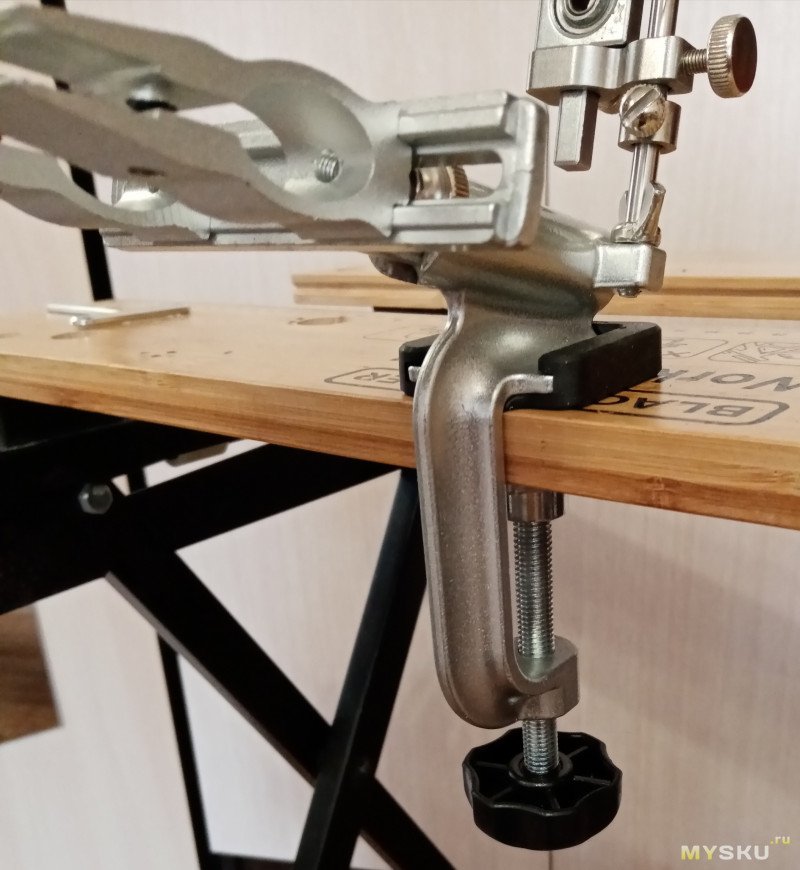
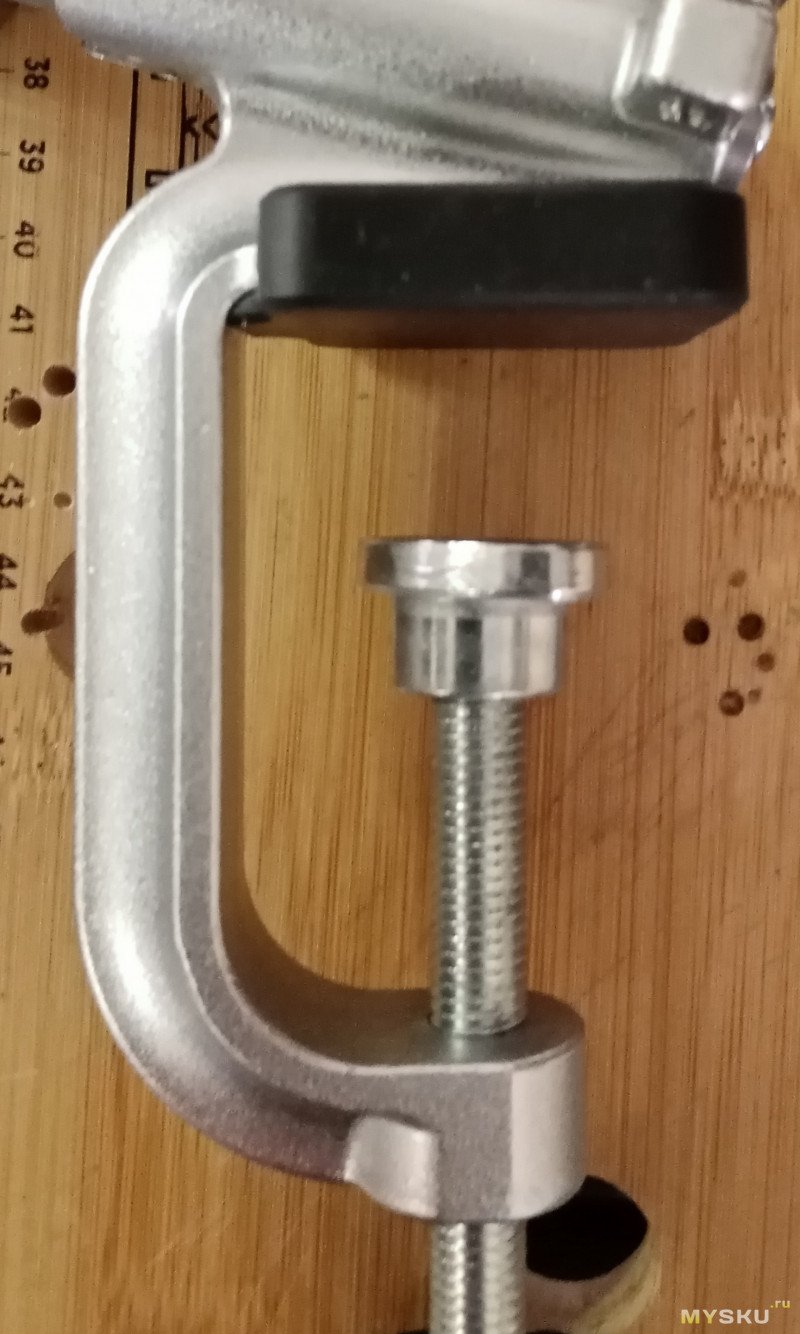
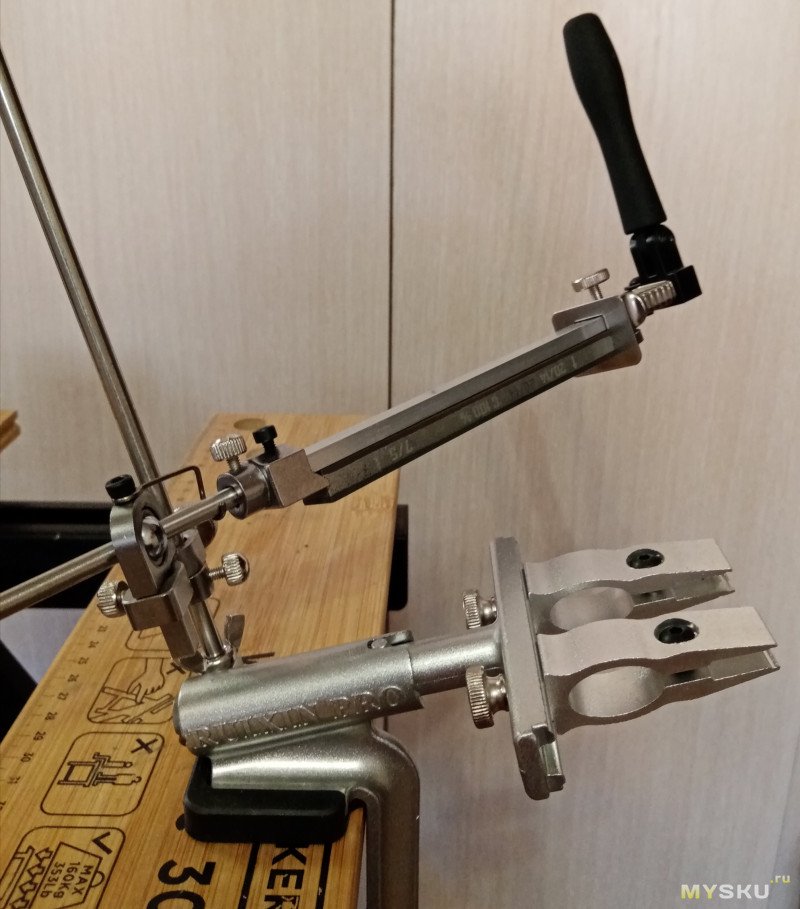
- . Fix the base on the table, then remove the screws on the base. ( Figure 2)

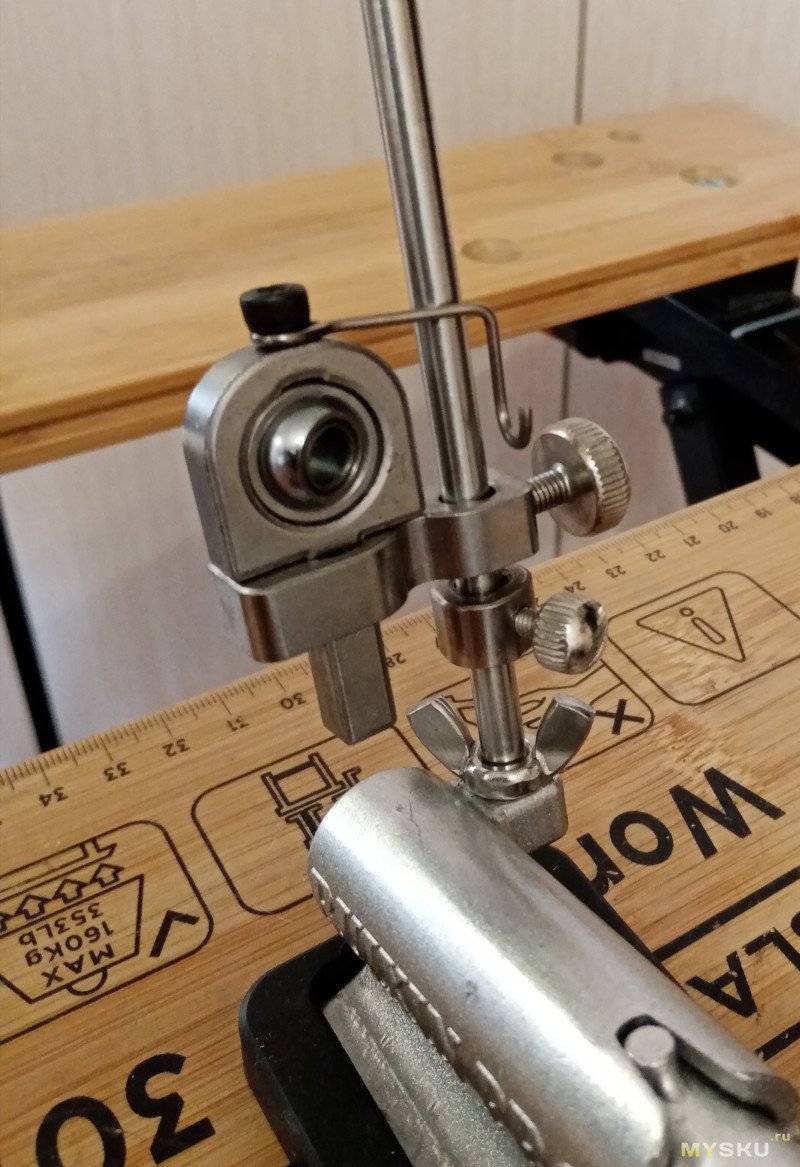
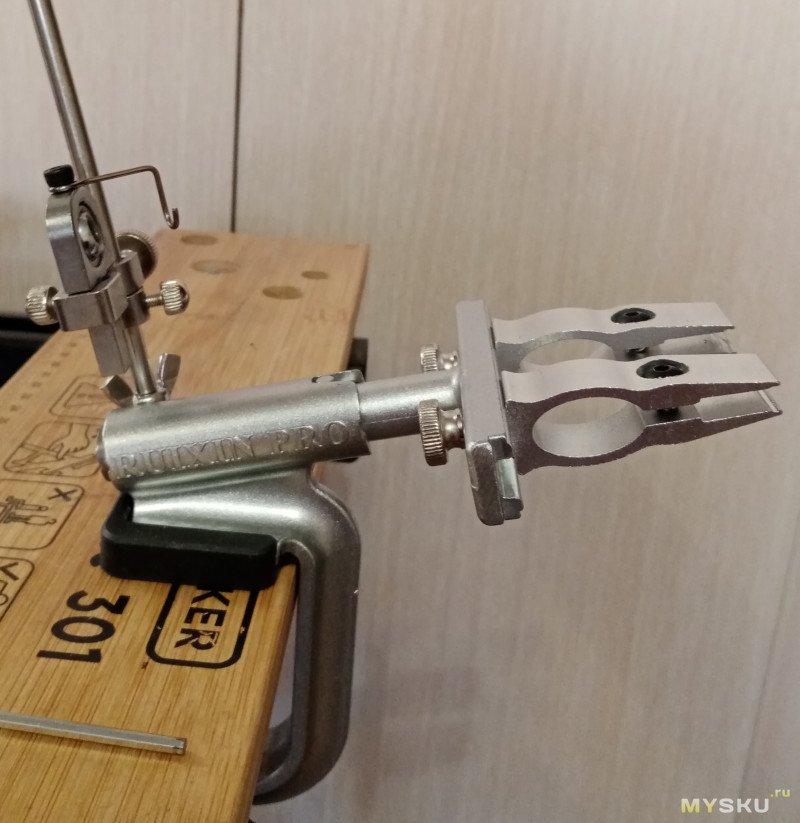
- Secure the Angle Adjustment Post to the Base(Tighten the long rod first, then tighten the butterfly buckle firmly) ( Figure 3)

- If you need to sharpen the chef knife or other kitchen knife, you can put on a silicone non-slip pad
- Instructions on sharpening stones installation

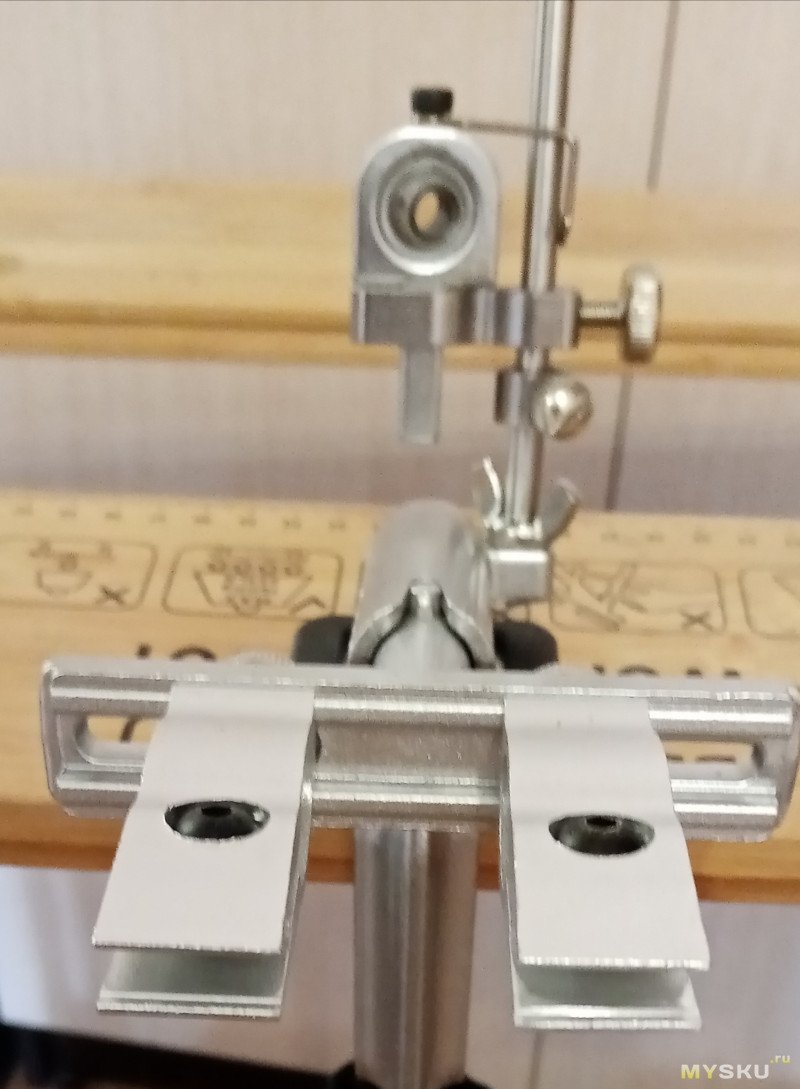
Step 1. Install the stone according to the figure 1.
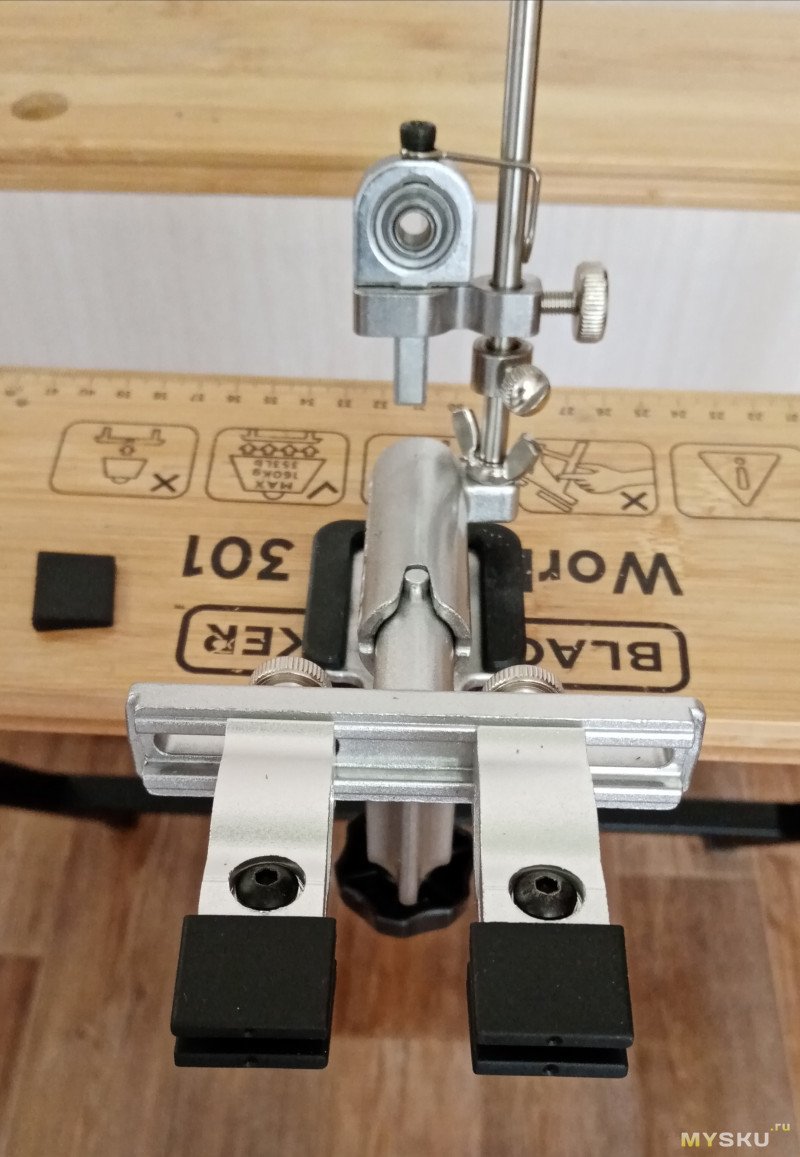
Step 2. Slightly tighten the screws at the back. - Installation completed as below:


Part 2. START SHARPENING BY FOLLOWING STEPS BELOW:
- CHECK: Re-Check your setup of the knife sharpener.
- Angle Adjustment:
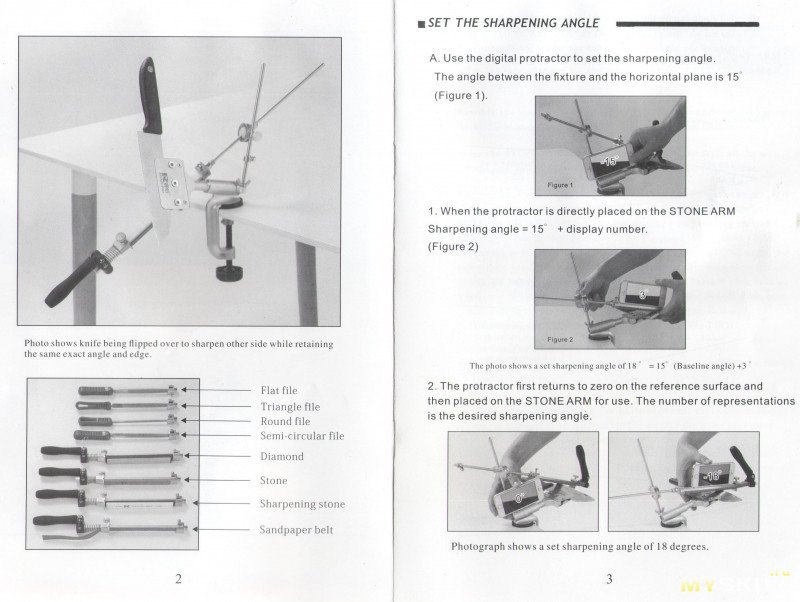
a) Use a protractor app on a smart phone (if it’s iPhone, APP: Measure-Level) to measure the angle of the FLAT surface of the knife blade. Add (or subtract, depending the measure) the desired bevel angle to this angle to get the angle the stone needs to be.
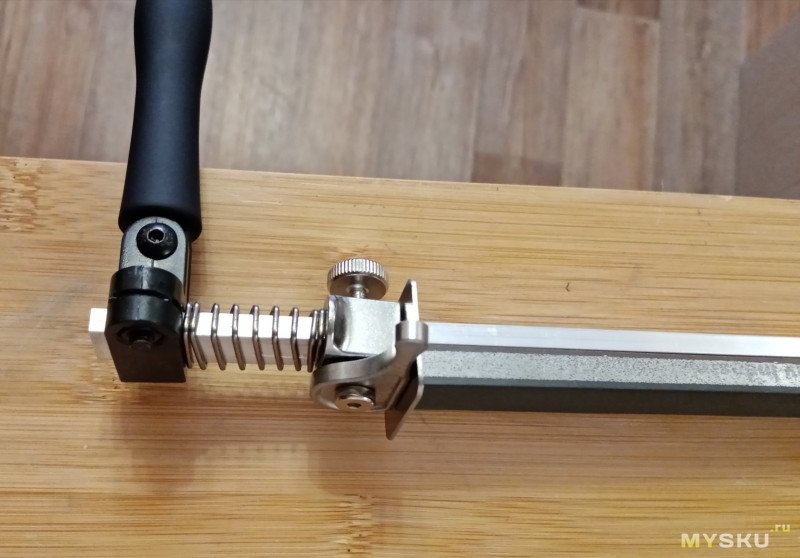
b) Insert the stone holder rod into the ball joint and adjust the thumb screw to move the stone to the proper angle.
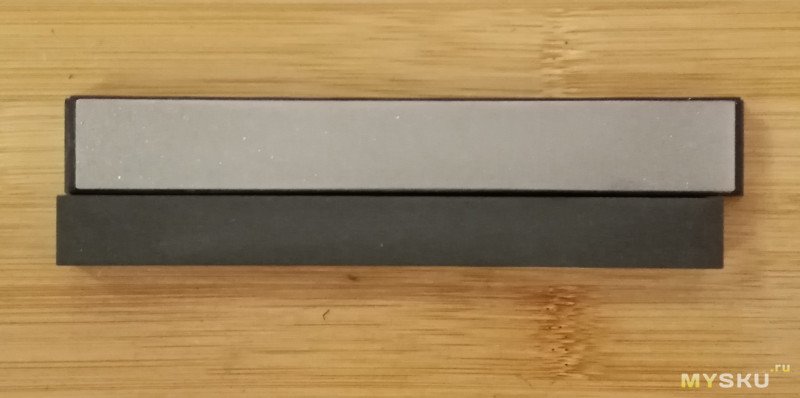
c) Measure the stone angle and the knife angle again and re-calculate or adjust as necessary. - Choose the appropriate stone from the kit: Coarse(LOW Grit) or Fine(High Grit), Difference Usage — The coarse grinding can be used to repair serious passivated blade, the fine grinding can be used to edge, consolidate the blade and daily sharpening; Start with the coarsest (lowest Grit) stone, and then to higher ones
Kindly note: The pivot of RX-009 has a whetstone thickness compensation function, you can use different thickness whetstones by SIMPLY adjusting the height of the pivot
- Steps to use the stones before and during sharpening work:
a) Wet the stone with water. soak it for 5-10 mins before use, lubricate with water or honing oil as needed. You can soak all of them in one time to save time, and wipe off the extra water before use it.
b). Insert the stone into the holder.
c). Draw the stone diagonally along the blade tip to handle or handle to tip, towards the spine. Use LIGHT pressure, not much more than the weight of the stone. Slowly and smoothly. - Repeat 4.c) for about 10 strokes and WIPE THE BLADE with a clean, soft cloth.
- Sharpen the other side of the blade by Flip the knife: Remember to re-measure and adjust the angle. Then Repeat 4.c) -5 on sides of the blade. (If the angle changes while flip, please refer to more details on FAQ part.)
- If the edge is about to completed, repeat 4.c) with 5 strokes on each side this time.
- Change Stones: pass to the next finer stone. (Higher Grit)
- Repeat steps 4.c)-7 till you’ve done this all with your finest stone.
- Leather strop use: (NOTE: If it is not included in the offer you’ve chosen, please skip Step 10).
a). Check and adjust the angle as needed.
b). Strop the edge from tip to handle or handle to tip but diagonally AWAY from the spine this time.
c). Strop for 3-5 strokes on each side. Remember to re-measure and adjust your angle whenever you flip the knife. - Wipe the knife clean.
- Maintain and store stones after use: Rinse the stones. Rub the used side with finger or soft brush to loosen the metal filings. Dry the stones with a clean towel and let them air dry the rest of the way before storing them.
- Disassemble the knife sharpener and store everything back to the carry bag.

Part 3. TIPS ON OPERATING:
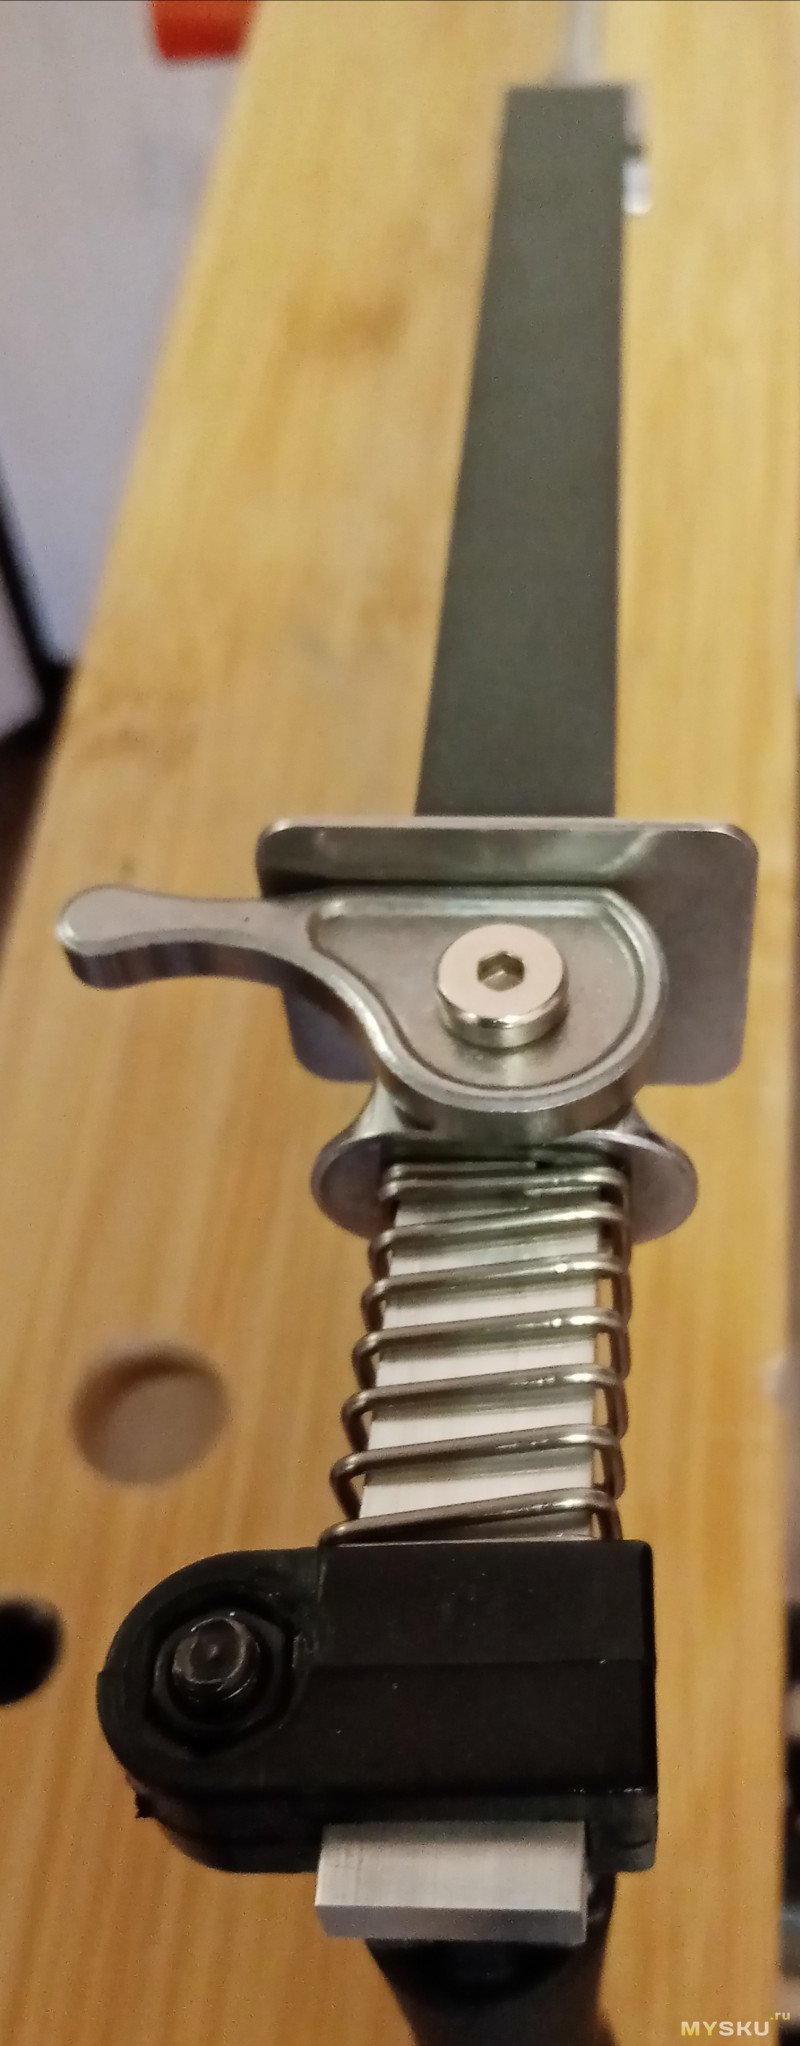
- Wipe off excess water after wet the stones to prevent water fall off from STONE ARM to PIVOT.
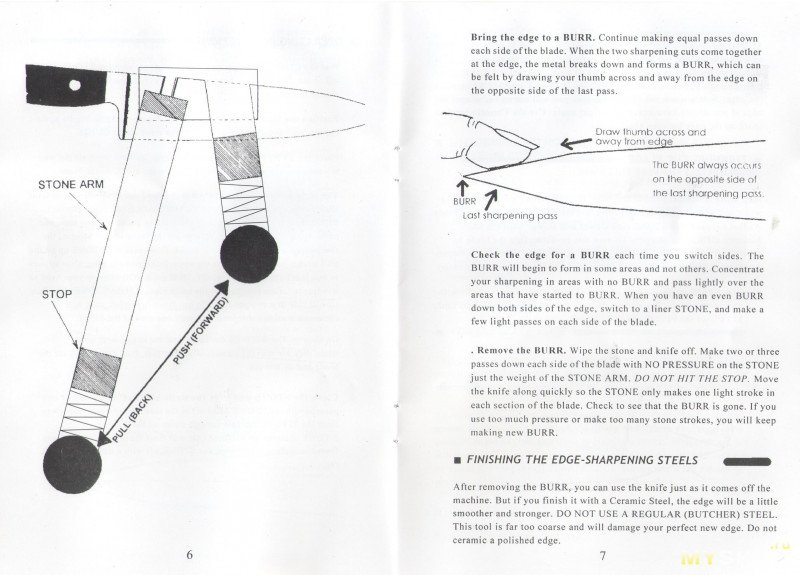
- Place the blade on the BLADE TABLE with the knife handle against the machine and the edge parallel to the front of the GUIDE
- Place the STONE on the edge of the knife. Pull the knob all the way toward you, and slide the STONE over to the HEEL of the blade.
- The Stroke: Push the STONE ARM forward and at the same time let it slide to the opposite side of the BLADE TABLE (diagonal motion). PULL the STONE ARM back to the starting position along the same path. Apply just enough pressure to get the stone to cut. Most of the sharpening is done on the push stroke. Don’t pick the STONE up on the pull stroke, just let it slide on the edge. Make smooth, long, slow strokes so you just bump the stops gently. Hold the KNOB loose in your hand so it is free to follow the shape of the knife blade. Let the STONE slide from side to side in a straight line. Do not move in circles, as it will concentrate all the sharpening in only one area of the edge.
- Go slowly. The STONES cut faster and are easier to control when they are moving slowly. If you go fast, they just slide over the blade and do not cut.
- Clean the STONE and wipe the knife blade off — (move the STONE ARM to the side, so the water run away from the PIVOT) Put just enough water on the STONE to cover the surface. This will float the metal and grit away from the surface. Then wipe the STONE off with a damp terry cloth/rag.


Part 4. TIPS ON JUDGING WHETHER THE SHARPENING IS COMPLETED
- Bring the edge to a BURR. Continue making equal passes down each side of the blade. When the two sharpening cuts come together at the edge, the metal breaks down and forms a BURR. which can be felt by drawing your thumb across and away from the edge on the opposite side of the last pass.

- Check the edge for a BURR each time you switch sides. The BURR will begin to form in some areas and not others. Concentrate your sharpening in areas with no BURR and pass lightly over the areas that have started to BURR. When you have an even BURR down both sides of the edge, switch to a liner STONE, and make a few light passes on each side of the blade.
- Remove the BURR. Wipe the stone and knife off. Make 2-3 passes down each side of the blade with NO PRESSURE on the STONE just the weight of the STONE ARM. DO NOT HIT THE STOP. Move the knife along quickly so the STONE only makes one light stroke in each section of the blade. Check to see that the BURR is gone. If you use too much pressure or make too many stone strokes, you will keep making new BURR

Part 5. FAQ
Q1: The stone cannot be clamped tightly
A: Firstly check whether the handle is in place or not (The screw on the handle can be loosened to adjust the handle position)

Secondly, check if you’ve installed the stone according to the above instructions.
Q2: Whetstone Guide Rod Falls Off
A: The guide rod may fall off due to not enough tight, please try to tighten it with a screwdriver

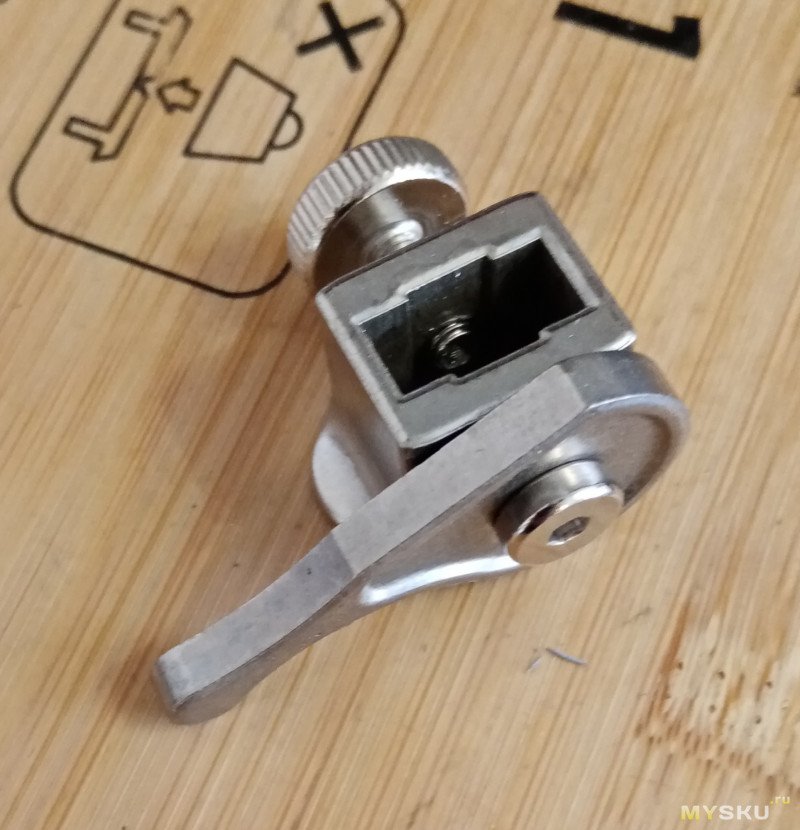
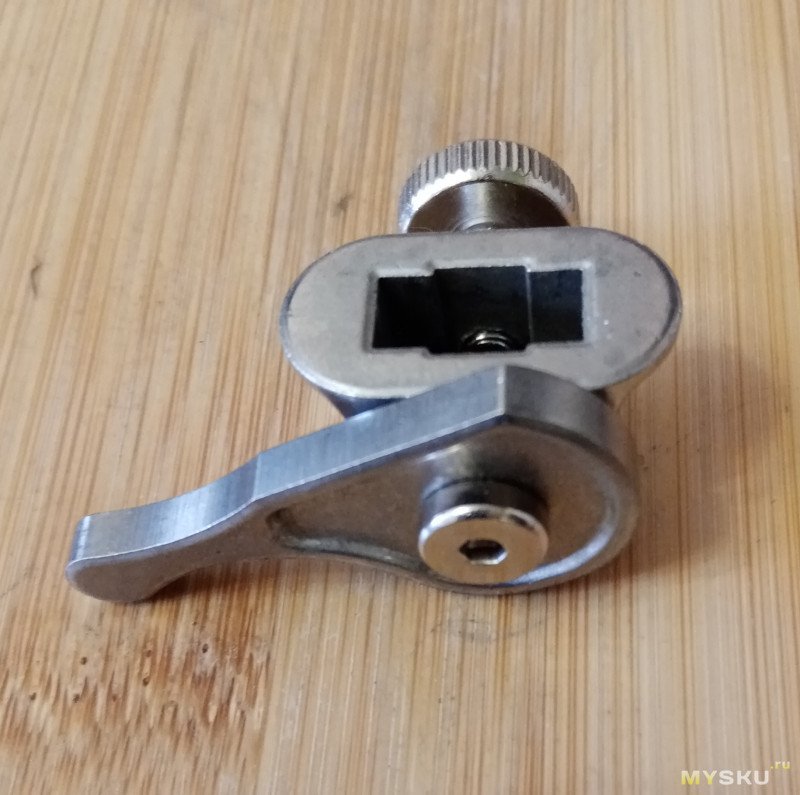
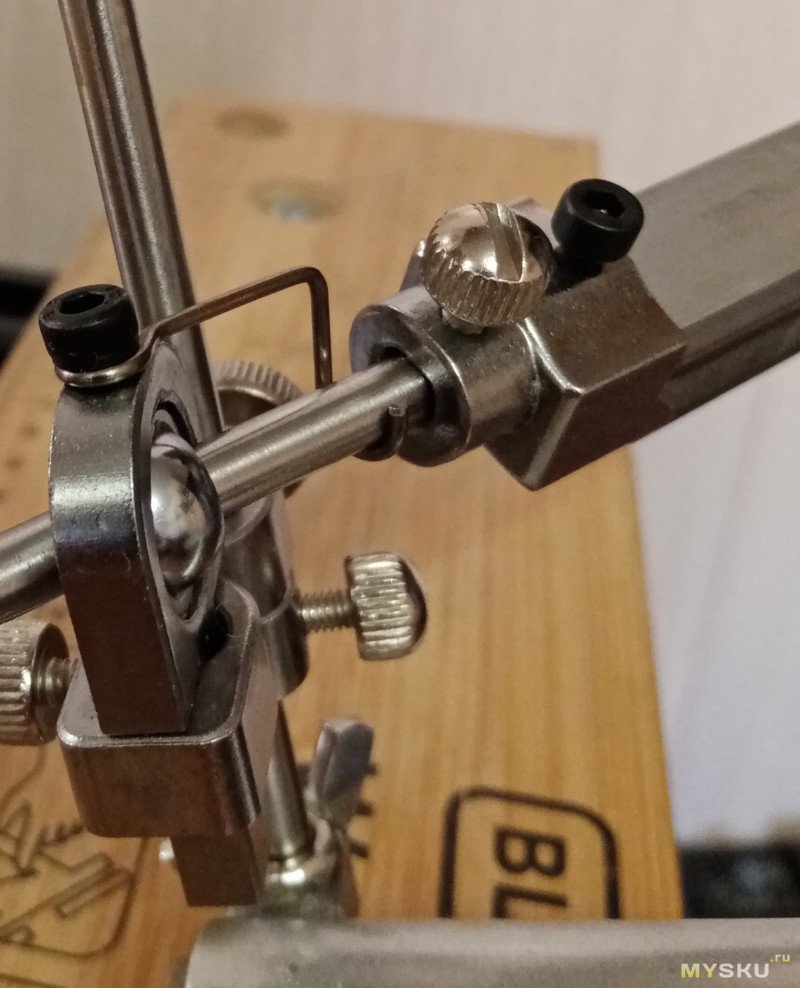
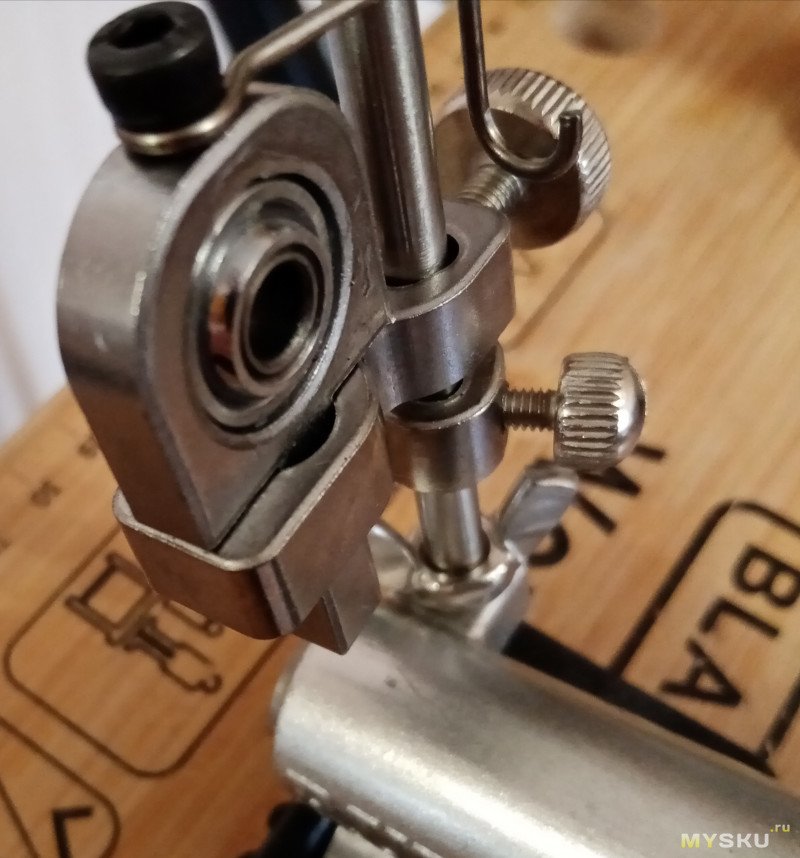
Q3: Angle adjustment pivot slides during sharpening
A: Firstly, please check if the stopper (circled in red) is under the pivot, to get fixed angles, the use of stoppers to prevent the pivot from slipping is required.

If pivot move up and down, you can use two stoppers together (other stopper on whetstone guide rod) to fix the position of the PIVOT

Q4: Angle difference while flipping the blade
A: Check whether if the knife is too deep into the fixture or not, then adjust the position of knife on clamp
TOO DEEP

NORMAL

Q5: Pivot sliding stuck
A: Slightly loosen the screw above the pivot, Apply some lubricating oil or graphite on the guide rod. Insert the guide rod and rub it back and forth to lubricate the pivot.

Part 6. FUNCTION&USAGE OF VARIOUS SHARPENING STONES
DIAMOND STONE
Diamond stone is generally used in cemented carbide knives. With high hardness and large grinding capacity,
and no need to lubricate. Ceramic knives can also be sharpened with diamond stones

120-240#: Coarse grinding, Suitable for Removing chips from a damaged blade
600#: Medium grinding, Smoothing a rough edge into a medium edge
1000-3000#: Fine grinding, Smoothing a medium edge into a sharp edge for Daily use
SILICON CARBIDE WHETSTONE
Made by sintering with silicon carbide abrasive mixed with binder. With high hardness and grinding
performance. Suitable for edge repair. Before use, please soak them into water or lubricate with honing oil

180#(60-70um): Suitable for Removing chips from a damaged blade
400#(35-25um): Roughly sharpening a blunt edge
800#(14-20um): Smoothing a rough edge into a medium edge
Alumina ceramic whetstone
The whetstone is sintered from alumina and binder, Alumina ceramics have high mesh and hardness, which is very suitable for fine grinding of knives. Before use, please soak them into water or lubricate with honing oil

1500-3000#(2.5-7um): Smoothing a medium edge into a sharp edge for Daily use
BORON CARBIDE WHETSTONE
The whetstone is sintered from boron carbide particles and binder, which has good stability and high hardness, and is very suitable for polishing the knife edge. More durable and better protection for knife. Before use, please soak them into water or lubricate with honing oil.

3000#fine (1.5-2um): Preliminary polishing of the blade
6000#(0.5-1.0um): Polished blade to mirror effect
NATURAL WHETSTONE/WATER STONE
Cut from natural emeralds, it has a high grain size ideal for edge polishing. Because it is a natural stone, there may be cracks in some places, which won’t affect the use

10000#(0.5-1.0um): Polished blade to mirror effect
LEATHER STROP
Made of cowhide paste, it is generally used at the end of sharpening knives. It can remove the burr on the blade and make the edge sharper. You can also apply polishing paste to further polish the blade.

Customer Support
Email: [email protected]
For any question on product, please email us at any time!
Documents / Resources
tags: Kit, Knife Sharpener Kit, RUIXIN PRO, RX-008, RX-008 Knife Sharpener Kit, RX-009, Sharpener Kit,
- June 14, 2024
- RUIXIN PRO
Table of Contents
- Part 1. SETUP RX-008 KNIFE SHARPENER
- Part 2. START SHARPENING BY FOLLOWING STEPS BELOW:
- Part 3. TIPS ON OPERATING:
- Part 4. TIPS ON JUDGING WHETHER THE SHARPENING IS COMPLETED
- Part 5. FAQ
- Part 6. FUNCTION&USAGE OF VARIOUS SHARPENING STONES
- SILICON CARBIDE WHETSTONE
- Customer Support
- Read User Manual Online (PDF format)
- Download This Manual (PDF format)
RUIXIN PRO RX-008 Knife Sharpener Kit
Part 1. SETUP RX-008 KNIFE SHARPENER
-
Assemble the whetstone bracket and connect the rod (In order to prevent loosen while sharpening, you can use a screwdriver to tighten it) ( Figure 1)

-
. Fix the base on the table, then remove the screws on the base. ( Figure 2)
-
Secure the Angle Adjustment Post to the Base (Tighten the long rod first, then tighten the butterfly buckle firmly) ( Figure 3)
-
If you need to sharpen the chef knife or other kitchen knife, you can put on a silicone non-slip pad
-
Instructions on sharpening stones installation
Step 1. Install the stone according to the figure 1.
Step 2. Slightly tighten the screws at the back. -
Installation completed as below:
Part 2. START SHARPENING BY FOLLOWING STEPS BELOW:
-
CHECK: Re-Check your setup of the knife sharpener.
-
Angle Adjustment:
a) Use a protractor app on a smart phone (if it’s iPhone, APP: Measure-
Level) to measure the angle of the FLAT surface of the knife blade. Add (or
subtract, depending the measure) the desired bevel angle to this angle to get
the angle the stone needs to be.
b) Insert the stone holder rod into the ball joint and adjust the thumb
screw to move the stone to the proper angle.
c) Measure the stone angle and the knife angle again and re-calculate or
adjust as necessary. -
C hoose the appropriate stone from the kit: Coarse(LOW Grit) or Fine(High Grit), Difference Usage – The coarse grinding can be used to repair serious passivated blade, the fine grinding can be used to edge, consolidate the blade and daily sharpening; Start with the coarsest (lowest Grit) stone, and then to higher ones
Kindly note: The pivot of RX-009 has a whetstone thickness compensation
function, you can use different thickness whetstones by SIMPLY adjusting the
height of the pivot
-
Steps to use the stones before and during sharpening work:
a) Wet the stone with water. soak it for 5-10 mins before use, lubricate
with water or honing oil as needed. You can soak all of them in one time to
save time, and wipe off the extra water before use it.
b). Insert the stone into the holder.
c). Draw the stone diagonally along the blade tip to handle or handle to
tip, towards the spine. Use LIGHT pressure, not much more than the weight of
the stone. Slowly and smoothly. -
Repeat 4.c) for about 10 strokes and WIPE THE BLADE with a clean, soft cloth.
-
Sharpen the other side of the blade by Flip the knife: Remember to re-measure and adjust the angle. Then Repeat 4.c) -5 on sides of the blade. (If the angle changes while flip, please refer to more details on FAQ part.)
-
If the edge is about to completed, repeat 4.c) with 5 strokes on each side this time.
-
Change Stones: pass to the next finer stone. (Higher Grit)
-
Repeat steps 4.c)-7 till you’ve done this all with your finest stone.
-
Leather strop use: (NOTE: If it is not included in the offer you’ve chosen, please skip Step 10).
a). Check and adjust the angle as needed.
b). Strop the edge from tip to handle or handle to tip but diagonally
AWAY from the spine this time.
c). Strop for 3-5 strokes on each side. Remember to re-measure and adjust
your angle whenever you flip the knife. -
Wipe the knife clean.
-
Maintain and store stones after use: Rinse the stones. Rub the used side with finger or soft brush to loosen the metal filings. Dry the stones with a clean towel and let them air dry the rest of the way before storing them.
-
Disassemble the knife sharpener and store everything back to the carry bag.
Part 3. TIPS ON OPERATING:
- Wipe off excess water after wet the stones to prevent water fall off from STONE ARM to PIVOT.
- Place the blade on the BLADE TABLE with the knife handle against the machine and the edge parallel to the front of the GUIDE
- Place the STONE on the edge of the knife. Pull the knob all the way toward you, and slide the STONE over to the HEEL of the blade.
- The Stroke : Push the STONE ARM forward and at the same time let it slide to the opposite side of the BLADE TABLE (diagonal motion). PULL the STONE ARM back to the starting position along the same path. Apply just enough pressure to get the stone to cut. Most of the sharpening is done on the push stroke. Don’t pick the STONE up on the pull stroke, just let it slide on the edge. Make smooth, long, slow strokes so you just bump the stops gently. Hold the KNOB loose in your hand so it is free to follow the shape of the knife blade. Let the STONE slide from side to side in a straight line. Do not move in circles, as it will concentrate all the sharpening in only one area of the edge.
- Go slowly. The STONES cut faster and are easier to control when they are moving slowly. If you go fast, they just slide over the blade and do not cut.
- Clean the STONE and wipe the knife blade off – (move the STONE ARM to the side, so the water run away from the PIVOT) Put just enough water on the STONE to cover the surface. This will float the metal and grit away from the surface. Then wipe the STONE off with a damp terry cloth/rag.
Part 4. TIPS ON JUDGING WHETHER THE SHARPENING IS COMPLETED
-
Bring the edge to a BURR. Continue making equal passes down each side of the blade. When the two sharpening cuts come together at the edge, the metal breaks down and forms a BURR. which can be felt by drawing your thumb across and away from the edge on the opposite side of the last pass.
-
Check the edge for a BURR each time you switch sides. The BURR will begin to form in some areas and not others. Concentrate your sharpening in areas with no BURR and pass lightly over the areas that have started to BURR. When you have an even BURR down both sides of the edge, switch to a liner STONE, and make a few light passes on each side of the blade.
-
Remove the BURR. Wipe the stone and knife off. Make 2-3 passes down each side of the blade with NO PRESSURE on the STONE just the weight of the STONE ARM. DO NOT HIT THE STOP. Move the knife along quickly so the STONE only makes one light stroke in each section of the blade. Check to see that the BURR is gone. If you use too much pressure or make too many stone strokes, you will keep making new BURR
Part 5. FAQ
Q1: The stone cannot be clamped tightly
A: Firstly check whether the handle is in place or not (The screw on the
handle can be loosened to adjust the handle position)
Secondly, check if you’ve installed the stone according to the above
instructions.
Q2: Whetstone Guide Rod Falls Off
A: The guide rod may fall off due to not enough tight, please try to
tighten it with a screwdriver
Q3: Angle adjustment pivot slides during sharpening
A: Firstly, please check if the stopper (circled in red) is under the
pivot, to get fixed angles, the use of stoppers to prevent the pivot from
slipping is required.
If pivot move up and down, you can use two stoppers together (other stopper on
whetstone guide rod) to fix the position of the PIVOT
Q4: Angle difference while flipping the blade
A: Check whether if the knife is too deep into the fixture or not, then
adjust the position of knife on clamp
TOO DEEP
NORMAL
Q5: Pivot sliding stuck
A: Slightly loosen the screw above the pivot, Apply some lubricating oil
or graphite on the guide rod. Insert the guide rod and rub it back and forth
to lubricate the pivot.
Part 6. FUNCTION&USAGE OF VARIOUS SHARPENING STONES
DIAMOND STONE
Diamond stone is generally used in cemented carbide knives. With high hardness
and large grinding capacity,
and no need to lubricate. Ceramic knives can also be sharpened with diamond
stones
120-240#: Coarse grinding, Suitable for Removing chips from a damaged
blade
600#: Medium grinding, Smoothing a rough edge into a medium edge
1000-3000#: Fine grinding, Smoothing a medium edge into a sharp edge for
Daily use
SILICON CARBIDE WHETSTONE
Made by sintering with silicon carbide abrasive mixed with binder. With high
hardness and grinding
performance. Suitable for edge repair. Before use, please soak them into
water or lubricate with honing oil
180#(60-70um): Suitable for Removing chips from a damaged blade
400#(35-25um): Roughly sharpening a blunt edge
800#(14-20um): Smoothing a rough edge into a medium edge
Alumina ceramic whetstone
The whetstone is sintered from alumina and binder, Alumina ceramics have high
mesh and hardness, which is very suitable for fine grinding of knives. Before
use, please soak them into water or lubricate with honing oil
1500-3000#(2.5-7um): Smoothing a medium edge into a sharp edge for Daily use
BORON CARBIDE WHETSTONE
The whetstone is sintered from boron carbide particles and binder, which has
good stability and high hardness, and is very suitable for polishing the knife
edge. More durable and better protection for knife. Before use, please soak
them into water or lubricate with honing oil.
3000#fine (1.5-2um): Preliminary polishing of the blade
6000#(0.5-1.0um): Polished blade to mirror effect
NATURAL WHETSTONE/WATER STONE
Cut from natural emeralds, it has a high grain size ideal for edge polishing.
Because it is a natural stone, there may be cracks in some places, which won’t
affect the use
10000#(0.5-1.0um): Polished blade to mirror effect
LEATHER STROP
Made of cowhide paste, it is generally used at the end of sharpening knives.
It can remove the burr on the blade and make the edge sharper. You can also
apply polishing paste to further polish the blade.
Customer Support
Email: cruitech4u@hotmail.com
For any question on product, please email us at any time!
Read User Manual Online (PDF format)
Read User Manual Online (PDF format) >>
Download This Manual (PDF format)
Download this manual >>

Работаем с 44ФЗ, 223ФЗ, 275ФЗ
Аккредитация на АСТ ГОЗ
Самовывоз из магазина0 руб.
по предварительному заказу
(г. Москва, м. Таганская,
ул. Большие Каменщики, д. 6, стр. 1)
Курьером (1-2 рабочих дня)0 руб.
(300 руб. при покупке до 9500 руб.)
Самовывоз из ПВЗ (1-2 рабочих дня)0 руб.
(300 руб. при покупке до 9500 руб.)
ХАРАКТЕРИСТИКИ
Абразивность, грит
— 3000
Длина рабочей части, см
— 60
Материал
— Абразив, Легированная сталь
Материал абразива
— Карбид
Особенности ножеточки
— Регулируемый уровень заточки; Слот для ножниц
Тип
— Механические, профессиональные, станки точильные
Точило
— С натуральным точилом
Функции точилки для ножей
— Доводка, заточка, полировка, правка, шлифовка
Для лезвий
— С прямой заточкой
Тип товара
— Точилки для ножей
КОМПЛЕКТАЦИЯ
- Точилка
- Упаковка
ОПИСАНИЕ
Профессиональный точильный станок Ruixin Pro RX-009 подходит для заточки ножей, ножниц и других режущих инструментов. Модель представляет собой pro-версию точилки Ruixin RX-009. В новом варианте усовершенствовали механизм закрепления лезвия – сразу двое тисков для фиксации инструмента. На точилке можно обрабатывать инструменты самых разных размеров: от крошечных лезвий в мультитулах до массивных охотничьих ножей.
Несущие детали станка Ruixin Pro RX-009 изготовлены из прочной нержавеющей стали. Крепления в виде болтов и запчасти для соединения балок между собой создают прочную конструкцию. Тиски для фиксации основания надежно удерживают станок в вертикальном положении. В комплекте предусмотрен ключ для сборки точилки и затяжки болтов во время работы. Если во время работы отпадает необходимость во втором тиске, его можно отодвинуть в сторону.
Также с набором идут 4 точильных бруска с разной зернистостью. Каждый камень отвечает за разные этапы заточки: 150 и 320 грит для начальной обработки, для обычной заточки абразив с крупностью 600 и финальная обработка с зерном 1500 грит. Конструкция Ruixin Pro RX-009 продумана до мельчайших деталей – точильные камни легко заменять в процессе, не отвлекаясь от заточки инструмента.
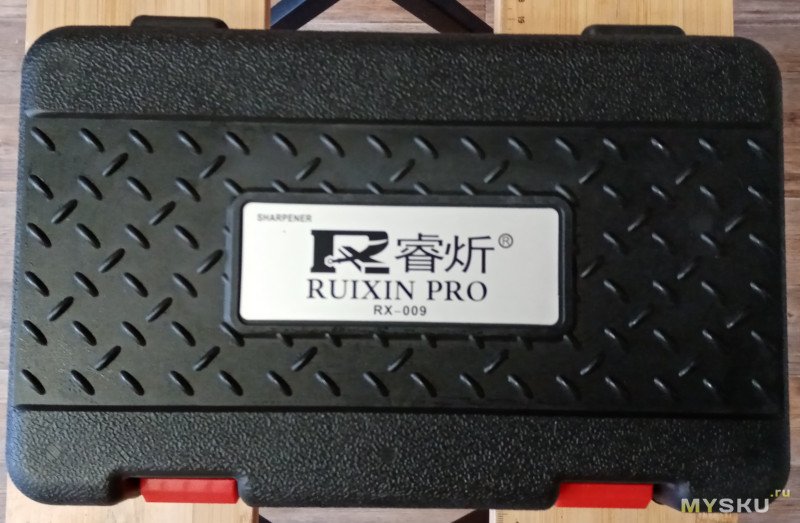
Вес механической точилки Ruixin Pro RX-009 составляет 1,7 кг. Дополнительно, точилка комплектуется фирменным кейсом для хранения и транспортировки, финишем для шлифования, ключом для затяжки болтов и подробной инструкцией пользователя.
Последние отзывы или вопросы
Нет отзывов о данном товаре.
Это не полноценный обзор точилки RX-009. Можно сказать, это первые впечатления, мое субъективное мнение стала ли новая точилка лучше предыдущей Ruixin Pro RX-008, которая меня уже давно не устраивала. Мне проще – я могу сравнивать и даже комбинировать/компилировать из двух устройств. А вот тем, кто первый раз покупает заточное устройство нужно подумать.
В моем городе цены на эти две точилки различаются в 400 рублей. И конечно 009 не хуже 008, но и не лучше намного. Но, если цена вопроса и разница в 1000 рублей, то решение зависит от задач, которые будущий пользователь ставит перед собой. Для меня вот эта покупка PX-009 – это еще один шаг к системе для заточки ножей TSPROF Pioneer, и вот теперь уже точно без вариантов.
Сама покупка опять-таки была спонтанной, понравилась цена и сразу же вопрос – почему бы не попробовать. Точу я для себя, друзей, знакомых, родственников, т.е. это просто хобби, результатом которого являются острые ножи. Подкупило конечно в новой точилке система крепления клинка двумя зажимами. В старой 008 было очень трудно точить маленькие клинки, в новой эта проблема была решена. Новизна есть, но так ли она нужна, удобна и эффективна. Попробую кратко мои впечатления.
Начну с упаковки. Новая точилка 009 теперь уже в кейсе, правда без ручки для переноски.
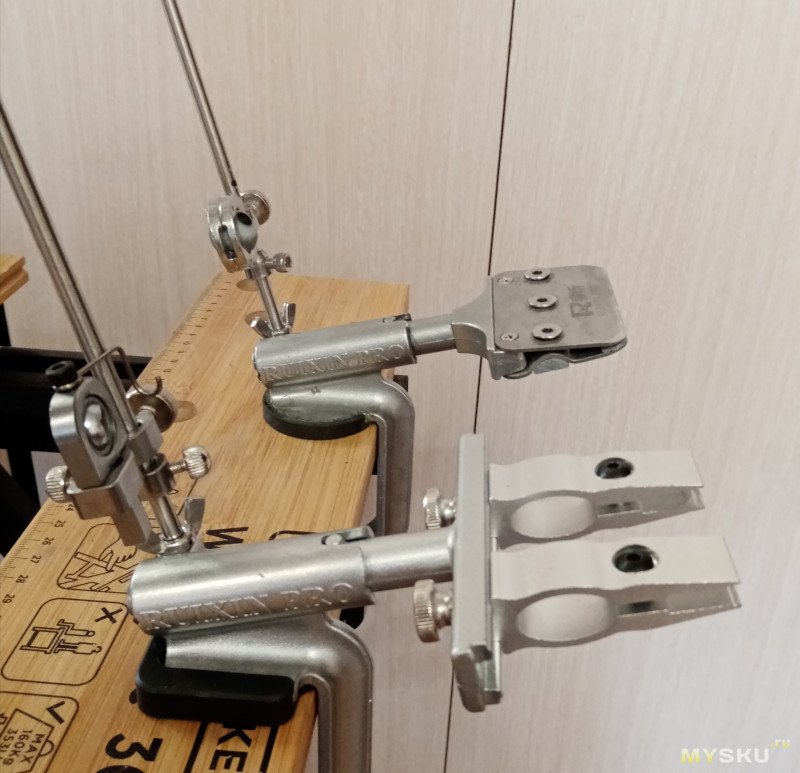
Ручка кстати не помешала. Зато в кейсе в двух половинках в ложементы уложены все составляющие точилки, которая состоит из следующих узлов:
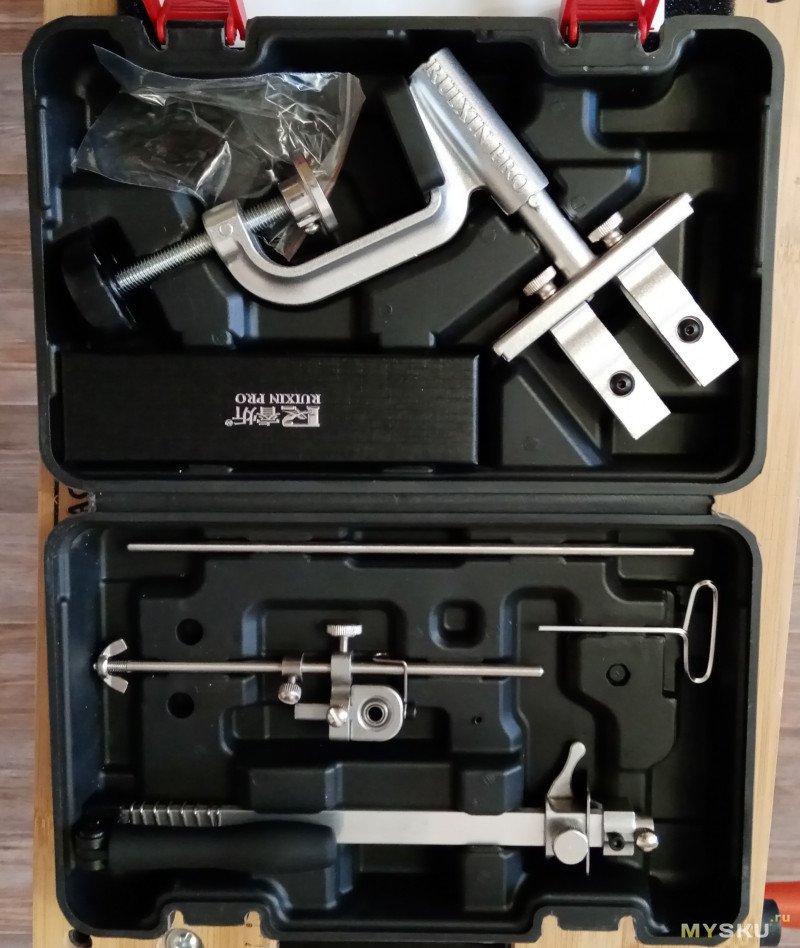
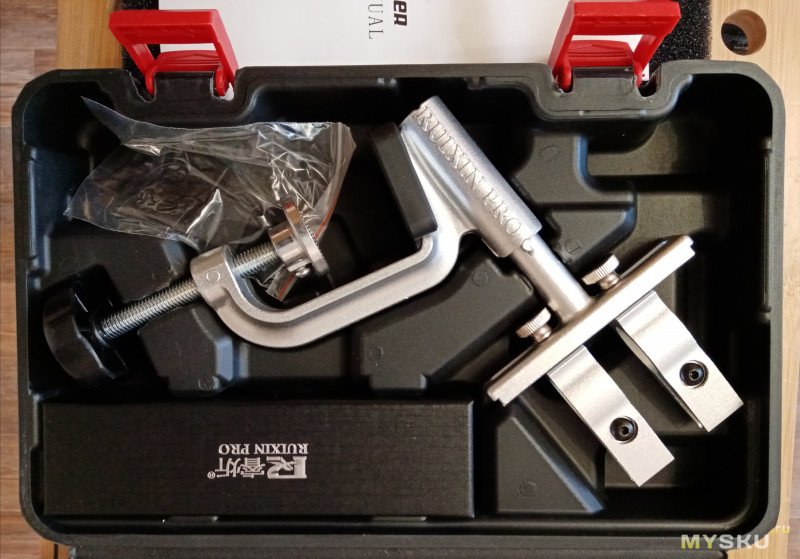
— станина с поворотным механизмом и струбциной для фиксации устройства на столе для работы

— вертикальная штанга с шарнирным механизмом, шар металлический
— штанга с устройством держателей бланков и камней, с регулируемой рукояткой
— набор водных камней без пластмассовых бланков
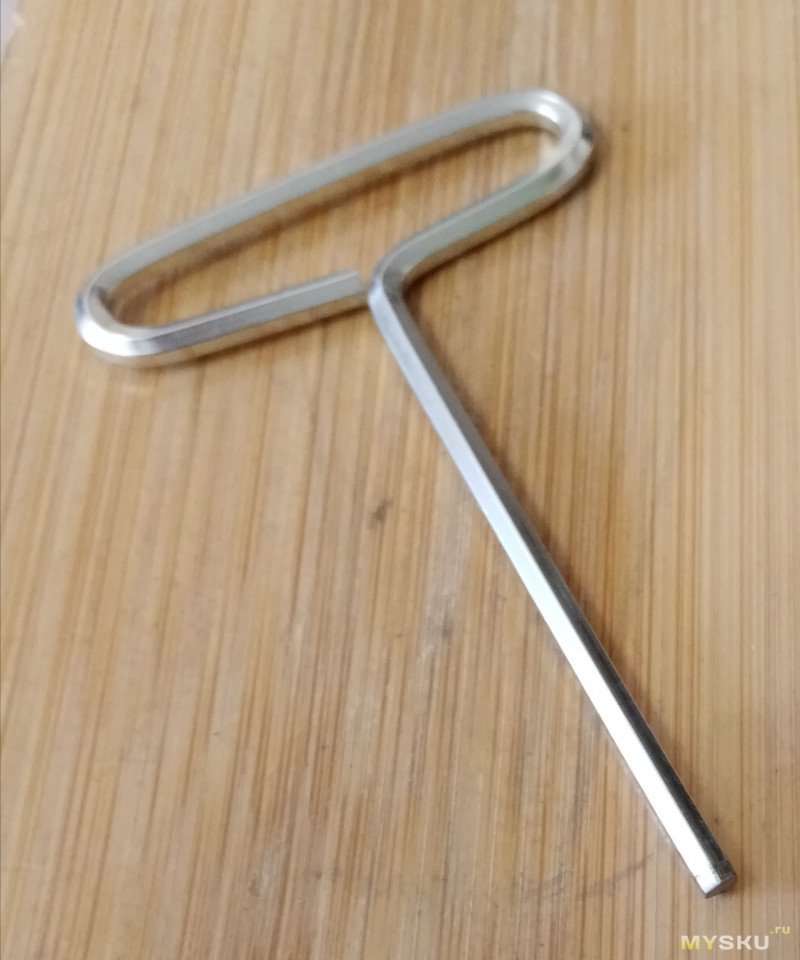
— ключ шестигранник в виде ключа
— инструкция в которой сразу сравниваются два устройства 008 и 009:
Да все на английском, но есть картинки.
И сразу же фотки для сравнения:

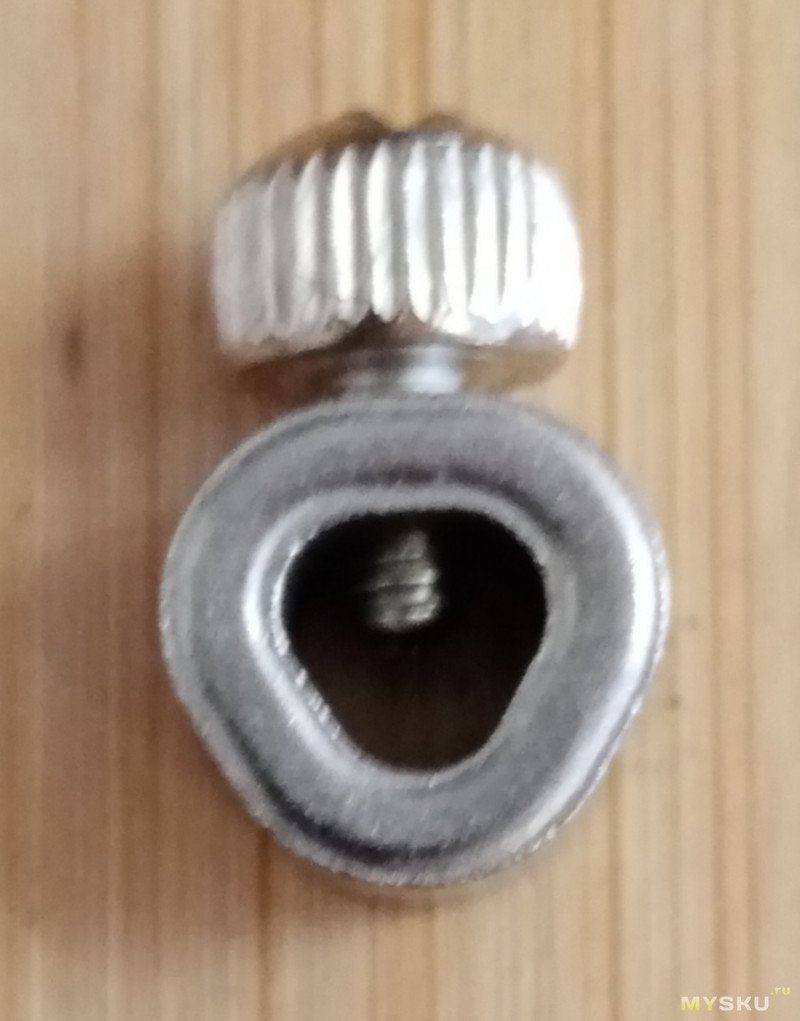
Теперь фиксатор с винтом имеет треугольное овальное отверстие. Наверное, это правильно и удобно, но я не ощутил каких-то однозначных преимуществ.
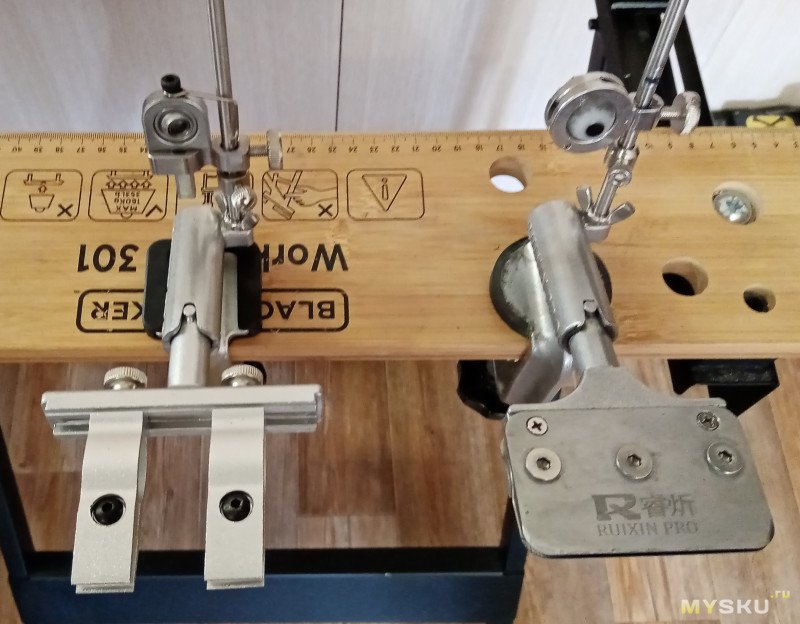
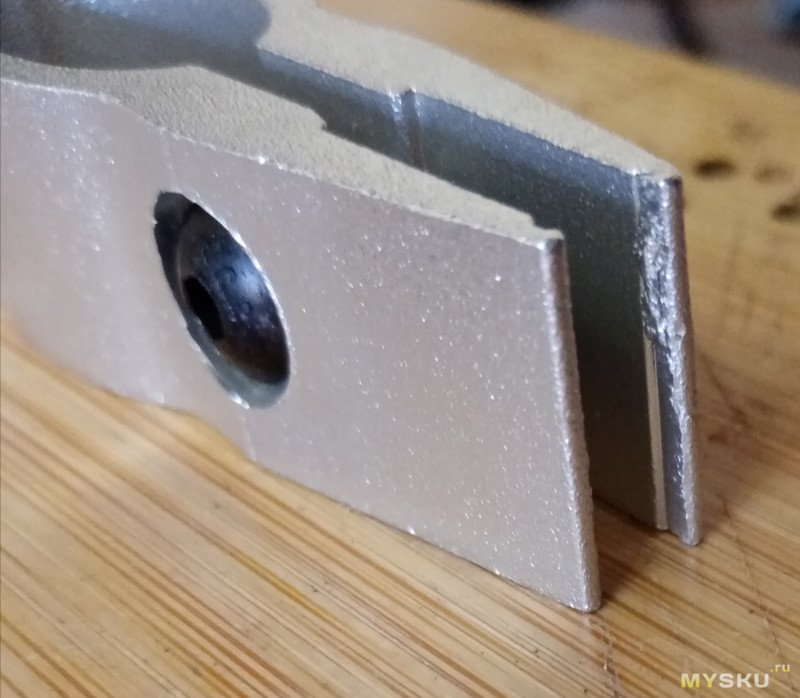
Планка поворотного механизма держит два зажима, которые своими губками удерживают клинок.
Для губок существуют резиновые наконечники, они позволяют более бережно держать плоскость клинка не повреждая его. Зажимы двигаются по планке и фиксируются винтами с насечкой.
Вполне возможно вставить маленький и тонкий клинок для заточки в один зажим и работать с ним. В старой точилке как раз этого мне и не хватало.
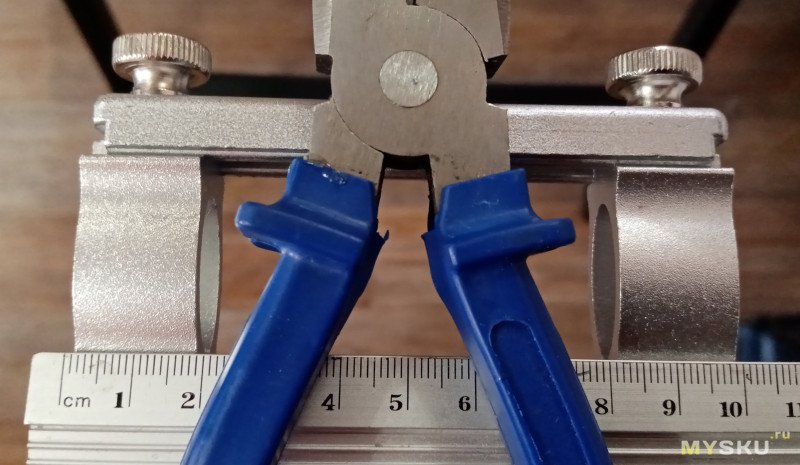

У моих зажимов не все губки были чисто обработаны, вот на одном такие наплывы металла, пришлось самому убирать.
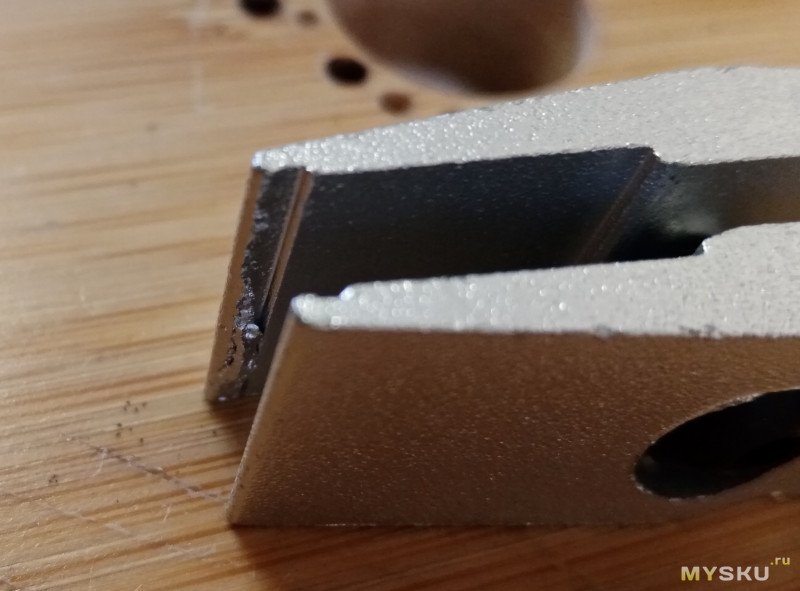
Так что резиновые наконечники явно лишними не будут. Один даже запасной.

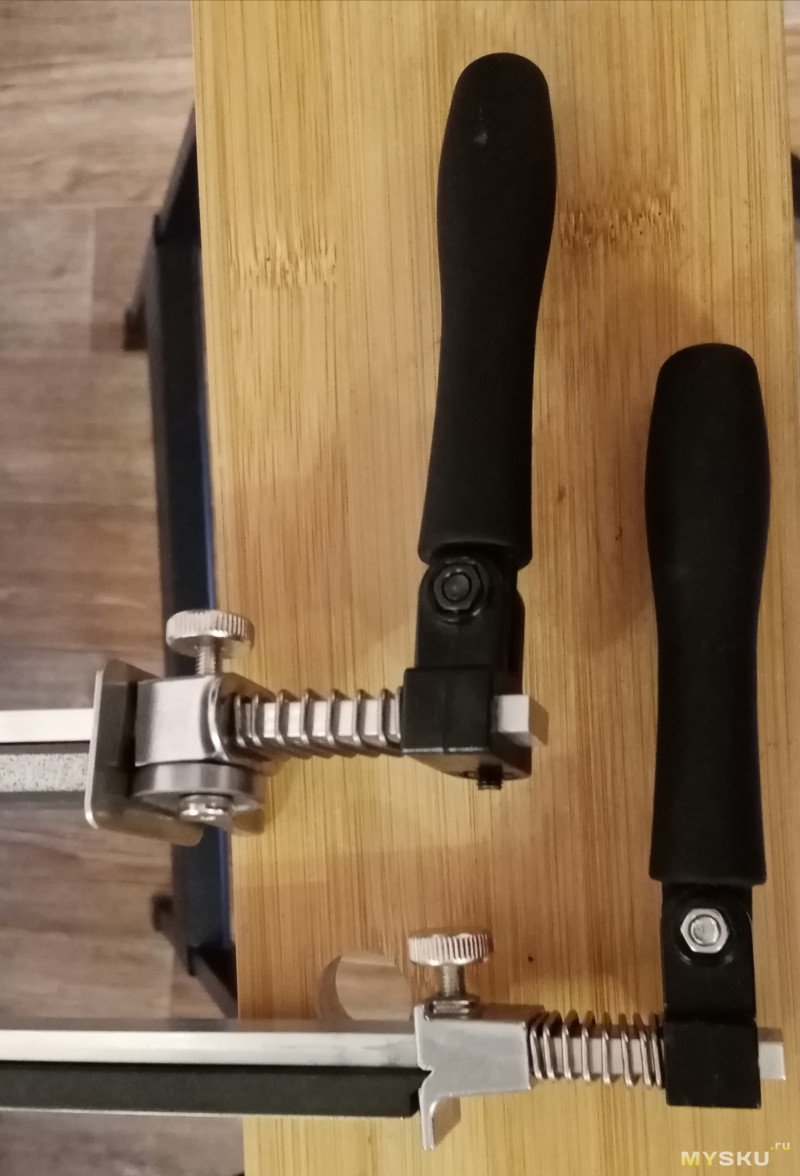
В держатель бланков ввели эксцентриковый механизм.
Мне он не понравился, очень сырая конструкция. Возможно это касается только меня и моей работы с бланками при заточке. Я применяю и алмазные бланки с гальваническим напылением, веневские двухсторонние алмазы, бланки с кожей.
Усилие пружины регулируется задним креплением со стороны рукоятки.
В моем случае получается, что гальваника работает со старым креплением держателей, а веневские алмазы с новым креплением. Для меня это и оперативно, и удобно.
Теперь самое основное. У меня три точилки 008: дом, дача, походы. И только в одной из них (самой старой) угол при повороте на 180 градусов стабилен, у остальных есть расхождения до градуса. Пробую новую точилку. Чудес не произошло, но я и не ждал. Расхождение при повороте в 0,2-0,3 градуса. Что в принципе конечно это не критично.
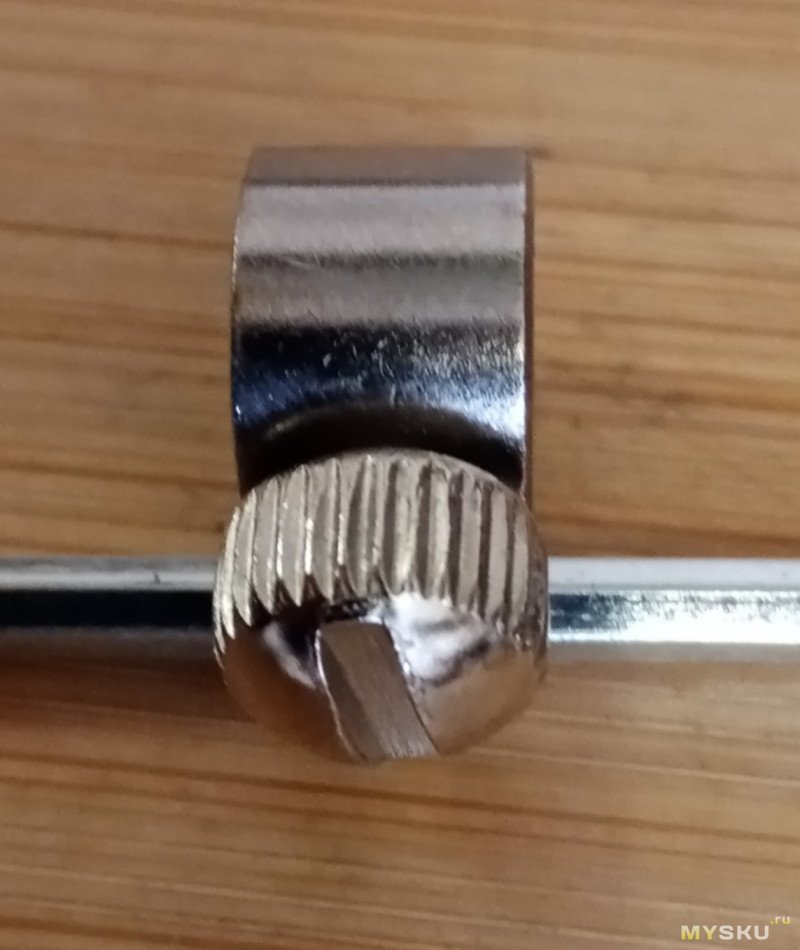
Понравилось, что я не смог вкрутить в станину вертикальную тягу с шаровым устройством.
Оказалось, что в резьбе находится винт, так сказать для защиты резьбы при транспортировке.
Нет люфтов в шаровом механизме. Новый шаровой механизм однозначно лучше старого.

Введена проволочная парковка. Наверное, нужна, но мне все равно.
Введена площадка, для компенсации бланков различной толщины.

Первая заточка меня не впечатлила. На 008 я все поджимал маленькими плоскогубцами для надежности фиксации. В 009 при зажатии фиксирующих винтов от руки они разбалтываются во время работы, и это неприятно – появляются люфты где не ждал. Придется опять применять плоскогубцы. При заточке кухонных ножей никаких преимуществ я не почувствовал. Маленькие еще не точил.
Ощущения от новой точилки двоякое: вроде бы какие-то элементы стали удобнее, дизайн получше, но принципиально ничего особенно не изменилось. Что однозначно плюс:
— новая система крепления клинка зажимами;
— новое шаровое устройство с металлическим шариком;
— улучшен кое-где дизайн.
Чтобы хотелось? Чтобы сами зажимы и новое шаровое устройство можно было купить отдельно.
Мог бы я порекомендовать начинающему заточнику это устройство. Наверное да, но если вас это увлечет и потребуется более точное и удобное, то это к TSPROF Pioneer. Покупать ли 008 или 009? Если разница в цене большая – 008, если незначительная — 009.
Правильного выбора и удачи!
Заточное устройство Ruixin Pro RX-009
Это устройство — новая версия более старого заточного устройства Ruixin RX-008. В конструкцию RX-009 был внесён ряд изменений, который значительно повысил удобство работы с устройством.
Станок состоит из нескольких частей:
- Станины с поворотным механизмом и струбциной для фиксации устройства на столе
- Вертикальной штанги с шарнирным механизмом
- Штанги с держателем бланков и камней, рукоять регулируемая
Теперь поворотный механизм оснащён двумя регулируемым зажимами с резиновыми насадками в комплекте для более бережного удержания клинка. Зажимы фиксируются металлическими винтами с насечками. Преимущество двух небольших зажимов заключается в возможности фиксировать на станке не только крупные ножи, но и более мелкие.
В держателе имеется эксцентриковый механизм, который значительно ускоряет установку бланка на станок.
Шаровой механизм выполнен из металла, что значительно повышает его срок службы. За счёт надёжной конструкции механизм не имеет люфта.
Также в RX-009 добавлена проволочная парковка, которой не было в прошлой версии.
Ruixin Pro имеет регулируемый угол заточки и позволяет выдерживать и контролировать его на протяжении всей работы, поворотный механизм вращается на 360 градусов и позволяет работать с ножом в любом положении, не вынимания его из станка. Заточное устройство изготовлено из нержавеющей стали и не подвержено коррозии.
Особенности:
- Быстрая сборка
- Не подвержена коррозии
- Возможность заточки самых разных инструментов
- Компактность
- Поворотный механизм 360 градусов
Характеристики:
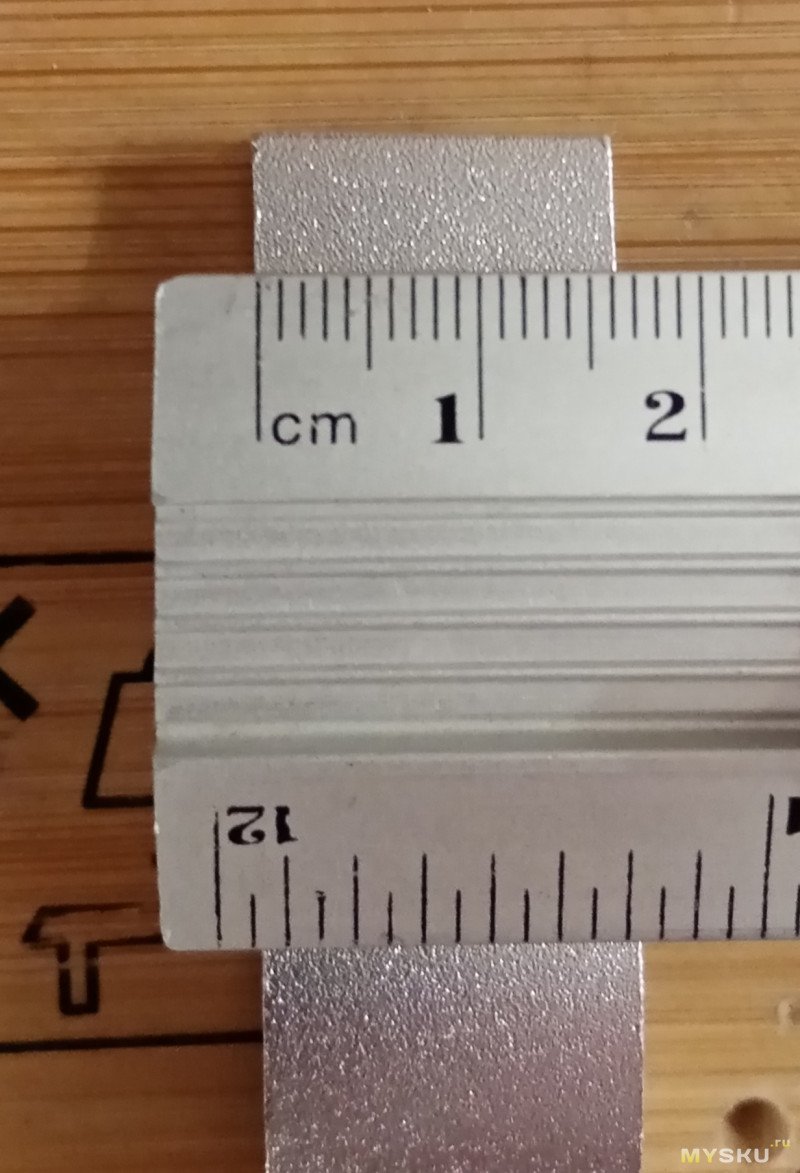
- Габариты (Д х Ш х В): 230 х 100 х 230 мм
- Вес: 1450 гр
Комплектация: станок, ключ шестигранник, набор камней 120/320/600/1500, пластикатовый кейс, инструкция на английском