
Applies ToWindows 11 Windows 10
В большинстве случаев Windows автоматически обнаруживает и устанавливает как сканеры, подключенные локально, так и сканеры, расположенные в сети. Однако если сканер не обнаруживается и не устанавливается автоматически, в этой статье описывается установка сканера вручную. После установки в этой статье описывается сканирование рисунка или документа.
В большинстве случаев для настройки сканера в Windows необходимо подключить сканер к устройству Windows. Подключите USB-кабель от сканера к доступному USB-порту на устройстве с Windows, а затем включите сканер. Windows продолжает установку сканера. Если Windows не устанавливает локальный сканер автоматически, его можно установить вручную:
-
Убедитесь, что сканер подключен к устройству с Windows через USB и что сканер включен.
-
В окне Устройства bluetooth & > Принтеры & сканеры нажмите кнопку Добавить устройство рядом с пунктом Добавление принтера или сканера.
-
Windows выполняет поиск сканеров, подключенных локально к устройству Windows. Поиск может занять несколько минут.
-
После того как локальные сканеры будут обнаружены, они отображаются в списке в окне Устройства Bluetooth & > Принтеры & сканеры . В списке нажмите кнопку Добавить устройство рядом со сканером, который необходимо установить.
-
Windows устанавливает выбранный сканер. После завершения установки сканер появится в окне устройства & Bluetooth > принтеры & сканеры .
Совет: Если сканер входит в состав многофункционального или многофункционального принтера, сканер может отображаться как принтер. Чтобы убедиться, что Windows также обнаруживает принтер в качестве сканера, выберите принтер в окне Устройства Bluetooth & > Принтеры & сканеры . Если принтер также обнаружен в качестве сканера, параметры сканера отображаются в качестве параметра в открывавшемся окне Устройства Bluetooth & > Принтеры & сканеры > <Printer_Name> .
Если сканер включен и подключен к сети, Windows должна найти и установить его автоматически. Доступные сканеры могут включать сканеры в сети, такие как сканеры Bluetooth, беспроводные сканеры или сканеры, подключенные к другому устройству и совместно используемые в сети. Если Windows не устанавливает сканер сети автоматически, его можно установить вручную:
-
В окне Устройства bluetooth & > Принтеры & сканеры нажмите кнопку Добавить устройство рядом с пунктом Добавление принтера или сканера.
-
Windows выполняет поиск сканеров в сети. Поиск может занять несколько минут.
-
После того как сетевые сканеры будут обнаружены, они отображаются в списке в окне Bluetooth & устройства > Принтеры & сканеры . В списке нажмите кнопку Добавить устройство рядом со сканером, который необходимо установить.
-
Windows устанавливает выбранный сканер. После завершения установки сканер появится в окне устройства & Bluetooth > принтеры & сканеры .
Если сканер, который требуется установить, не обнаружен и не отображается в списке, выберите ссылку Добавить новое устройство вручную рядом с пунктом Нужный принтер отсутствует в списке. В открывавшемся окне Добавление принтера следуйте инструкциям, чтобы добавить его вручную.
Советы:
-
Если сканер входит в состав многофункционального или многофункционального принтера, сканер может отображаться как принтер. Чтобы убедиться, что Windows также обнаруживает принтер в качестве сканера, выберите принтер в окне Устройства Bluetooth & > Принтеры & сканеры . Если принтер также обнаружен в качестве сканера, параметры сканера отображаются в качестве параметра в открывавшемся окне Устройства Bluetooth & > Принтеры & сканеры > <Printer_Name> .
-
Если сканер и устройство Windows подключены к сети по беспроводной сети, убедитесь, что они находятся в одной беспроводной сети или SSID.
-
Инструкции по подключению сканера с беспроводными возможностями к беспроводной сети см. в инструкциях, которые поставляется со сканером или веб-сайтом производителя.
Чтобы убедиться, что сканер установлен, убедитесь, что сканер включен, а затем выполните следующие действия.
-
Убедитесь, что в открывавшемся окне & сканеры устройства Bluetoo & th > принтеры , убедитесь, что сканер отображается в окне.
Совет: Если сканер входит в состав многофункционального или многофункционального принтера, сканер может отображаться как принтер. Чтобы убедиться, что Windows также обнаруживает принтер в качестве сканера, выберите принтер в окне Устройства Bluetooth & > Принтеры & сканеры . Если принтер также обнаружен в качестве сканера, параметры сканера отображаются в качестве параметра в открывавшемся окне Bluetooth & устройства > принтеры & сканеры > <Printer_Name> .
После установки сканера можно использовать приложение «Проверка Windows» для сканирования рисунка или документа. Вот как это сделать.
-
Убедитесь, что сканер включен.
-
На устройстве с Windows щелкните правой кнопкой мыши меню Пуск и выберите Поиск .
-
В поле поиска Введите здесь для поиска введите:
Проверка Windows
-
В результатах поиска в разделе Приложения выберите Сканировать в результатах.
Примечание: Если приложение «Сканирование » не отображается в списке результатов поиска, оно может быть не установлено. Чтобы установить приложение «Сканирование Windows» , установите его из Microsoft Store , щелкнув следующую ссылку:
Проверка Windows
-
Поместите документ или рисунок для сканирования в сканере в зависимости от типа сканера:
-
Если сканер имеет планшет, поместите документ или рисунок для сканирования лицевой стороной вниз на планшет сканера и закройте крышку.
-
Если сканер имеет средство подачи документов, поместите документ или рисунок для сканирования в средство подачи документов сканера. Обратитесь к документации сканера, независимо от того, должен ли элемент быть лицом вниз или лицом вверх.
Примечание: Если сканер имеет как планшет, так и средство подачи документов, можно использовать любой из этих средств.
-
-
На странице Сканирование приложения «Сканирование» выполните следующие действия.
-
Убедитесь , что в раскрывающемся меню Сканер выбран нужный сканер.
-
В раскрывающемся меню Источник убедитесь, что выбран нужный источник (планшет, канал, автоматически настроен). В большинстве случаев автоматическая настройка по умолчанию является нормальной. В противном случае источник должен совпадать с местом размещения документа или рисунка на предыдущем шаге.
-
В раскрывающемся меню Тип файла выберите тип файла изображения, чтобы сохранить сканированную копию. Доступные параметры: JPEG, PNG, TIFF и Bitmap.
-
Щелкните ссылку Показать дополнительно , чтобы отобразить параметр Сохранить файл в . Щелкните ссылку в разделе Сохранить файл в. Откроется окно Выбор папки . Перейдите к расположению, в котором должны быть сохранены проверки, и нажмите кнопку Выбрать папку .
Примечание: Если расположение для сохранения не выбрано, то по умолчанию приложение «Проверка Windows» сканирует папку «Изображения и сканирование » в папке пользователя.
-
-
Чтобы отсканировать документ или рисунок, выберите Сканировать в нижней части окна Сканировать приложение.
-
После завершения сканирования документа или рисунка сканер автоматически сохраняет его в ранее выбранную папку. Выберите один из следующих двух параметров в верхней части экрана, чтобы продолжить:
-
Вид — открывает отсканированный элемент в приложении «Фотографии » в новом окне, чтобы можно было просмотреть отсканированный элемент. Отсканированный элемент также можно изменить в приложении «Фотографии «. После завершения просмотра или редактирования отсканированного элемента окно приложения «Фотографии» можно закрыть.
-
Закрыть — завершает текущее задание сканирования в рамках подготовки к дополнительным заданиям сканирования.
-
-
На устройстве с Windows щелкните правой кнопкой мыши меню Пуск и выберите проводник .
-
В открывавшемся окне проводник перейдите к расположению, выбранному для сохранения сканирований в разделе Сканирование рисунка или документа с помощью приложения проверки Windows.
Совет: Если расположение не было выбрано в разделе Сканирование рисунка или документа с помощью приложения «Сканирование Windows» , по умолчанию приложение «Сканирование Windows» сохраняет сканы, — это папка «Изображения и сканирование » в папке пользователя.
Дополнительные сведения, включая дополнительные сведения об устранении неполадок, см. на веб-сайте производителя сканера.
Нужна дополнительная помощь?
Нужны дополнительные параметры?
Изучите преимущества подписки, просмотрите учебные курсы, узнайте, как защитить свое устройство и т. д.
Сканирование позволяет перевести любой документ в цифровой формат, удобный для чтения, долгосрочного хранения и отправки адресату по e-mail. Сам процесс сканирования практически не зависит от моделей и производителей периферийных устройств. Единственным условием является наличие функции сканера в МФУ. Мы расскажем, как сканировать в windows 10 быстро и легко.

Сканирование документов в windows 10
Скан-копии можно получить с помощью многофункционального устройства МФУ, которое выполняет задачи принтера, сканера и копира. Современные модели имеют подключение к Wi-Fi, которое обеспечивает беспроводное соединение с ПК. Компьютер также может соединяться с МФУ через usb – разницы никакой нет. Чтобы отсканировать документ, следуем алгоритму действий:
- Скачиваем и устанавливаем программное обеспечение МФУ на свой компьютер. Обязательно проверьте наличие драйвера для функции сканера.
- В отсек для сканирования укладываем нужный документ таким образом, чтобы текст или изображение были направлены вниз. Хотя есть модели сканирующих устройств, у которых стекло располагается сверху. Читайте инструкцию.
- Заходим в раздел «Устройства и принтеры» в меню Пуск. Здесь выбираем подходящее МФУ, кликаем правой кнопкой мыши и задаем «Начать сканирование».
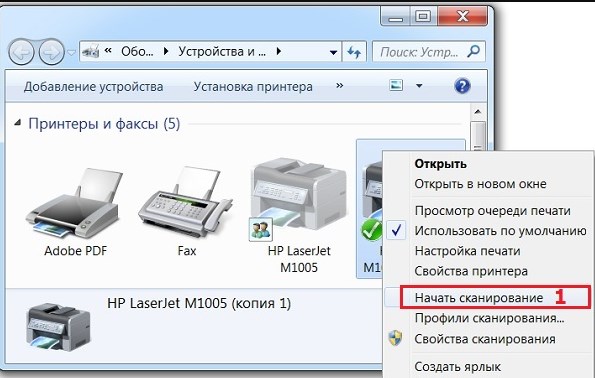
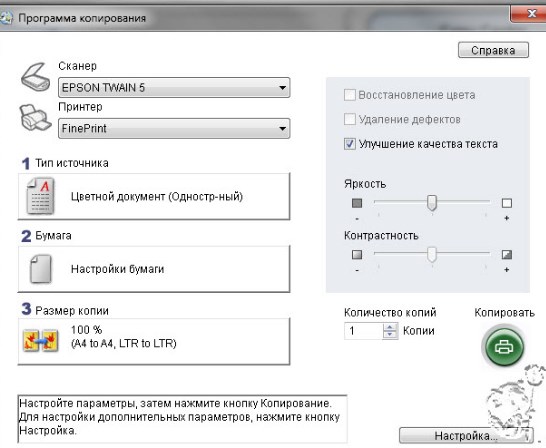
- В выпавшем окошке задаем нужные параметры сканирования. Указываем что именно будет сканироваться – текст, фото и т.д. из списка. При необходимости подкорректируйте яркость, контрастность, разрешение. Нажимайте предварительный просмотр, чтобы оценить будущий результат. Если все устраивает, начинаем процесс сканирования и сохраняем готовый файл.
Сканируем А0, А1, А2, А3, А4 в любой формат файла.
100 листов — за 10 минут по цене от 5 руб. за лист в нашем копицентре!
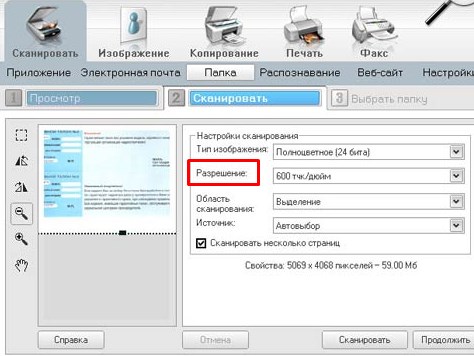
Параметры сканирования документов
Основным параметром отсканированных изображений является DPI – это разрешение отсканированной картинки. Чем выше этот показатель, тем качественнее, четче и ярче получается скан-копия
- От 100 до 200 dpi – невысокое качество, но довольно быстрый результат сканирования.
- От 300 до 400 dpi – оптимальный вариант для работы с текстовыми документами.
- От 500 до 600 dpi – максимально возможное качество изображения, подходит для сканирования паспортов, официальных документов с детализацией.
Какие услуги мы хотим Вам предложить
Статья о том, как сканировать в windows 10, написана при поддержке специалистов копировального центра Printside.ru

Принимаем заявки 24/7
Менеджер
Александра
Оставьте заявку, наш менеджер свяжется с Вами в ближайшее время и ответит на все интересующие вопросы.
Оставьте заявку, наш менеджер свяжется с Вами в ближайшее время и ответит на все интересующие вопросы.
(Image credit: Windows Central)
Although we’re now living in a digital world, from time to time, you may still need to scan important documents, such as handwritten letters, contracts, forms, and more, for many reasons. For instance, when you need to sign and send an agreement digitally via email, you want to convert important papers into digital files for inventory or preservation purposes, etc.
If you have a multi-function printer or standalone scanner, you can probably walk up to the device and directly scan the document (or picture) onto a USB flash drive. However, Windows 10 has two apps you can use to save you the trip to scan any documents and pictures directly onto your device without having to use the manufacturer software, whether you have a flatbed or feeder scanner.
In this Windows 10 guide, we’ll walk you through two methods to scan documents and photos on your device.
- How to scan documents using Windows Scan app
- How to scan documents using Windows Fax and Scan app
How to scan documents using Windows Scan app
Windows 10 has a modern app to scan documents using a scanner, but you must first download and install it from the Microsoft Store.
Install Windows Scan app
To install the Windows Scan app, use these steps:
- Open web browser.
- Use this Microsoft Store link to get the Windows Scan app.
- Click the Get button.
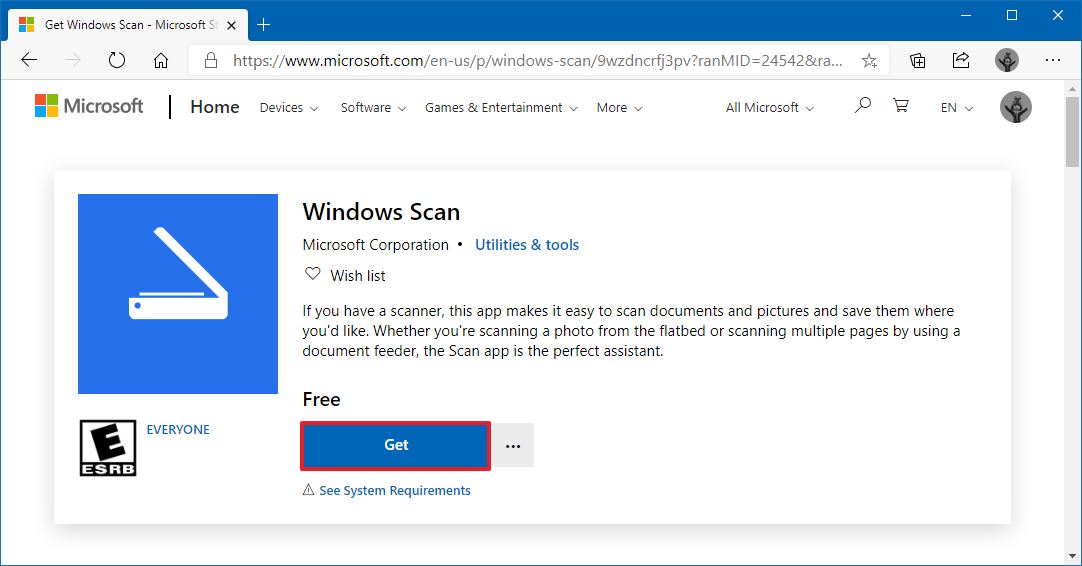
- Click the Open button.
- Click the Install button.
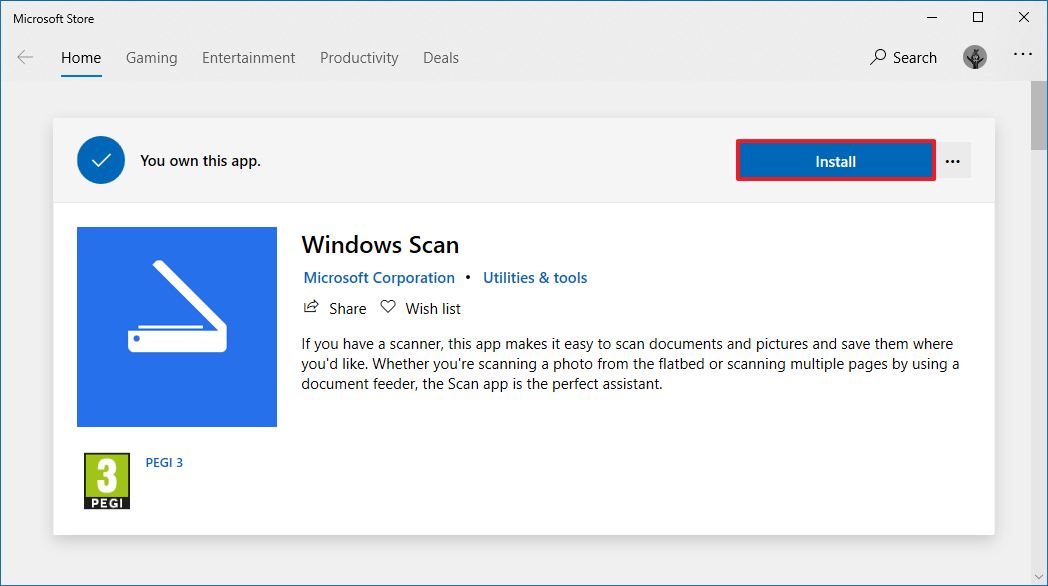
Once you complete the steps, the app will install, and you can proceed to convert documents from physical to digital.
Scan documents
To scan physical documents to PDF, JPEG, or another file format, use these steps:
All the latest news, reviews, and guides for Windows and Xbox diehards.
- Open Start.
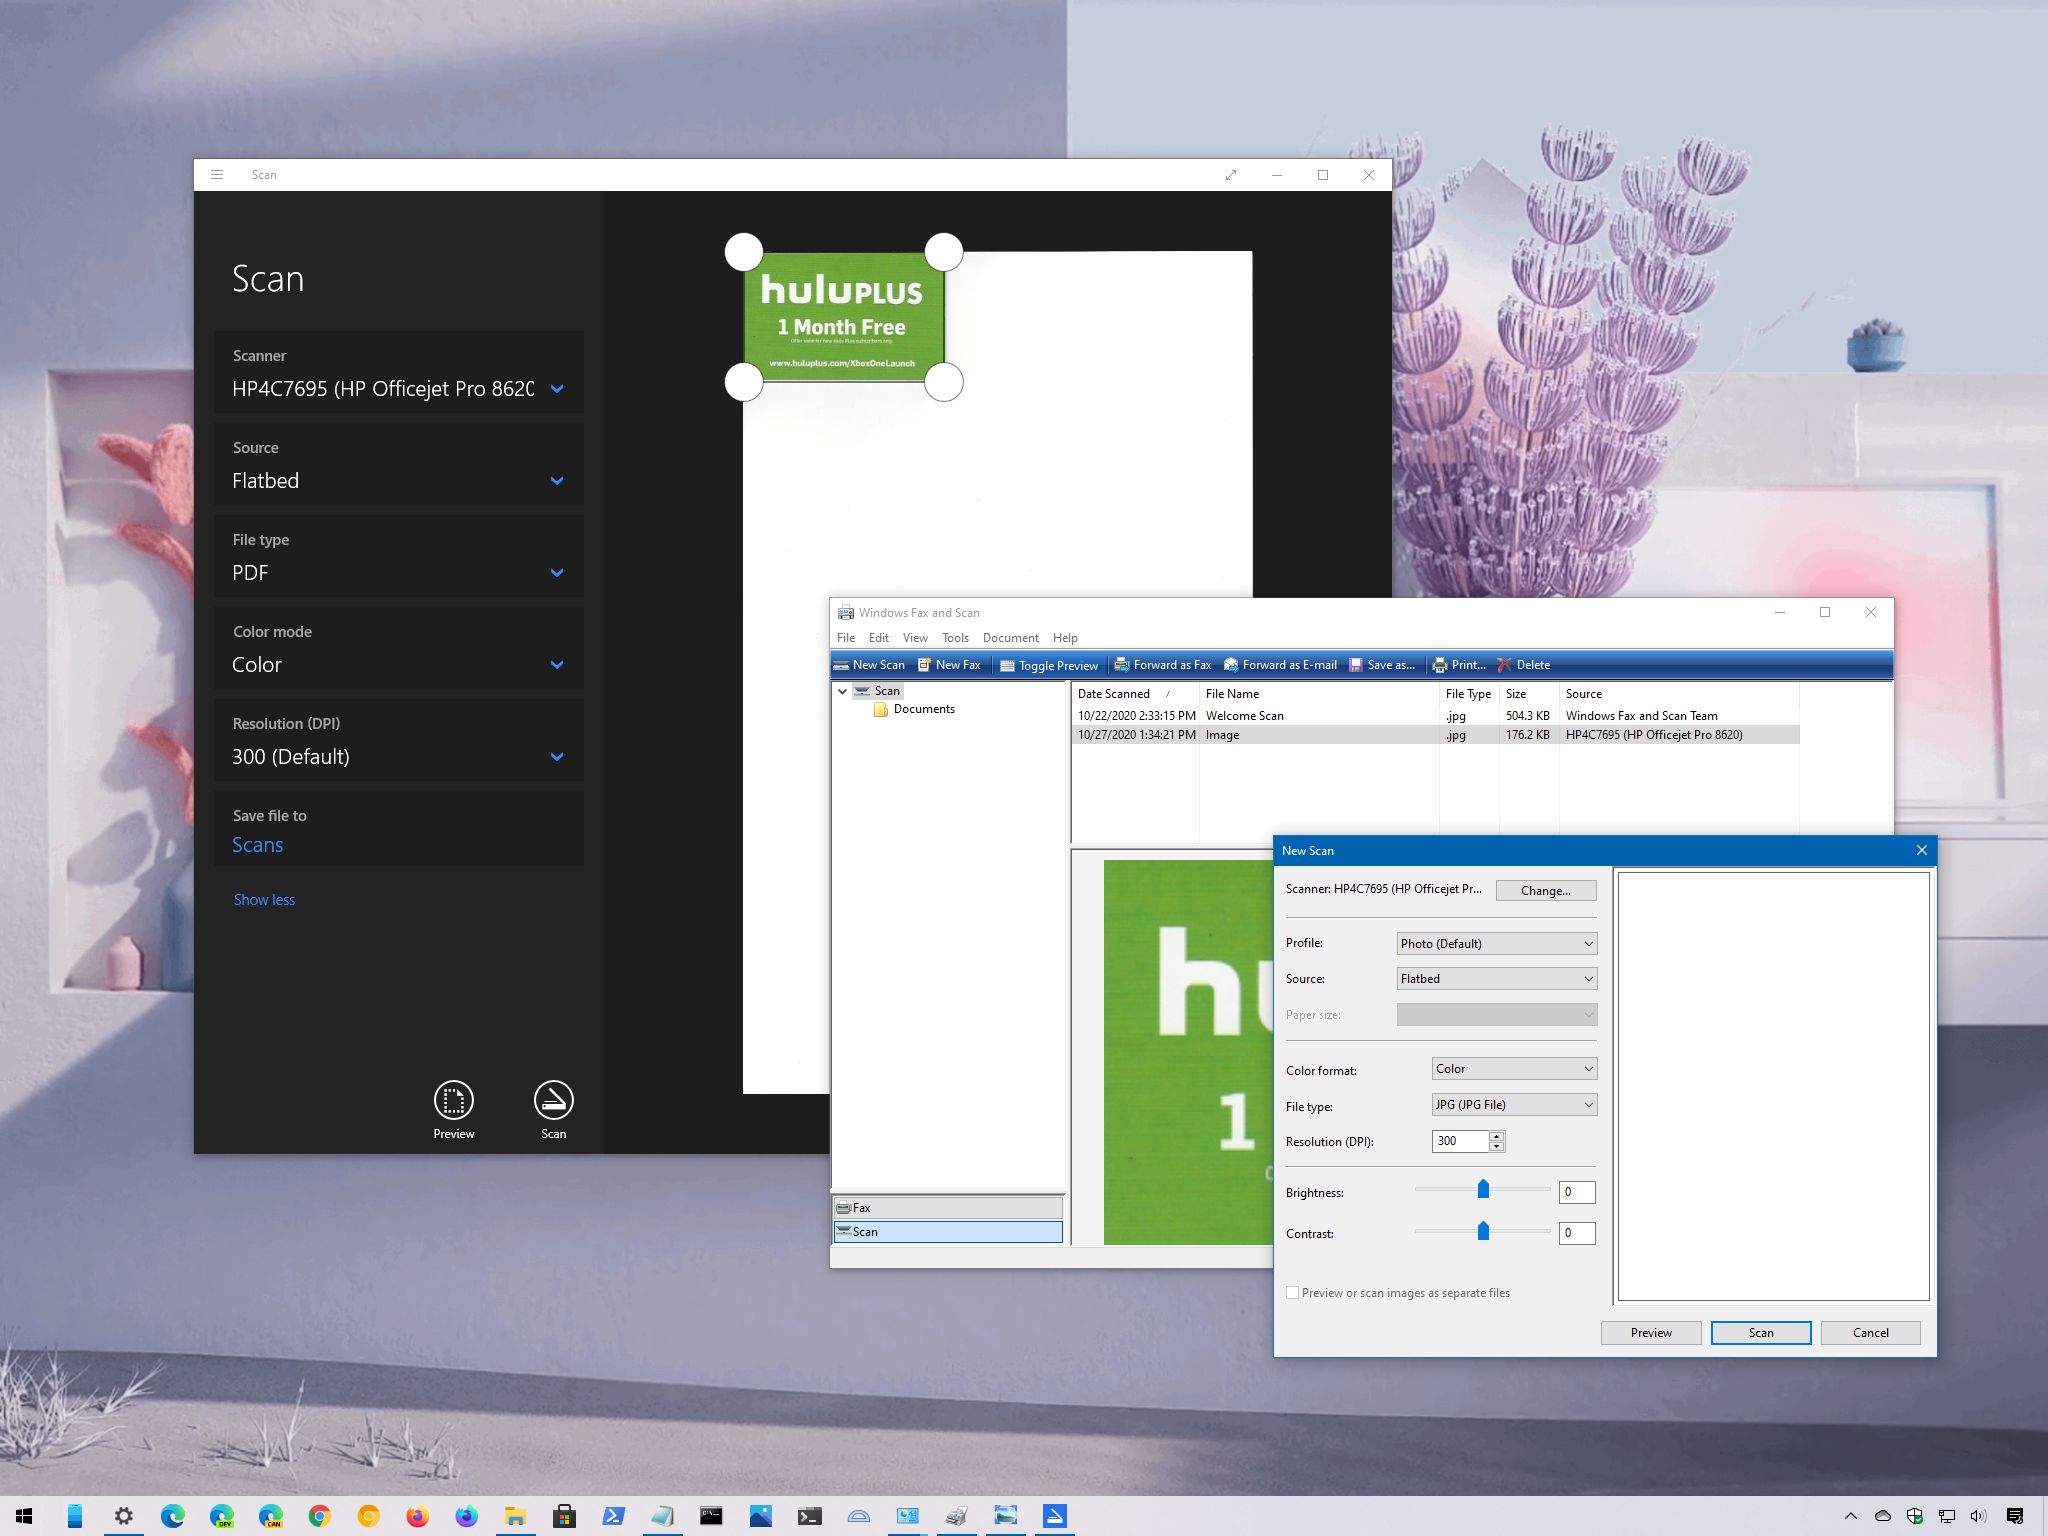
- Search for Windows Scan and click the top result to open the app.
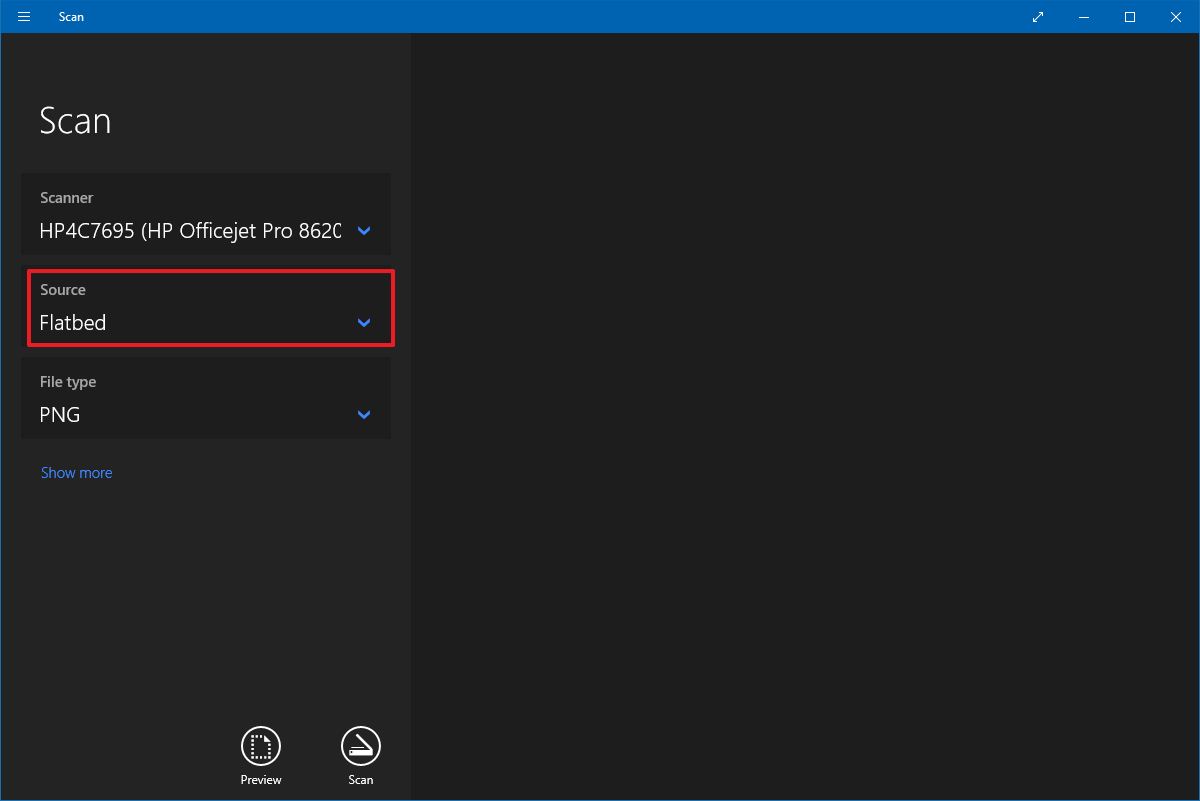
- Use the «Scanner» drop-down menu to select the scanning device.Quick tip: Before proceeding with the scan, make sure the scanner is powered on and connected to the computer via USB or network, depending on how you configured the device.
- Use the «Source» drop-down menu to select the location of the document you are trying to scan:
- Flatbed: This option will apply for most users who have a standalone scanner or multi-function printer with scanning functionality.
- Feeder: This option is for scanners that support scanning by feeding the document using the roller paper feeder. If you select this option, you’ll also be able to select two additional settings, including the ability to scan both sides and select the paper size.
- Auto-configured: This option doesn’t include additional settings, and it’ll scan the document as-is and save the output into a file.
For this guide’s purpose, we’ll be selecting the «Flatbed» option since it will apply to most users.
- Use the «File type» drop-down to select the file format to save the document scan. Options available include:
- JPEG.
- PNG.
- TIFF.
- Bitmap.
- OpenXPS.
- XPS.
- PDF.
Quick tip: Usually, you may want to select the PDF option for paper documents and JPEG when scanning images. For this guide, we’ll be selecting the «PDF» option.
- (Optional) Click the Show more option.
- Use the «Color mode» drop-down menu to select whether you want the scan. Options available include:
- Color.
- Grayscale.
- Black and white.
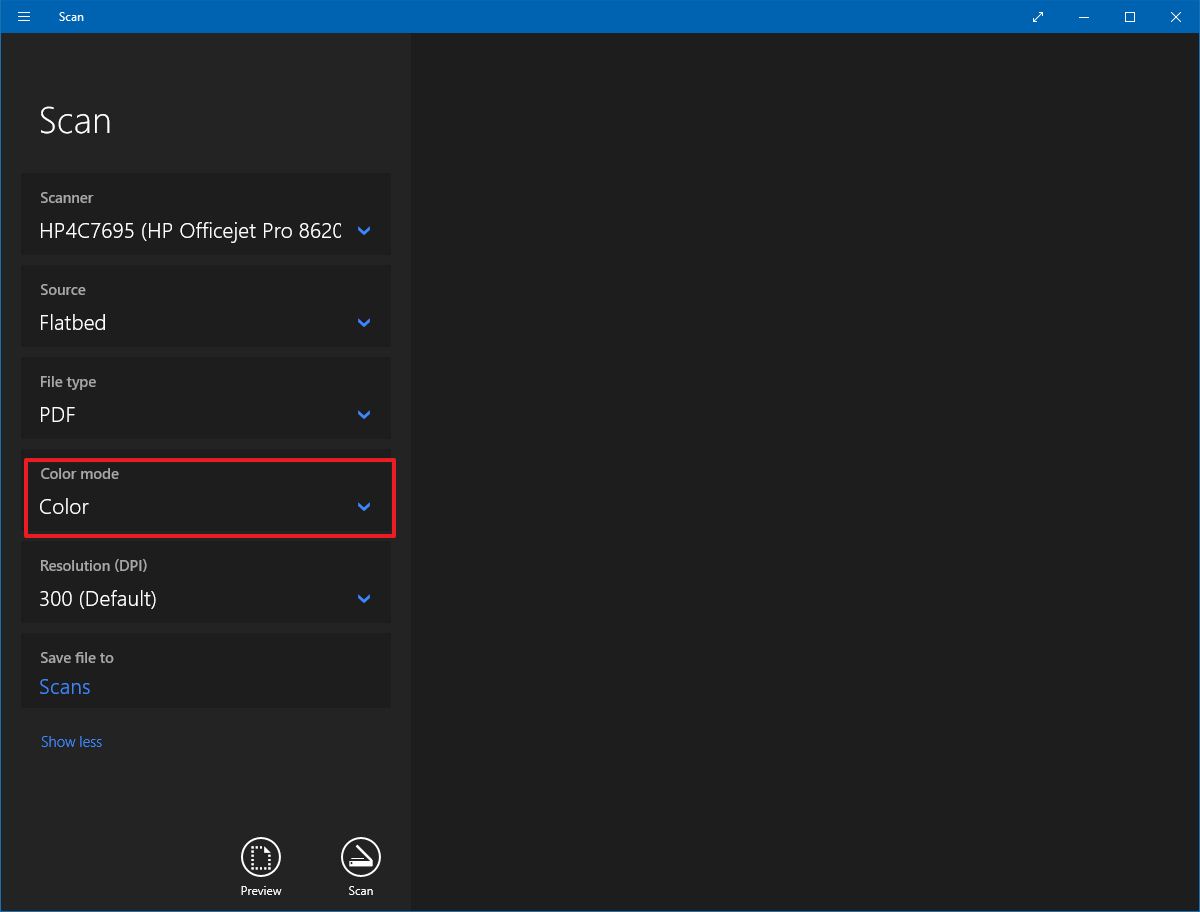
- Use the «Resolution (DPI)» drop-down menu to select the Dots Per Inch setting. The higher the DPI, the higher the resolution. (Usually, 300 DPI is suitable for most scenarios.)
- Click the Scans file to option.
- Select the destination folder.
- Click the Select Folder button.
- Click the Preview button.
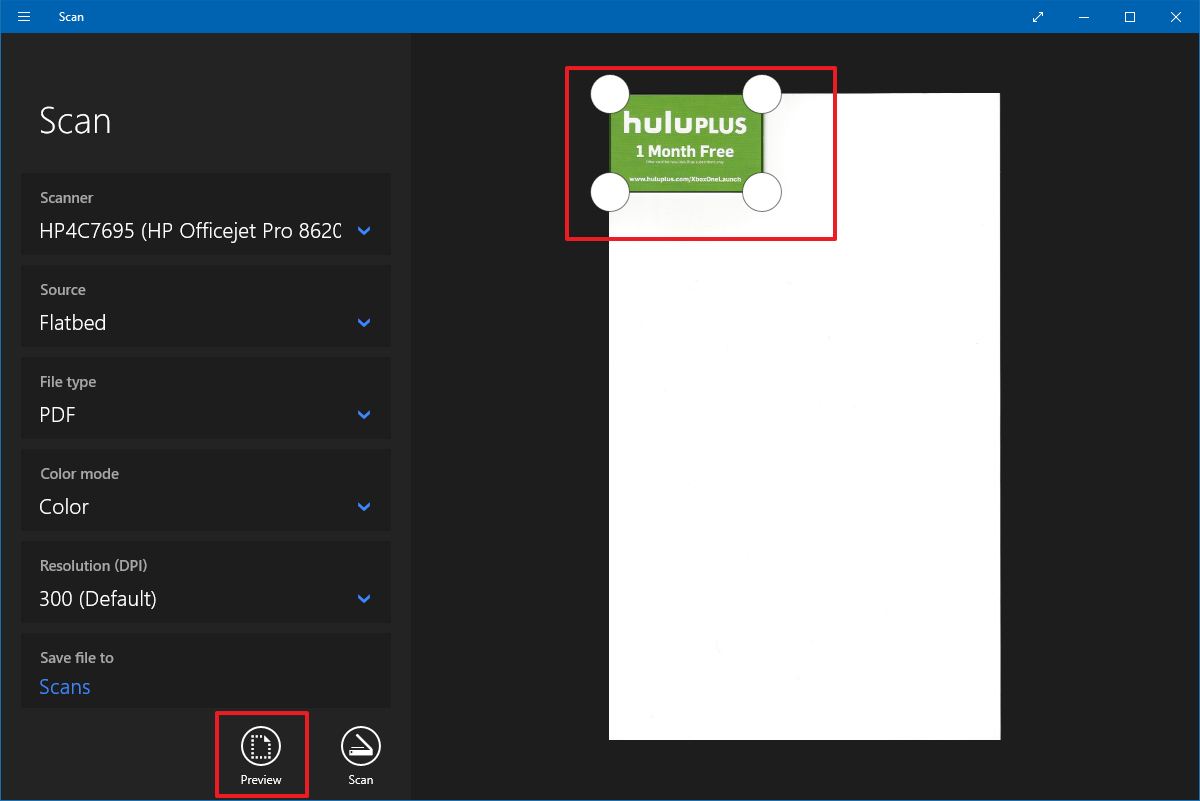
- Use the pins to crop the document (as needed).
- Click the Scan button.
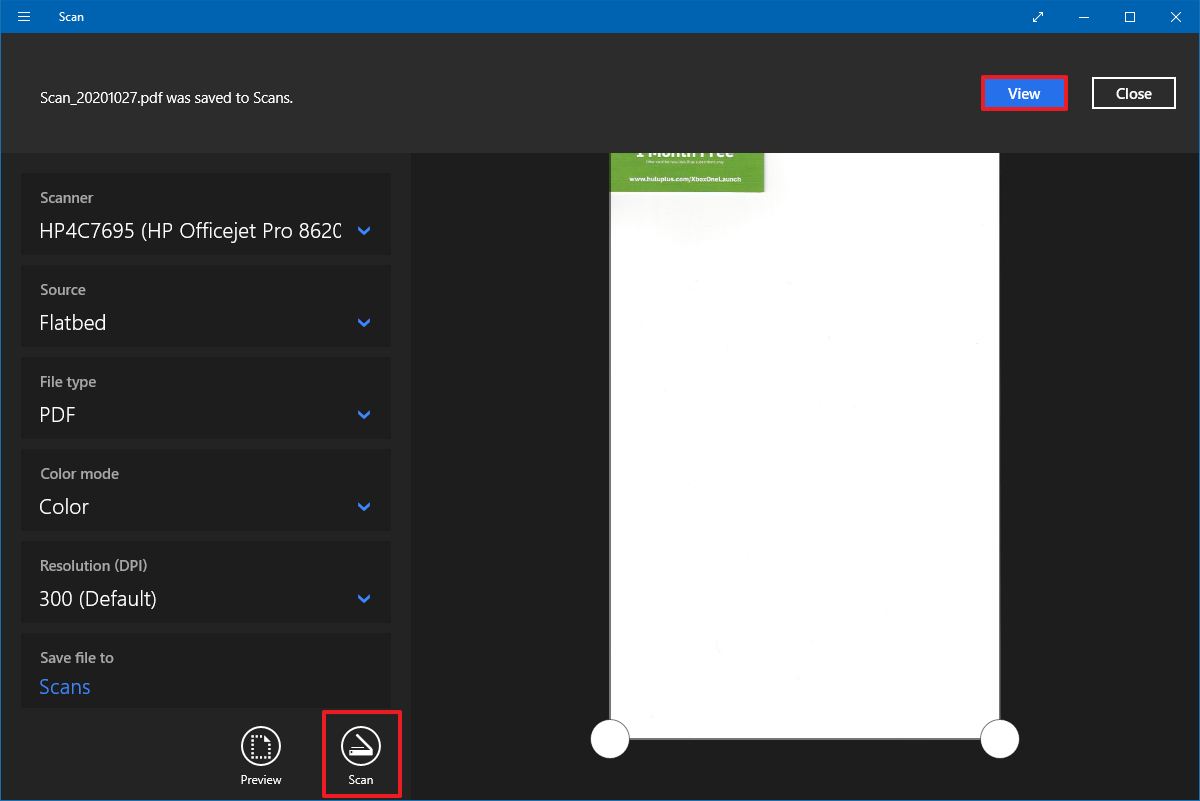
- Click the View button.
Once you complete the steps, the scanner will scan the document, and the app will save a digital copy in the Scans folder inside the Pictures profile folder unless you selected a different location.
If you scanned an image, the view option would open the file with the Photos app, and if you scanned a document as PDF, then the file will open with the default PDF viewer.
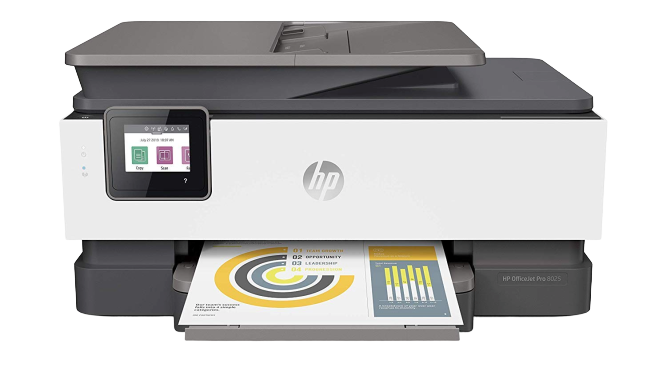
In the case that you’re in the market for a new all-in-one printer with scanning capability, then look no further than the HP OfficeJet Pro 8025 since it’s a reliable wireless printer that offers decent speed and good quality printing. Of course, it also includes a flatbed scanner with feeder functionality to scan both sides of the page. This is our best overall, but we have other picks you may want to consider.
Printer and scanner
HP OfficeJet Pro 8025
It prints and scans
The OfficeJet Pro 8025 is a great solution for your home office or small business. It’s full of smarts so that you can use it with the cloud.
How to scan documents using Windows Fax and Scan app
Alternatively, you can also use the legacy Windows Fax and Scan app. The app has been available for many years, and it includes all the essential features to scan documents and images. (If you have a modem and landline, you can also use it to send and receive faxes.)
To scan a document with the Windows Fax and scan app, use these steps:
- Open Start.
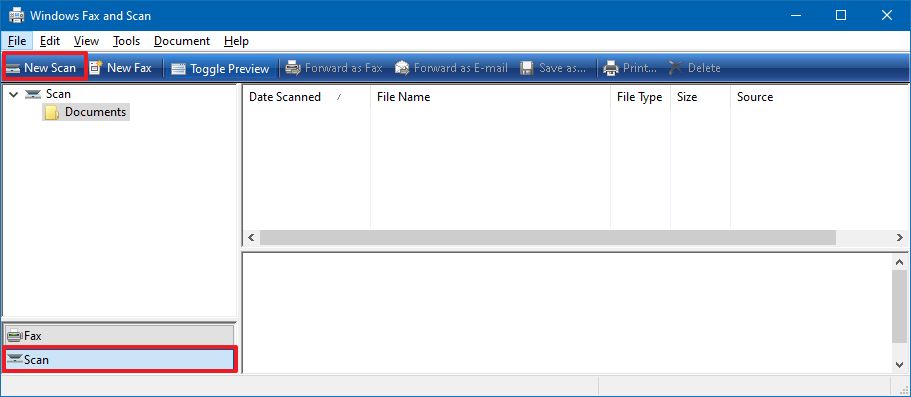
- Search for Windows Fax and Scan and click the top result to open the app.
- Click the Scan option from the bottom of the page (if applicable).
- Click the New Scan button from the top-left corner.
- Click the Change button to select the scanning device (if applicable).
- Click the OK button.
- Use the Profile drop-down menu to select the profile that applies to your scan. Options available include:
- Photos.
- Documents.
For this guide, we’ll be selecting the «Documents» option.
- Use the «Source» drop-down menu to select the location of the document you are trying to scan:
- Flatbed: This option will apply for most users who have a dedicated scanner or a multi-function printer with scanning functionality.
- Feeder: This option is for scanners that support scanning by feeding the document using the roller paper feeder. If you select this option, you’ll also be able to select two additional options, including the ability to scan both sides and select the paper size.
For this guide, we’ll be selecting the «Flatbed» option.
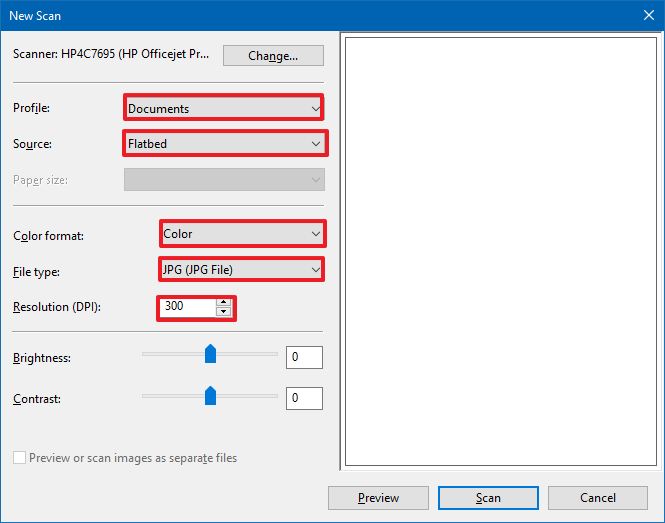
- Use the «Color format» drop-down menu to select whether you want the scan. Options available include:
- Color.
- Grayscale.
- Black and white.
- Use the «File types» drop-down menu to select the format to save the scan. Options available include:
- JPG.
- BMP.
- PNG.
- TIF.
- Use the «Resolution (DPI)» drop-down menu to specify the scan’s resolution.Quick note: When specifying the resolution, the higher the number means higher resolution, but using 300 is good enough for most scans.
- (Optional) Use the slider to control the scan brightness.
- (Optional) Use the slider to control the scan contrast.
- Click the Preview button.
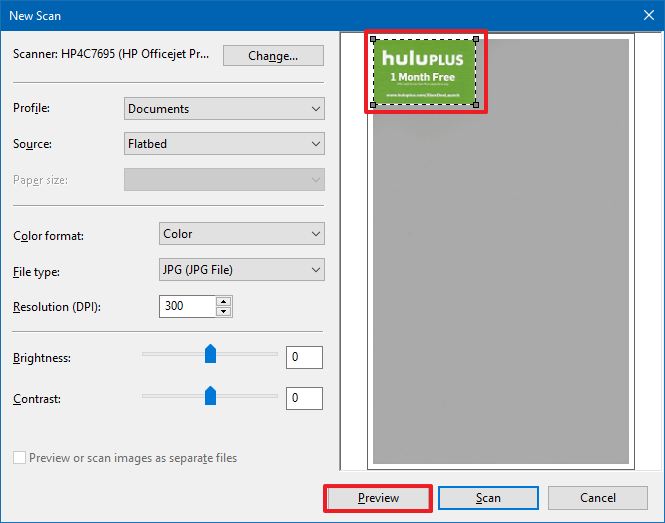
- Use the pins to crop the document (as needed).
- Click the Scan button.
- Select the image from the Windows Fax and Scan inbox to view a preview of the scan.
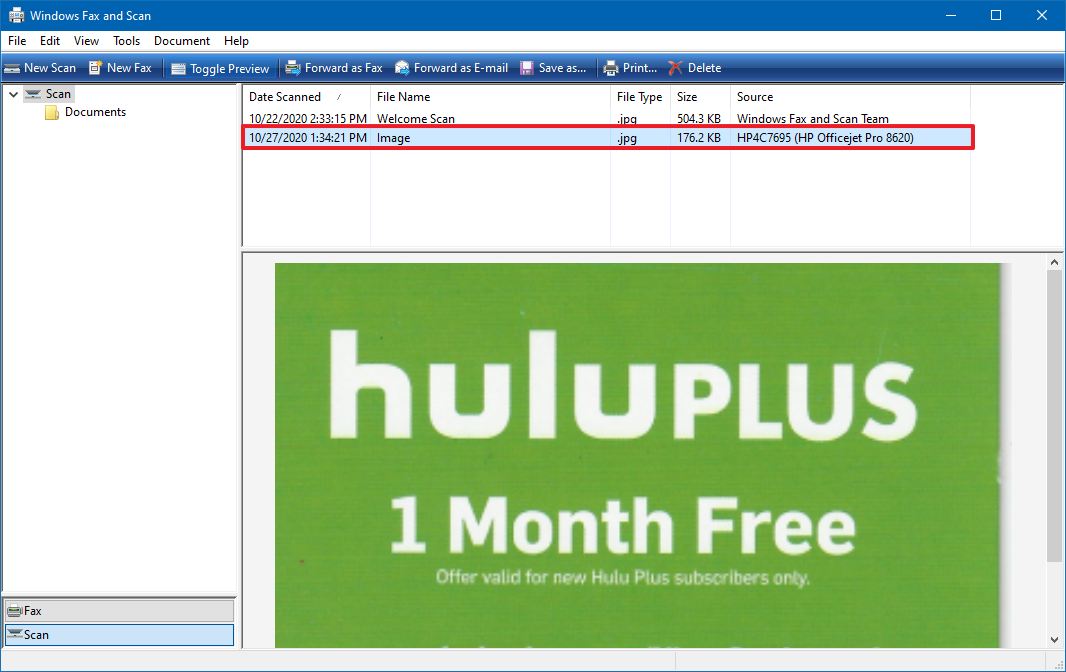
After you complete the steps, you can find the output file in the «Scanned Documents» inside the Documents folder.
We’re focusing this guide on scanning documents, but the instructions will also work to convert printed pictures into digital copies.
Mauro Huculak has been a Windows How-To Expert contributor for WindowsCentral.com for nearly a decade and has over 15 years of experience writing comprehensive guides. He also has an IT background and has achieved different professional certifications from Microsoft, Cisco, VMware, and CompTIA. He has been recognized as a Microsoft MVP for many years.
Having a scanning device upfront, the first thing that hits on your minds is How to Scan Using Printer or Scanner in Windows 10. Most of the printers these days come with default scanning feature and the ways for both are exactly same. Microsoft has also introduced new scan app utility to support that specialty which delivers a quality service. In addition, few users might have the experience to do the same with old methods from the control panel. Today, we are going to discuss multiple ways for scanning whether it is using the Settings, app, control panel or built-in manufacturer software. We suggest reading How to Add a Scanner to Windows 10 PC before starting.
How to Scan Using Printer or Scanner in Windows 10
1. Scan using Settings
- Press “Windows logo key” and I“, let the Windows Settings appear on the screen and Select “Devices”.
- Make a click on Printers & scanners and navigate to the right pane to locate the printer you have connected to your system. Hit on this and select Open Printer app.
- The HP Smart will open by default (if the printer is from HP otherwise Scan app opens). Choose Scan option from the tiles. New Scan page open on windows.
- Select Preset, Page size, Output type, Source, Resolution (DPI) as you want and finally hit the Scan button from the bottom.
- Name the document and determine a location on the Save as window and finally, click on “Save” button.
- Go to the suggested folder and collect your document.
2 Scan using Windows Scan App
Before any proceeding, installation of the Windows Scan app from Microsoft store is required. The configuration page will open and this is somewhat similar to the old one. But the advanced feature is you can crop your doc here as you want. The full procedure is in below guidelines:
Step-1: Follow this link and Click Open Microsoft store to get a view of the application. Select Get button once it comes.
Step-2: Once downloading and installation finishes, Launch the app from your system.
Step-3: Do a click on Show more in order to see configuration options.
Step-4: Crop the image according to your need, change the File type, Color mode, Resolution (DPI) using the options if you need. But in maximum cases, the default values are fit with the users’ requirement. Now hit the Scan button.
Finally, choose the destination folder where you want to store this copy clicking on Save file to option.
If you are confused about selecting the Color mode and Resolution (DPI), read the following tips to get help.
Choose Black and White for Drawings, line diagrams, B&W structures as well as clip arts.
Select Color once you are opting to scan a magazine page or a photo that seems glossy.
Go for Grayscale for other purposes
Use 300 (Default) for most of the documents in Resolution (DPI) section. Anything higher will enlarge the size thus you might face difficulty while attaching it to email. Less than 300 will lower down the scan quality.
How to Scan Using Printer or Scanner in Windows 10 using Classic method
Still, you are able to apply the old method to Scan Using Printer or Scanner in Windows 10 as you usually implemented in Windows 7 and 8. If you prefer the classic way then follow –
- To Open control panel hit the Start, type cp, and press Enter.
- Select Devices and Printers option after changing the appearance of Control panel into “Small/Large icons”.
- Execute a right click on the Printer or scanner you have attached to your system and select Scan from the list.
- Although Photo to file will be by default selected but you should make sure for this before moving ahead. Click on the Scan button from the bottom of the tray.
- Import pictures and video pop up for the scanner will appear, choose Import all new items now. Add a tag with the name with a view to find it easily afterward. In the course, Perform a click on Import button to initiate scanning.
This method is valid for all old and new printers. But if you have the latest printer, you can get your job done a lot easier using Windows Scan app.
Scan Using Printer or Scanner in Windows 10 using the manufacturer’s built-in software
For Windows 10 users, this is the ultimate method as they will need to open the native application of the manufacturer. Here I have connected the HP Deskjet printer, but every company gives a supporting application with the hardware so you can use them. See the process –
1. Open the printer software with help of the icon located on the desktop. After the interface comes on the screen, select Scan a Document or whatever the name in your printer or scanner utility.
3. You will get the same window as in the previous method so onward follow and collect your document.
Wrapping up
Scanning is a wise option to keep a document safe. Microsoft has placed a terrific app to make this task easier and smooth. Windows Scan application works faster and produces high class scanned doc. But this feature is available for latest printers only. So, we have focused on both the traditional and latest methods to tell you How to Scan from Printer to Computer in Windows 10.