
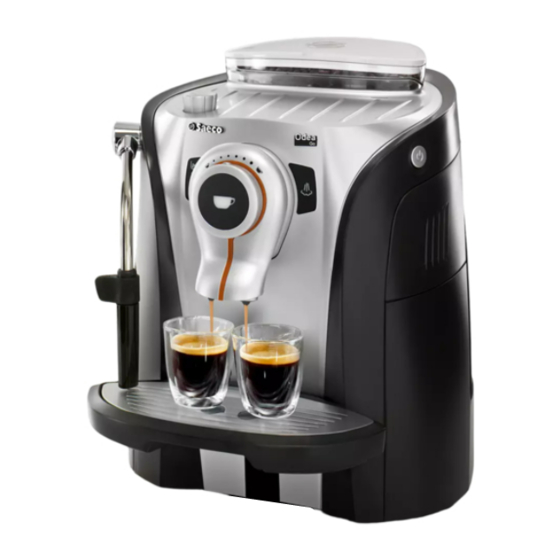
View the manual for the Philips Saeco Odea RI9752 here, for free. This user manual comes under the category coffee makers and has been rated by 1 people with an average of a 7.5. This manual is available in the following languages: English. Do you have a question about the Philips Saeco Odea RI9752?
Ask your question here
Frequently asked questions
Can’t find the answer to your question in the manual? You may find the answer to your question in the FAQs about the Philips Saeco Odea RI9752 below.
What is the best way to descale my coffee maker?
To descale the coffee maker, it is recommended to use a liquid descaling agent which is labelled as suitable for coffee machines.
How often should I descale my coffee maker?
How often a coffee machine needs to be descaled depends on how often it is used and the hardness of the water.
If hard water is used it is recommended to descale once a month, if soft water is used once a quarter is sufficient.
What does the grind say about the taste of the coffee?
How the coffee beans are ground strongly influences the taste of the coffee. If the coffee beans are very finely ground you will have a stronger taste and if the grind is coarser you will have a milder taste.
What is espresso?
Espresso is a small amount of concentrated coffee.
How long can I keep coffee beans?
The best-before date can be found on the packaging of the coffee beans. This best-before date applies as long as the bag is closed.
What is the best way to store coffee?
It is recommended to store coffee in an airtight and clean container.
Is the manual of the Philips Saeco Odea RI9752 available in English?
Yes, the manual of the Philips Saeco Odea RI9752 is available in English .
Is your question not listed? Ask your question here
-
Страница 1
Operat ion and maintenance manual Bef ore using th e machine, please read t he at t ached oper ating ins tru ctio ns. Ca refull y read the s afet y rules Mode d ‘ emploi V euillez lire attentivement le mode d’emploi (notamment les consignes de sécurité) avant d’utiliser l’appareil. FOR HOUSEHOLD USE ONL Y USAGE DOMESTIQUE SEUL[…]
-
Страница 2
2 IMPORT ANT SAFEGU ARDS When using electrical appliances, basic safety precautions should always be followed, including the following: 1. Read all instructions. 2. Do not touch hot surfaces. Use handles or knobs. 3. T o protect against fire, electric shock and injury to persons do not immerse cord, plugs, or appliance in water or other liquid. 4. […]
-
Страница 3
3 IMPORT ANT Lors de l’utilisation d’appareils électriques, il est indispensable de respecter toujours les précautions de sécurité principales, y compris les suivantes : 1. Lire toutes les instructions. 2. Ne pas toucher de surfaces chaudes. Utiliser les poignées ou les boutons. 3. Afin d’éviter tout incendie, choc électrique et blessu[…]
-
Страница 4
4 CA UTION This appliance is for household use only . Any servicing, other than cleaning and user maintenance, should be performed by an authorized service centre. Do not immerse machine in water . T o reduce the risk of fire or electric shock, do not disassemble the machine. There are no parts inside the machine serviceable by the user . Repair sh[…]
-
Страница 5
5 PRÉCA UTIONS Machine est réservée à un usage domestique. T out entretien, en dehors du nettoyage et de l’entretien usuel par l’usager , doit être fait par un service après- vente autorisé. Ne pas plonger la base dans l’eau. P our éviter les courts- circuits et les décharges électriques, ne pas démonter la base. Elle ne contient a[…]
-
Страница 6
6 GENERAL INFORMA TION …………………………………………………………………………………………………. 7 APPLIANCE ……………………………………………………………………………………………………… ……………… 8 ACCESSORIES ……………………………………………[…]
-
Страница 7
7 GENERAL INFORMA TION This coffee machine is suitable for preparing espresso coffee using coffee beans and it is equipped with a device to dispense steam and hot water . The machine is designed for domestic use and is not suitable for heavy or professional use. W arning: no liability is assumed for any damage caused by: • incorrect use not in ac[…]
-
Страница 8
8 APPLIANCE — APP AREIL ACCESSORIES — ACCESSOIRES Intenza water fi lter (optional) Filtre à eau Intenza (en option) Power cable Câble d’alimentation Brew group Groupe de distribution Dregdrawer T iroir à marc Socket for power cable Prise pour câble d’alimentation Coffee bean hopper Réservoir à café en grains Cup warming surface Plaque p[…]
-
Страница 9
9 1 2 3 4 5 6 INST ALLA TION — MONT AGE ST ARTING THE MACHINE — MISE EN MARCHE DE LA MACHINE Make sure the power button is not pressed and that the machine is turned off. Check the machine features on the label on the bottom of the appliance. S’assurer que l’interrupteur général ne soit pas actionné. Véri fi er les caractéristiques de la […]
-
Страница 10
10 7 8 9 12 10 11 Place a container beneath the steam spout. Placer un récipient sous la buse de vapeur . T urn the knob until the position is reached. T ourner le bouton jusqu’au point de repère . W ait until a steady fl ow of water comes out of the wand. Attendre jusqu’à ce que l’eau coule de manière régulière. The machine is ready f[…]
-
Страница 11
11 6 5 2 3 1 4 Place a container beneath the steam wand. Dispense the water in the tank using the hot water function (see page 19). Placer un récipient sous la buse de vapeur . Distribuer l’eau chaude se trouvant dans le réservoir au moyen de la fonction eau chaude (voir page 19). Fill the tank again with fresh drinking water . The machine is r[…]
-
Страница 12
12 CONTROL P ANEL — T ABLEAU DE COMMANDE LED Light — T ouche / DEL Description — Description Coffee button: • the button has been pushed once: 1 coffee has been selected. • the button has been pushed twice: 2 coffees have been selected. Bouton de distribution du café : • touche appuyée une fois : 1 café sélectionné. • touche appuyée d[…]
-
Страница 13
13 If the and lights fl ash alternately: turn of f the machine. T urn it on again after 30 seconds, wait until the machine stops and then turn it off again. Remove and thoroughly clean the brew group (see page 28). If this signal appears again when the machine is turned back on, contact the customer service centre. Led et clignotant à tour de rô[…]
-
Страница 14
14 ADJUSTMENTS — RÉGLAGES COFFEE VOLUME ADJUSTMENT PER CUP DRIP TRA Y HEIGHT ADJUSTMENT The coffee volume knob adjusts the amount of coffee brewed per cup. This adjustment has an immediate effect on the selected type of brewing. Pour régler la quantité de café distribuée dans une tasse. Ce réglage a un effet immédiat sur la distribution sél[…]
-
Страница 15
15 ST AND-BY — ST AND-BY The machine is designed for energy saving. After 60 minutes of inactivity , the machine goes into stand-by mode, the boiler is no longer heated and all the lights turn off with the exception of the temperature light which will blink slowly . Power consumption is reduced to a minimum. T o turn the machine on again simply pre[…]
-
Страница 16
16 ADJUSTMENTS — RÉGLAGES Le café est un produit naturel et ses caractéristiques peuvent changer selon son origine, son mélange et sa torréfaction. La machine à café Saeco est munie d’un système d’autoréglage permettant d’utiliser tout type de café en grains disponible dans le commerce (non caramélisé). • La machine se règle au[…]
-
Страница 17
17 COFFEE GRINDER ADJUSTMENT — RÉGLAGE DU MOULIN The machine enables a slight adjustment of the coffee grinder . Coffee may be ground according to your own tastes. The adjustment must be performed using the small pin located inside the coffee bean hopper . This must be pressed and turned using the supplied grinder adjustment key only . Press and t[…]
-
Страница 18
18 1 2 3 4 5 6 COFFEE BREWING AND HOT W A TER DISPENSING DISTRIBUTION DE CAFÉ ET D’EAU CHAUDE COFFEE BREWING — DISTRIBUTION DE CAFÉ The coffee brewing cycle can be interrupted at any moment by pushing the button. T o brew 2 cups, the machine dispenses half of the entered quantity and brie fl y interrupts dispensing in order to grind the second[…]
-
Страница 19
19 2 1 3 4 6 5 Dispensing may be preceded by short sprays of hot water , and scalding is possible. The hot water/steam wand may reach high temperatures: do not touch it with bare hands. Use the appropriate handle only . Au début de la distribution, faire attention au risque de brûlures car il peut y avoir des éclaboussures d’eau chaude. La bus[…]
-
Страница 20
20 2 3 1 6 4 5 CAPPUCCINO CAPPUCCINO Dispensing may be preceded by short sprays of hot water , and scalding is possible. The hot water/steam spout may reach high temperatures: do not touch it with bare hands. Use the appropriate handle only . Au début de la distribution, faire attention au risque de brûlures car il peut y avoir des éclaboussures[…]
-
Страница 21
21 7 9 11 8 10 12 13 14 15 Drain any residual water and wait until the spout ejects steam only . Évacuer l’eau de condensation éventuelle et attendre jusqu’à ce qu’il n’y ait que de la vapeur qui sorte. Immerse the steam spout in the milk. Plonger la buse de vapeur dans le lait. T urn the knob until it is in the rest position ( ). T ourn[…]
-
Страница 22
22 17 16 After frothing the milk, brew coffee into the cup for a creamy cappuccino. Remove the container . When the wand is cold, disassemble it and wash it carefully . Retirer le récipient. Lorsque la buse est froide, la démonter et la laver avec soin. When the machine ready indicator is permanently on, turn the knob until it is in the rest posi[…]
-
Страница 23
23 2 3 1 DESCALING — DÉT ARTRAGE DESCALING — DÉT ARTRAGE When performing a descaling cycle, it is necessary to be present during the entire process (about 40 minutes). Caution! Do not use vinegar as a descaler . Descaling should be performed every 3 months, or when indicated by the machine. Use a non-toxic, non- harmful descaling solution. Saeco […]
-
Страница 24
24 7 8 9 3 7 4 5 6 DESCALING T urn the knob until the position is reached. Dispense the descaling solution into the container for 15 seconds. T ourner le bouton jusqu’au point de repère . Distribuer la solution détartrante dans le récipient pendant 15 secondes. T urn the knob until it is in the rest position ( ). T ourner le bouton jusqu’à […]
-
Страница 25
25 10 11 12 13 14 Place a large container beneath the steam spout. Placer un récipient aux capacités adéquates sous la buse de vapeur . T urn the knob until the position is reached to empty the water tank. When this operation is completed, turn the knob until it is in the rest position ( ). T ourner le bouton jusqu’au point de repère pour vid[…]
-
Страница 26
26 1 2 3 CLEANING AND MAINTENANCE NETT OY AGE ET ENTRETIEN Remove the dregdrawer . Retirer le tiroir à marc. Empty the coffee grounds and the residual liquids separately . W ash all containers. Vider séparément le marc de café et les liquides résidus présents. Laver tous les réservoirs. MAINTENANCE DURING OPERA TION During normal operation, […]
-
Страница 27
27 6 1 2 3 4 5 HOW TO CLEAN THE MACHINE — NETT OY AGE DE LA MACHINE The machine must be cleaned at least once a week. Do not immerse the machine in water or place any of its parts in a dishwasher . Do not use alcohol, solvents, benzene and/or abrasive objects to clean the machine. The water left in the tank for several days must be disposed of. Do […]
-
Страница 28
28 2 1 3 CLEANING THE BREW GROUP The brew group must be cleaned at least once a week. Before removing the brew group, remove the dregdrawer as shown in fi g. 1 on page 26. Once you have washed and inserted the brew group, insert the dregdrawer and close the service door . Lubricate the brew group after approximately 500 brewing cycles. The grease […]
-
Страница 29
29 5 6 8 9 7 4 Make sure the brew group is in rest position; the two references must match. S’assurer que le groupe de distribution est en position de repos ; les deux références doivent coïncider . Make sure the components are in the correct position. The hook shown must be in the correct position; to check its position, fi rmly press the ?[…]
-
Страница 30
30 P ROBLEMS C AUSES S OLUTIONS The machine does not turn on. The machine is not connected to the power source. Connect the machine to the power source. The plug has not been plugged into the back of the machine. Insert the plug into the machine’s power socket. Machine in stand-by . Press the brew button to start the machine. Coffee is not hot en[…]
-
Страница 31
31 P ROBLÈMES C AUSES R EMÈDES La machine ne s’allume pas La machine n’est pas branchée sur le réseau électrique. Brancher la machine sur le réseau électrique. La fi che n’est pas branchée sur la prise située au dos de la machine. Brancher la fi che sur la prise de la machine. Machine en attente (Stand-by). Appuyer sur la touche ca[…]
-
Страница 32
32 I N CASE OF EMERGENCY Immediately unplug the cable from the outlet. U SE THE APPLIANCE ONL Y — Indoors. — T o prepare coffee, dispense hot water , froth milk or heat beverages using steam. — For domestic use only . N EVER USE THE APPLIANCE For purposes other than those indicated above, in order to avoid danger . Do not introduce any substances o[…]
-
Страница 33
33 E N CAS D ’ URGENCE Débrancher immédiatement la fi che de la prise murale. U TILISER EXCLUSIVEMENT L ’ APP AREIL — Dans un lieu fermé. — Pour la préparation de café, d’eau chaude, pour faire monter le lait ou pour réchauffer des boissons avec la vapeur . — Pour l’utilisation domestique. N E JAMAIS UTILISER L ’ APP AREIL pour des[…]
-
Страница 34
34 SAFETY RULES F AILURES — Do not use the appliance in case of sure or suspected faults such as after falls. — Any repairs must be performed by an authorized customer service center . — Do not use the appliance with a defective power cable. If damaged, the power cable must be replaced by the manufacturer or authorized service centre. (Caution! Ele[…]
-
Страница 35
35 CONSIGNES DE SÉCURITÉ tirant par le câble. — Attention ! Risque de brûlures au contact de l’eau chaude, de la vapeur et de la buse d’eau chaude/vapeur . P ANNES — Ne pas utiliser l’appareil en cas de panne identi fi ée ou suspecte, par ex. après une chute. — Les éventuelles réparations doivent être effectuées par un service d’[…]
-
Страница 36
36 TECHNICAL DA T A • Nominal voltage See label on the appliance • Power rating See label on the appliance • Power supply See label on the appliance • Shell material ABS — Thermoplastic • Size (w x h x d) 313 x 372 x 408 mm — 1 1.41 x 14.57 x 15.18 in • Weight 8 Kg — 17.63 lbs • Cable length 1200 mm — 47.24 in • Control panel Front […]
-
Страница 37
37[…]
-
Страница 38
38 R & D Manager Mr . Andrea Castellani EC DECLARA TION OF CONFORMITY EC 2006/95, EC 2004/1 18, EC 1992/31, EC 1993/68 SAECO INTERNA TIONAL GROUP S.P .A — Via T orretta, 240 — 40041 Gaggio Montano (Bo) — Italy declare under our responsability that the product: AUTOMA TIC COFFEE MAKER SUP 031O to which this declaration relates is in conformity w[…]
-
Страница 39
39 R & D Manager Mr . Andrea Castellani DECLARA TION DE CONFORMITÉ CE EC 2006/95, EC 2004/1 18, EC 1992/31, EC 1993/68 SAECO INTERNA TIONAL GROUP S.P .A — Via T orretta, 240 — 40041 Gaggio Montano (Bo) — Italy déclarons sous notre responsabilité que le produit: MACHINE À CAFÉ AUTOMA TIQUE SUP 031O auquel se réfère cette déclaration est […]
-
Страница 40
Saeco Int er na ti on al G ro up S.p. A. Vi a T or ret ta , 2 40 I-4004 1 Gaggio Montano , Bologna T e l: + 3 9 0 53 4 7 7 1111 Fa x: + 39 0534 31025 www . sa ec o . co m © Sa ec o In te rn at i on a l Gr ou p S. p.A . T y pe SU P031O Cod. 1 500156 2 Rev .00 de l 1 5- 05- 08 Th e man uf act ur er re se r ve s the r i ght t o ch ang e th e fea tur […]
гз,-
М
гти
живан
1
ДСТВО по 31ссплуата141л1^
Гфосьба ознакомиться с прилагаемой инструкцией по
эксплуатации перед использованием машины.
Внимательно ознакомьтесь с правилагии техники безопасности
с
1 а

ш
Щ ш
пользоваким в дшашнмх fGлoвiяx необюдиио приншать все меры пре-
досторожносте для того, чтобы ограшчеть pici возникновения пожара, пора
жения эпектрическик тоюм и (или) несчасткого случая.
® Просьба внимательно ознакомиться с инструкциями и информацией, приводимыми в на
стоящем руководстве и других прилагаемых к изделию проспектах перед включением или
использованием данной кофемашины (кофемашины эспрессо).
» Не прикасайтесь к горячим поверхностям.
Во избехсание пох<ара, удара электрическим током или несчастного случая не погружайте
сетевой шнур, вилку или корпус машины в воду или другую хсидкость.
При пользовании машиной в присутствии детей необходимо проявлять особую осторож
ность.
6 Следует отключать машину от сети, если она не используется, или во время её очистки.
Перед снятием или установкой элементов, а также перед очисткой машинь! необходимо
охладить ее.
® Не включайте машину, имеющую поврехадения или неисправности сетевого шнура, вилки.
Проверка и
ремонт машины
должны осуществляться только специалистами ближайшего
сервисного
центра.
Использование дополнительных принадлехсностей, не рекомендованных изготовителем,
мохгет нанести ущерб имуществу или привести к травма|у
1
.
е
Не следует
использовать машину на открьлом
воздухе.
е Убедитесь в том, что сетевой шнур не провисает и не касается горячих поверхностей.
* Машина не должна устанавливаться вблизи
источников
тепла.
® Перед подключением машины к сети убедитесь, что главный вь!ключатель установлен
5 полохгении =<Off» (Вь!кл.). Для того чтобы выключить машину, необходимо установить
выключатель в положение
«Off»
и вьщернуть
вилку
из розетки.
ПЭОУ
пара.
‘‘¡Нс
‘¡реднс.г
х:од!;:.;о про
качена иоключ!-;тбльно для 5ь1
злять Э005′-‘Ю оотооожнсот.^
-■ ¡тспольз
:льсС
D дЛ’ИЯ.
устройством для подачи
:п:: у,:гх
лпл
С’
л
П
ул
:
схчз
:1
о
:-;
ущу
:
. :ДыУ.
чхду
ы .
у
: Г- . : : .
1
у
:
ч
. Л
ш
6:
у
узусчт
ч
/
ху
-: сбххдхххгсхх.х уххххчх;
йх
ххххх
.
ххххх
::
ДХХХхХ СХХУ-ыХ: ‘Х обХХУХХХшХХХ.Х, ХХХХХ.ХХ :
й
ХХХХХХХ1ХХ
яхххх
;
хх
:>
::хх;
йуххххйхйхххох
: :-
х
;
жхдххзгс
хсх
;
х
:
х
. Л
х
х
:
г
;
хххх
:
хсххххххх
yXXIXXLX г ХГД\Т
® Проверьте, чтобы напряжение, указанное на ярлыке, соответствовало напряжению в ва
шем
доме.
«■ Не наливайте подогретую или горячую воду в
емкость
для
воды.
Используйте только хо
лодную
воду.
® Не
касайтесь
голыми руками сетевого шнура или нагреть!х поверхностей работающей
машины.
е Никогда не используйте агрессивные моющие средства или абразивные принадлехсности
для мь!тья машины. Используйте только влахгную мягкуьэ ткань.
^ Чтобы замедлить процесс образования накипи мы рекомендуем использовать фильтро
ванную воду.

в
;.;}“::.Ь:иЕ^апКЮ зле
1
:тркч&С
1
Шго шн¥ра
« Соавнительно небольшая дл14на злектрического шнура не позволяет ему скручнватося и
исключает возможность споткнуться о него.
«Допускается использование шнура-удлинителя, но при его иoпoлDЗOвaнии необходимо
проявлять осторожность.
!
1рИ: использовании V,цJiИг’iИ!вii>i П’^^иилидгиг’гО ! ípOБeOч».~D, НТООз]!
a) напряжение, указанное на удлинителе соответствовало напряжению машиног
b
) удлинитель был оборудован трёхконтактной вилкой с заземлением (если таким явля
ется сетевой шнур машины);
c) во избежание опасности споткнуться необходимо, чтобь; шнур не свисал свободно со
стола.
е Не используйте розетки с несколькими гнёздами
.;
у
:.,’
д
.НУ . . н : ‘
й
‘ Н . ■ .
. . .
^
‘
. . : .
• .
‘
. ж . . ; . . . :
« Использованием машины не по назначению;
— Ремонтом, выполненным работниками неазторизованного оэрзионого центра;
‘ Самостоятельной переделкой и ремонтом сетевого шнура;
« Самостоятельной переделкой и ремонтом деталей и узлов машиньг
® Использованием неоригинальньо; запчастей и дополнительного оборудования:
« Нерегулярной очисткой машине: от накипи или её использованием пои температуре ниже О’С
: г
храните данную инструкцию в безопасном месте, давая возможность ознакомиться с ней
лицам, которые буду^ пользоваться машиной. Для получения дополнительной информации,
или при возникновении проблем и вопросов, не освеьценных или недостаточно освещенньгх
Б
данной инструкции, просьба обраш,аться в авторизованный серзиснь:й центр.
.;гт-
?:.Г
се
:
д
;
гг
:
д
:
р
Д
с
‘^
г
;;
з
.:;:
г

ш
I Юдогреваемая подставка
для чашек
Панель угфавления
Диспенсер
Лоток для капель т
решетка и поплавок
Контейнер для для
кофейных зерен ‘■
Крышка контейнера для
кофейжых зерен
Кнопка включения/
выключения питания
Сервисная дверца
Контейнер для
использованного кофе
Ручка регулятора подачи
горячей водьКпарЕ
1 рубка горячей воды/пара
Контейнер для воды
лоток для капель
Устройство
приготовления
…. Гнездо шнура
питания
Ключ для регулировки
кофеиолки
Фильтр
для
воды
«Aqua
Prima«
знур питания
Щетка для очистки

Тр i-;nRj’-p’i
t- ■
5
—
ВКЛЮЧЕНИЕ МАШИНЫ
Проверьте, чтобы кнопка включ
8
ния/вь
1
ключения питания ке бьта нажата, и чтобы ма
шина была выключена. Проверьте характеристики машины на этикетке, расположенной
внизу машины.
Снимите крь!шку контейнера
для кофейных зерен.
заполните контейнер зерна
ми. Закройте крышку, пра
вильно разместив ее на кон
тейнере.
Снимите контейнер для воды.
Мы
рекомендуем
устано
вить фильтр для ВОДЬ! «Aqua
-rima=^ icM, стр. 7).
с
Ы||А7’^
г
‘
а;
ч
Заполните контейнер свежей
Вставьте шнур одним концом
С усилием нахл.хме кноп!;у
питьевой водой до отметки
в гнездо на задней панели
питания для включен;;я
;;а-
МАХ. Вставьте контейнер об-
машины, а другой конец (с
шины. Маш!4на проведет
са-
ратно.
вилкой) вставьте в розетку с
мотестирование.
подходяшим напряжением.
поместите емкость под труб- ;:иверн!:те руч:;у до положе-
ку пара.
н и я А ф —
Подождите, пока из трубки не
начнет поступать устойчивый
поток ВОЛЬ!.

ФМЛЬТР
для
ВОДЬ[
^¡Шк
РИМА
»
да
Д ;Vi
Д :
Поверните ручку, установив
ее в исходное положение
Снимите контейнер.
Машина готова к использо
ванию.
После достижения нужной температуры машина выполняет операцию ополаскивания внутрен
него контура. Выпускается небольшое количество воды; на зтом зтапе световая индикация
осуществляется против часовой стрелки. Дождитесь завершения зтого цикла.
Для улучшения качества используемой Вами водь: рекомендуем установить фильтр «Aqua
Prima». Перед использованием поместите фильтр в контейнер с водой на 30 минут.
Извлеките
фильтр
«AQUA
PRIMA» из упаковки. Введите
текущий месяц.
Вставьте фильтр в пустой
контейнер. Отметка и канавка
фильтра должны совпадать.
Нажмите с усилием до пол
ной вставки фильтра.
Поместите емкость под труб
ку пара, пустите воду в кон
тейнер,
используя
функцию
подачи
горячей
воды
(см.
стр.9)
Снова наполните контейнер
свежей питьевой водой.
Машина готова к использо
ванию.
. . . .
Наполните контейнер свежей
водой. Поместите фильтр в
воду на 30 минут. По исте
чении 30 минут вылейте из
контейнера всю воду, затем
наполните его свежей водой.

ПАНЕЛЬ ¥Г:
Световой индикатор, предупреждающий о необходимости очистить
контейнер для использованного кофе:
е ПОСТОЯННО включвн; сигнализирует о необходимости очистить контейнер для использованного
кофе; данная операция должна производиться, когда машина включена (шаги 4 и 5, стр.15)
Вращающаяся ручка-дозатор кофе (см. сто. 
Кнопка кофе:
в медленное мигание: выбрана 1 порция кофе (кнопка была
нажата один раз).
® быстрое мигание: выбрано 2 порции кофе (кнопка бь;ла
нажата дважды).
——- —
шшш
с-.т-к-
X
Кнопка пуска горячей воды:
®
{зь»;л.(:
в=:5ранг
функция выпуска пара.
*■
(вкл.): выбрана фун
кция
вьтуска
горячей
воды.
I
!реДуПр8Д14Т8ЛЬНо1Й СВбТОВОЙ
индикатор:
е постоякко включен (одно м более состояния); сигнализирует об отсутствии коозе
Б машине, отсутствии воды в контейнере или переполнении контейнера для ис-
пользовакного кофе.
# включен к медленно мигает (одно и более состояния): ызгнализирует о том, что
не вставлено устройство приготовления, не вставлен контейнер для использован
ного кофе, не вставлена крышка контейнера для зерен, либо открыта сервисная
дверца.’
‘ ::л.:-а-.
с — с т : : . ‘ ~ает: сигнализирует о необходимости залить воду в водный
контур.
Индикатор накипи:
® включен к мигает: сигнализирует о необходимости провести цикл очистки от
накипи (см. стр. 15).
Световой индикатор готовности машины к использованию:
« постоянно включен: сигнализирует о том, что машина готова к использованию.
® включен и мигает; сигнализирует о том, что машина прогревается.
если индикаторы (фД и у мигают попеременно, выключите машину и через 30 секунд включите
его снова. Если данный тип сигнала появился вновь, обратитесь в сервис-центр.

о
Ж У Ш О Ш к
PEГ¥liPOBiCA Р131ЕРЛ^тарда1^
Вращающаяся
ручка-дозатор
регулиру
ет количество кофе, используемого для
приготовления одной П0рЦ14И.
Изменение позиции ручки-дозатора не
медленно изменяет выбранный тип при-
готовлен14Я кофе.
Кофе «Эспрессо»
л,
Кофе средняя порция
Кофе боль
шая порция
:а-эС»Ф лщ РФ :Л5;
ллгфл
—
Высота лотка для капель регулируется, с тем
чтобы соответствовать чашкам разного раз
мера.
Для регулировки высоты лотка для капель
поднимайте или опускайте его вручную до тех
пор, пока он не достигнет хселаемой высоты.
… ….
г:—.фг г’г
г:1-фугг;;.”г^-г
—…….. ч
-‘»Г г:
. ..с.
■фф. . . В1 .
Машина позволяет регулировать работу кофемолки
для получения желаемого качества помола.
Регулирование
производится
путем
нахсатия
на
ручку регулировки, расположенную внутри емкости
для кофейных зерен. При нажатии на ручку регу
лировки и её вращении необходимо пользоваться
поставляемым в комплекте ключом.
За один раз следует нажимать и поворачивать руч
ку регулировки на одну отметку, после чего можно
приготовить 2-3 чашки кофе; только так можно за
метить изменения в качестве помола.
Отметки внутри контейнера указывают на текущую
настройку тонкости помола.
‘
кФФфффШч1ЩШФ;’ФЖфФ»»»»^
ТОНКИЙ
п о м о л
СРЕДНИЙ
п о м о л
К Р У П Н Ы Й п о м о л

л:^::г:тз:.гь-:н
е
л
е
— _ :
х
—
х
: : ?
е
—
х г
ее
;.
е
: х^й
ПРИГОТОВЛЕНИЕ КОФЕ
Цикл приготовления кофе можно прервать в любой момент путем нажатия кнопки ‘>ХХ‘’ •
При приготовлении двух чашек кофе машина выдает половину от введенного количества
продукта, прерьшает выдачу напитка, начиная размаль!вать кофе для второй порции. Затем
возобновляется и завершается выдача приготовленного кофе.
I
|РСр1| ■
Отрегулируйте лоток для
Установите одну чашку,
капель в соответствии с вы-
если вы хотите получить
сотой чашки (-ек).
всего одну порцию кофе.
Установите две чашки, если
зы хотите получить две пор
ции кофе.
Отрегулируйте
количество
кофе поворотом ручки-до
затора.
Нажмите
на
центральную
кнопку:
Один раз для 1 порции кофе
Два раза для 2 порций кофе
а_лна автоматически на
чнет готовить кофе. После
окончания
машиной
при
готовления уберите чашку
(-КИ).
у X _ …
>щаче кзпктка кожет предшествовать
ке:;г’ю;:т ;ж;У» х:.;: ж:;-‘
г;е»
чт; хож.ет пж;:е:ю;
Тз..;;.е:а: ‘.; т;.у.:
ноежхтгхеа;::;:;“.:: ж
!р, ж:;;.а:- :. :ж :.: ;сж;;к: ;:е ;;ж-ак’:юь ее х ж м : д ка к- Пжтееук“ео.: с::еж;-
Отрегулируй!
для капель.
5Ь1Соту лотка
: юверните ^ ручку до поло
жения Уж А.

Дождитесь,
пока
контейнер
не заполнится желаеЕиым ко
личеством воды.
Поверните ручку, установив
ее в исходное полохшние
( « ) .
Снимите емкость.
…………
:
,, ……………………
:
…………………….. ‘ ,
д Выдаче капктка может предшестеовать некоторое разбрызгивснме горячей
/I \ воды, что «омшт прнвестм к ожогжТейшературатр¥бкк^разбрь1згивашщей воду/
;:ы
ы’ т . т ч ч й ‘ : ;д:д “’ы _ ‘ : ‘ ‘ ы т ‘
ж ; ‘ о : . . ж : у г : ы ж т —
альном ручкой.
Отрегулируйте высоту лотка
для капель.
Заполнить чашку ка 1/3 хо
лодным молоком.
Поместите емкость под труб
ку пара.
Нажмите кнопку для выбора
функции пара. Загорится ин
дикатор пара.
Световой
индикатор начнет
мигать.
Подождите,
пока
индикатор не начнет гореть
постоянно.
Поверните ручку до полохге-

13:23
Кофемашина Saeco Odea Go, инструкция, видео обзор!
06:33
Чистка, удаление накипи, декальцинация кофемашины Saeco Odea Go (Giro)
13:31
Чистка кофемашины от накипи Philips Saeco Giro Plus
11:48
Ремонт кофемашины Saeco Odea SUP031
09:33
Descaling Saeco Odea Go Espresso machine.
05:56
кофемашина Saeco Odea Go, неисправная кофемолка
Нажмите на кнопку для помощи
- Manuals
- Brands
- Saeco Manuals
- Coffee Maker
- RI9752/43
- Operating and maintenance manual
Odea go
-
Contents
-
Table of Contents
-
Troubleshooting
-
Bookmarks
Quick Links
The manufacturer reserves the right to change the features of the product without prior notice.
O fabricante reserva-se o direito de efectuar qualquer alteração sem aviso prévio.
Need help?
Do you have a question about the RI9752/43 and is the answer not in the manual?
Questions and answers
Related Manuals for Saeco RI9752/43
Summary of Contents for Saeco RI9752/43
-
Page 1
The manufacturer reserves the right to change the features of the product without prior notice. O fabricante reserva-se o direito de efectuar qualquer alteração sem aviso prévio. -
Page 2
Operation and maintenance manual Before using the machine, please read the attached operating instructions. Carefully read the safety rules. Manual de uso e manutenção Antes de utilizar a máquina consulte estas instruções. Leia atentamente as normas de segurança. -
Page 3: Table Of Contents
CONTENTS — ÍNDICE TECHNICAL DATA …3 IMPORTANT PRECAUTIONARY MEASURES …4 APPLIANCE …8 ACCESSORIES … 8 INSTALLATION …9 STARTING THE MACHINE … 9 RINSING OF THE INTERNAL CIRCUITS … 10 FIRST USE — USE AFTER A LONG PERIOD OF INACTIVITY …11 INSTALLING THE INTENZA WATER FILTER (OPTIONAL) …
-
Page 4: Technical Data
TECHNICAL DATA — DADOS TÉCNICOS TECHNICAL DATA • Nominal voltage • Power rating • Power supply • Shell material • Size (w x h x d) • Weight • Cable length • Control panel • Water tank • Pump pressure (bars) •…
-
Page 5: Important Precautionary Measures
IMPORTANT PRECAUTIONARY MEASURES During use, every precaution must be taken to limit the risk of fi re, electric shock and/or accidents. • Read carefully all the instructions and information listed in this manual and in any other booklet contained in the packaging before turning on or using the espresso machine.
-
Page 6: Precauções Importantes
Durante a utilização da maquina, aconselha-se a tomar algumas precauções a fi m de limitar o risco de incêndios, choques eléctricos e/ou acidentes. • Leia atentamente todas as instruções e informações indicadas neste manual e em qualquer outro folheto contido na embalagem antes de ligar ou utilizar a máquina de café expresso. •…
-
Page 7: General Information
IMPORTANT PRECAUTIONARY MEASURES INSTRUCTIONS FOR THE ELECTRICAL CORD • A short electrical cord has been provided to keep it from twisting or causing tripping. • Extension cords can be used, but must be used with great care. When an extension cord is used, check that: a.
-
Page 8: Uso Destas Instruções
INSTRUÇÕES SOBRE O CABO ELÉCTRICO • É fornecido um cabo eléctrico bastante curto para evitar enrolamentos ou de tropeçar nele. • É possível utilizar, com muito cuidado, extensões. Quando for utilizada uma extensão, certifi que-se de que: a. a voltagem indicada na extensão corresponda à voltagem eléctrica do electrodoméstico; b.
-
Page 9: Appliance
APPLIANCE — APARELHO Cup warming surface Plano de apoio para chávenas Control panel Painel de comando Dispensing head Distribuidor Drip tray + grill Bandeja de limpeza + grelha Hot water / steam knob Botão da torneira água quente/vapor Hot water / steam wand Tubo de distribuição de água quente/vapor Water tank…
-
Page 10: Installation
STARTING THE MACHINE — LIGAÇÃO DA MÁQUINA Make sure the power button is not pressed and that the machine is turned off. Check the machine features on the label on the bottom of the appliance. Assegure-se de que o interruptor geral não esteja pressionado. Verifi que as características da máquina, indicadas na plaqueta de dados posicionada na parte inferior.
-
Page 11: Rinsing Of The Internal Circuits
INSTALLATION — INSTALAÇÃO Place a container beneath the steam spout. Coloque um recipiente por baixo do tubo do vapor. Turn the knob until it is in the rest position ( ). Vire o botão até a posição de repouso ( ). RINSING OF THE INTERNAL CIRCUITS ENXÁGÜE DOS CIRCUITOS INTERNOS When the correct temperature is reached, the machine performs a rinse cycle of the internal circuits.
-
Page 12: First Use — Use After A Long Period Of Inactivity
FIRST USE — USE AFTER A LONG PERIOD OF INACTIVITY PRIMEIRA UTILIZAÇÃO — APÓS UM LONGO PERÍODO DE INUTILIZAÇÃO These operations ensure an optimum brewing and must be performed: 1) At fi rst start-up — 2) When the machine remains inactive for a long time (more than 2 weeks). Estas operações asseguram-lhe uma óptima distribuição e devem ser realizadas: 1) Na primeira utilização — 2) Quando a máquina permanecer inutilizada por um longo período de tempo (por mais de 2 semanas).
-
Page 13: Installing The Intenza Water Filter (Optional)
INTENZA WATER FILTER (OPTIONAL) FILTRO ÁGUA INTENZA (OPCIONAL) WATER FILTER (OPTIONAL) — FILTRO ÁGUA INTENZA (OPCIONAL) To improve the quality of the water used, it is recommended to install the water fi lter. Remove the water fi lter from its packaging, immerse it vertically (with the opening facing upwards) in cold water and gently press the sides so as to let the air bubbles out.
-
Page 14: Control Panel
CONTROL PANEL — PAINEL DE COMANDO LED Light — Tecla / LED Description — Descrição Coffee button: • the button has been pushed once: 1 coffee has been selected. • the button has been pushed twice: 2 coffees have been selected. Botão de distribuição do café: •…
-
Page 15
CONTROL PANEL — PAINEL DE COMANDO LED Light — Tecla / LED Description — Descrição Alarm light: • permanently on : signals the machine is out of coffee, the water tank is empty, the drip tray is full or the dregdrawer is full (in this case, also empty the coffee grounds drawer in order to prevent failures). -
Page 16: Adjustments
COFFEE VOLUME ADJUSTMENT PER CUP ALTURA DO CAFÉ NA CHÁVENA The coffee volume knob adjusts the amount of coffee brewed per cup. This adjustment has an immediate effect on the selected type of brewing. Para seleccionar a quantidade de café a ser distribuído na chávena. Este ajuste tem um efeito imediato na distribuição seleccionada.
-
Page 17: Standby
ADJUSTMENTS — AJUSTES STAND-BY — STAND-BY The machine is designed for energy saving. After 60 minutes of inactivity, the machine goes into stand-by mode, the boiler is no longer heated and all the lights turn off with the exception of the temperature light which will blink slowly.
-
Page 18: Saeco Adapting System
SAECO ADAPTING SYSTEM SAECO ADAPTING SYSTEM Coffee is a natural product and its characteristics may change according to its origin, blend and roast. The Saeco coffee machine is equipped with a self-adjusting system that allows the use of all types of coffee beans available on the market (not including fl…
-
Page 19: Coffee Grinder Adjustment
ADJUSTMENTS — AJUSTES COFFEE GRINDER ADJUSTMENT — AJUSTE DO MOINHO DE CAFÉ The machine enables a slight adjustment of the coffee grinder. Coffee may be ground according to your own tastes. The adjustment must be performed using the small pin located inside the coffee bean hopper. This must be pressed and turned using the supplied grinder adjustment key only.
-
Page 20: Coffee Brewing
COFFEE BREWING — DISTRIBUIÇÃO CAFÉ The coffee brewing cycle can be interrupted at any moment by pushing the the machine dispenses half of the entered quantity and briefl y interrupts dispensing in order to grind the second serving of coffee. Coffee dispensing is then restarted and completed. O ciclo de distribuição de café…
-
Page 21: Hot Water Dispensing
HOT WATER DISPENSING DISTRIBUIÇÃO DE ÁGUA QUENTE HOT WATER DISPENSING — DISTRIBUIÇÃO DE ÁGUA QUENTE Dispensing may be preceded by short sprays of hot water, and scalding is possible. The hot water/steam wand may reach high temperatures: do not touch it with bare hands. Use the appropriate handle only.
-
Page 22: Cappuccino
CAPPUCCINO Dispensing may be preceded by short sprays of hot water, and scalding is possible. The hot water/steam spout may reach high temperatures: do not touch it with bare hands. Use the appropriate handle only. No início da distribuição podem-se verifi car breves jactos de água quente com perigo de queimaduras.
-
Page 23
CAPPUCCINO Drain any residual water and wait until the spout ejects steam only. Descarregue a eventual presença de condensação e aguarde sair apenas vapor. Turn the knob until the position is reached. Vire o botão até a marca Press the button to dispense water. -
Page 24
When the machine ready indicator is permanently on, turn the knob until it is in the rest position. Quando o indicador luminoso se acender de modo fi xo, vire o botão até a posição de repouso. Remove the container. When the wand is cold, disassemble it and wash it carefully. -
Page 25: Descaling
DESCALING — DESCALCIFICAÇÃO In case of confl ict, priority must be given to what is indicated in the operation and maintenance manual over the instructions provided on separately sold accessories and materials. Warning! Never drink the descaling solution or any products dispensed until the cycle has been carried out to the end.
-
Page 26
Descaling must be performed when the light blinks. Quando o indicador luminoso piscar, será preciso realizar a descalcifi cação. Place a large container (about 500 ml capacity) under the steam wand. Coloque um recipiente grande (cerca de 500 ml) debaixo do tubo de vapor. -
Page 27
DESCALING — DESCALCIFICAÇÃO Empty the descaling solution out of the container. Esvazie o recipiente da solução descalcifi cante. Once the solution is fi nished, rinse and fi ll the tank with fresh drinking water. Terminada a solução, enxagúe e encha o reservatório com água fresca potável. -
Page 28
Once fi nished, turn the knob until it reaches the off position ( ). Depois de terminado, coloque-o na posição de repouso ( ). Fill the tank again with fresh drinking water. Encha novamente o reservatório com água fresca potável. Reinstall the Intenza water fi… -
Page 29: Cleaning And Maintenance
CLEANING AND MAINTENANCE LIMPEZA E MANUTENÇÃO MAINTENANCE DURING OPERATION MANUTENÇÃO DURANTE O FUNCIONAMENTO During normal operation, the message for emptying the coffee grounds may appear on the display (see page 13). This operation must be performed when the machine is on. Durante o normal funcionamento pode aparecer a sinalização que indica de esvaziar as borras (veja pág.13).
-
Page 30: How To Clean The Machine
HOW TO CLEAN THE MACHINE — LIMPEZA DA MÁQUINA The machine must be cleaned at least once a week. Do not immerse the machine in water or place any of its parts in a dishwasher. Do not use alcohol, solvents, benzene and/or abrasive objects to clean the machine. The water left in the tank for several days must be disposed of.
-
Page 31: Cleaning The Brew Group
CLEANING AND MAINTENANCE LIMPEZA E MANUTENÇÃO CLEANING THE BREW GROUP LIMPEZA DO GRUPO DE DISTRIBUIÇÃO The brew group must be cleaned at least once a week. Before removing the brew group, remove the dregdrawer as shown in fi g. 1 on page 28. Once you have washed and inserted the brew group, insert the dregdrawer and close the service door.
-
Page 32
Apply the grease evenly on both side guides. Distribua a graxa uniformemente nas duas guias laterais. The lever on the rear part of the group must be in contact with the Brew Group base. A alavanca posicionada na parte traseira do grupo deve fi… -
Page 33: Troubleshooting
TROUBLESHOOTING Problems The machine does not turn on. The machine is not connected to the power source. The plug has not been plugged into the back of the machine. Machine in stand-by. Coffee is not hot enough. The cups are cold. Hot water or steam is not dispensed.
-
Page 34: Resolução De Problemas
PROBLEMAS — CAUSAS — SOLUÇÕES Problemas A máquina não se liga. A máquina não está ligada à rede eléctrica. Não foi ligada a fi cha na tomada posicionada na parte traseira da máquina. Máquina em Stand-by. O café não está bastante quente. As chávenas estão frias. Não sai água quente ou vapor.
-
Page 35: Safety Rules
SAFETY RULES N CASE OF EMERGENCY Immediately unplug the cable from the outlet. SE THE APPLIANCE ONLY — Indoors. — To prepare coffee, dispense hot water, froth milk or heat beverages using steam. EVER USE THE APPLIANCE For purposes other than those indicated above, in order to avoid danger. Do not introduce any substances other than those indicated in the instruction manual.
-
Page 36: Normas De Segurança
M CASO DE EMERGÊNCIA Retire imediatamente a fi cha da tomada de rede. TILIZE EXCLUSIVAMENTE O APARELHO — Em lugar fechado — Para preparar café, água quente, para bater o leite ou para aquecer bebidas utilizando o vapor. UNCA UTILIZE O APARELHO para fi…
-
Page 37
SAFETY RULES AILURES — Do not use the appliance in case of sure or suspected faults such as after falls. — Any repairs must be performed by an authorized customer service center. — Do not use the appliance with a defective power cable. If damaged, the power cable must be replaced by the manufacturer or authorized service centre. -
Page 38
VARIAS — Não utilize o aparelho no caso de avaria verifi cada ou suspeita, por exemplo após uma queda. — Consertos eventuais deverão ser realizados pelo serviço de assistência autorizado. — Não utilize um aparelho com cabo de alimentação defeituoso. Se o cabo de alimentação estiver danifi cado, deverá…