
Почему britax romer покупают у нас
-
Фирменный магазин Britax-Romer
-
Только оригинальный товар
-
Профессиональная консультация
-
Доставка по всей россии
-
Оплата любыми способами
-
30 дней возврат товара
-
Максимальный ассортимент Romer

Возникли трудности в выборе?
Обратитесь к специалистам магазина по телефону
Звонок по России бесплатный
или вы можете
Запатентованная система защиты от бокового удара — система D-SIP
Быстрое снимание с коляски всего лишь одним движением, благодаря встроенной в ручку кнопке
Адаптеры CLICK & GO для установки на коляску уже встроены в автокресло
Внутренние 5-ти точечные ремни с мягкими накладками
Глубокие боковины максимально защищают малыша
Подголовник регулируется по высоте в 7-ми положениях вместе с ремнями. По мере роста малыша положение спины становится из практически лежачего в полусидячее
Чехол, который легко снимается для стирки без необходимости вытаскивания внутренних ремней
Ручка регулируется по наклону в 3-х положениях и образует дополнительный каркас безопасности
Регулировка положения ручки происходит нажатием одной кнопки
Встроенный солнцезащитный капор регулируется независимо от ручки
Изогнутое основание для укачивания малыша
Крепление только лицом против хода движения
Установка в автомобиле как при помощи штатных ремней автомобиля, так и при помощи Isofix-базы или ременной базы (базы приобретаются отдельно)
Автокресло Britax Römer Baby Safe Plus SHR II соответствует последнему стандарту ECE R44/04, включая краш-тест на переворот!
Габаритные размеры: высота 57 см, ширина 44 см, глубина 65 см.
Вес 4,7 кг.
0 — 13 kg
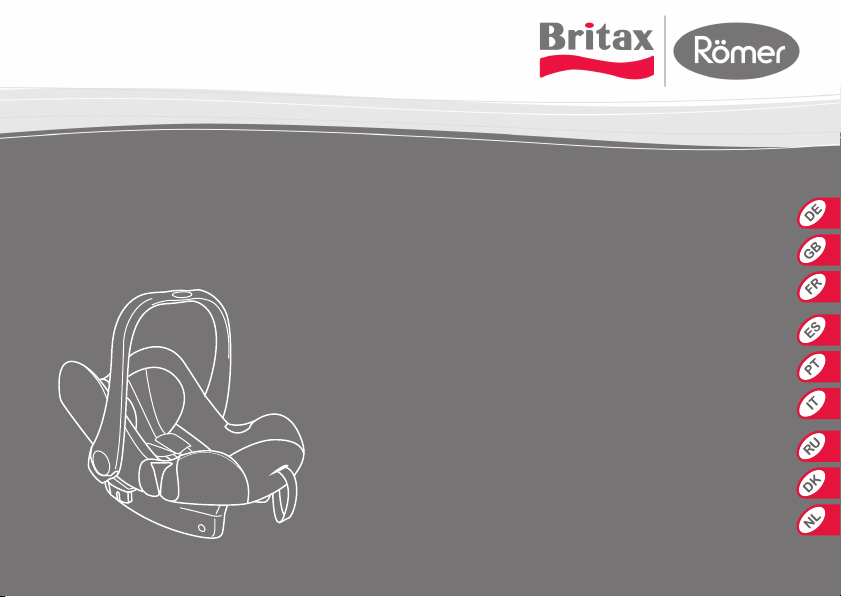
BABY-SAFE plus II
RÖMER BABY-SAFE plus II
BABY-SAFE plus SHR II
RÖMER BABY-SAFE plus SHR II
Gebrauchsanleitung
User Instructions
Mode d’emploi
Instrucciones de uso
Manual de instruções
Istruzioni per l’uso
Инструкция по эксплуатации
Brugsvejledning
Gebruiksaanwijzing
BABY-SAFE plus II *
BABY-SAFE plus SHR II *
1
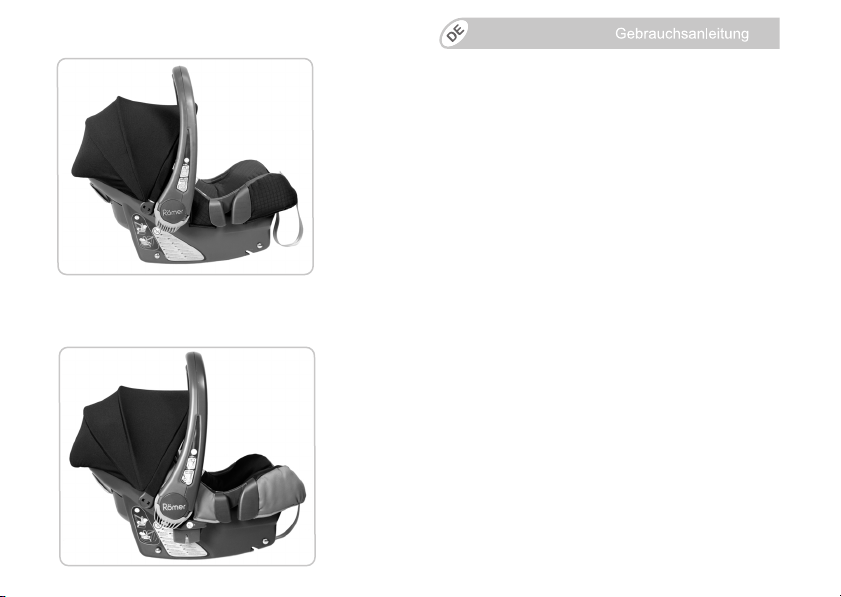
Gebrauchsanleitung
Wir freuen uns, dass unser BABY-SAFE plus II /
BABY-SAFE plus SHR II Ihr Kind sicher durch die
ersten Monate seines Lebens begleiten darf.
Um Ihr Baby richtig schützen zu können, muss der
BABY-SAFE plus II / BABY-SAFE plus SHR II
unbedingt so verwendet und eingebaut werden, wie
wir es Ihnen in dieser Anleitung beschreiben.
Bitte bewahren Sie die Gebrauchsanleitung immer
griffbereit im dafür vorgesehenen Fach am
Kindersitz auf.
Wenn Sie noch Fragen zur Benutzung haben,
wenden Sie sich bitte an uns.
BRITAX RÖMER Kindersicherheit GmbH
Britax Excelsior Ltd.
*Diese Gebrauchsanleitung ist für das Modell mit und ohne Travel
System Adapter gültig. Abweichungen im Gebrauch sind
gesondert beschrieben:
ohne Travel System Adapter
BABY-SAFE plus II
mit integriertem Travel System Adapter
BABY-SAFE plus SHR II

User instructions
Mode d’emploi
We are pleased that our BABY-SAFE plus II /
BABY-SAFE plus SHR II may accompany your
child safely through the first months of his or her
life.
In order to protect your baby correctly, the BABY-
SAFE plus II / BABY-SAFE plus SHR II must
always be used and installed as described in these
instructions.
Please always keep the user instructions available
in the compartment provided on the child seat.
If you have any further questions regarding its use,
please feel free to contact us.
BRITAX RÖMER Kindersicherheit GmbH
Britax Excelsior Ltd.
*These user instructions apply to the model with and without
Travel System Adapter. Differencesin use are described
separately:
without Travel System Adapter
BABY-SAFE plus II
with integrated Travel System Adapter
BABY-SAFE plus SHR II
Nous sommes heureux que notre BABY-SAFE
plus II / BABY-SAFE plus SHR II puisse
accompagner votre enfant en toute sécurité durant
les premiers mois de sa vie.
Pour protéger efficacement votre bébé, le BABY-
SAFE plus II / BABY-SAFE plus SHR II doit
impérativement être utilisé et installé de la manière
décrite dans le présent mode d’emploi.
Veuillez toujours garder le mode d’emploi à porter
de main dans le compartiment prévu à cet effet sur
le siège enfant.
Pour toute question complémentaire, n’hésitez pas
à nous contacter.
BRITAX RÖMER Kindersicherheit GmbH
Britax Excelsior Ltd.
*Le présent mode d’emploi est valable pour le modèle avec ou
sans adaptateur Travel System. Les différences dans l’utilisation
sont décrites séparément :
sans adaptateur Travel System
BABY-SAFE plus II
avec adaptateur Travel System intégré
BABY-SAFE plus SHR II
2

Inhalt
1. Eignung ……………………………………………………… 5
2. Verwendung im Fahrzeug ………………………….. 11
2.1 mit dem 3-Punkt-Gurt des Fahrzeuges
(universal) …………………………………………… 15
3. Sichern Ihres Babys ………………………………….. 17
3.1 Verstellen des Tragebügels …………………… 21
3.2 Lockern der Schultergurte …………………….. 25
3.3 Anpassen der Kopfstütze ……………………… 25
3.4 Anschnallen des Babys ………………………… 29
3.5 Straffen der Gurte ………………………………… 31
3.6 So ist Ihr Baby richtig gesichert ……………… 33
4. Einbau im Fahrzeug ………………………………….. 33
4.1 Anschnallen der Babyschale …………………. 37
4.2 Ausbau der Babyschale ………………………… 41
4.3 So ist Ihre Babyschale richtig eingebaut ….43
5. Verwendung des Sonnenverdecks …………….. 47
6. Verwendung als Travel System ………………….. 49
6.1 Anbringen der Babyschale auf einem
Kinderwagen ……………………………………….. 51
6.2 Abnehmen der Babyschale vom
Kinderwagen ……………………………………….. 55
7. Verwendung des Zubehörs ………………………… 59
8. Pflegeanleitung …………………………………………. 65
8.1 Pflege des Gurtschlosses ……………………… 67
8.2 Reinigung ……………………………………………71
3
Contents
1. Suitability …………………………………………………….6
2. Use in the vehicle ……………………………………….12
2.1 with the vehicle’s 3-point belt (universal) ….16
3. Securing your baby ……………………………………18
3.1 Adjusting the handle ……………………………..22
3.2 Loosening the shoulder straps ………………..26
3.3 Adjusting the headrest …………………………..26
3.4 Securing your baby using the harness ……..30
3.5 Tightening the straps …………………………….32
3.6 Checklist to ensure that your baby is
buckled up correctly ………………………………34
4. Installation in the vehicle …………………………… 34
4.1 Securing the baby seat in your vehicle …….38
4.2 Removing the baby seat ………………………..42
4.3 Checklist to ensure that your baby seat is
correctly installed ………………………………….44
5. Using the sunshade ……………………………………48
6. Use as a Travel System ………………………………50
6.1 Fitting the infant carrier to a pushchair………52
6.2 Removing the baby seat from the
pushchair …………………………………………….56
7. Using the accessories ………………………………..60
8. Care instructions ………………………………………. 64
8.1 Care for the harness buckle …………………….68
8.2 Cleaning ………………………………………………70
8.3 Removing the cover ………………………………72
Table des matières
1. Habilitation …………………………………………………. 6
2. Utilisation dans le véhicule ……………………….. 12
2.1 avec la ceinture à 3 points du véhicule
(universel) …………………………………………… 16
3. Protection de votre bébé …………………………… 18
3.1 Ajustage de l’anse ……………………………….. 22
3.2 Desserrage des bretelles ………………………. 26
3.3 Réglage de l’appui-tête ………………………….26
3.4 Mise en place de la ceinture du bébé ……… 30
3.5 Serrage des sangles ……………………………..32
3.6 Comment savoir si votre bébé est bien
protégé ………………………………………………. 34
4. Montage dans le véhicule ………………………….. 34
4.1 Fixation de la coque pour bébé ……………… 38
4.2 Démontage de la coque pour bébé ………… 42
4.3 Montage correct de votre coque pour bébé 44
5. Utilisation du pare-soleil ……………………………. 48
6. Utilisation en tant que Travel System …………. 50
6.1 Fixation de la coque pour bébé sur une
poussette ……………………………………………. 52
6.2 Retrait de la coque pour bébé de la
poussette ……………………………………………. 56
7. Utilisation des accessoires ………………………..58
8. Consignes d’entretien ……………………………….. 64
8.1 Entretien du fermoir de ceinture …………….. 68
8.2 Nettoyage ……………………………………………70
4
8.3 Abziehen des Bezuges ………………………….73
8.4 Aufziehen des Bezuges …………………………77
9. Hinweise zur Entsorgung …………………………… 77
10. Folgesitze …………………………………………………. 79
11. 2 Jahre Garantie ………………………………………… 79
12. Garantiekarte / Übergabe-Check ………………… 83
1. Eignung
Zulassung
Der BABY-SAFE plus II / BABY-SAFE plus SHR II
ist für zwei unterschiedliche Anwendungsarten
zugelassen:
als Auto-Kindersitz eingebaut im
Fahrzeug
• Der Auto-Kindersitz ist ausgelegt, geprüft und
zugelassen entsprechend den Anforderungen
der europäischen Norm für KindersicherheitsEinrichtungen (ECE R 44/04).
Das Prüfzeichen E (in einem Kreis) und die
Zulassungsnummer befinden sich auf dem
Zulassungsetikett (Aufkleber am Auto-
5
Kindersitz).
8.4 Re-fitting the cover …………………………….. 76
9. Notes regarding disposal ………………………… 76
10. Next child safety seat ……………………………… 78
11. 2-year warranty ……………………………………….. 78
12. Warranty Card / Transfer Check ……………….. 86
8.3 Retrait de la housse ……………………………… 72
8.4 Remise en place de la housse ……………….76
9. Remarques relatives à l’élimination …………….76
10. Sièges ultérieurs ……………………………………….. 78
11. 2 ans de garantie ………………………………………. 78
12. Carte de garantie / Procès-verbal de remise ..88
1. Suitability
Certification
The BABY-SAFE plus II / BABY-SAFE plus
SHR II is approved for two different methods of
use:
As a child safety seat installed in a
vehicle
• The child safety seat has been designed, tested
and certified according to the requirements of the
European Standard for Child Safety Equipment
(ECE R 44/04).
The seal of approval E (in a circle) and the
approval number are located on the approval
label (sticker on the child safety seat).
1. Habilitation
Homologation
Le siège BABY-SAFE plus II / BABY-SAFE plus
SHR II est homologué pour deux types
d’applications différents :
en tant que siège auto fixé dans le
véhicule
• Le siège auto est conçu, contrôlé et homologué
conformément aux exigences de la norme
européenne pour les équipements de sécurité
pour enfants (ECE R 44/04).
Le signe de contrôle E (dans un cercle) et le
numéro d’homologation se trouvent sur
l’étiquette d’homologation (autocollant sur le
siège auto).
6
• Die Zulassung erlischt, sobald Sie am AutoKindersitz etwas verändern. Änderungen darf
ausschließlich der Hersteller vornehmen.
•Der BABY-SAFE plus II / BABY-SAFE plus
SHR II darf ausschließlich zur Sicherung Ihres
Kindes im Fahrzeug oder auf dem passenden
Kinderwagen verwendet werden. Er eignet sich
keinenfalls Zuhause als Kinderliegesitz oder
Spielzeug.
Britax / RÖMER
Auto-Kindersitz
BABY-SAFE plus II
BABY-SAFE plus
SHR II
*ECE = Europäische Norm für Sicherheitsausrüstung
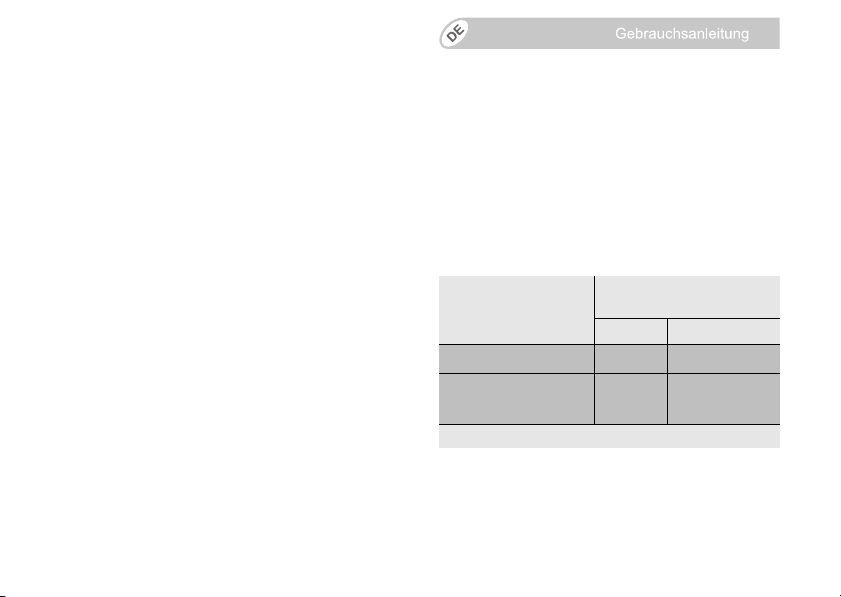
Prüfung und Zulassung
nach ECE* R 44/04
Gruppe Körpergewicht
0+ bis 13 kg
0+ bis 13 kg
7
• This approval will be invalidated if you make any
modifications to the child safety seat. Only the
manufacturer is permitted to make modifications
to the child safety seat.
•Use the BABY-SAFE plus II / BABY-SAFE plus
SHR II exclusively for securing your child in your
vehicle or on a suitable pushchair. It must not
under any circumstances be used as a child’s
recliner or toy in the home.
• Le siège auto perd son homologation dès que
vous réalisez des modifications. Toute
modification doit exclusivement être réalisée par
le fabricant.
• Le siège BABY-SAFE plus II / BABY-SAFE plus
SHR II est exclusivement réservé à l’installation
sécuritaire de votre enfant dans votre véhicule
ou sur la poussette adaptée. Il ne convient en
aucun cas à un usage domestique en tant que
nacelle ou jouet.
Tested and certified
Britax / RÖMER
Child safety seat
BABY-SAFE plus II
BABY-SAFE plus
SHR II
*ECE = European Standard for Child Safety Equipment
according to
ECE* R 44/04
Group Body weight
0+ up to 13 kg
0+ up to 13 kg
Britax / RÖMER
Siège auto
BABY-SAFE plus II
BABY-SAFE plus
SHR II
*ECE = norme européenne pour les équipements de sécurité
Examen et homologation
selon ECE* R 44/04
Groupe Poids
0+ jusqu’à 13 kg
0+ jusqu’à 13 kg
8
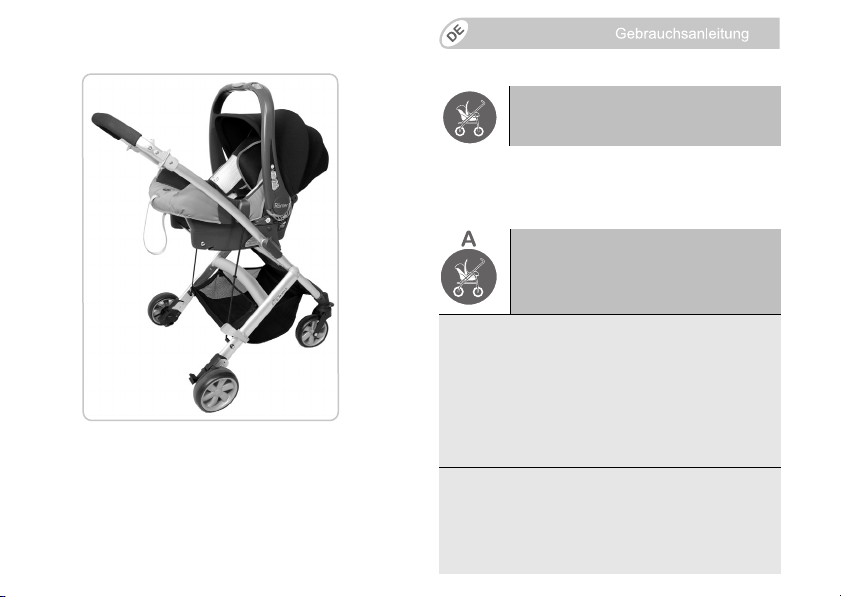
als Travel System auf einem
Kinderwagen-Fahrgestell:
Die Babyschale ist als Travel System entwickelt
und hergestellt entsprechend der Norm
EN1888:2005-11.
von Geburt bis 13 kg
BABY-SAFE plus II
Der Travel System Adapter „Typ A“ ist als
Zubehör erhältlich und wird einfach von unten in
den Rand der Babyschale eingeclipst
BABY-SAFE plus SHR II
Der Travel System Adapter ist bereits in die
Babyschale integriert.
Die Babyschale kann als Travel System mit allen
Kinderwagen-Fahrgestellen verwendet werden,
die mit dem Adapter „Typ A“ ausgestattet sind
und für Britax/RÖMER Babyschalen freigegeben
9
sind.

as a Travel System on a pushchair
frame:
This baby seat has been designed and
manufactured as a Travel System in accordance
with European standard EN1888:2005-11.
en tant que Travel System sur un
châssis de poussette :
Cette coque pour bébé est conçue et fabriquée en
tant que Travel System conformément à la norme
EN1888:2005-11.
from birth to 13 kg
BABY-SAFE plus II
The Travel System Adapter «Type A» is available
as an accessory and is simply clipped from
underneath into the edge of the baby seat
BABY-SAFE plus SHR II
The Travel System Adapter is already integrated
into the baby seat.
The baby seat can be used as a Travel System
on all pushchair frames which are equipped with
the «type A» adapter and which have been
approved for use with RÖMER/Britax baby seats.
de la naissance jusqu’à 13 kg.
BABY-SAFE plus II
L’adaptateur Travel System de « type A » est
disponible en tant qu’accessoire et est
simplement clipsé sur le bord de la coque pour
bébé par le bas
BABY-SAFE plus SHR II
L’adaptateur Travel System est déjà intégré dans
la coque pour bébé.
La coque pour bébé peut être utilisée en tant que
Travel System avec tous les châssis de
poussette équipés de l’adaptateur de « type A »
et dont l’utilisation avec des coques pour bébé
Britax/RÖMER est autorisée.
10
11
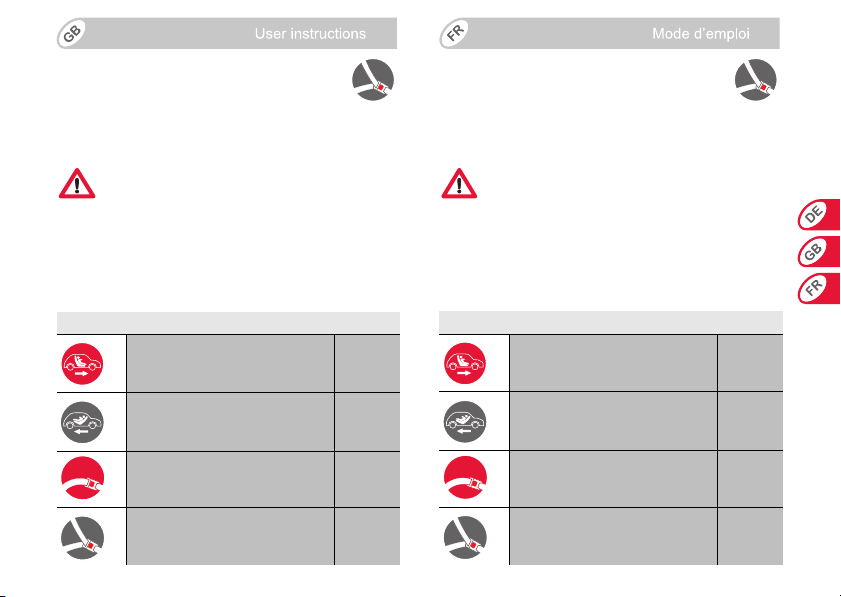
2. Verwendung im Fahrzeug
Bitte beachten Sie die Hinweise zur
Benutzung von Kinder-RückhalteSystemen in Ihrem Fahrzeughandbuch.
Gefahr! Bei einem Unfall entstehen enorme Kräfte.
Versuchen Sie niemals ein Kind auf Ihrem Schoß
mit dem Autogurt oder durch Festhalten zu sichern.
Sichern Sie Ihr Kind bei jeder Fahrt im AutoKindersitz!
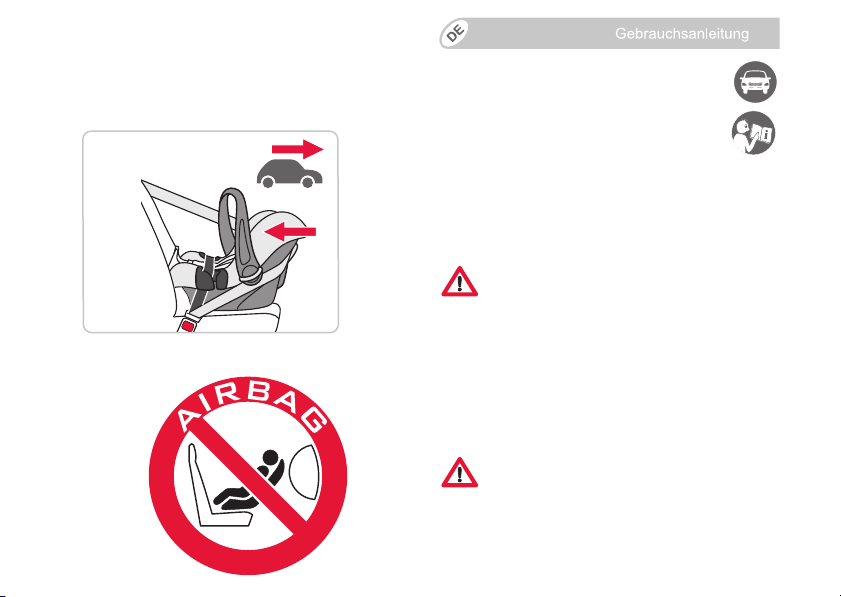
Sichern Sie die Babyschale immer entgegen der
Fahrtrichtung auf dem Fahrzeugsitz.
Gefahr! Ein auf die Babyschale auftreffender
Airbag kann Ihr Kind sehr schwer verletzen oder
sogar töten.
Nicht auf Beifahrersitzen mit Front-Airbag
verwenden!
Bitte beachten Sie bei Sitzplätzen mit
Seitenairbags die Hinweise in Ihrem FahrzeugHandbuch.
2. Use in the vehicle
2. Utilisation dans le véhicule
Please observe the instructions on the
use of child restraint systems described in
your vehicle owner’s manual.
Danger! In an accident, enormous forces occur.
Never try to secure a child on your lap with the
vehicle seat belt or by holding onto them.
Secure your child in the car seat for every
journey!
Always secure the baby seat onto the vehicle seat
in a rearward-facing position.
Danger! An airbag hitting the baby seat can cause
serious injuries to your child, possibly resulting in
death.
DO NOT use on a passenger seat with a
front airbag!
For seats with side airbags, please observe the
instructions in your owner’s manual.
Veuillez consulter à ce sujet les
indications d’utilisation des systèmes de
retenue des sièges auto figurant dans le
manuel d’utilisation de votre véhicule.
Danger ! Les forces produites en cas d’accident
sont considérables. N’essayez en aucun cas de
sécuriser un enfant sur vos genoux avec la ceinture
ou en le tenant.
Sécurisez votre enfant dans le siège auto
pour chaque déplacement !
Sécurisez toujours la coque pour bébé dans le
sens contraire à la marche sur le siège du véhicule.
Danger ! Un airbag heurtant la coque risque de
blesser gravement votre enfant ou même de le
tuer.
Ne pas utiliser sur les sièges passager à
airbag frontal !
Pour les places assises équipées d’airbags
latéraux, veuillez respecter les instructions figurant
dans le manuel d’utilisation de votre véhicule.
12

13
Der BABY-SAFE plus II / BABY-SAFE plus SHR II
ist für drei unterschiedliche Einbauarten
zugelassen:
mit dem 3-Punkt-Gurt des Fahrzeuges
(universal)
Oder ergänzt durch das als Britax/RÖMER
Zubehör erhältliche:
BABY-SAFE Belted Base
mit dem 3-Punkt-Gurt des Fahrzeuges
und Stützbein
(semi universal)
BABY-SAFE ISOFIX Base:
mit ISOFIX-Befestigung und Stützbein
(semi universal)
Die Befestigung mit BABY-SAFE ISOFIX Base I BABY-SAFE
Belted Base erfolgt durch eine semi universale
Genehmigung. Der Sitz darf mit Base nur in den Fahrzeugen
verwendet werden, die in der im Base beigelegeten KfzTypenliste aufgeführt sind. Die Typenliste wird laufend
ergänzt. Die aktuellste Version erhalten Sie direkt bei uns
oder auf www.britax.eu
The BABY-SAFE plus II / BABY-SAFE plus
SHR II is approved for three different methods of
installation:
Le siège BABY-SAFE plus II / BABY-SAFE plus
SHR II est homologué pour trois types de montage
différents :
with the vehicle’s 3-point seatbelt
(universal)
Or supplemented with the following items,
available as Britax/RÖMER accessories:
BABY-SAFE Belted Base
with the vehicle’s 3-point seatbelt and
support leg
(semi-universal)
BABY-SAFE ISOFIX Base:
with ISOFIX fastening and support leg
(semi-universal)
Fastening with BABY-SAFE ISOFIX Base I BABY-SAFE
Belted Base is based on semi-universal approval. The seat
may only be used in the vehicles detailed in the list of
approvedvehicletypes enclosed with the Base. This list is
constantly updated. The latest version can be obtained from
us or from www.britax.eu
avec la ceinture à 3 points du véhicule
(universel)
Ou complèté par l’élément disponible en tant
qu’accessoire Britax/RÖMER :
BABY-SAFE Belted Base
avec la ceinture à 3 points du véhicule
et la jambe de support
(semi-universel)
BABY-SAFE ISOFIX Base :
avec la fixation ISOFIX et le pied de
maintien
(semi-universel)
La fixation avec BABY-SAFE ISOFIX Base I BABY-SAFE
Belted Base se fait via une homologation semi-universelle.
Le siège ne doit être utilisé avec la base que dans des
véhicules figurant dans la liste des types de véhicules de la
base. Cette liste de véhicules est constamment complétée.
Pour obtenir la version la plus récente, veuillez nous contacter
directement ou consulter notre site Internet www.britax.eu
14
15
2.1 mit dem 3-Punkt-Gurt des
Fahrzeuges (universal)
Gefahr! Die Verwendung eines 2-PunktGurtes erhöht das Verletzungsrisiko Ihres Kindes
bei einem Unfall erheblich.
Immer mit einem geprüften 3-Punkt-Gurt
verwenden!
Der Gurt muss nach ECE R 16 (oder vergleichbarer
Norm) genehmigt sein z.B. erkennbar am
umrandeten «E», «e» auf dem Prüfetikett am Gurt.
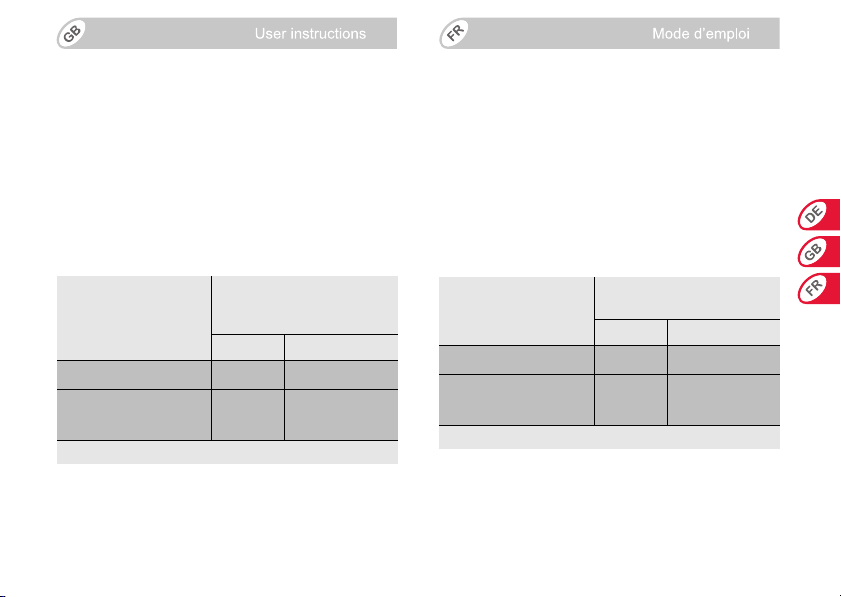
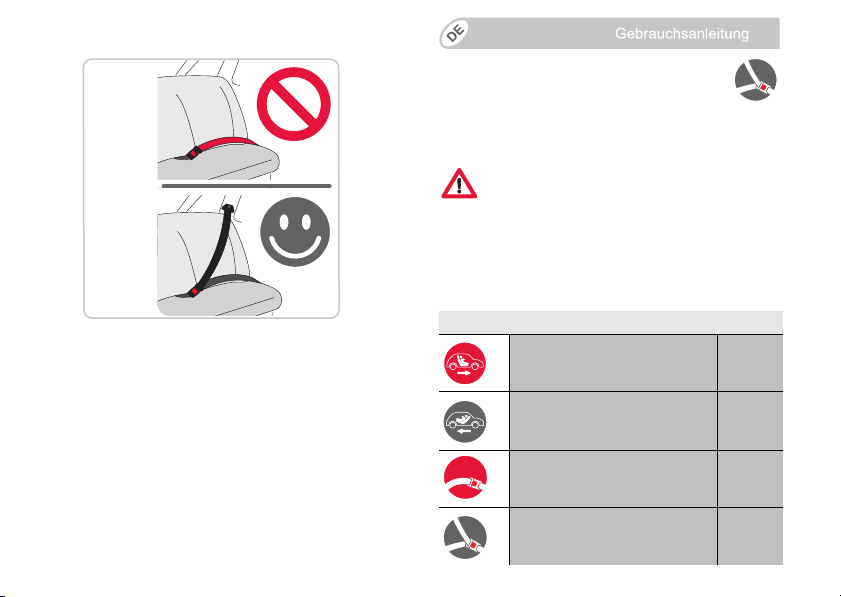
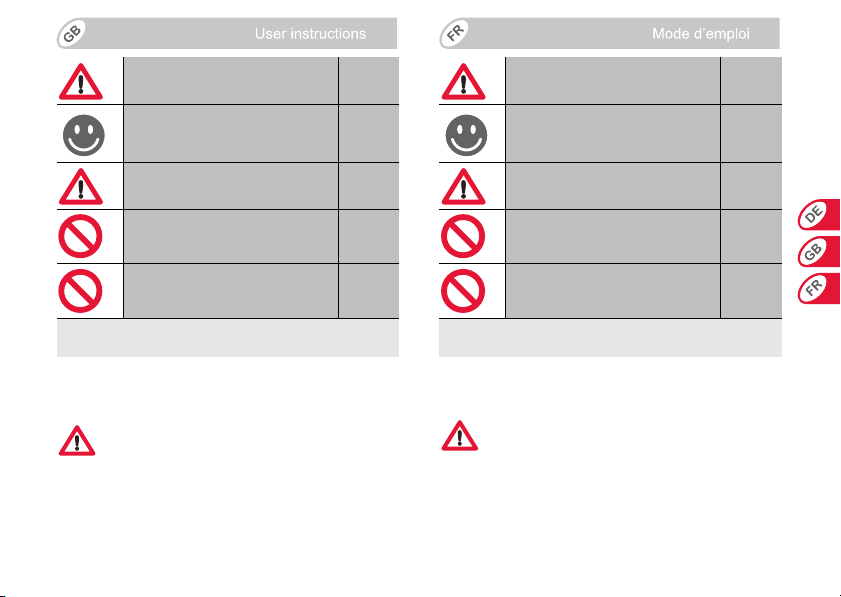
So können Sie Ihren Auto-Kindersitz verwenden:
in Fahrtrichtung nein
entgegen der Fahrtrichtung ja
mit 2-Punkt-Gurt nein
mit 3-Punkt-Gurt ja
2.1 with the vehicle’s 3-point belt
(universal)
Danger! The use of a 2-point belt
substantially increases the risk of injury to your
child in the event of an accident.
Always use with an approved 3-point belt!
The safety belt must be approved to ECE R 16 or a
comparable standard (see test label on belt with an
«E» or «e» in a circle).
You can use your child safety seat as follows:
2.1 avec la ceinture à 3 points du
véhicule (universel)
Danger ! L’utilisation d’une ceinture à 2
points augmente considérablement le risque de
blessure pour votre enfant en cas d’accident.
Utilisez toujours le siège avec une ceinture à
3 points contrôlée !
La ceinture doit être homologuée selon ECE R 16
(ou une norme comparable), ce qui est par
exemple signalé par la lettre « E », « e » entourée
d’un cercle et figurant sur l’étiquette de contrôle de
la ceinture.
Voici comment vous pouvez utiliser le siège auto :
in the direction of travel no
against the direction of travel yes
with 2-point belt no
with 3-point belt yes
dans le sens de la marche non
dans le sens contraire de la
marche
avec ceinture à 2 points non
avec ceinture à 3 points oui
oui
16

auf dem Beifahrersitz
ohne Front-Airbag
auf äußeren Rücksitzen ja
ja
17
auf mittlerem Rücksitz
mit 3-Punkt-Gurt
auf rückwärts gerichtete Sitze nein
auf seitwärts gerichtete Sitze nein
Bitte beachten Sie die Vorschriften Ihres Landes.
3. Sichern Ihres Babys
ja
Zum Schutz Ihres Babys
• Schnallen Sie Ihr Baby in der Babyschale immer
an.
• Grundsätzlich gilt: Je enger der Gurt am Körper
Ihres Kindes anliegt, desto größer ist die
Sicherheit.
on front passenger seat
without front airbag
yes
sur le siège passager
sans airbag frontal
oui
on outer rear seat yes
on centre rear seat
with 3-point belt
on a rearward-facing seat no
on seats facing sidewards no
Please observe the regulations applicable to your
particular country.
yes
3. Securing your baby
For the protection of your baby
• Always secure your baby in the baby seat using
the seat belt.
• As a general rule: The more snugly the belt fits
over your child’s body, the safer your child will
be.
sur les sièges arrière latéraux oui
sur le siège arrière central
avec une ceinture à 3 points
sur des sièges orientés vers
l’arrière
sur les sièges orientés
latéralement
Veuillez respecter les directives en vigueur dans
votre pays.
oui
non
non
3. Protection de votre bébé
Pour protéger votre bébé
• Attachez toujours votre bébé dans la coque pour
bébé.
• Les principes suivants sont à respecter : Plus la
ceinture est proche du corps de votre enfant,
plus celui-ci est en sécurité.
18
19
• Lassen Sie Ihr Baby in der Babyschale niemals
aus den Augen, wenn Sie es auf erhöhten
Flächen abstellen.
(z.B. Wickelkomode, Tisch…)
• Klemmen Sie den Verstellgurt 8 (siehe 3.6)
niemals in bewegliche Teile ein (z.B.
automatische Türen, Rolltreppen…).
• Die Metall- und Kunststoffteile des ganzen
Kindersitz-Systems heizen sich in der Sonne auf.
Vorsicht! Ihr Kind kann sich daran verbrennen.
Schützen Sie Ihr Kind und den Kindersitz vor
intensiver Sonneneinstrahlung (z.B. ein leichtes
Tuch über den Sitz legen).
• Die Babyschale beansprucht nur einen Sitzplatz.
Dieser Vorteil bedingt jedoch die halbliegende
Lage des Babys.
Nehmen Sie Ihr Baby so oft wie möglich aus der
Babyschale und entlasten Sie seine Wirbelsäule.
Unterbrechen Sie dazu längere Autofahrten.
Denken Sie auch ausserhalb des Autos daran,
Ihr Baby nicht zu lange in der Babyschale zu
lassen.

• Never leave your baby unattended in the baby
seat when placing it on elevated surfaces.
(e.g. a table, nappy changing unit, etc.).
• Never allow the adjusting strap 8 (see 3.6) to
become caught in moving parts (e.g. automatic
doors, escalators, etc.).
• The metal and plastic parts of the complete child
safety seat system can heat up in the sun.
Caution! Your child may get burnt. Protect your
child and the child safety seat against intense
sunlight (e.g. by putting a light cloth over the
seat).
• The baby seat requires only one seat in the car.
This advantage means, however, that your baby
must be in a semi-reclined position.
Take your baby out of the baby seat as often as
possible to relieve its spine. We recommend
frequent breaks during long journeys. Even
outside of the car, please avoid leaving your
baby in the baby seat for too long.
• Ne perdez jamais de vue votre bébé se trouvant
dans la coque lorsque vous la déposez sur des
surfaces surélevées
(table à langer, table à manger, etc.)
• Ne coincez jamais la sangle de réglage 8 (voir
paragraphe 3.6) dans des pièces mobiles (par
ex. portes automatiques, escalier roulant…).
• Les parties en métal et en matière plastique de
l’ensemble du système du siège auto se
réchauffent en plein soleil.
Attention ! Votre enfant risque de se brûler.
Protégez votre enfant et le siège enfant contre le
rayonnement intensif du soleil (recouvrez par ex.
le siège d’un linge).
• La coque pour bébé n’occupe qu’un seul siège.
Cet avantage présuppose cependant la position
semi-couchée du bébé.
Retirez votre bébé aussi souvent que possible
de la coque pour soulager ainsi sa colonne
vertébrale. Pour ce faire, prévoyez des pauses
lors de longs trajets. N’oubliez pas qu’il ne faut
pas laisser votre bébé trop longtemps dans la
coque pour bébé à l’extérieur du véhicule.
20
21
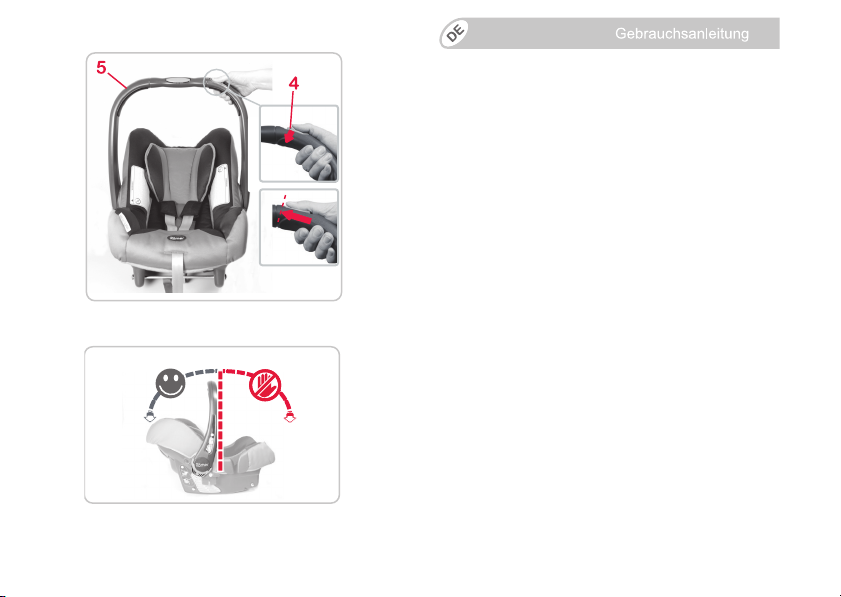
3.1 Verstellen des Tragebügels
Sie können den Tragebügel 5 in vier Stellungen
einrasten:
1. Drücken Sie auf den hellgrauen
Entriegelungsknopf 4 am Tragebügel und
schieben Sie ihn vollständig bis zum Anschlag
zur Seite.
2. Schwenken Sie nun den Tragebügel 5 mit
gedrücktem Entriegelungsknopf 4.
Achten Sie darauf den Tragebügel nicht weiter
in Richtung „II“ zu schwenken als bis zu der
Bügelposition A.
3. Lassen Sie den Entrieglungskopf 4 los und
schwenken Sie den Tragebügel 5 bis er in der
gewünschten Stellung beidseitig einrastet.
• Bügelposition A : Zum Tragen und zum
Transport im Auto.
Befindet sich der Tragebügel in der
Bügelposition A, darf er nur in Richtung der
Bügelpositionen B, C und D (Richtung „I“)
geschwenkt werden.
Vorsicht! Vergewissern Sie sich, ob der
Tragebügel 5 beidseitig sicher eingerastet ist,
bevor Sie die Babyschale anheben.

3.1 Adjusting the handle
You can engage the handle 5 in four positions:
1. Press the light grey release button 4 on the
carrying handle and push to the side until it stops
completely.
2. With the release button 4 pressed, now swivel
the handle 5.
Make sure the carrying handle does not swivel
further toward “II” as up to the handle position A.
3. Let go of the release button 4 and swivel the
handle 5 until it engages on both sides in the
desired position.
3.1 Ajustage de l’anse
Vous pouvez enclencher l’anse 5 en quatre
positions :
1. Appuyez sur le bouton de déverrouillage gris
clair 4 se trouvant sur l’anse et poussez-le
complètement sur le côté, jusqu’en butée.
2. Maintenant balancer la poignée 5 avec bouton
de déclenchement 4.
Veuillez ne pas basculer l’anse en direction « II »
au-delà de la position A.
3. Relâchez le bouton de déverrouillage 4 et
basculez l’anse 5 jusqu’à ce qu’elle s’encliquète
dans la position souhaitée.
• Handle position A : For carrying and for transport
in the car.
If the carrying handle is in the handle position A,
it may be swivelled only toward the handle
positions B, C and D (direction “I”).
Caution! Caution! Make sure that the carrying
handle 5 is locked securely on both sides before
lifting the infant carrier.
• Position de l‘anse A : pour porter la nacelle et
pour la transporter dans la voiture.
Si l’anse se trouve en position A, elle doit
seulement être basculée en direction des
positions B, C et D (direction « I »).
Attention ! Assurez-vous que l’anse 5 est bien
enclenchée des deux côtés, avant de soulever la
coque pour bébé.
22
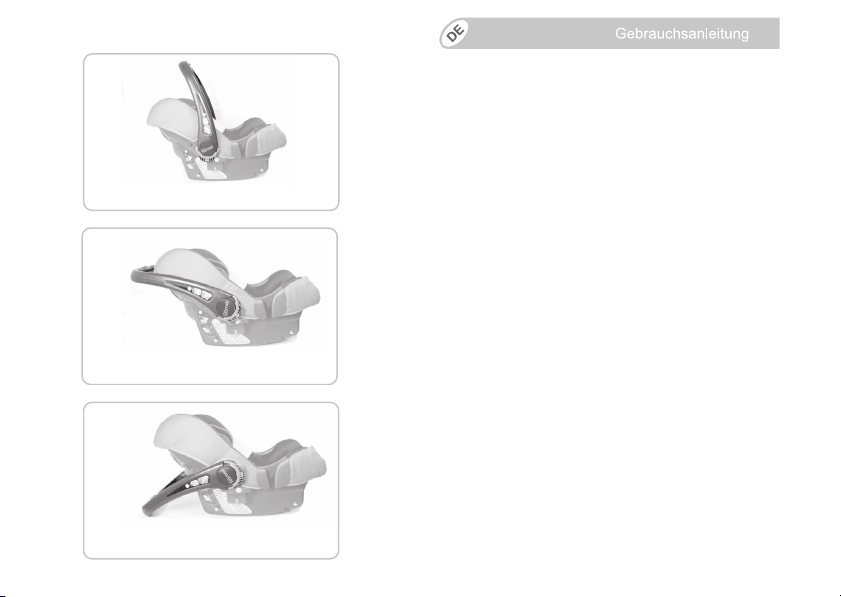
• Bügelposition B : Sicherheits-Stopp
Tipp! Diese Stellung verhindert, dass der
Tragebügel 5 unbeabsichtigt nach hinten
schwenkt.
• Bügelpositipon C : Zum Hineinlegen Ihres Babys
und beim Gebrauch als Travel System
• Bügelposition D: Zum sicheren Stand ausserhalb
des Autos
23

• Handle position B : Safety stop
Tip! This position prevents the handle 5 from
being unintentionally swivelled backwards.
• Position de l‘anse B : Arrêt de sécurité
Astuce ! Cette position permet d’éviter un
basculement involontaire de l’anse 5 vers
l’arrière.
• Handle position C : For putting your baby in and
when using as a Travel System
• Handle position D: For setting the baby seat
down safely outside the car
• Position de l‘anse C : Pour coucher votre bébé
ou à utiliser en tant que Travel System
• Position de l‘anse D: Pour déposer la coque à
l’extérieur de la voiture
24
25
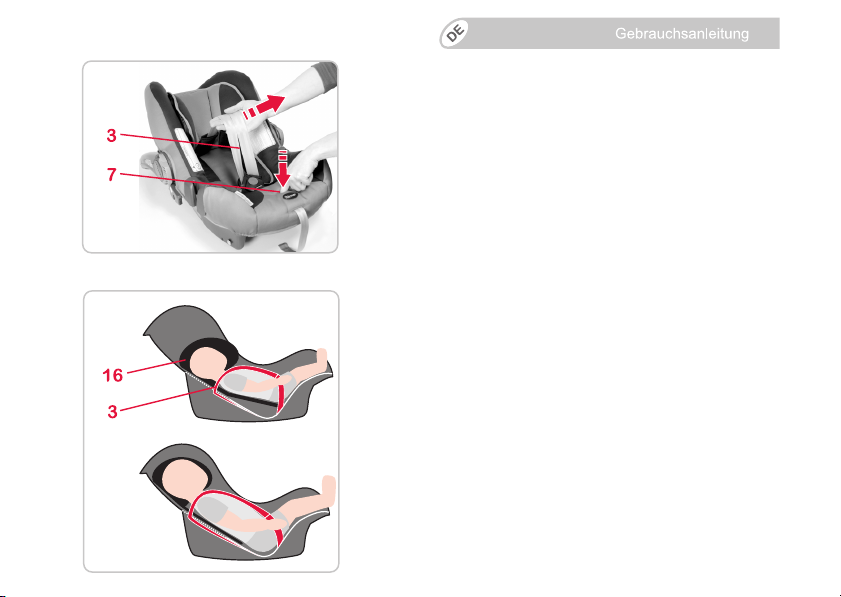
3.2 Lockern der Schultergurte
Drücken Sie auf die Verstelltaste 7 und ziehen
Sie gleichzeitig die beiden Schultergurte 3 nach
vorne.
3.3 Anpassen der Kopfstütze
Eine richtig angepasste Kopfstütze 16 gibt Ihrem
Baby in der Babyschale den optimalen Halt.
Durch Einstellen der Kopfstüze 16 wir gleichzeitig
die Neigung der Rückenlehne altersgerecht
angepasst.
• Die Kopfstütze 16 muss so eingestellt sein, dass
die Schultergurte 3 auf Schulterhöhe des Babys
liegen oder etwas darunter.

3.2 Loosening the shoulder straps
Press the adjustment button 7 and at the same
time pull both shoulder straps 3 forward.
3.2 Desserrage des bretelles
Appuyez sur la touche de réglage 7 et tirez les
deux bretelles 3 en même temps vers l’avant.
3.3 Adjusting the headrest
A correctly adjusted headrest 16 ensures your
baby’s optimal posture in the baby seat.
When the headrest is adjusted 16, the inclination of
the backrest adapts to the age of the baby.
• The headrest 16 must be adjusted so that the
shoulder straps 3 are at the same level as your
baby’s shoulders or slightly below.
3.3 Réglage de l’appui-tête
Un appui-tête 16 bien réglé assure le mainten
optimal de votre bébé dans la coque.
Le réglage de l’appui-tête 16 permet également un
réglage de l’inclinaison du dossier en fonction de
l’âge de l’enfant.
• L’appui-tête 16 doit être réglé de telle manière à
ce que les bretelles 16 se trouvent à la hauteur
des épaules du bébé ou un peu en dessous.
26
27
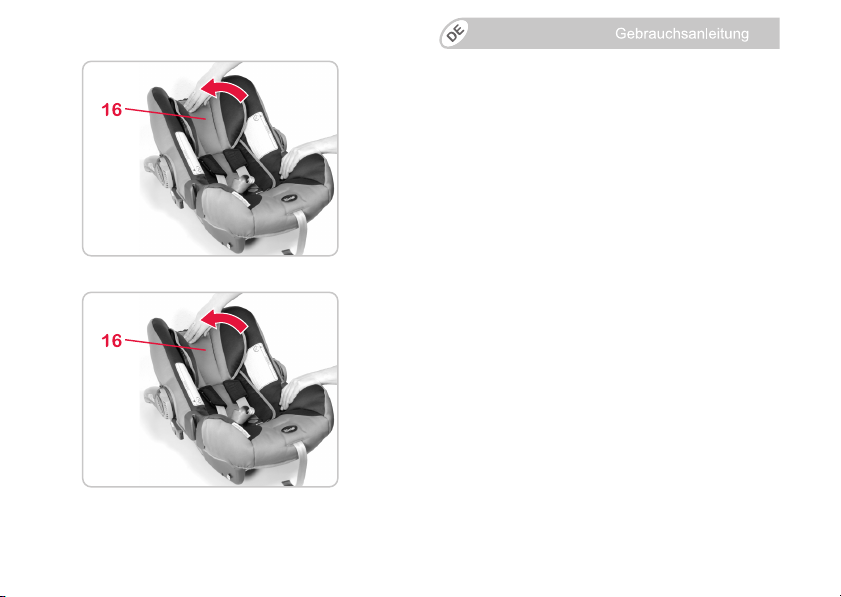
So können Sie die Höhe der Kopfstütze 16 der
Körpergrösse Ihres Babys anpassen:
Lockern Sie die Gurte so weit wie möglich (siehe
3.2).
Kippen Sie die Kopfstütze 16 nach vorne.
Nun ist der Kopfstützen-Versteller entriegelt.
Verschieben Sie die Kopfstütze 16 in die richtige
Schultergurthöhe.
Klappen Sie die Kopfstütze 16 wieder zurück an
die Sitzschale, um den Kopfstützen-Versteller
wieder zu verriegeln.

To adjust the height of the headrest 16 to fit your
baby:
Loosen the straps as far as possible (see 32).
Tip the headrest 16 forward.
The headrest adjuster is now unlocked.
Slide the headrest 16 until the shoulder straps
are at the correct height.
Voici comment adapter la hauteur de l’appui-tête
16 à la taille de votre bébé :
Desserrez les sangles autant que possible (voir
32).
Basculez l’appui-tête 16 vers l’avant.
Le système de réglage de l’appui-tête est à
présent déverrouillé.
Faites glisser l’appui-tête 16 à la hauteur de
bretelles appropriée.
Fold the headrest 16 back onto the seat shell to
lock the headrest adjuster again.
Rabattez l’appui-tête 16 sur la coque, pour
verrouiller à nouveau le système de réglage de
l’appui-tête.
28
29
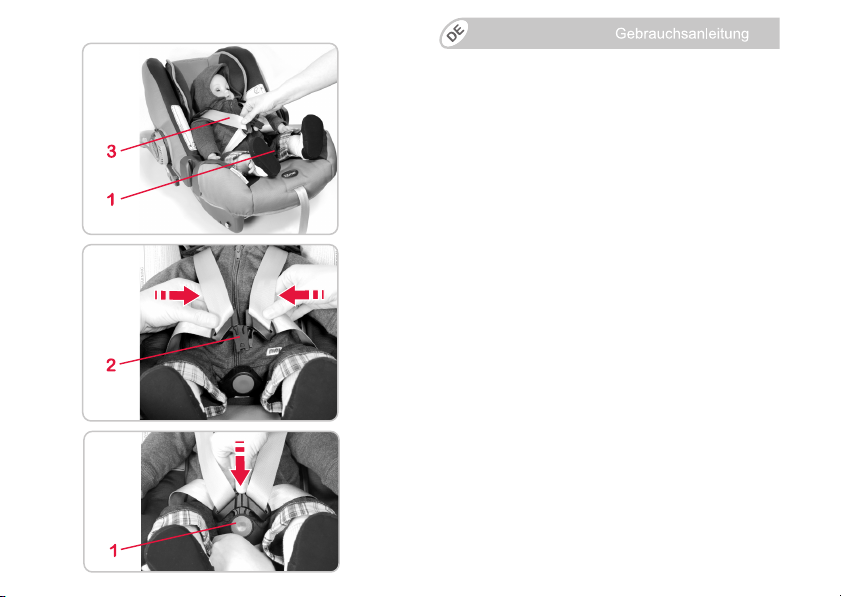
3.4 Anschnallen des Babys
Lockern Sie die Schultergurte.(siehe 3.2)
Öffnen Sie das Gurtschloss 1 (auf die rote Taste
drücken).
Legen Sie Ihr Baby in die Babyschale.
Führen Sie die Schultergurte 3 über die
Schultern Ihres Babys.
Vorsicht! Schultergurte nicht verdrehen oder
vertauschen.
Führen Sie die beiden Schlosszungen 2
zusammen…
…und rasten Sie sie im Gurtschloss 1 hörbar ein.
KLICK!
Loading…

BABY-SAFE plus II
RÖMER BABY-SAFE plus II
BABY-SAFE plus SHR II
RÖMER BABY-SAFE plus SHR II
0 — 13 kg
Gebrauchsanleitung
User Instructions
Mode d’emploi
Instrucciones de uso
Manual de instruções
Istruzioni per l’uso
Инструкция по эксплуатации
Brugsvejledning
Gebruiksaanwijzing
Детское автокресло Britax Römer Baby-Safe plus SHR II
Данная модель предназначена для весовой группы 0+ (0-13 кг), примерный возраст от рождения до 12 месяцев.
Детское автокресло Britax Roemer Baby-Safe plus SHR II является аналогом по безопасности и комфорту автокресла Baby-Safe plus II, но уже со встроенными переходниками для установки на детскую коляску Britax с системой Travel. Управление адаптером-переходником расположено на ручке автокресла в моделях SHR (Single Handle Release — система управления одной рукой).
Характеристики автокресла Britax Römer Baby-Safe plus SHR II:
- Уникальная запатентованная система боковой защиты D-SIP;
- Развитые глубокие боковины для защиты от бокового удара;
- Внутренние 5титочечные ремни безопасности;
- Эластичные демпфирующие накладки ремней;
- Прочная удобная ручка для переноски может принимать 3 положения. Регулировка наклона производится одной рукой;
- Удобная регулировка подголовника автокресла Baby-Safe plus SHR II в 7 положениях;
- При изменении высоты подголовника, специальная пластина автоматически изменит угол наклона спинки и более маленькие дети при низком расположении подголовника будут находиться в более комфортном для них полулежачем положении;
- Можно использовать как переноску и кресло-качалку;
- Козырек для защиты от солнца и ветра с защитой от УФ-излучения 50+;
- Имеет встроенные адаптеры для установки автокресла на коляски;
- Чехол с мягкой подкладкой съемный, его можно стирать.
Дополнительные возможности:
Автокресло Britax Römer Baby-Safe Plus SHR II может быть установлено на коляски Britax или Hartan, для этого в кресло встроены специальные адаптеры. Благодаря удобной системе установки (кнопка фиксации и отстегивания находится на ручке), перестановка происходит очень легко.
Типы тканей, используемых в обивке автокресел Romer:
ClassicLine — ткань максимально приближена по своим тактильным свойствам к хлопчатобумажной, хорошо впитывает влагу;
TrendLine — ткань напоминает хлопчатобумажный материал с небольшой тефлоновой пропиткой, что позволяет повысить ее износостойкость;
HighLine — так же этот материал называют искусственной замшей, очень нежная на ощупь, приятна к телу;
Belly Button — плотный материал без ворса наиболее износостоек.
Размеры и вес
Размеры (В х Ш х Г): 57 х 44 х 65 см
Вес: 3,9 кг
Скачать инструкцию romer baby-safe plus shr II
Установка автокресла
Фиксация автокресла Britax Römer Baby-Safe plus SHR II осуществляется с помощью штатных 3точечных ремней безопасности автомобиля.
Устанавливается спиной вперед, лицом против хода движения автомобиля.
Более надежную фиксацию и легкую установку обеспечит одна из специальных баз: Britax Romer Isofix Base (с креплением Isofix) или Britax Romer Belted Base (крепится автомобильными ремнями). Базы приобретаются отдельно.
Видео обзор автокресла Britax Roemer Baby-Safe plus SHR II
Видео по установке детского автокресла Romer Baby-Safe plus SHR II
Краш-тест (видео):
Автокресло Romer Baby-Safe plus SHR II соответствует европейскому стандарту ECE R44-04.
Код товара: 013547
Страна: Германия
Метки:
Автомобильные кресла
Автокресла гр.0+ (0-13 кг)
Без ISOFIX
Britax Römer