
КРАТКОЕ
Руководство пользователя
ML-216x Series
ML-216xW Series
КРАТКОЕ
Руководство пользователя
В
данном руководстве представлена информация по установке,
основным
функциям и устранению неисправностей в системе
Windows.
РАСШИРЕННОЕ
Данное
руководство содержит информацию об установке, расширенной
конфигурации
, эксплуатации, а также поиске и устранении неисправностей в
различных
операционных системах.
Некоторые
функции могут различаться в зависимости от модели и региона.


Ключевые преимущества
Экологическая безопасность
• Для экономии тонера и бумаги устройство снабжено функцией
экопечати
(см. «Easy Eco Driver» на стр. 176).
• В целях экономии бумаги можно распечатывать несколько страниц
на
одном листе (см. «Использование дополнительных параметров
печати
» на стр. 155).
• Для экономии бумаги можно печатать на обеих сторонах листа
(функция двусторонней ручной печати) (см. «Использование
дополнительных
параметров печати» на стр. 155).
• Данное устройство позволяет сэкономить электроэнергию,
автоматически
снижая ее потребление в режиме ожидания.
Быстрая и высококачественная печать
• Печать можно выполнять с разрешением до 1200 x 1200 тчк/дюйм
(фактическое разрешение).
• Быстрая печать по требованию.
— 20 стр/мин для формата A4 или 21 стр/мин для формата Letter
при
односторонней печати.
Удобство
• Программа Easy Capture Manager позволяет печатать снимки
экрана
, полученные нажатием кнопки Print Screen на клавиатуре
(см. «Знакомство с программой Easy Capture Manager» на стр.
177).
• Приложения Samsung Easy Printer Manager и Состояние принтера
Samsung (или Smart Panel) предназначены для мониторинга и
отображения
информации о состоянии устройства. Они позволяют
выбрать
подходящие параметры работы (см. «Работа с Samsung
Easy Printer Manager» на стр. 182).

Ключевые преимущества
• Приложение AnyWeb Print помогает делать снимки экрана, а также
обеспечивает
удобный предпросмотр, редактирование и печать
изображений
(см. «Samsung AnyWeb Print» на стр. 175).
• Программа Служба обновлений позволяет регулярно проверять
наличие
новых версий программного обеспечения и
устанавливать
их во время установки драйвера. Эта функция
доступна
только для пользователей ОС Windows.
• Если у вас есть доступ в Интернет, вы можете получить справку,
поддержку
, драйверы устройства, руководства и информацию о
заказе
материалов на веб-сайте www.samsung.com > ваш продукт
> Поддержка и загрузка.
Широкий набор функций и поддержка
множества приложений
• Поддержка разного формата бумаги (см. «Характеристики
материала
для печати» на стр. 66).
• Печать водяных знаков: В документ можно добавлять различные
надписи
, например «Секретно» (см. «Использование
дополнительных
параметров печати» на стр. 155).
• Печать плакатов: Текст и изображения на каждой странице
документа
можно увеличить, распечатать на нескольких листах
бумаги
и склеить (см. раздел «Использование дополнительных
параметров
печати» на стр. 155).
• Печать можно выполнять из разных операционных систем (см.
«Системные требования» на стр. 69).
• Устройство оборудовано интерфейсом USB.
Поддержка разных методов настройки
беспроводной сети
• Использование кнопки WPS (Wi-Fi Protected Setup™)
— Вы можете легко подключить устройство к беспроводной сети
при
помощи кнопки WPS на устройстве и точке доступа
(беспроводном маршрутизаторе).
• Использование USB-кабеля или сетевого кабеля
— Вы можете подключить и использовать различные
беспроводные
сети посредством USB-кабеля или сетевого
кабеля
.
• С помощью Wi-Fi Direct
— Вы можете легко и удобно посылать файлы на печать с ваших
мобильных
устройств посредством функций Wi-Fi или Wi-Fi
Direct.
См
. «Введение в методы настройки беспроводной сети.» на
стр
. 115.

Функции различных моделей
Функции и комплектация устройств могут различаться в зависимости от модели и региона.
Операционная система
Программное обеспечение
Операционная система
ML-216x Series
ML-216xW Series
Windows
●
●
Macintosh
●
●
Linux
●
●
Unix
Программное обеспечение
ML-216x Series
ML-216xW Series
Драйвер принтера PCL
Драйвер принтера SPL
●
●
Драйвер печати PS
Драйвер принтера XPS
a
a. Драйвер XPS поддерживается только в системе Windows. Его можно загрузить с веб-сайта Samsung
(www.samsung.com)
●
●
Samsung Easy Printer Manager
●
●
SyncThru™ Web Service
●

Функции различных моделей
Различные функции
(●: поддерживаемая функция, пустое поле: неподдерживаемая функция)
Функции
ML-216x Series
ML-216xW Series
Высокоскоростной интерфейс USB 2.0
●
●
Интерфейс проводной локальной сети Ethernet
10/100 Base TX
Беспроводной сетевой интерфейс 802.11b/g/n
●
Протокол IPv6
●
Easy Eco Driver (
Экономичная печать
a
a. Настроить параметры ECO можно в окне драйвера.
●
●
Защищенная настройка Wi-Fi (WPS)
●
Дуплексная (двусторонняя) печать в ручном
режиме
●
●

Полезная информация
Откуда можно загрузить драйвер для
устройства?
• Посетите страницу www.samsung.com/printer. Отсюда
можно
скачать последний драйвер к устройству,
который
следует установить.
Где можно приобрести дополнительные
компоненты и расходные материалы?
• Задайте вопрос поставщику или продавцу техники
Samsung.
• Посетите страницу www.samsung.com/supplies.
Выберите
ваш регион и страну, чтобы просмотреть
соответствующую
информацию по обслуживанию.
Индикатор состояния мигает или светится
непрерывно.
• Выключите и снова включите устройство.
• Проверьте значение такого поведения индикатора в
данном
руководстве, а затем выполните
соответствующую
процедуру устранения проблемы
(см. «Описание индикаторов состояния» на стр. 60).
Произошло замятие бумаги.
• Откройте и закройте верхнюю крышку (см. «Вид
спереди
» на стр. 19).
• См. указания по устранению замятия бумаги в данном
руководстве
, а затем выполните соответствующую
процедуру
устранения проблемы (см. «Удаление
замятой
бумаги» на стр. 57).
Нечеткая печать.
• Низкий уровень тонера или неравномерное его
распределение
в картридже. Встряхните картридж с
тонером
.
• Выберите другое разрешение печати.
• Замените картридж с тонером.
Устройство не печатает.
• Откройте очередь печати и удалите документ из списка
на
печать (см. «Отмена задания печати» на стр. 40).
• Удалите драйвер и установите его повторно (см.
«Установка драйвера локально» на стр. 24).
• Выберите данное устройство устройством по
умолчанию
в ОС Windows.

10
1.
Введение
О руководстве пользователя
В
настоящем руководстве пользователя приведены основные
сведения
об устройстве, а также детальное описание порядка его
использования
.
• Перед началом эксплуатации устройства следует ознакомиться с
информацией
о безопасности.
• Решение проблем, связанных с эксплуатацией устройства,
приведено
в разделе, посвященном устранению неисправностей.
• Описание терминов, используемых в данном руководстве, см. в
глоссарии
.
• В зависимости от модели и комплектации конкретного устройства
его
вид может отличаться от иллюстраций в данном руководстве
пользователя
.
• В зависимости от версии драйвера/микропрограммы конкретного
устройства
, вид меню может отличаться от иллюстраций в данном
руководстве
пользователя.
• Операции, приведенные в данном руководстве, в основном
предназначены
для выполнения в среде Windows 7.
1
Условные обозначения
Некоторые
термины настоящего руководства имеют одинаковое
значение
, например:
• «документ» и «оригинал».
• «бумага», «материал» и «материал для печати».
• «устройство», «принтер» и «МФУ».
2
Общие значки
Значок
Текст
Описание
Внимание!
Содержит
инструкции по защите устройства
от
возможных механических повреждений и
неисправностей
.
Примечан
ие
Содержит
дополнительные сведения или
подробные
описания функций и возможностей
устройства
.

12:40
Заправка картриджа MLT-D101s к принтерам Samsung SCX-3400/3405 и ML-2160/2165
10:21
Прошивка Samsung ML-2160 с ужасной версией 1.01.02.00
04:31
Обзор принтера Samsung ML 2160
34:28
Разборка и профилактика принтера Samsung ML-2160
08:58
Обзор лазерного принтера samsung ml 2160
15:39
Заправка картриджа MLT D101S Samsung ML-2160 /SCX 3400
08:51
#7 Принтер Samsung ML 2160 | Как снять и чем почистить ролик захвата бумаги, либо заменить.
05:55
Понижение версии прошивки, прошивка принтера Samsung ML-2160, ML-2165 (v1.01.02.00) с помощью JTAG
Нажмите на кнопку для помощи
Bookreader Item Preview
52
Views
DOWNLOAD OPTIONS
Temporarily Unavailable
DAISY
For users with print-disabilities
Temporarily Unavailable
EPUB
Uploaded by
chris85
on
SIMILAR ITEMS (based on metadata)
View the manual for the Samsung ML-2160 here, for free. This manual comes under the category printers and has been rated by 12 people with an average of a 8.1.
This manual is available in the following languages: English. Do you have a question about the Samsung ML-2160 or do you need help?
Ask your question here
Samsung ML-2160 specifications
Below you will find the product specifications and the manual specifications of the Samsung ML-2160.
The Samsung ML-2160 printer is a monochrome laser printer with a high maximum resolution of 1200 x 1200 DPI. It features duplex printing capability, allowing for double-sided printing to save paper. The printer has a fast print speed of 20 pages per minute for black and white documents in normal quality on A4/US Letter paper, with a time to first page of 8.5 seconds.
With a maximum duty cycle of 10,000 pages per month, the Samsung ML-2160 printer is suitable for small businesses or individuals requiring moderate printing needs. The printer has 8 MB of internal memory and operates on a 300 MHz processor frequency.
The Samsung ML-2160 printer has a total input capacity of 150 sheets, which is divided between a 150-sheet input tray and a single-sheet manual feed slot. The output capacity is 100 sheets. This printer is network-unready, meaning it must be connected directly to a computer using a USB interface.
The maximum printable size for the Samsung ML-2160 printer is 216 x 297 millimeters, or standard A4 paper size. The printer is compact and has a stylish design that will fit well in most home or office environments. Overall, the Samsung ML-2160 printer is a reliable and cost-effective option for those in need of a monochrome laser printer for moderate printing needs.
Maximum duty cycle
10000 pages per month
Total input capacity
150 sheets
Maximum print size
216 x 297 mm
General
| Brand | Samsung |
| Model | ML-2160 | ML-2160 |
| Product | printer |
| EAN | 8806071592220, 8806071717449, 8806071739816 |
| Language | English |
| Filetype | User manual (PDF) |
Printing
| Color | No |
| Maximum resolution | 1200 x 1200 DPI |
| Duplex printing | Yes |
| Print technology | Laser |
| Print speed (black, normal quality, A4/US Letter) | 20 ppm |
| Time to first page (black, normal) | 8.5 s |
Network
| Network ready | No |
| Ethernet LAN | No |
| Wi-Fi | No |
Features
| Maximum duty cycle | 10000 pages per month |
| Number of print cartridges | — |
| Page description languages | SPL |
Performance
| Internal memory | 8 MB |
| Maximum internal memory | — MB |
| Processor frequency | 300 MHz |
| Sound pressure level (printing) | 50 dB |
| Sound pressure level (quiet mode) | 26 dB |
Input & output capacity
| Total input capacity | 150 sheets |
| Total output capacity | 100 sheets |
Paper handling
| Maximum print size | 216 x 297 mm |
| Paper tray media types | Envelopes, Labels, Plain paper, Pre-Printed, Recycled paper |
| ISO A-series sizes (A0…A9) | A4 |
| Maximum ISO A-series paper size | A4 |
Ports & interfaces
| Standard interfaces | USB 2.0 |
System requirements
| Windows operating systems supported | Windows 2000, Windows 7 Home Premium, Windows 7 Professional, Windows 7 Starter, Windows 7 Ultimate, Windows Vista Business, Windows Vista Home Basic, Windows Vista Home Premium, Windows Vista Ultimate, Windows XP Home, Windows XP Professional |
| Mac operating systems supported | Mac OS X 10.4 Tiger, Mac OS X 10.5 Leopard, Mac OS X 10.6 Snow Leopard, Mac OS X 10.7 Lion |
| Linux operating systems supported | Yes |
| Server operating systems supported | Windows Server 2003 |
Power
| Power consumption (printing) | 310 W |
| Power consumption (standby) | 30 W |
| Power consumption (off) | 0.9 W |
Weight & dimensions
| Dimensions (WxDxH) | 331 x 215 x 178 mm |
| Weight | 4000 g |
Design
Other features
| Toner cartridge | 1500 standard pages |
| Standard output capacity for envelopes | 10 sheets |
show more
Frequently Asked Questions
Can’t find the answer to your question in the manual? You may find the answer to your question in the FAQs about the Samsung ML-2160 below.
Why is my printer not turning on?
Ensure that the power cable is securely plugged into both the printer and the power outlet. Also, check if the power switch at the back of the printer is turned on.
How do I load paper into the printer?
Open the paper input tray by pulling it downward. Adjust the paper guides to fit the size of the paper you are using, then place the paper neatly into the tray. Make sure not to exceed the maximum paper capacity indicated.
My prints are coming out with streaks or smudges, how can I fix this?
Firstly, check if the toner cartridge is properly installed and not near its end. If the cartridge is fine, then perform a cleaning cycle using the printer software. This can usually be done through the printer settings on your computer.
What should I do if the printer is frequently jamming?
Begin by removing any jammed paper carefully. Next, check and clean the paper path, ensuring there are no loose bits of paper or foreign objects. Also, make sure you are using the correct type and size of paper for your printer.
How can I connect my printer wirelessly to my computer?
Make sure your printer and computer are connected to the same Wi-Fi network. On your computer, locate the Wi-Fi settings and search for available networks. Select your printer from the list of available devices and follow the on-screen instructions to complete the setup.
Does the Samsung ML-2160 have duplex printing?
Yes, the Samsung ML-2160 has duplex printing. This means that it can print on both sides of the paper automatically, which is convenient and helps save paper.
What is the maximum resolution of the Samsung ML-2160?
The maximum resolution of the Samsung ML-2160 is 1200 x 1200 DPI. This means that it can produce high-quality prints with sharp and detailed images.
Is the Samsung ML-2160 network ready?
No, the Samsung ML-2160 is not network ready. This means that it does not have built-in network capabilities and can only be connected to a computer via USB.
What is the maximum duty cycle of the Samsung ML-2160?
The maximum duty cycle of the Samsung ML-2160 is 10000 pages per month. This means that it is designed to handle a moderate volume of printing tasks on a monthly basis.
How fast does the Samsung ML-2160 print?
The Samsung ML-2160 can print at a speed of 20 ppm (pages per minute) for black, normal quality prints on A4 or US Letter size paper. This is a relatively fast printing speed compared to other similar printers.
What is the weight of the Samsung ML-2160?
The Samsung ML-2160 has a weight of 4000 g.
What is the best way to remove jammed paper from my printer?
It is best to gently pull the paper out of the printer. Turn the printer off, and make sure that the printhead is not hanging over the paper and that no paper remains in the printer.
How come my prints are of poor quality?
There can be various reasons for poor print quality. Check if the cartridges or toners are full. If so, inkjet printers often require cleaning the printer, the cartridges have dried out, or the print head is broken. With laser printers, calibrating the laser printer is recommended.
How come my printer does not accept original cartridges?
Non-genuine cartridges may not be recognised by the printer. In that case you will receive a message that the cartridge is empty. The manual of the purchased cartridge usually contains the solution, if this does not work, it is advisable to contact the seller.
How many cartridges can be placed in the Samsung ML-2160?
— cartridges can be placed in the Samsung ML-2160.
How come my inkjet printer has black stripes?
In most cases, the inkjet printer cartridge is broken and the cartridge needs to be replaced.
What is the difference between a laser printer and an inkjet printer?
A laser printer prints with a toner and an inkjet printer prints with ink.
What does DPI stand for?
DPI stands for Dots Per Inch and is the number of ink droplets (per inch) that end up on the paper when printing.
Is the manual of the Samsung ML-2160 available in English?
Yes, the manual of the Samsung ML-2160 is available in English .
Is your question not listed? Ask your question here

User’s Guide
User’s Guide
BASIC
BASIC
This guide provides information concerning installation, basic operation and
troubleshooting on windows.
ADVANCED
This guide provides information about installation, advanced configuration, operation and
troubleshooting on various OS environments.
ML-216x Series
ML-216xW Series
Some features may not be available depending on models or countries.

Available supplies 39
1. Introduction
Key benefits 4
Features by models 6
Useful to know 8
About this user’s guide 9
Safety information 10
Machine overview 15
Control panel overview 18
Turning on the machine 20
Installing the driver locally 21
Reinstalling the driver 22
2. Menu overview and basic setup
Available maintenance parts 40
Storing the toner cartridge 41
Redistributing toner 43
Replacing the toner cartridge 44
Cleaning the machine 46
Tips for moving & storing your machine 49
4. Troubleshooting
Tips for avoiding paper jams 51
Clearing paper jams 52
Understanding the status LED 55
5. Appendix
Printing a demo page 24
Media and tray 25
Basic printing 34
3. Maintenance
Ordering supplies and accessories 38
Specifications 59
Regulatory information 68
Copyright 78
2

1. Introduction
This chapter provides information you need to know before using the machine.
• Key benefits 4
• Features by models 6
• Useful to know 8
• About this user’s guide 9
• Safety information 10
• Machine overview 15
• Control panel overview 18
• Turning on the machine 20
• Installing the driver locally 21
• Reinstalling the driver 22
Key benefits
Environmentally friendly
• To save toner and paper, this machine supports the Eco feature (see «Easy
Eco Driver» on page 158).
• To save paper, you can print multiple pages on a single sheet of paper (see
«Using advanced print features» on page 140).
• To save paper, you can print on both sides of the paper (manual doublesided printing) (see «Using advanced print features» on page 140).
• To save electricity, this machine automatically conserves electricity by
substantially reducing power consumption when not in use.
Print with excellent quality and speed
• You can print with a resolution of up to 1,200 x 1,200 dpi effective output.
• Fast, on-demand printing.
— For single-side printing, 20 ppm (A4) or 21 ppm (Letter).
Convenience
• Easy Capture Manager allows you to easily edit and print whatever you
captured using the Print Screen key on the keyboardG(see «Understanding
Easy Capture Manager» on page 159).
• Samsung Easy Printer Manager and Samsung Printer Status (or Smart Panel)
are a program that monitors and informs you of the machine’s status and
allows you to customize the machine’s settings (see «Using Samsung Easy
Printer Manager» on page 163).
• AnyWeb Print helps you screen-capture, preview, scrap, and print the
screen more easily than when you use the ordinary program (see «Samsung
AnyWeb Print» on page 157).
• Smart Update allows you to check for the latest software and install the
latest version during the printer driver installation process. This is available
only for Windows OS users.
• If you have Internet access, you can get help, support application, machine
drivers, manuals, and order information from the Samsung website,
www.samsung.com > find your product > Support or Downloads.

Key benefits
Wide range of functionality and application support
• Supports various paper sizes (see «Print media specifications» on page 61).
• Print watermark: You can customize your documents with words, such as
“Confidential” (see «Using advanced print features» on page 140).
• Print posters: The text and pictures of each page of your document are
magnified and printed across the multiple sheets of paper and can then be
taped together to form a poster (see «Using advanced print features» on
page 140).
• You can print in various operating systems (see «System requirements» on
page 64).
• Your machine is equipped with a USB interface.
Supports various wireless network setting method
• Using the USB cable or a network cable
— You can connect and set various wireless network settings using a USB
cable or a network cable.
• Using the Wi-Fi Direct
— You can conveniently print from your mobile device using the Wi-Fi or
Wi-Fi Direct feature.
See «Introducing wireless set up methods» on page 105.
• Using the WPS (Wi-Fi Protected Setup™) button
— You can easily connect to a wireless network using the WPS button on
the machine and the access point (a wireless router).
Features by models
Some features and optional goods may not be available depending on model or country.
Operating System
Software
Operating System ML-216x Series ML-216xW Series
Windows Ɣ Ɣ
Macintosh Ɣ Ɣ
Linux Ɣ Ɣ
Unix
Software ML-216x Series ML-216xW Series
PCL printer driver
SPL printer driver Ɣ Ɣ
PS printer driver
XPS printer driver Ɣ Ɣ
Samsung Easy Printer Manager Ɣ Ɣ
SyncThru™ Web Service Ɣ
Features by models
Variety feature
(Ɣ: Included, Blank: Not available)
Features ML-216x Series ML-216xW Series
Hi-Speed USB 2.0 Ɣ Ɣ
Network Interface Ethernet 10/100 Base TX wired LAN
Network Interface 802.11b/g/n wireless LAN Ɣ
IPv6 Ɣ
Eco printing(Easy Eco Driver)
a
a. Setting the ECO settings is available from the windows driver.
Ɣ Ɣ
Wi-Fi Protected Setup™ (WPS) Ɣ
Manual duplex (2-sided) printing Ɣ Ɣ
Useful to know
Where can I download the machine’s driver?
• Visit www.samsung.com/printer to download the latest
machine’s driver, and install it on your system.
Where can I purchase accessories or supplies?
• Inquire at a Samsung distributor or your retailer.
• Visit www.samsung.com/supplies. Select your country/region
to view product service information.
The status LED flashes or remains constantly on.
• Turn the product off and on again.
• Check the meanings of LED indications in this manual and
troubleshoot accordingly (see «Understanding the status LED»
on page 55).
Printouts are blurry.
• The toner level might be low or uneven. Shake the toner
cartridge.
• Try a different print resolution setting.
• Replace the toner cartridge.
The machine does not print.
• Open the print queue list and remove the document from the
list (see «Canceling a print job» on page 35).
• Remove the driver and install it again (see «Installing the driver
locally» on page 21).
• Select your machine as your default machine in your Windows.
A paper jam has occurred.
• Open and close the top cover (see «Front view» on page 16).
• Check the instructions on removing jammed paper in this
manual and troubleshoot accordingly (see «Clearing paper
jams» on page 52).
About this user’s guide
This user’s guide provides information for your basic understanding of the
machine as well as detailed steps to explain machine usage.
• Read the safety information before using the machine.
• If you have a problem using the machine, refer to the troubleshooting
chapter.
• Terms used in this user’s guide are explained in the glossary chapter.
• All illustrations in this user’s guide may differ from your machine depending
on its options or model you purchased.
• The screenshots in this user’s guide may differ from your machine
depending on the machine’s firmware/driver version.
• The procedures in this user’s guide are mainly based on Windows 7.
1
Conventions
2
General icons
Icon Text Description
Caution
Note
Gives users information to protect the machine from
possible mechanical damage or malfunction.
Provides additional information or detailed
specification of the machine function and feature.
Some terms in this guide are used interchangeably, as below:
• Document is synonymous with original.
• Paper is synonymous with media, or print media.
• Machine refers to printer or MFP.
1. Introduction
9

Safety information
These warnings and precautions are included to prevent injury to you and
others, and to prevent any potential damage to your machine. Be sure to read
and understand all of these instructions before using the machine. After reading
this section, keep it in a safe place for future reference.
3
Important safety symbols
Explanation of all icons and signs used in this chapter
Warning
Caution
Do not attempt.
Hazards or unsafe practices that may result in severe
personal injury or death.
Hazards or unsafe practices that may result in minor
personal injury or property damage.
4
Operating environment
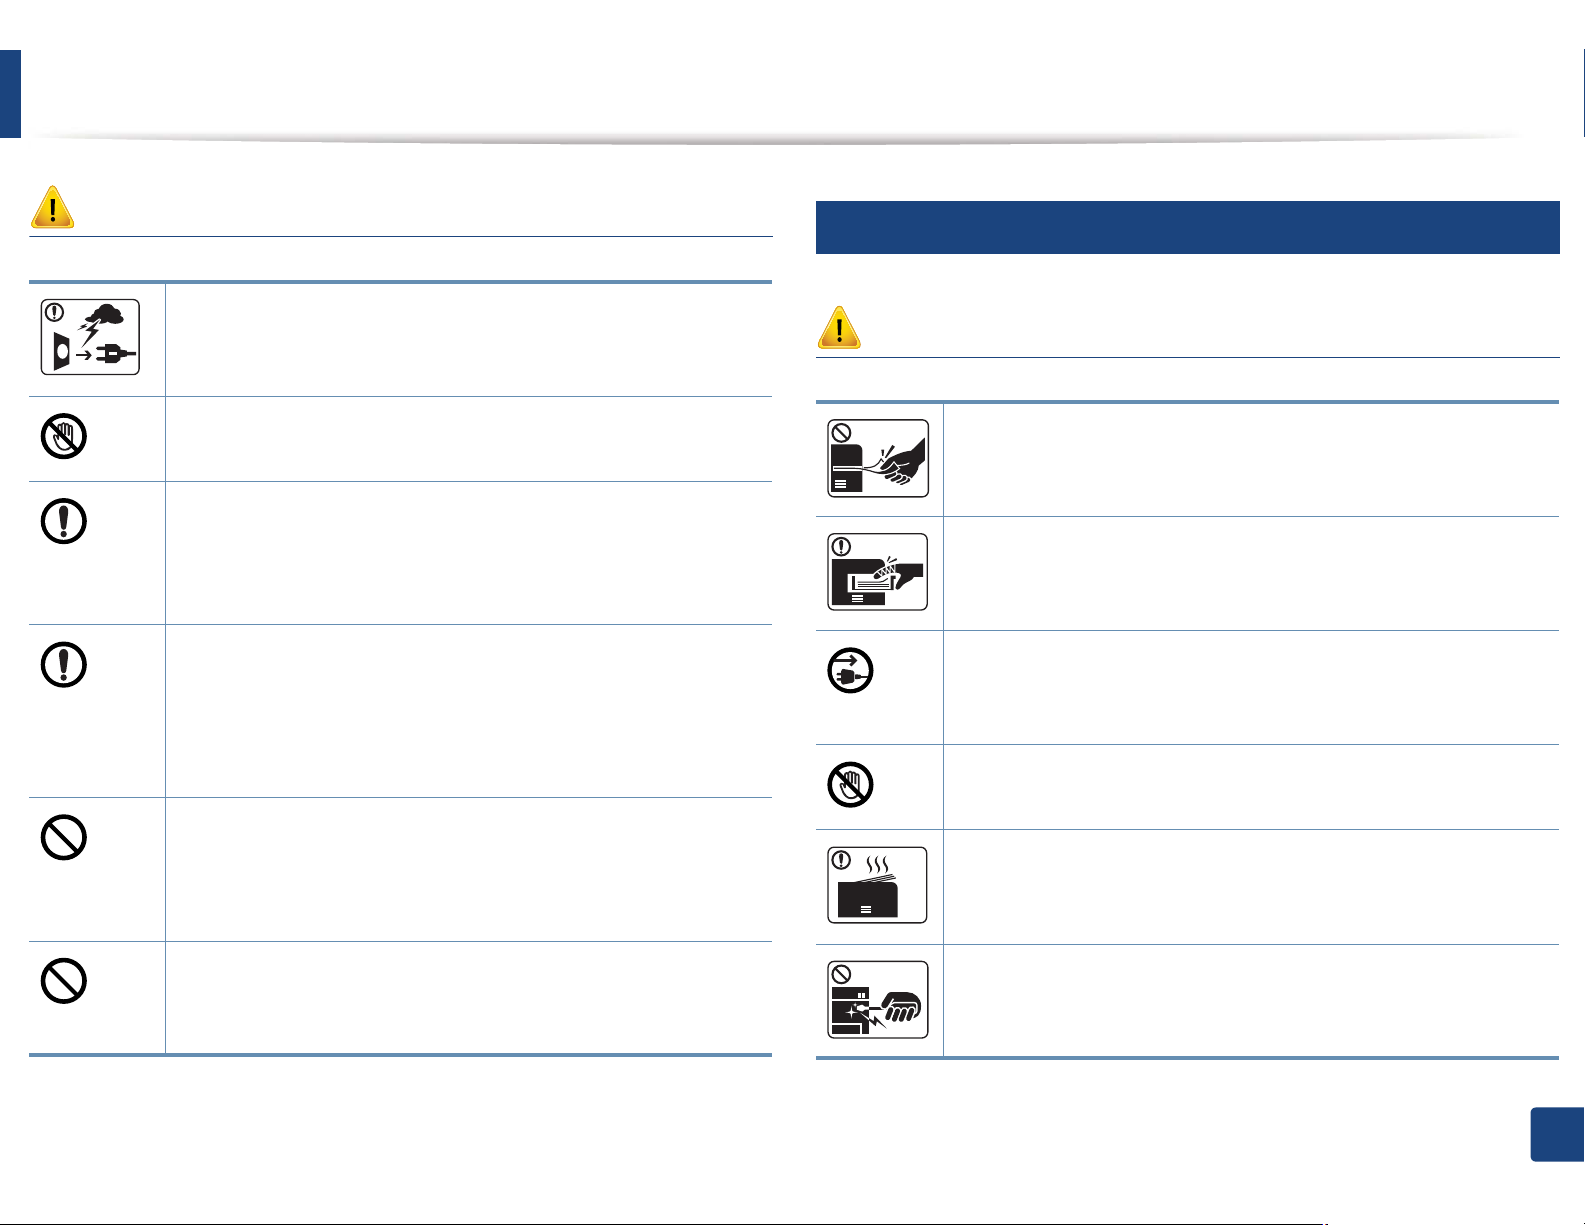
Warning
Do not use if the power cord is damaged or if the electrical outlet is
not grounded.
This could result in electric shock or fire.
Do not place anything on top of the machine (water, small metal or
heavy objects, candles, lit cigarettes, etc.).
This could result in electric shock or fire.
• If the machine gets overheated, it releases smoke, makes
strange noises, or generates an odd odor, immediately turn off
the power switch and unplug the machine.
• The user should be able to access the power outlet in case of
emergencies that might require the user to pull the plug out.
This could result in electric shock or fire.
Do not bend, or place heavy objects on the power cord.
Stepping on or allowing the power cord to be crushed by a heavy
object could result in electric shock or fire.
Do not remove the plug by pulling on the cord; do not handle the
plug with wet hands.
This could result in electric shock or fire.
1. Introduction
10
Safety information
5
Caution
During an electrical storm or for a period of non-operation,
remove the power plug from the electrical outlet.
This could result in electric shock or fire.
Be careful, the paper output area is hot.
Burns could occur.
If the machine has been dropped, or if the cabinet appears
damaged, unplug the machine from all interface connections and
request assistance from qualified service personnel.
Otherwise, this could result in electric shock or fire.
If the machine does not operate properly after these instructions
have been followed, unplug the machine from all interface
connections and request assistance from qualified service
personnel.
Otherwise, this could result in electric shock or fire.
If the plug does not easily enter the electrical outlet, do not
attempt to force it in.
Call an electrician to change the electrical outlet, or this could
result in electric shock.
Operating method
Caution
Do not forcefully pull the paper out during printing.
It can cause damage to the machine.
Be careful not to put your hand between the machine and paper
tray.
You may get injured.
This machine’s power reception device is the power cord.
To switch off the power supply, remove the power cord from the
electrical outlet.
Be care when replacing paper or removing jammed paper.
New paper has sharp edges and can cause painful cuts.
When printing large quantities, the bottom part of the paper
output area may get hot. Do not allow children to touch.
Burns can occur.
Do not allow pets to chew on the AC power, telephone or PC
interface cords.
This could result in electric shock or fire and/or injury to your pet.
When removing jammed paper, do not use tweezers or sharp metal
objects.
It can damage the machine.
1. Introduction
11
Safety information
Do not allow too many papers to stack up in the paper output tray.
It can damage the machine.
Do not block or push objects into the ventilation opening.
This could result in elevated component temperatures which can
cause damage or fire.
Use of controls or adjustments or performance of procedures other
than those specified herein may result in hazardous radiation
exposure.
6
Installation / Moving
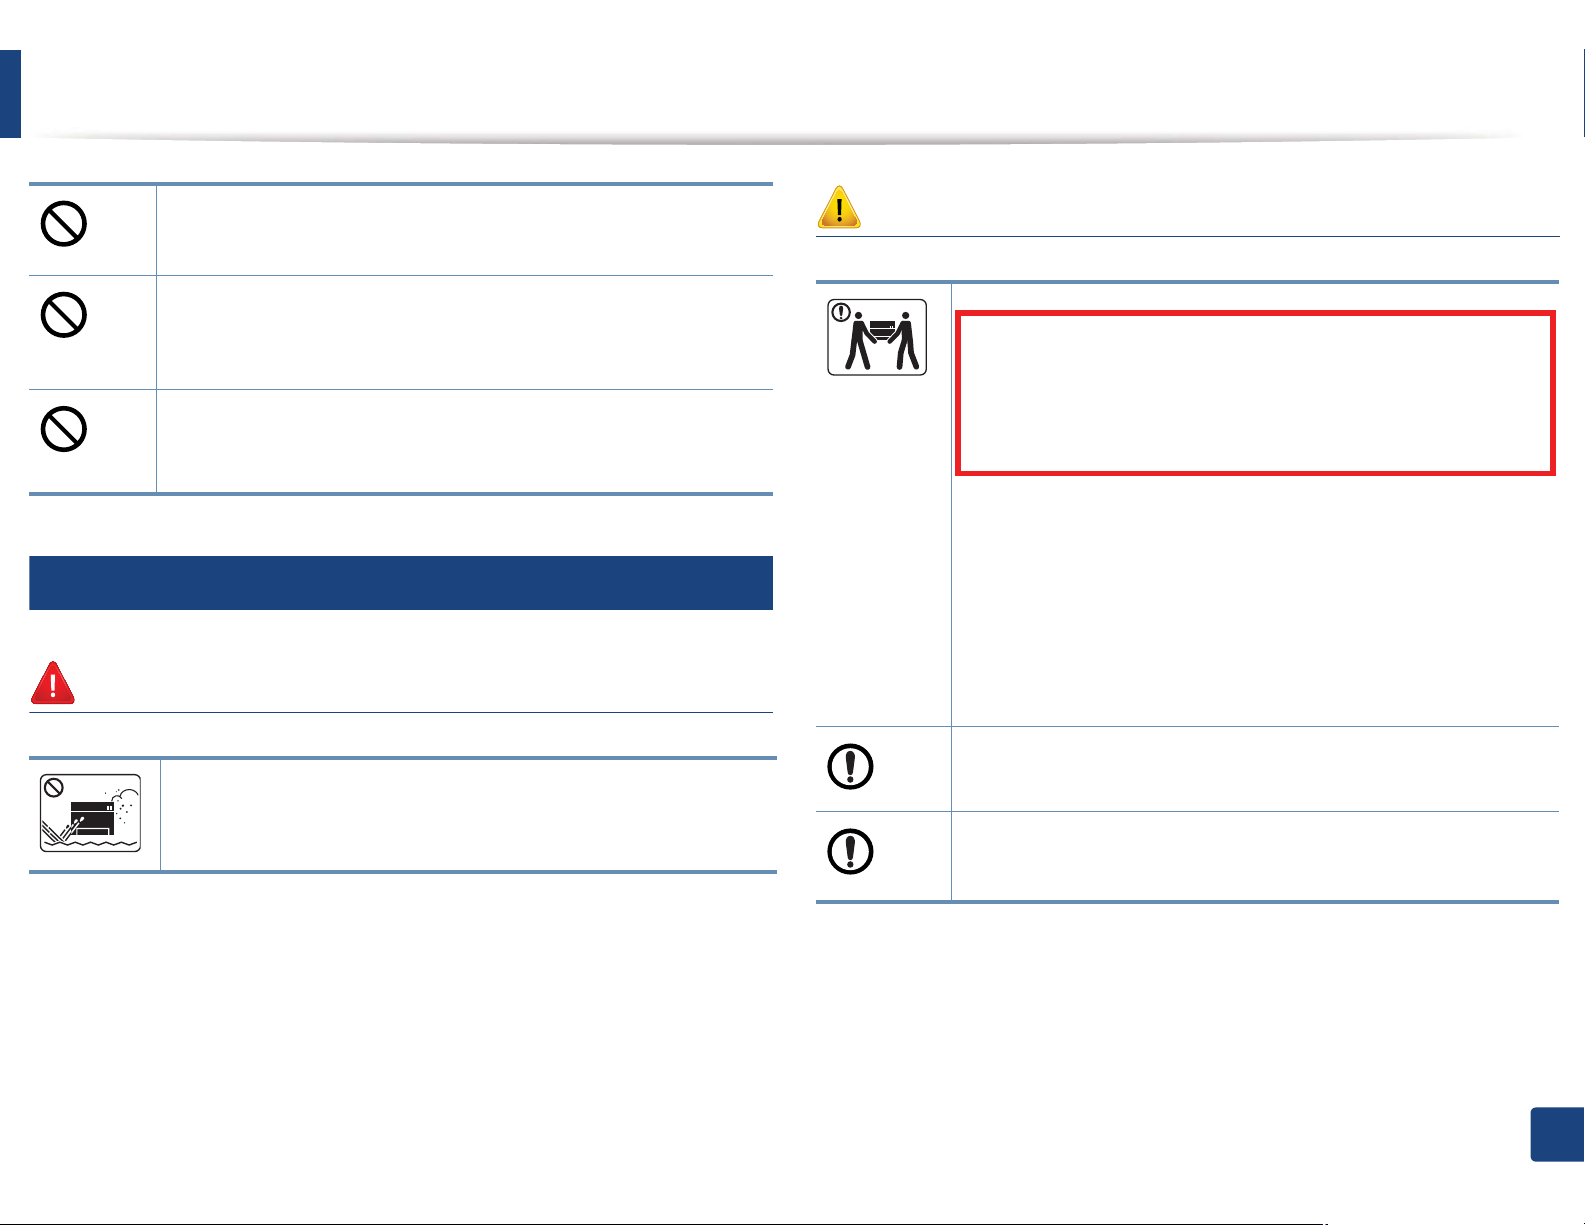
Warning
Do not place the machine in an area with dust, humidity, or water
leaks.
This could result in electric shock or fire.
Caution
Before moving the machine, turn the power off and disconnect all
cords. The information below are only suggestions based on the
units weight.
If you have a medical condition that prevents you from lifting, do
not lift the machine. Ask for help, and always use the appropriate
amount of people to left the device safety.
Then lift the machine:
• If the machine weighs under 20 kg (44.09 lbs), lift with 1 person.
• If the machine weighs 20 kg (44.09 lbs) — 40kg (88.18 lbs), lift
• If the machine weighs more than 40 kg (88.18 lbs), lift with 4 or
The machine could fall, causing injury or machine damage.
Do not place the machine on an unstable surface.
The machine could fall, causing injury or machine damage.
Use only No.26 AWG
Otherwise, it can cause damage to the machine.
with 2 people.
more people.
a
or larger, telephone line cord, if necessary.
1. Introduction
12

Safety information
Use the power cord supplied with your machine for safe
operation. If you are using a cord which is longer than 2 meters (6
feet) with a 110 V machine, then the gauge should be 16 AWG or
larger.
7
Maintenance / Checking
Otherwise, it can cause damage to the machine, and could result
in electric shock or fire.
Make sure you plug the power cord into a grounded electrical
outlet.
Otherwise, this could result in electric shock or fire.
Do not overload wall outlets and extension cords.
This can diminish performance, and could result in electric shock
or fire.
Do not put a cover over the machine or place it in an airtight
location, such as a closet.
If the machine is not well-ventilated, this could result in fire.
The machine should be connected to
the power level which is specified on the label.
If you are unsure and want to check the power level you are using,
contact the electrical utility company.
a. AWG: American Wire Gauge
Caution
Unplug this product from the wall outlet before cleaning the
inside of the machine. Do not clean the machine with benzene,
paint thinner or alcohol; do not spray water directly into the
machine.
This could result in electric shock or fire.
When you are working inside the machine replacing supplies or
cleaning the inside, do not operate the machine.
You could get injured.
Keep cleaning supplies away from children.
Children could get hurt.
Do not disassemble, repair or rebuild the machine by yourself.
It can damage the machine. Call a certified technician when the
machine needs repairing.
1. Introduction
13

Safety information
8
Supply usage
• Do not remove any covers or guards that are fastened with
screws.
• Fuser units should only be repaired by a certified service
technician. Repair by non-certified technicians could result in
fire or electric shock.
• The machine should only be repaired by a Samsung service
technician.
To clean and operate the machine, strictly follow the user’s guide
provided with the machine.
Otherwise, you could damage the machine.
Keep the power cable and the contact surface of the plug clean
from dust or water.
Otherwise, this could result in electric shock or fire.
Do not burn any of the supplies such as toner cartridge or fuser
unit.
This could cause an explosion or uncontrollable fire.
When storing supplies such as toner cartridges, keep them away
from children.
Toner dust can be dangerous if inhaled or ingested.
When changing the toner cartridge or removing jammed paper,
be careful not to let toner dust touch your body or clothes.
Toner dust can be dangerous if inhaled or ingested.
When toner gets on your clothing, do not use hot water to wash
it.
Hot water sets toner into fabric. Use cold water.
Using recycled supplies, such as toner, can cause damage to the
machine.
In case of damage due to the use of recycled supplies, a service
fee will be charged.
Caution
Do not disassemble the toner cartridge.
Toner dust can be dangerous if inhaled or ingested.
1. Introduction
14
Machine overview
9
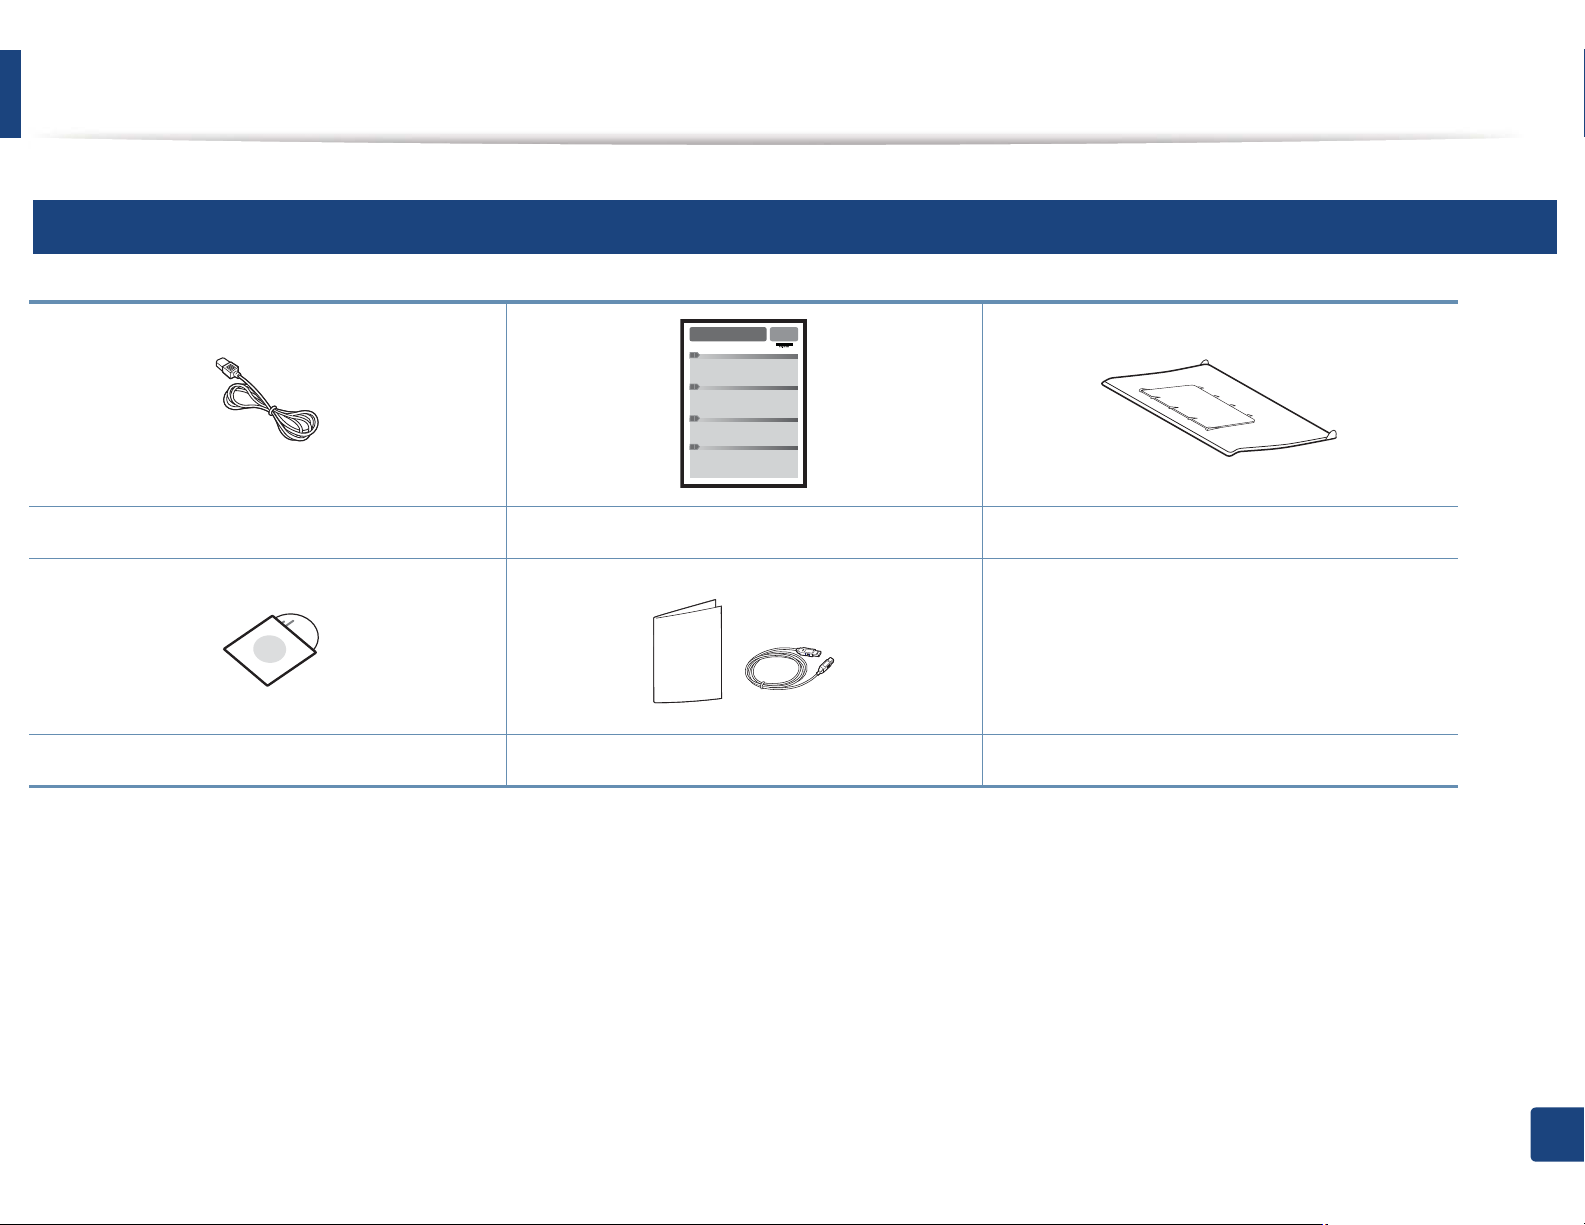
Accessories
Power cord Quick installation guide
Software CD
a. Refer to the Quick Install Guide to attach the output stacker to the machine.
b. The software CD contains the printer drivers and software applications.
c. Miscellaneous accessories included with your machine may vary by country of purchase and specific model.
b
Misc. accessories
c
Output stacker
a
1. Introduction
15
Machine overview
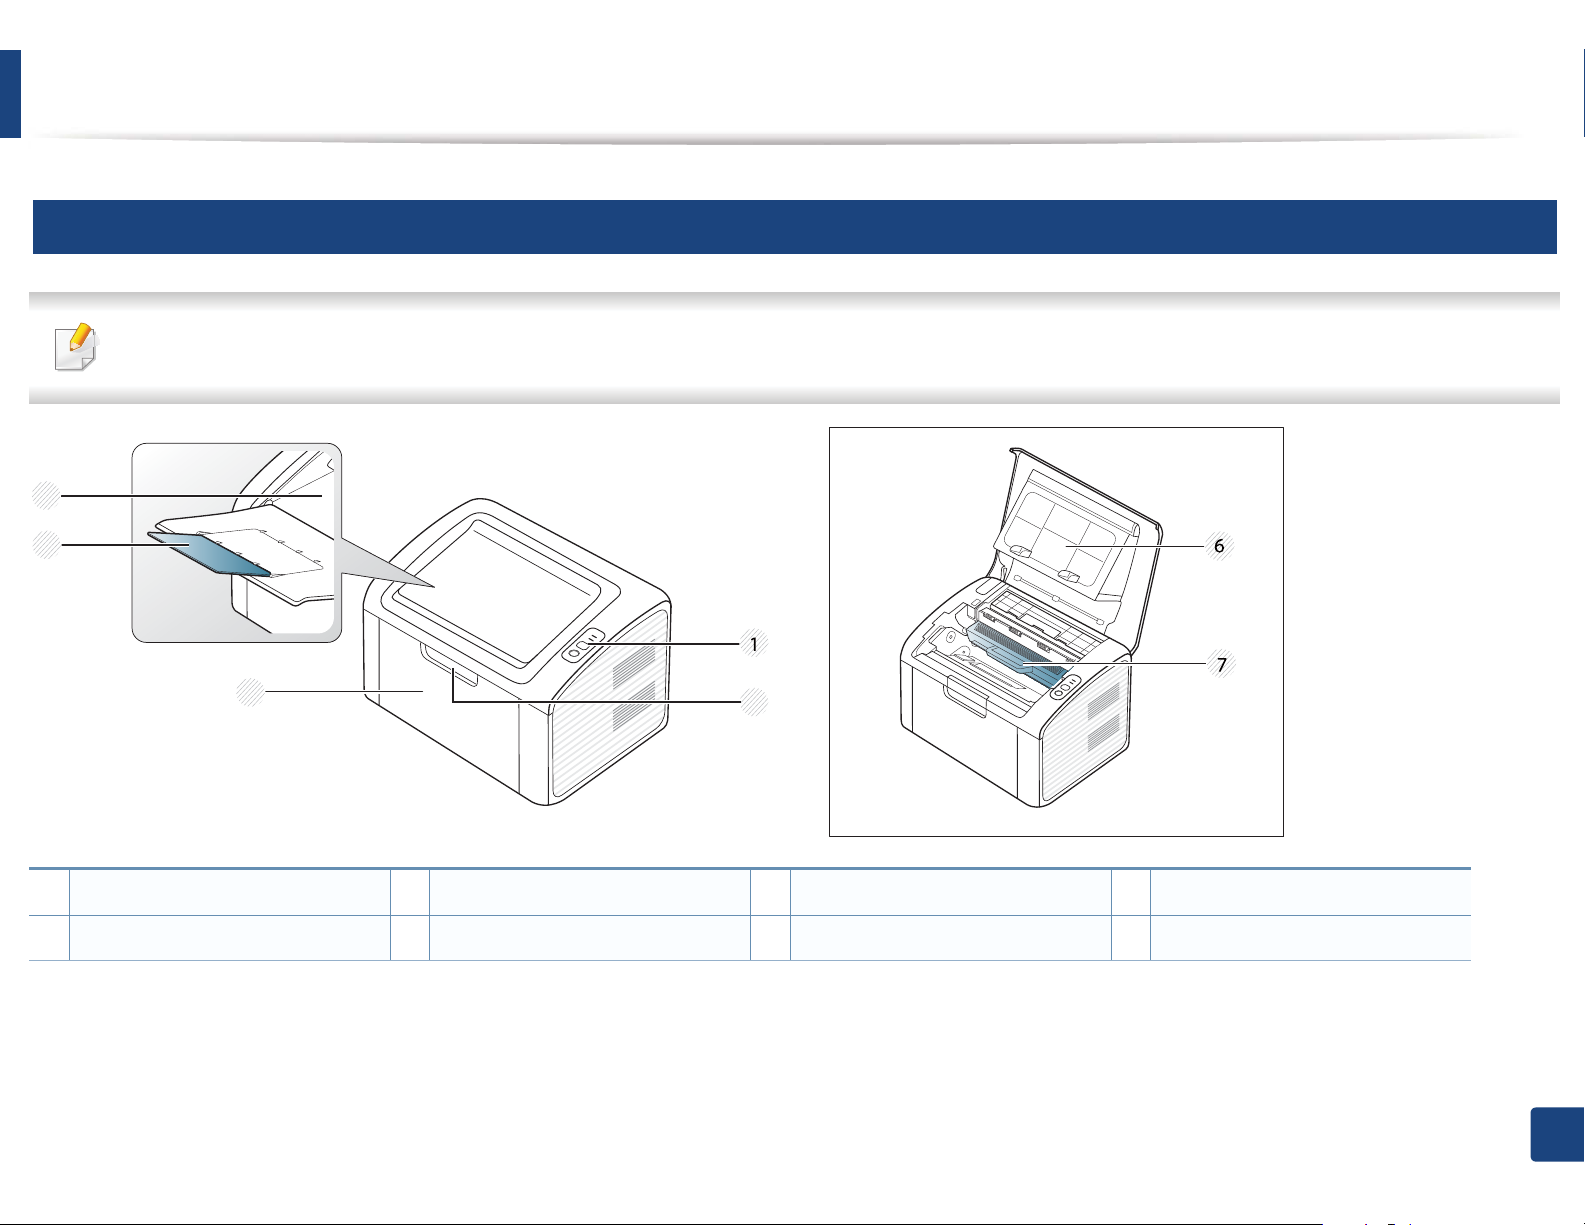
10
Front view
• This illustration may differ from your machine depending on its model.
• Some features and optional goods may not be available depending on model or country (see «Features by models» on page 6).
4
5
3
2
1 Control panel 3 Tray 5 Output support 7 Toner cartridge
2
Tray handle 4 Output tray 6 Top cover
1. Introduction
16
Machine overview
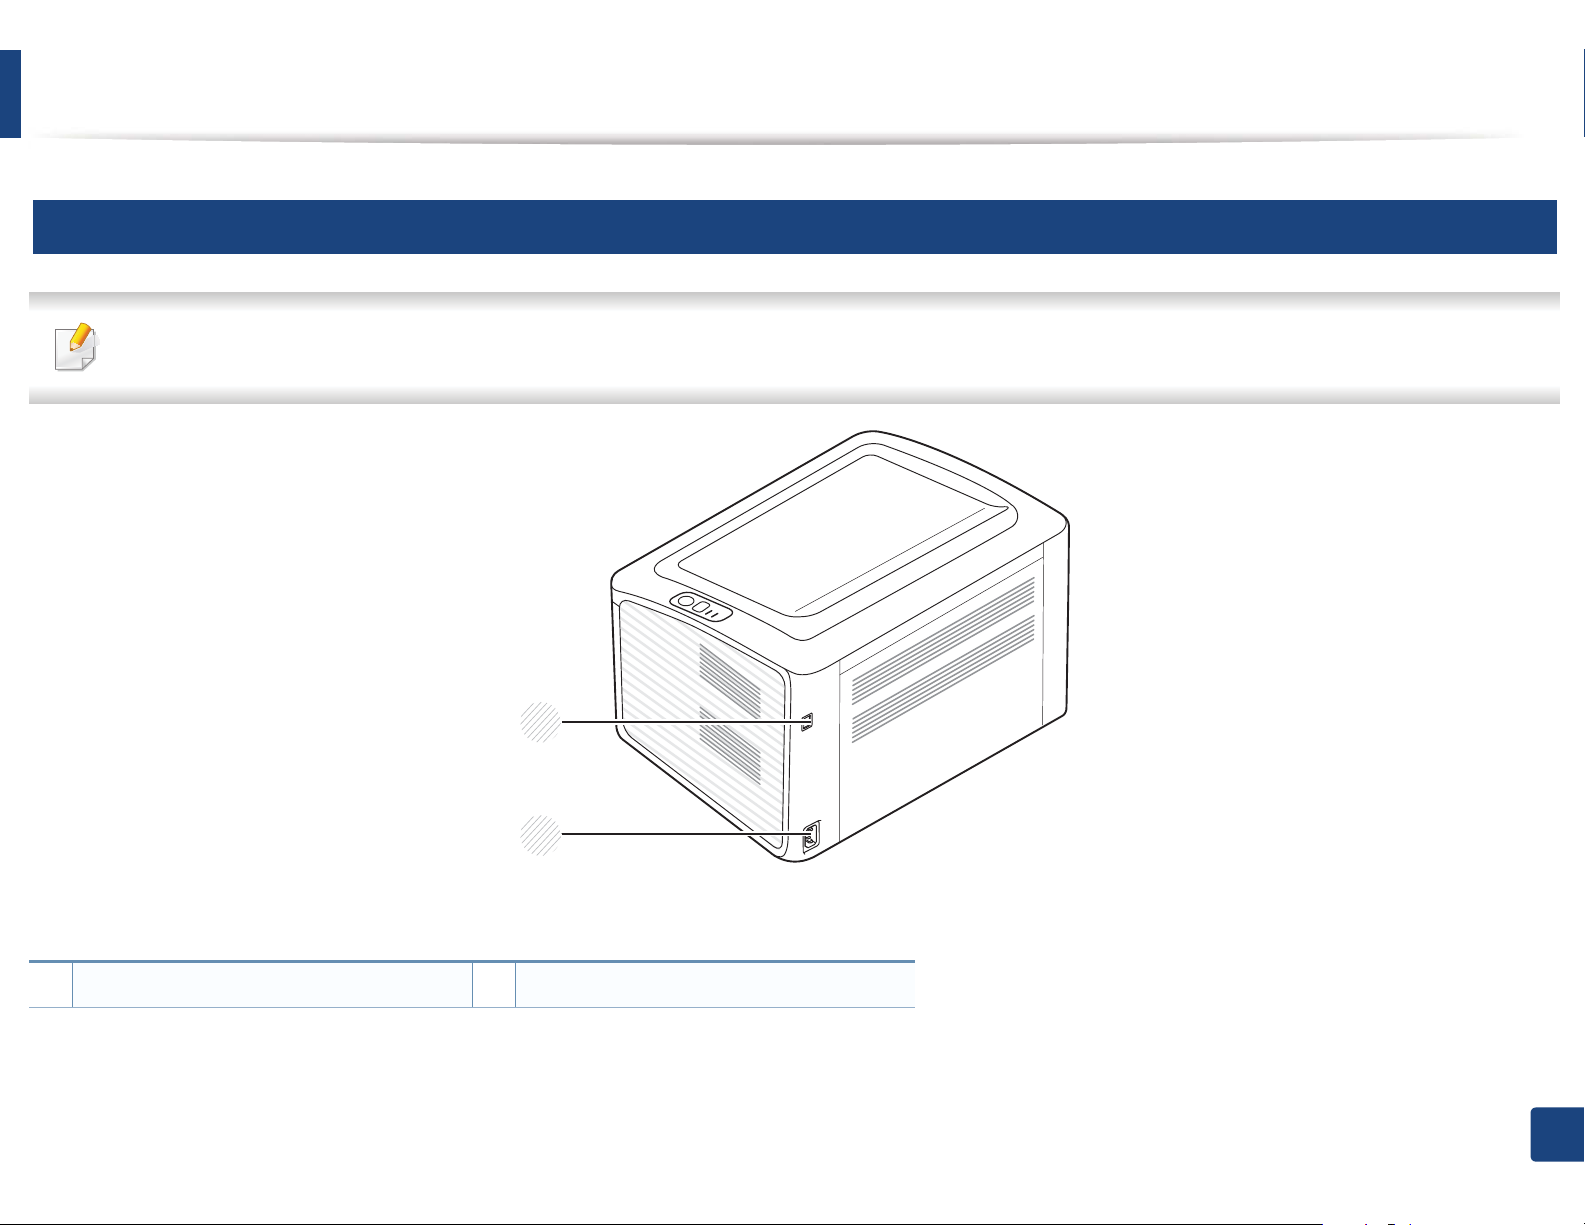
11
Rear view
• This illustration may differ from your machine depending on its model.
• Some features and optional goods may not be available depending on model or country (see «Features by models» on page 6).
1
2
1 USB port 2 Power receptacle
1. Introduction
17

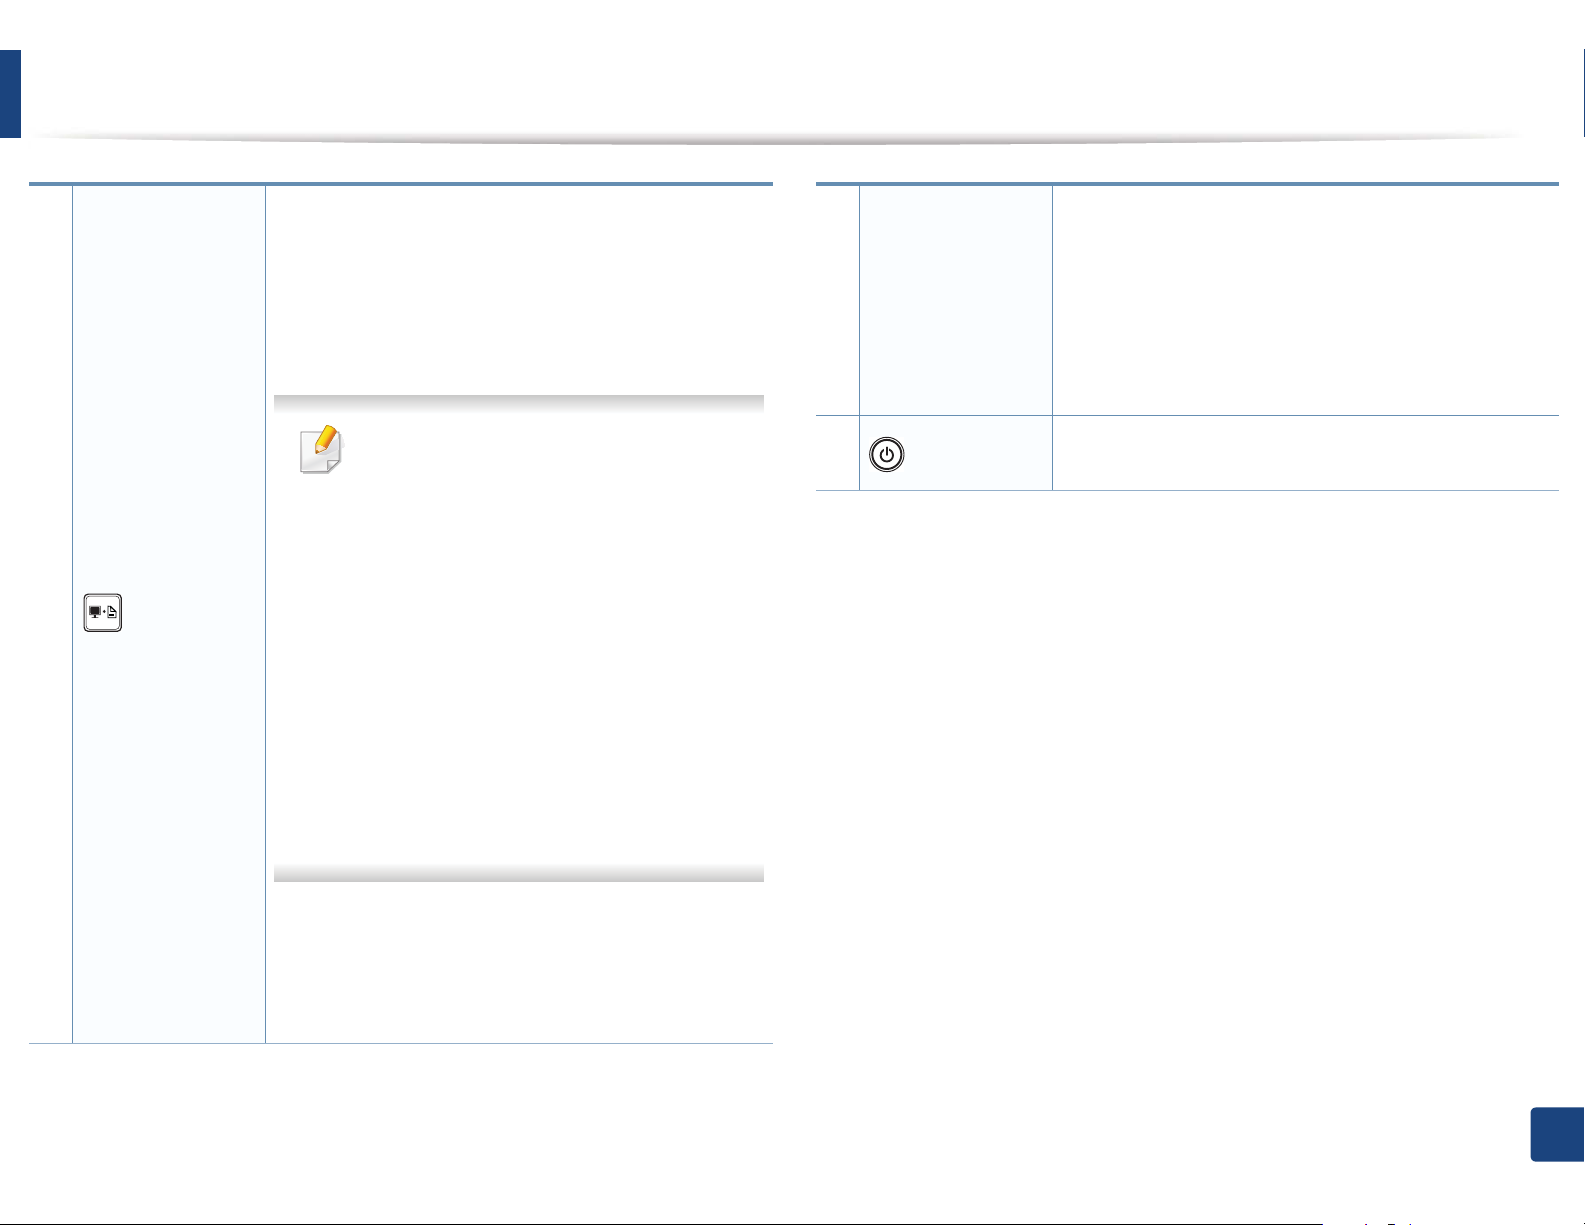
Control panel overview
This control panel may differ from your machine depending on its model.
There are various types of control panels.
1
2
3
(WPS)
Configures the wireless network connection easily
without a computer (see «Wireless network setup» on
page 104).
• configuration sheet
— Press and hold this button for about 10 seconds
until the green LED blinks slowly, and release.
• Prints supplies info report / error report
— Press and hold this button for about 15 seconds
until the green LED on, and release.
1
2
Toner LED
(Status
LED)
3
4
Shows the status of the toner (see «Status LED» on page
56).
Shows the status of your machine (see «Status LED» on
page 56).
• Manual print
— Press this button each time you load a sheet of
paper in the tray if you have selected Manual
Feeder for Source in your printer driver.
1. Introduction
18
Control panel overview
3
(Print screen)
• Prints the screen
— Press this button and the green LED will start
blinking. If you want to print only the active
screen, release the button when the green LED
stops blinking. If you want to print the whole
screen, release the button while it’s blinking.
• Print Screen can only be used in the
Windows and Macintosh operating
systems.
• You can only use this function with USBconnected machine.
• When printing the active window/whole
monitor screen using the print screen
button, the machine may use more toner
depending on what is being printed.
• You can only use this function if the
machine’s Easy Printer Manager program
is installed if you are a macintosh OS user,
you need to enable Screen Print Settings
from the Easy Printer Manager to use the
Print Screen feature.
4
(Power)
• Prints supplies info report / error report
— Press and hold this button for about 15 seconds
until the green LED on, and release.
• Manual print
— Press this button each time you load a sheet of
paper in the tray if you have selected Manual
Feeder for Source in your printer driver.
You can turn the power off or wake the machine up
from the sleep mode with this button.
• configuration sheet
— Press and hold this button for about 10 seconds
until the green LED blinks slowly, and release.
1. Introduction
19
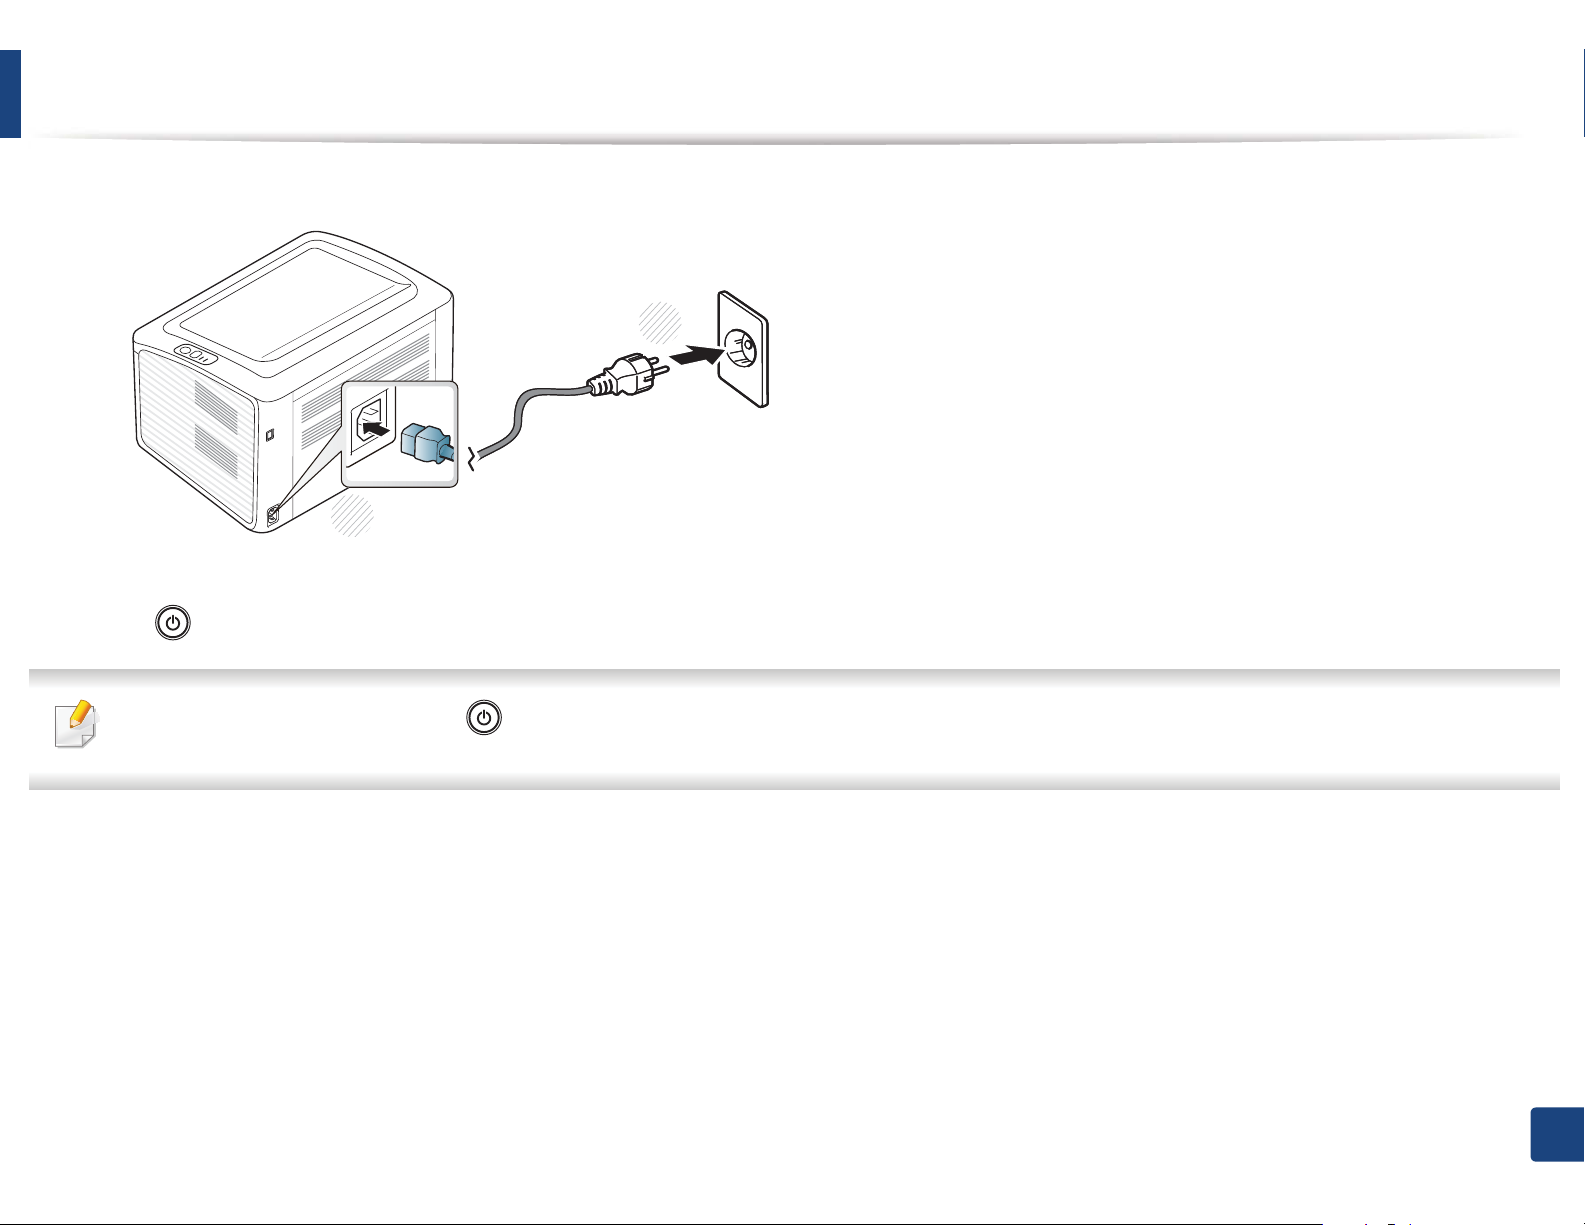
Turning on the machine
Connect the machine to the electricity supply first.
1
2
1
press (power) on the control panel.
2
If you want to turn the power off, press (power) on the control panel.
1. Introduction
20

Installing the driver locally
A locally connected machine is a machine directly attached to your computer
using the cable. If your machine is attached to a network, skip the following
steps below and go on to installing a network connected machine’s driver (see
Advanced Guide).
• If you are a Macintosh or Linux OS user, refer to the «Software
installation» on page 82.
• The installation window in this User’s Guide may differ depending on
the machine and interface in use.
• Selecting Custom Installation allows you to choose which programs to
install.
• Only use a USB cable no longer than 3 meters (118 inches).
12
Windows
Insert the supplied software CD into your CD-ROM drive.
2
The software CD should automatically run and an installation window
will appear.
Select Install Now.
3
Make sure that the machine is connected to your computer and
1
powered on.
If the “Found New Hardware Wizard” appears during the installation
procedure, click Cancel to close the window.
Read License Agreement, and select I accept the terms of the License
4
Agreement. Then, click Next.
Follow the instructions in the installation window.
5
1. Introduction
21

Reinstalling the driver
If the printer driver does not work properly, follow the steps below to reinstall
the driver.
13
Windows
Make sure that the machine is connected to your computer and
1
powered on.
From the Start menu, select Programs or All Programs > Samsung
2
Printers > your printer driver name > Uninstall.
Follow the instructions in the installation window.
3
Insert the software CD into your CD-ROM drive and install the driver
4
again (see «Installing the driver locally» on page 21).
1. Introduction
22

2. Menu overview and basic
setup
After installation is complete, you may want to set the machine’s default settings. Refer to the next section if you would
like to set or change values. This chapter provides information about the overall menu structure and the basic setup
options.
• Printing a demo page 24
• Media and tray 25
• Basic printing 34

Printing a demo page
Print a demo page to make sure that the machine is operating correctly (Windows only).
To print a demo page:
• Open the Printing Preferences (see «Opening printing preferences» on page 35) > Samsung tab > Demo page
2. Menu overview and basic setup
24

Media and tray
This chapter provides information on how to load print media into your
machine.
• Using print media that does not meet these specifications may cause
problems or require repairs. Such repairs are not covered by Samsung’s
warranty or service agreements.
• Make sure not to use the inkjet photo paper with this machine. It could
cause damage to the machine.
• Using inflammable print media can cause a fire.
• Use designated print mediaG(see «Print media specifications» on page
61).
The use of inflammable media or foreign materials left in the printer may
lead to overheating of the unit andS in rare cases may cause a fire.
1
Tray overview
To change the size, you need to adjust the paper guide.
2
1 Paper width guide
1
If you do not adjust the guide, it may cause paper registration, image skew,
or jamming of the paper.
2 Tray
2. Menu overview and basic setup
25
Media and tray
2
Loading paper in the tray
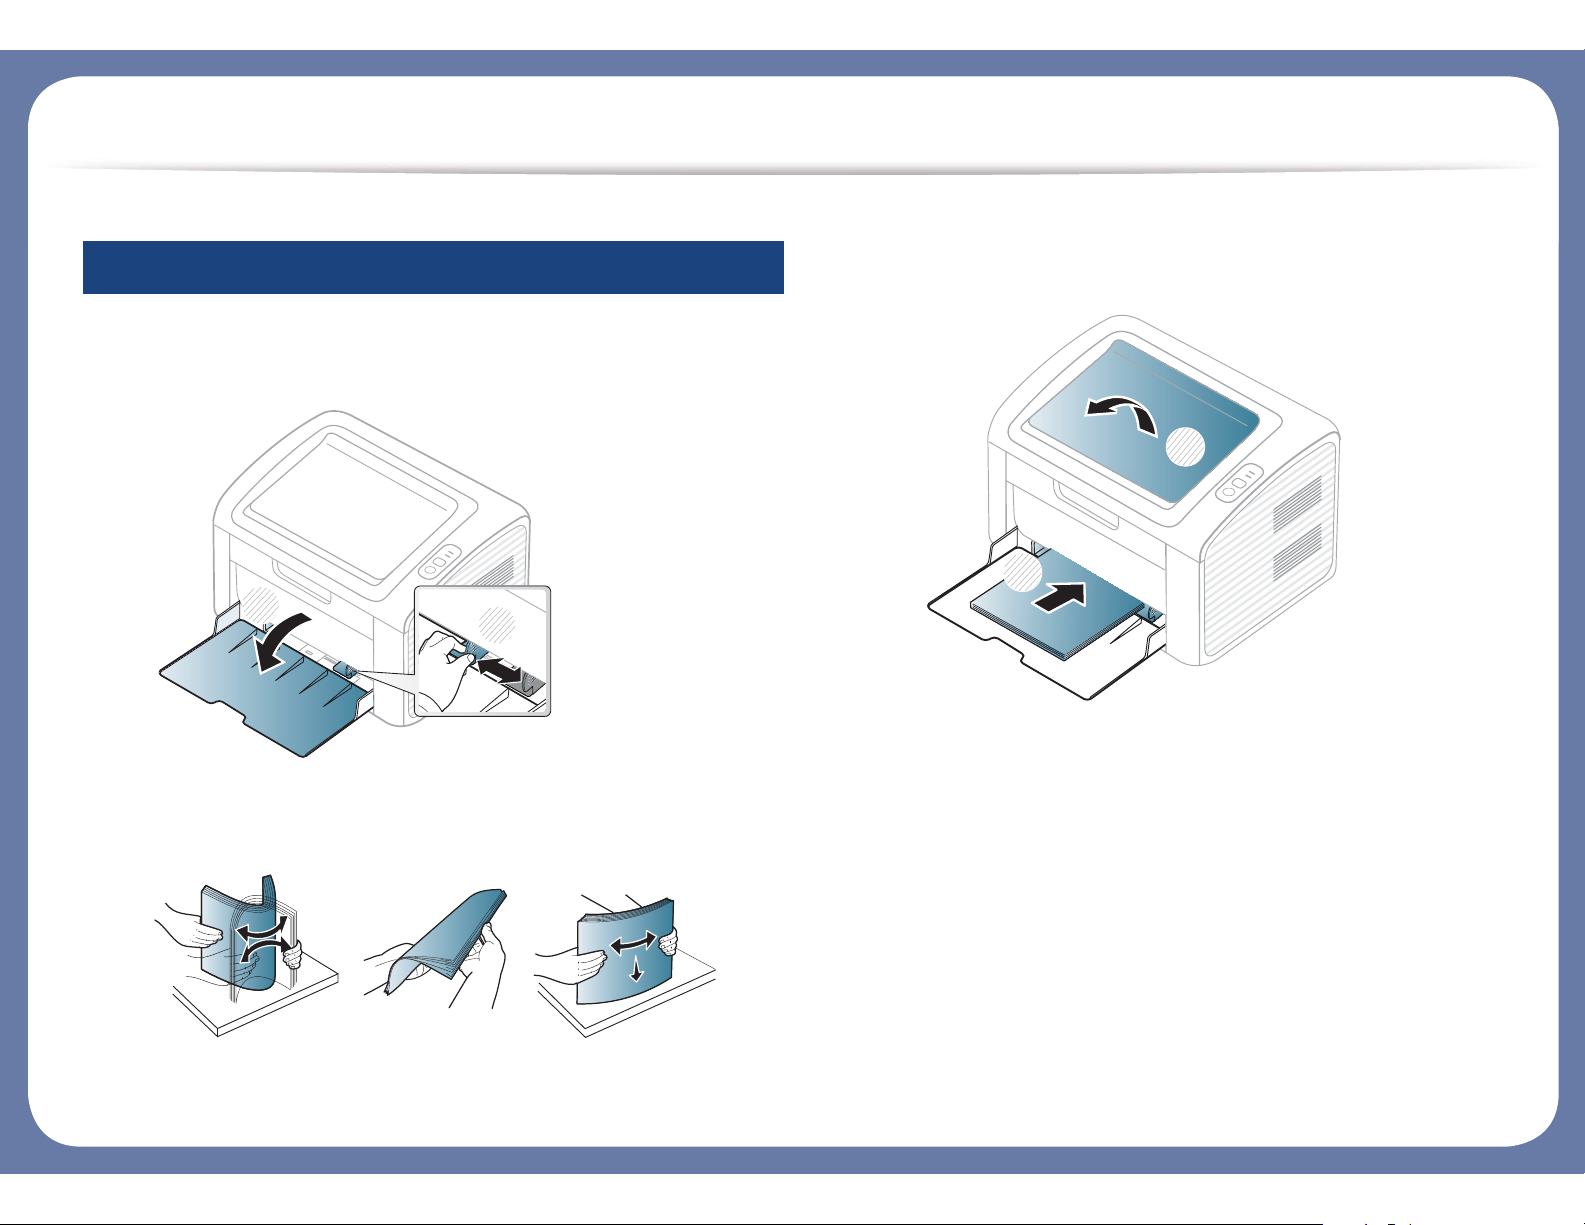
Open the tray. Then, adjust the tray size to the media size you are
1
loading (see «Tray overview» on page 25).
1
Place the paper with the side you want to print facing up and
3
open the output tray.
2
1
2
Flex or fan the edge of the paper stack to separate the pages before
2
loading papers.

Media and tray
Squeeze the paper width guide and slide it to the edge of the paper
4
stack without causing it to bend.
• Do not push the paper width guide too far causing the media to
warp.
When you print a document, set the paper type and size for the tray
5
(see «Setting the paper size and type» on page 33).
The settings made from the machine driver override the settings on
the control panel.
a To print in application, open an application and start the print
menu.
b Open Printing Preferences (see «Opening printing preferences»
on page 35).
c Press the Paper tab in Printing Preferences, and select an
appropriate paper type.
For example, if you want to use a label, set the paper type to Label.
d Select Manual Feeder in paper source, then press OK.
e Start printing in application.
• Do not use a paper with a leading-edge curl, it may cause a paper
jam or the paper can be wrinkled.
• If you do not adjust the paper width guide, it may cause paper
jams.

Media and tray
3
Manual feeding in the tray
The manual feeder can hold special sizes and types of print material, such
as postcards, note cards, and envelopes (see «Print media specifications» on
page 61).
Tips on using the manual feeder
• Load only one type, size and weight of print media at time in the
manual feeder.
• If you select Paper > Source > Manual Feeder for the paper
source in your software application, you need to press (Print
screen) or (WPS) button each time you print a page and load
only one type, size and weight of print media at a time on the
manual tray.
• To prevent paper jams, do not add paper while printing when
there is still paper in the manual feeder.
• When printing on special media, you must follow the loading
guidelines (see «Printing on special media» on page 28).
• When the machine is in a power save mode, the machine does not
feed paper from the manual feeder. Wake up the machine by
pressing the power button before using the manual feeder.
• Print media should be loaded face up with the top edge going into
the manual feeder first and be placed in the center of the tray.
• To ensure printing quality and to prevent paper jams, only load the
available paper (see «Print media specifications» on page 61).
• Flatten any curl on postcards, envelopes, and labels before loading
them into the manual feeder.
4
Printing on special media
The table below shows the special media usable in each tray.
Media and tray
The media types are shown in the Printing Preferences. To get the higest
printing quality, select the proper media type from the Printing Preferences
window > Paper tab > Paper Type (see «Opening printing preferences» on page
35).
For example, if you want to print on labels, select Labels for Paper Type.
When using special media, we recommend you feed one sheet at a time
(see «Print media specifications» on page 61).
To see for paper weights for each sheet, refer to «Print media specifications» on
page 61.
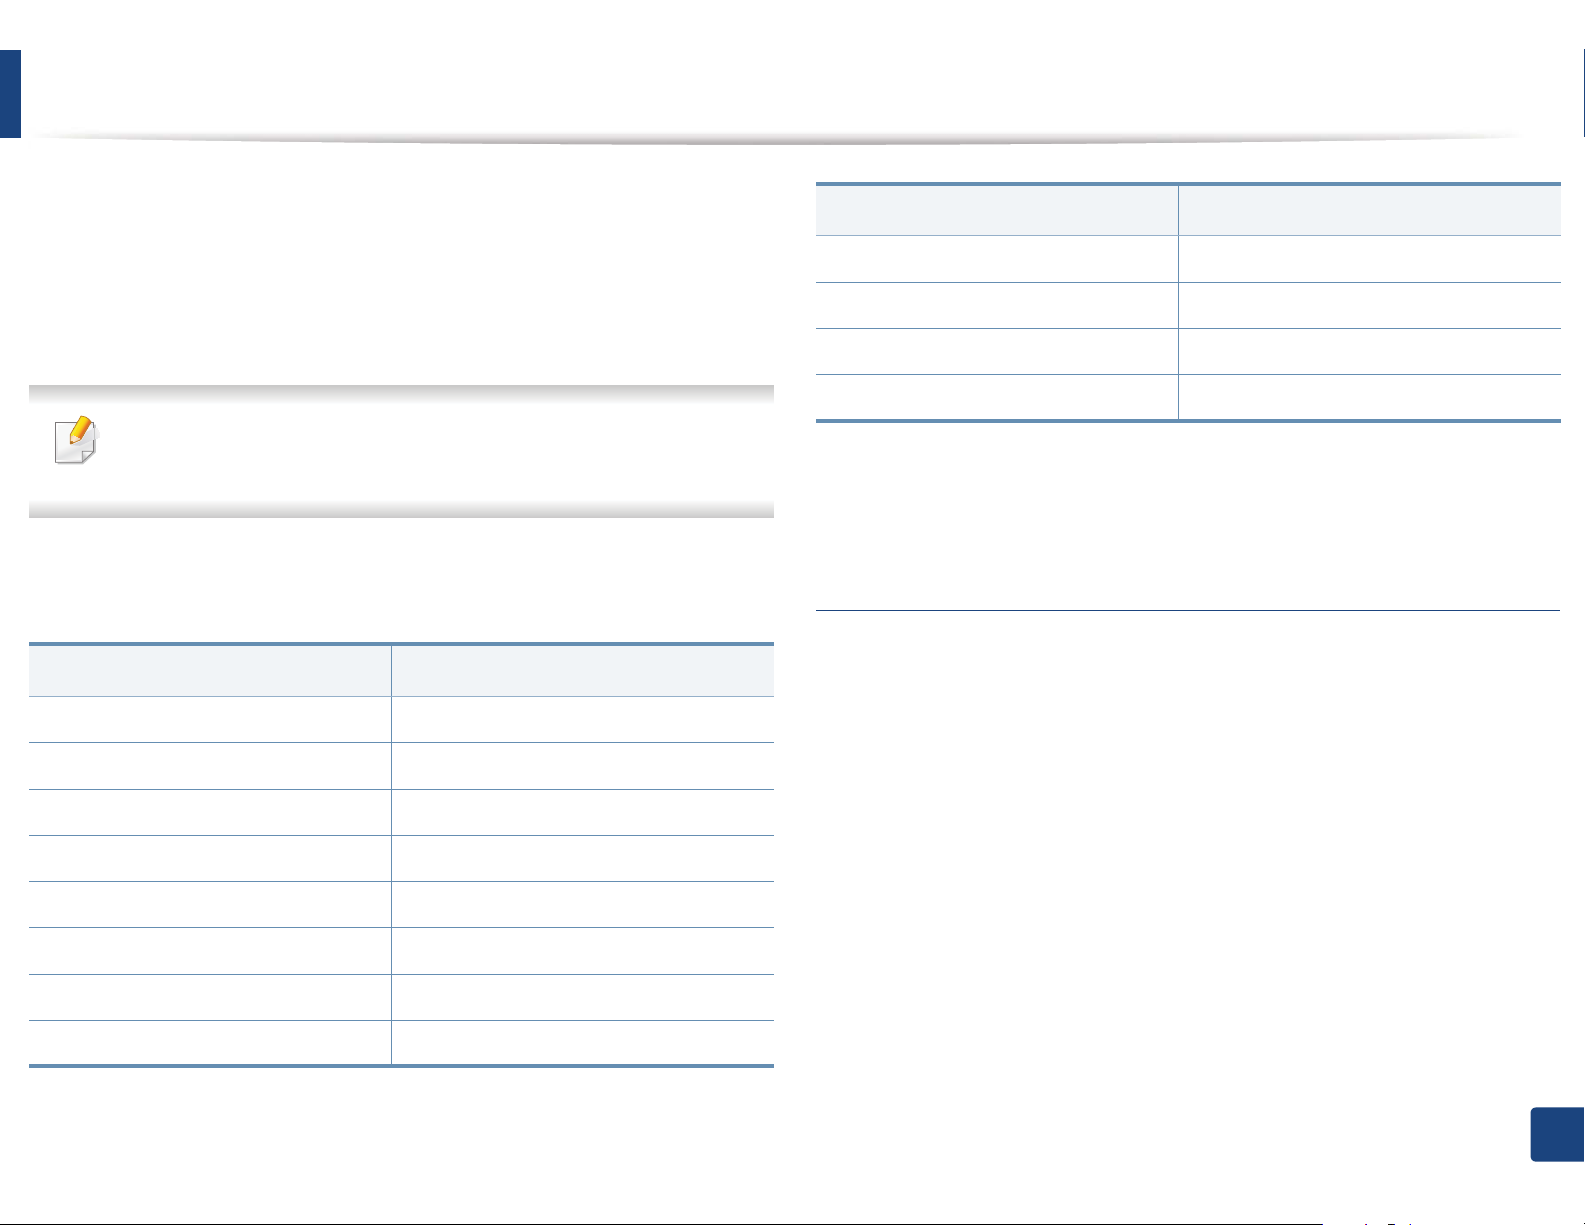
Types
Plain Ɣ
Thick Ɣ
Tray
a
Types
Preprinted Ɣ
Cotton Ɣ
Recycled Ɣ
Archive Ɣ
a. The paper types available manual feeding in tray.
Tray
a
(Ɣ: Included, Blank: Not available)
Envelope
Printing successfully on envelopes depends upon the quality of the envelopes.
Thin Ɣ
Bond Ɣ
Color Ɣ
CardStock Ɣ
Labels Ɣ
Envelope Ɣ
2. Menu overview and basic setup
29
Media and tray
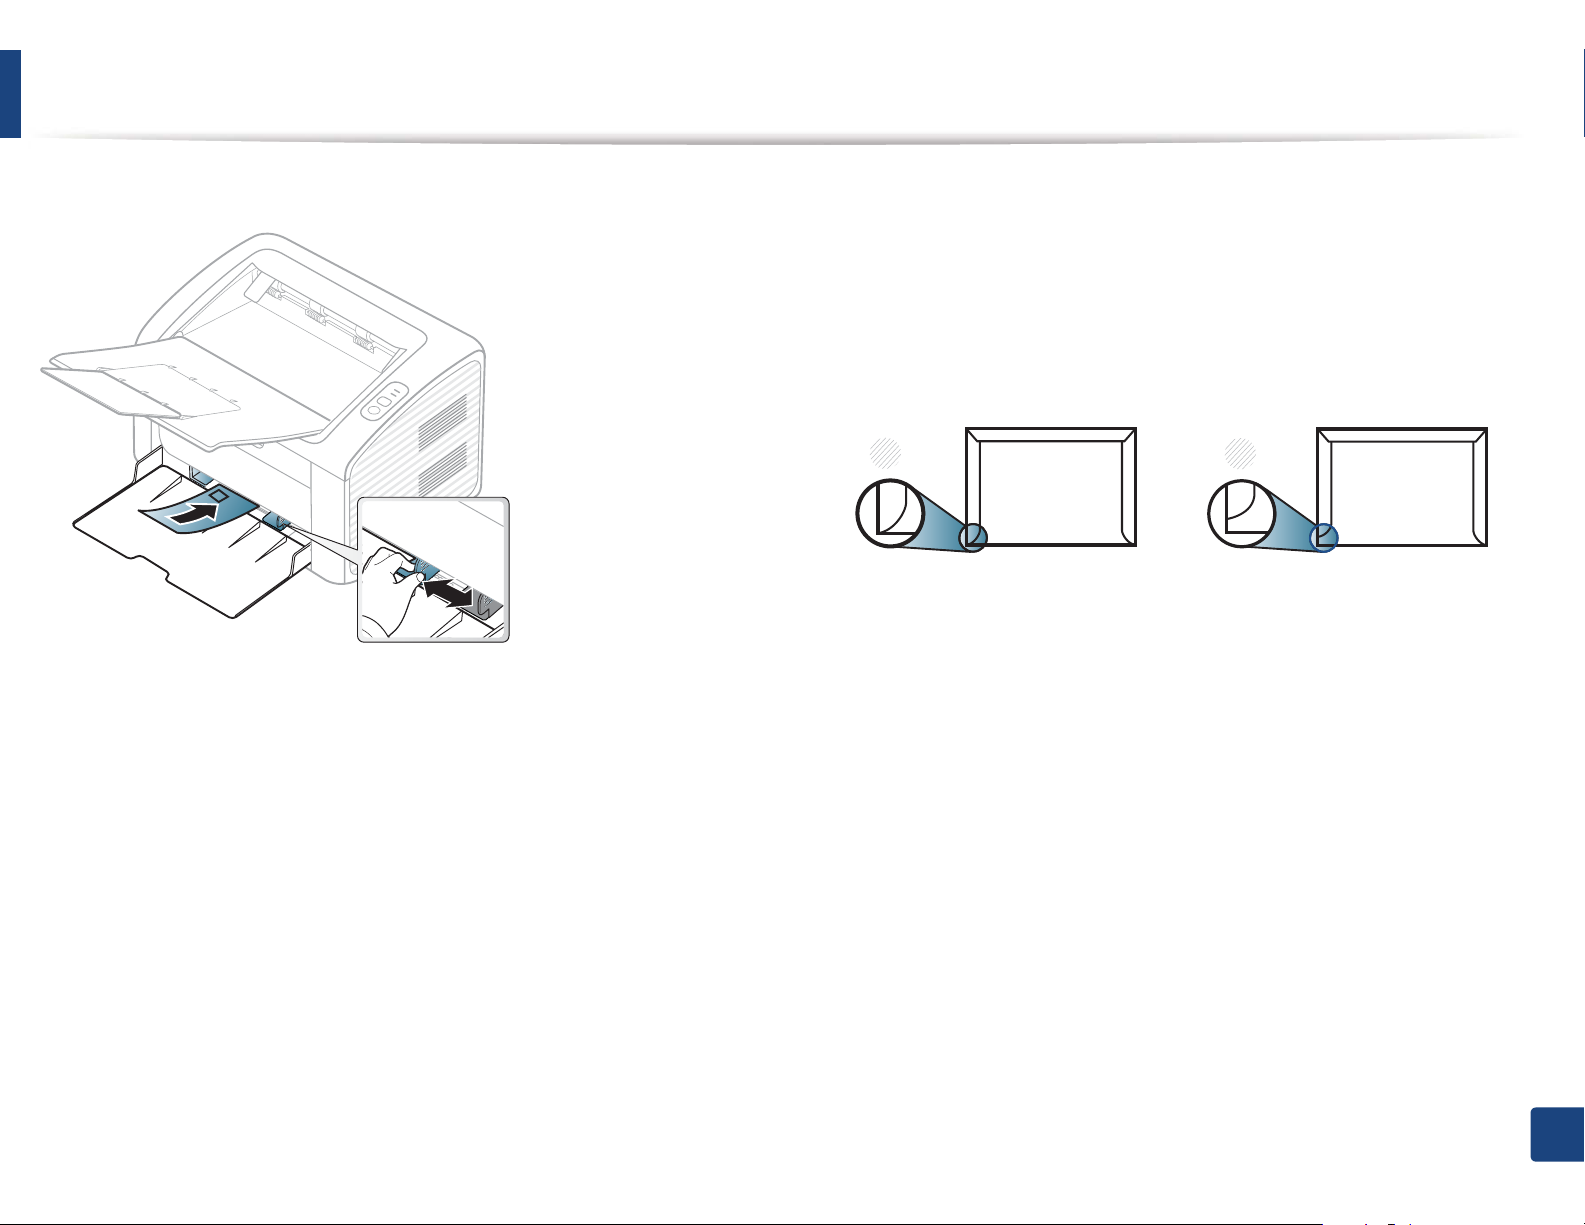
To print an envelope, place it as shown in the following figure.
If you select Envelope from the Printing Preferences window, but the printed
images get easily erased, select Thick Envelope and try printing again.
However, this might cause some noise when printing.
• Do not use stamped envelopes.
• Do not use envelopes with clasps, snaps, windows, coated lining, selfadhesive seals, or other synthetic materials.
• Do not use damaged or poorly made envelopes.
• Be sure the seam at both ends of the envelope extends all the way to the
corner of the envelope.
1
1 Acceptable
2 Unacceptable
• Envelopes with a peel-off adhesive strip or with more than one flap that
folds over to seal must use adhesives compatible with the machine’s fusing
temperature for 0.1 second (about 170°C (338 °F)). The extra flaps and strips
might cause wrinkling, creasing, or jams, and may even damage the fuser.
2
• When selecting envelopes, consider the following factors:
2
— Weight: should not exceed 90 g/m
— Construction: should lie flat with less than 6 mm curl and should not
contain air.
— Condition: should not be wrinkled, nicked, nor damaged.
— Temperature: should resist the heat and pressure of the machine
during operation.
• Use only well-constructed envelopes with sharp and well-creased folds.
otherwise; jams may occur.
• For the best print quality, position margins no closer than 15 mm from the
edges of the envelope.
• Avoid printing over the area where the envelope’s seams meet.
2. Menu overview and basic setup
30
Loading…