
Швейная машина Dragonfly 124 — инструкция пользователя по применению, эксплуатации и установке на русском языке. Мы надеемся, она поможет вам решить возникшие у вас вопросы при эксплуатации техники.
Вы можете скачать инструкцию к Dragonfly 124 по ссылке ниже, если не хотите ждать загрузки. Если остались вопросы, задайте их в комментариях после инструкции.
«Загружаем инструкцию», означает, что нужно подождать пока файл загрузится и можно будет его читать онлайн. Некоторые инструкции очень большие и время их появления зависит от вашей скорости интернета.
Полезные видео
Остались вопросы?
Не нашли свой ответ в руководстве или возникли другие проблемы? Задайте свой вопрос в форме ниже с подробным описанием вашей ситуации, чтобы другие люди и специалисты смогли дать на него ответ. Если вы знаете как решить проблему другого человека, пожалуйста, подскажите ему
Часто задаваемые вопросы
Как посмотреть инструкцию к Dragonfly 124?
Необходимо подождать полной загрузки инструкции в сером окне на данной странице или скачать кликнув по специальной кнопке.
Руководство на русском языке?
Все наши руководства представлены на русском языке или схематично, поэтому вы без труда сможете разобраться с вашей моделью
Как можно распечатать инструкцию?
Скачайте ее по специальной кнопке над формой чтения на ваше устройства и отправьте на печать.

1
ПОДГОТОВКА К РАБОТЕ
Наименование частей . . . . . . . . . . . . . . . . . . . . . . . . . . . . . . . . . .2
Стандартные аксессуары . . . . . . . . . . . . . . . . . . . . . . . . . . . . . . .3
Разновидности прижимных лапок и аксессуаров . . . . . . . .4-5
Съёмный столик . . . . . . . . . . . . . . . . . . . . . . . . . . . . . . . . . . . . . . .6
Хранение аксессуаров . . . . . . . . . . . . . . . . . . . . . . . . . . . . . . . . .6
В дополнительном столике . . . . . . . . . . . . . . . . . . . . . . . . . . . . . .7
Боковая панель . . . . . . . . . . . . . . . . . . . . . . . . . . . . . . . . . . . . . . . .7
Сборка расширительного рабочего стола . . . . . . . . . . . . . . . . .8
Работа с тканенаправителем . . . . . . . . . . . . . . . . . . . . . . . . . . . .8
Установка коленного рычага . . . . . . . . . . . . . . . . . . . . . . . . . . . .9
Подключение питания . . . . . . . . . . . . . . . . . . . . . . . . . . . . . . . . .10
Рабочие кнопки машины . . . . . . . . . . . . . . . . . . . . . . . . . . . . . . .11
Кнопка Старт/Стоп . . . . . . . . . . . . . . . . . . . . . . . . . . . . . . . . . . . .11
Кнопка реверса . . . . . . . . . . . . . . . . . . . . . . . . . . . . . . . . . . . . . . .11
Кнопка автоматической закрепки . . . . . . . . . . . . . . . . . . . . . . .11
Кнопка подъема/опускания иглы . . . . . . . . . . . . . . . . . . . . . . .12
Кнопка обрезки нити . . . . . . . . . . . . . . . . . . . . . . . . . . . . . . . . . .12
Джойстик . . . . . . . . . . . . . . . . . . . . . . . . . . . . . . . . . . . . . . . . . . . .12
Кнопка подтверждения . . . . . . . . . . . . . . . . . . . . . . . . . . . . . . . .12
Функциональные кнопки . . . . . . . . . . . . . . . . . . . . . . . . . . . .13-14
Выбор строчки . . . . . . . . . . . . . . . . . . . . . . . . . . . . . . . . . . . . . . . .15
Кнопка помощи . . . . . . . . . . . . . . . . . . . . . . . . . . . . . . . . . . . . . .16
Установки пользователя . . . . . . . . . . . . . . . . . . . . . . . . . . . .17-20
Яркость экрана . . . . . . . . . . . . . . . . . . . . . . . . . . . . . . . . . . . .17
Звук . . . . . . . . . . . . . . . . . . . . . . . . . . . . . . . . . . . . . . . . . . . . . .17
Время демонстрации дополнительного окна . . . . . . . . . . . . .18
Вызов последних установок . . . . . . . . . . . . . . . . . . . . . . . . .18
Выбор языка . . . . . . . . . . . . . . . . . . . . . . . . . . . . . . . . . . . . . . . . .18
Калибровка сенсорного экрана . . . . . . . . . . . . . . . . . . . . . . . . .19
Возврат всех первоначальных установок стежков . . . . . . . . .20
Удаление сохраненных комбинаций . . . . . . . . . . . . . . . . . . . .20
Возврат всех первоначальных установок . . . . . . . . . . . . . . . .20
Контроль скорости шитья . . . . . . . . . . . . . . . . . . . . . . . . . . . . . .21
Регулятор контроля скорости . . . . . . . . . . . . . . . . . . . . . . . .21
Ножная педаль . . . . . . . . . . . . . . . . . . . . . . . . . . . . . . . . . . . .21
Регулировка давления лапки . . . . . . . . . . . . . . . . . . . . . . . . . . .22
Отключение транспортера ткани . . . . . . . . . . . . . . . . . . . . . . . .22
Подъем и опускание прижимной лапки . . . . . . . . . . . . . . . . .23
Замена прижимной лапки . . . . . . . . . . . . . . . . . . . . . . . . . . . . .24
Снятие прижимной лапки . . . . . . . . . . . . . . . . . . . . . . . . . .24
Установка прижимной лапки . . . . . . . . . . . . . . . . . . . . . . .24
Смена и установка держателя лапки . . . . . . . . . . . . . . . . . . . .24
Снятие держателя лапки . . . . . . . . . . . . . . . . . . . . . . . . . . . .24
Установка держателя лапки . . . . . . . . . . . . . . . . . . . . . . . . .24
Работа с верхним транспортером ткани . . . . . . . . . . . . . . . . .25
Установка лапки-верхнего транспортера ткани . . . . . . . . . . .25
Установка устройства верхнего транспортера . . . . . . . . . . . .25
Отключение устройства верхнего транспортера . . . . . . . . . .26
Снятие лапки-верхний транспортер . . . . . . . . . . . . . . . . . . . . .26
Направительные линии для швов . . . . . . . . . . . . . . . . . . . . . . .27
Создание прямых углов . . . . . . . . . . . . . . . . . . . . . . . . . . . .27
Быстрые измерения в см/дюймах . . . . . . . . . . . . . . . . . . . . . . .27
Сбалансированное натяжение нити . . . . . . . . . . . . . . . . . . . . .28
Сбалансированное натяжения игольной нити . . . . . . . . . . .28
Изменение натяжения нити вручную . . . . . . . . . . . . . . . . . . . .28
Корректировка несбалансированных строчек . . . . . . . . . . . .29
Смена игл . . . . . . . . . . . . . . . . . . . . . . . . . . . . . . . . . . . . . . . . . . .30
Разновидности игл . . . . . . . . . . . . . . . . . . . . . . . . . . . . . . . . . . . .31
Установка катушки ниток . . . . . . . . . . . . . . . . . . . . . . . . . . . . . .32
Дополнительный катушечный стержень . . . . . . . . . . . . . . . . .32
Удаление шпульки . . . . . . . . . . . . . . . . . . . . . . . . . . . . . . . . . . . .32
Намотка шпульки . . . . . . . . . . . . . . . . . . . . . . . . . . . . . . . . . . . . .33
Установка шпульки . . . . . . . . . . . . . . . . . . . . . . . . . . . . . . . . . . .34
Заправка нити в машину . . . . . . . . . . . . . . . . . . . . . . . . . . . . . . .35
Автоматический нитевдеватель . . . . . . . . . . . . . . . . . . . . . . . .36
Вытягивание нижней нити . . . . . . . . . . . . . . . . . . . . . . . . . . . . .37
ОСНОВНЫЕ ШВЕЙНЫЕ ТЕХНИКИ
Прямой стежок . . . . . . . . . . . . . . . . . . . . . . . . . . . . . . . . . . . . . . .38
Начало работы . . . . . . . . . . . . . . . . . . . . . . . . . . . . . . . . . . . .38
Закрепление шва . . . . . . . . . . . . . . . . . . . . . . . . . . . . . . . . . .38
Смена направления шитья . . . . . . . . . . . . . . . . . . . . . . . . . .38
Изменение положения иглы . . . . . . . . . . . . . . . . . . . . . . . .39
Изменение длины стежка . . . . . . . . . . . . . . . . . . . . . . . . . . . . . .39
Программирование персональных установок . . . . . . . . . . . .40
Возврат первоначальных установок . . . . . . . . . . . . . . . . .40
Разнообразие прямых стежков . . . . . . . . . . . . . . . . . . . . . . . . .41
Прямой стежок с левым положением иглы . . . . . . . . . . . . . . .41
Автоматическая закрепка . . . . . . . . . . . . . . . . . . . . . . . . . . . . . .41
Закрепочный стежок . . . . . . . . . . . . . . . . . . . . . . . . . . . . . . . . . .41
Работа от края плотной ткани . . . . . . . . . . . . . . . . . . . . . . . . . .42
Сборки . . . . . . . . . . . . . . . . . . . . . . . . . . . . . . . . . . . . . . . . . . . . . .42
Пришивание молнии . . . . . . . . . . . . . . . . . . . . . . . . . . . . . .43-45
Роликовый шов . . . . . . . . . . . . . . . . . . . . . . . . . . . . . . . . . . . . . .46
Зигзаг . . . . . . . . . . . . . . . . . . . . . . . . . . . . . . . . . . . . . . . . . . . . . . .47
Изменение ширины зигзага . . . . . . . . . . . . . . . . . . . . . . . . .47
Изменение длины стежка . . . . . . . . . . . . . . . . . . . . . . . . . . . . . .47
Обработка края зигзагом . . . . . . . . . . . . . . . . . . . . . . . . . . . . . .48
Аппликация атласными стежками . . . . . . . . . . . . . . . . . . . . . .48
Тройной зигзаг . . . . . . . . . . . . . . . . . . . . . . . . . . . . . . . . . . . . . . .49
Штопка . . . . . . . . . . . . . . . . . . . . . . . . . . . . . . . . . . . . . . . . . . . . .49
Стежок-змейка . . . . . . . . . . . . . . . . . . . . . . . . . . . . . . . . . . . . . . .49
Потайной шов . . . . . . . . . . . . . . . . . . . . . . . . . . . . . . . . . . . . . . .50
Разновидности петель . . . . . . . . . . . . . . . . . . . . . . . . . . . . . . . . .51
Квадратная (сенсорная) петля . . . . . . . . . . . . . . . . . . .52-54
Зажгутованная петля . . . . . . . . . . . . . . . . . . . . . . . . . . . . . . .55
Изменение ширины петли . . . . . . . . . . . . . . . . . . . . . . . . . . . . .56
Изменение плотности стежков петли . . . . . . . . . . . . . . . . . . . .56
Автоматическая петля . . . . . . . . . . . . . . . . . . . . . . . . . . . . . . . . .57
Закругленная петля и петли на тонких тканях . . . . . . . . . . . . .58
Петля с глазком . . . . . . . . . . . . . . . . . . . . . . . . . . . . . . . . . . . . . .58
Трикотажная петля . . . . . . . . . . . . . . . . . . . . . . . . . . . . . . . . . . .59
Декоративная (сенсорная) петля . . . . . . . . . . . . . . . . . . . . .60-61
Пришивание пуговиц . . . . . . . . . . . . . . . . . . . . . . . . . . . . . . . . .62
Тройной стежок стреч . . . . . . . . . . . . . . . . . . . . . . . . . . . . . . . . .63
Стежок стреч . . . . . . . . . . . . . . . . . . . . . . . . . . . . . . . . . . . . . . . . .63
Обработка края . . . . . . . . . . . . . . . . . . . . . . . . . . . . . . . . . . . . . .63
Трикотажный стежок . . . . . . . . . . . . . . . . . . . . . . . . . . . . . . . . . .64
Оверлочный стежок . . . . . . . . . . . . . . . . . . . . . . . . . . . . . . . . . .64
Оверлочный стежок . . . . . . . . . . . . . . . . . . . . . . . . . . . . . . . . . .64
Шов-ракушка . . . . . . . . . . . . . . . . . . . . . . . . . . . . . . . . . . . . . . . .65
Супероверлочный стежок . . . . . . . . . . . . . . . . . . . . . . . . . . . . .65
Заплатка . . . . . . . . . . . . . . . . . . . . . . . . . . . . . . . . . . . . . . . . . .66-67
Закрепка . . . . . . . . . . . . . . . . . . . . . . . . . . . . . . . . . . . . . . . . . . . .68
Выполнение глазков . . . . . . . . . . . . . . . . . . . . . . . . . . . . . . . . . .69
ПЭЧВОРК И КВИЛТИНГ
Сшивание кусочков ткани . . . . . . . . . . . . . . . . . . . . . . . . . . . . .70
Строчки для квилтинга . . . . . . . . . . . . . . . . . . . . . . . . . . . . . . . .70
Работа с устройством двойной подачи ткани . . . . . . . . . . . . .71
Квилтинг . . . . . . . . . . . . . . . . . . . . . . . . . . . . . . . . . . . . . . . . . . . .72
Игольная пластина для прямого стежка . . . . . . . . . . . . . . . . . .72
Декоративная аппликация . . . . . . . . . . . . . . . . . . . . . . . . . . . . .73
Аппликация . . . . . . . . . . . . . . . . . . . . . . . . . . . . . . . . . . . . . . . . . .74
Стежки для печворка . . . . . . . . . . . . . . . . . . . . . . . . . . . . . . . . . .74
Наметка . . . . . . . . . . . . . . . . . . . . . . . . . . . . . . . . . . . . . . . . . . . . .75
Свободный квилтинг . . . . . . . . . . . . . . . . . . . . . . . . . . . . . . . . . .76
Стипплинг . . . . . . . . . . . . . . . . . . . . . . . . . . . . . . . . . . . . . . . . . . .77
ДЕКОРАТИВНЫЕ СТРОЧКИ
Узкие складки . . . . . . . . . . . . . . . . . . . . . . . . . . . . . . . . . . . . . . . .78
Мережка . . . . . . . . . . . . . . . . . . . . . . . . . . . . . . . . . . . . . . . . . . . .78
Бахрома . . . . . . . . . . . . . . . . . . . . . . . . . . . . . . . . . . . . . . . . . . . . .79
Прореживание . . . . . . . . . . . . . . . . . . . . . . . . . . . . . . . . . . . . . . .79
Сборки . . . . . . . . . . . . . . . . . . . . . . . . . . . . . . . . . . . . . . . . . . . . . .80
Французские узлы . . . . . . . . . . . . . . . . . . . . . . . . . . . . . . . . . . . .81
Фестоны . . . . . . . . . . . . . . . . . . . . . . . . . . . . . . . . . . . . . . . . . . . . .81
Пришивание шнура (тройной шнур) . . . . . . . . . . . . . . . . . . . .82
Пришивание шнура (одинарный шнур) . . . . . . . . . . . . . . . . .82
Атласные строчки . . . . . . . . . . . . . . . . . . . . . . . . . . . . . . . . . . . .83
Бордюры с лапкой-направителем для бордюров . . . . . . . . .83
Шитье по кругу . . . . . . . . . . . . . . . . . . . . . . . . . . . . . . . . . . . . . .84
Строчка с двойной иглой . . . . . . . . . . . . . . . . . . . . . . . . . . .85-86
Шов двойной иглой . . . . . . . . . . . . . . . . . . . . . . . . . . . . . . . . . .87
ПРОГРАММИРОВАНИЕ КОМБИНАЦИЙ СТРОЧЕК
Строчка с автоматической закрепкой . . . . . . . . . . . . . . . . . . .88
Комбинация строчек . . . . . . . . . . . . . . . . . . . . . . . . . . . . . . . . . .89
Выполнение комбинации строчек с начала . . . . . . . . . . . . . .90
Выполнение текущей строчки с начала . . . . . . . . . . . . . . . . . .90
Программирование автоматической обрезки нитки . . . . . . .91
Проверка свойств комбинаций строчек . . . . . . . . . . . . . . . . . .91
Строчки с мостиками . . . . . . . . . . . . . . . . . . . . . . . . . . . . . . . . . .92
МОНОГРАММЫ
Выбор стиля . . . . . . . . . . . . . . . . . . . . . . . . . . . . . . . . . . . . . . . . .93
Выбор букв . . . . . . . . . . . . . . . . . . . . . . . . . . . . . . . . . . . . . . . . . .93
Программирование монограмм . . . . . . . . . . . . . . . . . . . . . . . .94
РЕДАКТИРОВАНИЕ КОМБИНАЦИИ СТРОЧЕК
Просмотр длинной комбинации . . . . . . . . . . . . . . . . . . . . . . . .95
Редактирование . . . . . . . . . . . . . . . . . . . . . . . . . . . . . . . . . . . . . .95
Единое изменение ширины или длины стежка . . . . . . . . . . .96
Индивидуальное изменение ширины или длины стежка . . .97
СОХРАНЕНИЕ И ВЫЗОВ КОМБИНАЦИИ СТРОЧЕК
Постоянная память . . . . . . . . . . . . . . . . . . . . . . . . . . . . . . . . . . .98
Перезапись сохраненной комбинации строчек . . . . . . . . . . .98
Вызов сохраненной комбинации строчек . . . . . . . . . . . . . . . .99
Удаление сохраненной комбинации строчек . . . . . . . . . . . . .99
УХОД ЗА МАШИНОЙ
Чистка шпульного отсека, тканенаправителей
и нитеобрезателя . . . . . . . . . . . . . . . . . . . . . . . . . . . . . . . . . . . .100
Установка шпуледержателя и игольной пластины . . . . . . . .100
Проблемы и предупреждающие сигналы . . . . . . . . . . . .101-102
Устранение неисправностей . . . . . . . . . . . . . . . . . . . . . . . . . . .103
СОДЕРЖАНИЕ
ВАЖНЫЕ ИНСТРУКЦИИ ПО БЕЗОПАСНОСТИ
Машина не предназначена для использования детьми и психически нездоровыми людьми, людьми с
ограниченными возможностями без достаточного опыта и надлежащего присмотра. Не позволяйте детям играть с
ней.
Эта машина сконструирована и разработана только для бытового использования.
Перед началом работы на машине внимательно прочитайте все инструкции по пользованию.
ОПАСНО —
Во избежание риска удара электрическим током:
1. Никогда не оставляйте включенную в сеть машину без присмотра. Всегда отключайте прибор от сети сразу же
после работы и перед началом чистки.
ВНИМАНИЕ —
Во избежание ожогов, пожара, удара электрическим током или нанесения
повреждений пользователю:
1. Не позволяйте играть с машиной. Будьте внимательны при работе, если в помещении находятся дети.
2. Используйте прибор только по его прямому назначению, описанному в этой инструкции. Используйте
приспособления, только рекомендуемые производителем и описанные в инструкции.
3. Не используйте машину, если у нее поврежденный шнур или вилка, в случае, если она падала, была повреждена,
попала в воду или работает неправильно. Отнесите машину к ближайшему авторизованному дилеру для ремонта
или наладки.
4. Машина должна работать только с открытыми вентиляционными отверстиями. Периодически чистите
вентиляционные области машины и ножную педаль от пыли, грязи и остатков материи.
5. Ничего не кидайте и не вставляйте в вентиляционные отверстия.
6. Работайте на машине только в помещении.
7. Не работайте в помещении, где распылялись аэрозоли или использовался кислород.
8. Чтобы отключить машину, сначала поставьте все выключатели в положение ВЫКЛ., затем отсоедините вилку от
электрической розетки.
9. Не тяните вилку из розетки за шнур, берите вилку за корпус.
10. Будьте осторожны при работе с движущимися частями машины. Особое внимание уделяйте рабочей области
вокруг иглы.
11. Используйте только оригинальную игольную пластину. Из-за неправильной пластины может сломаться игла.
12. Не используйте гнутые иглы.
13. Не тяните и не толкайте ткань при шитье, может сломаться игла.
14. Всегда отключайте питание машины при регулировке или замене деталей в области работы иглы: заправке нити в
иглу, смене иглы, заправке нижней нити, смене прижимной лапки и т.д.
15. Всегда отключайте машину от электрической розетки при проведении профилактических работ, снятии панелей и
других процедур, описанных в этой инструкции.
СОХРАНЯЙТЕ ЭТИ ИНСТРУКЦИИ
Внешний вид и характеристики машины могут изменяться без предварительного уведомления.
1
ПОДГОТОВКА К РАБОТЕ
Наименование частей . . . . . . . . . . . . . . . . . . . . . . . . . . . . . . . . . .2
Стандартные аксессуары . . . . . . . . . . . . . . . . . . . . . . . . . . . . . . .3
Разновидности прижимных лапок и аксессуаров . . . . . . . .4-5
Съёмный столик . . . . . . . . . . . . . . . . . . . . . . . . . . . . . . . . . . . . . . .6
Хранение аксессуаров . . . . . . . . . . . . . . . . . . . . . . . . . . . . . . . . .6
В дополнительном столике . . . . . . . . . . . . . . . . . . . . . . . . . . . . . .7
Боковая панель . . . . . . . . . . . . . . . . . . . . . . . . . . . . . . . . . . . . . . . .7
Сборка расширительного рабочего стола . . . . . . . . . . . . . . . . .8
Работа с тканенаправителем . . . . . . . . . . . . . . . . . . . . . . . . . . . .8
Установка коленного рычага . . . . . . . . . . . . . . . . . . . . . . . . . . . .9
Подключение питания . . . . . . . . . . . . . . . . . . . . . . . . . . . . . . . . .10
Рабочие кнопки машины . . . . . . . . . . . . . . . . . . . . . . . . . . . . . . .11
Кнопка Старт/Стоп . . . . . . . . . . . . . . . . . . . . . . . . . . . . . . . . . . . .11
Кнопка реверса . . . . . . . . . . . . . . . . . . . . . . . . . . . . . . . . . . . . . . .11
Кнопка автоматической закрепки . . . . . . . . . . . . . . . . . . . . . . .11
Кнопка подъема/опускания иглы . . . . . . . . . . . . . . . . . . . . . . .12
Кнопка обрезки нити . . . . . . . . . . . . . . . . . . . . . . . . . . . . . . . . . .12
Джойстик . . . . . . . . . . . . . . . . . . . . . . . . . . . . . . . . . . . . . . . . . . . .12
Кнопка подтверждения . . . . . . . . . . . . . . . . . . . . . . . . . . . . . . . .12
Функциональные кнопки . . . . . . . . . . . . . . . . . . . . . . . . . . . .13-14
Выбор строчки . . . . . . . . . . . . . . . . . . . . . . . . . . . . . . . . . . . . . . . .15
Кнопка помощи . . . . . . . . . . . . . . . . . . . . . . . . . . . . . . . . . . . . . .16
Установки пользователя . . . . . . . . . . . . . . . . . . . . . . . . . . . .17-20
Яркость экрана . . . . . . . . . . . . . . . . . . . . . . . . . . . . . . . . . . . .17
Звук . . . . . . . . . . . . . . . . . . . . . . . . . . . . . . . . . . . . . . . . . . . . . .17
Время демонстрации дополнительного окна . . . . . . . . . . . . .18
Вызов последних установок . . . . . . . . . . . . . . . . . . . . . . . . .18
Выбор языка . . . . . . . . . . . . . . . . . . . . . . . . . . . . . . . . . . . . . . . . .18
Калибровка сенсорного экрана . . . . . . . . . . . . . . . . . . . . . . . . .19
Возврат всех первоначальных установок стежков . . . . . . . . .20
Удаление сохраненных комбинаций . . . . . . . . . . . . . . . . . . . .20
Возврат всех первоначальных установок . . . . . . . . . . . . . . . .20
Контроль скорости шитья . . . . . . . . . . . . . . . . . . . . . . . . . . . . . .21
Регулятор контроля скорости . . . . . . . . . . . . . . . . . . . . . . . .21
Ножная педаль . . . . . . . . . . . . . . . . . . . . . . . . . . . . . . . . . . . .21
Регулировка давления лапки . . . . . . . . . . . . . . . . . . . . . . . . . . .22
Отключение транспортера ткани . . . . . . . . . . . . . . . . . . . . . . . .22
Подъем и опускание прижимной лапки . . . . . . . . . . . . . . . . .23
Замена прижимной лапки . . . . . . . . . . . . . . . . . . . . . . . . . . . . .24
Снятие прижимной лапки . . . . . . . . . . . . . . . . . . . . . . . . . .24
Установка прижимной лапки . . . . . . . . . . . . . . . . . . . . . . .24
Смена и установка держателя лапки . . . . . . . . . . . . . . . . . . . .24
Снятие держателя лапки . . . . . . . . . . . . . . . . . . . . . . . . . . . .24
Установка держателя лапки . . . . . . . . . . . . . . . . . . . . . . . . .24
Работа с верхним транспортером ткани . . . . . . . . . . . . . . . . .25
Установка лапки-верхнего транспортера ткани . . . . . . . . . . .25
Установка устройства верхнего транспортера . . . . . . . . . . . .25
Отключение устройства верхнего транспортера . . . . . . . . . .26
Снятие лапки-верхний транспортер . . . . . . . . . . . . . . . . . . . . .26
Направительные линии для швов . . . . . . . . . . . . . . . . . . . . . . .27
Создание прямых углов . . . . . . . . . . . . . . . . . . . . . . . . . . . .27
Быстрые измерения в см/дюймах . . . . . . . . . . . . . . . . . . . . . . .27
Сбалансированное натяжение нити . . . . . . . . . . . . . . . . . . . . .28
Сбалансированное натяжения игольной нити . . . . . . . . . . .28
Изменение натяжения нити вручную . . . . . . . . . . . . . . . . . . . .28
Корректировка несбалансированных строчек . . . . . . . . . . . .29
Смена игл . . . . . . . . . . . . . . . . . . . . . . . . . . . . . . . . . . . . . . . . . . .30
Разновидности игл . . . . . . . . . . . . . . . . . . . . . . . . . . . . . . . . . . . .31
Установка катушки ниток . . . . . . . . . . . . . . . . . . . . . . . . . . . . . .32
Дополнительный катушечный стержень . . . . . . . . . . . . . . . . .32
Удаление шпульки . . . . . . . . . . . . . . . . . . . . . . . . . . . . . . . . . . . .32
Намотка шпульки . . . . . . . . . . . . . . . . . . . . . . . . . . . . . . . . . . . . .33
Установка шпульки . . . . . . . . . . . . . . . . . . . . . . . . . . . . . . . . . . .34
Заправка нити в машину . . . . . . . . . . . . . . . . . . . . . . . . . . . . . . .35
Автоматический нитевдеватель . . . . . . . . . . . . . . . . . . . . . . . .36
Вытягивание нижней нити . . . . . . . . . . . . . . . . . . . . . . . . . . . . .37
ОСНОВНЫЕ ШВЕЙНЫЕ ТЕХНИКИ
Прямой стежок . . . . . . . . . . . . . . . . . . . . . . . . . . . . . . . . . . . . . . .38
Начало работы . . . . . . . . . . . . . . . . . . . . . . . . . . . . . . . . . . . .38
Закрепление шва . . . . . . . . . . . . . . . . . . . . . . . . . . . . . . . . . .38
Смена направления шитья . . . . . . . . . . . . . . . . . . . . . . . . . .38
Изменение положения иглы . . . . . . . . . . . . . . . . . . . . . . . .39
Изменение длины стежка . . . . . . . . . . . . . . . . . . . . . . . . . . . . . .39
Программирование персональных установок . . . . . . . . . . . .40
Возврат первоначальных установок . . . . . . . . . . . . . . . . .40
Разнообразие прямых стежков . . . . . . . . . . . . . . . . . . . . . . . . .41
Прямой стежок с левым положением иглы . . . . . . . . . . . . . . .41
Автоматическая закрепка . . . . . . . . . . . . . . . . . . . . . . . . . . . . . .41
Закрепочный стежок . . . . . . . . . . . . . . . . . . . . . . . . . . . . . . . . . .41
Работа от края плотной ткани . . . . . . . . . . . . . . . . . . . . . . . . . .42
Сборки . . . . . . . . . . . . . . . . . . . . . . . . . . . . . . . . . . . . . . . . . . . . . .42
Пришивание молнии . . . . . . . . . . . . . . . . . . . . . . . . . . . . . .43-45
Роликовый шов . . . . . . . . . . . . . . . . . . . . . . . . . . . . . . . . . . . . . .46
Зигзаг . . . . . . . . . . . . . . . . . . . . . . . . . . . . . . . . . . . . . . . . . . . . . . .47
Изменение ширины зигзага . . . . . . . . . . . . . . . . . . . . . . . . .47
Изменение длины стежка . . . . . . . . . . . . . . . . . . . . . . . . . . . . . .47
Обработка края зигзагом . . . . . . . . . . . . . . . . . . . . . . . . . . . . . .48
Аппликация атласными стежками . . . . . . . . . . . . . . . . . . . . . .48
Тройной зигзаг . . . . . . . . . . . . . . . . . . . . . . . . . . . . . . . . . . . . . . .49
Штопка . . . . . . . . . . . . . . . . . . . . . . . . . . . . . . . . . . . . . . . . . . . . .49
Стежок-змейка . . . . . . . . . . . . . . . . . . . . . . . . . . . . . . . . . . . . . . .49
Потайной шов . . . . . . . . . . . . . . . . . . . . . . . . . . . . . . . . . . . . . . .50
Разновидности петель . . . . . . . . . . . . . . . . . . . . . . . . . . . . . . . . .51
Квадратная (сенсорная) петля . . . . . . . . . . . . . . . . . . .52-54
Зажгутованная петля . . . . . . . . . . . . . . . . . . . . . . . . . . . . . . .55
Изменение ширины петли . . . . . . . . . . . . . . . . . . . . . . . . . . . . .56
Изменение плотности стежков петли . . . . . . . . . . . . . . . . . . . .56
Автоматическая петля . . . . . . . . . . . . . . . . . . . . . . . . . . . . . . . . .57
Закругленная петля и петли на тонких тканях . . . . . . . . . . . . .58
Петля с глазком . . . . . . . . . . . . . . . . . . . . . . . . . . . . . . . . . . . . . .58
Трикотажная петля . . . . . . . . . . . . . . . . . . . . . . . . . . . . . . . . . . .59
Декоративная (сенсорная) петля . . . . . . . . . . . . . . . . . . . . .60-61
Пришивание пуговиц . . . . . . . . . . . . . . . . . . . . . . . . . . . . . . . . .62
Тройной стежок стреч . . . . . . . . . . . . . . . . . . . . . . . . . . . . . . . . .63
Стежок стреч . . . . . . . . . . . . . . . . . . . . . . . . . . . . . . . . . . . . . . . . .63
Обработка края . . . . . . . . . . . . . . . . . . . . . . . . . . . . . . . . . . . . . .63
Трикотажный стежок . . . . . . . . . . . . . . . . . . . . . . . . . . . . . . . . . .64
Оверлочный стежок . . . . . . . . . . . . . . . . . . . . . . . . . . . . . . . . . .64
Оверлочный стежок . . . . . . . . . . . . . . . . . . . . . . . . . . . . . . . . . .64
Шов-ракушка . . . . . . . . . . . . . . . . . . . . . . . . . . . . . . . . . . . . . . . .65
Супероверлочный стежок . . . . . . . . . . . . . . . . . . . . . . . . . . . . .65
Заплатка . . . . . . . . . . . . . . . . . . . . . . . . . . . . . . . . . . . . . . . . . .66-67
Закрепка . . . . . . . . . . . . . . . . . . . . . . . . . . . . . . . . . . . . . . . . . . . .68
Выполнение глазков . . . . . . . . . . . . . . . . . . . . . . . . . . . . . . . . . .69
ПЭЧВОРК И КВИЛТИНГ
Сшивание кусочков ткани . . . . . . . . . . . . . . . . . . . . . . . . . . . . .70
Строчки для квилтинга . . . . . . . . . . . . . . . . . . . . . . . . . . . . . . . .70
Работа с устройством двойной подачи ткани . . . . . . . . . . . . .71
Квилтинг . . . . . . . . . . . . . . . . . . . . . . . . . . . . . . . . . . . . . . . . . . . .72
Игольная пластина для прямого стежка . . . . . . . . . . . . . . . . . .72
Декоративная аппликация . . . . . . . . . . . . . . . . . . . . . . . . . . . . .73
Аппликация . . . . . . . . . . . . . . . . . . . . . . . . . . . . . . . . . . . . . . . . . .74
Стежки для печворка . . . . . . . . . . . . . . . . . . . . . . . . . . . . . . . . . .74
Наметка . . . . . . . . . . . . . . . . . . . . . . . . . . . . . . . . . . . . . . . . . . . . .75
Свободный квилтинг . . . . . . . . . . . . . . . . . . . . . . . . . . . . . . . . . .76
Стипплинг . . . . . . . . . . . . . . . . . . . . . . . . . . . . . . . . . . . . . . . . . . .77
ДЕКОРАТИВНЫЕ СТРОЧКИ
Узкие складки . . . . . . . . . . . . . . . . . . . . . . . . . . . . . . . . . . . . . . . .78
Мережка . . . . . . . . . . . . . . . . . . . . . . . . . . . . . . . . . . . . . . . . . . . .78
Бахрома . . . . . . . . . . . . . . . . . . . . . . . . . . . . . . . . . . . . . . . . . . . . .79
Прореживание . . . . . . . . . . . . . . . . . . . . . . . . . . . . . . . . . . . . . . .79
Сборки . . . . . . . . . . . . . . . . . . . . . . . . . . . . . . . . . . . . . . . . . . . . . .80
Французские узлы . . . . . . . . . . . . . . . . . . . . . . . . . . . . . . . . . . . .81
Фестоны . . . . . . . . . . . . . . . . . . . . . . . . . . . . . . . . . . . . . . . . . . . . .81
Пришивание шнура (тройной шнур) . . . . . . . . . . . . . . . . . . . .82
Пришивание шнура (одинарный шнур) . . . . . . . . . . . . . . . . .82
Атласные строчки . . . . . . . . . . . . . . . . . . . . . . . . . . . . . . . . . . . .83
Бордюры с лапкой-направителем для бордюров . . . . . . . . .83
Шитье по кругу . . . . . . . . . . . . . . . . . . . . . . . . . . . . . . . . . . . . . .84
Строчка с двойной иглой . . . . . . . . . . . . . . . . . . . . . . . . . . .85-86
Шов двойной иглой . . . . . . . . . . . . . . . . . . . . . . . . . . . . . . . . . .87
ПРОГРАММИРОВАНИЕ КОМБИНАЦИЙ СТРОЧЕК
Строчка с автоматической закрепкой . . . . . . . . . . . . . . . . . . .88
Комбинация строчек . . . . . . . . . . . . . . . . . . . . . . . . . . . . . . . . . .89
Выполнение комбинации строчек с начала . . . . . . . . . . . . . .90
Выполнение текущей строчки с начала . . . . . . . . . . . . . . . . . .90
Программирование автоматической обрезки нитки . . . . . . .91
Проверка свойств комбинаций строчек . . . . . . . . . . . . . . . . . .91
Строчки с мостиками . . . . . . . . . . . . . . . . . . . . . . . . . . . . . . . . . .92
МОНОГРАММЫ
Выбор стиля . . . . . . . . . . . . . . . . . . . . . . . . . . . . . . . . . . . . . . . . .93
Выбор букв . . . . . . . . . . . . . . . . . . . . . . . . . . . . . . . . . . . . . . . . . .93
Программирование монограмм . . . . . . . . . . . . . . . . . . . . . . . .94
РЕДАКТИРОВАНИЕ КОМБИНАЦИИ СТРОЧЕК
Просмотр длинной комбинации . . . . . . . . . . . . . . . . . . . . . . . .95
Редактирование . . . . . . . . . . . . . . . . . . . . . . . . . . . . . . . . . . . . . .95
Единое изменение ширины или длины стежка . . . . . . . . . . .96
Индивидуальное изменение ширины или длины стежка . . .97
СОХРАНЕНИЕ И ВЫЗОВ КОМБИНАЦИИ СТРОЧЕК
Постоянная память . . . . . . . . . . . . . . . . . . . . . . . . . . . . . . . . . . .98
Перезапись сохраненной комбинации строчек . . . . . . . . . . .98
Вызов сохраненной комбинации строчек . . . . . . . . . . . . . . . .99
Удаление сохраненной комбинации строчек . . . . . . . . . . . . .99
УХОД ЗА МАШИНОЙ
Чистка шпульного отсека, тканенаправителей
и нитеобрезателя . . . . . . . . . . . . . . . . . . . . . . . . . . . . . . . . . . . .100
Установка шпуледержателя и игольной пластины . . . . . . . .100
Проблемы и предупреждающие сигналы . . . . . . . . . . . .101-102
Устранение неисправностей . . . . . . . . . . . . . . . . . . . . . . . . . . .103
СОДЕРЖАНИЕ
1
2
3
4
5
6
7
8
9
10
11
12
13
14
15
16
17
18
19
20
21
22
23
24
25
26
27
32
33
30
31
37
34
36
35
48
47
46
45
44
43
42
40
38
28
29
39
41
2
ПОДГОТОВКА К РАБОТЕ
Наименование частей
1.
Рычаг нитеводителя
2. Регулятор давления лапки
3. Панель с краткой информацией
4. Верхняя крышка
5. Отсек для хранения лапок
6. Обрезатель шпульной нити
7. Стопор намотки шпульки
8. Шпиндель моталки
9. Отверстие для дополнительного
катушечного стержня
10. Держатель катушки
11. Катушечный стержень
12. Регулятор натяжения нити
13. Обрезатель нити
14. Передняя панель
15. Жидкокристаллический дисплей
16. Панель с кнопками управления
17. Джойстик
18. Кнопка подтверждения
19. Боковой отсек для хранения аксессуаров
20. Регулятор контроля скорости
21. Кнопка обрезки нити
22. Кнопка подъема/опускания иглы
23. Кнопка автоматической закрепки
24. Разъем для коленного рычага
25. Регулятор баланса стежка
26. Кнопка реверса
27. Кнопка Старт/Стоп
28. Линейка измерений в см/дюймах
29. Съемный рукав (отсек для хранения
аксессуаров)
30. Отверстия для шитья по кругу
31. Винт игольного стержня
32. Игла
33. Лапка для зигзага А
34. Кнопка снятия челночной пластины
35. Пластина челночного отсека
36. Игольная пластина
37. Держатель лапки
38. Встроенный нитевдеватель
39. Рычаг петли
40. Устройство верхнего транспортера ткани
41. Ручка для переноса
42. Маховое колесо (поворачивать всегда
на себя)
43. Регулятор двойной подачи ткани
44. Рычаг отключение транспортера ткани
(рейки)
45. Электрический разъем
46. Разъем педали
47. Выключатель питания
48. Рычаг подъема прижимной лапки
1
2
3
4
5
6
7
8
9
10
11
12
13
14
15
17
16
18
19
20
21
22
23
25
26
27
28
29
30
31
24
38
32
33
34
35
36
37
39
3
Стандартные аксессуары
1.
Лапка А для зигзага (установлена
на машине)
2. Лапка С для обработки края
3. Лапка D для роликового шва
4. Лапка Е для пришивания молнии
5. Лапка F атласных строчек
6. Лапка G для потайной строчки
7. Лапка Н для пришивания шнура
8. Оверлочная лапка М
9. Лапка R для автоматической петли
10. Отвертка
11. Отвертка-ключ
12. Набор игл
13. Щеточка для чистки пыли
14. Вспарыватель (разрезатель петель)
15. Держатель катушки (большой,
установлен на машине)
16. Держатель катушки (малый)
17. Шпульки (всего 4, одна в машине)
18. Направитель для квилтинга
19. Лапка О для шва 0,6 см
20. Лапка Т для пришивания пуговиц
21. Лапка F-2 для атласных строчек
22. Фетровая прокладка
23. Лапка-верхний транспортер двойной
подачи AD
24. Коленный рычаг
25. Держатель катушки
26. Дополнительный катушечный
стержень
27. Стилус
28. Лапка для бордюров с направителем
29. Лапка QB-H для свободного квилтинга
30. Открытая лапка
31. Прозрачная лапка
32. Педаль
33. Игольная пластина прямострочная
34. Шнур питания
35. Тканенаправитель
36. Полужесткий тканевый чехол
37. Расширительный рабочий стол
38. Приспособление для шитья по кругу
39. Инструкция
* Приспособление для шитья по кругу
закреплено и хранится в боковом
отсеке для аксессуаров.
4
Разновидности прижимных лапок
и аксессуаров
Лапка А для зигзага:
Эта лапка установлена на машине. Это наиболее часто
используемая лапка для различных стежков, включая
прямые и зигзаг. Кнопка фиксирует лапку
в горизонтальном положении, помогая прошить
переход с тонкого слоя на более толстый слой ткани.
Лапка С для обработки края:
Избегайте обсыпания волокон по краю ткани,
обработайте его стежком зигзаг. Щеточка на лапке
предотвращает пропуски стежков по краю ткани
и делает их плоскими.
Подходит для средних тканей.
Лапка D для роликовых швов:
Вставьте ткань в завиток на лапке. Спираль
закручивает ткань, создавая роликовый шов.
Это легкий и профессиональный способ создания швов.
Лапка Е для пришивания молнии:
Эта лапка – для пришивания молнии. Зубцы молнии
проходят вдоль выемок внизу лапки.
Пристегните либо на левую, либо на правую сторону
от иглы для пришивания молнии.
Лапка F для атласных строчек:
Эта прозрачная пластиковая лапка идеально подходит
для атласных и декоративных стежков. Отверстие
по центру внизу лапки позволяет равномерно
накладывать плотные стежки.
Лапка F-2 для пэчворка
Эта открытая лапка для атласных стежков
предназначается для вышивки, аппликации, пэчворка
и монограмм. Вырезы снизу лапки позволяют атласным
стежкам плотно ложиться, открытая передняя часть
лапки не загораживает выполняемые строчки.
Лапка G для потайного шва:
Направитель на лапке обеспечивает захват иглой только
одного или двух волокон ткани, в результате чего
получается аккуратный невидимый шов.
Лапка Н для пришивания шнура:
Создайте собственный дизайн кос или шнуров.
Вставьте от одного до трех шнуров в направители лапки
и прошейте зигзагом или декоративной строчкой
поверх шнура.
Лапка О с направителем:
Аккуратность — ключ к успеху при пэчворке или
квилтинге. Направитель на лапке позволяет создавать
точный припуск на шов в 0,6 см при положении иглы
3.5. Или с положением иглы 4.5 создайте еле заметный
шов в 0,6 см, такой желаемый и часто используемый
квилтерами.
Оверлочная лапка М:
Лапка сконструирована для имитации настоящего
оверлочного шва. Тонкие пластины на лапке не
позволяют краю ткани закручиваться или обсыпаться.
5
Лапка R для автоматической петли:
Расположите пуговицу в держателе в дальней части
лапки. Лапка автоматически прошьет петлю по размеру
пуговицы.
Лапка Т для пришивания пуговиц:
Форма пуговицы абсолютно не важна. Отличительные
особенности этой лапки — открытая передняя часть
крепко удерживает пуговицу на ткани.
Лапка QB-H для свободного квилтинга:
Эта лапка используется для любой свободно-ходовой
техники как стипплинг, вышивка и др.
Высота лапки регулируется, выступ на лапке
совмещается с открытой и прозрачной лапками.
Открытая лапка:
При создании свободного квилтинга открытая лапка
не загораживает рабочую область.
Прозрачная лапка:
Эта лапка специально предназначается для создания
свободного квилтинга зигзагом.
Направитель для квилтинга:
Направитель для квилтинга помогает создавать ровные
параллельные ряды стежков.
Лапка для бордюров с направителем:
На этой прозрачной лапке имеются параллельные
направительные линии для создания ровных рядов
декоративных строчек.
Лапка-верхний транспортер двойной подачи AD:
Это специальная лапка для работы с трудно
продвигаемыми материалами. Она предотвращает
смещение слоев тканей и не позволяет им собираться.
Она великолепна при квилтинге и создании одеял.
Приспособление для шитья по кругу:
На свободном рукаве имеются отверстия на 1,8 см
друг от друга. При помощи этого приспособления
зафиксируйте ткань и создавайте великолепные круги
или волны или большие фестоны.
Игольная пластина для прямых стежков:
Пропуски стежков или сборки на ткани? Маленькое
отверстие для иглы в этой пластине не позволяет игле
толкать ткань под игольной пластиной. (Используется
только центральное положение иглы.)
1
2
3
5
6
7
8
9
1
4
6
Съёмный столик
Потяните за столик влево от машины как показано
на рисунке, чтобы открыть «свободный рукав»
для обработки манжет, рукавов и др.
1
Съемный столик
Как снять:
Потяните его влево.
Как установить:
Установите съемный столик на полозья и подтолкните
его вправо.
Работа со свободным рукавом:
Свободный рукав используется для обработки рукавов,
манжетов, брюк и других изделий по кругу. Он также
полезен при штопке носков или создания заплаток
на области колен и локтей.
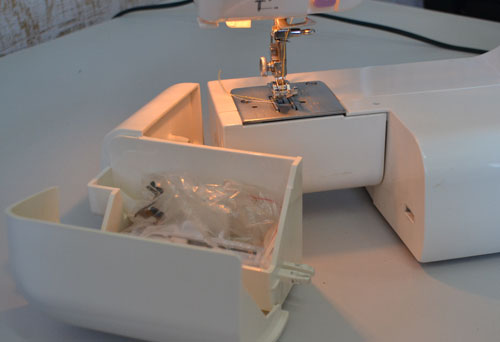
Хранение аксессуаров
Аксессуары удобно хранятся в отсеке для лапок
под верхней крышкой и в съемном столике.
Под верхней крышкой
1
Открытая лапка для атласных строчек F-2
2 Лапка О для шва 0,6 см
3 Лапка Т для пришивания пуговиц
4 Оверлочная лапка М
5 Прозрачная лапка
6 Открытая лапка
7 Лапка QB-H для свободного квилтинга
8 Держатель лапки
9 Стилус
1
1
2
3
4
5
6
7
8
9
10
12
13
11
14
2
3
4
5
6
7
8
9
10
15
A
7
В съемном столике
Аксессуары также могут храниться в съемном столике.
Потяните за верхнюю крышку и откройте отсек.
1
Отвертка
2 Отвертка-ключ
3 Лапка-верхний транспортер двойной подачи AD
4 Набор игл
5 Дополнительный катушечный стержень
6 Шпульки
7 Лапка для бордюров
8 Вспарыватель
9 Тканенаправитель
10 Подставка под катушку
11 Держатель катушки (большой)
12 Держатель катушки (малый)
13 Щеточка для чистки пыли
14 Направитель для квилтинга
15 Игольная пластина для прямых стежков
* Игольную пластину можно хранить в отсеке А
в съемном столике.
Боковой отсек
Потяните на себя и откройте крышку.
1
Боковой отсек для хранения аксессуаров
2 Лапка А для зигзага (установлена на машине)
3 Лапка С для обработки края
4 Лапка D для роликового шва
5 Лапка F атласных строчек
6 Лапка Н для пришивания шнура
7 Лапка G для потайной строчки
8 Лапка R для автоматической петли
9 Лапка Е для пришивания молнии
10 Приспособление для шитья по кругу
Кармашки с лапками можно наклонить вперед
для более удобной работы.
1
2
4
3
2
1
5
8
Отклейте защитную пленку с резиновых прокладок
и установите их снизу на ножки.
1
Резиновые прокладки
2 Ножка
3 Винт
Прикрутите к верхней части стола 6 ножек винтами.
4 Верхняя часть стола
Установите собранный стол на машину как показано
на рисунке. Придвиньте его вправо к машине
до щелчка. Отрегулируйте высоту стола при помощи
регулируемых винтов.
5 Регулируемый винт
Тканенаправитель
Снимите съёмный столик и установите дополнительный
расширительный столик.
На свободный рукав установите тканенаправитель,
нажав на него и пристегнув на место.
Передвиньте направитель на желаемую позицию.
Расположите край ткани рядом с тканенаправителем
и начинайте работать.
1
Тканенаправитель
2 Свободный рукав
Сборка дополнительного расширительного
столика
Содержание
- инструкции на русском
- Швейная машина Dragonfly 124
- Dragonfly 124 инструкция на русском скачать бесплатно
- Dragonfly 124 характеристика
- Швейная машина Dragonfly 124 видео
- DRAGONFLY 124
- Видео обзоры DRAGONFLY 124
- Характеристики DRAGONFLY 124
- Все про швейную машинку Dragonfly 124
- Описание
- Общие характеристики
- Операции, которые выполняет машинка
- Комплектация
- Надежность
- Удобство
- Какие материалы прошивает машинка?
- Как почистить машинку от мусора?
- Китайская швейная машина Dragonfly 218
- Челночный ход швейной машины Dragonfly
- Количество строчек и рычаги управления
- Выполнение петли в автоматическом режиме
- Инструменты и сменные лапки
- Доступ к электроприводу машинки
- Преимущества китайской швейной машинки Dragonfly 218
инструкции на русском
Инструкцию для Dragonfly 124 на русском языке, в формате pdf можно скачать с нашего сайта. Наш каталог предоставляем Вам инструкцию производителя фирмы Dragonfly, которая была взята из открытых источников. Ознакомившись с руководством по эксплуатации от Dragonfly, Вы на все 100% и правильно сможете воспользоваться всеми функциями устройства.
Швейная машина Dragonfly 124
Dragonfly 124 инструкция на русском скачать бесплатно
Описание к инструкции:
- Тип устройства: Швейная машина
- Фирма производитель: Dragonfly
- Модель: Dragonfly 124
- Инструкция на русском языке
- Формат файла: pdf
- Размер файла: 720 Kb
Dragonfly 124 характеристика
Швейная машина Dragonfly 124 видео
Видео скоро будет добавлено на сайт
Для сохранения инструкции «Швейная машина Dragonfly 124» на русском языке на вашем компьютере либо телефоне, нажмите кнопку «Скачать инструкцию». Если активна кнопка «Инструкция онлайн», то Вы можете просмотреть документ (manual), в своём браузере онлайн.
Если у Вас нет возможности скачать инструкцию по эксплуатации либо просмотреть её, Вы можете поделиться ссылкой на эту страницу в социальных сетях и при удобном моменте скачать инструкцию. Либо добавьте эту страницу в закладки Вашего браузера, нажав кнопку «Добавить страницу в закладки браузера».
Источник
DRAGONFLY 124
- Кнопка реверса есть
- Освещение есть
- Тип управления электромеханическое
- Максимальная длина стежка 4 мм
- Количество швейных операций 24
- Максимальная ширина стежка 5 мм
- Выполнение петли полуавтомат
- Лапки для вшивания молнии
- Рукавная платформа есть
- Вес 5.5 кг
- Показать все
Перед приобретением DRAGONFLY 124 по самой низкой цене, изучите характеристики, видео обзоры, плюсы и минусы модели, отзывы покупателей.
Видео обзоры DRAGONFLY 124
Характеристики DRAGONFLY 124
Основные характеристики *
| Кнопка реверса | есть |
| Освещение | есть |
| Тип управления | электромеханическое |
Операции *
| Максимальная длина стежка | 4 мм |
| Количество швейных операций | 24 |
| Максимальная ширина стежка | 5 мм |
| Строчки | обметочная, потайная, эластичная, эластичная потайная |
| Выполнение петли | полуавтомат |
Входит в комплект *
| Лапки | для вшивания молнии |
Конструкция *
| Рукавная платформа | есть |
| Вес | 5.5 кг |
| Дисплей | нет |
| Чехол | жесткий |
| Отсек для аксессуаров | есть |
| Вышивальный блок | нет |
| Размеры (ШxГxВ) | 41x23x32 см |
* Точные характеристики уточняйте у продавца.
подарили и все же жалко денег
Не реально настроить, чтобы не рвала нить и в сервис возила, но не надолго хватило. Если нервами дорожите не берите, что есть машина что нет. Пользовалась эпизодически в течении 5 лет.
купила эту машинку в декабре 2012 года.и как я только с ней не намучилась прокляла все. на иголках одних разорилась уже! очень часто заедает челночный барабан,при пошиве она не вибрирует,а трясется как трактор и звук издает такой же. подшить джинсы не возможно на швах буксует,пропускает и рвет нитки. на тонких тканях может начать мельчить.и никакие настройки нити и строчек не помогают! и это еще не все ее фокусы.
нормально отработала у меня только год. Хотя шила на ней я не каждый день. Шью давно, так что угробить ее своей «неопытностью» не могла. Через год внутри машинки начал раскручиваться какой-то винт( наладчик сказал, что сборка плохая), и при этом механизм , движущий иголку, приходил в ступор. вызов наладчика данную проблему устранял, но хорошей работы хватало только до первого более-менее «толстого» места в шве.И винт снова соскакивал. Поменять его в нашей «глуши » в виду » специфичности китайского болта»( со слов наладчика)не представлялось возможным,т.к. отсутствовали запчасти к данной марке машин.Операцию по наладке я повторила три раза. И решила не убивать деньги по-напрасну на наладчика — и купить новую машинку известного бренда, который имеет сервисный центр в нашей стране.Хотя грешить на все машинки данной фирмы не буду, возможно у меня попалась неудачная машинка.
Источник
Все про швейную машинку Dragonfly 124
Тип управления: Электромеханический
Уровень квалификации: Начальный
- многофункциональность;
- прочный вертикальный челнок;
- дополнительное освещение.
Описание
Чтобы сделать первые шаги в изготовлении одежды и пошиве изделий из текстиля, необязательно иметь дорогостоящую технику, обладающую многочисленными возможностями. Достаточно приобрести недорогую, простую в эксплуатации машинку и пробовать на ней работать.
Конечно, с первого раза может не получиться красиво и аккуратно выполнить строчку. Но, поработав некоторое время, вы обязательно научитесь так безупречно шить, что и не понадобиться покупать модель подороже. К таким простым устройствам относится швейная машинка Dragonfly 124.
Общие характеристики
Представленная модель относится к электромеханическому типу машинок. Ее низкая цена и достаточное количество швейных операций делает ее популярной среди рукодельниц, делающих первые шаги в познании секретов кройки и шитья. Машинка четко выполняет несколько видов строчек. Всего оборудование имеет 24 швейных операции и предназначена для обработки легких и средних тканей.
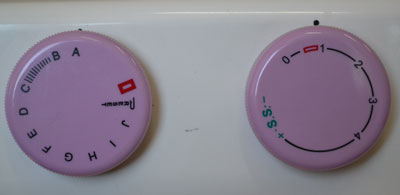
В ней нет особых примудростей в управлении. Все довольно просто. На лицевой панели размещены регуляторы установки операций. На том, что с права регулируется длина стежка. На том, что слева выбираются виды отделочных строчек, каждая буква которых соответствует рисунку, находящемуся на корпусе машины с правой стороны
Dragonfly 124 оснащена качающимся челночным механизмом вертикального исполнения. Благодаря этому, мастер ощущает всю мощь и надежную работу агрегата. Конструкторы не забыли и о съемной платформе, которая обеспечивает обработку узких элементов одежды.
В швейной машинке предусмотрено место для хранения мелких запчастей в виде съемного отдела. При использовании более толстых тканей, например, трикотажа и джинса, мастер может самостоятельно регулировать высоту лапки и степень ее нажатия на материал. Для закрепления строчки в конце шва в конструкции модели предусмотрен обратный ход.
Швейная машинка дает возможность швее настраивать длину стежка до 4 мм. При слабом освещении и работе в темное время суток есть дополнительная подсветка, обеспечивающая комфорт и удобство эксплуатации.
Основные технические характеристики швейной машинки:
| Тип управления | электромеханическое |
| Виды строчек | оверлочная, прямая, зигзаг, потайная, эластичная, обработка фестоном |
| Выполнение петли | одна в полуавтоматическом режиме |
| Количество операций | 24 |
| Регулировка параметров стежка | длина – 4мм, ширина – 5 мм |
| Скорость шитья | 450 ст./мин. |
| Дополнительное освещение | есть |
| Съемная платформа | предусмотрена |
Справа корпуса машинки расположена круглая рукоятка управления маховиком. Она приходит на помощь в случае необходимости прохождения значительных уплотнений. Для этого нужно приостановить работу оборудования и в ручном режиме прокрутить дисковую рукоятку.
Ниже расположена клавиша включения/выключения техники и разъем для присоединения педали управления скоростью. С ее помощью пользователь имеет возможность плавно набирать скорость и увеличивать мощность двигателя. Педаль пластиковая удобная, можно работать даже босой ногой, дискомфорта не ощущается.
С нижней стороны на основании установлены резиновые ножки, которые не дают машинке скользить при работе на гладкой ровной повержности. В верхней части машины имеется ручка, для ее транспортировки.
Она очень удобная поэтому без труда можно перенести вашу любимицу в любое удобное для этого место. Переносная ручка очень легко убирается в специальные пазы, которые есть на верхней части и предусмотрены как раз под ее размер. В процессе шитья ничего мешать не будет.
Операции, которые выполняет машинка
- 24 швейные операции;
- выполнение 1 петли в полуавтоматическом режиме;
- настройка параметров стежка;
- обратный ход;
- регулировка лапки по высоте.
Комплектация
- набор иголок;
- 3 шпульки для намотки титок;
- лапки: стандартная, для вшивания молнии, зигзаг;
- вспарыватель с закщитным колпачком;
- графитовая смазка;
- отвертка (большая и маленькая).
Надежность
Конструкция модели Dragonfly 124 выполнена из прочных материалов, легко выдерживающих многочасовые нагрузки. Машинка рассчитана на длительный срок эксплуатации до 10 лет.
Удобство
Возможность подшивать цилиндрические элементы при помощи рукавной платформы. Имеется отдел для мелких принадлежностей. В верхней части есть специальная ручка для переноса оборудования.
Какие материалы прошивает машинка?
Легко работает с легкими и сверхлегкими, средними и умеренными тяжелыми материалами.
Как почистить машинку от мусора?
Швейная техника может загрязняться, как снаружи, так и внутри. Рассмотрим методы очистки оборудования.
С поверхности машинки: при сильном загрязнении корпуса оборудования, следует взять тканевую салфетку или тряпочку, смочить ее в воде со слабым моющим средством и протереть поверхность. При необходимости выжать салфетку и протереть еще раз. После этого вытереть насухо корпус чистой тряпкой.
Чистка челночного механизма:
- снять иглу;
- демонтировать прижимную лапку и ее держатель;
- открыть отсек и вынуть шпульку;
- выкрутить винты на игольной пластинке и снять ее;
- с помощью щеточки из комплекта тщательно очистить внутренний механизм (транспортер и шпульный колпачок).
Источник
Китайская швейная машина Dragonfly 218

В наше время подавляюще большинство бытовых швейных машин выпускается китайскими фирмами производителями швейной техники. Известные на весь марки Brother, Singer, Juki, Verirtas и другие разместили свои филиалы в Китае и уже много лет выпускают свою продукцию в Китае, Тайване. Но кроме лицензионной продукции Китай выпускает и собственные марки швейных машин, такие как Butterfly и Dragonfly. Эти марки швейных машин известны в нашей стране еще с советских времен и были представлены моделями с ручным и ножным приводом. Внешне они очень напоминали ручную машинку Подольск с одним единственным отличием. У китайской швейной машинки «хвостик» шпульного колпачка направлен влево.
В этой статье мы приводим инструкцию для Dragonfly 218, а также рассмотрим, чем отличаются современные китайские швейные машинки Dragonfly 218, 214 от аналогичных моделей швейных машин эконом-класса других брендов.
Челночный ход швейной машины Dragonfly

У швейной машинки Dragonfly 218 качающийся тип челнока, как у любой другой недорогой модели швейной машины. Его главное преимущество в том, что он металлический, а стало быть, надежнее, но есть и недостатки. Скорость швейной машины с таким челноком невысокая, повышенный шум при работе, ниже качество строчки. Но для домашнего использования, ремонта одежды и мелкого пошива такие машинки вполне подойдут.
Съемный столик — это не очень удобное приспособление, поскольку чтобы заменить шпульку приходится его каждый раз отсоединять от корпуса машинки. Но цена машинки с лихвой компенсирует это неудобство, тем более что у этой китайской машинки есть ряд преимуществ.
Количество строчек и рычаги управления
Количество строчек минимальное, но вполне достаточное чтобы любую швейную операцию. Незначительный набор строчек компенсируется автоматически выметыванием петли (стрелочка). Эта надпись в переводе с английского означает, что изготовление петли производится автоматически.
См. Особенности петель «автомат» и «полуавтомат».
Левая рукоятка предназначены для выбора строчки и переключения в режим изготовления петли, а правая — для установки длины стежка при выполнении обычных строчек и в режиме выметывания петли.
У швейной машинки Dragonfly 218 натяжитель верхней нити стандартной конструкции. Цифры, обведенные рамочкой — это рекомендуемое значение натяжения нитки. Если швейная машинка образует некачественную строчку на этих значениях, значит нужно выполнить регулировку натяжения нижней нити или заменить сами нитки. Возможно, появились какие-либо неисправности, о поиске которых и устранении на нашем сайте имеется множество статей. Например, «Почему петляет машинка с горизонтальным челноком».
На фронтальной крышке имеется даже схема заправки верхней нитки. Если машинка не образует красивого стежка, проверьте, как вы заправили верхнюю нитку.
Выполнение петли в автоматическом режиме
Выполнение петли в автоматическом режиме требует внимания от швеи. Процесс происходит автоматически, но если вы забудете выдвинуть этот рычаг, то петлю придется распускать и переделывать.
Вот так этот рычаг должен устанавливаться в лапке. Причем выдвигайте его вниз до упора, чтобы он находился между стенками ограничителей лапки для выметывания петли.
Не забывайте также, что частоту прокладывания стежков в петле можно регулировать.
А ткань между стежками пробитой петли можно разрезать вот таким распарывателем, который прилагается в комплекте инструментов и аксессуаров для данной модели китайской швейной машинки Dragonfly 218.
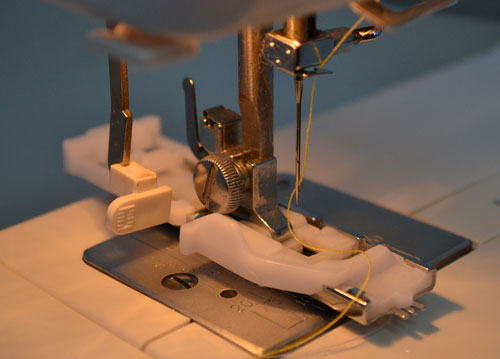
Инструменты и сменные лапки
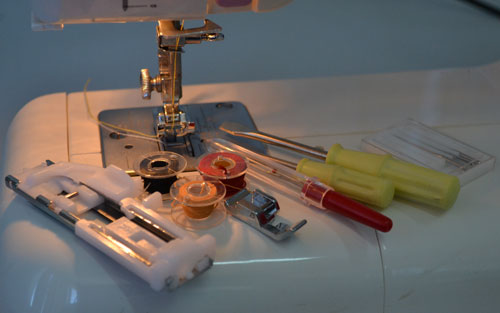
В штатный комплект лапок китайской швейной машинки Dragonfly 218 входит лапки для выметывания петли, универсальная лапка для выполнения прямой строчки и строчки зигзаг, а также лапка для установки молнии. Кстати, у машинки предусмотрена для этого возможность смещение иглы (влево, вправо).
Этих лапок вполне достаточно, чтобы шить и ремонтировать одежду, но если вам потребуются дополнительные лапки для швейных машин, то их легко купить в любом магазине швейных машин.
Доступ к электроприводу машинки
Очень просто можно»добраться» к электроприводу у этой модели швейной машинки Драгонфлай. Иногда требуется смазать некортые узлы, находящиеся внутри копруса машинки, и чтобы получить к ним доусуп прихъодится полностью разбирать корпус швейной машинки.
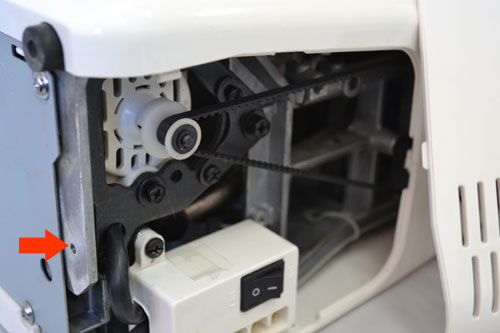
А чтобы проверить натяжение ремня электропривода, вообще достаточно лишь отвернуть один винт в нижней части корпуса и снять боковую крышку.
Преимущества китайской швейной машинки Dragonfly 218
Есть ли преимущества у китайской швейной машинки Dragonfly 218 перед другими машинками такого класса? Есть, но только второстепенные, поскольку все машинки такого класса имеют одинаковую конструкцию, челночный ход с качающимся челноком, используют минимальное количество пластмассовых деталей. У них, как правило, ограниченное количество операций и строчек, минимальный набор лапок в комплекте, ну естественно и самая низкая цена.
Но у этой швейной машинки Dragonfly 218 есть отличия. Во-первых, выполнение петли в атематическом режиме встречается только у машин более высокого класса и соответственно боле дорогих. Во-вторых, очень простой и удобный доступ к внутренним узлам дает возможность периодически смазывать их, что делает менее шумной работу машинки. Ну и в третьих, довольно низкая цена по сравнению с другими китайскими машинками подобного класса.
Устройство и ремонт швейной машины Джаноме
Как устроена недорогая швейная машинка Janome и как выполнить ремонт Джаноме своими руками.
Основные преимущества электронной машинки
Если вы собираетесь купить швейную машинку, тогда прочитайте эту статью про особенности электронной швейной машины.
Швейная машинка Singer выпуска 90-х годов
В этой статье мастер поделится своим мнением о моделях швейных машин фирмы Зингер, выпущенных в начале 90-х годов.
Устройство и инструкция оверлока Прима
Бытовой оверлок Прима в зависимости от модели выполняет трех или четырехниточный шов. Устройство, инструкция оверлока Прима, уход и ремонт.
Швейная машинка Astralux M10
Если вы собираетесь купить швейную машину фирмы Астралюкс, то эта статья поможет вам узнать больше о машинках фирмы Astralux.
Компьютеризированная швейная машина Brother
Чем отличается компьютеризированная швейная машина. Устройство и основные операции и виды строчек.
All rights reserved © / 2011 / Sewing-Master.ru / How to repair sewing machine at home by yourself / MY-Project
У вас есть швейная машинка, и вы любите шить? Тогда этот сайт для вас. Профессиональные мастера подскажут вам как выполнить мелкий ремонт швейной, вязальной машинки. Опытные технологи поделятся секретами пошива одежды. Обзорные статьи подскажут, какую купить швейную или вязальную машину, утюг манекен и много других полезных советов вы найдете на нашем сайте.
Спасибо, что вы полностью просмотрели страницу.
Копирование и перепечатка статей сайта «Швейный мастер» без согласия автора запрещена.
Авторские права защищаются законом.
Источник
ВАЖНЫЕ ИНСТРУКЦИИ ПО БЕЗОПАСНОСТИ
Машина не предназначена для использования детьми и психически нездоровыми людьми, людьми с
ограниченными возможностями без достаточного опыта и надлежащего присмотра. Не позволяйте детям играть с
ней.
Эта машина сконструирована и разработана только для бытового использования.
Перед началом работы на машине внимательно прочитайте все инструкции по пользованию.
ОПАСНО —
Во избежание риска удара электрическим током:
1. Никогда не оставляйте включенную в сеть машину без присмотра. Всегда отключайте прибор от сети сразу же
после работы и перед началом чистки.
ВНИМАНИЕ —
Во избежание ожогов, пожара, удара электрическим током или нанесения
повреждений пользователю:
1. Не позволяйте играть с машиной. Будьте внимательны при работе, если в помещении находятся дети.
2. Используйте прибор только по его прямому назначению, описанному в этой инструкции. Используйте
приспособления, только рекомендуемые производителем и описанные в инструкции.
3. Не используйте машину, если у нее поврежденный шнур или вилка, в случае, если она падала, была повреждена,
попала в воду или работает неправильно. Отнесите машину к ближайшему авторизованному дилеру для ремонта
или наладки.
4. Машина должна работать только с открытыми вентиляционными отверстиями. Периодически чистите
вентиляционные области машины и ножную педаль от пыли, грязи и остатков материи.
5. Ничего не кидайте и не вставляйте в вентиляционные отверстия.
6. Работайте на машине только в помещении.
7. Не работайте в помещении, где распылялись аэрозоли или использовался кислород.
8. Чтобы отключить машину, сначала поставьте все выключатели в положение ВЫКЛ., затем отсоедините вилку от
электрической розетки.
9. Не тяните вилку из розетки за шнур, берите вилку за корпус.
10. Будьте осторожны при работе с движущимися частями машины. Особое внимание уделяйте рабочей области
вокруг иглы.
11. Используйте только оригинальную игольную пластину. Из-за неправильной пластины может сломаться игла.
12. Не используйте гнутые иглы.
13. Не тяните и не толкайте ткань при шитье, может сломаться игла.
14. Всегда отключайте питание машины при регулировке или замене деталей в области работы иглы: заправке нити в
иглу, смене иглы, заправке нижней нити, смене прижимной лапки и т.д.
15. Всегда отключайте машину от электрической розетки при проведении профилактических работ, снятии панелей и
других процедур, описанных в этой инструкции.
СОХРАНЯЙТЕ ЭТИ ИНСТРУКЦИИ
Внешний вид и характеристики машины могут изменяться без предварительного уведомления.
1
ПОДГОТОВКА К РАБОТЕ
Наименование частей . . . . . . . . . . . . . . . . . . . . . . . . . . . . . . . . . .2
Стандартные аксессуары . . . . . . . . . . . . . . . . . . . . . . . . . . . . . . .3
Разновидности прижимных лапок и аксессуаров . . . . . . . .4-5
Съёмный столик . . . . . . . . . . . . . . . . . . . . . . . . . . . . . . . . . . . . . . .6
Хранение аксессуаров . . . . . . . . . . . . . . . . . . . . . . . . . . . . . . . . .6
В дополнительном столике . . . . . . . . . . . . . . . . . . . . . . . . . . . . . .7
Боковая панель . . . . . . . . . . . . . . . . . . . . . . . . . . . . . . . . . . . . . . . .7
Сборка расширительного рабочего стола . . . . . . . . . . . . . . . . .8
Работа с тканенаправителем . . . . . . . . . . . . . . . . . . . . . . . . . . . .8
Установка коленного рычага . . . . . . . . . . . . . . . . . . . . . . . . . . . .9
Подключение питания . . . . . . . . . . . . . . . . . . . . . . . . . . . . . . . . .10
Рабочие кнопки машины . . . . . . . . . . . . . . . . . . . . . . . . . . . . . . .11
Кнопка Старт/Стоп . . . . . . . . . . . . . . . . . . . . . . . . . . . . . . . . . . . .11
Кнопка реверса . . . . . . . . . . . . . . . . . . . . . . . . . . . . . . . . . . . . . . .11
Кнопка автоматической закрепки . . . . . . . . . . . . . . . . . . . . . . .11
Кнопка подъема/опускания иглы . . . . . . . . . . . . . . . . . . . . . . .12
Кнопка обрезки нити . . . . . . . . . . . . . . . . . . . . . . . . . . . . . . . . . .12
Джойстик . . . . . . . . . . . . . . . . . . . . . . . . . . . . . . . . . . . . . . . . . . . .12
Кнопка подтверждения . . . . . . . . . . . . . . . . . . . . . . . . . . . . . . . .12
Функциональные кнопки . . . . . . . . . . . . . . . . . . . . . . . . . . . .13-14
Выбор строчки . . . . . . . . . . . . . . . . . . . . . . . . . . . . . . . . . . . . . . . .15
Кнопка помощи . . . . . . . . . . . . . . . . . . . . . . . . . . . . . . . . . . . . . .16
Установки пользователя . . . . . . . . . . . . . . . . . . . . . . . . . . . .17-20
Яркость экрана . . . . . . . . . . . . . . . . . . . . . . . . . . . . . . . . . . . .17
Звук . . . . . . . . . . . . . . . . . . . . . . . . . . . . . . . . . . . . . . . . . . . . . .17
Время демонстрации дополнительного окна . . . . . . . . . . . . .18
Вызов последних установок . . . . . . . . . . . . . . . . . . . . . . . . .18
Выбор языка . . . . . . . . . . . . . . . . . . . . . . . . . . . . . . . . . . . . . . . . .18
Калибровка сенсорного экрана . . . . . . . . . . . . . . . . . . . . . . . . .19
Возврат всех первоначальных установок стежков . . . . . . . . .20
Удаление сохраненных комбинаций . . . . . . . . . . . . . . . . . . . .20
Возврат всех первоначальных установок . . . . . . . . . . . . . . . .20
Контроль скорости шитья . . . . . . . . . . . . . . . . . . . . . . . . . . . . . .21
Регулятор контроля скорости . . . . . . . . . . . . . . . . . . . . . . . .21
Ножная педаль . . . . . . . . . . . . . . . . . . . . . . . . . . . . . . . . . . . .21
Регулировка давления лапки . . . . . . . . . . . . . . . . . . . . . . . . . . .22
Отключение транспортера ткани . . . . . . . . . . . . . . . . . . . . . . . .22
Подъем и опускание прижимной лапки . . . . . . . . . . . . . . . . .23
Замена прижимной лапки . . . . . . . . . . . . . . . . . . . . . . . . . . . . .24
Снятие прижимной лапки . . . . . . . . . . . . . . . . . . . . . . . . . .24
Установка прижимной лапки . . . . . . . . . . . . . . . . . . . . . . .24
Смена и установка держателя лапки . . . . . . . . . . . . . . . . . . . .24
Снятие держателя лапки . . . . . . . . . . . . . . . . . . . . . . . . . . . .24
Установка держателя лапки . . . . . . . . . . . . . . . . . . . . . . . . .24
Работа с верхним транспортером ткани . . . . . . . . . . . . . . . . .25
Установка лапки-верхнего транспортера ткани . . . . . . . . . . .25
Установка устройства верхнего транспортера . . . . . . . . . . . .25
Отключение устройства верхнего транспортера . . . . . . . . . .26
Снятие лапки-верхний транспортер . . . . . . . . . . . . . . . . . . . . .26
Направительные линии для швов . . . . . . . . . . . . . . . . . . . . . . .27
Создание прямых углов . . . . . . . . . . . . . . . . . . . . . . . . . . . .27
Быстрые измерения в см/дюймах . . . . . . . . . . . . . . . . . . . . . . .27
Сбалансированное натяжение нити . . . . . . . . . . . . . . . . . . . . .28
Сбалансированное натяжения игольной нити . . . . . . . . . . .28
Изменение натяжения нити вручную . . . . . . . . . . . . . . . . . . . .28
Корректировка несбалансированных строчек . . . . . . . . . . . .29
Смена игл . . . . . . . . . . . . . . . . . . . . . . . . . . . . . . . . . . . . . . . . . . .30
Разновидности игл . . . . . . . . . . . . . . . . . . . . . . . . . . . . . . . . . . . .31
Установка катушки ниток . . . . . . . . . . . . . . . . . . . . . . . . . . . . . .32
Дополнительный катушечный стержень . . . . . . . . . . . . . . . . .32
Удаление шпульки . . . . . . . . . . . . . . . . . . . . . . . . . . . . . . . . . . . .32
Намотка шпульки . . . . . . . . . . . . . . . . . . . . . . . . . . . . . . . . . . . . .33
Установка шпульки . . . . . . . . . . . . . . . . . . . . . . . . . . . . . . . . . . .34
Заправка нити в машину . . . . . . . . . . . . . . . . . . . . . . . . . . . . . . .35
Автоматический нитевдеватель . . . . . . . . . . . . . . . . . . . . . . . .36
Вытягивание нижней нити . . . . . . . . . . . . . . . . . . . . . . . . . . . . .37
ОСНОВНЫЕ ШВЕЙНЫЕ ТЕХНИКИ
Прямой стежок . . . . . . . . . . . . . . . . . . . . . . . . . . . . . . . . . . . . . . .38
Начало работы . . . . . . . . . . . . . . . . . . . . . . . . . . . . . . . . . . . .38
Закрепление шва . . . . . . . . . . . . . . . . . . . . . . . . . . . . . . . . . .38
Смена направления шитья . . . . . . . . . . . . . . . . . . . . . . . . . .38
Изменение положения иглы . . . . . . . . . . . . . . . . . . . . . . . .39
Изменение длины стежка . . . . . . . . . . . . . . . . . . . . . . . . . . . . . .39
Программирование персональных установок . . . . . . . . . . . .40
Возврат первоначальных установок . . . . . . . . . . . . . . . . .40
Разнообразие прямых стежков . . . . . . . . . . . . . . . . . . . . . . . . .41
Прямой стежок с левым положением иглы . . . . . . . . . . . . . . .41
Автоматическая закрепка . . . . . . . . . . . . . . . . . . . . . . . . . . . . . .41
Закрепочный стежок . . . . . . . . . . . . . . . . . . . . . . . . . . . . . . . . . .41
Работа от края плотной ткани . . . . . . . . . . . . . . . . . . . . . . . . . .42
Сборки . . . . . . . . . . . . . . . . . . . . . . . . . . . . . . . . . . . . . . . . . . . . . .42
Пришивание молнии . . . . . . . . . . . . . . . . . . . . . . . . . . . . . .43-45
Роликовый шов . . . . . . . . . . . . . . . . . . . . . . . . . . . . . . . . . . . . . .46
Зигзаг . . . . . . . . . . . . . . . . . . . . . . . . . . . . . . . . . . . . . . . . . . . . . . .47
Изменение ширины зигзага . . . . . . . . . . . . . . . . . . . . . . . . .47
Изменение длины стежка . . . . . . . . . . . . . . . . . . . . . . . . . . . . . .47
Обработка края зигзагом . . . . . . . . . . . . . . . . . . . . . . . . . . . . . .48
Аппликация атласными стежками . . . . . . . . . . . . . . . . . . . . . .48
Тройной зигзаг . . . . . . . . . . . . . . . . . . . . . . . . . . . . . . . . . . . . . . .49
Штопка . . . . . . . . . . . . . . . . . . . . . . . . . . . . . . . . . . . . . . . . . . . . .49
Стежок-змейка . . . . . . . . . . . . . . . . . . . . . . . . . . . . . . . . . . . . . . .49
Потайной шов . . . . . . . . . . . . . . . . . . . . . . . . . . . . . . . . . . . . . . .50
Разновидности петель . . . . . . . . . . . . . . . . . . . . . . . . . . . . . . . . .51
Квадратная (сенсорная) петля . . . . . . . . . . . . . . . . . . .52-54
Зажгутованная петля . . . . . . . . . . . . . . . . . . . . . . . . . . . . . . .55
Изменение ширины петли . . . . . . . . . . . . . . . . . . . . . . . . . . . . .56
Изменение плотности стежков петли . . . . . . . . . . . . . . . . . . . .56
Автоматическая петля . . . . . . . . . . . . . . . . . . . . . . . . . . . . . . . . .57
Закругленная петля и петли на тонких тканях . . . . . . . . . . . . .58
Петля с глазком . . . . . . . . . . . . . . . . . . . . . . . . . . . . . . . . . . . . . .58
Трикотажная петля . . . . . . . . . . . . . . . . . . . . . . . . . . . . . . . . . . .59
Декоративная (сенсорная) петля . . . . . . . . . . . . . . . . . . . . .60-61
Пришивание пуговиц . . . . . . . . . . . . . . . . . . . . . . . . . . . . . . . . .62
Тройной стежок стреч . . . . . . . . . . . . . . . . . . . . . . . . . . . . . . . . .63
Стежок стреч . . . . . . . . . . . . . . . . . . . . . . . . . . . . . . . . . . . . . . . . .63
Обработка края . . . . . . . . . . . . . . . . . . . . . . . . . . . . . . . . . . . . . .63
Трикотажный стежок . . . . . . . . . . . . . . . . . . . . . . . . . . . . . . . . . .64
Оверлочный стежок . . . . . . . . . . . . . . . . . . . . . . . . . . . . . . . . . .64
Оверлочный стежок . . . . . . . . . . . . . . . . . . . . . . . . . . . . . . . . . .64
Шов-ракушка . . . . . . . . . . . . . . . . . . . . . . . . . . . . . . . . . . . . . . . .65
Супероверлочный стежок . . . . . . . . . . . . . . . . . . . . . . . . . . . . .65
Заплатка . . . . . . . . . . . . . . . . . . . . . . . . . . . . . . . . . . . . . . . . . .66-67
Закрепка . . . . . . . . . . . . . . . . . . . . . . . . . . . . . . . . . . . . . . . . . . . .68
Выполнение глазков . . . . . . . . . . . . . . . . . . . . . . . . . . . . . . . . . .69
ПЭЧВОРК И КВИЛТИНГ
Сшивание кусочков ткани . . . . . . . . . . . . . . . . . . . . . . . . . . . . .70
Строчки для квилтинга . . . . . . . . . . . . . . . . . . . . . . . . . . . . . . . .70
Работа с устройством двойной подачи ткани . . . . . . . . . . . . .71
Квилтинг . . . . . . . . . . . . . . . . . . . . . . . . . . . . . . . . . . . . . . . . . . . .72
Игольная пластина для прямого стежка . . . . . . . . . . . . . . . . . .72
Декоративная аппликация . . . . . . . . . . . . . . . . . . . . . . . . . . . . .73
Аппликация . . . . . . . . . . . . . . . . . . . . . . . . . . . . . . . . . . . . . . . . . .74
Стежки для печворка . . . . . . . . . . . . . . . . . . . . . . . . . . . . . . . . . .74
Наметка . . . . . . . . . . . . . . . . . . . . . . . . . . . . . . . . . . . . . . . . . . . . .75
Свободный квилтинг . . . . . . . . . . . . . . . . . . . . . . . . . . . . . . . . . .76
Стипплинг . . . . . . . . . . . . . . . . . . . . . . . . . . . . . . . . . . . . . . . . . . .77
ДЕКОРАТИВНЫЕ СТРОЧКИ
Узкие складки . . . . . . . . . . . . . . . . . . . . . . . . . . . . . . . . . . . . . . . .78
Мережка . . . . . . . . . . . . . . . . . . . . . . . . . . . . . . . . . . . . . . . . . . . .78
Бахрома . . . . . . . . . . . . . . . . . . . . . . . . . . . . . . . . . . . . . . . . . . . . .79
Прореживание . . . . . . . . . . . . . . . . . . . . . . . . . . . . . . . . . . . . . . .79
Сборки . . . . . . . . . . . . . . . . . . . . . . . . . . . . . . . . . . . . . . . . . . . . . .80
Французские узлы . . . . . . . . . . . . . . . . . . . . . . . . . . . . . . . . . . . .81
Фестоны . . . . . . . . . . . . . . . . . . . . . . . . . . . . . . . . . . . . . . . . . . . . .81
Пришивание шнура (тройной шнур) . . . . . . . . . . . . . . . . . . . .82
Пришивание шнура (одинарный шнур) . . . . . . . . . . . . . . . . .82
Атласные строчки . . . . . . . . . . . . . . . . . . . . . . . . . . . . . . . . . . . .83
Бордюры с лапкой-направителем для бордюров . . . . . . . . .83
Шитье по кругу . . . . . . . . . . . . . . . . . . . . . . . . . . . . . . . . . . . . . .84
Строчка с двойной иглой . . . . . . . . . . . . . . . . . . . . . . . . . . .85-86
Шов двойной иглой . . . . . . . . . . . . . . . . . . . . . . . . . . . . . . . . . .87
ПРОГРАММИРОВАНИЕ КОМБИНАЦИЙ СТРОЧЕК
Строчка с автоматической закрепкой . . . . . . . . . . . . . . . . . . .88
Комбинация строчек . . . . . . . . . . . . . . . . . . . . . . . . . . . . . . . . . .89
Выполнение комбинации строчек с начала . . . . . . . . . . . . . .90
Выполнение текущей строчки с начала . . . . . . . . . . . . . . . . . .90
Программирование автоматической обрезки нитки . . . . . . .91
Проверка свойств комбинаций строчек . . . . . . . . . . . . . . . . . .91
Строчки с мостиками . . . . . . . . . . . . . . . . . . . . . . . . . . . . . . . . . .92
МОНОГРАММЫ
Выбор стиля . . . . . . . . . . . . . . . . . . . . . . . . . . . . . . . . . . . . . . . . .93
Выбор букв . . . . . . . . . . . . . . . . . . . . . . . . . . . . . . . . . . . . . . . . . .93
Программирование монограмм . . . . . . . . . . . . . . . . . . . . . . . .94
РЕДАКТИРОВАНИЕ КОМБИНАЦИИ СТРОЧЕК
Просмотр длинной комбинации . . . . . . . . . . . . . . . . . . . . . . . .95
Редактирование . . . . . . . . . . . . . . . . . . . . . . . . . . . . . . . . . . . . . .95
Единое изменение ширины или длины стежка . . . . . . . . . . .96
Индивидуальное изменение ширины или длины стежка . . .97
СОХРАНЕНИЕ И ВЫЗОВ КОМБИНАЦИИ СТРОЧЕК
Постоянная память . . . . . . . . . . . . . . . . . . . . . . . . . . . . . . . . . . .98
Перезапись сохраненной комбинации строчек . . . . . . . . . . .98
Вызов сохраненной комбинации строчек . . . . . . . . . . . . . . . .99
Удаление сохраненной комбинации строчек . . . . . . . . . . . . .99
УХОД ЗА МАШИНОЙ
Чистка шпульного отсека, тканенаправителей
и нитеобрезателя . . . . . . . . . . . . . . . . . . . . . . . . . . . . . . . . . . . .100
Установка шпуледержателя и игольной пластины . . . . . . . .100
Проблемы и предупреждающие сигналы . . . . . . . . . . . .101-102
Устранение неисправностей . . . . . . . . . . . . . . . . . . . . . . . . . . .103
СОДЕРЖАНИЕ
1
2
3
4
5
6
7
8
9
10
11
12
13
14
15
16
17
18
19
20
21
22
23
24
25
26
27
32
33
30
31
37
34
36
35
48
47
46
45
44
43
42
40
38
28
29
39
41
2
ПОДГОТОВКА К РАБОТЕ
Наименование частей
1.
Рычаг нитеводителя
2. Регулятор давления лапки
3. Панель с краткой информацией
4. Верхняя крышка
5. Отсек для хранения лапок
6. Обрезатель шпульной нити
7. Стопор намотки шпульки
8. Шпиндель моталки
9. Отверстие для дополнительного
катушечного стержня
10. Держатель катушки
11. Катушечный стержень
12. Регулятор натяжения нити
13. Обрезатель нити
14. Передняя панель
15. Жидкокристаллический дисплей
16. Панель с кнопками управления
17. Джойстик
18. Кнопка подтверждения
19. Боковой отсек для хранения аксессуаров
20. Регулятор контроля скорости
21. Кнопка обрезки нити
22. Кнопка подъема/опускания иглы
23. Кнопка автоматической закрепки
24. Разъем для коленного рычага
25. Регулятор баланса стежка
26. Кнопка реверса
27. Кнопка Старт/Стоп
28. Линейка измерений в см/дюймах
29. Съемный рукав (отсек для хранения
аксессуаров)
30. Отверстия для шитья по кругу
31. Винт игольного стержня
32. Игла
33. Лапка для зигзага А
34. Кнопка снятия челночной пластины
35. Пластина челночного отсека
36. Игольная пластина
37. Держатель лапки
38. Встроенный нитевдеватель
39. Рычаг петли
40. Устройство верхнего транспортера ткани
41. Ручка для переноса
42. Маховое колесо (поворачивать всегда
на себя)
43. Регулятор двойной подачи ткани
44. Рычаг отключение транспортера ткани
(рейки)
45. Электрический разъем
46. Разъем педали
47. Выключатель питания
48. Рычаг подъема прижимной лапки
1
2
3
4
5
6
7
8
9
10
11
12
13
14
15
17
16
18
19
20
21
22
23
25
26
27
28
29
30
31
24
38
32
33
34
35
36
37
39
3
Стандартные аксессуары
1.
Лапка А для зигзага (установлена
на машине)
2. Лапка С для обработки края
3. Лапка D для роликового шва
4. Лапка Е для пришивания молнии
5. Лапка F атласных строчек
6. Лапка G для потайной строчки
7. Лапка Н для пришивания шнура
8. Оверлочная лапка М
9. Лапка R для автоматической петли
10. Отвертка
11. Отвертка-ключ
12. Набор игл
13. Щеточка для чистки пыли
14. Вспарыватель (разрезатель петель)
15. Держатель катушки (большой,
установлен на машине)
16. Держатель катушки (малый)
17. Шпульки (всего 4, одна в машине)
18. Направитель для квилтинга
19. Лапка О для шва 0,6 см
20. Лапка Т для пришивания пуговиц
21. Лапка F-2 для атласных строчек
22. Фетровая прокладка
23. Лапка-верхний транспортер двойной
подачи AD
24. Коленный рычаг
25. Держатель катушки
26. Дополнительный катушечный
стержень
27. Стилус
28. Лапка для бордюров с направителем
29. Лапка QB-H для свободного квилтинга
30. Открытая лапка
31. Прозрачная лапка
32. Педаль
33. Игольная пластина прямострочная
34. Шнур питания
35. Тканенаправитель
36. Полужесткий тканевый чехол
37. Расширительный рабочий стол
38. Приспособление для шитья по кругу
39. Инструкция
* Приспособление для шитья по кругу
закреплено и хранится в боковом
отсеке для аксессуаров.
4
Разновидности прижимных лапок
и аксессуаров
Лапка А для зигзага:
Эта лапка установлена на машине. Это наиболее часто
используемая лапка для различных стежков, включая
прямые и зигзаг. Кнопка фиксирует лапку
в горизонтальном положении, помогая прошить
переход с тонкого слоя на более толстый слой ткани.
Лапка С для обработки края:
Избегайте обсыпания волокон по краю ткани,
обработайте его стежком зигзаг. Щеточка на лапке
предотвращает пропуски стежков по краю ткани
и делает их плоскими.
Подходит для средних тканей.
Лапка D для роликовых швов:
Вставьте ткань в завиток на лапке. Спираль
закручивает ткань, создавая роликовый шов.
Это легкий и профессиональный способ создания швов.
Лапка Е для пришивания молнии:
Эта лапка – для пришивания молнии. Зубцы молнии
проходят вдоль выемок внизу лапки.
Пристегните либо на левую, либо на правую сторону
от иглы для пришивания молнии.
Лапка F для атласных строчек:
Эта прозрачная пластиковая лапка идеально подходит
для атласных и декоративных стежков. Отверстие
по центру внизу лапки позволяет равномерно
накладывать плотные стежки.
Лапка F-2 для пэчворка
Эта открытая лапка для атласных стежков
предназначается для вышивки, аппликации, пэчворка
и монограмм. Вырезы снизу лапки позволяют атласным
стежкам плотно ложиться, открытая передняя часть
лапки не загораживает выполняемые строчки.
Лапка G для потайного шва:
Направитель на лапке обеспечивает захват иглой только
одного или двух волокон ткани, в результате чего
получается аккуратный невидимый шов.
Лапка Н для пришивания шнура:
Создайте собственный дизайн кос или шнуров.
Вставьте от одного до трех шнуров в направители лапки
и прошейте зигзагом или декоративной строчкой
поверх шнура.
Лапка О с направителем:
Аккуратность — ключ к успеху при пэчворке или
квилтинге. Направитель на лапке позволяет создавать
точный припуск на шов в 0,6 см при положении иглы
3.5. Или с положением иглы 4.5 создайте еле заметный
шов в 0,6 см, такой желаемый и часто используемый
квилтерами.
Оверлочная лапка М:
Лапка сконструирована для имитации настоящего
оверлочного шва. Тонкие пластины на лапке не
позволяют краю ткани закручиваться или обсыпаться.
5
Лапка R для автоматической петли:
Расположите пуговицу в держателе в дальней части
лапки. Лапка автоматически прошьет петлю по размеру
пуговицы.
Лапка Т для пришивания пуговиц:
Форма пуговицы абсолютно не важна. Отличительные
особенности этой лапки — открытая передняя часть
крепко удерживает пуговицу на ткани.
Лапка QB-H для свободного квилтинга:
Эта лапка используется для любой свободно-ходовой
техники как стипплинг, вышивка и др.
Высота лапки регулируется, выступ на лапке
совмещается с открытой и прозрачной лапками.
Открытая лапка:
При создании свободного квилтинга открытая лапка
не загораживает рабочую область.
Прозрачная лапка:
Эта лапка специально предназначается для создания
свободного квилтинга зигзагом.
Направитель для квилтинга:
Направитель для квилтинга помогает создавать ровные
параллельные ряды стежков.
Лапка для бордюров с направителем:
На этой прозрачной лапке имеются параллельные
направительные линии для создания ровных рядов
декоративных строчек.
Лапка-верхний транспортер двойной подачи AD:
Это специальная лапка для работы с трудно
продвигаемыми материалами. Она предотвращает
смещение слоев тканей и не позволяет им собираться.
Она великолепна при квилтинге и создании одеял.
Приспособление для шитья по кругу:
На свободном рукаве имеются отверстия на 1,8 см
друг от друга. При помощи этого приспособления
зафиксируйте ткань и создавайте великолепные круги
или волны или большие фестоны.
Игольная пластина для прямых стежков:
Пропуски стежков или сборки на ткани? Маленькое
отверстие для иглы в этой пластине не позволяет игле
толкать ткань под игольной пластиной. (Используется
только центральное положение иглы.)
1
2
3
5
6
7
8
9
1
4
6
Съёмный столик
Потяните за столик влево от машины как показано
на рисунке, чтобы открыть «свободный рукав»
для обработки манжет, рукавов и др.
1
Съемный столик
Как снять:
Потяните его влево.
Как установить:
Установите съемный столик на полозья и подтолкните
его вправо.
Работа со свободным рукавом:
Свободный рукав используется для обработки рукавов,
манжетов, брюк и других изделий по кругу. Он также
полезен при штопке носков или создания заплаток
на области колен и локтей.
Хранение аксессуаров
Аксессуары удобно хранятся в отсеке для лапок
под верхней крышкой и в съемном столике.
Под верхней крышкой
1
Открытая лапка для атласных строчек F-2
2 Лапка О для шва 0,6 см
3 Лапка Т для пришивания пуговиц
4 Оверлочная лапка М
5 Прозрачная лапка
6 Открытая лапка
7 Лапка QB-H для свободного квилтинга
8 Держатель лапки
9 Стилус
1
1
2
3
4
5
6
7
8
9
10
12
13
11
14
2
3
4
5
6
7
8
9
10
15
A
7
В съемном столике
Аксессуары также могут храниться в съемном столике.
Потяните за верхнюю крышку и откройте отсек.
1
Отвертка
2 Отвертка-ключ
3 Лапка-верхний транспортер двойной подачи AD
4 Набор игл
5 Дополнительный катушечный стержень
6 Шпульки
7 Лапка для бордюров
8 Вспарыватель
9 Тканенаправитель
10 Подставка под катушку
11 Держатель катушки (большой)
12 Держатель катушки (малый)
13 Щеточка для чистки пыли
14 Направитель для квилтинга
15 Игольная пластина для прямых стежков
* Игольную пластину можно хранить в отсеке А
в съемном столике.
Боковой отсек
Потяните на себя и откройте крышку.
1
Боковой отсек для хранения аксессуаров
2 Лапка А для зигзага (установлена на машине)
3 Лапка С для обработки края
4 Лапка D для роликового шва
5 Лапка F атласных строчек
6 Лапка Н для пришивания шнура
7 Лапка G для потайной строчки
8 Лапка R для автоматической петли
9 Лапка Е для пришивания молнии
10 Приспособление для шитья по кругу
Кармашки с лапками можно наклонить вперед
для более удобной работы.
1
2
4
3
2
1
5
8
Отклейте защитную пленку с резиновых прокладок
и установите их снизу на ножки.
1
Резиновые прокладки
2 Ножка
3 Винт
Прикрутите к верхней части стола 6 ножек винтами.
4 Верхняя часть стола
Установите собранный стол на машину как показано
на рисунке. Придвиньте его вправо к машине
до щелчка. Отрегулируйте высоту стола при помощи
регулируемых винтов.
5 Регулируемый винт
Тканенаправитель
Снимите съёмный столик и установите дополнительный
расширительный столик.
На свободный рукав установите тканенаправитель,
нажав на него и пристегнув на место.
Передвиньте направитель на желаемую позицию.
Расположите край ткани рядом с тканенаправителем
и начинайте работать.
1
Тканенаправитель
2 Свободный рукав
Сборка дополнительного расширительного
столика
Вступление
Швейная машина является одним из важнейших инструментов в арсенале каждого рукодельника. Она позволяет создавать одежду и текстильные изделия, сохраняя высокое качество и профессиональный вид. Швейная машина Excellence in Quality – это именно та модель, которая отличается непревзойденным качеством и функциональностью.
В данной статье мы предоставим вам подробную инструкцию по применению швейной машины Excellence in Quality на русском языке. Рассмотрим ее основные характеристики, режимы работы и функциональные возможности. Вы сможете ознакомиться с полезными советами и трюками по использованию этой модели для создания профессиональных швейных проектов. Начнем!
Основные характеристики
Швейная машина Excellence in Quality предлагает широкий спектр возможностей для реализации ваших швейных идей. Она обладает прочным и надежным механизмом, который гарантирует стабильность работы на протяжении длительного времени.
Мощный двигатель швейной машины позволяет легко обрабатывать различные виды тканей – от легкого хлопка до толстой кожи. Благодаря присутствию нескольких режимов скорости, вы сможете выбрать оптимальную скорость шитья для каждого проекта.
Швейная машина Excellence in Quality оснащена широким выбором стежков – от обычного прямого до сложных декоративных. Вы сможете создавать неповторимые узоры и оформления на вашей одежде и других текстильных изделиях. Кроме того, модель оснащена функцией программирования заданных стежков, что поможет вам повторять их в точности в каждом проекте.
Режимы работы и функциональные возможности
Швейная машина Excellence in Quality обладает разнообразными режимами работы, которые позволяют вам создавать проекты различной сложности. Рассмотрим некоторые из них:
- Простой режим – идеально подходит для начинающих рукодельников. Вы сможете освоить основы шитья и создавать простые проекты, такие как подушки и скатерти.
- Режим стежков с узорами – позволяет выбирать из множества предустановленных узоров для декоративного оформления одежды.
- Режим автоматической строчки – упрощает шитье рядов, что особенно полезно при создании изделий с длинными швами.
Все режимы работы швейной машины Excellence in Quality легко настраиваются с помощью интуитивно понятных кнопок и регуляторов. Инструкция, поставляемая вместе с моделью, содержит подробное описание каждого режима и пошаговые инструкции для настройки.
Советы и трюки по использованию
Чтобы получить максимальную отдачу от швейной машины Excellence in Quality, рекомендуем следующие советы и трюки:
- Проверьте, что машина подключена к электричеству и включена перед началом работы.
- Выберите подходящий тип иглы и нити для каждого проекта.
- Периодически чистите машину от остатков нитей и тканей, чтобы избежать застревания и обеспечить бесперебойную работу.
- При необходимости, используйте прессер-стопор, чтобы закрепить сложные углы и кромки тканей.
- Не забывайте проверять качество швов и регулировать натяжение нити при необходимости.
Итог

Швейная машина Excellence in Quality – это надежный и профессиональный инструмент, который поможет вам осуществить самые смелые швейные идеи. Благодаря ее многофункциональности и простоте использования, вы сможете создавать швейные проекты, которые будут радовать вас и других своим качеством и красотой.


Мы надеемся, что данная инструкция по применению швейной машины Excellence in Quality на русском языке стала для вас полезной и позволит вам использовать все возможности этой модели наиболее эффективно. Желаем вам творческих успехов и приятного шитья!
Швейная машина Excellence in Quality: инструкция по применению на русском
В наше современное время швейные машины являются незаменимым инструментом для создания и ремонта одежды. Они облегчают жизнь тем, кто не представляет свою жизнь без шитья и создания собственных уникальных изделий.
Швейная машина Excellence in Quality – это модель, которая отличается высоким качеством и простотой использования. В данной статье мы предоставим вам подробную инструкцию по применению данной модели на русском языке.
Установка и подготовка к работе
- Перед началом работы с машиной необходимо установить ее на рабочую поверхность. Расположите ее так, чтобы было достаточно места для прохождения ткани.
- Подсоедините швейную машину к источнику питания.
- Снимите защитный чехол с машины.
- Проверьте правильность установки нитей и нитевдевателя.
- Установите подходящую иглу в швейную машину.
- Расположите ткань снизу иглы.
Основные функции швейной машины Excellence in Quality

Прежде чем перейти к использованию различных функций швейной машины Excellence in Quality, необходимо ознакомиться с их описанием и правилами использования.
Внимание! Перед каждым использованием швейной машины рекомендуется прочитать руководство пользователя и ознакомиться с основными функциями.

Далее представлены основные функции, которыми обладает швейная машина Excellence in Quality:
- Пешочка для пришивания молнии: данная функция позволяет легко и быстро пришивать молнии на одежду.
- Пешочка для строчки краев ткани: с помощью этой функции вы сможете прошить и пришить края тканей, чтобы они не распустились.
- Пешочка для создания петелек: используйте эту функцию, чтобы создать красивые петли на вашей одежде.
- Регулировка длины стежка: швейная машина Excellence in Quality позволяет вам выбирать нужную длину стежка в зависимости от типа работы.
- Регулировка скорости: вы можете настроить скорость работы машины, чтобы сделать шитье более комфортным для вас.
Полезные советы и рекомендации
В ходе использования швейной машины Excellence in Quality следуйте следующим рекомендациям:
- Перед началом работы проверьте, нет ли на машине повреждений или неисправностей.
- Выбирайте подходящую иглу и нити для вашего проекта.
- Следите за правильностью натяжения нитей.
- Периодически прочищайте швейную машину от нитей и пыли.
- Придерживайтесь инструкции по уходу за машиной, чтобы она служила вам долго и надежно.
Общий итог
Швейная машина Excellence in Quality – это предмет, который может стать вашим надежным помощником в создании и ремонте одежды. Она обладает широкими функциональными возможностями и проста в использовании.
Перед использованием швейной машины Excellence in Quality рекомендуется внимательно прочитать инструкцию по применению на русском языке. Правильная установка и настройка машины поможет вам получить отличные результаты и сделать вашу работу более удобной и эффективной.
Пользуйтесь швейной машиной Excellence in Quality с удовольствием и достигайте новых высот в мире шитья!
Швейная машина Excellence in Quality: инструкция по применению на русском
Шитье — это уникальное и творческое хобби, которое радует многих людей со всего мира. Для достижения идеальных результатов и создания качественных изделий необходимы надежные инструменты. В этой статье мы рассмотрим швейную машину Excellence in Quality и предоставим вам подробную инструкцию по ее применению на русском языке.
О марке Excellence in Quality
Excellence in Quality — это известный производитель швейных машин с богатым опытом работы. Они стремятся предоставить своим клиентам продукты высокого качества, которые сочетают в себе передовую технологию и надежность.
Швейная машина Excellence in Quality имеет множество преимуществ, которые делают ее популярным выбором среди профессионалов и начинающих ремесленников. Она обладает широким функционалом, простотой использования и долговечностью.
Инструкция по применению
1. Подготовка машины:
- Установите швейную машину на ровную и стабильную поверхность.
- Проверьте наличие достаточного количества нитей верхней и нижней.
- Установите выбранную иглу.

2. Начало работы:
- Включите швейную машину.
- Выберите желаемую скорость шитья.
- Поместите ткань под иглу и опустите лапку ножа.
- Начните шитье, управляя тканью с помощью руки.

3. Выполнение различных стежков:
- Различные типы стежков доступны на швейной машине Excellence in Quality. Используйте соответствующие настройки для создания ровных стежков, обратных стежков, строчек и других эффектов.
- Экспериментируйте с различными стежками, чтобы придать вашим проектам уникальный вид и добавить эмоциональности.
Креативность и самовыражение — вот ключевые слова, определяющие мир шитья. Швейная машина Excellence in Quality поможет вам воплотить ваши идеи в реальность, обеспечивая безупречные швы и комфортную работу.
Заключение
Швейная машина Excellence in Quality — это надежный помощник в вашем швейном процессе. Она обладает высоким качеством исполнения и доступна для всех, кто желает погрузиться в мир шитья.
Следуя нашей детальной инструкции на русском языке, вы сможете максимально эффективно использовать все функции машины и достигнуть результатов высокого уровня. Пусть каждый стежок будет наполнен вашим творчеством и страстью к шитью!
Table of Contents
- eXcellence 782 Sewing Machine
- Product Information
- Product Usage Instructions:
- Frequently Asked Questions
- IMPORTANT SAFETY INSTRUCTIONS
- ESSENTIAL PARTS
- GETTING READY TO SEW
- Stitch Reference Chart
- Winding the bobbin
- Threading the Machine
- 9/65-11/75
- ORDINARY SEWING MODE
- Securing Seams
- BUTTONHOLES AND SPECIALTY STITCHES
- Circular Sewing
- PROGRAMMING A PATTERN COMBINATION
- SEWING APPLICATION
- References
- Read User Manual Online (PDF format)
- Download This Manual (PDF format)
eXcellence 782 Sewing Machine

Product Information
The eXcellence 782 sewing machine is a versatile household appliance designed
to meet your sewing needs. With a range of features and accessories, this
machine offers convenience and precision for your sewing projects.
Product Usage Instructions:
Safety Instructions:
Before using the eXcellence 782 sewing machine, it is crucial to follow these
safety guidelines:
- Never leave the appliance unattended when plugged in.
- Avoid using the sewing machine as a toy, especially around children.
- Use only recommended attachments and accessories.
Setting Up the Machine:
Follow these steps to set up your eXcellence 782 sewing machine:
- Place the machine on a stable surface.
- Plug in the power cord to a suitable electrical outlet.
- Refer to the owner’s manual for specific threading instructions.
Sewing Operations: To start sewing with the eXcellence 782, follow these
general steps:
- Select the desired stitch pattern on the machine.
- Position the fabric under the presser foot.
- Lower the presser foot and begin sewing at a steady pace.
Frequently Asked Questions
- Q: Can I use the eXcellence 782 sewing machine outdoors?
- A: No, this sewing machine is intended for indoor household use only. Avoid using it outdoors.
- Q: How should I clean and maintain the eXcellence 782?
- A: Refer to the owner’s manual for specific cleaning instructions. Regular maintenance will help prolong the life of your sewing machine.
“`
eXcellence 782
Instruction Book
IMPORTANT SAFETY INSTRUCTIONS
When using an electrical appliance, basic safety precautions should always be
followed, including the following: This sewing machine is designed and
manufactured for household use only. Read all instructions before using this
sewing machine.
DANGER– To reduce the risk of electric shock: 1. An appliance should never be
left unattended when plugged in. Always unplug this sewing machine from the
electric outlet immediately after using and before cleaning.
WARNING– To reduce the risk of burns, fire, electric shock, or injury to
persons:
1. Do not allow to be used as a toy. Close attention is necessary when this
sewing machine is used by or near children.
2. Use this appliance only for its intended use as described in this owner’s
manual. Use only attachments recommended by the manufacturer as contained in
this owner’s manual.
3. Never operate this sewing machine if it has a damaged cord or plug, if it
is not working properly, if it has been dropped or damaged, or dropped into
water. Return this sewing machine to the nearest authorized dealer or service
center for examination, repair, electrical or mechanical adjustment.
4. Never operate the appliance with any air opening blocked. Keep ventilation
openings of this sewing machine and foot controller free from accumulation of
lint, dust and loose cloth.
5. Never drop or insert any object into any opening. 6. Do not use outdoors.
7. Do not operate where aerosol (spray) products are being used or where
oxygen is being
administered. 8. To disconnect, turn all controls to the off (“O”) position,
then remove plug from outlet. 9. Do not unplug by pulling on cord. To unplug,
grasp the plug, not the cord. 10. Keep fingers away from all moving parts.
Special care is required around the sewing machine
needle and/or cutting blade. 11. Always use the proper needle plate. The wrong
plate can cause the needle to break. 12. Do not use bent needles. 13. Do not
pull or push fabric while stitching. It may deflect the needle causing it to
break. 14. Switch this sewing machine off (“O”) when making any adjustment in
the needle area, such as
threading the needle, changing the needle, threading the bobbin or changing
the presser foot, and the like. 15. Always unplug this sewing machine from the
electrical outlet when removing covers, lubricating, or when making any other
adjustments mentioned in this owner’s manual.
SAVE THESE INSTRUCTIONS
For Europe only: This appliance can be used by children aged from 8 years and
above and persons with reduced physical, sensory or mental capabilities or
lack of experience and knowledge if they have been given supervision or
instruction concerning use of the appliance in a safe way and understand the
hazards involved. Children shall not play with the appliance. Cleaning and
user maintenance shall not be made by children without supervision. For
outside Europe (except U.S.A.): This appliance is not intended for use by
persons (including children) with reduced physical, sensory or mental
capabilities, or lack of experience and knowledge, unless they have been given
supervision or instruction concerning use of the appliance by a person
responsible for their safety. Children should be supervised to ensure that
they do not play with the appliance.
Please note that on disposal, this product must be safely recycled in
accordance with relevant National legislation relating to
electrical/electronic products. If in doubt please contact your retailer for
guidance. (EEA (European Economic Area) and UK)
ESSENTIAL PARTS
Names of Parts
(1) Thread take-up lever (2) Reference chart (3) Top cover (4) Touch panel
stylus holder (5) Foot compartment (6) Bobbin thread cutter B (7) Bobbin
winder spindle (8) Bobbin thread cutter A (9) Hole for extra spool pin (10)
Spool pin (11) Spool holder (large)
(12) (13)
(14) (15)
(16) (17)
(18)
(19) (20)
(12) Retractable sewing light (13) Face plate (14) Needle threader lever (15)
Thread cutter/holder (16) Extension table (accessory storage) (21) (17) Needle
plate release lever (18) Holes for circular pivot pin (19) Feed balancing dial
(20) Knee lifter socket (21) Visual touch screen
(22) Speed control slider (23) Start/stop button (24) Reverse button (25)
Auto-lock button (26) Needle up/down button (27) Presser foot lifter button
(28) Thread cutter button
(25) (26) (27) (28)
(24)
(23) (22)
(29) (30)
(44) (45)
(43)
(42)
(41)
(31)
(32) (33) (34) (35)
(29) Stitch width adjusting dial (30) Stitch length adjusting dial
(31) Lower thread guide (32) Needle clamp screw (33) Needle bar thread guide
(34) Needle (35) Zigzag foot A (36) Needle plate (37) Hook cover release
button (38) Hook cover plate (39) Bobbin thread cutter (40) Feed dogs (41)
Foot holder (42) Thumbscrew (43) Lever (44) Buttonhole lever (45) Needle
threader guide
(40) (39)
(38) (37) (36)
4
(46)
(47)
(48) (49)
(50)
(51)
(55)
(52) (53) (54)
(46) Carrying handle
(47) Handwheel
(48) Dual feed balancing dial
(49) Ventilation openings
(50) Thread cutter switch jack (51) USB port
(58)
(52) Drop feed lever
(53) Machine socket
(54) Foot control jack
(57)
(55) Power switch
(56) Dual feed drive
(57) Presser foot lifter
(58) Attachment connector cover
(56)
NOTE:
· To carry the sewing machine, hold the carrying
handle with your hand, and support the sewing
machine with the other hand.
· Sewing machine design and specifications are
subject to change without prior notice.
Standard Accessories
No.
Part Name
Part No.
1 Zigzag foot A (set on the machine) 859802006
2 Overcasting foot M
859810007
3 Satin stitch foot F
859806011
4 Blind hemming foot G
859807001
5 Zipper foot E
859805009
6 1/4 seam foot O
859814012
7 1/4 seam foot O (without guide)
202313104
8 Automatic buttonhole foot R
862822013
9 Stabilizer plate
859832016
10 Rolled hem foot D
859804008
11 Open-toe satin stitch foot F2
859813000
12 Darning foot PD-H
859839002
13 Darning foot PD-H (open-toe)
859839013
14 Professional grade foot HP
865803006
15 Free motion quilting closed-toe foot QC 859836009
16 Free motion quilting open-toe foot QO 859837000
17 Free motion quilting zigzag foot QV 859812009
18 Variable zigzag open-toe foot QZ
862895006
19 Ruler work foot QR
862896007
20 Button sewing foot T
859811008
21 Button shank plate
832820007
22 Dual feed holder
859817015
23 Dual feed foot AD
859819109
24 Dual feed plus professional foot HP2 865522008
5
(29)
(25)
(26)
(30)
(27)
(28)
(31)
(32)
Standard Accessories
No.
Part Name
25 A.S.R. case
26
A.S.R. (Accurate Stitch Regulator) with ASR-QC
27 A.S.R.
28 A.S.R. closed-toe foot ASR-QC
29 A.S.R. open-toe foot ASR-QO
30 A.S.R. clear-view foot ASR-QV
31 A.S.R. ruler work foot ASR-QR
32 A.S.R. instruction card
Part No. 869408010
868835006
868835017 868837008 868837101 868837204 868837307 103334A01
(1) (5)
(9) (13)
(2)
(3)
(4)
(6)
(7)
(8)
(10)
(11)
(12)
(15)
No.
Part Name
1 Bobbin x 5* (1 set on the machine)
2 Needle set
3 Lint brush
4 Seam ripper (Buttonhole opener)
5 Quilting guide bar
6 Screwdriver
7
Spool holder (large) x 2* (1 set on the machine)
8 Spool holder (small) x 2*
9 Spool holder (special) x 2*
10 Extra spool pin
11 Touch panel stylus
12 Circular pivot pin
13 Needle plate (set on the machine)
14 Hook cover plate
15 Straight stitch needle plate
16 Hook cover plate
17 Professional grade needle plate HP
18 Hook cover plate (HP)
19 Accessory case
Part No. 102261103 859856005 802424004 647808009 755802001 820832005
822020503
822019509 862408008 809146000 860194002 849801004 861606016 809136100
862817118 809136100 865805019 809136A01 866801018
- This is a part number of single item (not set number).
(14) (17)
(16) (19)
(18) 6
(20)
(21)
(22)
(23) (26)
(24)
(25)
No.
Part Name
20 Instruction book
21 Threading guide sticker
22 Dust cover
U.S.A. and Canada
23
Power supply cable**
U.K. Australia
Continental Europe
24 Cloth guide
25 Extra wide table
26 Knee lifter
Part No. 869800407 101506A08 858802069 856519004 830377008 830314018 830335004
858401008 865812008 846417022
** The power supply cable included may differ from the illustration.
(1)
(2)
(3)
(4)
(5)
(6)
(7)
(8)
No.
Part Name
1 Foot control
2 Thread cutter switch
3 Cable tie
Base plate 4
*Rubber sole x 6**
5 Setscrew A x 4**
6 Setscrew B x 2**
7 Washer x 2**
8 Rubber sole x 2**
Part No. 043170108 865810006 767849306 767849100 525010005 000081005 865045002
000072508 525010005
- Rubber sole x 6 are already attached on the under side of the base plate.
** This is a part number of single item (not set number).
Instructional Video
A presentation video with quick-start information for this model is available
online and can be accessed using the following QR code.
https://www.youtube.com/playlist?list=PLzURYW7eSwbGCTc2tRbWKe5sG0kPfkkCz
Download application for PC
You can design and create your own stitch patterns.
- This application is for PC only.
StitchComposer
Optional accessories Optional accessories for this model are avaialble by
accessing the following QR code.
Optional accessories
7
(2) (2)
(1) (3)
Extension Table The extension table provides an extended sewing area and can
be removed for free-arm sewing.
(1) Extension table (2) Free-arm
To detach: Draw the table out to the left. To attach: Slide the table on the
base and push the table to the right.
Free-arm Sewing Free-arm sewing is used for stitching sleeves, waistbands,
pant legs or any other tubular garments. It is also useful for darning socks
or mending knees or elbows.
(3) Free-arm
Accessory Storage
The accessories can be conveniently stored in the accessory case, the
compartments of the extension table and the compartments under the top cover.
To store the accessories in the compartment of the
extension table, hook your fingers in the hollow on the left
side of the extension table. While holding the extension
(1)
table with the other hand, pull it open in the direction of
the arrow to open it.
(1) Foot compartment
(2) Stabilizer plate
(3) Automatic buttonhole foot R
(4) Straight stitch needle plate
(5) Professional grade needle plate HP
(6) Bobbin
(7) Dual feed foot AD
(8) Dual feed plus professional foot HP2
(3)
(9) Extra spool pin
(10) Circular pivot pin
(4)
(5)
Other accessories can be also stored in the compartment
in the extension table.
(6)
(1)
(10)
(7) (8) (9)
Accessory Case
To store the other accessories, open the accessory case and store in the
appropriate places. Optional accessories can also be stored in this case.
8
1. 2.
(2)
(1)
(3)
(4)
(5)
4.
Extra Wide Table To attach: 1. Screw the adjusting screws into the legs. 2.
Peel off the backing paper from the rubber soles and
attach to the bottom of the legs. (1) Adjusting screw (2) Leg (3) Rubber sole
3. Attach the 6 legs to the table top with the setscrews. (4) Setscrew (5)
Table top
4. Remove the extension table.
5. Place the assembled table on the machine.
6. Adjust the height of the table top by turning the
adjusting screw.
loosen
tighten
To remove: To remove the legs from the table top, you do not have to loosen
the setscrews. Turn the leg clockwise to remove the leg from the table top.
To attach the leg to the table top again, insert the leg into the attachment
of the leg, then turn the leg counterclockwise until it stops.
9
(1) (3)
Foot Control and Thread Cutter Switch
To attach the foot control and the thread cutter switch to the base plate,
tighten setscrews, and setscrews with washers as shown.
(1) Foot control (2) Thread cutter switch (3) Base plate (4) Setscrew A (5)
Setscrew B (6) Washer
(2)
(4)
(4)
(5)
(6)
Adjusting the Thread Cutter Switch Position
Placing the thread cutter switch to the left.
The thread cutter switch position can be adjusted for your convenience.
If you wish to attach the thread cutter switch to the left side of the foot
control, follow the procedure below.
NOTE: A Phillips head screwdriver is not included with this machine.
1. Remove the setscrews A, B and washers with a Phillips head screwdriver.
(1) (1)
(2)
(3)
(1) Setscrew A (2) Setscrew B
(3) Washer
2. Turn the base plate 180 degrees.
3. Attach the foot control and thread cutter switch
with the setscrews and the washers. Tighten the
setscrews A and B. Be sure that the cable is not
caught between the foot control and the base plate.
(1) Setscrew A (2) Setscrew B
(3) Washer
(2)
(3)
(1)
(1)
10
Adjusting the horizontal position of the thread cutter switch
1. Loosen the setscrews under the switch.
(1) Setscrew
(2) Washer
(2) (1)
2. Slide the switch to the left or right, and fix it at the
desired position by tightening the setscrews with a
screwdriver.
1. 2.
(2) (5) (4)
Adjusting the vertical position of the thread cutter switch
1. Remove the setscrews and washers.
2. Move the switch forward or backward, attach the
(3)
switch at the desired position and fix it with the setscrews and washers.
(1) Setscrew (2) Washer
(3) Desired position
(1)
NOTE:
· To fix the thread cutter switch at its lowest position,
(6)
fix the setscrews into the hole (4), and then holes (5). · Tighten the
setscrews securely.
· Peel off the backing paper from the rubber sole (6)
and attach it to the bottom of the thread cutter switch
as shown.
11
GETTING READY TO SEW
Connecting the Power Supply
Using Start/Stop Button
- 1. First make sure the power switch is off.
2. Insert the machine plug of the power supply cable
(1)
into the machine socket.
3. Insert the power supply plug into the wall outlet, and turn the power
switch on.
(3) 2.
(2)
(1) Power switch (2) Machine plug (3) Machine socket (4) Power supply plug (5)
Wall outlet
3. (5)
(4)
NOTE: · Make sure to use the power supply cable that came
with the machine. · If you turn off the power switch, wait for 5 seconds
before turning it on again.
WARNING:
· While in operation, always keep your eyes on the sewing area, and do not
touch any moving parts such as the thread take-up lever, handwheel or needle.
· Always turn off the power switch and unplug the machine from the power
supply: – when leaving the machine unattended. – when attaching or removing
parts. – when cleaning the machine.
· Do not place anything on the foot control.
Before Using Your Sewing Machine
Before using your sewing machine for the first time, place a scrap of fabric
under the presser foot and run the machine for a few minutes. Wipe away any
oil which may appear.
Operating Instructions:
The symbol “O” on the switch indicates the “off” position of the switch.
For the U.S.A. and Canada only Polarized plug (one blade wider than the
other): To reduce the risk of electric shock, this plug is intended to fit in
a polarized outlet only one way. If it does not fit fully in the outlet,
reverse the plug. If it still does not fit, contact a qualified electrician to
install the proper outlet. Do not modify the plug in any way.
12
(1)
(5)
3. (4)
(2)
(3)
4. (7)
(6)
Using Foot Control
If you wish to use the foot control, pull out the cord from the foot control
and insert the pin connector into the jack on the machine.
1. First make sure the power switch is off.
2. Insert the machine plug of the power supply cable into the machine socket.
3. Draw out the cord from the foot control and insert the pin connector into
the foot control jack on the machine.
4. Insert the power supply plug into the wall outlet, and turn the power
switch on.
(1) Power switch (2) Machine plug (3) Machine socket (4) Pin connector (5)
Foot control jack (6) Power supply plug (7) Wall outlet
NOTE: The start/stop button does not work when the foot control is connected.
13
Thread Cutter Switch
(1)
If you wish to use the thread cutter switch, insert the pin connector into the
thread cutter switch jack on the
machine.
1. First make sure the power switch is off.
(6)
2. Remove the cable tie from the cable.
(5)
3. Insert the machine plug of the power supply cable
into the machine socket.
4. Insert the pin connector into the thread cutter switch
- (3)
5. (8)
(7)
jack on the machine. 5. Insert the power supply plug into the wall outlet, and
turn the power switch on.
(1) Power switch (2) Cable tie
(4)
(3) Pin connector
(2)
(4) Thread cutter switch jack
(5) Machine plug
(6) Machine socket
(7) Power supply plug
(8) Wall outlet
After sewing, depress the thread cutter switch on the right side of the foot
control to trim both the needle and bobbin threads.
Do not depress the thread cutter switch until the start/
stop button turns blue (2).
(1)
(1) Thread cutter switch
NOTE:
· The thread cutter switch does not work without the
foot control being depressed first.
· Bundle the cables with the cable tie as necessary.
(2)
(3) Cable tie
(3) 14
(1)
(2)
(3)
Controlling Sewing Speed Speed Control Slider You can limit the maximum sewing
speed with the speed control slider according to your sewing needs. To
increase the sewing speed, move the slider to the right. To decrease the
sewing speed, move the slider to the left. The sewing speed can be changed
while stitching.
Foot Control
Pressing on the foot control can vary sewing speed. The harder you press the
foot control, the faster the machine runs.
NOTE: · The machine runs at the maximum speed set by
the speed control slider when the foot control is fully depressed. · You can
select the desired start-up speed from slow, medium or high (refer to page
143). · This machine is equipped with an automatic shutdown safety feature to
prevent overheating whenever the machine is running overloaded. Follow the
safety instructions that appear on the visual touch screen.
Cord storage The cord of the foot control can be conveniently stored in the
cord storage under the base cover of the foot control.
(1) Base cover (2) Cord (3) Hooks
Operating Instructions: Foot control model 21380 is for use with this sewing
machine.
15
(3) (4) (5) (6)
(7)
(8)
(2)
(3) Auto-lock button · When the following stitch patterns are selected:
Utility Applique Quilt Bridge Decorative
(1)
Machine Operating Buttons (1) Start/stop button Press this button to start or
stop the machine. The machine starts running slowly for the first few
stitches, then runs at the speed set by the speed control slider. The machine
runs slowly as long as this button is pressed. The button will turn red when
the machine is running, and blue when it has been stopped. Pressing and
holding this button while sewing will slow down the sewing speed and the
machine will stop when the button is released.
NOTE: · The start/stop button cannot be used when the foot
control is connected to the machine. · You can select the desired start-up
speed from slow,
medium or high (refer to page 143).
(2) Reverse button · When the following stitch patterns are selected:
Utility Applique Quilt Bridge Decorative
The machine will sew in reverse as long as the reverse button is pressed.
Release the button to sew forward. When the machine is stopped and foot
control is disconnected, the machine will sew in reverse slowly as long as the
reverse button is pressed. Release the button to stop the machine. · When any
other stitches are selected: If you press the reverse button when sewing any
other patterns, the machine will immediately sew locking stitches and
automatically stop.
Press the auto-lock button to sew a locking stitch immediately. The machine
will automatically stop.
When the machine is stopped, press the auto-lock button and the LED signal (7)
will blink. The machine will immediately sew locking stitches and
automatically stop when the machine is started.
· When any other stitches are selected: Press the auto-lock button to sew a
locking stitch at the end of current pattern. The machine will automatically
stop.
When the machine is stopped, press the auto-lock button and the LED signal (7)
will blink. The machine will sew a locking stitch at the end of the current
pattern and automatically stop when the machine is started.
The machine will trim the threads automatically after locking the stitch when
the auto thread cutting is turned on (refer to page 142).
(4) Needle up/down button
Press this button to bring the needle bar up or down. The machine will stop
with the needle in down position. However, you can change the needle stop
position in the machine setting mode (refer to page 142).
(5) Presser foot lifter button
The presser foot will go up or down by pressing this button.
You can also use the presser foot lifter and knee lifter to raise and lower
the presser foot (refer to pages 18 and 34).
(6) Thread cutter button
After finishing sewing, press this button to trim the threads. The needle bar
automatically rises after trimming the threads (refer to page 42). The LED
signal (8) blinks when the machine trims threads.
NOTE: · The thread cutter button does not function:
– directly after turning on the power. – when the presser foot is raised with
the presser foot
lifter. – after being pressed 3 times in a row.
· Use the thread cutter on the face plate if the thread is #30 or thicker
(refer to page 42).
NOTE: There will be particular functions of the reverse button when stitch
pattern U2, U3, B2, B13, or B14 is selected. Refer to pages 47, 62-63, 68 and
121 for instructions.
After using auto thread cutting or threading the bobbin holder, you can start
sewing without drawing up the bobbin thread.
16
Touch Panel Keys and Jog Dials
CAUTION:
Do not press the touch panel or visual touch screen with hard or sharp objects
like pencils or screwdrivers. Use the touch panel stylus included in the
standard accessories.
(1) Home key
Press this key to return the top of the utility stitch pattern
(1)
selections.
(2) Stitch reference key (refer to page 19)
(2)
Press this key to show the stitch reference chart.
(3) Open file key (refer to pages 81 and 102)
(3)
Press this key and the open file window will open.
You can open pattern combinations and monograms
saved in the machine’s internal memory or on a USB
(4)
flash drive.
(4) Set mode key (refer to page 138)
Press this key to enter the setting mode. You can
(5)
customize the machine settings to your preference.
The settings for “Machine Settings”, “Sewing Settings”,
(6)
and “Language Setting” are available in this mode.
(5) Lockout key
(7)
Press this key to lockout the machine when threading the
machine, replacing the accessories, etc.
To reduce the risk of injury, all the buttons except the lockout key and
presser foot lifter button are deactivated.
To unlock the machine, press this key again.
(9)
(8)
(6) Touch bar
Press on the bar and slide to the right or left to display the next page or
previous page.
(7) Page keys
Press the page key to display the next page or previous page. Press and hold
the page key to turn the pages continuously.
(8) Stitch length adjusting dial (refer to pages 51, 60, etc.)
Turn this jog dial to alter the stitch length of the selected pattern.
(9) Stitch width adjusting dial (refer to pages 50, 53, 60, 68, 122, etc.)
Turn this jog dial to alter the stitch width or needle drop position of the
selected stitch pattern.
17
(2) (1)
(5)
(4) (2)
(6)
(3)
Raising and Lowering the Presser Foot
CAUTION:
Do not turn the handwheel or press the needle up/ down button when the presser
foot is in extra lifted position. This may cause damage to the presser foot.
The presser foot lifter button, the presser foot lifter or the knee lifter
raises and lowers the presser foot. You can raise the presser foot about 6 mm
(1/4) higher than the normal up position by exerting more pressure when
lifting the presser foot lifter or knee lifter. This helps you to place layers
of thick fabric.
(1) Presser foot lifter button (2) Presser foot lifter (3) Presser foot (4) Up
position (5) Extra lifted position (6) Down position
NOTE: The presser foot cannot be lowered with the presser foot lifter if the
foot was raised with the presser foot lifter button.
18
Stitch Reference Chart
Press the stitch reference key to show the stitch reference chart window.
You can select stitches directly by pressing stitch patterns in the stitch
reference charts.
(1)
(1) Stitch reference key
(2) Page number
NOTE:
· Stitch reference charts will not be displayed if the monogram key or sewing
application key is selected.
· When selecting some specific sewing such as twin needle sewing, stitch
patterns not suitable for those
sewing in the stitch reference chart are grayed out
and cannot be selected.
(2)
(2) 19
(2) (3)
(1)
(2)
(1) (4)
Winding the Bobbin Removing the Bobbin Press the lockout key. Slide the hook
cover release button to the right, and remove the hook cover plate.
(1) Hook cover release button (2) Hook cover plate
Lift out the bobbin from the bobbin holder. (3) Bobbin
NOTE: · Use “J” plastic bobbins (4) for the horizontal hook.
Using other bobbins, such as pre-wound paper bobbins, may cause stitching
problems and/or damage to the bobbin holder. · Do not use the easy bobbin or
metal bobbins.
Setting the spool of thread Lift up the spool pin. Place the spool of thread
on the spool pin. Attach the spool holder (large), and press it firmly against
the spool of thread.
(1) Spool holder (large)
Use the spool holder (small) to hold narrow or small spools of thread.
(2) Spool holder (small)
(3)
(3) (3)
(4) (5)
(4)
(1)
(2)
Use the spool holder (special) to hold the specific size of the spool of
threads as shown. The sizes of the spools of thread are as follows; The hole
diameter of the spool has a range of 3/8 to 7/16 (9.5 mm to 10.5 mm), and the
spool length has a range of 2 3/4 to 3 (70 mm to 75 mm).
(3) Spool holder (special) (4) Hole diameter (3/8 to 7/16) (5) Spool length (2
3/4 to 3)
Firmly insert the spool holder (special) into the hole and hold the spool as
illustrated.
Extra spool pin Use the extra spool pin when you need to wind a bobbin without
unthreading the machine while working on a sewing project (refer to page 21).
Insert the extra spool pin into the hole as shown. Place a spool of thread on
the extra spool pin and fix the spool with the spool holder.
(1) Extra spool pin (2) Hole for extra spool pin (3) Spool holder
NOTE: The extra spool pin is also used for twin needle sewing.
20
Winding the bobbin
NOTE: Set the speed control slider at the fastest position (refer to page 15).
1. Pull the thread from the spool. Hold the thread with both hands and pass
the thread into the guide slot. Draw the thread to the left and forward around
the thread guide. Draw the thread to the rear and to the right around and
under the guide plate. (1) Guide slot (2) Thread guide (3) Guide plate
2. Firmly pull the thread to the right while holding it with both hands.
Bobbin winding when the extra spool pin is attached If you want to wind the
bobbin with the extra spool pin, do not pass the thread into the guide slot.
Instead, draw the thread around the thread guide as shown.
(1) Guide slot (2) Thread guide
3. Put the bobbin on the bobbin winder spindle. Be sure that the bobbin snaps
into the place. (4) Bobbin (5) Bobbin winder spindle (6) Slit (7) Spring
(Projection)
4. Pass the thread to the bobbin. Hold the thread with both hands and wind it
around the bobbin clockwise several times.
5. Insert the thread into one of the slits of the flange plate and pull the
thread to cut. (8) Flange plate (9) Slit
6. Push the bobbin to the right. The visual touch screen will show the bobbin
winding sign.
NOTE: Do not move the bobbin winder spindle while the machine is running.
7. Start the machine. Stop the machine when the bobbin is fully wound and
stops spinning. Return the bobbin winder spindle to its original position.
8. Remove the bobbin. Cut the thread with the bobbin thread cutter B. (10)
Bobbin thread cutter B
NOTE: For safety purposes, the machine will automatically stop 1.5 minutes
after starting bobbin winding.
21
Inserting the Bobbin
1. Press the lockout key.
Place the bobbin in the bobbin holder with the thread
(2)
(3)
running off counterclockwise as shown on the hook
cover plate.
(1) Lockout key (2) End of thread (3) Bobbin holder (4) Hook cover plate
(1)
(4)
(5)
(6)
(7)
(8) Correct
Wrong
2. Hold the bobbin with your fingertip so it does not rotate. Guide the
thread into the front notch of the bobbin holder. Pull the thread to the left
to pass it under the guide. (5) Front notch (6) Guide
3. Draw the thread to the left to pass it into the guide path marked “1”.
Make sure that the thread comes out from the side notch of the bobbin holder.
(7) Guide path 1 (8) Side notch
NOTE: If the thread does not come out from the side notch, rethread from step
(8)
(8)
- (9)
(10)
(4)
4. Continue to draw the thread along the guide path marked “2” and pull the
thread to the right through the slit. The thread will be cut to a proper
length and held in place. (9) Guide path 2 (10) Slit (Thread cutter)
5. Set the left edge of the hook cover plate into the opening. Push the hook
cover plate down to fit in place.
NOTE: · Unless otherwise noted, you can start sewing
without drawing up the bobbin thread. · Refer to page 26 for how to draw up
the bobbin
thread.
22
6. 7.
3. 4. 8.
- (2)
Threading the Machine
CAUTION:
Always make sure to press the lockout key to lockout the machine before
threading the machine.
Press the needle up/down button to raise the take-up lever to the highest
position. Press the lockout key to lockout the machine. The presser foot will
go down and the upper thread tension disks will open.
(1) Lockout key
(1) Pass the thread in order from 1. to 8. 1. Hold the thread with both hands
and pass the thread into the guide slot. (2) Guide slot
- (3)
(4)
3. 4.
(4) (5) (7)
(6)
2. Be sure that the thread is pulled down under the notch and into the space
below the guide slot as shown. (3) Notch
3. Hold the thread with both hands and draw the thread around the corner of
the guide. Firmly pull the thread toward you along the right channel until the
thread snaps. (4) Corner of the guide (5) Right channel
4. Draw the thread down along the right channel and around the bottom of the
thread guide plate. Pull the thread up along the left channel. (5) Right
channel (6) Thread guide plate (7) Left channel
23
- (8)
6. 7.
(9)
(10)
5. While holding the thread at the spool, firmly draw the thread up and to
the back of the take-up lever. Draw the thread forward to slip it into the eye
of the take-up lever. (8) Eye of the take-up lever
6. Then pull the thread down along the left channel and through the lower
thread guide. (9) Lower thread guide
7. Slide the thread from the right of the needle bar thread guide to the
left. (10) Needle bar thread guide
8. Thread the needle with the needle threader (refer to the next page).
Example (1)
Guide Sticker for Threading
There is a threading guide sticker in the standard accessories. If you wish,
you can attach the sticker on the machine to check the threading procedure.
(1) Threading guide sticker
24
- (1)
-
(3)
Built-in Needle Threader
NOTE:
· The needle threader can be used with a #11 to #16
needle.
· Thread size 50 to 90 is recommended.
(2)
· Do not use thread size 30 or thicker.
· The needle threader cannot be used with the twin
needle.
1. Press the needle up/down button to raise the needle. Press the lockout key
to lock the machine. (1) Needle up/down button (2) Lockout key
2. Pull the thread up to the left, over the needle threader guide while
holding the thread near the spool with your hand. (3) Needle threader guide
(4)
NOTE:
Be sure that the thread pass the slit of the needle
threader as shown.
(4) Slit
3. Pull the thread up and slip it between the thread cutter and face plate
from behind.
Pull the thread toward you to cut.
4. Pull down the needle threader lever as far as it will go.
5. Slowly release the needle threader lever to its original
position to pass the thread through the needle eye.
NOTE: If the thread loop is formed after releasing the needle threader lever,
pull out the thread loop through the needle eye.
25
- (1) (2)
-
(3)
-
(4)
Drawing Up the Bobbin Thread After using auto thread cutting or threading the
bobbin holder, you can start sewing without drawing up the bobbin thread.
However, you need to draw up the bobbin thread when sewing gathering stitches,
etc. 1. Remove the bobbin. Insert the bobbin into the
bobbin holder again and rethread the bobbin holder according to the
instructions on page 22, but leave a 10 cm (4) tail of bobbin thread as shown.
(1) Bobbin thread NOTE: Do not cut the bobbin thread with the thread cutter.
(2) Thread cutter 2. Raise the presser foot. Hold the needle thread lightly
with your left hand. (3) Needle thread
3. Press the needle up/down button twice to lower and raise the needle and
pick up the bobbin thread. (4) Needle up/down button
4. Pull both threads 10 cm (4) under and behind the presser foot.
26
(1) (3)
(4)
Replacing Needles
CAUTION:
Always make sure to press the lockout key to lockout the machine before
replacing the needle.
Raise the needle by pressing the needle up/down button.
Press the lockout key.
(2)
(1) Needle up/down button
(2) Lockout key
Loosen the needle clamp screw by turning it counterclockwise. Remove the
needle from the clamp.
(3) Needle clamp screw
Insert a new needle into the needle clamp with the flat side of the needle to
the rear.
(4) Flat side
When inserting the needle into the needle clamp, push it up against the
stopper pin and tighten the needle clamp screw firmly with a screwdriver.
To check needle straightness, place the flat side of the needle onto something
flat (a needle plate, glass, etc.).
The gap between the needle and the flat surface should be consistent.
(5) Gap
(5)
Never use a blunt needle.
CAUTION:
Be sure to tighten the needle clamp screw firmly with a screwdriver when
attaching a needle to the machine, otherwise the needle may break or cause
malfunction.
Fabric
Thread
Needle
Lawn
Georgette Cotton #80-100 Blue tip needle
Fine Tricot
Synthetic
Universal needle
Organza #80-100
9/65-11/75
Crepe
Medium
Sheeting Jersey
Broadcloth
Fleece
Cotton #50-80
Synthetic #50-80
Red tip needle Purple tip needle Universal needle #11/75-14/90
Heavy weight
Denim Tweed Coating Quilting
Cotton #40-50
Synthetic #40-50
Red tip needle Purple tip needle Universal needle #14/90-16/100
NOTE: 1 x twin needle, 2 x blue tip needle (#11/75), 1 x red tip needle
(#14/90) and 1 x purple tip needle (#14/90) are included in the needle case
(Part No. 859856005).
Fabric and Needle Chart
· For general sewing, use a red needle. · Fine threads and needles should be
used for sewing
fine fabrics. · In general, use the same thread for both needle and
bobbin. · Use a blue tip needle for sewing fine fabrics, stretch
fabrics, tricot and buttonholes to prevent skipped stitches. · Use a purple
tip needle for sewing knits, free quilting and across the hem to prevent
skipped stitches. · Use a stabilizer or interfacing for stretch or fine
fabrics to prevent seam puckering. · Always test the thread and needle size on
a small piece of the same fabric you will use for actual sewing.
27
- (1)
-
(3)
Replacing the Presser Foot
CAUTION:
· Always make sure to press the lockout key before replacing the presser foot.
· Use the proper foot for the selected pattern. The wrong foot can cause the
needle to break.
(2)
1. Raise the needle by pressing the needle up/down
button.
Press the lockout key.
(1) Needle up/down button (2) Lockout key
2. Raise the presser foot lifter. (3) Presser foot lifter
- (4)
3. Press the black lever on the back of the foot holder. The presser foot
will drop off. (4) Lever
CAUTION:
To avoid damaging the lever, do not push it down.
4. Place the presser foot so that the pin on the foot lies
just under the groove of the foot holder.
(7)
Lower the presser foot lifter to lock the foot in place.
(5) Pin
(6)
(6) Groove
(5)
Each foot is marked with an identification letter.
(7) Identification letter
28
- (1)
(3) -
(5) (4) (1)
1. 2.
Removing and Attaching the Foot Holder Remove the foot holder before using
professional grade foot HP, ruler work foot QR, darning foot PD-H, dual feed
foot AD or A.S.R. (Accurate Stitch Regulator).
CAUTION:
Always make sure to press the lockout key to lockout the machine before
replacing the foot holder. (2)
Removing the foot holder 1. Raise the needle by pressing the needle up/down
button. Press the lockout key and raise the presser foot with the presser foot
lifter.
(1) Needle up/down button (2) Lockout key (3) Presser foot lifter
2. Loosen the thumbscrew and remove the foot holder. (4) Thumbscrew (5) Foot
holder
(2) (3)
Attaching the foot holder 1. Attach the foot holder to the presser bar from
the
rear. Lower the presser foot with the presser foot lifter.
(1) Foot holder (2) Presser bar
2. Tighten the thumbscrew securely with the screwdriver. (3) Thumbscrew
29
Attaching Ruler Work Foot QR
Attach Ruler work foot QR to the presser bar from behind. Tighten the
thumbscrew firmly with the screwdriver.
(1) (2)
Attaching Darning Foot PD-H Attach darning foot PD-H or darning foot PD-H
(open-toe) to the presser bar by putting the pin on the needle clamp screw.
(1) Pin (2) Needle clamp screw
Tighten the thumbscrew firmly with the screwdriver.
Attaching Professional Grade Foot HP
Attach professional grade foot HP to the presser bar. Lower the presser foot
with the presser foot lifter. Tighten the thumbscrew firmly with the
screwdriver.
30
1. 2.
(2)
(3) (2)
(1)
Attaching Dual Feed Foot AD or Dual Feed Plus Professional Foot HP2 1. Attach
the dual feed holder to the presser bar from
behind. (1) Dual feed holder
2. Tighten the thumbscrew with your fingers. Push the dual feed link to
engage it with upper feed drive. (2) Dual feed link (3) Upper feed drive
3. Lower the presser foot lifter. Lower the needle to the lowest position by
turning the handwheel.
4. Tighten the thumbscrew securely with the screwdriver.
(2) (1)
Retractable Sewing Light In addition to the twin LED lights, the machine is
equipped with a retractable sewing light. Place your finger in the groove and
slide the arm towards you. The light will turn on automatically.
(1) Arm (2) Groove Push back the arm to turn the light off and store it.
CAUTION:
Do not hit or exert excessive force on the arm of the retractable sewing light
as this may cause damage when it is extended.
31
Replacing the Needle Plate
Use the straight stitch needle plate when using the
dual feed foot, quilt piecing or free motion. Use the professional grade
needle plate HP when using the
professional grade foot HP.
CAUTION:
(1)
· Always make sure to press the lockout key to lockout
the machine before replacing the needle plate.
(2)
· Never press the needle plate release lever while
running the machine.
NOTE:
When the straight stitch needle plate or professional
grade needle plate HP is attached to the machine, the
patterns not suitable for the straight stitch needle plate
or the professional grade needle plate HP cannot be
(3)
selected.
1. Press the needle up/down button to raise the needle. Press the lockout
key.
Press the presser foot lifter button to raise the
presser foot.
(1) Needle up/down button
(5)
(2) Lockout key
(3) Presser foot lifter button
2. Slide the extension table to the left to remove it. Push down the needle
plate release lever and the needle plate will snap off.
(4) Needle plate release lever (5) Needle plate
(4)
3. A warning message will appear that the needle plate
is not secured.
Remove the needle plate to the right. Place the straight stitch needle plate
or professional grade needle plate HP on the machine. Set the left edge of the
needle plate into the opening.
4. Push down on the mark of the needle plate until it
locks in place.
Make sure the warning message disappears and the
(6)
straight stitch is automatically selected.
Turn the handwheel slowly and make sure that the
needle does not hit the needle plate.
Press the lockout key to unlock the machine. (6) Mark
32
Using the Straight Stitch Needle Plate
(1)
The straight stitch needle plate has three holes where the
needle enters. The straight stitch needle plate is helpful
to hold and support the fabric when the needle pierces
the fabric. Use the straight stitch needle plate for better
results.
(1) Three holes
It is recommended to use straight stitch needle plate to select patterns U1 to
U3 when sewing straight stitches.
Refer to page 32 for how to attach the straight stitch needle plate.
NOTE: The patterns not suitable for the straight stitch needle plate are
grayed out.
Dropping the Feed Dogs
The feed dogs can be lowered for sewing on buttons, free motion quilting, etc.
Shift the drop feed lever toward you to lower the feed dogs.
(1) Drop feed lever (2) Feed dogs
(2)
Shift the drop feed lever away from you to raise the feed
dogs, it will return to the up position when you start the
machine.
(1)
NOTE: If you start the machine with the feed dogs lowered, a message will
appear on the visual touch screen.
33
Knee Lifter
The knee lifter is extremely helpful when sewing
patchwork, quilting, etc. since it allows you to handle the
(3)
fabric while your knee controls the presser foot.
Attaching the knee lifter
(2)
Match the ribs on the knee lifter with the notches in the
knee lifter socket and insert the knee lifter.
(1) Knee lifter
(2) Rib
(1)
(3) Knee lifter socket
Adjusting the knee lifter
The angle of the knee lifter can be adjusted to fit the user.
Loosen the setscrew and slide the angle bar in or out to
(4)
adjust the angle of the knee lifter.
Tighten the setscrew to secure the angle bar.
(4) Setscrew (5) Angle bar
Using the knee lifter
(5)
Push the knee lifter with your knee to easily move the
presser foot up and down.
You can control how high the foot rises by the amount of knee pressure you
exert.
Using the Cloth Guide
(1)
Remove the extension table and attach the extra wide
table (refer to page 9).
(1)
Attach the cloth guide to the free-arm by pushing the
cloth guide down to snap it in place.
Slide the cloth guide to the desired position.
Place the fabric with its edge against the guide and sew.
(1) Cloth guide
(2) Free-arm
(2)
(3) Guide
(4) Edge
(4) (3)
34
(1) (2) (3) (4) (5)
ORDINARY SEWING MODE
Ordinary Stitch Patterns
In the ordinary sewing mode, there are 5 categories available.
(1) Utility stitches and buttonholes (2) Decorative and quilting stitches (3)
Monogramming (4) Tapering (5) Sewing applications Press one of the keys to
select the category.
NOTE: In this manual, the pattern number refers to the initial letter for each
group or category. For example, pattern #15 in the buttonholes and specialty
stitches is referred to as pattern B15.
(1)
(1) Utility stitches and buttonholes
Utility (U)
You can select utility stitches for seaming, overcasting, blind hemming,
basting and shell tucking.
Buttonhole (B) There are various styles of buttonholes, button sewing,
darning, tacking, fly stitches and eyelets available in this category.
35
(2)
(A) (H) (QS)
(K) (W) (CS)
(3)
(C) (BR) (Q) (BO) (S) (AN)
(SE) (M)
(2) Decorative and quilting stitches
This category consists of the following 17 groups.
· Applique (A)
· Cross-stitch (C)
· Heirloom (H)
(D)
· Quilt (Q) · Quilt Style (QS)
· Satin (S)
(L)
· Bridge (BR)
· Decorative (D)
(LS) · Botanical (BO) · Long (L)
· Animals (AN)
· Life Style (LS)
· Kids (K)
· Seasons (SE)
· Words (W)
· Mirage (M)
· Created Stitch (CS)
(3) Monogramming
You can program lettering as well as a combination of characters and symbol
patterns (refer to pages 97-99).
36
(4) Tapering
(4)
You can taper the beginning and end of the decorative
stitch patterns to create tapered corners and points (refer
to pages 90-96).
37
(5) Sewing applications
(5)
You can select the appropriate stitch for a specific sewing
project and fabric type from the designated application in
this category (refer to pages 103-137).
Press one of the key to select the category.
(6) Sewing key (7) Quilt key
(8) Optional foot key
(6)
(7)
(8) 38
(1) (2) (3) (4) (5)
(6) (7) (8)
Function Keys (1) Foot-up key If this option is turned on, the needle stops at
the down position and the presser foot will automatically go up when the
machine stops. Press this key to turn this option on or off (refer to page
52).
(2) Twin needle key Press this key to set the stitch width for twin needle
sewing (refer to pages 82-83).
(3) Dual feed key Press this key for dual feed sewing (refer to pages 43-44).
(4) Floating mode key Press this key for floating mode (refer to page 46).
(5) Startover key If you stop sewing in the middle of a stitch pattern and
wish to sew the pattern again from the beginning, press this key before you
start sewing. Press this key once to startover from the beginning of the
current pattern, or press this key twice to startover from the beginning of
the first pattern of the combination (refer to page 87).
(6) Program key Press this key to program a pattern combination. When this key
is pressed, the mirror image keys, delete key, preview key, letter size key,
save file key and cursor keys will appear (refer to pages 84-89).
(7) Vertical mirror image key Press this key to sew a vertical mirror image of
the selected pattern (refer to page 84).
(8) Horizontal mirror image key Press this key to sew a horizontal mirror
image of the selected pattern. The key is grayed out if the selected pattern
cannot be turned over (refer to page 84).
(9) (9) Initial lock stitch key Press this key to turn on or off the initial
lock stitch.
39
(11) (12) (13) (14) (15) (16)
(10)
(10) Cursor keys Press one of the cursor keys to move the cursor up or down.
(11) Letter size key Press this key to select full size (L) or small size (S).
(12) Letter case key Press this key to select upper case or lower case for
monograms.
(13) Delete key Press this key to delete a pattern from the pattern
combination.
(14) Preview key Press this key to view the stitch image of the entire pattern
combination.
(15) Function switch key Press this key to switch the function keys.
(16) Save file key Press this key to save the pattern combination as a file.
(17) (18)
(17) Hiragana/Katakana key Press this key to switch Hiragana or Katakana for
monograms.
(18) Horizontal/Vertical orientation key Press this key to switch the
horizontal or vertical orientation.
(19) (19) Needle stop position key You can select the needle stop position to
be either up or down by pressing the needle stop position key.
40
(1) (2)
Utility Stitches Straight Stitches
Patterns U1 to U5 are straight stitches for seaming. Press the pattern
selection key for the desired stitch. Starting to sew Place the fabric next to
the seam guide line on the needle plate. Lower the needle to the point where
you want to start. Pull the needle thread towards the rear and lower the foot.
NOTE: Pull the needle thread to the left when using satin stitch foot F, open-
toe satin stitch foot F2, dual feed foot or automatic buttonhole foot R.
Press the start/stop button or foot control to start sewing. Gently guide the
fabric along the seam guide line letting the fabric go naturally.
(1) Start/stop button
Sewing from the Edge of Thick Fabric
The black button on the zigzag foot A locks the foot in the horizontal
position. This is helpful when you start sewing at the extreme edge of thick
fabrics or for sewing across a hem. Lower the needle into the fabric at the
point where you wish to start sewing. Lower the foot while pushing in the
black button. The foot is locked in the horizontal position to avoid slipping.
After a few stitches, the black button is released automatically.
(2) Black button
Changing Sewing Direction
Stop the machine and press the presser foot lifter button to raise the presser
foot. Pivot the fabric around the needle to change the sewing direction as
desired. Start sewing in the new direction.
NOTE: If you turn on the foot up option, the presser foot will automatically
go up when the machine stops (refer to page 52).
5/8 (3)
Turning a Square Corner To maintain a 5/8 seam allowance after turning a
square corner, use the cornering guide on the needle plate. Stop sewing when
the front edge of fabric reaches the cornering guide lines. Press the presser
foot lifter button and turn the fabric 90 degrees. Start sewing in the new
direction.
(3) Cornering guide
41
(1) (4)
(3) (2)
Securing Seams
For fastening the ends of seams, press the reverse button and sew several
reverse stitches. The machine sews in reverse as long as you press and hold
the reverse button.
(1) Reverse button
Press the reverse button once when sewing the locka-matic stitch (pattern U2)
or locking stitch (pattern U3) and the machine will lock the stitches off and
stop automatically.
Cutting Threads
To cut the threads after finishing sewing, press the thread cutter button. The
needle bar and presser foot will automatically go up after trimming the
threads.
(2) Thread cutter button
NOTE: · The thread cutter button does not function when the
LED signal is turned off or the presser foot is raised with the presser foot
lifter. · Use the thread cutter on the face plate to cut specialized, #30 or
thicker threads if the auto thread cutter does not work well. (3) LED signal
To use the thread cutter on the face plate, remove the fabric and draw it to
the back. Pull the threads up and slip them between the thread cutter and face
plate from behind. Pull the threads toward you to cut.
(4) Thread cutter
(4) (2)
(3)
(1)
Needle Plate Guides
The seam guides are marked on the needle plate, freearm and hook cover plate.
The seam guides for 1/4, 3/8 and 5/8 are also marked on the front of the
needle plate.
(1) Seam guides on the front of the needle plate
The numbers on the needle plate indicate the distance from the center needle
position in millimeters and inches.
(2) Center needle position
The cornering guides are very useful when turning a square corner (refer to
page 41).
(3) Cornering guide
The angle scales on the needle plate are useful for patchwork piecing (refer
to page 78).
(4) Angle scales
42
(1)
(3) (2)
Sewing with the Dual Feed Device
(1)
Patterns U1 to U5 and Q1 to Q7 can be sewn with the
dual feed device.
The dual feed device is extremely effective when sewing hard to feed materials
such as PVC coated fabric or leather. It also eliminates layer slippage.
Refer to page 31 for how to attach the dual feed foot and to engage the dual
feed device.
Press the dual feed key and select the desired pattern.
(1) Dual feed key
NOTE: · The patterns not suitable for dual feed sewing are
grayed out. · The dual feed key will gray out or not be indicated
if you selected a pattern not suitable for dual feed sewing.
NOTE:
Dual feed quilting piecing foot 1/4 OD appears on the visual touch screen when
patterns Q2 or Q3 is selected.
Dual feed quilting piecing foot 1/4 OD is an optional item.
Place the fabric under the foot and lower the needle at the point where you
wish to start. Lower the presser foot. Start sewing at medium speed.
When seaming plaid fabrics, match the plaids of the upper and lower layers and
pin them together. Remove the pins as you sew.
Dual feed balancing dial
The dual feed balancing dial should be set at “0”, however you may need to
adjust the dual feed balance depending on the type of fabric.
Check the feed balance by test sewing on an extra piece of the fabric you
intend to use.
(A) : If the lower layer puckers, turn the dual feed
(A)
balancing dial toward “+”.
(B) : If the upper layer puckers, turn the dual feed
balancing dial toward “”.
(1) Upper layer
(2) Lower layer
(1)
(3) Dual feed balancing dial
(B) NOTE: When dual feed feet are not used, return the dual feed balancing
dial to the “0” position.
43
(1)
(2)
(2)
Dual Feed Plus Professional Foot HP2 This foot provides superior visibility
and is great for curves and precise topstitching. Holds fabrics firmly in sync
with the feed dogs to achieve professional results.
Replace the needle plate with the professional grade needle plate HP when
using dual feed plus professional foot HP2. Refer to page 32 for how to attach
the professional grade needle plate HP.
(1) Professional grade needle plate HP Refer to page 31 for how to attach dual
feed plus professional foot HP2 and to engage the dual feed device. Press the
dual feed key and select the desired pattern.
(2) Dual feed key
NOTE: The patterns not suitable for dual feed sewing will not be displayed.
Place the fabric under the foot and lower the needle at the point where you
wish to start. Lower the presser foot. Start sewing at medium speed (refer to
page 43).
44
Sewing with Professional Grade Foot HP
(1)
Use the professional grade foot HP for straight stitch to
provide professional results.
Replace the needle plate with the professional grade needle plate HP when
using the professional grade foot HP. Refer to page 32 for how to attach the
professional grade needle plate HP.
(1) Professional grade needle plate HP
Refer to page 30 for how to attach the professional grade foot HP.
Attach the professional grade needle plate HP and professional grade foot HP
and select the desired pattern.
NOTE: The patterns not suitable for the professional grade needle plate HP
will not be displayed.
Place the fabric under the foot and lower the needle at the point where you
wish to start. Lower the presser foot. Start sewing.
45
1. 2. 3.
Floating Mode
(1)
You can decrease layer slippage and wrinkles by lifting
the presser foot slightly in the floating mode.
1. Press the floating mode key. (1) Floating mode key
NOTE: Patterns not suitable for floating mode are grayed out.
2. Press the setting bar to expand the manual setting window.
(2) Setting bar
(2)
3. Press “+” or “” to adjust the presser foot height. (3) Presser foot hight
adjustment key
Press “+” to increase the presser foot height. Press “” to decrease the
presser foot height.
NOTE:
(3)
· When using the floating mode, always adjust the
presser foot height and conduct a test sew on an
extra piece of the fabric before actual sewing.
· Using the dual feed foot is recommended to
decrease layer slippage when the floating mode
does not work.
46
Variety of Straight Stitches U1 Straight stitch in center needle position Use
this stitch for seaming, rolled hemming, etc.
U2 Lock-a-matic stitch Use this stitch to secure the beginning and the end of
a seam with backstitching. When you reach the end of the seam, press the
reverse button once. The machine will sew four reverse stitches, four forward
stitches, and then stop sewing automatically.
U3 Locking stitch This unique stitch is used where an invisible locking stitch
is needed. The machine will sew several locking stitches at the beginning and
continue sewing forward. When you press the reverse button at the end of the
seam, the machine will sew several locking stitches in place, then stop sewing
automatically.
U4 Straight stitch in left needle position Use this stitch to seam fabrics
close to the edge.
U5 Triple stretch stitch This strong, durable stitch is recommended for areas
where both elasticity and strength are needed to ensure comfort and
durability. Use it to reinforce areas such as crotch and armhole seams. Also
use it when constructing items such as backpacks for extra strength.
U6, U7 Stretch stitches These are narrow stretch stitches designed to
eliminate puckering on knit fabrics and bias seams, while permitting the seam
to be pressed completely open flat. Use U7 for seaming fine fabrics or stretch
fabrics.
47
U8 Basting Refer to page 119 for sewing instructions.
Variety of Zigzag Stitches U9, U10 Zigzag stitches Zigzag stitches are used
for various sewing needs including overcasting. These stitches can be used on
most woven fabrics. A dense zigzag stitch can also be used for applique.
U11 Multiple zigzag stitch This stitch is used for mending tears.
48
Variety of Overcasting Stitches U11 Multiple zigzag stitch This stitch is used
to finish a raw edge of synthetics and other stretch fabrics that tend to
pucker. Sew along the fabric edge leaving an adequate seam allowance. After
sewing, trim off the seam allowance close to the stitches.
U12 Overcasting stitch This stitch can be used to simultaneously seam and
overcast edges of fabrics. Use this stitch when you do not need to open seams
flat. Place the fabric edge next to the guide of the foot and sew.
U13 Knit stitch This stitch is recommended for sewing such fabrics as
synthetic knits and stretch velour as it provides the greatest amount of
elasticity and strength. Place the fabric edge next to the guide of the foot
and sew. For better results, use zigzag foot A and sew leaving an adequate
seam allowance. After sewing, trim the seam allowance close to the stitches.
U14 Double overedge stitch This stitch is excellent for fabrics that tend to
fray extensively such as linens and gabardines. Place the fabric edge next to
the guide of the foot and sew. Two rows of zigzag stitches are simultaneously
sewn over the edge to insure that the fabric will not ravel.
U15 Overlock stitch This stitch finishes the edges of fabric in a way similar
to a commercial overlocking machine for a professional look. Place the fabric
edge next to the guide of the foot and sew.
49
(1)
(2)
(3) (2)
(+) (-)
(-)
(4.5)
(+)
Manual Stitch Settings You can alter the stitch width, needle drop position of
the straight stitches, needle thread tension, presser foot pressure value and
stitch length. Turn the stitch width or length adjusting dial, or press the
“+” or “” key to change the setting. Press the default key to recover the
original stitch setting.
When you press the setting bar, the manual setting window expands to show more
options. You can alter other settings such as needle thread tension and
presser foot pressure value, depending on the selected stitch pattern. Press
the setting bar again to shrink the manual setting window.
(1) Setting bar (2) Manual setting window (3) Default key
Altering needle drop position (straight stitches) Turn the stitch width
adjusting dial clockwise to move the needle drop position to the right. Turn
the stitch width adjusting dial counterclockwise to move the needle drop
position to the left.
You can also change the setting with the “+” or “” key. Press the “+” key to
move the needle drop position to the right. Press the “” key to move the
needle drop position to the left.
(+) (-)
(-)
(3.0)
(+)
Altering stitch width Turn the stitch width adjusting dial clockwise to
increase the stitch width. Turn the stitch width adjusting dial
counterclockwise to decrease the stitch width.
You can also change the setting with the “+” or “” key. Press the “+” key to
increase the stitch width. Press the “” key to decrease the stitch width.
NOTE: The adjustable range for patterns U6-U7 and U9-U11 is 0.0 to 7.0.
50
(+) (-)
Altering stitch length
(+)
Turn the stitch length adjusting dial clockwise to increase
the stitch length.
Turn the stitch length adjusting dial counterclockwise to decrease the stitch
length.
(-)
You can also change the setting with the “+” or “” key.
Press the “+” key to increase the stitch length.
Press the “” key to decrease the stitch length.
NOTE:
(-)
(+)
(-)
(+)
· The adjustable range for patterns U1-U6 and U9-
U11 is 0.0 to 5.0.
· The adjustable range for pattern U7 is 1.0 to 5.0.
Adjusting Thread Tension This machine is equipped with automatic thread
tension control, which optimizes the tension balance for the selected stitch
pattern. Balanced thread tension Straight stitch: Both needle and bobbin
threads interlock between the layers.
Zigzag stitch: The needle thread appears slightly on the wrong side of the
fabric.
However you may need to manually adjust the tension balance depending on the
sewing conditions, or you can fine-tune the thread tension to suit your
preference.
(1) Press the “+” key if the tension is too loose. (2) Press the “” key if
the tension is too tight.
(1)
(2)
51
Adjusting Foot Pressure Control
The presser foot pressure is automatically optimized for each stitch pattern.
However, you can adjust the foot pressure manually by pressing the “+” key or
“” key to suit your specific sewing needs.
(1)
(2) (3) (4)
(1)
Number of Locking Stitches The machine sews 5 lock stitches at the beginning
and 3 lock stitches at the end. However, you can change the number of lock
stitches at the beginning and the end with this option. To change the number
of lock stitches at the beginning, press the “+” or “” key in section (3). To
change the number of lock stitches at the end, press the “+” or “” key in
section (4).
(1) Lock stitches at the beginning (2) Lock stitches at the end
NOTE: This option is available only for the locking stitch (U3).
Foot Up for Pivoting If this option is turned on, the presser foot will
automatically go up when the machine stops. This feature is very useful when
turning corners. Press the foot-up key to turn this option on or off.
(1) Foot-up key
NOTE: Height of the foot can be adjusted in the sewing setting mode (refer to
page 143).
52
Favorite Stitch Adjustment
You can save customized stitch settings (stitch length,
stitch width, thread tension and presser foot pressure,
depending on the selected stitch patterns) as “Favorite
Stitch Adjustment”. When the favorite stitch adjustment
option is turned ON (refer to page 145), the last-used
customized stitch settings are automatically assigned
(1)
when the stitch pattern is selected.
(1) Favorite Stitch Adjustment
NOTE:
· Favorite stitch option cannot be assigned for created stitch (CS).
· Favorite stitch option cannot be used in monogram
mode.
(2)
(3)
(4) (6)
(5)
Example: To change the preset value of the needle drop position from “4.5” to
“5.0”.
Turn the Favorite Stitch Adjustment option ON (refer to page 145).
Select stitch pattern U1. Press the setting bar. The manual setting window
expands to show more options. The favorite stitch key appears on the manual
setting window.
Change the needle drop position from “4.5” to “5.0” by turning the stitch
width adjusting dial or pressing “+” key. Press the favorite stitch key. The
dialog box will open. Press the save favorite key to register the favorite
stitch settings.
(2) Setting bar (3) Favorite stitch key (4) Save favorite key
The square bracket indicates that the customized preset stitch value is
applied to the setting.
To delete favorite stitch settings, press the favorite stitch key and press
the delete key.
(5) Square bracket (6) Delete key
53
Other Utility Stitches U16, U17 Blind Hem Refer to page 110-111 for sewing
instruction.
U18, U22 Shell Tuck Refer to page 112 for sewing instruction.
U19 Visible hemming Fold and press a single hem. Place the fabric with the
right side up. Sew along the fold at the desired depth. Trim the excess on the
wrong side.
54
U20 Attaching elastic Mark the elastic into quarters. Match those to the
center front, center back and side seams, and pin the elastic to the fabric.
Place the elastic under the foot and stitch into place while stretching the
elastic evenly.
U21 Box stitching Use this stitch to join heavy weight fabrics. Overlap two
raw edges together and use this stitch to join them. Use also for fagoting.
U23 Hemstitch Use this stitch for fagoting or decorative stitch.
U24 Backward stitch U24 is backward stitch. Use the stitch if it is hard to
guide the fabric while pressing the reverse button. The machine sews in
reverse without pressing the reverse button so that you can guide the fabric
with both hands.
55
BUTTONHOLES AND SPECIALTY STITCHES
Variety of Buttonholes B1 Sensor (square) buttonhole This square buttonhole is
widely used on medium to heavy weight fabrics. The buttonhole size is
automatically determined by placing a button in the foot.
B2 Automatic (square) buttonhole This is also a square buttonhole similar to
the sensor square buttonhole, but you can manually set the buttonhole size and
the machine memorizes it to sew buttonholes of the same size.
B3 Round end buttonhole This buttonhole is used on fine to medium weight
fabrics especially for blouses and children’s clothes.
B4 Fine fabric buttonhole This buttonhole is rounded at both ends and is used
on fine, delicate fabrics such as fine silk.
B5 Keyhole buttonhole The keyhole buttonhole is widely used on medium to heavy
weight fabrics. It is also suitable for larger and thicker buttons.
B6 Rounded keyhole buttonhole This buttonhole is used for thicker buttons on
medium weight fabrics.
B7 Tailored buttonhole This durable buttonhole is used with thick buttons and
heavy fabrics.
B8 Stretch buttonhole This buttonhole is suitable for stretch fabrics. It can
also be used as a decorative buttonhole.
B9 Knit buttonhole This buttonhole is suitable for knit fabrics. It can also
be used as a decorative buttonhole.
B10 Antique buttonhole This buttonhole looks like the heirloom stitch. It has
an attractive handmade appearance and makes a nice decorative buttonhole.
B11 Welted buttonhole This is a template pattern for the hand sewn welted
(bound) buttonhole.
NOTE: B3-B11 are sensor buttonholes and the sewing procedure is the same as
for B1.
56
B1 Sensor (Square) Buttonhole
The size of a buttonhole is automatically set by placing a button in the rear
of automatic buttonhole foot R.
The button holder of the foot takes a button size of 1 cm (3/8) to 2.5 cm (1)
in diameter. When selecting the buttonholes, the visual touch screen advises
you to lower the buttonhole lever.
NOTE: · It is sometimes necessary to change buttonhole
size to match certain heavy or specific fabrics and threads. · Make a test
buttonhole on an extra piece of the fabric to check your settings. · The
preset width of the buttonhole is suited for ordinary buttons. · Apply an
interfacing to stretch or fine fabrics.
- (1) (2) (3)
Sewing
1. Pull the button holder to the back, and place the button in it. Push it
together tightly on the button.
(1) Button holder
NOTE: · Check the length of the test buttonhole, and adjust
the buttonhole length if necessary by turning the adjusting screw on the
buttonhole foot. · To increase the buttonhole length, turn the adjusting screw
to move the marker toward “L”. · To decrease the buttonhole length, turn the
adjusting screw to move the marker toward “S”.
(2) Adjusting screw (3) Marker
2. Press the needle up/down button to raise the needle.
Press the lockout key.
Raise the presser foot and attach automatic
(4)
buttonhole foot R snapping the pin into the groove of the foot holder.
You may lift the presser foot lifter to the extra lifted
position when placing the automatic buttonhole foot
(5)
under the foot holder.
Press the lockout key to unlock the machine.
(4) Groove (5) Pin
57
-
(7)
3. Draw the needle thread to the left through the hole of the foot. Mark the
buttonhole position on the fabric and place it under the buttonhole foot.
Lower the needle at the starting point by turning the handwheel. (6) Starting
point
(6) 4. Lower the presser foot and pull the buttonhole lever down as far as it
will go. (7) Buttonhole lever
NOTE:
Make sure there is no gap between the slider and
front stopper, otherwise the buttonhole will be out of
position or there will be a sewing gap.
(8) No gap
(8)
(9) Starting point
(10) Sewing gap
(10)
5.
(10) (9)
(10) (9)
(9) 5. Start sewing while pulling the needle thread lightly to the left. After
sewing a few stitches, free the thread and continue sewing.
NOTE: If you start sewing without pulling down the buttonhole lever, the
visual touch screen will show a warning and the machine will stop after a few
stitches. Pull the buttonhole lever down and start sewing.
58
6. The buttonhole is sewn automatically in the sequence
shown.
When the buttonhole is finished, the machine will
stop automatically with the needle in the up position.
Press the thread cutter button and remove the fabric.
7. After you finish buttonhole sewing, push the
buttonhole lever up as far as it will go.
8. Place a pin just below the bartack at each end to
prevent accidentally cutting the threads.
Cut the opening with the seam ripper.
Use a punch to open a keyhole buttonhole.
NOTE: A punch is not included with this machine.
Double Layer Buttonhole To make a sturdy buttonhole, sew another layer of
buttonhole stitches over the previous stitches. After the buttonhole is
finished, simply start the machine again. Do not raise the foot or buttonhole
lever. Do not reselect the pattern.
NOTE: Turn off “Thread Cut after Auto-Lock” option when you make a double
layer buttonhole (refer to page 142).
59
Manual Settings
(1)
You can alter the buttonhole opening width, buttonhole
width and buttonhole stitch density on the manual setting
window.
When you press the setting bar, the manual setting window expands to show more
options.
(2)
(1) Setting bar
(3)
(4)
(2) Altering buttonhole opening width
Press the “+” key to make the buttonhole opening wider. Press the “” key to
make the buttonhole opening narrower.
(3) Altering buttonhole width
Turn the stitch width adjusting dial clockwise to increase the buttonhole
width. Turn the stitch width adjusting dial counterclockwise to decrease the
buttonhole width.
Or press the “+” key to increase the buttonhole width. Press the “” key to
decrease the buttonhole width.
(4) Altering buttonhole stitch density Turn the stitch length adjusting dial
clockwise to make the buttonhole stitches less dense. Turn the stitch length
adjusting dial counterclockwise to make the buttonhole stitches denser.
Or press the “+” key to make the buttonhole stitches less dense. Press the “”
key to make the buttonhole stitches denser.
NOTE: · The opening width is adjustable from 0.2 to 2.0. · The buttonhole
width is adjustable from 2.6 to 9.0. · The stitch density is adjustable from
0.20 to 1.00.
60
Using the Stabilizer Plate
The stabilizer plate holds and supports the fabric so it is
helpful when sewing buttonholes over the hem of thick
fabrics.
1. Insert the tab of the stabilizer plate into the slot of the buttonhole
foot.
(1) Stabilizer plate (2) Slot
(2)
(1)
2. Place the button on the button holder of the foot.
Attach the buttonhole foot to the machine.
Draw the needle thread to the left between the foot and stabilizer plate.
3. Place the fabric between the buttonhole foot and
stabilizer plate. Lower the needle into the starting
point by turning the handwheel.
Lower the foot and buttonhole lever.
Start the machine while pulling the needle thread lightly to the left. After
sewing a few stitches, free the
thread and continue sewing.
NOTE: The sewing procedure is exactly the same as that for B1 sensor (square)
buttonhole (refer to pages 57-59).
61
B2 Automatic (Square) Buttonhole
Pull the button holder all the way out. Draw the needle thread to the left
through the hole of the foot. Mark the buttonhole position on the fabric.
Place the fabric under the foot, and lower the needle at the starting point by
turning the handwheel. Lower the foot and start sewing while pulling the
needle thread lightly to the left. After sewing a few stitches, free the
thread and continue sewing.
NOTE: · You do not need to pull down the buttonhole lever. · If you wish to
sew a buttonhole longer than the size
permitted by automatic buttonhole foot R, use satin stitch foot F.
NOTE: · The opening width is adjustable from 0.2 to 2.0. · The buttonhole
width is adjustable from 2.6 to 9.0. · The stitch density is adjustable from
0.20 to 1.00.
1. Sew the left side up to the required buttonhole length
and stop the machine. Then press the reverse button.
(1) Reverse button
(1)
2.
(1)
2. Start sewing again, and the machine sews back with a straight stitch. Stop
the machine when you reach the starting point. Then press the reverse button.
(1) Reverse button
62
- (1)
3. Start sewing again, and the machine sews the front bartack and right side
of the buttonhole. Stop the machine when you reach the ending point. Then
press the reverse button. (1) Reverse button
4. Start sewing again, and machine sews the back bartack and locking stitches
then stops automatically with the needle in the up position. When the
buttonhole is finished, a message will appear. To make the next buttonhole,
position the fabric and start sewing again. The message disappears and the
machine sews another buttonhole identical to the first one then stops
automatically.
To sew another buttonhole in a different size, press the X key on the dialog
box. NOTE: · To cut the buttonhole opening, refer to the instructions on page
59. · The memorized length will be cancelled if the presser foot is raised or
the startover key (refer to page 87) is pressed before buttonhole is
completed.
63
Other Buttonholes B3, B4 Round end and fine fabric buttonholes The sewing
procedure is the same as that of B1 sensor (square) buttonhole (refer to pages
57-59).
NOTE: · The opening width is adjustable from 0.2 to 2.0. · The buttonhole
width is adjustable from 2.6 to 9.0. · The stitch density is adjustable from
0.20 to 1.00.
B5-B7 Keyhole buttonholes The sewing procedure is the same as B1 sensor
(square) buttonhole (refer to pages 57-59). Use a punch to open the keyhole
buttonhole. (1)
NOTE: · A punch is not included with this machine. · The opening width (1) is
adjustable from 0.2 to 2.0. · The buttonhole width is adjustable from 5.6 to
9.0. · The stitch density is adjustable from 0.20 to 1.00.
B8, B10 Stretch and Antique buttonholes The sewing procedure is the same as B1
sensor (square) buttonhole (refer to pages 57-59). The sewing steps are as
shown.
NOTE: · The opening width is adjustable from 0.2 to 2.0. · The buttonhole
width is adjustable from 2.6 to 9.0. · The stitch density is adjustable from
0.50 to 1.00 (B8),
and from 0.50 to 2.50 (B10).
B9 Knit buttonhole The sewing procedure is the same as B1 sensor (square)
buttonhole (refer to pages 57-59).
NOTE: · The opening width is adjustable from 0.2 to 2.0. · The buttonhole
width is adjustable from 2.6 to 9.0. · The stitch density is adjustable from
0.70 to 1.20.
64
(2)
(1)
(2)
2.
(1)
3.
(3)
4.
(1)
5.
(3)
6.
B11 Welted Buttonhole (Bound Buttonhole) A welted buttonhole is made by
stitching a strip or patch of fabric to the buttonhole. Welted buttonholes are
particularly suitable for tailored garments, but are not recommended for sheer
or delicate fabrics where the patch might show through or add bulk.
1. Baste a patch to the garment fabric with the right sides together. (1)
Wrong side of patch (2) Right side of garment fabric
(3)
2. Select pattern B11.
Sew the welted buttonhole on both fabrics together. Cut the buttonhole opening
as illustrated then pull the
patch out through the slit to the other side.
(1) Wrong side of patch
(2) Right side of garment fabric
(3) Right side of patch
(4)
3. Pull out the patch until the right side of the patch is
showing. Use an iron to press both corner ends until
they are squared off.
(3) Right side of patch
(4) Wrong side of garment fabric
(3)
4. Fold back each side of the patch to form buttonhole
lips.
(1) Wrong side of patch (3) Right side of patch
(4)
5. Press both folds with an iron.
(3) Right side of patch (4) Wrong side of garment fabric
(2)
6. Baste both edges of the seam with a needle and
thread by hand.
(2) Right side of garment fabric
65
7. 8.
(1)
(5) (4)
(4) (2)
(3)
(4)
(6)
10.
(7)
(7)
11.
(6)
(7)
(6)
(7)
7. Fold over the length of the garment fabric, sew back and forth beside the
original seam to secure flaps of the patch. (4) Wrong side of garment fabric
(5) Sew back and forth
8. Fold over the end of fabric and sew back and forth three times over the
triangular end. (1) Wrong side of patch (2) Right side of garment fabric (4)
Wrong side of garment fabric
9. The patch should be cut 1 cm to 1.5 cm (3/8 – 5/8) away from the hole. The
corners should be cut rounded off as shown. (3) Right side of patch (4) Wrong
side of garment fabric
10. Place the facing on the wrong side of the garment fabric. Mark the 4
corners with pins as shown. (6) Facing (7) Garment fabric
11. Turn all the layers over and cut the buttonhole opening on the facing in
the same way as step 2. Four marker pins show you the corner points on the
facing. Fold back each flap between the facing and patch. (6) Facing (7)
Garment fabric
12. Stitch around the opening with a needle and thread as shown. (6) Facing
(7) Garment fabric
13. The welted buttonhole is complete. (7) Garment fabric
66
(2)
2. 3.
Corded Buttonhole To sew a corded buttonhole, follow the same procedure as for
B1 sensor (square) buttonhole.
Select pattern B1. 1. Place the button on the button holder on the
buttonhole foot. Hook a filler cord on the spur on the front of the foot.
Bring the ends of cord toward the back and under the foot. Bring up the ends
of the cord and insert both ends between the ribs and metal plate.
(1) Spur (2) Metal plate Set the stabilizer plate as necessary and attach the
buttonhole foot. (1)
2. Lower the needle into the fabric where the buttonhole will start. Lower
the foot and buttonhole lever. Pull the needle thread lightly to the left.
Start the machine to sew the buttonhole over the cord. The machine stops
automatically when finished. Remove the fabric from the machine and cut the
sewing threads only.
3. Cut the filler cord at both ends as close to the buttonhole as possible.
NOTE: · Do not adjust the opening width wider than 0.8. · Set the stitch width
in accordance with the thickness
of the cord used. · To cut the buttonhole opening, refer to the
instructions on page 59.
Specialty Stitches B12 Button Sewing Refer to page 120 for sewing
instructions.
67
(1)
B13 Darning
1. Attach automatic buttonhole foot R and pull the button holder all the way
out.
Place the fabric under the foot, and lower the needle at the starting point.
Then lower the foot.
(1) Button holder (2) Starting point
(2)
2.
(3)
0.9 cm
3.
2. Start the machine and continue sewing until the machine stops
automatically. When finished sewing, a confirmation message will appear.
NOTE: The machine will sew the darning at maximum 2 cm (3/4) length and fixed
0.9 cm (3/8) width when sewing until it stops automatically.
(3) 2 cm (3/4)
3. Sew another layer of darning over the first layer, at a right angle to it.
To sew shorter darning
(4)
Sew the first line to the desired length and stop the
machine.
Press the reverse button and start the machine again.
The machine will sew the rest of the darning and stop
(5)
automatically.
(4) Reverse button
(5) Required length
To sew the same size darning
When finished sewing, a confirmation message will appear.
Simply start the machine to sew another layer of darning stitches in the same
size.
To sew the next layer of darning stitches in a different
size, press the X key.
To adjust the evenness of darning stitches
You can correct unevenness of darning stitches by turning the stitch width
adjusting dial or pressing the “” or “+” key of the adjusting window. If the
left corner is lower than the right side, turn the stitch width adjusting dial
counterclockwise or press the “” key to correct it. If the right corner is
lower than the left side, turn the stitch width adjusting dial clockwise or
press the “+” key to correct it.
NOTE: The memorized length will be cancelled if the presser foot is raised or
the startover key (refer to page 87) is pressed before darning is completed.
68
B14 Tacking Refer to page 121 for sewing instructions.
B15 Fly Stitch
The fly stitch is a triangle tacking stitch for use on a zipper fly bottom and
on the side pockets of pants.
Attach the satin stitch foot F.
To sew:
(1)
Place the garment under the foot and lower the needle at
the starting point.
Sew the stitch until the machine stops automatically.
(1) Starting point
B16-B18 Eyelets Refer to page 122 for sewing instructions.
69
(1)
(3) (4) (5) (6) (7) (8)
(2) (3)
DECORATIVE STITCHES
Decorative Stitches The patterns in this section are classified into 17
groups. These patterns are programmable and you can make a pattern
combination. Press the decorative and quilting stitches key and the decorative
stitch selection window will open.
(1) Decorative and quilting stitches key
NOTE: The decorative stitch selection window is composed of multiple pages.
Press page keys to switch the decorative stitch selection window.
(2) Page keys
(3) Applique (A): 2 pages Stitches in this group are for applique (refer to
pages 132-133).
(4)
(4) Cross-stitch (C): 2 pages
This group provides cross-stitches for craft sewing and home décor.
70
(5) Heirloom (H): 3 pages
(5)
This group provides heirloom stitches for craft sewing
and home décor.
(6)
(6) Quilt (Q): 9 pages
Stitches in this group are for patchwork and quilting (refer to pages 78-79,
125-135).
71
(6) Quilting stitches (Q) (continued from previous
(6)
page)
(7)
(7) Quilt Style (QS): 2 pages
There are stitch patterns created from quilt blocks in this group.
72
(8) Satin (S): 3 pages
(8)
The stitches in this group can be elongated up to 5 times
their original length while the stitch density remains the
same (refer to page 79).
(9) (11) (13) (9)
(10) (12) (14) (10)
(9) Bridge (BR): 1 page Bridge stitches are used for inserting straight
stitches after a stitch pattern. The number beside the stitch image on the
straight stitch key indicates the stitch count of a programmable unit.
Patterns BR5, BR6 and BR8 will inherit the needle drop position and stitch
length of the previous pattern in the programmed pattern combination (refer to
page 85).
(10) Decorative (D): 6 pages 50 attractive patterns are available in this
group. Patterns in this group are ideal for decorating.
73
(10) Decorative stitches (D) (continued from
(10)
previous page)
(11)
(11) Botanical (BO): 3 pages
There are patterns of trees, grass and flowers in this group.
74
(12) Long (L): 2 pages
(12)
Patterns in this group are ideal for decorating garments
and for adding border trims.
(13)
(13) Animals (AN): 1 page
There are patterns of animals in this group.
(14)
(14) Life Style (LS): 3 pages
There are patterns related to lifestyle in this group.
75
(15) (17) (19)
(15)
(16) (18)
(15) Kids (K): 3 pages There are patterns for kids in this group.
(16)
(16) Seasons (SE): 2 pages
There are patterns related to seasons in this group.
76
(17) Words (W): 1 page
(17)
There are word patterns in this group.
(18)
(18) Mirage (M): 1 page
This group provides satin patterns without connecting
straight stitches (refer to page 80).
(19)
(19) Created Stitch (CS): 1 to 5 pages
In this section, you can select original stitch patterns created with
StitchComposer.
Refer to page 81 for how to transfer created stitch patterns from a PC to the
machine.
77
(2)
Quilting
Using the Quilting Guide Bar
(1)
The quilting guide bar is helpful when sewing parallel, evenly spaced rows of
stitches.
Insert the quilting guide bar into the hole in the back of the foot holder.
Slide the quilting guide bar and set it to
the desired spacing.
(1) Quilting guide bar (2) Hole
Sew rows of stitches while tracing the previous row of
(2)
stitches with the quilting guide bar.
(1)
(1)
(3)
(4)
(1)
(2)
(2)
(1)
(1)
Q1-Q3 Patchwork Piecing
Patterns Q1 to Q3 are special stitches for seaming patchwork pieces.
Patterns Q2 and Q3 are for patchwork piecing with 1/4 and 7 mm seam allowances
respectively. Use 1/4 seam foot O. Place the patchwork pieces with the right
sides together. Sew while guiding the edge of fabric along the guide.
(1) Guide (2) Right side of the fabric (2)
You can sew a 1/4 allowance from the guide line with 1/4 seam foot O (without
guide) as shown. Align the guide line with the 1/4 guide of the foot and (5)
sew.
(3) Guide line (4) 1/4 guide
To sew 1/4 seam allowance from the right fabric edge, (6) align the right edge
of the foot and the edge of the fabric
and sew.
(5) Right fabric edge (6) Right edge of the foot
Angle Scales on the Needle Plate
You can easily seam patchwork pieces at the desired angle without marking, by
using the angle scales on the needle plate. The angle scales are marked at 45,
60, 90 and 120 degrees. Use the broken lines when piecing the patchwork pieces
with 1/4 seam foot O as illustrated.
(1) Broken line
NOTE:
Use the solid lines when piecing the patchwork pieces
with zigzag foot A. Align the edge of the fabric to the
(3)
1/4 seam guide line.
(2) Solid line
(3) 1/4 seam guide line
78
(2) (1)
Circular Sewing
The circular pivot pin is inserted into free arm and provides a pivot point to
sew perfect curves or circles for doilies or large scallops.
Select a desired decorative stitch. Fold fabric into quarters to determine
center. Pierce center of fabric with pivot pin. Insert pivot pin into hole on
the free arm. Lower presser foot and sew. Smooth the fabric out evenly from
the center to the front of the foot by hand.
(1) Circular pivot pin (2) Holes for circular pivot pin
NOTE: Light to medium weight fabrics will need a stabilizer to sew the
circle/curve correctly.
Q76-Q79 Hand-look Quilt Stitches
Patterns Q76 to Q79 are special stitches for quilting which look like hand
sewn stitches.
Use a transparent nylon thread for the needle and ordinary sewing thread for
the bobbin. The bobbin thread is pulled up on the right side of the fabric and
the stitches look as if they were sewn by hand.
(1) X1 X2 X3 X4 X5
Satin Stitches Elongation Ratio
Patterns S1 to S24 are decorative satin stitches for which the pattern length
can be elongated without changing the (4) stitch density. (2) Press the
setting bar to expand the manual setting (3) window.
(1) Setting bar
Press the “+” key to elongate the stitch pattern. (2) “+” key
To reduce the elongation ratio, press the “” key. (3) “” key
The pattern can be elongated up to 5 times the original length. The elongation
ratio is indicated in the box.
(4) Elongation ratio
You can also alter stitch density and stitch width.
79
A
(1)
B
(4) (7) (8)
(3)
Mirage Stitches
Sew Mirage stitch and open the fabric to make patterns without connecting
straight stitches.
NOTE: (5) Use a medium fabric (such as sheeting, broadcloth)
for Mirage stitch patterns. Using fine fabrics may cause wrinkles when opened.
(6) There are two ways to sew the Mirage stitch patterns (sewing on one or two
pieces of fabric).
A: Sewing on one piece of fabric
Fold the fabric with the right sides together. Place a sheet of stabilizer
under the fabric.
(1) Right side of the fabric (2) Sheet of stabilizer
Attach satin stitch foot F to the machine.
Sew the Mirage patterns with the marker on the presser foot along the fabric
edge as shown.
Sew the connecting straight stitches on the right side of the fabric edge (on
the sheet of stabilizer) as shown.
(3) Marker
(2)
In the Mirage stitch, you can adjust the stitch length of the decorative
stitch part and connecting straight stitch
part separately.
Press the setting bar to expand the manual setting
window.
(4) Setting bar
Adjust decorative stitch length adjustment key or connecting straight stitch
adjustment key.
(5) Decorative stitch length adjustment key (6) Connecting straight stitch
adjustment key (7) Decorative stitch
(8) Connecting straight stitch
(2) (1)
(9)
B: Sewing on two pieces of fabrics
Sew the fabric this way when you want to use two different fabrics on the
right and left. Place two pieces of fabric with the right sides together.
Place the sheet of stabilizer under the fabric.
(1) Right side of the fabric (2) Sheet of stabilizer
Sew the fabric while keeping a constant seam allowance. (9) Seam allowance
Open the fabric flat to hide the connecting straight stitches.
A
B
80
Created Stitches Original stitch patterns created with StitchComposer are
saved in this group. Insert the USB flash drive containing the original stitch
patterns and press the open file key.
(1) Open file key
(1)
Select the USB key and the folder list will appear. Select the desired folder
to open and the file list will
appear.
(2)
Select the desired file to save the original stitch pattern.
Saved stitch pattern will appear as the pattern selection
key.
You can select, program and sew these patterns the same way as with the built-
in stitch patterns.
(2) USB key
NOTE:
· This model supports FAT16 and FAT32 formats only.
If the USB flash drive is not read, check its format (refer to pages 152-153).
· Do not use a USB card reader and USB hub.
To delete a pattern, press the delete key and select the
(3)
pattern to delete.
A confirmation message will appear.
Press the OK key to delete the pattern.
(3) Delete key
NOTE: · Up to 60 patterns can be saved in this group. · Twin needle sewing is
not available for the created
stitches.
81
Twin Needle Sewing
(1)
Some of the utility stitches and decorative stitches can
be sewn with a twin needle.
Press the twin needle key and select the desired pattern.
Patterns not suitable for twin needle sewing cannot be selected (pattern
selection keys are grayed out).
Buttonholes, specialty stitches, monogram and tapering cannot be selected.
(1) Twin needle key
NOTE: · When you sew patterns with the twin needle, test the
stitches first before you sew on the garment. · Use zigzag foot A or satin
stitch foot F for twin
needle sewing. · Use the threads #60 or finer. · When changing the sewing
direction, raise the
needle and presser foot then turn the fabric (foot up for pivoting option is
not available when the twin needle is selected). · Use the thread cutter on
the face plate when cutting threads.
Replace the needle with the twin needle supplied with the standard accessories
(refer to page 27).
CAUTION:
· Press the lockout key before changing the needle. · Do not use twin needles
other than the ones
included in the standard accessories, otherwise the needle may hit the needle
plate, foot or hook and break.
(2) Lockout key (2)
82
4. 2.
A
B (3)
(1)
Insert the extra spool pin into the hole under the top cover. Place a spool of
thread on the extra spool pin and the spool stand (refer to page 20).
(3) Extra spool pin
Draw both threads from the spools and pass them through the threading points
from 1. to 4. Slip the thread A through the lower thread guide 5., then pass
through points 6. and 7. as illustrated. Thread the thread B through the
front hole of lower thread guide 5., then pass it through the needle hole 8.
Make sure that the two strands of thread from the spools do not get tangled. *
A: Thread from spool pin, B: Thread from extra spool
pin.
NOTE: · Threading from points 1. to 4. is the same as for a
single needle (refer to pages 23-24). · The needle threader cannot be used
with the twin
needle.
After twin needle sewing is finished, press the twin needle key and the
warning message will appear.
(1) Twin needle key Replace the twin needle with a single needle and press the
OK key.
83
(1) (2) (3)
(6)
(5)
(4)
PROGRAMMING A PATTERN COMBINATION
The patterns in the decorative stitch category and monograms can be programmed
to make a pattern combination. You can program up to 100 patterns in each
combination by pressing the program key. The images of programmed patterns are
shown on the left side of the visual touch screen.
(1) Program key
Mirror Image of Patterns To sew or program the pattern as a mirror image,
press the vertical mirror image key or horizontal mirror image key. Select the
desired patterns to create the mirror image. Press the vertical or horizontal
mirror image key again to cancel the mirror image function.
(2) Vertical mirror image key (3) Horizontal mirror image key
NOTE: · Horizontal mirror image is available only for specific
patterns. For pattern identification, these patterns are colored in blue on
the reference chart inside the top cover.
· The vertical or horizontal mirror image key will gray out when the selected
pattern is not suitable for the mirror image.
To view the entire pattern combination, press the cursor keys to scroll over
the pattern combination or press the preview key to show the entire pattern
combination at a glance. Press the function switch key to show the preview
key.
(4) Cursor keys (5) Preview key (6) Function switch key
NOTE: Presser foot pressure cannot be adjusted to the stitch patterns of a
pattern combination individually. If you attempt to do so, only the last
pattern’s presser foot pressure settings are applied to all the programmed
patterns.
84
Bridge Stitches
Bridge stitches are used for inserting straight stitches after a stitch
pattern.
The number beside the stitch image on the straight stitch key indicates the
stitch count of a programmable unit.
If you want more space between French knots (D5), for example, insert pattern
BR5 after pattern D5.
Two counts of straight stitches are added to pattern D5.
D5
BR5
NOTE:
Patterns BR5, BR6 and BR8 will inherit the stitch
length and needle drop position of the previous
pattern in the pattern combination.
85
(2) (1)
Editing a Pattern Combination
The programmed pattern (pattern combination) can be edited in the programming
mode. You can insert, delete or flip the stitch pattern by selecting the
stitch with the cursor. You can also adjust the stitch width and stitch
length.
Deleting a Pattern
The pattern before the cursor or shown in blue is deleted by pressing the
delete key.
(1) Cursor (2) Delete key
(4) (3)
(5)
To delete a pattern in the middle of a combination, press the cursor keys to
select the pattern you wish to delete. The stitch image of the selected
pattern turns blue. Press the delete key to delete the selected pattern.
(3) Cursor keys (4) Selected pattern
Inserting a Pattern Press the cursor keys to select the pattern next to where
you wish to insert a pattern. Enter the desired pattern to insert it before
the selected pattern.
(5) Inserted pattern
86
(1) (2)
(2)
(3) (4)
Startover Key This is a 2-way function key to start sewing a pattern
combination over from the beginning. When you stop sewing a pattern
combination, the startover key is activated.
Current pattern startover If you wish to start sewing from the beginning of
the current pattern, press the startover key once and start the machine. The
key will change and show a triangle and double bar that means the machine will
start over from the current pattern of the combination.
(1) Startover key (current pattern of the combination) (2) Current pattern
NOTE: When you stop sewing a pattern combination during the first pattern and
press the startover key, the number of the bar above the triangle will not
change because the pattern will be sewn from the first pattern.
First pattern startover The key shows a triangle and single bar that means the
machine will start over from the first pattern. If you wish to start sewing
from the beginning of the first pattern of the combination, press the
startover key twice and start the machine.
(3) Startover key (first pattern of the combination) (4) First pattern
NOTE: If auto thread cutting is done, the machine will startover from the
first pattern.
87
(1)
(2)
(3) (4)
Checking Pattern Combination Length You can check the total length of the
pattern combination by pressing on the pattern combination length key
indicated in the preview window. Press the function switch key. Press the
preview key and the preview window will open.
(1) Function switch key (2) Preview key (3) Pattern combination length key
The readout of the total length is a theoretical value and the actual length
may vary depending on sewing conditions.
For example, select pattern SE5 three times, and sew a pattern combination. If
the actual length differs considerably from the readout, measure the actual
length and enter the nearest value by pressing the “+” or “” key. In this
case, the theoretical value is 48 mm. However, if the actual length is 40 mm,
enter 40 mm by pressing the “” key. Press the OK to register it.
(4) Actual length
The readout is adjusted automatically when calculating the length of other
pattern combinations. The message “Displays the length of the corrected
pattern.” appears to indicate that the displayed value is adjusted already.
88
For example select patterns LS4, LS6 and SE5. The theoretical value is 54 mm.
However, the read out is calculated according to the measured actual length.
In this case, the adjusted value is 45 mm. Press the default key to clear the
entered length.
(5) Default key (5)
89
Tapering
You can taper the beginning and end of the decorative
stitch patterns to create tapered corners and points.
Press the tapering key to enter the tapering mode.
(1)
(2)
(1) Tapering key
Press the stitch reference key to show the stitch
reference chart for tapering (refer to page 19).
(2) Stitch reference key
NOTE: · The tapering length varies depending on the stitch
pattern and its tapering shape. Make a test stitch on an extra piece of the
fabric to check the tapering length. · If you stop the machine while sewing
and change the stitch width, needle drop position or stitch length, the
machine will start tapered sewing from the beginning.
Tapered Stitch Sample 1
Example: To sew tapered stitch pattern #9
Select stitch pattern #9. Start the machine. The machine sews the start
tapering pattern and pattern body. Sew to the required length, then press the
auto-lock button. The machine sews the end tapering pattern and stops.
(1) Auto-lock button (2) Required length (3) Start tapering pattern (4) End
tapering pattern
NOTE:
When you press the reverse button while sewing, the
(3)
machine will sew several locking stitches in place,
then stop sewing automatically. The tapering pattern
is not completed.
(1)
(2)
(4)
To sew the same sized tapered pattern
When finished sewing, a confirmation message will
(5)
appear. The number shown indicates the number of the
body patterns.
(5) Number of the body patterns
Press OK and simply start the machine to sew another tapered pattern of the
same size.
To sew the same tapered pattern in a different size, press the X key.
90
(1)
(2)
(1)
(3)
(4)
(5)
(6)
Auto-lock Stitch Function
The machine sews auto-lock stitch at the beginning and end of the sewing with
the default settings.
However, you can turn on or off the auto-lock stitches by pressing the
corresponding auto-lock keys on the visual touch screen.
(1) Initial lock stitch key (2) End lock stitch key (3) Initial lock stitch
(4) End lock stitch (5) Lock stitch key (ON) (6) Lock stitch key (OFF)
(5)
(6)
Flipping a Tapered Pattern 1
Press the static flip key to flip a tapered pattern vertically without
flipping its start and end tapering degree angle.
(1) Static flip key
91
Adjustment of Tapered Stitches You can adjust the shape of the tapered stitch
pattern. Press the tapering adjustment key. The tapering adjustment window
will open.
(1) Tapering adjustment key
(1)
Tapering shape
(6)
(4)
Select the shape of the tapering for the beginning and
the end of the stitch patterns by pressing the tapering
(2)
shape keys.
The keys on the top are for start tapering pattern.
(7)
The keys on the bottom are for end tapering pattern.
(2) Tapering shape keys (for start tapering pattern)
(3) Tapering shape keys (for end tapering pattern)
(8)
(4) Start tapering pattern
(5) End tapering pattern
(3)
The numbers in the tapering shape keys indicate the
(5)
degree of tapering. You can apply the tapering alignment
from left, center, right or off. The start and end of the
stitch patterns can be aligned separately.
The shape of the selected tapering pattern will be displayed on the left side
of each column.
The upper column shows the start tapering pattern. The middle column shows the
pattern body. The lower column shows the end tapering pattern.
(6) Start tapering pattern (7) Pattern body (8) End tapering pattern
92
Pattern body length
The keys on the middle are for pattern body length. The machine sews the
pattern body as long as the autolock key is pressed when the free length key
is turned on. However, you can set the number of the pattern body to be sewn
by pressing the pattern length key.
(1) Keys on the middle
(4)
(2) Pattern body
(3)
(3) Free length key
(1)
(2) (4) Pattern length key
(5) Number of the body patterns
(5)
Press the pattern length key.
Press the “+” or “” key to set the number to repeat the pattern body.
(4) Pattern length key
(4)
(6) “+” key
(7) “” key
(6) (7)
(10) (8)
(9) You can also set the number to repeat the pattern body by pressing the
numeric pad key. Press the numeric pad key and the numeric keypad window will
open. Enter the desired pattern length and press the OK key. (8) Numeric pad
key (9) OK key
After the shape of the tapered stitch pattern is selected, press the OK key to
apply the tapered stitch pattern.
(10) OK key
93
Flipping a Tapered Pattern 2 Press the mirror image key to flip a tapered
pattern vertically.
(1) Mirror image key
(1)
Saving tapered stitches The customized tapered patterns can be saved as a file
in the machine’s internal memory or a USB flash drive. Press the save file key
after customizing a tapered stitch. The tapered stitch file is saved as a
*.JCS file. To save or open the file refer to pages 100-102.
(1) Save file key
(1)
94
2. 3.
Tapered Stitch Sample 2 Example: To create a corner frame with tapered stitch
pattern #32
1. Select stitch pattern #32. 2. Press the end lock stitch key to turn off
the end lock
stitch. (1) End lock stitch key
3. Press the tapering adjustment key. (2) Tapering adjustment key
- (3) (5) (7) (6)
(4)
(8)
(1) (2)
4. Press the tapering shape key (for start tapering pattern). Press the
tapering shape key (for end tapering pattern). Press the pattern length key.
Press the “+” key 4 times or press the numeric pad key and enter “5” (refer to
page 93). Press the OK key. (3) Tapering shape key (for start tapering
pattern) (4) Tapering shape key (for end tapering pattern) (5) Pattern length
key (6) Numeric pad key (7) OK key
5. Press the foot-up key. You can check the number of body patterns on the
screen. (8) Foot-up key (9) Number of the body pattern
6. Lower the needle into the fabric at the point where you want to start
sewing. Start sewing. Sew until the machine stops. The machine stops and the
presser foot rises automatically.
(9) 95
- (10)
7. Pivot the fabric 90 degrees.
Press the presser foot lifter button to lower the presser foot.
Press the initial and end lock stitch keys.
Be sure that the initial lock stitch key is turned off, and the end lock
stitch key is turned on.
Start sewing in the new direction. (10) Presser foot lifter button (11)
Initial lock stitch key (1) End lock stitch key
(11)
(1)
8. The machine automatically stops at the end of the
corner with the lock stitch.
96
(1)
(2) (3) (4) (5) (6) (7) (8) (9)
(11) (12) (13) (14)
(15)
(10)
(16) (17)
MONOGRAMMING
You can program letters and symbol designs for monogramming. Press the
Monogram key and the font selection window will open.
(1) Monogram key
You can select one of 8 fonts. Select the desired font by pressing the
corresponding key.
(2) Block key (3) Script key (4) Broadway key (5) Block (9 mm) key (6)
Cyrillic key (7) Mincho (9 mm) key (8) Marumoji (9 mm) key (9) Symbol key The
monogram mode window will open.
NOTE: The heights of Block (9 mm), Mincho (9 mm) and Marumoji (9 mm) are
approximately 9 mm.
Function Keys (10) Cursor keys Press the cursor keys to move the cursor up or
down.
(11) Letter size key Press this key to select the full size (L) or small size
(S). (12) Letter case key Press this key to select upper case or lower case.
(13) Delete key Press this key to delete selected characters.
(14) Preview key Press this key to view the entire monogram.
(15) Save file key Press this key to save the monogram as a data file. (16)
Hiragana/Katakana key Press this key to switch Hiragana or Katakana for
monograms.
(17) Horizontal/Vertical orientation key Press this key to switch the
horizontal or vertical orientation.
NOTE: Numbers, symbols and European letters are available on pages 2/5 through
5/5. * These keys are displayed only when Mincho (9 mm)
or Marumoji (9 mm) is selected.
97
(2) (3)
(1)
Manual Thread Tension
(1)
This machine is equipped with automatic thread tension
control. However, you may need to manually adjust the
(4)
tension balance depending on the sewing conditions.
To adjust the thread tension, press the setting bar to
show the option.
(1) Setting bar
Individual Thread Tension Adjustment
To apply the thread tension adjustment to each letter individually, select the
letter by moving the cursor with cursor keys.
(2) Cursor (3) Cursor keys
Press “+” or “” key to adjust the thread tension of the selected letter. The
adjusted thread tension is applied to the selected letter.
(4) Thread tension adjustment key
Unified Thread Tension Adjustment
To apply the thread tension adjustment to all letters together, you do not
need to select the letters.
Press the unified thread tension key. (5) Unified thread tension key
Press “+” or “” key to adjust the thread tension. The adjusted thread tension
is applied to all entered letters.
When unified thread tension control is applied, the unified thread tension key
turns to light blue. Press the unified thread tension key again to deactivate
the unified thread tension adjustment.
NOTE:
Unified thread tension adjustment cannot be applied
(5)
to Symbol characters or decorative stitches.
(1) (2) (3) (4)
2/3
Spacing To enter a space in monogramming, press one of the three space keys on
the lower right corner of the monogram selection.
(1) Space keys (2) Small-size space (3) Medium-size space (4) Large-size space
Reducing the Size of Letters To reduce the height of a character to
approximately 2/3 of full size (L), select the character and press the letter
size key.
(1) Letter size key
98
(1) (2)
Programming a Monogram Simply enter the characters by pressing the
corresponding keys to program a monogram.
NOTE: · Use a blue tip needle for sewing a monogram. · Apply a sheet of
stabilizer to fine fabrics or stretch
fabrics. · Test sew to check the sewing results.
Example 1: “Quilt” in Block font Press the monogram key and select Block font.
Enter “Q”.
(1) Monogram key
Press the letter case key to select lower case. (2) Letter case key
Enter “u”, “i”, “l” and “t”.
Start sewing. Sew until the machine stops.
Example 2: “Café” in Script font
Press the monogram key and select Script font. Enter “C”.
(1)
(1) Monogram key
Press the letter case key and select lower case letters. Enter “a” and “f”.
Press the next page key 3 times to go to page 4/5. Enter “é”.
(2) Next page key
(2) Start sewing. Sew until the machine stops.
99
(6) (7) (8)
(1) (2)
(3) (4)
(5)
Saving a Pattern Combination The pattern combination and monogram can be saved
as a file in the machine’s internal memory or a USB flash drive. The machine
has a USB port for USB flash drives. Press the function switch key. Press the
save file key after programming a pattern combination, and the save file
window will open.
(1) Function switch key (2) Save file key Select the location to where you
wish to save the pattern combination. The “Ordf” folder is shown and the file
name is assigned automatically starting from C_001…..in order.
Select the “Ordf” folder. Press the OK key to save the file under the assigned
name.
(3) File name
If you wish to assign a unique name to the file, press the rename key and the
keyboard window will open.
(4) Rename key
NOTE: · The files and folders are also displayed on different
pages. Press page keys to switch the window. (5) Page keys
· This model supports FAT16 and FAT32 formats only. If the USB flash drive is
not read, check its format (refer to pages 152-153).
· Do not use a USB card reader and USB hub.
If you wish to use a QWERTY layout keyboard, press the keyboard key. Press the
upper or lower case key to select letter case.
(6) Upper case key (7) Lower case key (8) Keyboard key Enter a new name and
press the OK key to change the file name.
Press the OK key and the file is saved under the new name.
100
(10) (9) (11) (12)
Creating a New Folder Select a location for a new folder and press the new
folder key. The keyboard window will open. Enter a folder name and press the
OK key. The new folder is created under the assigned name.
(9) New folder key
NOTE: Press the parent directory key to move to the parent directory and
display the folder.
(10) Parent directory key
Changing a Folder Name or File Name Press the rename key and select the folder
or file of which you wish to change its name. The keyboard window will open.
Enter the new name and press the OK key. The name of the folder or file will
change.
(11) Rename key
Deleting a File or Folder
Press the delete key and select the file or folder to delete. A confirmation
message appears. Press the OK key to delete the file or folder.
(12) Delete key
101
(1) (2)
Opening a Pattern Combination You can open the pattern combination, monogram
and tapered stitch saved in the machine’s internal memory or a USB flash
drive. Press the open file key and the open file window will open.
(1) Open file key
Select the memory location; either the machine’s internal memory or a USB
flash drive. The “Ordf” folder will appear.
NOTE: · If you created any folders before, those folders will
also appear. · If you cannot find the desired folder or the file in the
page, press the next or previous page key to display the other pages.
(2) Next or previous page key
Select the desired folder and the file list will appear. Select the desired
file.
The screen will return to the ordinary sewing window showing the saved pattern
combination or monogram.
Press one of the layout keys to select the layout of the file list as shown.
(3) Layout keys
(3) 102
(2)
(5) (3) (4)
(5)
(1) (3) (5)
(7) (9) (11)
SEWING APPLICATION
Variety of Sewing Applications
Sewing application is a unique feature that provides you
(1)
with useful sewing applications.
Press the sewing application key and the sewing
application menu will open.
(1) Sewing application key
Press one of the key to select the category.
(2) Sewing key (3) Quilt key
The sewing applications using optional presser feet can be selected by
pressing the optional foot key. Please refer to optional feet instructions for
usage details.
(4) Optional foot key
NOTE: This category is composed of multiple pages. Press page keys to switch
the category pages.
(5) Page keys
Sewing
Press the sewing key and the sewing application menu will open.
The 21 sewing applications are as follows:
(2)
(1) Seaming Woven
(2) Seaming Stretch/Knit
(3) Curve
(4) Topstitching
(4)
(5) Rolled Hem
(6) Overedge Woven
(6)
(7) Overedge Stretch/Knit
(8) Overedge Heavy
(9) Blind Hem
(8)
(10) Shell Tuck (11) Lapped Zipper
(12) Pouch Zipper
(10)
(12)
103
(13) Gathering
(14) Easestitching
(15) Basting
(16) Buttonhole
(13)
(14)
(17) Button
(18) Tacking
(15)
(16)
(17)
(18)
(19) Eyelet
(20) Smocking (21) Fagoting
(19)
(20)
(21)
Quilt
In this category, 10 types of useful stitches for quilting are
available.
(1)
(2)
Press the quilt key and the quilt sewing application menu
will open.
The 10 quilt sewing applications are as follows:
(1) Patchwork Piecing
(3)
(4)
(2) Free Motion
(3) Ruler Work
(4) Variable ZZ
(5) Applique
(5)
(6)
(6) Straight Stitch
(7) Decorative Quilt Stitch
(8) Clasp Stitch
(9) Sashiko
(7)
(8)
(10) Hand-Look QU
(9)
(10)
104
(1) (3) (5) (7) (9)
(1)
Optional Sewing Application
The option category of the sewing application provides you with 10 useful
sewing applications.
Press the optional foot key and the optional sewing
(2)
application menu will open.
The 10 optional sewing applications are as follows:
(1) Beading
(4)
(2) Ribbon/Sequin (3) Piping
(4) Cording
(5) Pintucking
(6)
(6) Free Motion Couching
(7) Applique
(8) Ruffler
(9) Ultraglide
(8)
(10) Invisible Zipper/CONCEAL® Zipper*
Refer to the instructions on optional foot for sewing.
- “CONCEAL” is a registered trademark of YKK Corporation.
(10)
Sewing Press the sewing key and the sewing application menu will open.
(1) Sewing key
Seaming Woven Straight stitches for seaming regular woven fabrics.
105
Seaming Stretch/Knit Narrow stretch stitches for seaming stretch or knit
fabrics.
Curve Short straight stitches for seaming curved lines.
Topstitching Long straight stitch for topstitching with thick threads.
106
Rolled Hem
(1) Straight Stitch Rolled hemming with straight stitch
(2) Zigzag Stitch
(1)
(2) Rolled hemming with narrow zigzag stitch
(3) 4 mm & 6 mm
Rolled hemming using optional rolled hemming feet D1
(3)
and D2
0.3 cm (1/8)
5 cm (2)
To sew: Attach rolled hem foot D. Fold the fabric edge twice to form a hem,
0.3 cm (1/8) wide and 5 cm (2) long then press.
Place the fabric aligning the hem edge with the guide of the foot. Turn the
handwheel to lower the needle to the starting point. Lower the foot and sew
several stitches slowly while pulling on the threads to assist feeding the
fabric. Stop the machine and lower the needle into the fabric. Raise the foot
and insert the folded portion of the fabric into the curl of the foot.
Lower the foot and sew while lifting the edge of the fabric to keep it feeding
into the curl smoothly and evenly.
0.9 cm (3/8) 0.9 cm (3/8)
NOTE: Trim the corners 0.9 cm (3/8) to reduce bulk.
107
Overedge Woven Overcasting stitch for regular woven fabrics.
Overedge Stretch/Knit Knit stitch for finishing raw edges of stretch or knit
fabrics. For better results, use zigzag foot A and sew leaving an adequate
seam allowance. After sewing, trim the seam allowance close to the stitches
(refer to page 49).
108
Overedge Heavy Double overedge stitch for preventing raw edges of linens and
gabardines from ravelling.
109
Blind Hem
Select “Blind Hem”. The following 2 options are available. (1)
(1) Woven
For blind hemming regular woven fabric. (2) (2) Stretch/Knit
For blind hemming stretch or knit fabric.
(3)
(A)
(B)
(7)
(4) (3)
(6) (5)
To sew:
Attach blind hemming foot G.
Fold the fabric to form a hem leaving a 0.5 cm (1/4) allowance as shown.
(3) 0.5 cm (1/4)
(A) Medium to heavy fabrics: The raw edge should be overcasted.
(B) Fine fabrics: Fold the raw edge 1 cm (3/8). (4) 1 cm (3/8)
Position the fabric so that the fold comes to the left side of the guide on
the foot. Lower the presser foot.
The needle should just pierce the folded edge when it comes over to the left
side.
Adjust the position of the needle drop if necessary. Sew guiding the fold
along the guide.
(5) Fold (6) Guide (7) Wrong side of the fabric
(8)
After sewing is finished, open the fabric flat.
The seam on the right side of the fabric is almost
invisible.
(7) Wrong side of the fabric
(7)
(8) Right side of the fabric
110
(1)
(3) (2)
Adjusting the needle drop position Press the setting bar to expand the manual
setting window.
(1) Setting bar Press the “+” key to move the needle drop positions to the
left. Press the “” key to move the needle drop positions to the right.
(2) “+” key (3) “” key
The needle drop position will change, while the stitch width (2.8 mm) remains
consistent. The distance between the left needle drop position and guide of
the foot is indicated in millimeters.
NOTE: You can alter the stitch width by changing the right needle drop
position.
2.8 mm
Altering blind hem stitch width
Press the “+” key in (2) to increase stitch width (3).
Press the “” key in (2) to decrease stitch width (3).
(1)
(2)
NOTE: You can move the left needle drop position (4) with the
“+” or “” key in (1).
(4)
(3) 111
Shell Tuck Select “Shell Tuck”. The following 3 options are available. (1)
Small (1) Narrow shell tuck stitch
(2) (2) Medium Medium width shell tuck stitch
(3) (3) Large Regular shell tuck stitch
To sew:
Use a light weight fabric (Tricot, for example).
(4)
Fold the fabric in bias as shown and stitch on the fold.
(4) Bias direction
Allow the needle to barely clear the folded edge to create a shelled edge.
If you sew shell tucks, space the rows at least 1.5 cm (5/8) apart.
112
Lapped Zipper
Press the Lapped Zipper key and the zipper sewing window will open. Press the
sewing step key and the machine setting will automatically adjust to suit each
sewing step.
NOTE: Dual feed plus foot VD and dual feed plus zipper foot ED appear on the
visual touch screen when the dual feed key is pressed. Dual feed plus zipper
foot ED is used with dual feed plus foot VD together.
- Dual feed feet and holder are optional items (sold separately).
(4)
(2)
(1)
(3) Lock-a-Matic
Basting
(5)
Fabric preparation Add 1 cm (3/8) to the zipper size. This is the overall
opening size. Mark the end of opening.
(1) Zipper size (2) Opening size (3) 1 cm (3/8) (4) End of opening Attach
zigzag foot A.
Lock-a-Matic Place the right sides of the fabric together and sew to the end
of the opening leaving a 2 cm (3/4) allowance.
(5) 2 cm (3/4)
Basting Baste the zipper opening.
113
(6) (7)
Sew Left side
Replace the foot with zipper foot E.
Fold back the left seam allowance. Turn the right seam allowance under to form
References
- Elna master shop – Swiss design
- Optional accessories – Elna master shop
Read User Manual Online (PDF format)
Read User Manual Online (PDF format) >>
Download This Manual (PDF format)
Download this manual >>
Как отрегулировать натяжение нитей в швейной машинке — несколько практических советов и лайфхаков

Регулировка натяжения нити в машинке в первый раз для новичка может показаться чем-то очень сложным. Но со временем вы приобретете опыт и научитесь справляться с этой задачей легко, быстро, а затем и вовсе на автомате, незаметно для себя. На этапе обучения шитью любая техническая задача может показаться сложной. Но вы обязательно справитесь!
Неправильное натяжение нити сложно не заметить. Стежки становятся неравномерными, нижняя и верхняя нить может цеплять друг друга, рваться, терять структуру и портить всю работу. Если вы заметили, что ваши стежки выходят не идеально (они слишком тугие или наоборот слабые), это тоже может сигналить о неполадке с натяжением. Правильная регулировка натяжения нитей в швейной машинке жизненно важна для создания равномерных и качественных стежков на ткани, как с лицевой стороны, так и с изнанки.
Шаг 1. Общая проверка настройки машинки
Самый первый шаг, который стоит сделать, чтобы решить эту проблему, это, конечно же, прочитать внимательно инструкцию к вашей швейной машинке. Изучите свою модель машинки и узнайте ее особенности. Как только вы сделаете это, многие штатные неполадки перестанут казаться проблемой.
Швейные машинки снабжены дисковым регулятором натяжения (натяжителем). Вам необходимо найти на своей машинке регулятор натяжения. Его положение варьируется в зависимости от модели машины, поэтому, если вы еще не знаете, как он выглядит, проверьте еще раз руководство по эксплуатации к швейной машине. Если же инструкции нет, то регулятор может выглядеть как диск с номерами, который при этом не задает изменение программ шитья, тип или размер стежков.
Это может быть реле, переключатель, кнопки или колесико, которое пронумеровано от 0 до 10. На разных машинках эти числа могут варьироваться. Отметка 10 (или наивысшая отметка) обычно соответствует самому тугому положению нити. Лучшее значение бывает от 2 до 6. Чтобы выяснить, какое число наиболее подходит для вашей машинки, используется простой метод тестирования.
Шаг 2. Проверка частей механизма натяжения нити
Для начала вам необходимо проверить настройку швейной машинки и правильно заправить нить. Убедитесь, что шпулька намотана и установлена корректно. Это необходимо для определения, что неправильное положение шпульки или сбившаяся настройка не стали сами по себе причинами проблемы с натяжением.
Причин неисправности с натяжением нитей может быть множество. Не все они связаны непосредственно с регулировкой. Перед перемещением регулятора натяжения обязательно проверьте, нет ли иных причин.
Например:
- машинка заправлена неправильно. Проверьте, что нить проходит через все направляющие (нитенаправители). Нить свободно разматывается с катушки и нигде не запуталась. Катушка установлена правильно. Нитенаправители — система крючков, через которые проходит нить. Убедитесь, что они не сломаны, не погнуты, и нить заправлена корректно.
- машинка загрязнена. Между натяжными дисками, вокруг шпульного колпачка или под лапкой могут оказаться частички нитей или волокна ткани. Это увеличивает сопротивление и создает помеху обычной работе прибора. Проверьте все эти детали и части и убедитесь, что они действительно чистые.
- случилась какая-то поломка. Погнутые иглы или перекошенные катушки, шероховатые поверхности игольного ушка, направляющих, натяжных дисков, намотки нити, лапки, шпулька или повреждение ее составных частей могут вызвать проблемы. Сделайте общий осмотр машины, помня, что любые дефекты способны повлиять на нормальное натяжение нити.
Обратите особое внимание на иглы, нити и ткани. Толщина нити, различие между верхней нитью или нижней, могут ослабить со временем натяжение. Кроме того, чрезмерно длинная или короткая иголка может нарушить балансировку швов. Если шов на легкой ткани помят, попробуйте уменьшить длину иглы на 1,75 мм. Все эти мелкие детали имеют большое значение, поэтому убедитесь, что вы правильно используете настройки машинки, с учетом всех особенностей шитья.
- Полиэфирная нить действительно универсальная и является лучшим вариантом для большинства из швейных задач. А, например, хлопковая нить намного толще, поэтому, если вы собираетесь использовать ее, вам необходимо отрегулировать в соответствии с этим и натяжение нитей.
- Холст и джут являются примерами тканей большей плотности, а хлопок и полиэстер — примерами тканей стандартной плотности. Если вы перейдете с толстой ткани на более тонкую, вам тоже необходимо отрегулировать натяжение, чтобы швы оставались стабильно качественными.
- Размер игл варьируется в зависимости от цели шитья. Существуют толстые иглы, предназначенные для джинсовой ткани, которые не ломаются при использовании, и тонкие иглы, которые не повреждают тонкие и деликатные ткани. При покупке игл посоветуйтесь с кем-нибудь в магазине, чтобы выбрать лучший вариант для материала, который вы будете использовать.
Шаг 3. Отрегулируйте диск натяжения нити
Положите кусочек ткани под прижимную лапку. Выполните пробный стежок и оцените натяжение на нем. Если нить будет натянута слишком туго, вы заметите это на лицевой стороне ткани. Если она будет слишком слабой, это будет заметнее с изнаночной стороны. На этом этапе вы можете отрегулировать натяжение ручкой или реле (в зависимости от модели машинки), пробуя разные варианты и добиваясь образцового шитья. Не делайте настройку слишком резко, попытайтесь плавно переходить от одного значения к другому.
Регулировка натяжения верхней нити
Отрегулируйте натяжение верхней нити, если оно слишком слабое
Чтобы увеличить натяжение верхней нити, если она слишком слабая, поверните циферблат в ту сторону, где цифры увеличиваются. Попробуйте 1/2 для еще одного номера, затем проведите тест шва на детали. Продолжайте плавно переходить, пока шов не станет твердым с обеих сторон, и вы перестанете видеть нижнюю нить сверху.
Отрегулируйте натяжение верхней нити, если нить слишком тугая.
Чтобы уменьшить натяжение верхней нити, поверните диск в направлении уменьшения числа. Попробуйте 1/2, чтобы получить на 1 номер меньше, затем проведите тест шва на детали. Продолжайте плавно переходить, пока шов не станет твердым с обеих сторон, и вы перестанете видеть нить внизу вверху.
После каждого переключения натяжения выполняйте тестовый стежок. Так вы оцените все варианты. Продолжайте регулировать ручку натяжения нити, пока не найдете ее идеальное натяжение. Обычно это бывает среднее значение отметки на ручке регулировки.
Если вы не можете исправить ситуация регулировкой верхней нити, то начните регулировать натяжение нижней нити.
Настройка натяжения нижней нити
Если вы уже попробовали все перечисленное выше, и вам ничего не помогло, то очевидно необходимо отрегулировать нижнюю нить.
Хороший способ проверить нормальное натяжение нижней нити — снять челнок и, подвесив его в воздухе, удерживая за нить из шпульки. Посмотрите, как поведет себя эта нить.
Если она не разматывается, то натяжение слишком велико и его необходимо уменьшить. Если нить легко и сильно разматывается (более чем на пару сантиметров), следует увеличить натяжение. Желательно, чтобы в таком положении нить вытягивалась на несколько сантиметров (2-3 см).
Используя небольшую отвертку, поверните винт рядом со шпульным колпачком не более чем на 1/4 оборота. Поверните по часовой стрелке, чтобы увеличить натяжение или против часовой стрелки, чтобы уменьшить его. Еще раз проверьте натяжение и повторяйте, пока нить не начнет разматываться всего на несколько сантиметров.
Настройка натяжения нити в горизонтальном челноке
Если настройка требуется в горизонтальном челноке, то он настраивается по-другому. Винт находится на самом челночном устройстве. В некоторых швейных машинках доступ к нему возможен только, если снять игольную пластину. И снова — загляните в инструкцию по эксплуатации, наверняка она подскажет, каким образом именно в вашей модели машинки регулируется натяжение нижней нити в горизонтальном челноке.
Если вы не сможете сделать это самостоятельно, то лучше обратитесь в сервисный центр или за подсказкой к опытной швее.
Это занятие требует терпения и некоторого времени. Вам нужно будет снова и снова оценивать стежки, регулируя натяжение. Вы узнаете, что нашли золотую середину, когда стежки на лицевой стороне будут иметь такой же вид и натяжение, как и стежки на оборотной стороне ткани.
Видео: как правильно заправить шпульку
Вот и все, что мы хотели рассказать по этому вопросу. Курсы кройки и шитья ЛадЛен желают вам удачи, вдохновения и неизменного удовольствия от шитья!
Если у вас есть несколько собственных советов о том, как правильно отрегулировать натяжение нитей в швейной машинке, поделитесь ими с нашими читателями, оставив комментарий ниже.
Вам понравится)
На счет того что это легко я бы не сказал) но это безумно интересно, теперь у меня большая часть гардероба сшита собственноручно)
Для тех, кто не знает
Трикотаж это сложно. Научиться шить даже простенькую трикотажную одежду дома по видеоурокам не просто. Мне посоветовали пойти учиться. И я рада, что нашла отличные курсы. Ходила в Ладлен на индивидуальные занятия. Очень понравилось. Во-первых, время можно выбрать удобное для себя, во-вторых, не надо подстраиваться под общий уровень. Я, например, базовые вещи знаю, выкройки делать могу. В-третьих, конечно же внимание только на моей работе. Меня все устроило и все понравилось. Спасибо!
Пошив головных уборов
Записалась на курсы «Пошив головных уборов». Курсы сложные но очень насыщенные в информационном и практическом плане. Теория сопровождается практикой и действительно понимаешь, что можешь самостоятельно, научиться делать красивые и качественные вещи. Всем кто желает научиться с нуля делать шляпки прямая дорога на эти курсы.
Спасибо!
Огромное спасибо Елене Геннадиевне за ее колоссальное терпение и невозмутимость по отношению к ученикам. Если пойдете учиться то только к ней!
Отличное решение
Если любите шить сама или надоело тратить уйму денег на то, что через полгода будет не нужно. Я про детскую одежду говорю сейчас, если что. Не знаю, как кому, но на моем мальчишке она просто горит! А на лето одеть четырехлетнего пацана просто во дворе потусоваться, это прорва какая-то)
Я уже не начинающая в этом деле, но все равно как-то не решалась сама что-то сшить. пошла на курсы. Круто было примерить сыночку первую футболку, сшитую самостоятельно!
Обучения с нуля
Всем привет! Я ходила на курсы кроя и шитья в Ладлен. Сразу скажу — я нулячая была. В детстве на бабушкиной машинке пару раз строчила, но это не в счет. Что могу сказать по существу. Для себя поняла, что на занятия ходить надо. Потому что самой себя заставить что-то делать, особенно, если не очень получается, почте не реально. В группе интереснее. Потому что там есть с чем сравнивать свои успехи. Преподаватель это очень важно. Терпеливый и позитивный. Мне повезло с этим. За месяц мне удалось наконец понять, что ошибаться не страшно, что шить я могу, что выкройка это не китайская грамота, что, наконец, фасон юбок может быть разнообразный! Так что, если шить интересно и есть на это силы и время, всем рекомендую походить на такие курсы.
Моделирование одежды
Супер, моделирование – это то что нужно для меня! Всегда нравилось шить, но записалась в этот обучающий центр именно потому, что можно делать это ещё более творчески и профессионально! Здесь реально начала создавать интересные модели. Есть возможность научиться видеть конечный результат ещё на этапе разработки. Короче, мне нравится, тем более что группы здесь и как для начинающих, так и для тех кто хочет идти дальше.
Кройка
Отзыв о курсах на м. Фрунзенская.
Кроить не умела никогда. Приходилось на глазок подгонять. Но это не правильно, если начинаешь много шить. Выкройка — основа всего. Хотя немного нудновато, требует усидчивости и внимания много. Но зато это навык, который открывает новые возможности в шитье. Если всерьез подходить к этому занятию, то лучше этому научиться у профессионалов.
Очень вдохновляет
Всегда любила выделяться и одеваться ярко, необычно. Поэтому школа шитья – это то, что было нужно для меня. Записалась в группу для начинающих и так увлеклась, оказалось очень интересно, много информации. Что нравится – к каждому свой подход. Начинала с лёгких вещий для себя. Но самое смешное, получила большое удовольствие когда шила мужскую рубашку для мужа. Получилось классно, мужу понравилось, остался доволен. И я своими результатами тоже довольна.
Отзыв
Я не знаю, может в моём возрасте поздно учиться шить, но как только вышла на пенсию, сразу решила, что пойду на эти курсы. Раньше не было времени. Да, чуточку дороговато для пенсионеров, но мне всегда нравилось шить. Вот нашла себе замечательное занятие. Хожу уже три месяца, многому научилась, сшила себе и юбку, и брюки, и платье, подруги завидуют, и тоже хотят, но пока не решаются. Главное верить в себя! А здешние преподаватели действительно помогают эту веру приобрести, не смотря на мой возраст, помогают мне, советуют, возятся со мной когда не понимаю. Одним словом, молодцы! И большое им за это спасибо!
Классные курсы!
Все здесь очень здорово. Большое спасибо Елене Геннадиевне! Приходите на курсы, весело и с большой пользой проведете время.
Интересно научиться новому
Я работаю оформителем на праздничных мероприятиях. Ходила на мастер-класс по изготовлению декоративных цветов из фаомирана. Мне это необходимо по работе. Отличный мини-курс. За три часа действительно можно научиться основам. Но я б его рекомендовала уже людям, которые знают, что это такое и зачем. Можно задавать свои вопросы, это большой плюс. И было приятно, что после мастер-класса преподаватель не свернул сразу все, а дал полезные советы и рекомендации, хотя это уже, считайте, факультатив.
Закончила курс по пошиву головных уборов. Осталась очень довольна
Что касаемо самого учебного центра, то он очень серьезный, педагоги квалифицированные, сразу видно с большим опытом работы.
Курсы оказались очень интересными и в действительности полезными.
Благодарность
Спешу выразить благодарность своему наставнице по предмету «Скорняжное дело» в учебном центре ЛадЛен — Ларисе Дмитриевне Гордеевой! Это — профессионал своего дела. Швея с большой буквы! Очень сердечный и добрый человек! А также, директору этого центра- Елене Геннадиевне Ладинской! Спасибо большое за полученные знания и отличную организацию учебного процесса! Благодаря вам я получила возможность работать портной дома и быть независимой! А регулярная практика и наработка навыков — лучшая школа кройки и шитья. Ещё раз- спасибо.
огромная благодарность
Хочу, обратиться ко всем кто хочет, научиться шить и стоит перед выбором, какие курсы выбрать. Могу, сказать со 100% уверенностью, Елена Геннадьевна Ладинская в Учебном центре кройки и шитья «ЛадЛен» Вас этому научит. Даже, если Вы очень «круглый ноль», в умелых руках мастера, практика и человека, тонко чувствующего и понимающего особенности женского тела + Ваше желание, через некоторое время Вы будете разбираться в конструировании и моделировании. На своих занятиях, Елена Геннадьевна, отвечает на все вопросы, на любые мелочные проблемы, которые возникают в процессе. Лично я получала грамотные и доступно-разжеванные ответы. На курсах царит очень доброжелательная обстановка, в группе на всех хватает места и машинок. Если, не Елена Геннадьевна Вас научит шить, то тогда кто же? Может научить любого с нуля, она еще и заряжает своим позитивом и увлеченностью любимым делом. На занятиях всегда приятная и непринуждённая атмосфера. Все доступно рассказывается сочетаясь это с практикой, за короткий период можно научится не только шить, но и моделировать и конструировать, главное иметь желание)
Елена Геннадьевна — Профессионал! Она в совершенстве владеет искусством моделирования, конструирования и непосредственно швейным мастерством. И самое главное, что она все свои знания, может донести до аудитории! Я пошла на курсы, для того, что бы овладеть методикой сборки и шитья вещи и собиралась дальше шить по готовым выкройкам. Но после курса, желание шить по журналам прошло, настолько всё понятно с конструированием, что необходимость в готовых выкройках пропала.
Девочки, если вы стоите перед выбором, на какие курсы по шитью вам записаться — ответ однозначный — идите в Учебный центр кройки и шитья «ЛадЛен».
Здесь и впрямь невозможно не научиться шить!))) Доступное изложение информации по конструированию и шитью, все изложено до мельчайших подробностей. А атмосфера, которая складывается между участниками на период курса, настолько домашняя и уютная, что грустно расставаться!
Елена Геннадьевна! хочу сказать спасибо:
1. За супер курсы. Индивидуальный подход к каждому слушателю, в сегодняшнее время это большого стоит. Курсы интенсивные и очень доступные, как мне кажется, для всех.
2. За подачу информации. Невероятное количество неиссякаемого оптимизма, жизнелюбия, доброты, и просто гигантского терпения на всех нас! Высший пилотаж ! Все очень подробно, каждая мелочь разжевывается до тех пор пока не будет понятно всё и всем. Таких хитростей о которых узнала на курсе, я бы нигде не нашла, так как не понимала бы, что они мне нужны и для чего это все мне:).
3. За то, что у Вас есть преподавательский талант. Многие, кто что-то преподает или пытается, не обладает такими космическими способностями. У Вас они есть! Просто есть!
4. За то, что появилось желание шить и не осталось никаких сомнений: «а надо ли мне это?».
5. За то, что делитесь с нами своим опытом. И не только опытом шитья ))))))
С нетерпением жду продолжения своего обучения! СПАСИБО, Елена Геннадьевна!
Если честно, то слов не хватает от переполняющих эмоций после данных курсов! Девочки! Приходите и сами всё испытаете и почувствуете. )) Я курсы окончила в середине марта 2017 года, но то невероятное «послевкусие» не отпускает до сих пор!
Успехов всем!
Лучшие курсы в Москве!
Никогда не думала, что учиться может быть так приятно и весело. Елена Геннадиевна очень позитивный человек, обучение проходит в непринужденной обстановке, материал подается качественно и очень доступно. Шить в ЛадЛен легко — это правда! Приходите, не сомневайтесь. Помимо необходимых навыков, вы получите массу приятных эмоций от общения с преподавателем. Позитив заразителен. Теперь я научилась шить и не унывать в трудных ситуациях.
Источник
Инструкция по эксплуатации ELNA eXcellence 740
Страница 3
ПОДГОТОВКА К РАБОТЕ
Наименование частей . . . . . . . . . . . . . . . . . . . . . . . . . . . . . . . . . .2
Стандартные аксессуары . . . . . . . . . . . . . . . . . . . . . . . . . . . . . . .3
Разновидности прижимных лапок и аксессуаров . . . . . . . .4-5
Съёмный столик . . . . . . . . . . . . . . . . . . . . . . . . . . . . . . . . . . . . . . .6
Хранение аксессуаров . . . . . . . . . . . . . . . . . . . . . . . . . . . . . . . . .6
В дополнительном столике . . . . . . . . . . . . . . . . . . . . . . . . . . . . . .7
Боковая панель . . . . . . . . . . . . . . . . . . . . . . . . . . . . . . . . . . . . . . . .7
Сборка расширительного рабочего стола . . . . . . . . . . . . . . . . .8
Работа с тканенаправителем . . . . . . . . . . . . . . . . . . . . . . . . . . . .8
Установка коленного рычага . . . . . . . . . . . . . . . . . . . . . . . . . . . .9
Подключение питания . . . . . . . . . . . . . . . . . . . . . . . . . . . . . . . . .10
Рабочие кнопки машины . . . . . . . . . . . . . . . . . . . . . . . . . . . . . . .11
Кнопка Старт/Стоп . . . . . . . . . . . . . . . . . . . . . . . . . . . . . . . . . . . .11
Кнопка реверса . . . . . . . . . . . . . . . . . . . . . . . . . . . . . . . . . . . . . . .11
Кнопка автоматической закрепки . . . . . . . . . . . . . . . . . . . . . . .11
Кнопка подъема/опускания иглы . . . . . . . . . . . . . . . . . . . . . . .12
Кнопка обрезки нити . . . . . . . . . . . . . . . . . . . . . . . . . . . . . . . . . .12
Кнопка подтверждения . . . . . . . . . . . . . . . . . . . . . . . . . . . . . . . .12
Функциональные кнопки . . . . . . . . . . . . . . . . . . . . . . . . . . . .13-14
Выбор строчки . . . . . . . . . . . . . . . . . . . . . . . . . . . . . . . . . . . . . . . .15
Кнопка помощи . . . . . . . . . . . . . . . . . . . . . . . . . . . . . . . . . . . . . .16
Установки пользователя . . . . . . . . . . . . . . . . . . . . . . . . . . . .17-20
Яркость экрана . . . . . . . . . . . . . . . . . . . . . . . . . . . . . . . . . . . .17
Время демонстрации дополнительного окна . . . . . . . . . . . . .18
Вызов последних установок . . . . . . . . . . . . . . . . . . . . . . . . .18
Выбор языка . . . . . . . . . . . . . . . . . . . . . . . . . . . . . . . . . . . . . . . . .18
Калибровка сенсорного экрана . . . . . . . . . . . . . . . . . . . . . . . . .19
Возврат всех первоначальных установок стежков . . . . . . . . .20
Удаление сохраненных комбинаций . . . . . . . . . . . . . . . . . . . .20
Возврат всех первоначальных установок . . . . . . . . . . . . . . . .20
Контроль скорости шитья . . . . . . . . . . . . . . . . . . . . . . . . . . . . . .21
Регулятор контроля скорости . . . . . . . . . . . . . . . . . . . . . . . .21
Ножная педаль . . . . . . . . . . . . . . . . . . . . . . . . . . . . . . . . . . . .21
Регулировка давления лапки . . . . . . . . . . . . . . . . . . . . . . . . . . .22
Отключение транспортера ткани . . . . . . . . . . . . . . . . . . . . . . . .22
Подъем и опускание прижимной лапки . . . . . . . . . . . . . . . . .23
Замена прижимной лапки . . . . . . . . . . . . . . . . . . . . . . . . . . . . .24
Снятие прижимной лапки . . . . . . . . . . . . . . . . . . . . . . . . . .24
Установка прижимной лапки . . . . . . . . . . . . . . . . . . . . . . .24
Смена и установка держателя лапки . . . . . . . . . . . . . . . . . . . .24
Снятие держателя лапки . . . . . . . . . . . . . . . . . . . . . . . . . . . .24
Установка держателя лапки . . . . . . . . . . . . . . . . . . . . . . . . .24
Работа с верхним транспортером ткани . . . . . . . . . . . . . . . . .25
Установка лапки-верхнего транспортера ткани . . . . . . . . . . .25
Установка устройства верхнего транспортера . . . . . . . . . . . .25
Отключение устройства верхнего транспортера . . . . . . . . . .26
Снятие лапки-верхний транспортер . . . . . . . . . . . . . . . . . . . . .26
Направительные линии для швов . . . . . . . . . . . . . . . . . . . . . . .27
Создание прямых углов . . . . . . . . . . . . . . . . . . . . . . . . . . . .27
Быстрые измерения в см/дюймах . . . . . . . . . . . . . . . . . . . . . . .27
Сбалансированное натяжение нити . . . . . . . . . . . . . . . . . . . . .28
Сбалансированное натяжения игольной нити . . . . . . . . . . .28
Изменение натяжения нити вручную . . . . . . . . . . . . . . . . . . . .28
Корректировка несбалансированных строчек . . . . . . . . . . . .29
Смена игл . . . . . . . . . . . . . . . . . . . . . . . . . . . . . . . . . . . . . . . . . . .30
Разновидности игл . . . . . . . . . . . . . . . . . . . . . . . . . . . . . . . . . . . .31
Установка катушки ниток . . . . . . . . . . . . . . . . . . . . . . . . . . . . . .32
Дополнительный катушечный стержень . . . . . . . . . . . . . . . . .32
Удаление шпульки . . . . . . . . . . . . . . . . . . . . . . . . . . . . . . . . . . . .32
Намотка шпульки . . . . . . . . . . . . . . . . . . . . . . . . . . . . . . . . . . . . .33
Установка шпульки . . . . . . . . . . . . . . . . . . . . . . . . . . . . . . . . . . .34
Заправка нити в машину . . . . . . . . . . . . . . . . . . . . . . . . . . . . . . .35
Автоматический нитевдеватель . . . . . . . . . . . . . . . . . . . . . . . .36
Вытягивание нижней нити . . . . . . . . . . . . . . . . . . . . . . . . . . . . .37
ОСНОВНЫЕ ШВЕЙНЫЕ ТЕХНИКИ
Прямой стежок . . . . . . . . . . . . . . . . . . . . . . . . . . . . . . . . . . . . . . .38
Начало работы . . . . . . . . . . . . . . . . . . . . . . . . . . . . . . . . . . . .38
Закрепление шва . . . . . . . . . . . . . . . . . . . . . . . . . . . . . . . . . .38
Смена направления шитья . . . . . . . . . . . . . . . . . . . . . . . . . .38
Изменение положения иглы . . . . . . . . . . . . . . . . . . . . . . . .39
Изменение длины стежка . . . . . . . . . . . . . . . . . . . . . . . . . . . . . .39
Программирование персональных установок . . . . . . . . . . . .40
Возврат первоначальных установок . . . . . . . . . . . . . . . . .40
Разнообразие прямых стежков . . . . . . . . . . . . . . . . . . . . . . . . .41
Прямой стежок с левым положением иглы . . . . . . . . . . . . . . .41
Автоматическая закрепка . . . . . . . . . . . . . . . . . . . . . . . . . . . . . .41
Закрепочный стежок . . . . . . . . . . . . . . . . . . . . . . . . . . . . . . . . . .41
Работа от края плотной ткани . . . . . . . . . . . . . . . . . . . . . . . . . .42
Пришивание молнии . . . . . . . . . . . . . . . . . . . . . . . . . . . . . .43-45
Роликовый шов . . . . . . . . . . . . . . . . . . . . . . . . . . . . . . . . . . . . . .46
Изменение ширины зигзага . . . . . . . . . . . . . . . . . . . . . . . . .47
Изменение длины стежка . . . . . . . . . . . . . . . . . . . . . . . . . . . . . .47
Обработка края зигзагом . . . . . . . . . . . . . . . . . . . . . . . . . . . . . .48
Аппликация атласными стежками . . . . . . . . . . . . . . . . . . . . . .48
Тройной зигзаг . . . . . . . . . . . . . . . . . . . . . . . . . . . . . . . . . . . . . . .49
Потайной шов . . . . . . . . . . . . . . . . . . . . . . . . . . . . . . . . . . . . . . .50
Разновидности петель . . . . . . . . . . . . . . . . . . . . . . . . . . . . . . . . .51
Квадратная (сенсорная) петля . . . . . . . . . . . . . . . . . . .52-54
Зажгутованная петля . . . . . . . . . . . . . . . . . . . . . . . . . . . . . . .55
Изменение ширины петли . . . . . . . . . . . . . . . . . . . . . . . . . . . . .56
Изменение плотности стежков петли . . . . . . . . . . . . . . . . . . . .56
Автоматическая петля . . . . . . . . . . . . . . . . . . . . . . . . . . . . . . . . .57
Закругленная петля и петли на тонких тканях . . . . . . . . . . . . .58
Петля с глазком . . . . . . . . . . . . . . . . . . . . . . . . . . . . . . . . . . . . . .58
Трикотажная петля . . . . . . . . . . . . . . . . . . . . . . . . . . . . . . . . . . .59
Декоративная (сенсорная) петля . . . . . . . . . . . . . . . . . . . . .60-61
Пришивание пуговиц . . . . . . . . . . . . . . . . . . . . . . . . . . . . . . . . .62
Тройной стежок стреч . . . . . . . . . . . . . . . . . . . . . . . . . . . . . . . . .63
Стежок стреч . . . . . . . . . . . . . . . . . . . . . . . . . . . . . . . . . . . . . . . . .63
Обработка края . . . . . . . . . . . . . . . . . . . . . . . . . . . . . . . . . . . . . .63
Трикотажный стежок . . . . . . . . . . . . . . . . . . . . . . . . . . . . . . . . . .64
Оверлочный стежок . . . . . . . . . . . . . . . . . . . . . . . . . . . . . . . . . .64
Оверлочный стежок . . . . . . . . . . . . . . . . . . . . . . . . . . . . . . . . . .64
Супероверлочный стежок . . . . . . . . . . . . . . . . . . . . . . . . . . . . .65
Выполнение глазков . . . . . . . . . . . . . . . . . . . . . . . . . . . . . . . . . .69
ПЭЧВОРК И КВИЛТИНГ
Сшивание кусочков ткани . . . . . . . . . . . . . . . . . . . . . . . . . . . . .70
Строчки для квилтинга . . . . . . . . . . . . . . . . . . . . . . . . . . . . . . . .70
Работа с устройством двойной подачи ткани . . . . . . . . . . . . .71
Игольная пластина для прямого стежка . . . . . . . . . . . . . . . . . .72
Декоративная аппликация . . . . . . . . . . . . . . . . . . . . . . . . . . . . .73
Стежки для печворка . . . . . . . . . . . . . . . . . . . . . . . . . . . . . . . . . .74
Свободный квилтинг . . . . . . . . . . . . . . . . . . . . . . . . . . . . . . . . . .76
Узкие складки . . . . . . . . . . . . . . . . . . . . . . . . . . . . . . . . . . . . . . . .78
Французские узлы . . . . . . . . . . . . . . . . . . . . . . . . . . . . . . . . . . . .81
Пришивание шнура (тройной шнур) . . . . . . . . . . . . . . . . . . . .82
Пришивание шнура (одинарный шнур) . . . . . . . . . . . . . . . . .82
Атласные строчки . . . . . . . . . . . . . . . . . . . . . . . . . . . . . . . . . . . .83
Бордюры с лапкой-направителем для бордюров . . . . . . . . .83
Шитье по кругу . . . . . . . . . . . . . . . . . . . . . . . . . . . . . . . . . . . . . .84
Строчка с двойной иглой . . . . . . . . . . . . . . . . . . . . . . . . . . .85-86
Шов двойной иглой . . . . . . . . . . . . . . . . . . . . . . . . . . . . . . . . . .87
ПРОГРАММИРОВАНИЕ КОМБИНАЦИЙ СТРОЧЕК
Строчка с автоматической закрепкой . . . . . . . . . . . . . . . . . . .88
Комбинация строчек . . . . . . . . . . . . . . . . . . . . . . . . . . . . . . . . . .89
Выполнение комбинации строчек с начала . . . . . . . . . . . . . .90
Выполнение текущей строчки с начала . . . . . . . . . . . . . . . . . .90
Программирование автоматической обрезки нитки . . . . . . .91
Проверка свойств комбинаций строчек . . . . . . . . . . . . . . . . . .91
Строчки с мостиками . . . . . . . . . . . . . . . . . . . . . . . . . . . . . . . . . .92
Выбор стиля . . . . . . . . . . . . . . . . . . . . . . . . . . . . . . . . . . . . . . . . .93
Выбор букв . . . . . . . . . . . . . . . . . . . . . . . . . . . . . . . . . . . . . . . . . .93
Программирование монограмм . . . . . . . . . . . . . . . . . . . . . . . .94
РЕДАКТИРОВАНИЕ КОМБИНАЦИИ СТРОЧЕК
Просмотр длинной комбинации . . . . . . . . . . . . . . . . . . . . . . . .95
Единое изменение ширины или длины стежка . . . . . . . . . . .96
Индивидуальное изменение ширины или длины стежка . . .97
СОХРАНЕНИЕ И ВЫЗОВ КОМБИНАЦИИ СТРОЧЕК
Постоянная память . . . . . . . . . . . . . . . . . . . . . . . . . . . . . . . . . . .98
Перезапись сохраненной комбинации строчек . . . . . . . . . . .98
Вызов сохраненной комбинации строчек . . . . . . . . . . . . . . . .99
Удаление сохраненной комбинации строчек . . . . . . . . . . . . .99
УХОД ЗА МАШИНОЙ
Чистка шпульного отсека, тканенаправителей
и нитеобрезателя . . . . . . . . . . . . . . . . . . . . . . . . . . . . . . . . . . . .100
Установка шпуледержателя и игольной пластины . . . . . . . .100
Проблемы и предупреждающие сигналы . . . . . . . . . . . .101-102
Устранение неисправностей . . . . . . . . . . . . . . . . . . . . . . . . . . .103
Источник
Инструкция и руководство для
Elna eXcellence 740 на русском
96 страниц подробных инструкций и пользовательских руководств по эксплуатации
Maquina de coser elna eXcellence 740
eXcellence 780+: presentation with quick-start information
스위스 명품 엘나미싱 740-뉴업데이트
Elna eXcellence 760
Cleaning Your elna excellence | Timm’s Tips
Обзор на швейную машинку Elna eXcellence 680
Selecting stitches on the elna excellence 760 | Timm’s Tips
Bobbin Loading on the elna eXcellence 760
Инструкцияпо эксплуатации.
Швейные машинки ELNA

Важные инструкции по безопасности, Опасно, Внимание
Сохраняйте эти инструкции
ВАЖНЫЕ ИНСТРУКЦИИ ПО БЕЗОПАСНОСТИ
Машина не предназначена для использования детьми и психически нездоровыми людьми, людьми с
ограниченными возможностями без достаточного опыта и надлежащего присмотра. Не позволяйте детям играть с
ней.
Эта машина сконструирована и разработана только для бытового использования.
Перед началом работы на машине внимательно прочитайте все инструкции по пользованию.
Во избежание риска удара электрическим током:
1. Никогда не оставляйте включенную в сеть машину без присмотра. Всегда отключайте прибор от сети сразу же
после работы и перед началом чистки.
Во избежание ожогов, пожара, удара электрическим током или нанесения
повреждений пользователю:
1. Не позволяйте играть с машиной. Будьте внимательны при работе, если в помещении находятся дети.
2. Используйте прибор только по его прямому назначению, описанному в этой инструкции. Используйте
приспособления, только рекомендуемые производителем и описанные в инструкции.
3. Не используйте машину, если у нее поврежденный шнур или вилка, в случае, если она падала, была повреждена,
попала в воду или работает неправильно. Отнесите машину к ближайшему авторизованному дилеру для ремонта
или наладки.
4. Машина должна работать только с открытыми вентиляционными отверстиями. Периодически чистите
вентиляционные области машины и ножную педаль от пыли, грязи и остатков материи.
5. Ничего не кидайте и не вставляйте в вентиляционные отверстия.
6. Работайте на машине только в помещении.
7. Не работайте в помещении, где распылялись аэрозоли или использовался кислород.
8. Чтобы отключить машину, сначала поставьте все выключатели в положение ВЫКЛ., затем отсоедините вилку от
электрической розетки.
9. Не тяните вилку из розетки за шнур, берите вилку за корпус.
10. Будьте осторожны при работе с движущимися частями машины. Особое внимание уделяйте рабочей области
вокруг иглы.
11. Используйте только оригинальную игольную пластину. Из-за неправильной пластины может сломаться игла.
12. Не используйте гнутые иглы.
13. Не тяните и не толкайте ткань при шитье, может сломаться игла.
14. Всегда отключайте питание машины при регулировке или замене деталей в области работы иглы: заправке нити в
иглу, смене иглы, заправке нижней нити, смене прижимной лапки и т.д.
15. Всегда отключайте машину от электрической розетки при проведении профилактических работ, снятии панелей и
других процедур, описанных в этой инструкции.
СОХРАНЯЙТЕ ЭТИ ИНСТРУКЦИИ
Внешний вид и характеристики машины могут изменяться без предварительного уведомления.
Источник