
Thank you for choosing the ILIFE V3s Pro robot vacuum cleaner! You’ve joined millions of people to get the cleaning done robotically. This user manual helps you to keep your robot performing at its best. Please take a few moments to read through it. You may also connect with us on Facebook and Twitter to enjoy exclusive benefits:
- Get model-specific customer support, including Q&A, maintenance tips, demo videos, live chat and more;
- Get first-hand product updates including new product launch, exclusive discounts and special promotions.
You may find us on:
Facebook: https://www.facebook.com/iliferobotics
Twitter: twitter.com/lLIFEROBOTICS
If you have any questions, please contact our customer service for assistance or visit www.iliferobot.com for more information.
Enjoy automated home cleaning performed by ILIFE V3s Pro. ILIFE Innovation
Important Tips
How to use
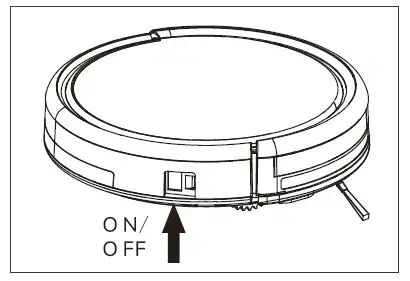
- Before using the robot, please ensure the power switch is on. Take a few moments to survey the area to be cleaned and remove any obstacles.
- The robot will pass over the same area of the floor multiple times to ensure thoroughly clean.
- The spinning brushes may flick small granule(dog food, cat litter) here and there, but finally the robot will vacuum them all in.
- Before replacing side brushes, check and match the “L” “R” mark on both the side brush and the bottom of the robot.
- When you set the clock time or schedule, the final operation will be confirmed by a beep from the robot. If no tone received, your setting is unsuccessful.
- Empty the dustbin. You could notice the robot vacuum less, even spits out. when the dustbin is full, though there is no warning beep sound.
For Best Performance
- Empty V3s Pro’s dustbin and clean its filter after every use.
- The filter could not be washed with water.
- Replace the new Filter when you notice the V3s Pro vacuum gets weaker and picks up less than before.
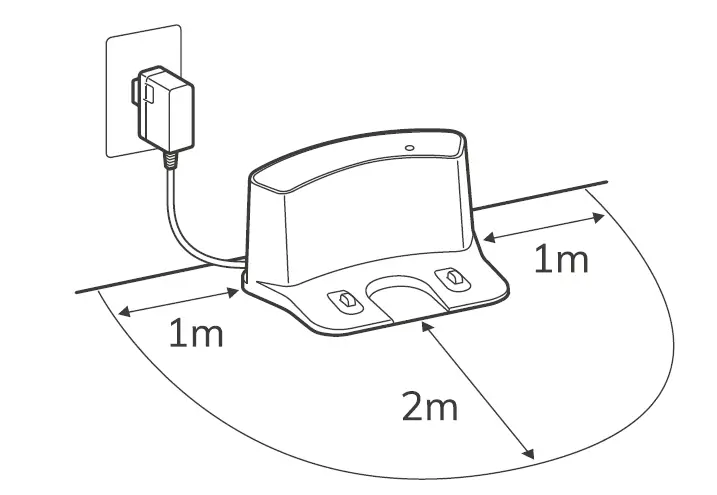
- Put the charging dock against the wall and remove obstacles about 1 meter at two sides and about 2 meters forward.
- Fully charge the robot’s battery before each cleaning cycle.
Battery Life
To extend V3s Pro’s battery life and keep its cleaning at peak performance:
- Charge the robot overnight before first-time use.
- If the robot is not used for a long time, please turn off the power switch.
- Recharge the robot as soon as possible. Waiting several days to recharge may damage the battery.
- Use the robot frequently.
Warning: The product contains electronic parts. DO NOT submerge V3s Pro or spray it with water, clean with a dry cloth only.
Safety Instructions
Before using this product, please read the following safety instructions and follow all normal safety precautions.
- Read this user manual thoroughly and carefully before using this product.
- Keep this user manual.
- Any operation or use of this product in any way other than that described in this manual may lead to serious injury or product damage.
WARNING
- Only certified technicians may disassemble the product. Users are not allowed to disassemble or repair the product.
- Only use the AC adapter provided by the factory. Using other AC adapters may cause electric shock, fire, or product damage.
- Do not touch the power cord, plug, or adapter when your hands are wet.
- Keep loose clothing and fingers away from being drawn into the product’s wheels.
- Keep the robot vacuum away from all flammables.
- Never clean the robot while it is on the charging dock or plugged indirectly. Unplug the robot and turn off the power switch when cleaning.
- Keep the AC power cord tucked away from becoming damaged in any way.
- This product is to be used only indoors. Not intended for outdoor use.
- Do not sit on top of the product or attach an object to the top of it.
- Do not use this product in wet or moist environments.
- Before use, remove all the objects that could get caught in the brushes or suction passage.
- Do not place this product on furniture or platforms where it can fall and be damaged.
- Turn the power switch off when not in use for a long period of time or when transporting the unit.
- To avoid battery damage please check whether the adapter and outlet are properly connected.
- To avoid any tripping hazards or injuries please inform all the people in the house when this product is in use.
- Do not use this product when the dustbin is full.
- Normal operating temperatures are -10 to 40 (centigrade).
- Do not operate this product in high-temperature environments.
- The battery must be removed from the product before it is scrapped.
- Unplug the vacuum from the power source when removing the battery.
- The battery is to be disposed of safely.
- Use factory authorized battery only. Do not use an unmatched battery.
Note: This product is not a toy and should not be used by children or people with a lack of related experience or knowledge.
For more details, please visit www.iliferobot.com
Product Composition
List of Accessories
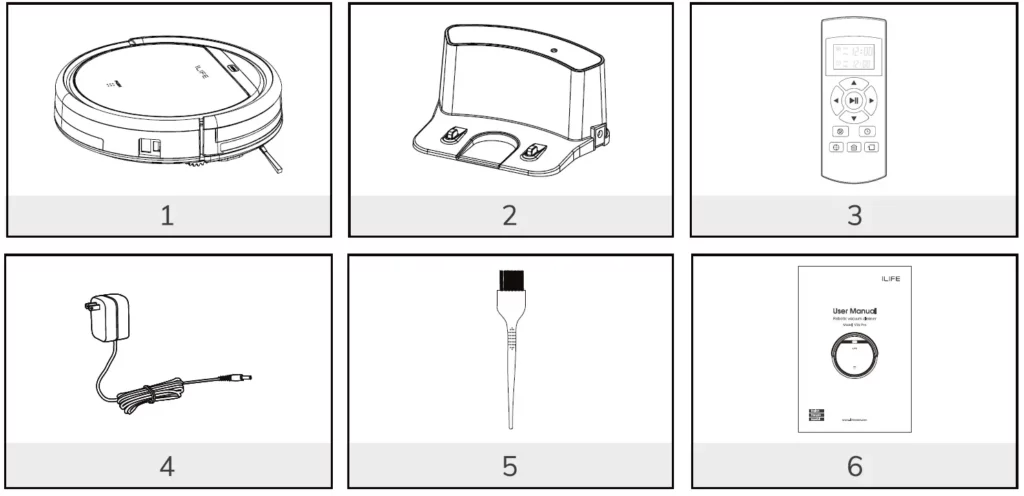
| Serial Number | Description | Q’ty |
| 1 | Main Body (battery included) | 1 |
| 2 | Charging Dock | 1 |
| 3 | Remote Control (battery not included) | 1 |
| 4 | Power Adapter | 1 |
| 5 | Cleaning Tool | 1 |
| 6 | User Manual | 1 |
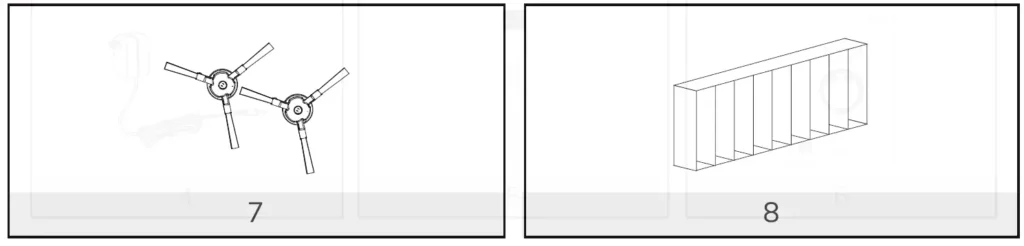
| 7 | Extra Side Brushes | 2 |
| 8 | High Performance Filter | 2 |
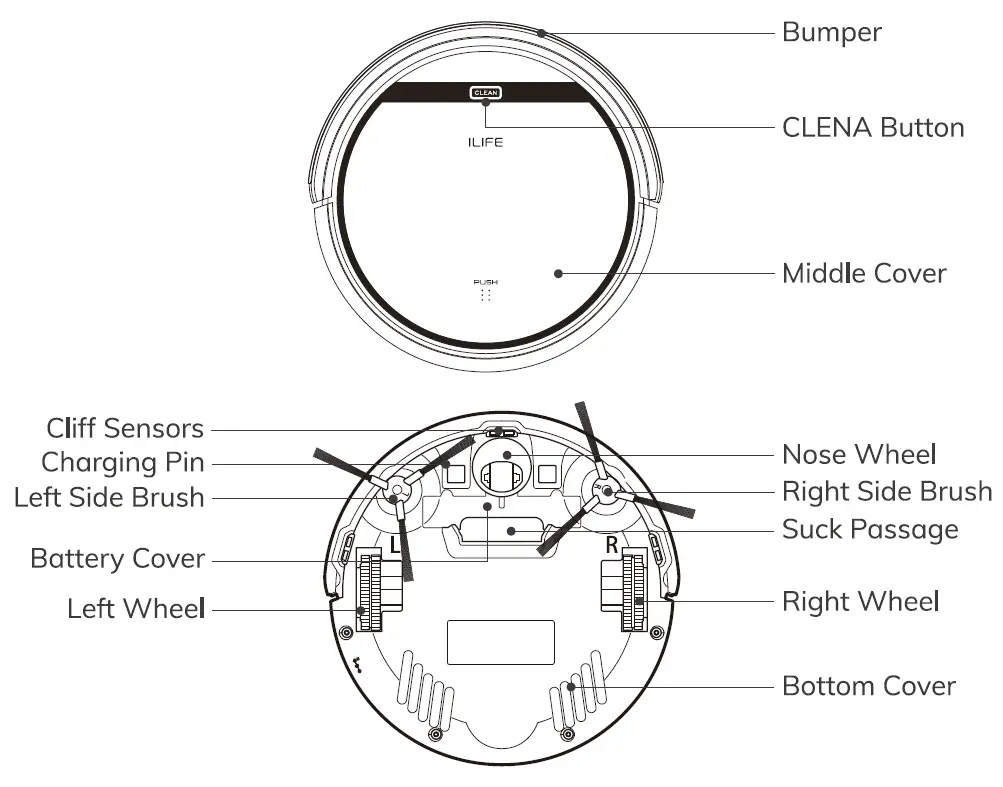
Robot Anatomy
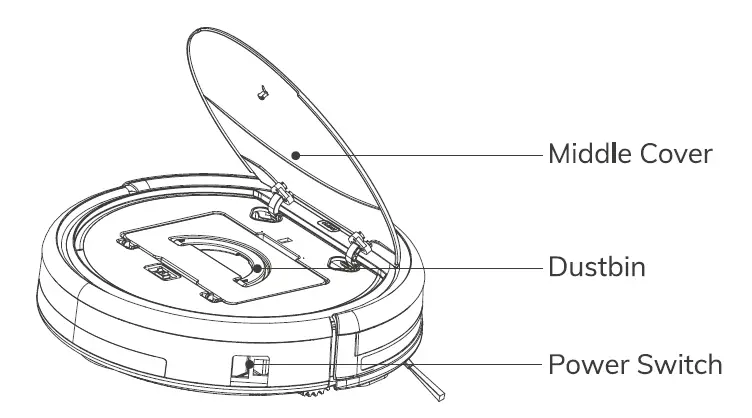
Dustbin
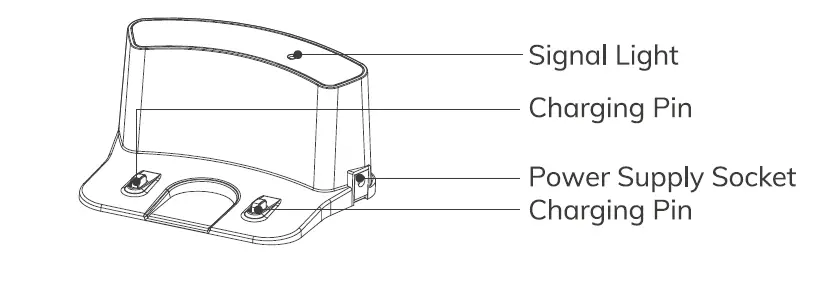
Charging Dock
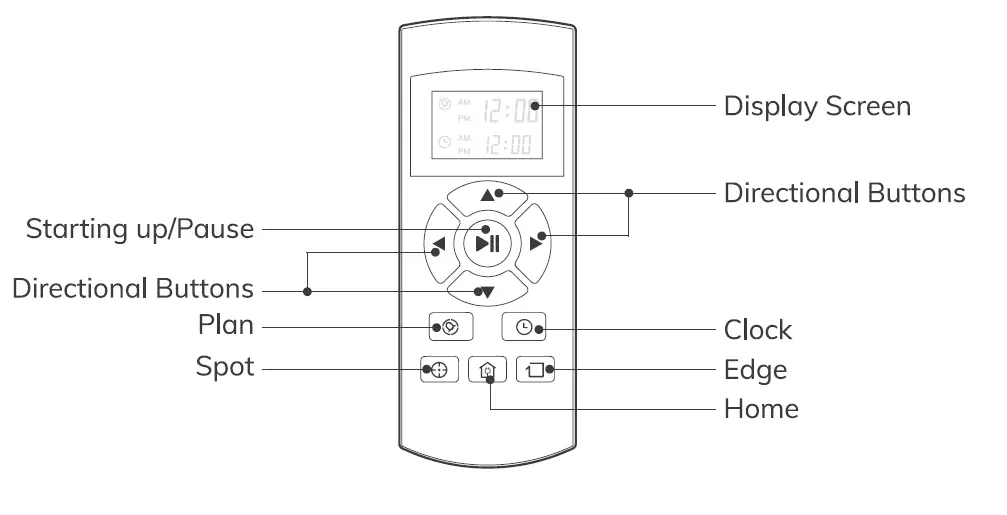
Remote Control
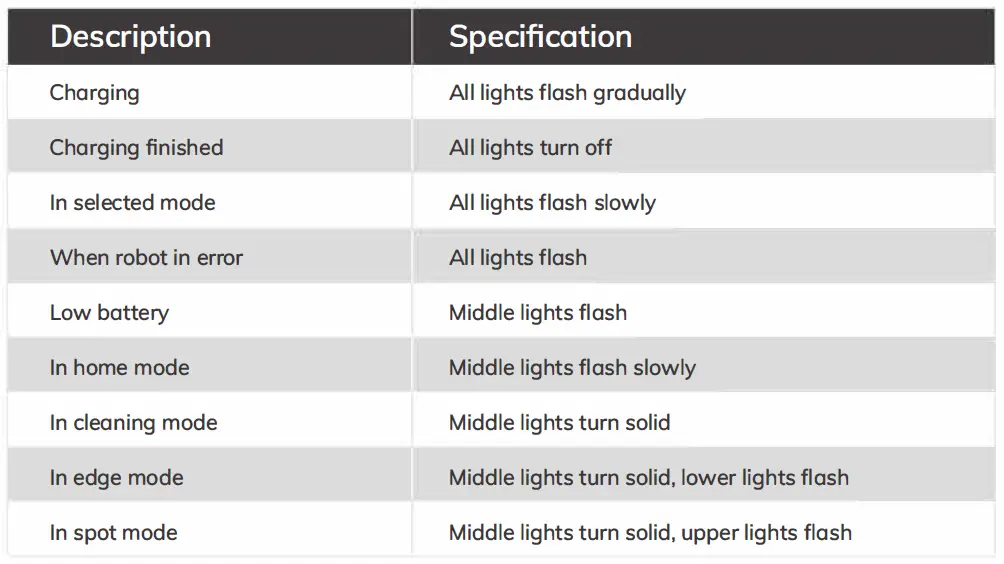
CLEAN Button Status
Remote Control Operating
- “

” Starting up/Pause
- Press this button to start cleaning in the selected mode.
- Press this button to make the robot stop when it’s cleaning.
- Press this button to exchange from sleeping mode to selected mode.
- Directional Buttons
A. ”
” button:
- Press this button to increase the number in scheduling or clock mode;
- Press this button to make the robot move forward in the selected mode and the robot will stop when it hits any objects.
B. ” ” button: - Press this button to decrease the number in scheduling or clock mode.
- Press to make the robot move backward for a little step in the selected mode.
C. ” ◄ ” button: - Press this button to exchange from minute to hour in scheduling or clock mode.
- Press this button to make the robot turn left.
D. ” ► ” button: - Press this button to exchange from hour to minute in scheduling or clock mode.
- Press this button to make the robot turn right.
- “” Plan
• Press this button to enter scheduling mode when in selected mode or charging mode.
• Press this button to confirm scheduling in scheduling mode. - “” Clock
• Press this button to enter clock mode when in selected mode or charging mode.
• Press this button to confirm the clock setting in clock mode. - “” Home
When the robot is in selected mode or cleaning mode, press this button to return the robot to the charging dock.
6. “” Edge
Press this button to make the robot clean along the wall.
7 “” Spot
Press this button to make the robot start spot cleaning.
8. Shows the scheduling time.
9. Shows the clock time.
Note:
- Install two AAA-type batteries into the remote control.
- Take out the batteries if the remote control is not used for a long time.
Notice for Use
How to Get Started
- Place charging dock, plug-in the adapter, the signal light on charging dock will turn solid.
Note: put the charging dock against the wall and remove obstacles about 1 meter at two sides and about 2 meters forward. - Turn on the power switch around the power socket, then the display panel will flash.
(If no command received, the robot will turn to sleep mode after 15 seconds.)
Note:
A. Please always keep the power switch turning on. If not, it is unable to make the robot work.
B. If the power switch is turned off, all the scheduling will be lost.
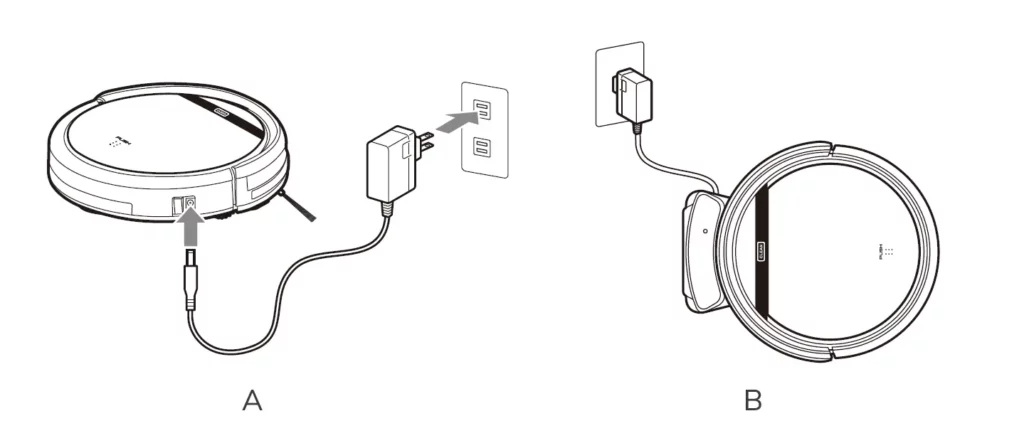
Caution: Before charging the robot, please make sure the power switch is turned on, or else the robot can not be charged. - Charge the robot in either way as shown below:
A. Plug into an outlet.
B. Press to make the robot return to the charging dock for charging itself.
For better extending battery life:
A. Before first use, charge the robot overnight. When charging is finished, the display panel will turn off.
B. In normal use, always store the robot on a charging dock with the base plugged in.
C. If the robot is not used for a long time, turn the power switch off, fully charge the robot and store it in a cool, dry place. - Auto charging
The robot will automatically return to the charging dock when the battery is low.
Starting Up/Pause/Sleeping
Sleeping mode: the robot is not working, lights around the CLEAN button are off and the power switch is on.
Selected model: the robot is not working, lights around CLEAN button flash.
Cleaning mode: the robot is working, lights around the CLEAN button are on.
Please refer to the form on page 9.- Starting up
A. Make sure the power switch is on.
B. Press the CLEAN button on main body or on remote control to start cleaning. I’
Note: If robot is in sleeping mode, press CLEAN button to wake the J.,.L robot up from sleeping mode. Then press CLEAN for a second time, the robot starts cleaning automatically. - Pause
Press CLEAN button on main body or on remote control to exchange robot from cleaning mode to selected mode.
Note: When robot is paused, press CLEAN to make robot to restart cleaning. - Sleeping
To turn robot into sleeping mode from selected mode:
A. Keep pressing CLEAN on main body for 3 seconds.
B. Robot will automatically enter sleeping mode if no command received for 15 seconds.
- Starting up
Scheduling
You can schedule to let the robot start cleaning from a certain time.
Note: Remember to set the clock time and schedule once replace the remote control battery. Once the clock time is set, any scheduling you have set will make robot work on the scheduled time.
Setting the clock time
- Point the remote control towards the robot (ensure the power switch is on).
- Press and then use directional buttons to set the correct time.
- Press
to save the setting. To cancel the schedule, please turn off the robot.
Setting a schedule
The robot will always work at the scheduled time unless power switch of the robot is turned off.
- Point the remote towards the robot.
- Press and then use directional buttons to set the schedule.
- Press to save the setting. To cancel the schedule, please turn off the robot.
Note: When you set the clock time or schedule, the final operation will be confirmed by beep from robot; If no tone received, your setting is unsuccessful.
Cleaning Mode
- Auto cleaning
The robot will clean a room automatically and adjust its cleaning according to the situation.
Note:Press CLEAN button on robot or on remote control to start auto cleaning. - Spot cleaning
- Press spot on the remote toward the robot when the robot is working. The robot will circle around and turn into auto clean mode after spot clean is finished.
- Press spot on the romote towrad the robot when the robot is in selected mode and the robot will begin to circle around. The robot will turn into selected mode after spot clean is finished.
- Edge cleaning
Put the robot near the edge (wall) and press a on remote control to start edge cleaning.
Maintenance
Cleaning Side Brushes
Clean the side brushes when it gets dirty and replace them if it’s been damaged.
Note: Before replacing side brushes, check and match “L” and “R” marks on both and bottom of robot.
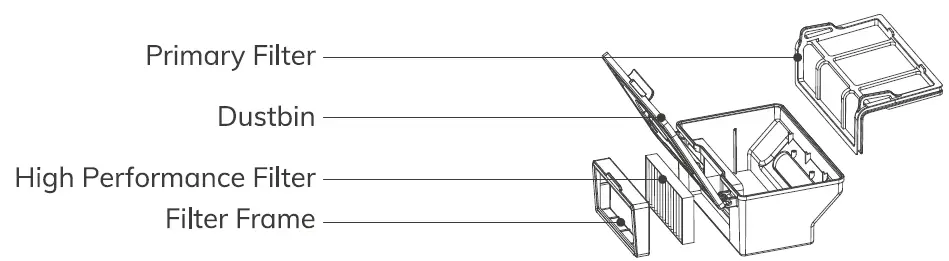
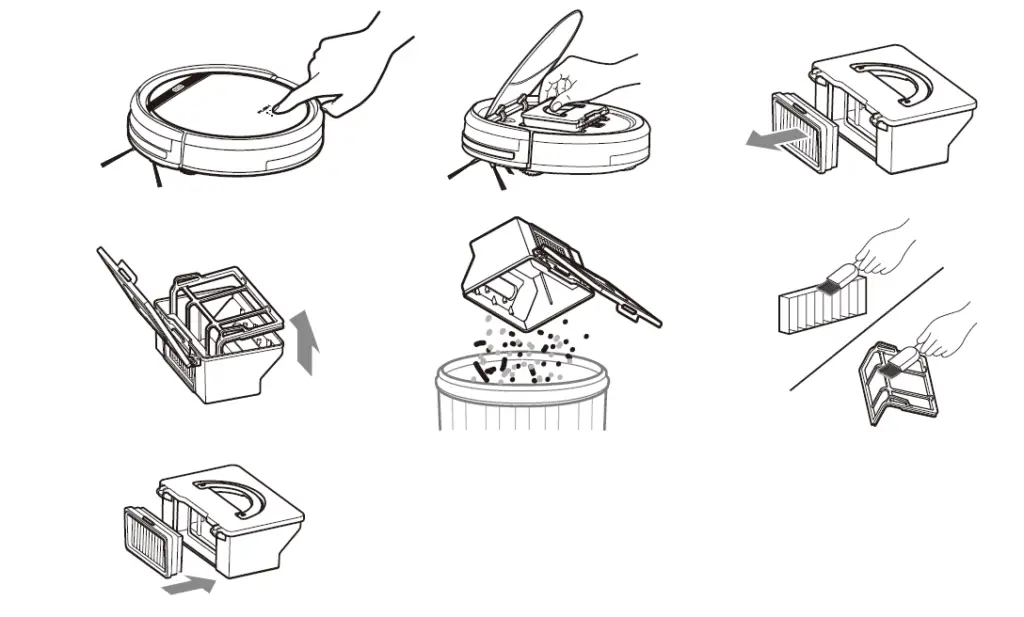
Cleaning Dustbin and Filter
Clean and empty dustbin after each use, steps are as shown in below figures.
- After taking dustbin, check whether there is foreign matter stuck in suck passage and clean it.
- Clean Filter after 15-30 days’use. And replace it after use for 6 months at maximum.
- Install both Filter and primary filters when they are dry.
- Filter and primary filter could be replaced if needed.
Cleaning Cliff Sensors and Auto Charging Pins
Slightly clean the sensor window and onto charging pins with a soft dry cloth
Note: Charging pins on charging dock need to clean if dirty.
Nose Wheel Clean Up
When there is foreign matter in nose wheel, it will affect the cleaning performance, please clean it follow the way below:
- Pull the wheel up vertically and clean it. Please note whether the gasket is off.
- It should be noted that whether the gasket is installed well after clean the nose wheel.
Trouble Shooting
Error Code Sheet
When the robot meets with some routine troubles, it will remind you by beep.
Short tone
| 01 | • | Wheels or side brushes no work | Check wheels or side brushes |
| 02 | • • | Cliff sensor or bumper sensor failure | Clean cliff sensor and shake bumper slightly , check
whether there is foreign matter |
| 03 | • • • | Main body gets stuck | Move main body and start again |
Error Appearance
| Circle around a small area | Side wheels are jammed | – Remove hair and debris from side wheels.
– While reinstalling, push the wheels in and out to make sure they can rotate freely. – Restart robot in another spot. |
| Keep moving Cliff sensor is dirty Check the cliff sensor lens. backward or broken Clean or replace it if needed. | ||
| Bump into obstacles repeatedly | The bumper is stuck | – Tap the bumper 10-20 times to remove debris lodged in it.
– Loosen the screw of the bumper. |
| Working time shortened | – Battery capacity dropped
– Robot is not fully charged |
– Replace battery
– Recharge robot |
| CLEAN button light is off while charging | – Hair or small debris stuck in charging pins.
– Robot is not properly connected to charging pins. |
– Clean charging pins
– Check if robot is connected to charging pins |
| Pick up less dirt and debris | Filter is dirty or wet | Clean or replace filter |
| Spit out litter | Dustbin is full | Empty the dustbin |
| Robot doesn’t start at scheduled time | – Schedule was not saved successfully
– Schedule was cancelled after you restarted robot – Power Switch is off – Battery is low – Debris jammed in components |
– Reset schedule. Wait for a beep to confirm completion of scheduling.
– Turn on power switch on robot – Keep the robot’s power switch on and put it on charging dock to make sure robot is fully charged for the next job – Turn off the power switch on robot and empty the dustbin – Clean side brushes and main brushes |
| Diameter | 300mm | |
| Mechanical
Specifications |
Height | 81mm |
| Weight | 2.2kg | |
|
Electrical |
Power | 22W |
| Specifications | Battery type | Li-ion |
| Dustbin capacity | 0.3L | |
| Charging type | Auto Charging/ Manual Charging | |
| Cleaning
Specifications |
Cleaning mode | Auto, Spot, Edge, DailySchedule |
| Charging time | < 300 mins | |
| Cleaning time | > 90 mins | |
| Main Body Button Type | Touch button |
Table of Contents
- ILIFE V3s Pro Robot Vacuum Cleaner
- Important Tips
- Battery life
- Safety Instructions
- Product Composition
- Product Composition
- **Remote control
- Notice for Use
- Scheduling
- Cleaning mode
- Maintenance
- Nose wheel clean up
- Trouble Shooting
- Product Specifications
- Read User Manual Online (PDF format)
- Download This Manual (PDF format)
ILIFE V3s Pro Robot Vacuum Cleaner

Dear Customer,
Thank you for purchasing ILIFE V3s Pro robotic vacuum cleaner! You’ve joined
the millions of people who clean with robots – the smarter way to get it done.
Please take a few moments to read this manual and get acquainted with your
robot, to get the best performance from your robot. If you have any problems
with your robot please do not hesitate to contact our customer service or
visit our website at www.iliferobot.com
for more information.
Stay connected with us on Facebook and twitter to enjoy these exclusive
benefits:
- Get support tailored to your specific robot, including answers to questions, maintenance tips, video demos, live chat and more.
- Get product updates and other valuable information among the first to find out about new robots, exclusive discounts and special promotions.
Connect with us right now at Facebook:
facebook.com/iliferobotics Twitter:
twitter.com/lLIFEROBOTUS
Enjoy a thorough cleaning every day! Best regards,
ILIFE Innovation
LIFE Customer Service
1-800 6 1-9676 ( toll free for North America)
Mon-Fri. 8.00 A.M. 7.00 P.M. CST
@service_us_ca @iliferobot.com
Important Tips
How to use
- Before using the robot, please ensure the power switch is on. Take a few moments to survey the area to be cleaned and remove any obstacles.
- The robot will pass over the same area of the floor multiple times to ensure thoroughly clean.
- The spinning brushes may flick small granules (dog food, cat litter) here and there, but finally, the robot will vacuum them all in.
- Before replacing side brushes, check and match “L” and “R” marks on both side brushes and bottom of robot.
- When you set the clock time or schedule, the final operation will be confirmed by beep from robot. If no tone received, your setting is unsuccessful.
- Empty the dustbin. You could notice the robot vacuum less, even spits out. when the dustbin is full, though there is no any warning beep sound.
For best performance
- Empty V3s Pro’s dustbin and clean its filter after every use.
- Filter could not be washed by water.
- Replace new Filter when you notice V3s Pro vacuum gets weaker and pick up less than before.
- Put charging dock against the wall and remove obstacles about 1 meter at two sides and about 2 meters forward.
- Fully charge robot’s battery before each cleaning cycle.
Battery life
To extend V3s Pro’s battery life and keep its cleaning at peak performance:
- Charge the robot overnight before first-time use.
- If the robot is not used for a long time, please turn off the power switch.
- Recharge the robot as soon as possible. Waiting several days to recharge may damage the battery.
- Use the robot frequently.
Warning: The product contains electronic parts. DO NOT submerge V3s Pro
or spray it with water, clean with a dry cloth only.
Safety Instructions
Before using this product, please read the following safety instructions and
follow all normal safety precautions.
- Read this user manual thoroughly and carefully before using this product.
- Keep this user manual.
- Any operation or use of this product in any way other than that described in this manual may lead to serious injury or product damage.
WARNING
- Only certified technicians may disassemble the product. Users are not allowed to disassemble or repair the product.
- Only use the AC adapter provided by the factory. Using other AC adapters may cause electric shock, fire or product damage.
- Do not touch the power cord, plug or adapter when your hands are wet.
- Keep loose clothing and fingers away from being drawn into the product’s wheels.
- Keep the robot vacuum away from all flammables.
- Never clean the robot while it is on the charging dock or plugged indirectly. Unplug the robot and turn off the power switch when cleaning.
- Keep the AC power cord tucked away from becoming damaged in any way.
- This product is to be used only indoors. Not intended for outdoor use.
- Do not sit on top of the product or attach an object on the top of it.
- Do not use this product in wet or moist environments.
- Before use, remove all the objects that could get caught in the brushes or suction passage.
- Do not place this product on furniture or platforms where it can fall and be damaged.
- Turn the power switch off when not in use for a long period of time or when transporting the unit.
- To avoid battery damage please check whether adapter and outlet are properly connected.
- 15. To avoid any tripping hazards or injuries please inform all the people in the house when this product is in use.
- Do not use this product when the dustbin is full.
- Normal operating temperatures -10 to 40 (centigrade).
- Do not operate this product in high-temperature environments.
- The battery must be removed from the product before it is scrapped.
- Unplug the vacuum from power source when removing the battery.
- The battery is to be disposed of safely.
- Use factory authorized battery only. Do not use unmatched battery.
Note: This product is not a toy and should not be used by children or
people with the lack of related experience or knowledge.
Product Composition
List of accessories
| Serial number | Description | Q’ty |
|---|---|---|
| 1 | Main body (battery included) | 1 |
| 2 | Charging dock | 1 |
| 3 | Remote control (battery not included) | 1 |
| 4 | Power adapter | 1 |
| 5 | Cleaning tool | 1 |
| 6 | User manual | 1 |
| 7 | Extra side brushes | 2 |
| 8 | High performance filter | 2 |
![ILIFE-V3s-Pro-Robot-Vacuum-Cleaner-2]](https://manuals.plus/wp-
content/uploads/2022/05/ILIFE-V3s-Pro-Robot-Vacuum-Cleaner-2-550×402.png)
Product Composition
Robot anatomy

Dustbin

Charging dock
**Remote control

**
CLEAN button status

Remote control operating
-
“@ ” Starting up/Pause
- Press this button to start cleaning in selected mode.
- Press this button to make the robot stop when it’s cleaning.
- Press this button to exchange from sleeping mode to selected mode.
-
Directional Buttons
A. ” ..&. ” button:- Press this button to increase number in scheduling or clock mode;
- Press this button to make robot move forward in selected mode and the robot will stop when it hits any objects.
- B. ” T ” button:
- Press this button to decrease number in scheduling or clock mode.
- Press to make robot move backward for little step in a selected mode.
- C. ” ◄ ” button:
- Press this button to exchange from minute to hour in scheduling or clock mode.
- Press this button to make robot turn left.
- D. ” ► ” button:
- Press this button to exchange from hour to minute in scheduling or clock mode.AC
- Press this button to make robot turn right.
-
“@ ” Plan button
- Press this button to enter scheduling mode when in selected mode or charging mode.
- Press this button to confirm scheduling in scheduling mode.
-
“0 ” Clock button
- Press this button to enter clock mode when in selected mode or charging mode.
- Press this button to confirm clock setting in clock mode.
-
“@r ” Auto charge button
When robot is in selected mode or cleaning mode, Press this button to return
robot to charging dock. -
“-0 ” Edge button
Press this button to make robot clean along wall. -
“ffi “Spot button
Press this button to make robot start spot cleaning. -
[Shows the scheduling time.
-
0 Shows the clock time .0
NOTE:
- Install two AAA-type batteries into the remote control.
- Take out the batteries if the remote control is not used for a long time.
Notice for Use
How to get started
-
Place charging dock, plug-in adapter, signal light on charging dock will turn solid.
Note: put charging dock against the wall and remove obstacles about 1
meter at two sides and about 2 meters forward. -
Turn on the power switch around power socket, then display panel will flash.
(If no command is received, the robot will turn to sleeping mode after 15
seconds.)
Note: -
Please always keep the power switch turning on. If not, it is unable to make the robot work.
-
If the power switch is turned off, all the scheduling will be lost.
Caution: Before charge the robot, please make sure the power switch is
turned on, or else the robot can not be charged. -
Charge the robot in either way as shown below:
-
Plug into an outlet.
-
Press @ to make robot return to charging dock for charging itself.
For better extending battery life:
-
Before first use, charge the robot overnight. When charging is finished, display panel will turn off.
-
In normal use, always store the robot on charging dock with base plugged in.
-
If the robot is not used for a long time, turn the power switch off, fully charge the robot and store it in a cool, dry place.
-
-
Auto charging
The robot will automatically return to charging dock when a battery is low.

Starting up/Pause/Sleeping
Sleeping mode: robot is not working, lights around CLEAN button are off
and power switch is on.
Selected mode: robot is not working, lights around CLEAN button flash.
Cleaning mode: robot is working, lights around CLEAN button are on. Please
refer to the form on page 9.
-
Starting up
- Make sure the power switch is on.
- Press CLEAN button on main body or on remote control to start cleaning. I’\ Note: If robot is in sleeping mode, press CLEAN button to wake the J.,.L robot up from sleeping mode. Then press CLEAN for a second time, the robot starts cleaning automatically.
-
Pause
Press CLEAN button on main body or on remote control to exchange robot from
cleaning mode to selected mode.
Note: When a robot is paused, press CLEAN to make robot to re-start J.. L
cleaning. -
Sleeping
To turn robot into sleeping mode from selected mode:- Keep pressing CLEAN on main body for 3 seconds.
- Robot will automatically enter sleeping mode if no command received for 15 seconds.
Scheduling
You can schedule to let the robot start cleaning from a certain time.
Note: Remember to set the clock time and schedule once replace the remote
control battery. Once the clock time is set, any scheduling you have set will
make robot work on the scheduled time.
Setting the clock time
- Point the remote control towards the robot (ensure the power switch is on).
- Press 0 and then use directional buttons to set the correct time.
- Press 0 to save the setting. To cancel the schedule, please turn off the robot.
Setting a schedule
The robot will always work at the scheduled time unless power switch of the
robot is turned off.
- Point the remote towards the robot.
- Press @ and then use directional buttons to set the schedule.
- Press @ to save the setting. To cancel the schedule, please turn off the robot.
Note: When you set the clock time or schedule, the final operation will
be confirmed by beep from robot; If no tone received, your setting is
unsuccessful. X
Cleaning mode
-
Auto-cleaning
The robot will clean a room automatically and adjust its cleaning according to
the situation.
Note: Press CLEAN button on robot or on remote control to start auto
cleaning. -
Spot cleaning
- Press spot on the remote toward the robot when the robot is working. The robot will circle around and turn into auto-clean mode after spot clean is finished.
- Press spot on the remote towards the robot when the robot is in selected mode and the robot will begin to circle around. The robot will turn into the selected mode after spot clean is finished.
-
Edge cleaning
Put the robot near the edge (wall) and press a on remote control to start edge
cleaning.
Maintenance
Cleaning side brushes
Clean the side brushes when it gets dirty and replace if it’s are damaged.
Note: Before replacing side brushes, check and match “L” and “R” marks on
J.., L both and bottom of robot.
Cleaning dustbin and filter
Clean and empty dustbin after each use, steps are as shown in below figures.
- After taking dustbin, check whether there is foreign matter stuck in suck passage and clean it.
- Clean Filter after 15-30 days’use. And replace it after use for 6 months at maximum.
- Install both Filter and primary filters when they are dry.
- Filter and primary filter could be replaced if needed.

Cleaning cliff sensors and auto charging pins
Slightly clean the sensor window and onto charging pins with a soft dry cloth.
Note: Charging pins on charging dock need to clean if dirty.

Nose wheel clean up
When there is foreign matter in nose wheel, it will affect the cleaning
performance, please clean it follow the way below:
- Pull the wheel up vertically and clean it. Please note whether the gasket is off.
- It should be noted that whether the gasket is installed well after clean the nose wheel.

Trouble Shooting
Error code sheet
When the robot meets with some routine troubles, it will remind you by beep.
- Short tone
| | |
—|—|—|—
01| •| Wheels or side brushes no work| Check wheels or side brushes
02
| • •| Cliff sensor or bumper sensor failure| Clean cliff sensor and shake
bumper slightly , check
whether there is foreign matter
03
| • • •| Main body gets stuck| Move main body and start again
Error appearance
| |
—|—|—
Circle around a small area| Side wheels are jammed| – Remove hair and debris
from side wheels.
– While reinstalling, push the
wheels in and out to make sure they can rotate freely.
– Restart robot in another spot.
Keep moving Cliff sensor is dirty Check cliff sensor
lens. backward or broken Clean or
replace it if needed.
Bump into obstacles repeatedly| The bumper is stucked| – Tap the bumper 10-20
times to remove debris lodged in it.
– Loosen the screw of the bumper.
| |
—|—|—
Working time shortened| – Battery capacity dropped
– Robot is not fully charged
| – Replace battery
– Recharge robot
CLEAN button light is off while charging| – Hair or small debris stuck in
charging pins.
– Robot is not properly connected to charging pins.
| – Clean charging pins
– Check if robot is connected to charging pins
Pick up less dirt and debris| Filter is dirty or wet| Clean or replace filter
Spit out litter| Dustbin is full| Empty the dustbin
Robot doesn’t start at scheduled time| – Schedule was not saved successfully
– Schedule was canceled after you restarted robot
– Power Switch is off
– Battery is low
– Debris jammed in components
| – Reset schedule. Wait for a beep to confirm completion of scheduling.
– Turn on power switch on robot
– Keep the robot’s power switch on and put it on charging dock to make sure
robot is fully charged for the next job
– Turn off the power switch on robot and empty the dustbin
– Clean side brushes and main
brushes
Product Specifications
| |
—|—|—
| Diameter| 300mm
Mechanical
specifications
| Height| 81mm
| Weight| 2.2kg
Electrical
| Power| 22W
specifications| Battery type| Li-ion
Dustbin capacity| 0.3L
| Charging type| Auto/ Manual
Cleaning
specifications
| Cleaning mode| Auto, Spot, Edge, DailySchedule
| Charging time| < 300 mins
Cleaning time| > 90 mins
Main body button type| Touch button
Read User Manual Online (PDF format)
Read User Manual Online (PDF format) >>
Download This Manual (PDF format)
Download this manual >>
Обзор робот пылесоса начального уровня.
Чего от него стоит ждать, а чего нет.
В каких случаях его покупка оправдана, а когда нет.
Кому интересно прошу в обзор.
Дамы и Господа прошу не путать!
Разговор пойдет про бюджетную модель пылесоса, но настоящую модель, а не фейк пылесос.
Существует конечно более дешевые модели, но если говорить честно, то дальше удешевление идет уже в ущерб удобству в использовании и качеству.
Данная модель пылесоса является начальным уровнем в мире робот пылесосов.
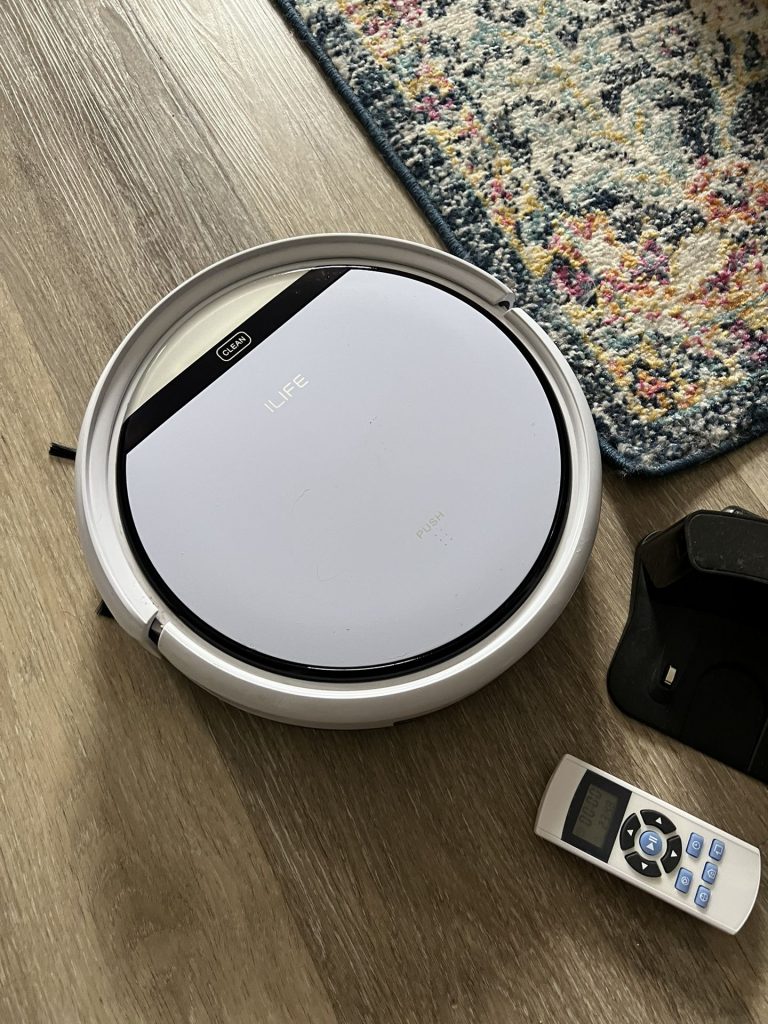
В простонародье робот-дурачек. Прозван так из за хаотичной езды.
Она действительно убирает, у нее есть пульт и базовая станция.
Поставка
Доставку делает курьерская компания. С момента заказа до прибытия посылки прошло около недели.
Поставляется в пакете, внутри фирменная коробка.
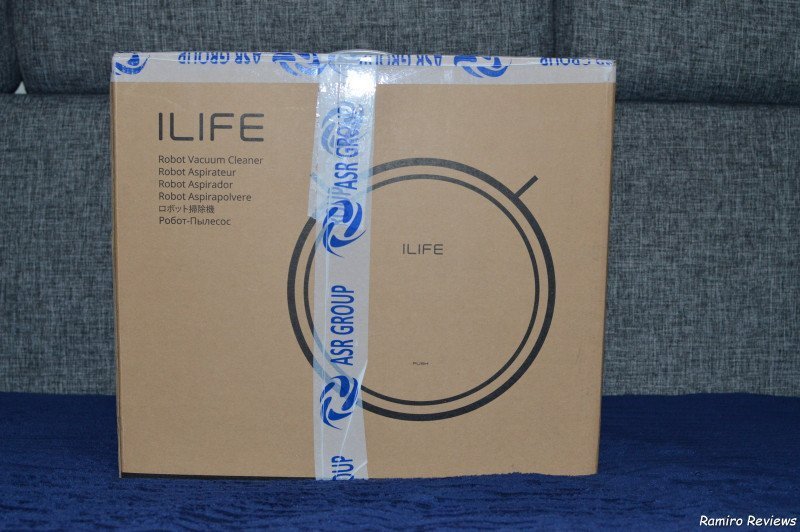
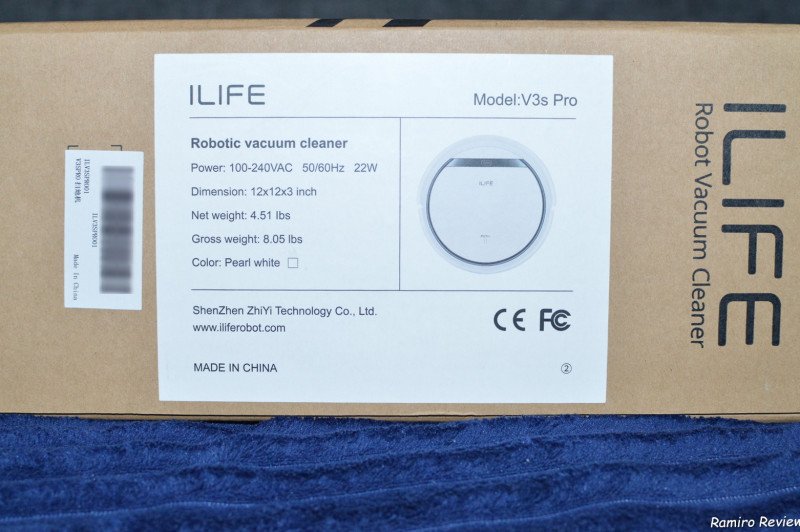
С боку чуть данные что в коробке
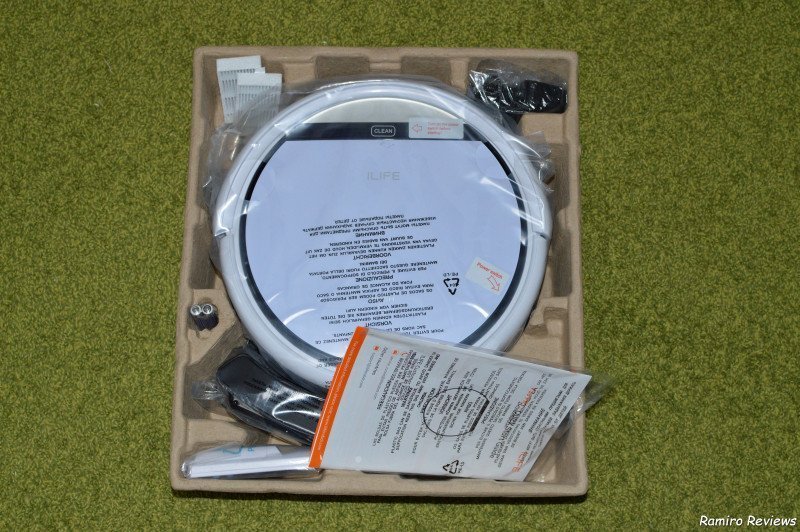
Комплектация
Робот пылесос — 1 шт.
Базовая станция — 1 шт.
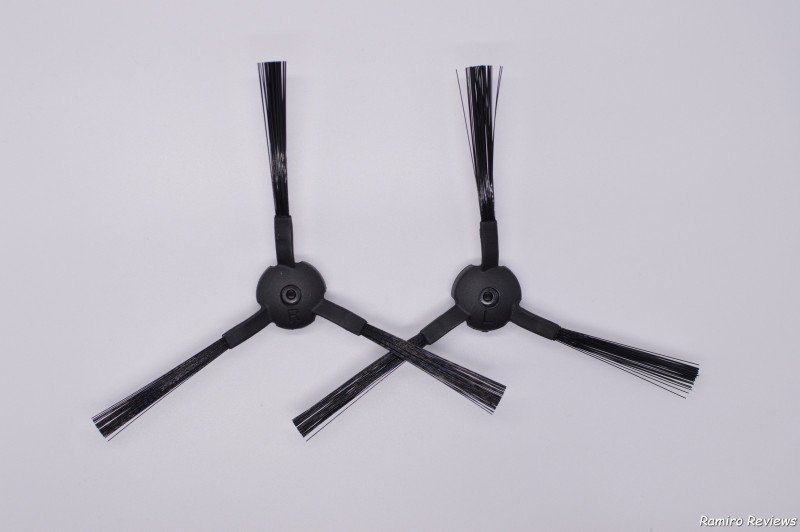
Цетка для очистки — 1 шт.
Запасные щетки робот пылесос — 1 пара.
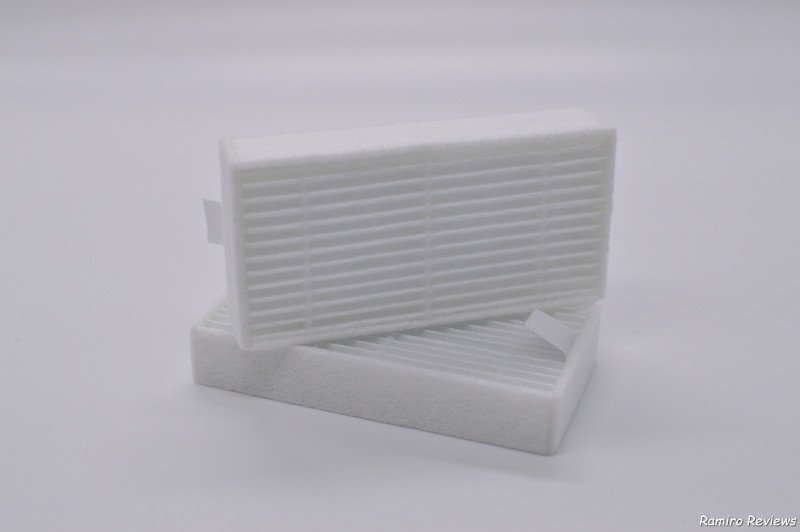
Запасные фильтры — 2 шт.
Зарядное устройство — 1 шт.
Инструкция — 1 шт.
Гарантийный талон — 1 шт.
Характеристики
Тип уборки -сухая
Дополнительные функции -программирование на ежедневную уборку
Особенности конструкции- мягкий бампер
Комплектация -боковая щетка
Возможность управления с пульта ДУ — да
Тип аккумулятора- Li-Ion
Время работы от аккумулятора -120 мин
Тип контейнера- для пыли
Объем контейнера для пыли 0.3 л
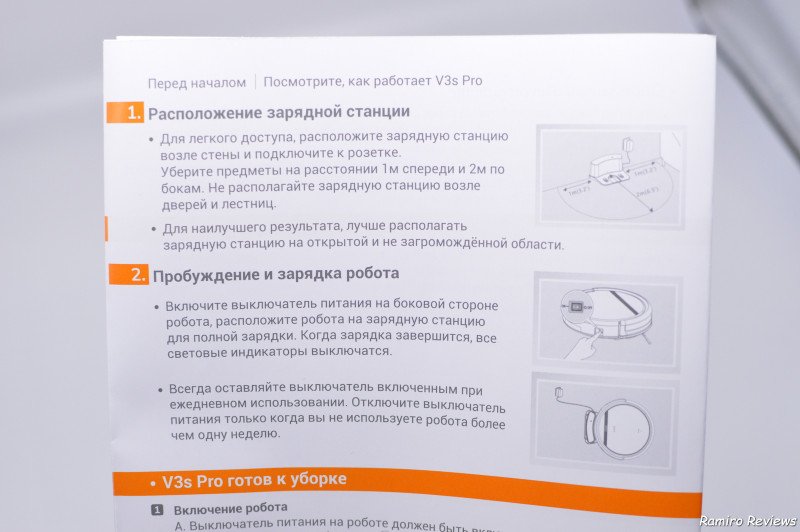
Инструкция
На русском языке
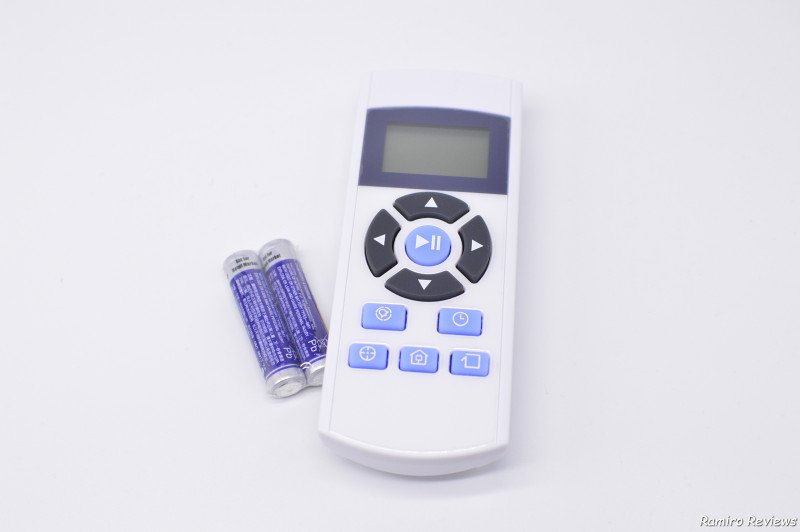
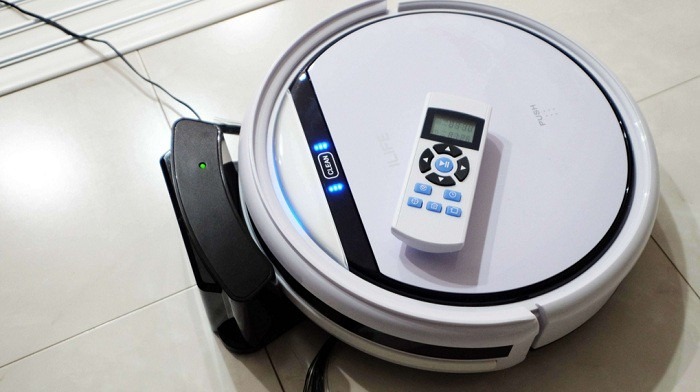
Управление
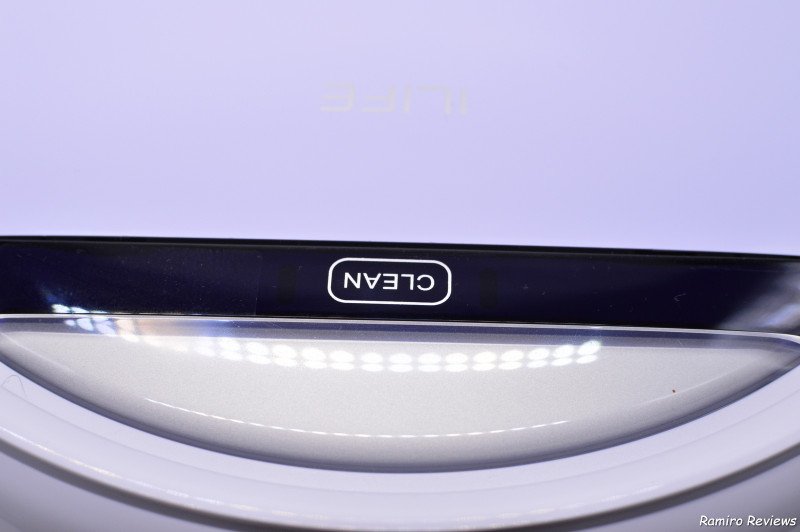
За управление отвечает сенсорная кнопка clean и пульт управления.
Можно запустить его на уборку и поставить на паузу.
Через пульт доступен полный спектр команд:
отправить на уборку
отправить на базу
установить ежедневную уборку
установить локальное время на пульте
запустить круговую турбо уборку
запустить боковую уборку
ручное управление
Габариты
Высота робот пылесоса 8.1 см. диаметр 30,5 см.
Высота имеет значение, это является конкурентным преимуществом перед моделью с лидаром.
Там, где модель имеющая лидар не проедет, данные пылесосы вполне себе проезжают в некоторых сценариях.
На этом в принципе преимущество данного робот пылесоса перед дорогими моделями кончаются.
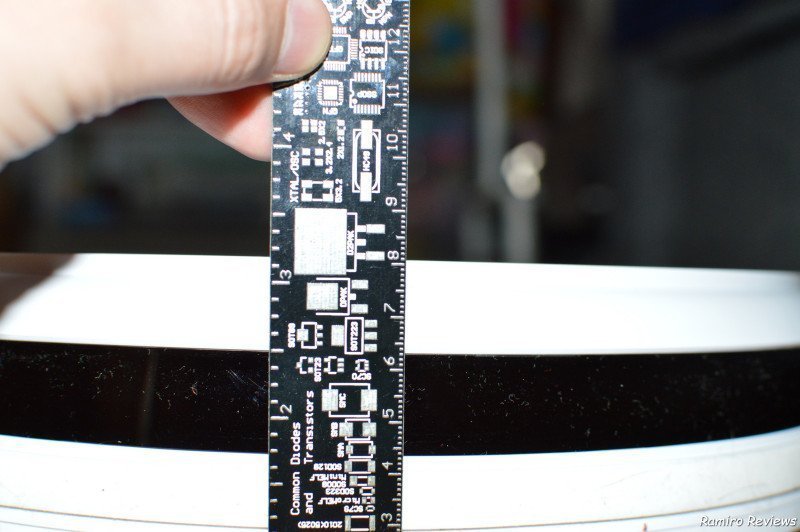
Фото робот пылесоса
Сверху
Снизу
О комплектующих
Дополнительные запасные насадки
Два фильтра, которых на али вагон и тележка так как на базе этого пылесоса выпускается множество клонов под другими именами
Базовая станция, типовая даже не предусмотрели место чтоб спрятать провод внутри
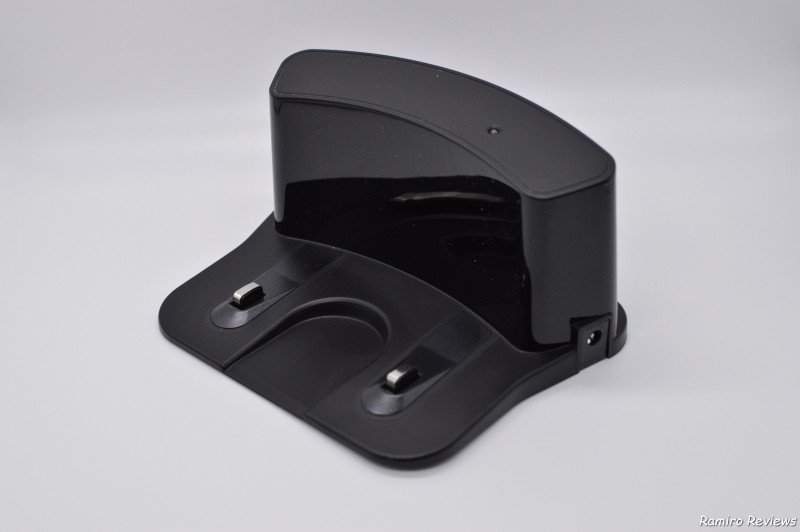
Ножки снизу прорезинены.

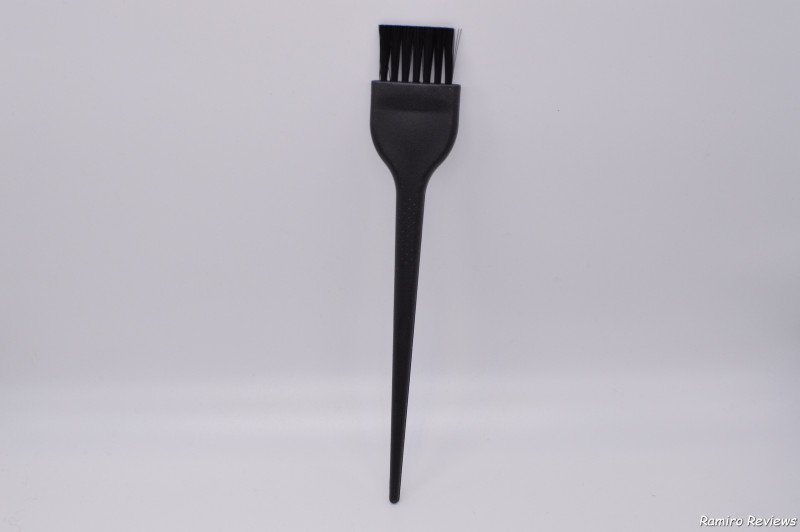
Кисточка! длина около 9 см. с ней намного удобнее чистить контейнер.
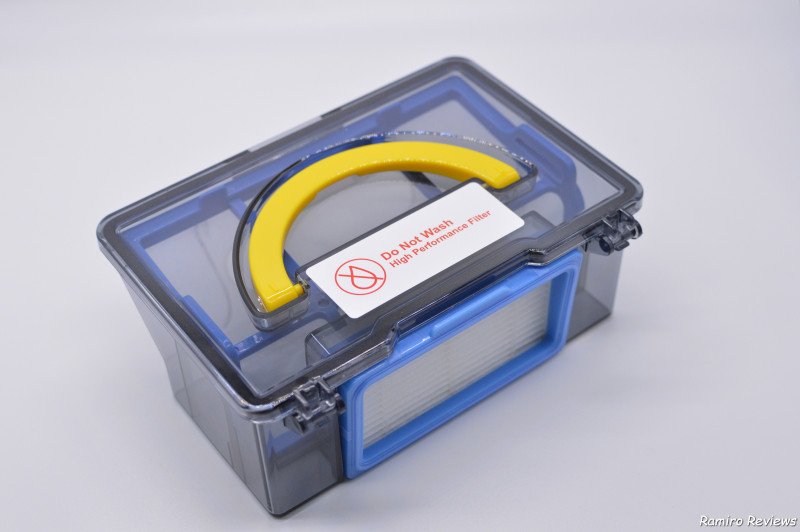
Контейнер для пыли.
Типовой контейнер весьма удобной формы.
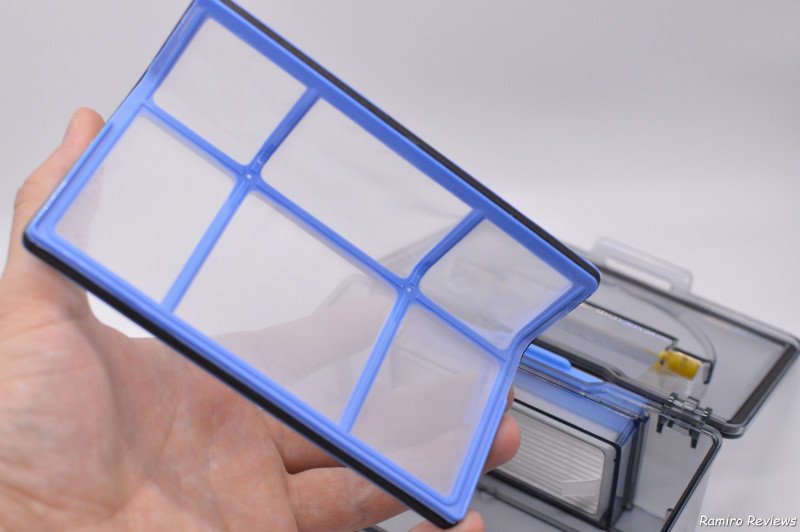
Пред фильтр
Робот пылесос
Робот пылесос представляет из себя стандартный дизайн по типу шайбы.
Данный робот пылесос сконструирован с 2мя щетками.
Передняя часть имеет противоударный мягкий бампер.
Аккумулятор заявлен li-ion.
С боковой стороны есть физический тумблер включения выключения.
Контейнер для пыли устанавливается по центру под крышкой.
Звуковое сопровождение сделано просто короткими звуковыми сигналами.
Уровень заряда отображает светодиоды около кнопки запуска.
Ранее уже у меня уже был примерно похожий робот пылесос, абсолютно одинаковый функционал вплоть до пульта.
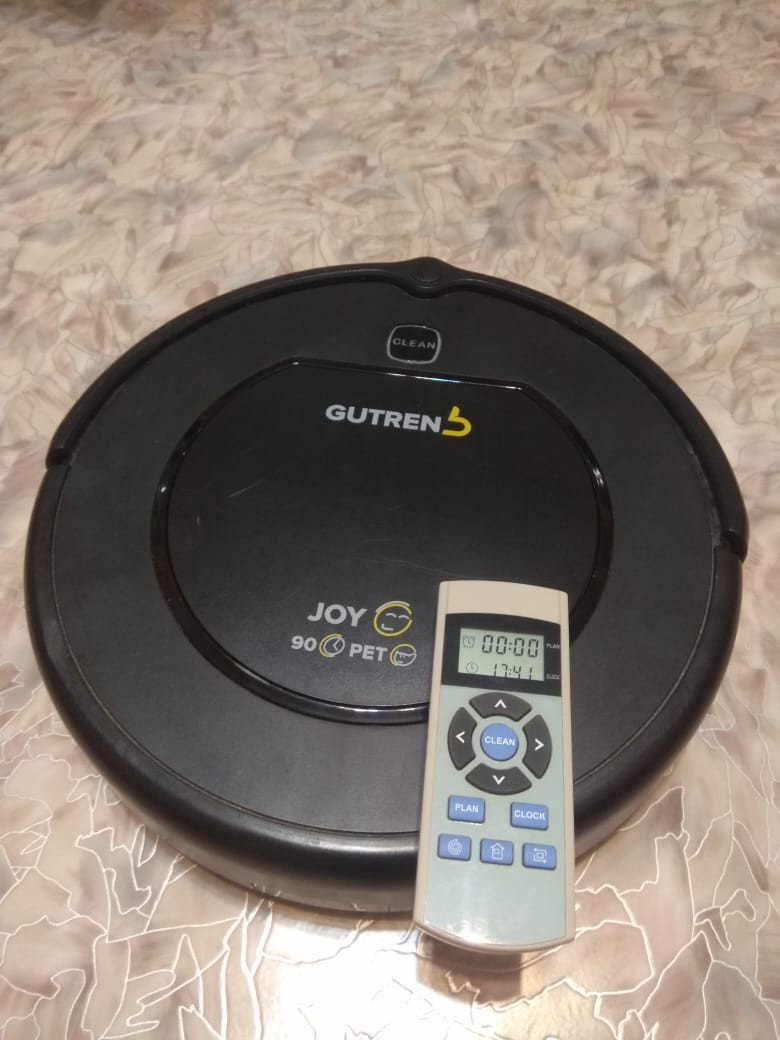
По сравнению со старым робот пылесосом (gutrend joy 90) у обозреваемой модели изменен алгоритм — он ходит не так хаотично, а имеет более логическую структуру хода.
Также у этой модели реализован примитивный механизм попытки обратного выхода при застревании.
Реализована защита от падения, но все равно луче перестраховаться. Тот же gutrend joy 90 спокойно улетал с дивана.
У обозреваемого дела с этим намного луче.
Робот обладает дополнительно режимом запуска круговой чистки на максимальной скорости.
Это удобно когда например постригли и с этого места включили этот режим.
Через пульт можно установить ежедневный цикл запуска пылесоса.
У робота есть база, вам не надо вручную втыкать его на зарядку как это может быть на более дешевой модели.
После окончания цикла уборки он возвращается на базу.
Базу рекомендуется ставить чтобы с боковой стороны оставалось свободное место по одному метру, а спереди два метра.
В отличие от пылесоса gutrend joy 90 данная модель находит базу намного лучше и быстрее.
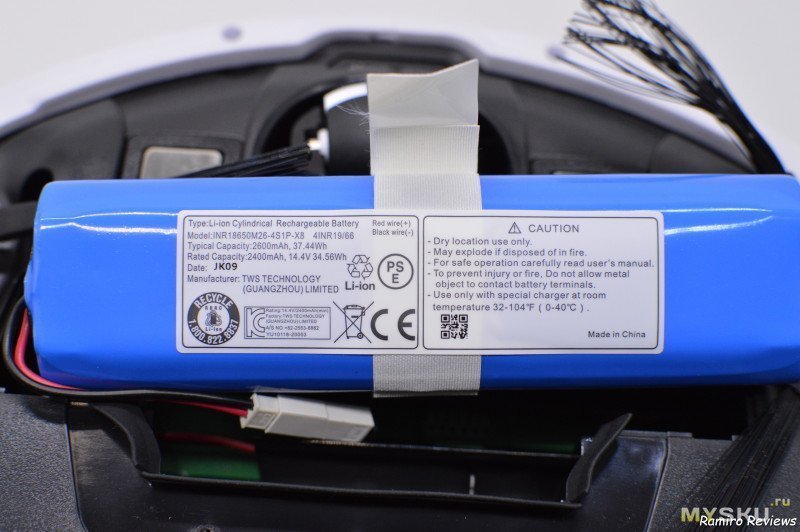
Давайте посмотрим его аккумулятор!
Для доступа к аккумулятору отвинчиваем 2 винта снизу, вытаскиваем защитную панельку и нам становится доступным аккумулятор. Внутри четыре штуки 18650.
Тестирование
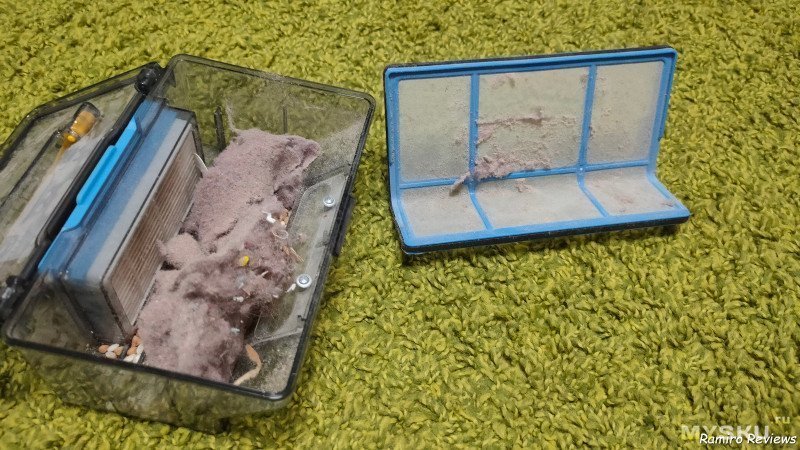
Робот был запущен на чистку по дому, вот столько пыли накопилось за два дня. (типовая хрущевка, 47 квадрат)
Базовый тест! Уборка риса и гречки.
Уборка гречки
Убираем рис
Итог
Это один из самых бюджетных, но образцовых моделей робот пылесоса своего сегмента.
Есть база, пульт и li-ion аккумулятор, он реально убирает и является полноценным робот пылесосом, а не фейком.
Данный робот пылесос сам по себе компромис качество/железо/деньги и дешевле него явно нет смысла что то искать.
Когда актуально покупать пылесос из обзора?
Если квартира небольшая, однокомнатная. Суммарно квадратов 15-30.
Если много комнат с большими порогами этот пылесос будет прекрасным дополнением к основному робот пылесосу.
Если денег нет, но робот пылесос хочется.
Если есть сомнения в робот пылесосах и хочется первый робот пылесос.
В остальных случая есть модели по дороже в магазине продавца представлены модели на любой вкус.
Купон
Магазин дает купон:
OWHP650
Цена [11.11] по распродаже будет:
5499р
Заранее приношу свои извинения за орфографию и грамматику текста, все допущенные ошибки сделаны не специально, а только по незнанию и в связи с несовершенством программ автоматической проверки текстов.
Категория: Обзоры
Содержание
- Плюсы и минусы
- Комплектация
- Обзор внешнего вида
- Технические характеристики
- Функционал
- Заключение обзора
Если вы находитесь в поиске бюджетного робота-пылесоса, ILIFE V3s Pro может стать отличным выбором. В этом обзоре мы рассмотрим особенности и функции iLife V3S Pro.
iLife V3S Pro — это бюджетный робот-пылесос, разработанный компанией iLife. Он обладает неплохой силой всасывания и интеллектуальной системой навигации, позволяющей ему преодолевать препятствия.
Плюсы и минусы
Традиционно начинаем наш обзор с перечня главных преимуществ и недостатков модели, чтобы вы могли быстро убедиться, стоит ли покупать iLife V3S Pro.
Плюсы:
- невысокая цена;
- наличие HEPA-фильтра;
- компактный и низкий;
- длительное время работы от аккумулятора;
- может работать на коврах;
- программируемое расписание.
Минусы:
- часто застревает;
- небольшая емкость пылесборника — всего 0.3 л;
- нет функции виртуальных стен;
- требуется переходник для вилки, которая сделана по китайским стандартам;
- иногда не находит док-станцию.
Комплектация
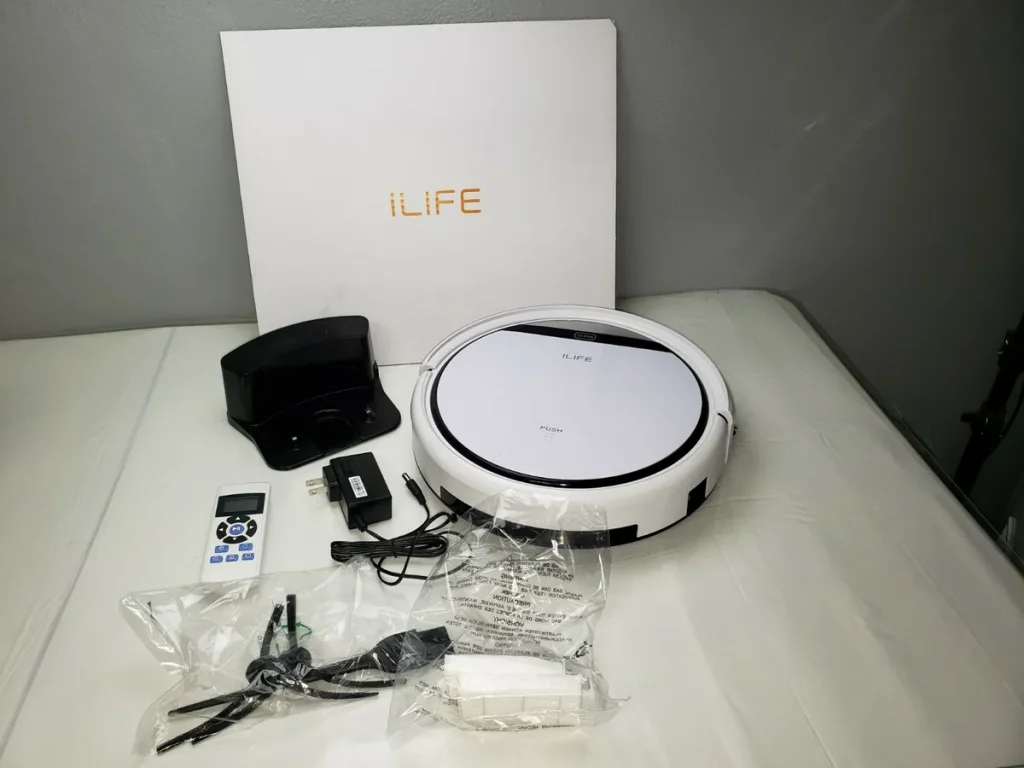
Робот поставляется в картонной коробке, которая защищает от повреждений основную коробку, в которой находится робот и комплектующие. На обеих коробках изображены характеристики, сама модель и ее главные особенности.
Обзор комплектации iLife V3S Pro:
- инструкция;
- сам пылесос;
- 2 запасные боковые щетки;
- щетка для очистки пылесборника;
- пульт ДУ и батарейки к нему;
- 2 запасных HEPA-фильтра;
- док-станция;
Сам пылесос тщательно упакован в пакет и имеет защитные пленки. Компания позаботилась о защите устройства во время его транспортировки.
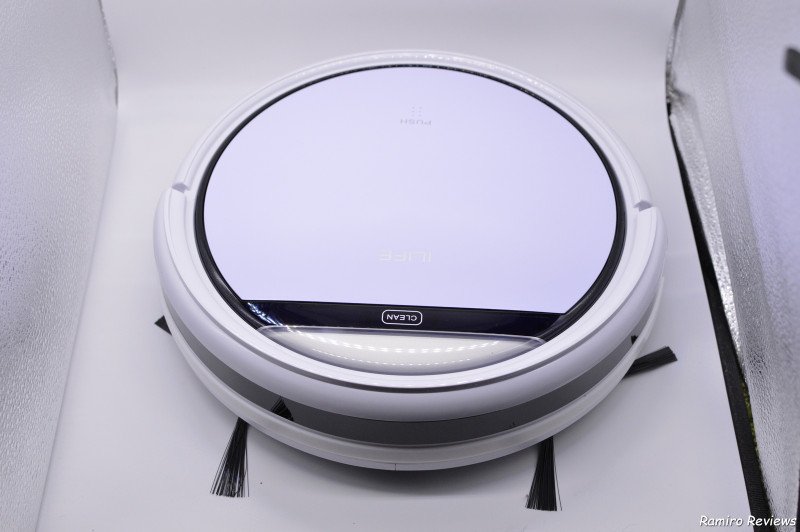
Обзор внешнего вида
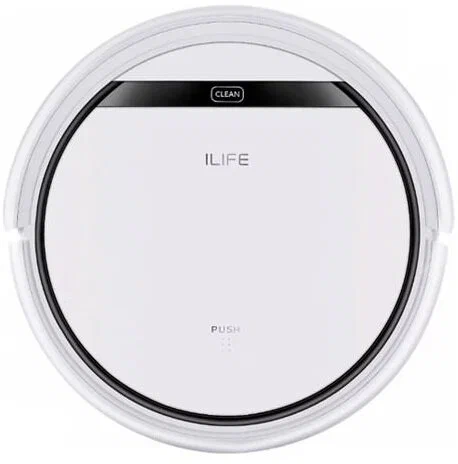
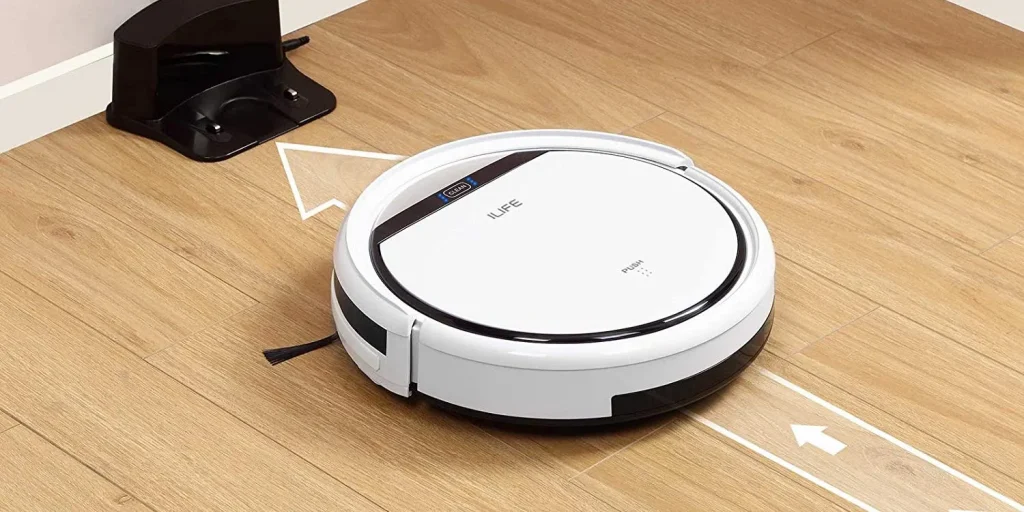
Перейдем к обзору внешнего вида iLife V3S Pro. Данная модель представляет собой компактный пылесос круглой формы. Устройство продается только в белом цвете с черными вставками.
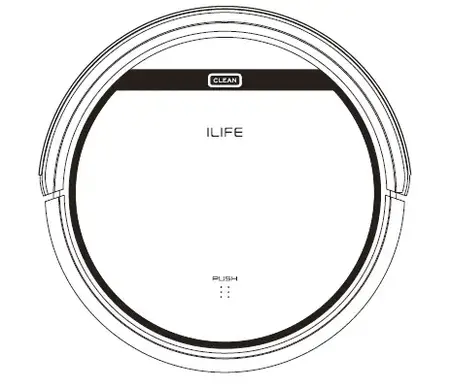
В верхней части устройства расположена только одна сенсорная кнопка «Clean», которая служит кнопкой включения и приостановки работы пылесоса. Также сверху находится крышка, под которой расположен пылесборник. Контейнер для пыли находится в центре пылесоса, прямо под передней панелью. Он оснащен ручкой. Крышка открывается нажатием на зону, обозначенную словом «Push».
Спереди расположены датчики препятствий и бампер мягкого касания, который защищает робота от повреждений при столкновений, а всасывающее отверстие и боковые щетки находятся на днище.

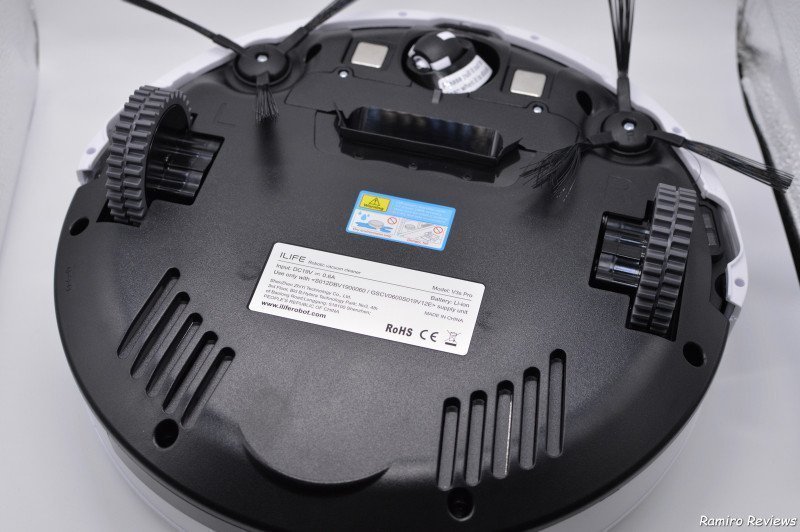
Снизу пылесоса расположены два ведущих колеса диаметром 65 мм, благодаря чему iLife V3S Pro может преодолевать пороги до 2,5 см и легко заезжать на ковровые покрытия. Помимо основных колес робот имеет маленькое направляющее колесо, отвечающее за поворот. Также на днище пылесоса расположены контакты для зарядки, информация о модели и 3 ИК-датчика.
Обратим внимание на модуль очистки. В модели iLife V3S Pro он представлен двумя боковыми щетками и всасывающим раструбом. Данная модель не оснащена турбощеткой, что значительно упрощает процесс ухода за устройством, но при этом снижает эффективность робота.
Завершаем обзор внешнего вида iLife V3S Pro упоминанием о габаритах. Герой обзора имеет размеры 30х30х7 см и весит 2,2 кг. Кроме того, два боковых колеса с технологией RoadRover имеют диаметр 65 мм, что повышает устойчивость устройства. Единственным недостатком является небольшой объем пылесборника — 300 мл.
Технические характеристики
Традиционно рассмотрим главные характеристики героя обзора. Данный раздел как нельзя лучше продемонстрирует эффективность работы данной модели
| Тип уборки | Робот может проводить только сухую уборку, в отличие от других моделей от iLife, которые встречались в наших обзорах. Мы разберем подробнее каждый тип уборки в следующем разделе обзора. |
| Емкость батареи | Учитывая в обзоре, что это один из самых бюджетных пылесосов в 2023 году, учтем, что емкость 2600 mАч — неплохой показатель, учитывая цену модели. Этого заряда хватит на 120 минут работы. |
| Время заряда | После того как заряд батареи окончится, робот автоматически возвращается на зарядную станцию, где заряжается около 5 часов, после чего может продолжить уборку. |
| Мощность всасывания | Мощность всасывания ILIFE V3s Pro составляет всего 600 Па или 22 Вт. Это один из самых низких показателей среди обзоров пылесосов 2023 года. |
| Емкость пылесборника | Это один из самых важных показателей в обзоре. Емкость пылесборника iLife V3S Pro составляет 300 мл. |
| Уровень шума | Но при мощности всасывания в 600 Па уровень шума ILIFE V3s Pro составляет 65 Дб. |
| Габариты (ШхГхВ, см) | Как говорилось ранее в обзоре, это довольно компактный робот размерами 30х30х7. |
| Вес | iLife V3S Pro весит всего 2.2 кг, поэтому его легко транспортировать. |
Функционал
ILIFE V3s Pro хорошо работает на кафельных, ламинированных и паркетных полах, тонких коврах. Пылесос не оснащен турбощеткой, что значительно упрощает процесс ухода за ним. Такое решение обеспечивает удаление шерсти, пыли и мусора с твердых полов, но делает прибор непригодным для ковров с высоким ворсом. Кроме того, устройство оснащено фильтром HEPA для удаления аллергенов из воздуха в зоне уборки.
Система навигации построена на базе ИК-датчиков и датчиков падения. Благодаря ИК-датчикам робот спокойно убирается на черных напольных покрытиях. Но это довольно бюджетная система навигации, поэтому робот будет время от времени врезаться в препятствия и застревать в труднодоступных местах, издавая специальный сигнал. Однако данная модель умеет создавать карты и обучаться в процессе уборки, поэтому со временем при уборке в одном и том же помещении проблемы с застреванием возникать не должны.
Сухая уборка возможна в обычном автоматическом режиме. Необходимо использовать пульт дистанционного управления, чтобы настроить робота на удаление локальных загрязнений или вручную направлять его вправо, влево, назад и вперед. Он также предназначен для установки расписания. Рекомендуем обратиться к руководству ILIFE V3s Pro, чтобы получить полное представление о различных настройках.
Заключение обзора
Робот имеет стильный минималистичный дизайн, небольшие габариты и большие колеса, которые позволяет ему без труда добираться на твердых напольных покрытиях и ковровых покрытиях. Однако он имеет некоторые недостатки среди которых небольшом объем контейнера для пыли, бюджетная система навигации, отсутствие функции влажной уборки и низкая мощность всасывания.
Однако iLife V3s Pro сможет поддерживать ваши напольные покрытия в чистоте с помощью сухой уборки при условии регулярного использования и бережной эксплуатации устройства. Важно следить за состоянием пылесборника и фильтров.
Данная модель не имеет собственного приложения или голосовой интеграции, поэтому он не будет отправлять уведомления на ваш смартфон или убираться только определенных комнатах. Однако iLife V3S Pro управляется с помощью пульта ДУ. С помощью него вы можете выбрать режим работы, установить расписание или вернуть устройство на базу.
В завершение отметим, что функционал и технические характеристики робота-пылесоса iLife V3s Pro полностью соответствуют цене модели на рынке в 2023 году. На момент создания обзора робот стоит 10 099,80 ₽ или 160 долларов на Алиэкспресс.
Что еще почитать?

Робот-пылесос Ilife — это умный и удобный помощник в доме, который бережно и эффективно убирает, освобождая ваше время. Но чтобы пользоваться всеми возможностями устройства, необходимо подключить его к приложению Ilife clean. В этой статье мы расскажем вам как подключить робот-пылесос Ilife к вашему смартфону, настроить Wi-Fi, решить возникающие проблемы и оптимизировать управление уборкой через смартфон.
Шаг 1. Установка и настройка приложения Ilife clean
- Чтобы подключить робот-пылесос Ilife к вашему смартфону, первым делом скачайте и установите мобильное приложение Ilife clean. Для iPhone откройте App Store,а для Android перейдите в Google Play.
- Регистрация или вход в аккаунт. Откройте приложение и зарегистрируйтесь, если у вас ещё нет аккаунта Ilife. Для этого введите ваш номер телефона (email) и создайте пароль. Если аккаунт уже есть – просто войдите.
- Включите Bluetooth и Wi-Fi на телефоне. Для успешной синхронизации с пылесосом важно включить Bluetooth и подключиться к сети Wi-Fi 2,4 ГГц (пылесос не поддерживает сеть 5 ГГц).
Шаг 2. Подключение пылесоса Ilife к Wi-Fi
Теперь переходим к подключению вашего пылесоса к Wi-Fi:
- Включите робот-пылесос и сбросьте настройки Wi-Fi, чтобы подготовить его к подключению. Для этого нажмите и удерживайте кнопку включения на пылесосе в течение нескольких секунд. Индикатор начнёт мигать, это значит, что пылесос в режиме поиска сети.
- Добавление устройства в приложение. В открытом Ilife clean нажмите «Добавить устройство» или значок «+». В списке доступных устройств найдите Ilife Robot Vacuum.
- Подключение к Wi-Fi. Когда пылесос начнёт искать сеть, приложение предложит ввести пароль от вашей Wi-Fi сети 2,4 ГГц. После этого нажмите «Подключить».
- Подтверждение подключения. Если пылесос успешно подключится, в приложении отобразится сообщение о завершении синхронизации. Пылесос теперь готов к управлению через телефон!
Оценка бренда: 4.9На основании многих тысяч отзывов наших довольных клиентов!
С нами ваш помощник быстро восстановит свою прежнюю мощность!

Что делать, если пылесос не подключается?
1. Проблема с Wi-Fi.
Решение:
- Удостоверьтесь, что вы подключены к сети 2,4 ГГц.
- Проверьте, нет ли ограничений на вашем роутере, например, MAC-фильтрации, или попробуйте временно её отключить.
- Используйте простое имя сети без специальных символов.
2. Проблемы с приложением
Решение:
- Попробуйте перезапустить приложение и повторить попытку подключения.
- Убедитесь, что ваше приложение обновлено до последней версии.
3. Проблемы с пылесосом
Решение:
- Если пылесос не выходит на режим синхронизации, попробуйте сбросить настройки робота (удерживайте кнопку включения на 10 секунд).
- Убедитесь, что пылесос включен и заряжен.
После успешного подключения к приложению Ilife clean, вам станут доступны различные функции для удобства использования:
- Режимы уборки. Выбирайте автоматический или интенсивный режим уборки, в зависимости от ваших потребностей.
- Настройка расписания. Устанавливайте автоматическую уборку в удобное для вас время.
- Очистка зоны. Мечтаете, чтобы пылесос очищал определённую область? Просто выделите её на карте и включите уборку.
- Голосовое управление. Подключите робот к голосовым помощникам, таким как Алиса или Маруся.
Также в приложении вы также можете следить за состоянием батареи, очисткой фильтра и другим важным параметрам работы пылесоса.
Чтобы ваш пылесос работал на полную мощность, следуйте этим простым рекомендациям от Filterix:
- Чистите фильтры и щётки после каждой уборки. Так компоненты дольше прослужат.
- Регулярно проверяйте контейнер для мусора. Если он переполнен, пылесос может работать неэффективно.
- Обновляйте приложение Ilife clean, чтобы всегда иметь доступ к новейшим функциям и улучшениям.
Если вы хотите, чтобы ваш Ilife работал на 100%, помимо подключений и настроек не забывайте о важных аксессуарах. Все нужные запчасти и аксессуары* для пылесосов можно найти в Filterix. У нас всегда в наличии оригинальные и проверенные аналоги аксессуары и запасные части.
Filterix поможет вам найти все необходимые аксессуары и запчасти для вашего Ilife и других пылесосов. Задавайте вопросы в Telegram, и мы подберём для вас лучшие расходники.
Аксессуары для
вашего пылесоса!
Кликните по промокоду,
чтобы применить!