
™
MUSTANG I
/
II
BY
FENDER
®
РАСШИРЕННОЕ РУКОВОДСТВО
ПОЛЬЗОВАТЕЛЯ

M U ST AN G
Введение
Представляем пошаговое руководство по всем новым
функциям гитарного комбо усилителя Mustang™ I / II
Информацию по использованию Fender® FUSE™,
Ableton® Live или Amplitube®, смотрите в отдельных
руководствах, доступных на сайте www.fender.com/support
Навигация
Далее дается понятие об основах навигации Mustang,
которые необходимо знать перед началом дальнейшего
исследования
Выбор пресетов
Наиболее мощная функция комбо усилителя Mustang – это
его возможность сохранять каждую настройку усилителя и
каждый выбор эффекта в качестве пресета, который
впоследствии может быть вызван с помощью рукоятки PRESET,
удаленно с компьютера, или с помощью ножного переключателя.
Для выбора одного из 24 пресетов используйте рукоятку PRESET.
Пресеты сохраняются в трех банках с цветовой кодировкой
, и .
Поверните рукоятку PRESET для просмотра каждого банка пресетов
в следующей последовательности:
Navig
ation
™
I / I I
Программируемые рукоятки
Поскольку настройка каждой рукоятки комбо усилителя
Mustang (за исключением MASTER) является частью каждого пресета, все программируемые рукоятки, как правило,
выключены, и позиции рукояток не показывают их текущих
настроек при первом выборе пресета
Программируемые рукоятки остаются выключенными до
момента начала их вращения.
Как включить программируемую рукоятку? В момент
поворота любой программируемой рукоятки, она активизируется и остается активной до момента выбора
другого пресета. В это время она вновь становится
неактивной.
Поверните рукоятки для активации их позиции.
При первом вращении рукоятки можно услышать значительное изменение громкости или тональности. Это
происходит при большой разнице между начальной позицией рукоятки и настройкой сохраненного пресета. Например, если рукоятка VOLUME указывает на значение «8», но
сохраненная в пресета установка VOLUME сделана на «2»,
то при начале вращения рукоятки VOLUME уровень громкости изменится со значения «2» на «8», поскольку рукоятка
VOLUME моментально активируется на значении «8».
AMBER Bank
( Factory presets )
Каждый пресет основан на основе одного из восьми типов
усилителя, указанных рядом с каждым светодиодным
индикатором пресета. Это позволяет получить в общей
сложности три пресета для каждого типа усилителя.
♫
Каждый пресет включает настройки всех программируемых
рукояток на Mustang. Сюда входят все рукоятки, кроме
MASTER громкости и PRESET
2
GREEN Bank
User presets
(
Красный и зеленый банки предназначены для создания
собственных пресетов. Оранжевый банк пресетов может
быть изменен только с использованием программного
обеспечения Fender FUSE, которое может быть бесплатно
загружено с сайта www.fender.com/support.
)
RED Bank
( User presets )
f e n d e r . c o m
Единственный способ узнать сохраненную настройку
♫
рукоятки перед началом ее вращения – это программа
Fender FUSE и подключение Mustang к компьютеру.
Эффекты
НА Mustang имеется две рукоятки выбора эффекта:
• MOD — Выбор эффектов типа модуляции
• DLY / REV — выбор эффектов типа задержки и ревербера-
ции.
Можно также выбрать эффект из папки STOMPBOX с
♫
помощью программы Fender FUSE
Рукоятки MOD и DLY / REV используют одни и те же светодиодные индикаторы. Индикаторами управляет последняя вращаемая рукоятка

Ножной переключатель
USB
Порт
♫
♫
♫
Восстановление заводски настрок
и обновление программы
Восстановление заводских настроек
!
Обновление программы
♫
FAQ
5
MUSTANG
™
I / II
f e n d e r . c o m
Для дистанционного переключения между двумя выбранными
пресетами, подключите (опционально) однокнопочный
ножной переключатель (№0994049000) к джеку FTSW. Свето-
диодный индикатор (рядом с джеком FTSW) загорится
красным или зеленым цветом, указывая на то, какой из
пресетов ножного переключателя активирован.
Программирование ножного переключателя:
1. Выберите пресет для назначения на ножной переключатель.
Пресет не должен быть изменен (для перехода к шагу 2
кнопка SAVE не должна гореть).
2. Нажмите кнопку SAVE. Кнопки SAVE и EXIT должны быстро
мигать. В этот момент, для отмены процедуры назначения
пресета на ножной переключатель можно нажать кнопку
EXIT.
3. Нажмите кнопку ножного переключателя для выбора
красного или зеленого индикатора рядом с разъемом FTSW
для установки его в соответствие с выбранным пресетом.
4. Нажмите кнопку SAVE для подтверждения назначения
ножного переключателя. Теперь, при нажатии на ножной
переключатель, выбранный пресет будет активирован с
соответствующим индикатором (красный или зеленый)
ножного переключателя.
Используйте USB порт для подключения комбо-усилителя
Mustang к компьютеру. Это позволит поднять музыку на новый
уровень.
• Для управления Mustang с компьютера и доступа к дополни
—
тельным функциям усилителя, не доступных при автономной
работе MustanG), используйте программу Fender® FUSE™.
Подробную информацию смотрите в руководстве Fender
FUSE на сайте www.fender. com/support.
• Запишите и отредактируйте аудио Mustang с помощью
программного обеспечения Ableton® Live Lite 8 Fender® Edition.
Для получения дополнительной информации о программе
Ableton® Live Lite 8 Fender edition обращайтесь на сайт
www.fender.com/support.
• Потоковое аудио и совместная игра с людьми во всем мире
стали возможными, благодаря программе Fender® BAND JAM,
предоставленной Jamming® AUDiiO.
Для получения 30-дневной пробной версии, перейдите на:
www.fender. com/ejamming
При необходимости можно выполнить восстановление
заводских настроек комбо усилителя Mustang. Все
пользовательские пресеты будут стерты!
Для восстановления заводских настроек комбо усилите-
ля Mustang:
1. Выключите усилитель.
2. Нажмите и удерживайте кнопку EXIT во время включе-
ния усилителя. Удерживайте кнопку EXIT до тех пор, пока
она не перестанет светиться.
Функция ВОССТАНОВЛЕНИЯ ЗАВОДСКИХ НАСТРОЕК
стирает все измененные пользователем пресеты. Эта
функция также выполняет восстановление ОРАНЖЕВО-
ГО банка пресетов и всех выборов эффектов, которые
были изменены с помощью программы Fender FUSE
Время от времени, Fender выпускает обновления для
программного обеспечения усилителя Mustang с целью
улучшения его работы или для добавления новых
функций. Для обновления программного обеспечения
усилителя, необходимо подключиться через USB порт к
компьютеру с программным обеспечением Fender FUSE
и подключением к Интернету.
Подробную информацию смотрите в руковод-
стве Fender FUSE на сайте www.fender. com/support
Имеется несколько отличных сайтов, на которых можно
получить дополнительную информацию о Mustang и
музыке.
• www.fender.com/support
• Посетите форум Fender Community где можно задать
вопросы и прочитать обсуждения различных проблем.
Также там имеется форум непосредственно для
Mustang: www.fender.com/community/forums
• Зарегистрируйтесь на Fender Knowledge Base для
возможности чтения «Часто задаваемых вопросов».
www.fender. com/support/faqs.php
• Найдите материалы по изучению теории музыки и ноты
на сайте Hal Leonard Publications: www.halleonard.com
- Инструкции и руководства
- Бренды
- Fender
- MUSTANG I/II
- Справочник Пользователя
GUITAR AMPLIFIERS
MUSTANG
BY
FENDER
®
™
ADVANCED OWNER’S MANUAL
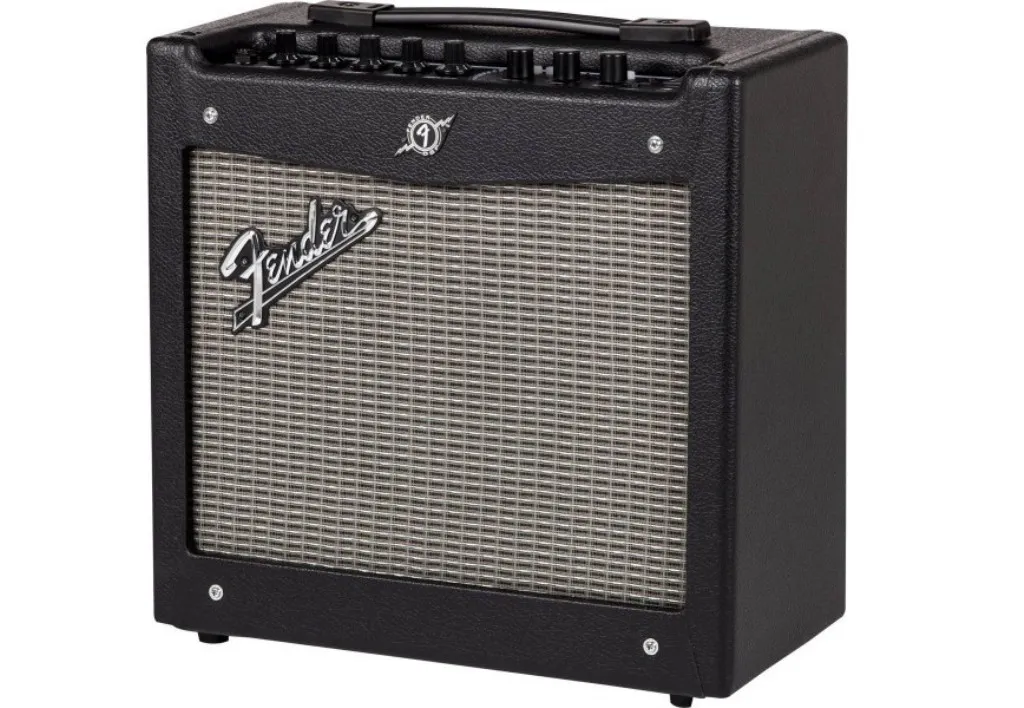
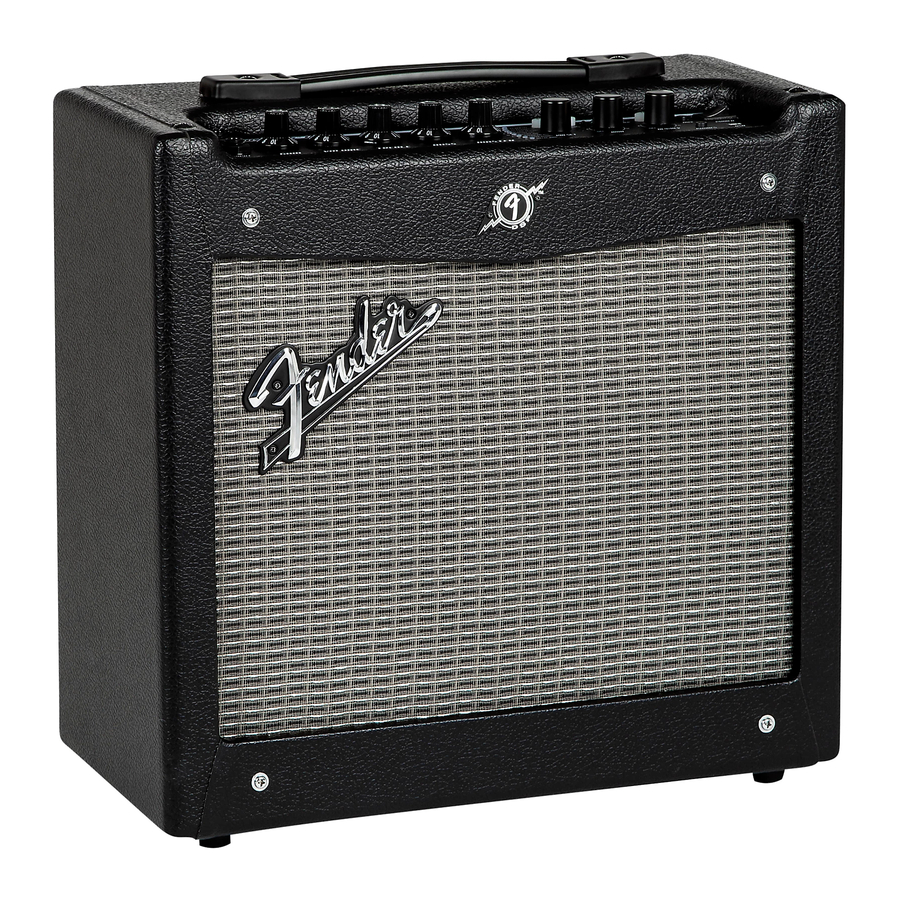
Усилитель для электрогитар Mustang I V2 — самый маленький в оригинальной серии Mustang от Fender. Это 20-ваттный твердотельный моделирующий усилитель с 8-дюймовым фирменным динамиком Fender. Буква «V2» означает, что он был модернизирован по сравнению с оригинальной конструкцией. Он полностью укомплектован моделями усилителей, пресетами и эффектами и идеально подходит для домашних занятий или джемов в небольшой группе.
Встроенный USB-порт позволяет подключить устройство к ПК или мобильному устройству для дальнейшего редактирования голосов. К сожалению, поддержка основного приложения для редактирования голосов, FUSE, была прекращена компанией Fender в 2023 году, поэтому в комплект поставки оно больше не входит. Однако, приложив немного усилий, можно загрузить и установить его или воспользоваться альтернативным программным обеспечением.
Итак, давайте немного углубимся в изучение гитарного усилителя Fender Mustang I V2…
Физические характеристики
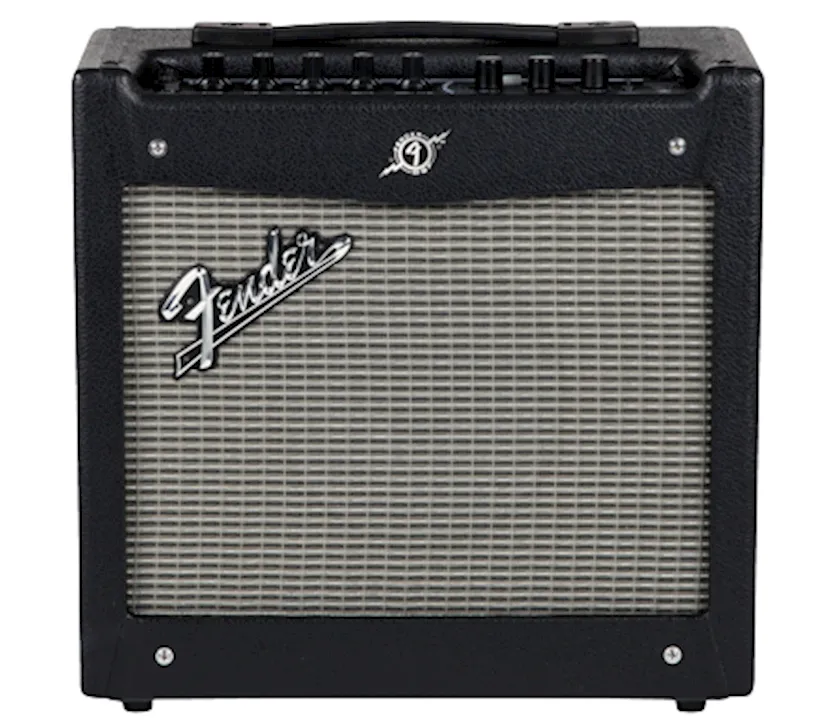
Mustang I — легкий и портативный гитарный усилитель весом всего 17 фунтов (7,3 кг). При размерах 15,5 x 14,5 x 7,6 дюйма (38,4 x 36,8 x 19,3 см) он незаметно разместится в вашей гостиной или спальне.
При этом он выглядит элегантно и круто благодаря фирменному черному покрытию Tolex, ручкам Fender и серебристому полотну гриля со знаменитым логотипом Fender.
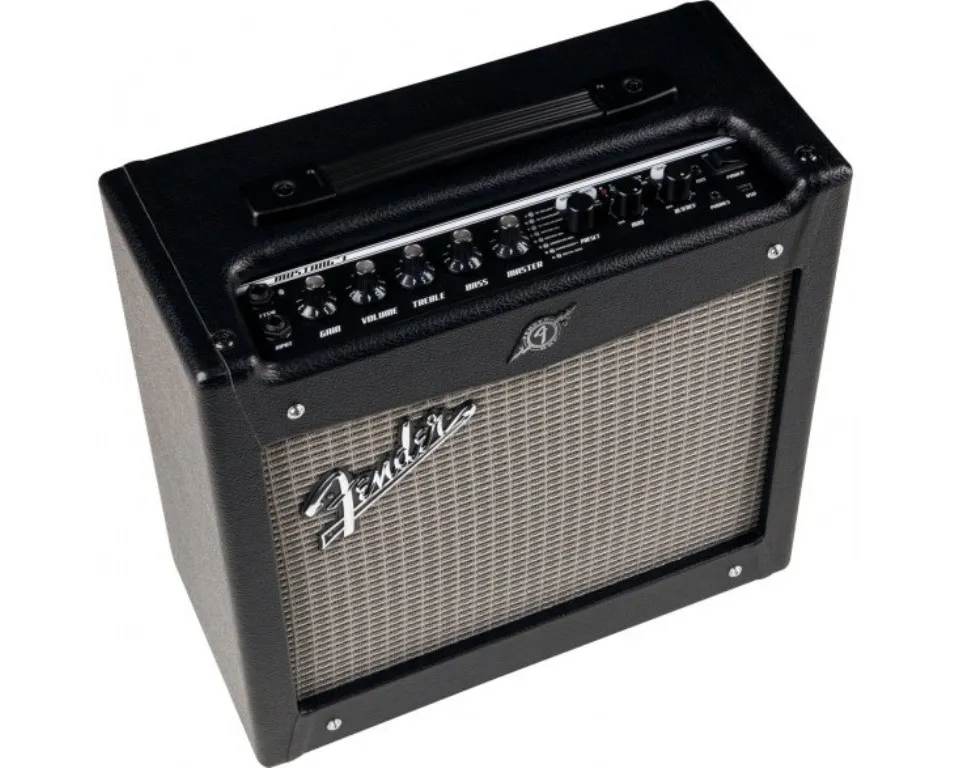
Органы управления
Вдоль верхней части усилителя расположены несколько ручек для выбора и настройки пресетов. Слева направо расположены регуляторы Gain, Volume, Treble, Middle, Bass, Reverb и Master Volume.
Обычно в гитарных усилителях Gain определяет, насколько сильно канал перегружен в дисторшн, при этом более низкие значения дают более чистое звучание. За исключением Master Volume, эти регуляторы неактивны — не имеет значения, как они установлены, — пока вы не активизируете один из них, повернув его.
В противном случае фактические значения сохраняются как часть текущей предустановки.
Интуитивно понятные цифровые регуляторы…
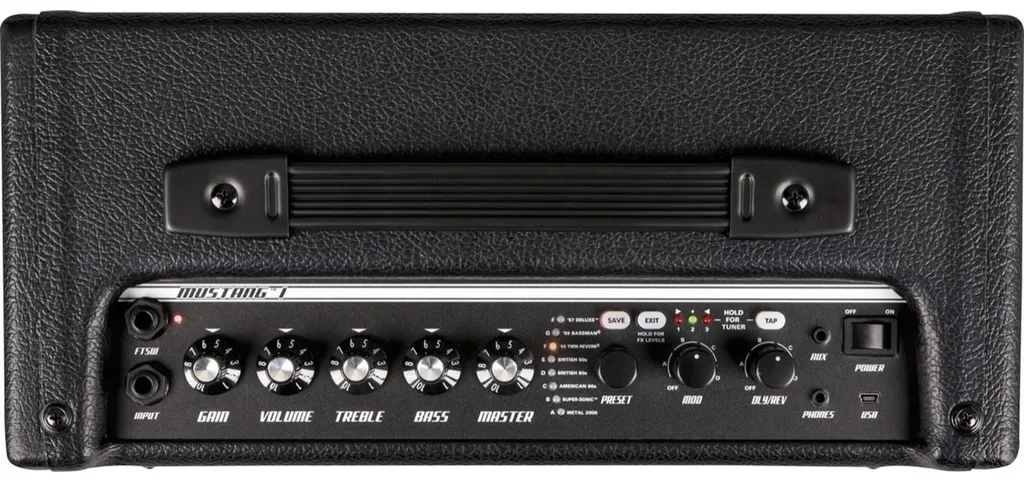
Справа от этих регуляторов находятся ручки PRESET и BANK, с помощью которых выбирается одна из 24 предустановок. Они хранятся в трех банках по восемь пресетов в каждом. Разноцветные светодиоды рядом с выбранным пресетом показывают, какой банк активен. Над регулятором PRESET расположены кнопки SAVE и EXIT для сохранения пользовательских пресетов.
Далее справа расположены две ручки выбора эффектов. Ручка MOD выбирает эффекты модуляции, а ручка DLY/REV — эффекты задержки и реверберации. А в крайнем правом углу находится переключатель включения/выключения питания мастера.
Настроить…
Над регулятором DLY/REV находится кнопка TAP, с помощью которой можно установить время задержки или эха. А если удерживать эту кнопку в течение двух секунд, то включается хроматический тюнер, использующий три светодиодных индикатора банка.
Вход и выход
Слева от регулятора Gain находится 1/4-дюймовый входной разъем для подключения электрогитары. Здесь же находится 1/4-дюймовый разъем для подключения опционального однокнопочного педального переключателя, который можно использовать для переключения между двумя выбранными пресетами.
На правой стороне верхней панели расположен 1/8-дюймовый вход Auxiliary, к которому можно подключить MP3-плеер или другой источник звука, если необходимо подыграть песне.
Там же находится разъем для наушников, который можно использовать для подключения наушников, колонок или линейного выхода для записи. При подключении к этому разъему внутренний динамик Mustang отключается.
Подключение к компьютеру…
Наконец, рядом с выключателем питания находится разъем mini USB. Этот USB-порт позволяет подключить Mustang I к персональному компьютеру или мобильному устройству. Он выполняет двойную функцию.
Во-первых, можно запускать приложения, позволяющие настраивать пресеты по своему вкусу, сохранять и вызывать банки пресетов. Во-вторых, к нему можно подключить аудиоинтерфейс для записи игры.
Модели усилителей
Mustang I V2 поставляется с восемью моделями усилителей. Среди них Fender 1957 Deluxe, ’65 Twin и ’59 Bassman. Есть также несколько «британских» моделей (используйте свое воображение). Кроме того, есть несколько необычных вариантов, таких как «Super-Sonic» и «Metal 2000».
Пресеты…
В отличие от традиционного многоканального лампового усилителя с отдельным набором регуляторов для каждого канала, в Mustang I V2 используются пресеты. Пресет — это комбинация виртуальной модели усилителя и всех связанных с ней настроек тембра, громкости и эффектов.
В Mustang имеется место для 24 пресетов, сохраненных в трех банках. Каждый из восьми пресетов в банке использует определенную модель усилителя, которая четко обозначена. Банк, обозначенный «янтарным» светодиодом, — это все заводские пресеты, а «зеленый» и «красный» банки — пользовательские пресеты.
Однако янтарный банк можно редактировать только с помощью приложения Fender FUSE или аналогичного программного обеспечения.
Эффекты…
Mustang I V2 оснащен 27 эффектами, которые выбираются с помощью ручек MOD и DLY/REV. Одновременно может применяться только один эффект.
Модуляционные эффекты включают хорус, фленджер, фазер, автоволну, тремоло, вибрато, сдвиг высоты тона и ступенчатый фильтр. Доступны такие эффекты, как монофоническая цифровая задержка, монофоническая и стереофоническая ленточная задержка, приглушенная задержка и эхо-фильтр. Модели ревербераторов включают комнаты, тарелки, залы и классические пружинные модели Fender.
Уровень эффектов можно регулировать вручную, а также использовать кнопку TAP для установки времени модуляции.
Как он звучит?
Mustang звучит на удивление хорошо, учитывая его скромную стоимость. Особой популярностью у пользователей пользуется модель Fender Twin. Эффекты также весьма удобны, не уступая многим отдельным педалям эффектов.
Как и большинство небольших моделирующих усилителей, он лучше всего звучит при низких или средних настройках усиления. Если вам нужен небольшой усилитель, который можно выкрутить на полную мощность и использовать с микрофоном, то лучше выбрать ламповый усилитель.
От Fender с любовью…
Очевидно, что компания Fender очень постаралась, чтобы винтажные модели усилителей Fender звучали превосходно. «Британские» модели также очень хороши, хотя и менее аутентичны.
Некоторые из современных моделей менее приятны, особенно металлические звуки с высокими искажениями. В целом, этот усилитель лучше всего подходит для блюза, классического рока, джаза R&B и подобных стилей.
Недостатки…
К минусам можно отнести отсутствие специфического «чистого» варианта. Модель Twin обеспечивает наиболее чистое звучание, хотя аккорды полного бара имеют тенденцию к некоторому хрусту. При этом соло звучит довольно гладко.
Многие пользователи отмечают, что модели усилителей выигрывают, если их немного подправить с помощью программы FUSE от Fender. Поскольку она больше не поставляется компанией Fender (см. следующий раздел), вам придется либо договориться о ее приобретении в другом месте, либо найти замену, либо использовать предоставленные модели как есть.
FUSE
С момента появления линейки усилителей Fender Mustang в ее состав входило приложение FUSE для Macintosh или Windows. Это программное обеспечение позволяет изменять голоса, настройки и тембры усилителя, загружать и сохранять настройки. Кроме того, можно редактировать и сохранять пресеты, а также загружать пресеты других пользователей Mustang.
В результате FUSE дала этой серии усилителей большое преимущество перед конкурентами.
К сожалению, с 20 марта 2023 года программа FUSE была снята с производства и больше активно не поддерживается компанией Fender. На самом деле это не вина Fender. FUSE опирался на «псевдо Flash/EAML» среду Microsoft Silverlight, которую Microsoft перестала поддерживать.
Но помощь пришла!
Есть несколько обходных путей (кроме использования моделей усилителей как есть). FUSE и необходимые драйверы по-прежнему доступны из других источников, в том числе здесь. Пользователи сообщают, что он по-прежнему отлично работает под Windows 10, хотя в будущем никаких улучшений не будет.
В качестве альтернативы можно использовать приложение Remuda для Android, которое позволяет редактировать предустановки и полностью совместимо с файлами FUSE. Оно имеет длинный список улучшений, о которых можно прочитать здесь. Remuda не бесплатна, но для начала можно попробовать бесплатную версию Lite.
Плюсы и минусы гитарного усилителя Fender Mustang I V2
ПЛЮСЫ
- Отличное звучание.
- Высококачественные эффекты, пресеты и моделирование усилителей.
- Легкий и портативный.
- Верность звучанию Fender.
- Возможность подключения по USB.
- Приложение FUSE.
- Идеально подходит для домашних тренировок и выступлений.
- Отличная цена
МИНУСЫ
- Отсутствует чистая настройка «clean».
- Приложение FUSE больше не поддерживается.
Заключение
Fender Mustang I V2 — это отличный небольшой усилитель для домашних тренировок или интимных джем-сессий. При мощности 20 Вт он обладает достаточной громкостью для небольшой комнаты.
Органы управления просты и понятны, что делает его идеальным для начинающих игроков с небольшим опытом использования гитарных усилителей с технологией моделирования. Прямо из коробки он работает как положено, без всякой настройки.
Этот усилитель идеально подходит для тех, кто хочет немного (или много) похрустеть в ламповом стиле, популярном в большинстве стилей рока и блюза. Любители усилителей Fender оценят несколько точных воспроизведений их классических моделей, включая достойный чистый звук Twin.
Наличие USB-соединения является большим плюсом, хотя пользователям придется пройти несколько дополнительных шагов, чтобы запустить приложение FUSE. Прекращение официальной поддержки этого старинного приложения вызывает некоторое разочарование, и это отражается на очень привлекательной цене усилителя.
Fender Mustang Amplifier I/II/III/IV/V v.2 Manual
Advanced Manual
Introduction
This manual is your step-by-step guide to the advanced features found on your Mustang™ I / II (V.2) amplifier. For information on using Fender® FUSE™, Ableton® Live or Amplitube®, please see the separate manuals for each product available at https://fuse.fender.com/mustangv2/support.
Navigation
There are just a few basics of Mustang navigation that you should know before you explore any further…
Selecting Presets
The most powerful feature of your Mustang amplifier is its ability to store every amplifier setting and effect selection as a preset that you can instantly recall using the PRESET knob, or remotely from your computer or footswitch.
Use the PRESET knob to select one of 24 presets. Presets are stored in three banks, colored AMBER, GREEN and RED.
Turn the PRESET knob to scroll through each bank of presets in the following order:
Each preset is based on one of the eight amplifier types labeled next to each of the preset LEDs. That gives you a total of three presets for each amplifier type.
The RED and GREEN banks are for creating your own presets. The AMBER bank of presets can only be modified using Fender FUSE software available free at https://fuse.fender.com.
Each preset includes the settings of all the programmable knobs on the Mustang, which includes every knob exceptthe MASTER volume and PRESET knobs.
Programmable Knobs
Because the setting of every knob on the Mustang amplifier (except MASTER) is part of each preset, all programmable knobs are normally inactive and knob positions will NOT show their actual settings when a preset is first selected.
How do I activate a programmable knob? The moment you turn any programmable knob it instantly becomes active and it will remain active until you select a different preset, at which time it becomes inactive again.
You may hear a big change in volume or tone when you first turn a programmable knob if there happens to be a large difference between the knob’s position and the stored preset setting for the knob. For example, if the VOLUME knob is pointing to «8» but the stored VOLUME preset setting is «2,» the volume level will jump from «2» to «8» the moment you turn the VOLUME knob, making the knob active.
The only way to know what the preset setting of a knob is before you turn it, is by using Fender FUSE software and connecting the Mustang to your computer.
Effects
There are two effect selection knobs on the Mustang:
- MOD — selects Modulation type effects
- DLY / REV — selects Delay and Reverb type effects
You can also select effects from a STOMPBOX category using Fender FUSE software.
The MOD and DLY / REV knobs share the same three selection indicator LEDs. Whichever knob was turned most recently is the knob currently associated with these 3 indicator LEDs:
These LEDs are numbered 1, 2, 3 and correspond to the three positions within each of the selection ranges A, B, C, D on both effects knobs. Use the LEDs to determine exactly which position the knob is pointing to, for example, A 1 is shown below:
Effect Selections
The tables below list the effect selections for each knob.
| MODULATION EFFECTS | |
| A1 | Chorus |
| A2 | Chorus Deep |
| A3 | Flanger |
| B1 | Touch Wah |
| B2 | Bias/Sine Tremolo |
| B3 | Optical/Vintage Tremolo Fast |
| C1 | Vibratone Slow |
| C2 | Vibratone Fast |
| C3 | Pitch Shifter – Up a 5th |
| D1 | Pitch Shifter – Down an Octave |
| D2 | Phaser Medium |
| D3 | Step Filter |
| DELAY EFFECTS | REVERB EFFECTS | |
| A1 | Tape Delay 150ms / 1 Repeat | |
| A2 | Stereo Tape Delay 300ms / 3 Repeats | |
| A3 | Mono Delay 700ms / 4 Repeats | |
| B1 | Small Room Reverb | |
| B2 | Plate Reverb | |
| B3 | Large Hall Reverb | |
| C1 | Fender ’65 Spring Reverb | |
| C2 | Fender ’63 Spring Reverb | |
| C3 | Tape Delay | Room |
| D1 | Tape Delay | Large Hall |
| D2 | Ducking Delay | Small Hall |
| D3 | Echo Filter |
You can completely change the effects list on your Mustang™ amplifier using Fender® FUSE™ software available at https://fuse.fender.com.
Effects Level
You can adjust the effects level by holding down the EXIT button while rotating either the MOD or DLY/REV knob, depending on which effect type you want to adjust.
Tap Button
The TAP button can be used to «tap in» delay time and modulation rate settings:
When you select a delay effect, the TAP button will blink green in time with the delay time setting. When you select a modulation effect, the TAP button will blink red in time with the modulation rate setting.
When both delay and modulation effects are selected simultaneously, the TAP button will blink green and only control the delay time setting.
You can use TAP to set both delay time and modulation rate by tapping in the modulation rate first, with NO delay effect selected, then adding a delay effect and tapping in the delay time last.
To set the TAP interval of effects:
- Select an effect that causes the TAP button to blink, using the DLY/REV or MOD knob.
- Press the TAP button rhythmically (twice minimum) in time with the desired interval.
Tuner Button
Your Mustang™ amplifier has a built-in Tuner mode that turns the control panel LEDs into a chromatic guitar tuner.
To use the tuner:
- Press and hold the TAP button for 2 seconds. The TAP and EXIT buttons will illuminate.
- Strike any single string on your guitar and watch the panel LEDs. The Preset LEDs are used to indicate the note of the string being tuned (the top LED «#» indicates if the note is sharp).
- Turn the tuning peg on your guitar until the fine tuning LEDs above the MOD knob indicate the string is in tune, as shown above.
- Standard guitar tuning is as follows:
- Press EXIT or TAP to exit from the Tuner.
Save Button
Your Mustang amplifier gives you the powerful ability to save every setting on the amplifier as part of a preset. When you select a preset, the level of each knob, including effect selections, is instantly recalled to your pre-programmed settings!
The SAVE button will light up red when you turn any programmable knob on the amplifier. This indicates that you have temporarily modified the preset. You can reset your modifications simply by selecting a different preset and then back again.
The EXIT button will not cancel changes to the current preset. Only by selecting a different preset using the PRESET knob will your temporary changes be erased.
To save a preset:
- To save a preset you must first modify an existing preset by turning any of the programmable knobs, such as GAIN or MOD. (once the SAVE button is illuminated, you can proceed to step 2).
- Press the SAVE button. The SAVE and EXIT buttons should be flashing rapidly. You can press EXIT at this point to cancel the save process.
- Turn the PRESET knob to select a preset to overwrite. You can only overwrite the red and green banks of the amplifier type that you started from (if you started by modifying the amber bank, you must select either the red or green bank to overwrite).
You can modify the AMBER bank of presets by using your computer and Fender® FUSE™ software available at https://fuse.fender.com. - Press the SAVE button again to confirm the save.
Aux / Phones Jacks
Auxiliary Input
You can use the Auxiliary jack to input audio into your Mustang amplifier for accompaniment. Connect the headphone output on your CD player or MP3 player to the AUX jack using a mini-stereo cable. Use the volume control on your player, together with the MASTER volume knob, to adjust the auxiliary volume level.
Phones Jack
Plug in your headphones, ear buds, or powered speakers to enjoy the Mustang’s stereo features. This jack may also be used as a stereo recording output. The amp’s internal speaker is muted when the PHONES jack is used.
Footswitch
Connect a (optional) 1-button footswitch (P/N 0994049000) into the FTSW jack to enable remote selection of your two favorite presets. The LED (next to the FTSW jack) will turn red or green to indicate which footswitch preset is active.
To program the footswitch:
- Select a preset that you want to assign to the footswitch. The preset must not be modified (the SAVE button must NOT be illuminated to proceed to step 2).
- Press the SAVE button. The SAVE and EXIT buttons should be flashing rapidly. You can press EXIT at this point to cancel the footswitch assignment process.
- Press the footswitch button to select either the red or green LED next to the FTSW jack to associate with the chosen preset.
- Press the SAVE button to confirm the footswitch assignment. Now when you press the footswitch, the chosen preset will be activated with the assigned red or green footswitch indicator.
USB Port
Use the USB port to connect the Mustang™ amplifier to your computer and take your music to the next level:
Factory Restore & Firmware Update
Factory Restore
You can restore your Mustang amplifier to the original factory settings if desired. All user presets will be erased!
To restore the Mustang amplifier to factory settings:
- Turn the amplifier OFF.
- Press and hold the EXIT button while turning the amplifier ON. Continue holding the EXIT button until it is no longer illuminated.
The FACTORY RESTORE function will erase all user modified presets. It will also restore the AMBER bank of presets and any effect selections that have been modified using Fender FUSE software.
Firmware Update
From time to time, Fender may make available firmware updates for your Mustang amplifier to improve operation or to add new features. To update the firmware on your amplifier you will need to connect it through the USB port to a computer with Fender FUSE software and an internet connection.
Please see the Fender FUSE manual at https://fuse.fender.com/support for details.
FAQ
There are several great places you can go to learn more about the Mustang and music in general:
- www.fender.com/support
- Join a Fender Community forum where you can ask questions and read threads. There’s even a forum just for the Mustang: www.fender.com/community/forums
- Find music theory learning materials and sheet music at Hal Leonard Publications: www.halleonard.com
MUSTANG III/IV/V (V.2)
Advanced Manual
Introduction
This manual is your step-by-step guide to all the advanced features found on your Mustang™ I II/ IV/V (V.2) amplifier. For information on using Fender® FUSE™, Ableton® Live or Amplitube®, please see the separate manuals for each product available at https://fuse.fender.com/mustangv2/support.
Navigation
There are just a few basics of Mustang navigation that you should know before you explore any further…
Selecting Presets
Turn the DATA WHEEL to select one of 100 presets.
You will find some presets you like and others that you want to change…
Each preset stores the settings for:
- Amplifier type — 17 selections
- Effects — 4 categories, 44 selections total
- Knob levels — GAIN through REVERB (not MASTER)
You can also select and edit presets from your computer using Fender® FUSE™ software, available free of charge at https://fuse.fender.com
Master Volume
The MASTER volume knob is always «active.» That means the position of the MASTER knob always shows the true master volume setting, unlike the programmable knobs.
(Always turn the MASTER volume knob first to adjust the overall volume output of your Mustang amplifier.)
Programmable Knobs
Because the setting of every knob (except MASTER) is stored within each preset, the «programmable» knob postitions are not active and the knob positions will NOT show their actual settings when a preset is first selected.

How do I activate a programmable knob? The moment you turn any programmable knob it instantly becomes active and it will remain active until you select a different preset, at which time all the programmable knobs become inactive again.

Press the DATA WHEEL to see what the stored preset settings are for all the programmable knobs before you turn them. Press EXIT to return to Play mode.
Press the DATA WHEEL a second time to see where your effects are located in the Guitar Signal Processing Path. Press EXIT to return to Play mode.
You can change the order of effects in the Signal Path using Fender® FUSE™ software.
Select amplifier models and adjust amplifier settings using the Amp menus.
Amplifier Models
To select Amplifier Models:
- Press the AMP button.
- Turn the DATA WHEEL to select one of 17 amplifier models:
AMP MODELS Studio Preamp ’57 Champ ’57 Deluxe ’57 Twin ’59 Bassman ’65 Princeton ’65 Deluxe Reverb ’65 Twin Reverb ’60s Thrift British Watts British ’60s British ’70s British ’80s British Colour Super-Sonic (Burn) American ’90s Metal 2000 - Press EXIT to return to Play mode.
Amplifier Settings
To adjust Amplifier Settings:
- Press the AMP button.
- Press the DATA WHEEL one or more times until the setting that you want to adjust is highlighted, then turn the DATA WHEEL to adjust the setting.
- Press the AMP button a second time to access «Page 2» with more amplifier settings. The settings that appear on «Page 2» will depend on the amp model that is currently selected.
You can de-select the highlighted amp setting and return to Amp Model selection mode, as a shortcut, by pressing and holding the AMP button.
- Press EXIT to return to Play mode.
Bypassing Effects
You can turn on–off effects that have been selected for the current preset by pressing the corresponding effect button.
Effects can also be bypassed (turned on-off) from the footswitch included with your Mustang amplifier.
Effects that are shown on screen as «–EMPTY–» can not be activated until an effect has been selected in that slot.
Selecting Effects
To select Effects:
- Press and hold one of the four effects buttons.
- Turn the DATA WHEEL to select one of the following effects:
STOMPBOX MODULATION Ranger Boost Sine Chorus Green Box Triangle Chorus Overdrive Sine Flanger Fuzz Triangle Flanger Orange Box Vibratone Black Box Vintage Tremolo Big Fuzz Sine Tremolo Wah Ring Modulator Touch Wah Step Filter Simple Compressor Phaser Compressor Wah Touch Wah Diatonic Pitch Pitch Shifter DELAY REVERB Mono Delay Small Hall Mono Echo Filter Large Hall Stereo Echo Filter Small Room Multitap Delay Large Room Ping Pong Delay Small Plate Ducking Delay Large Plate Reverse Delay Ambient Tape Delay Arena Stereo Tape Delay Fender ’63 Spring Fender ’65 Spring - Press EXIT to return to Play mode.
You can switch to a different effect category at any time, even while you are in the effect selection menus, by pressing and holding a different Effects button.
Effect Settings
Use the Effects Settings menus to adjust a dazzling array of effect settings.
To adjust Effect Settings:
- Press and hold any Effect button (STOMP, MOD, DELAY, REVERB).
- Turn the DATA WHEEL to select the effect you want to work with.
- Press the DATA WHEEL one or more times until the setting that you want to adjust is highlighted, then turn the DATA WHEEL to adjust the setting.
- Press EXIT to return to Play mode.
You can bypass an effect at any time, even while you are in the effect settings menus, by pressing the Effect button or corresponding footswitch button.
Tap Button
The TAP button can be used to «tap in» delay time and modulation rate settings, by rhythmically pressing the TAP button.
When you select a delay effect, the TAP button will blink in time with the delay time setting. When you select a modulation effect, the TAP button will blink in time with the modulation rate setting (note that modulation rates can have up to 12 second intervals and the TAP button will flash infrequently).
When both delay and modulation effects are selected simultaneously, the TAP button will blink in time with the delay effect and will only control the delay time setting.
You can use the Effects menus or Fender FUSE to set delay time and modulation rates more precisely.
To set the TAP interval of effects:
- Select a Delay or Modulation effect that causes the TAP button to blink, using the Effects menus (see Selecting Effects).
- Press the TAP button rhythmically (twice minimum) in time with the desired interval. If you press the TAP button only once, the interval will be set to the maximum value.
If you open the Effect settings menu (see Effect Settings, above), you can watch the actual TAP values you are setting while you are tapping them in!
Saving Presets
Your Mustang™ amplifier gives you the powerful ability to save every setting on the amplifier as part of a preset. When you select a preset, the level of each knob, every effect setting, and the amp model selection, are instantly recalled to your pre-programmed settings.
The SAVE button will light up red when you turn any programmable knob or edit any other setting on the amp. This indicates that you have temporarily modified the preset. You can undo your modifications by turning the DATA WHEEL to a different preset and then back again.
The EXIT button will not cancel changes to the current preset. Only by selecting a different preset using the DATA WHEEL, Footswitch, or Fender FUSE, will your temporary changes be erased.
To save a preset:
Memory Lock must be OFF to save presets (see Utility Menus)
- To save a preset you should first modify an existing preset, for example, by turning any of the programmable knobs, such as GAIN.
- Press the SAVE button. The SAVE and EXIT buttons should be illuminated. You can press EXIT at this point to cancel the save process.
- Turn the DATA WHEEL select a preset destination to overwrite.
- Press the DATA WHEEL if you want to edit the name of your new preset. Use the buttons to perform the functions listed along the bottom of the screen; turn the DATA WHEEL to select characters.
- Press the SAVE button a second time to confirm the save.
Guitar Tuner
Your Mustang™ amplifier has a built-in Tuner mode that turns the screen into a guitar tuner.
To use the Tuner:
- Press and hold the TAP button. The TAP and EXIT buttons will illuminate.
- Strike any single string on your guitar and watch the screen. The note of the string being tuned is displayed along with a fine tuning needle.
- Turn the tuning peg on your guitar until the fine tuning needle indicates the string is in tune, as shown above.
- Standard guitar tuning is as follows:
- Press EXIT or TAP to exit from the Tuner.
Footswitches
Four-Button Footswitch (0080996000)
Connect a 4-button footswitch to your Mustang amplifier (included with the Mustang IV & V, optional equipment for the Mustang III) to enable remote multi-function foot control. The footswitch display and LEDs show some of the same information as the amplifier screen, so you can, for example, tune your guitar and select presets by watching the footswitch without ever looking at the screen onboard the Mustang!
- Select Quick Access presets (QA1/QA2/QA3)
- Select presets (up/down/bank)
- Bypass effects
- Activate the Tuner
The footswitch has three modes that are identified by the three LEDs labeled MODE 1, MODE 2 and MODE 3. The footswitch also has a Tuner mode which is indicated when all of the mode LEDs are off.
To switch between modes, press the MODE button. To activate Tuner mode, press and hold the MODE button.
You can lock the 4-button footswitch in Mode 1, 2 or 3 using the Utility menus, to prevent accidental Mode changes (see Utility Menus).
- Mode 1—In Mode 1 the footswitch is used to select one of three Quick Access presets, using the buttons labeled: QA1 / QA2 / QA3 (in line with the MODE 1 LED). When you select a Quick Access preset, the number of the preset will appear in the display of the footswitch.
You can any assign any preset to be a Quick Access preset in the Utility menus. (see Utility Menus).
- Mode 2—In Mode 2 the footswitch is used to select presets down/up, or in banks of 10, using the buttons labeled: DOWN / UP / BANK (in line with the MODE 2 LED). When you select a preset, the number of the preset will appear in the display of the footswitch.
- Mode 3—In Mode 3 the footswitch is used to bypass the Stompbox, Modulation or Delay effects, using the buttons labeled: STOMP / MOD / DELAY (in line with the MODE 3 LED). The footswitch button LEDs indicate the effects that are active, just like the buttons on the amplifier.
You can also have a footswitch button assigned to bypass the Reverb effect by adding on the 2-button Mustang footswitch (see Six-Button Footswitching options, below).
- Tuner Mode—Press and hold the MODE button to activate the Tuner. The ampifier screen and the footswitch both will display the same tuner information so that you can look in either place to tune your guitar. The footswitch will display the nearest note; the button LEDs will indicate sharp and flat and «in tune» is indicated when the green LED below the footswitch display lights up. Press any footswitch button to exit Tuner mode.
Two-Button Footswitch (0080997000)
Connect a 2-button footswitch to your Mustang amplifier (included with the Mustang III, optional equipment for the Mustang IV & V) to enable remote multi-function foot control. Use the Utility menus to assign one of the following functions to the 2-button footswitch:
- Select presets (up/down)
- Select Quick Access presets (QA1/QA2)
- Bypass effects (various combinations)
- Set TAP interval
Six-Button Footswitching options
Plug both a 4-button and a 2-button footswitch into your Mustang amplifier to expand your remote control options. By assigning different functions to each footswitch you can create more than a dozen different foot control combinations.
For example, you could assign Quick Access presets to the 4-button footswitch and Up/Down presets to the 2-button footswitch. Or you could bypass effects with the 4-button footswitch and select presets with the 2-button footswitch. The choice is up to you.
EXP-1 Expression Pedal
The EXP-1 expression pedal (P/N 2301050000) is a dual-mode pedal that can be programmed to control a wide variety of parameters on your Mustang amplifier. Plug the EXP-1 pedal into the «4 BUTTON FOOTSWITCH» jack.
The EXP-1 operates in two modes, Volume behavior mode and Expression behavior mode. Switch between modes by pressing down hard on the toe end of the pedal. Red and green LEDs on the EXP-1 indicate the current pedal mode:
- Volume behavior mode (green) is used to control master volume (or the EXP-1 can be set to OFF in Volume mode).
- Expression behavior mode (red) can be used to control most effect and amp parameters on your Mustang amplifier. Some common uses are to control the frequency parameter of a wah effect or the rate/time parameter of a modulation or delay effect.
Fender® FUSE™ software can also be used to program all settings on your EXP-1 pedal.
EXP-1 Pedal Calibration
The first time you connect the EXP-1 to your Mustang amplifier, you should calibrate it so that the desired range of pedal movement registers with the amplifier. Calibration takes less than a minute:
To calibrate the EXP-1:
- Plug the EXP-1 pedal into the 4 BUTTON FOOTSWITCH jack on the back of your Mustang amplifier using the included cable.
- Turn the amplifier OFF.
- Press and hold the UTIL button on the amplifier, then turn the amplifier ON. Continue holding the UTIL button down until it is no longer illuminated.
- Move the EXP-1 pedal between the desired heel and toe endpoints to set the range of pedal movement that is registered (recognized) by the amplifier.
For example, if you only want the middle third of the pedal range to register with the amplifier, only move the EXP-1 pedal back and forth through the middle third of its range of motion. You must start the calibration process with the EXP-1 pedal positioned somewhere within the desired range. - Turn the DATA WHEEL to select a new preset.
- The EXP-1 expression pedal has been calibrated!
Repeat the calibration procedure each time you change EXP-1 pedals, plug the EXP-1 into a different amplifier, or perform a Factory Restore proceedure on the amplifier.
EXP-1 Pedal Settings
The EXP-1 pedals settings can be saved with the current preset so that each time you select a particular preset, the EXP-1 functions are customized for that preset. Before you change the EXP-1 settings, select the preset that you want to save the EXP-1 settings with.
To configure EXP-1 settings:
- Plug the EXP-1 pedal into the 4 BUTTON FOOTSWITCH jack on the back of your Mustang amplifier using the included cable.
- Select the preset with which you want to use the EXP-1.
- Press and hold the DATA WHEEL until the Expression Mode Enable menu appears.
- Rotate the DATA WHEEL to change the settings in the current menu. Press the DATA WHEEL to select the next menu from the list below.
SHORTCUT: You can speed select menus in either direction by rotating the DATA WHEEL while holding it down. - Save the current preset if you want to keep the modified EXP-1 settings, otherwise, press EXIT, then select a different preset using the DATA WHEEL to erase your changes.
EXP-1 Menus:
- Expression Mode Enable — (Off, Amp, Stomp, Mod, Delay, Reverb, Volume) Select the category that you want to control with the EXP-1 in Expression mode, or select «Off» if you want the pedal to be OFF in Expression mode.
You must have an effect selected for the current preset on the amplifier (or in Fender FUSE) to make that category of effect become available for selection in this menu. - Expression Mode Parameter — (Variable) Select the parameter that you want to control with the EXP-1 in Expression mode. Your options will vary depending on the category you selected in the Expression Mode Enable menu above, and the effect module that is selected in the current preset.
- Expression Mode Heel/Toe — (Variable) Use these two menus to set the level of the active parameter (selected in the menu above) with the heel of the pedal in the fully down position (Heel Setting) and with the toe of the pedal in the fully down position (Toe Setting). Range options will vary depending on your selection in the Expression Mode Parameter menu above.
- Expression Mode Type — (Capture, Live) If «Live» is selected, the current pedal position will override the stored preset setting for the assigned expression pedal parameter when a preset is first selected. If «Capture» is selected, the pedal is disabled until you move the pedal after a preset is first selected.
- Expression Effect Bypass — (On/Off) Select «On» to bypass (turn off) the effect currently selected in the Expression Mode Enable menu when switching the EXP-1 to Volume mode. Select «Off» to leave the effect active (keep on).
- Expression Parameter Restore — (On/Off) Select «On» to return the Expression Mode Parameter to the stored preset value when switching the EXP-1 to Volume mode. Select «Off» if you want the parameter to be left set to the position of the pedal (toe position) when switching to Volume mode.
- Volume Mode Behavior — (Volume/Off) Select «Volume» if you want the pedal to control the master volume in Volume mode. Select «Off» if you want the pedal to be OFF when switched to Volume mode.
- Volume Mode Heel/Toe — (0–100%) Use these two menus to set the master volume level with the heel of the pedal in the fully down position (Heel Volume) and with the toe of the pedal in the fully down position (Toe Volume).
- Pedal Initial Source — (From Preset/From Pedal) Select «From Preset» if you want the EXP-1 mode to switch to the Preset Default mode (see note below) each time you select a preset. Select «From Pedal» if you want the EXP-1 to remain in whichever mode the EXP-1 is currently in as you change presets. The Pedal Initial Source setting is a global setting. It is not associated with any preset and does not need to be saved; it stays set to the current selection.
Preset Default mode is the mode (volume or expression) that the EXP-1 is in when you save the preset. You can change the Preset Default mode by re-saving the preset with the EXP-1 in a different mode, or using Fender FUSE software.
Press the UTIL button to activate the Utility menus. Press the UTIL button repeatedly to step through each of the nine menus, listed below.
- Quick Access #1 / #2 / #3 — Use the first three Utility menus to choose Quick Access presets. You can then access those presets quickly from the footswitches (see Footswitches).
- Two-Button Footswitch Mode — Use this menu to assign functions to the two-button footswitch.
- Four-Button Footswitch Mode — Use this menu to lock the four-button footswitch in Mode 1, Mode 2 or Mode 3. Select «Normal» for normal, multi-mode operation. Tuner mode is always available, even when a mode is locked.
- Memory Lock — Use the Memory Lock menu to prevent accidental preset modifications. You will still be able to make temporary changes to presets with Memory Lock ON, but you won’t be able to save those changes until Memory Lock is switched OFF.
- Line Out Boost — Use the Line Out Boost menu to adjust the output level of the Line Out jacks to accommodate the input sensitivity of connected sound equipment.
- LCD Contrast — Use this menu to adjust the contrast of the Mustang display.
- About This Amp — This menu displays the Firmware version currently running on the amplifier. Use this information to determine if an update is available for your amplifier.
Speaker Outputs
Mustang V, only
The Mustang V head amplifier provides stereo speaker outputs that must both be connected to a stereo speaker cabinet such as the Mustang V 412, with four 12″ Celestion® G12P Rocket 50 speakers (recommended), or two 8Ω speaker cabinets capable of handling 75W each.
Line Outputs
These stereo XLR output jacks provide balanced, line-level signals for connection to mixing consoles or recording equipment. Press the GROUND LIFT switch «in» to disconnect the ground connections (pins-1) from the XLR jacks which may reduce line noise in some situations. Normally leave this switch in the «out» (grounded) position.
Aux / Phones Jacks
Auxiliary Input
You can use the Auxiliary jack to input audio into your Mustang amplifier for accompaniment. Connect the headphone output on your CD player or MP3 player to the AUX jack using a mini-stereo cable. Use the volume control on your player, together with the MASTER volume knob, to adjust the auxiliary volume level.
Phones Jack
Plug in your headphones, ear buds, or powered speakers to enjoy the Mustang’s stereo features. This jack may also be used as a stereo recording output. The amp’s speaker is muted when the PHONES jack is used.
Effects Loop
Connect external effects devices to your Mustang amplifier using the effects loop jacks.
The Mustang IV & V amplifiers can accept stereo or mono effects devices. Note that a mono-in, mono-out effect unit will use one send and one return, and only effect one side of the stereo image. The Mustang III amplifier only accepts mono effects devices.
Connect the FX SEND jack(s) to the input(s) on your external effects device and connect the FX RETURN jack(s) to the output(s) on your effects device.
USB Port
Use the USB port to connect the Mustang™ amplifier to your computer and take your music to the next level:
Factory Restore & Firmware Update
Factory Restore
You can restore your Mustang amplifier to the original factory settings if desired. All user presets will be erased!
To restore the Mustang amplifier to factory settings:
- Turn the amplifier OFF.
- Press and hold the EXIT button while turning the amplifier ON. Continue holding the EXIT button until it is no longer illuminated.
The FACTORY RESTORE function will erase all user modified presets. It will also restore any effect selections that have been modified using Fender FUSE software.
Firmware Update
From time to time, Fender may make available firmware updates for your Mustang amplifier to improve operation or to add new features. To update the firmware on your amplifier you will need to connect it through the USB port to a computer with Fender FUSE software and an internet connection.
Please see the Fender FUSE manual at https://fuse.fender.com/support for details.
FAQ
There are several great places you can go to learn more about your Mustang and music in general:
- www.fender.com/support
- Join a Fender Community forum where you can ask questions and read threads. There’s even a forum just for the Mustang: www.fender.com/community/forums
- Find music theory learning materials and sheet music at Hal Leonard Publications: www.halleonard.com
Videos
Fender Mustang Amp Series Tutorial Video
Documents / Resources
References
Download manual
Here you can download full pdf version of manual, it may contain additional safety instructions, warranty information, FCC rules, etc.
Download Fender Mustang Amplifier I/II/III/IV/V v.2 Manual
MUSTANG
™
III/IV/V
Advanced Manual
Introduction
This manual is your step-by-step guide to the advanced
features found on your Mustang™ III / IV / V amplifier. Turn to
page 8 for the Mustang I / II advanced manual. For information
on using Fender® FUSE™, Ableton® Live or Amplitube®, please
see the separate manuals for each product available at
.
Navigation
There are just a few basics of Mustang navigation that you
should know before you explore any further…
Selecting Presets
Turn the DATA WHEEL to select one of 100 presets.
You will find some presets you like and others that you want
to change…
Each preset stores the settings for:
• Amplifier type — 12 selections
• Effects — 4 categories, 37 selections total
• Knob levels — GAIN through REVERB (not MASTER)
♫
You can select and edit presets from your computer
using Fender® FUSE™ software, available free at
Master Volume
The MASTER volume knob is always «active.» That means the
position of the MASTER knob always shows the true master
volume setting, unlike the programmable knobs.
(Always turn the MASTER volume knob first to adjust the
overall volume output of your Mustang amplifier.)
Programmable Knobs
Because the setting of every knob (except MASTER) is part of
each preset, the «programmable» knobs are not active and
the knob positions will NOT show their actual settings when a
preset is first selected.
How do I activate a programmable knob? The moment you
turn any programmable knob it instantly becomes active and
it will remain active until you select a different preset, at which
time all the programmable knobs become inactive again.
Press the DATA WHEEL to see what the preset settings are for
all the programmable knobs before you turn them. Press EXIT
to return to Play mode.
Press the DATA WHEEL a second time to see where your
effects are located in the Guitar Signal Processing Path. Press
EXIT to return to Play mode.
♫
You can change the order of effects in the Signal Path
using Fender® FUSE™ software.
Preset contents are displayed
on screen for each preset
DATA
WHEEL
MASTER volume is
always active
PROGRAMMABLE knobs are not active unless turned
Turn any PROGRAMMABLE knob to activate it
To view preset knob settings, push the DATA WHEEL
To view the Signal Path, push the DATA WHEEL twice.
x2
2
f e n d e r . c o m