
В настоящий момент товары недоступны для заказа на samsung.com/ru
В настоящий момент товары недоступны для заказа на samsung.com/ru
Выберите свое местоположение и язык.
-
Настройка
Как узнать дату изготовления (производства) техники SamsungХотите узнать дату производства вашей техники Samsung? Ответ в этой статье.
-
Samsung Pay: как использовать, обзор, список банков, смартфонов, часовСамая свежая информация о сервисе Samsung Pay для РФ и РБ. Список банков, платежных систем, смартфонов и часов. Инструкции по регистрации и добавлению карт
-
Список банков, которые работают с Samsung Pay в БеларусиСписок банков для Беларуси в этой статье. Информация обновляется.
-
Как начать пользоваться Samsung Pay на носимых устройствахУзнайте подробнее о ‘Как начать пользоваться Samsung Pay на носимых устройствах’ с помощью службы поддержки Samsung. Часто задаваемые вопросы о Samsung Pay.
-
Bluetooth
Сопряжение Galaxy Buds+ с мобильным устройствомУзнайте подробнее о ‘Сопряжение Galaxy Buds+ с мобильным устройством’ с помощью службы поддержки Samsung. Часто задаваемые вопросы о мобильных устройствах Samsung Galaxy
-
Bluetooth
Что делать, если наушники Galaxy Buds+ не подключаются к смартфону Samsung GalaxyЧасто задаваемые вопросы о мобильных устройствах Samsung. Узнайте подробнее о ‘Что делать, если наушники Galaxy Buds+ не подключаются к смартфону Galaxy’ с помощью службы поддержки Samsung.
-
Питание / Зарядка
Samsung Galaxy Buds+ не заряжаютсяУзнайте подробнее о ‘Samsung Galaxy Buds+ не заряжаются’ с помощью службы поддержки Samsung. Часто задаваемые вопросы о мобильных устройствах Samsung Galaxy.
-
Звук / Динамик / Микрофон
Как управлять звонками на Samsung Galaxy Buds +Узнайте подробнее о ‘Как управлять звонками на Samsung Galaxy Buds +’ с помощью службы поддержки Samsung. Часто задаваемые вопросы о мобильных устройствах Samsung.
-
Использование
Какой уровень водонепроницаемости в Galaxy Buds Pro?Часто задаваемые вопросы о бытовой технике Samsung. Узнайте подробнее о ‘Какой уровень водонепроницаемости в Galaxy Buds Pro’ с помощью службы поддержки Samsung.
-
Использование
Как работает умное шумоподавление в наушниках Galaxy Buds Pro и Galaxy Buds2 ProУзнайте подробнее о ‘Как работает умное шумоподавление в наушниках Galaxy Buds Pro и Galaxy Buds2 Pro’ с помощью службы поддержки Samsung. Часто задаваемые вопросы о мобильных устройствах Samsung.
-
Обновление
Как обновить прошивку на носимых устройствах Samsung Galaxy (Watch, Buds, Fit)Часто задаваемые вопросы о технике Мобильные устройства Samsung. Узнайте подробнее о ‘Как обновить прошивку на носимых устройствах Samsung Galaxy (Watch, Buds, Fit)’ с помощью службы поддержки Samsung.
-
Использование
Как синхронизировать левый и правый наушники Samsung Galaxy между собойУзнайте подробнее о ‘Как синхронизировать левый и правый наушники Samsung Galaxy между собой’ с помощью службы поддержки Samsung. Часто задаваемые вопросы о мобильных устройствах Samsung.
-
Звук / Динамик / Микрофон
Что делать, если звук в одном наушнике Galaxy Buds тише, чем во второмУзнайте подробнее ‘Что делать, если звук в одном наушнике Galaxy Buds тише, чем во втором’ с помощью службы поддержки Samsung. Часто задаваемые вопросы о технике Мобильные устройства Samsung.
-
Использование
Как очистить наушники Galaxy BudsУзнайте подробнее о ‘Как прочистить наушники Galaxy Buds’ с помощью службы поддержки Samsung. Часто задаваемые вопросы о технике Мобильные устройства Samsung.
-
Настройка
Что делать, если перестали поступать уведомления на Samsung Galaxy Watch?Узнайте подробнее о ‘Что делать, если перестали поступать уведомления на Samsung Galaxy Watch?’ с помощью службы поддержки Samsung. Часто задаваемые вопросы о технике Samsung Galaxy Watch.
-
Использование
Как подключить и отключить беспроводную метку SmartTagЧасто задаваемые вопросы о технике Мобильные устройства Samsung. Узнайте подробнее о ‘Как подключить и отключить беспроводную метку SmartTag’ с помощью службы поддержки Samsung.
-
Использование
Что делать, если не работает один наушник Samsung Galaxy BudsУзнайте подробнее о ‘Что делать, если не работает один наушник Samsung Galaxy Buds’ с помощью службы поддержки Samsung. Часто задаваемые вопросы о технике Мобильные устройства Samsung.
-
Использование
Как установить соединение Galaxy Watch со смартфономУзнайте подробнее ‘Как установить соединение Galaxy Watch со смартфоном’ с помощью службы поддержки Samsung. Часто задаваемые вопросы о мобильных устройствах Samsung Galaxy
-
Использование
Как подключить Galaxy Buds к другим устройствамУзнайте, как выполнить сопряжение наушников Galaxy Buds с другими устройствами.
-
Использование
Как зарядить наушники Galaxy BudsЧасто задаваемые вопросы о Мобильных Устройствах. Узнайте больше о том, Как зарядить наушники Galaxy Buds, с помощью справочной системы Samsung Support.
-
Использование
Как изменить циферблат на Galaxy WatchЧасто задаваемые вопросы о мобильных устройствах Samsung. Узнайте подробнее о ‘Как изменить циферблат на Galaxy Watch’ с помощью службы поддержки Samsung.
-
Использование
Как пользоваться часами Galaxy WatchЧасто задаваемые вопросы о Мобильных Устройствах. Узнайте больше о том, Как пользоваться часами Galaxy Watch, с помощью справочной системы Samsung Support.
-
Использование
Как обновить программное обеспечение наушников Galaxy Buds, Galaxy Buds2, Galaxy Buds Live и Galaxy Buds ProЧасто задаваемые вопросы о Мобильных Устройствах. Узнайте больше о том, Как обновить программное обеспечение наушников Galaxy Buds, с помощью справочной системы Samsung Support.
-
Samsung Pay
Как совершить оплату с помощью Galaxy Watch?FAQ по использованию на мобильных устройствах. Узнайте подробнее, как совершить оплату с помощью Galaxy Watch, в Samsung Support.
-
Использование
Как найти Galaxy Watch и наушники Galaxy Buds с помощью SmartThings FindЧасто задаваемые вопросы о мобильных устройствах Samsung. Узнайте подробнее о ‘Как найти Galaxy Watch и наушники Galaxy Buds с помощью SmartThings Find’ с помощью службы поддержки Samsung.
-
Использование
Как управлять камерой смартфона Samsung Galaxy с носимых устройствЧасто задаваемые вопросы о мобильных устройствах Samsung. Узнайте подробнее о ‘Как управлять камерой смартфона Samsung Galaxy с носимых устройств’ с помощью службы поддержки Samsung.
-
Использование
Как носить наушники SamsungЧасто задаваемые вопросы о мобильных устройствах Samsung. Из этого раздела вы узнаете, как носить наушники Samsung.
-
Использование
Что делать, если микрофон наушников Galaxy Buds не работаетЧасто задаваемые вопросы о мобильных устройствах Samsung Mobile. В этом разделе справки и поддержки Samsung вы узнаете, что делать, если на наушниках Galaxy Buds не работает микрофон.
-
Использование
Как подключить ваше устройство Galaxy к другим устройствам с помощью приложения Подключенные устройстваFAQ для мобильных устройств. Узнайте подробнее, Как подключить ваше устройство Galaxy к другим устройствам с помощью приложения Подключенные устройства, в Samsung Support.
-
Использование
Низкое или плохое качество звука в наушниках SamsungЧасто задаваемые вопросы о Samsung Mobile. В этом разделе справки и поддержки Samsung вы узнаете о причинах низкого уровня громкости или недостаточного качества звука в наушниках.
-
Использование
Как использовать сенсорную команду наушников Samsung Galaxy BudsУзнайте, как настраивать и использовать сенсорные команды на серии Samsung Galaxy Buds2.
-
Использование
Влагозащита Galaxy WatchFAQ для мобильных устройств. Узнайте подробнее о Влагозащита Galaxy Watch, в Samsung Support.
-
Использование
Как использовать виртуальную SIM-карту (eSIM) на часах Galaxy WatchУзнайте подробнее о ‘Как использовать виртуальную SIM-карту (eSIM) на часах Galaxy Watch’ с помощью службы поддержки Samsung. Часто задаваемые вопросы о мобильных устройствах Samsung.
-
Использование
Измерьте состав своего тела с помощью серии Galaxy WatchВы можете измерить состав своего тела с помощью датчика BIA на Galaxy Watch.
-
Использование
Как измерить ЭКГ с помощью Galaxy WatchИзмерение ЭКГ с помощью Galaxy Watch позволяет следить за состоянием вашего сердца.
-
Использование
Что делать, если Galaxy Watch не подключаются к смартфону SamsungУзнайте подробнее о ‘Что делать, если Galaxy Watch не подключаются к смартфону Samsung’ с помощью службы поддержки Samsung. Часто задаваемые вопросы о мобильных устройствах Samsung.
-
Использование
Что делать, если Bluetooth-гарнитура не подключается к Samsung GalaxyЧасто задаваемые вопросы о мобильных устройствах Samsung. Узнайте подробнее о ‘Что делать, если Bluetooth-гарнитура не подключается к Samsung Galaxy’ с помощью службы поддержки Samsung.
-
Samsung Apps
Используйте приложение Samsung Find, чтобы поделиться своим местоположением с друзьями, ребенком, семьей и другими контактамиУзнайте, как использовать приложение Samsung Find, чтобы делиться своим местоположением с друзьями, семьей и другими контактами.
-
Использование
Что делать, если время на Galaxy Watch отображается неправильноУзнайте подробнее о ‘Что делать, если время на Galaxy Watch отображается неправильно’ с помощью службы поддержки Samsung. Часто задаваемые вопросы о мобильных устройствах Samsung.
-
Батарея
Беспроводная и обратная беспроводная зарядка Galaxy Watch Ultra и Watch7Узнайте, как изменения в дизайне у Galaxy Watch Ultra и Watch7 влияют на возможность беспроводной зарядки устройства.
-
Использование
Как заменить амбушюры на Galaxy Buds3 ProУзнайте подробнее о ‘Как заменить амбушюры на Galaxy Buds3 Pro’ с помощью службы поддержки Samsung. Часто задаваемые вопросы о мобильных устройствах Samsung.
-
Использование
Чем отличаются Galaxy Bugs3/Buds3Pro и другие модели наушников SamsungУзнайте подробнее о ‘Чем отличаются Galaxy Bugs3/Buds3Pro и другие модели наушников Samsung’ с помощью службы поддержки Samsung. Часто задаваемые вопросы о мобильных устройствах Samsung.
-
Использование
Чем Galaxy Watch7 отличаются от предыдущих моделейУзнайте подробнее о ‘Чем Galaxy Watch7 отличаются от предыдущих моделей’ с помощью службы поддержки Samsung. Часто задаваемые вопросы о мобильных устройствах Samsung.
-
Использование
Используйте мониторинг сна Samsung Health на своих Samsung Galaxy Watch и FitУзнайте, как использовать функцию мониторинга сна в приложении Samsung Health и улучшить ночной сон.
-
Звук / Динамик / Микрофон
Что делать, если вы слышите статический шум при использовании наушников Samsung Galaxy BudsУзнайте, что делать, если в наушниках Galaxy Buds слышен статический шум.
-
Использование
Как использовать функцию обнаружения риска апноэ во сне на Samsung Galaxy WatchУзнайте, как включить и использовать функцию апноэ во сне на Galaxy Watch.
-
Использование
Что делать, если сенсорный экран Galaxy Watch не работаетВоспользуйтесь данным руководством, чтобы устранить неисправности сенсорного экрана, восстановить реагирование экрана или сбросить настройки часов Galaxy Watch.
-
Батарея
Как зарядить Samsung Galaxy Watch с зарядным устройством или без негоУзнайте о различных методах зарядки и функциях экономии заряда батареи, доступных на ваших часах Galaxy Watch.
-
Питание / Зарядка
Как использовать функцию беспрозодная обратная зарядка на вашем устройстве GalaxyУзнайте, как использовать функцию беспрозодная обратная зарядка для зарядки телефона Galaxy и других устройств.
-
Звук / Динамик / Микрофон
Galaxy Buds: можно ли использовать только один наушникМожно ли использовать только один наушник Galaxy Buds? Читайте рекомендации от производителя в этой статье.
-
Звук / Динамик / Микрофон
Galaxy Buds: какие улучшения у Galaxy Buds по сравнению с IconX 2018Узнайте подробнее ‘Galaxy Buds: какие улучшения у Galaxy Buds по сравнению с IconX 2018’ с помощью службы поддержки Samsung. Часто задаваемые вопросы о мобильных устройствах Samsung Galaxy
-
Что делать, если забыт PIN-код от Samsung Pay. Как восстановить?Забыли PIN-код от Samsung Pay? Информация от производителя в этой статье
-
Как добавить банковскую карту в Samsung PayУзнайте подробнее о ‘Как добавить банковскую карту в Samsung Pay’ с помощью службы поддержки Samsung. Часто задаваемые вопросы о Samsung Pay.
-
Приложения
Как обновить ПО и приложения на вашем Samsung Galaxy Watch Active2Часто задаваемые вопросы о мобильных устройствах Samsung. Узнайте подробнее о ‘Как обновить ПО и приложения на вашем Samsung Galaxy Watch Active2’ с помощью службы поддержки Samsung.
-
Bluetooth
Как подключить Bluetooth наушники к Galaxy Watch Active 2Узнайте подробнее ‘Как подключить Bluetooth наушники к Galaxy Watch Active 2’ с помощью службы поддержки Samsung. Часто задаваемые вопросы о мобильных устройствах Samsung Galaxy
-
Приложения
Как настроить приложения на вашем Samsung Galaxy Watch Active2Как настроить приложения на вашем Samsung Galaxy Watch Active2
-
Мультимедийный контент
Как слушать музыку на Galaxy BudsУзнайте подробнее о ‘Как слушать музыку на Galaxy Buds’ с помощью службы поддержки Samsung. Часто задаваемые вопросы о технике Мобильные устройства Samsung.
-
Спецификации / Функции
Что делать, если GPS не работает должным образом на Samsung Galaxy Watch Active2Узнайте подробнее ‘Что делать, если GPS не работает должным образом на Samsung Galaxy Watch Active2’ с помощью службы поддержки Samsung. Часто задаваемые вопросы о мобильных устройствах Samsung Galaxy
-
Звук / Динамик / Микрофон
Что делать, если при использовании наушников с Galaxy Watch Active 2 низкое качество звукаУзнайте подробнее ‘Что делать, если при использовании наушников с Galaxy Watch Active 2 низкое качество звука’ с помощью службы поддержки Samsung. Часто задаваемые вопросы о мобильных устройствах Samsung Galaxy
-
Звук / Динамик / Микрофон
Как избежать задержки звука на Galaxy Buds+Узнайте подробнее ‘Как избежать задержки звука на Galaxy Buds+’ с помощью службы поддержки Samsung. Часто задаваемые вопросы о мобильных устройствах Samsung Galaxy
-
Настройка
Функция 360 Audio на Galaxy Buds ProУзнайте подробнее о ‘Функция 360 Audio на Galaxy Buds Pro’ с помощью службы поддержки Samsung. Часто задаваемые вопросы о технике Мобильные устройства Samsung.
-
Использование
Что такое мобильная экосистема Samsung GalaxyЧасто задаваемые вопросы о Мобильных устройствах Samsung. Узнайте подробнее о ‘Что такое мобильная экосистема Samsung Galaxy’ с помощью службы поддержки Samsung.
-
Использование
Советы по использованию Galaxy Buds ProЧасто задаваемые вопросы о технике Мобильные устройства Samsung. Узнайте подробнее о ‘Советы по использованию Galaxy Buds Pro’ с помощью службы поддержки Samsung.
-
Использование
Как пользоваться виджетами для Samsung Galaxy Buds ProЧасто задаваемые вопросы о технике Мобильные устройства Samsung. Узнайте подробнее о ‘Как пользоваться виджетами для Samsung Galaxy Buds Pro’ с помощью службы поддержки Samsung.
-
Звук / Динамик / Микрофон
Что делать, если в наушниках Galaxy Buds Pro разная громкость?Часто задаваемые вопросы о технике Samsung Galaxy Watch. Узнайте подробнее о ‘Что делать, если в наушниках Galaxy Buds Pro разная громкость ?’ с помощью службы поддержки Samsung
-
Звук / Динамик / Микрофон
Советы по правильному ношению Samsung Galaxy Buds2Часто задаваемые вопросы о технике Мобильные устройства Samsung. Узнайте подробнее о ‘Советы по правильному ношению Samsung Galaxy Buds2’ с помощью службы поддержки Samsung.
-
Настройка
Как настроить быстрые ответы на Galaxy WatchЧасто задаваемые вопросы о технике Samsung Galaxy. Узнайте подробнее о ‘Как настроить быстрые ответы на Galaxy Watch?’ с помощью службы поддержки Samsung
-
Использование
Как измерить состав тела с Galaxy Watch4Узнайте подробнее о ‘Как измерить состав тела с Galaxy Watch4’ с помощью службы поддержки Samsung. Часто задаваемые вопросы о технике Мобильные устройства Samsung.
-
Использование
Как перенести звукозапись с Galaxy Watch на смартфон Samsung GalaxyУзнайте подробнее о ‘Как перенести звукозапись с Galaxy Watch на смартфон Samsung Galaxy’ с помощью службы поддержки Samsung. Часто задаваемые вопросы о технике Мобильные устройства Samsung.
-
Использование
Что представляет собой функция Galaxy Buds «Аудио 360»?FAQ для мобильных устройств. Узнайте подробнее, Что представляет собой функция Galaxy Buds «Аудио 360», в разделе поддержки Samsung.
-
Использование
Как управлять виджетами и карточками на Galaxy WatchЧасто задаваемые вопросы о мобильных устройствах Samsung. Узнайте подробнее о ‘Как управлять виджетами и карточками на Galaxy Watch’ с помощью службы поддержки Samsung.
-
Использование
Как сделать снимок экрана на часах Galaxy Watch?Часто задаваемые вопросы о Мобильных Устройствах. Узнайте больше о том, Как сделать снимок экрана на часах Galaxy Watch, с помощью справочной системы Samsung Support.
-
Использование
Как изменить отображаемое имя наушников Galaxy Buds?Часто задаваемые вопросы о Мобильных Устройствах. Узнайте больше о том, Как изменить отображаемое имя наушников Galaxy Buds, с помощью справочной системы Samsung Support.
-
Использование
Чем отличаются Galaxy Buds2, Buds Live и Buds Pro?FAQ для мобильных устройств. Узнайте подробнее, чем отличаются Galaxy Buds2, Buds Live и Buds Pro, в Samsung Support.
-
Использование
Что делать, если возникла проблема со звуком на Galaxy WatchЧасто задаваемые вопросы о мобильных устройствах Samsung. Узнайте подробнее о ‘Что делать, если возникла проблема со звуком на Galaxy Watch’ с помощью службы поддержки Samsung.
-
Камера
Что делать, если не работает функция управления камерой телефона с часов Galaxy WatchУзнайте подробнее о ‘Что делать, если не работает функция управления камерой телефона с часов Galaxy Watch’ с помощью службы поддержки Samsung. Часто задаваемые вопросы о мобильной технике Samsung.
-
Использование
Техника безопасности при эксплуатации устройства GalaxyFAQ для мобильных устройств. Узнайте подробнее, как обеспечивается Техника безопасности при эксплуатации устройства Galaxy в Samsung Support.
-
Обновление
Обновление программного обеспечения для наушников SamsungЧасто задаваемые вопросы о мобильных устройствах Samsung. Из этого раздела вы узнаете о том, как выполнять обновление программного обеспечения для наушников Samsung.
-
Использование
Как настроить клавишу «Домой» на часах Samsung Galaxy WatchЧасто задаваемые вопросы о Samsung Mobile. В этом разделе справки и поддержки Samsung вы узнаете, как настроить клавишу «Домой» на часах Samsung Galaxy Watch.
-
Использование
Самодиагностика портативных устройств GalaxyЧасто задаваемые вопросы по работе на мобильных устройствах. Узнайте больше о Самодиагностике портативных устройств Galaxy, в Samsung Support.
-
Спецификации / Функции
Советы и методы использования спортивного ремешка D-Buckle для серии Galaxy WatchРаскройте весь потенциал ремешка D-Buckle Sport серии Galaxy Watch с советами и рекомендациями экспертов. Узнайте, как регулировать, обслуживать и настраивать ремешок для часов, чтобы сделать его индивидуальным и стильным. Улучшите свои часы Galaxy Watch с помощью этого универсального аксессуара, который дополнит ваш образ и сделает вашу игру на умных часах еще лучше.
-
Использование
Как настроить порядок упражнений на Galaxy WatchУзнайте подробнее о ‘Как настроить порядок упражнений на Galaxy Watch’ с помощью службы поддержки Samsung. Часто задаваемые вопросы о мобильных устройствах Samsung.
-
Использование
Руководство пользователя приложения «Компас» для Galaxy WatchЗнание того, как использовать компас вашего Galaxy Watch, поможет вам добраться туда, куда вам нужно, когда вы не совсем уверены, куда повернуть.
-
Использование
Как сделать резервную копию данных на Samsung Galaxy WatchЧасто задаваемые вопросы о мобильных устройствах Samsung. Узнайте подробнее о ‘Как сделать резервную копию данных на Samsung Galaxy Watch’ с помощью службы поддержки Samsung.
-
Использование
Как включить режим «Сон» или «Театр» на Galaxy WatchУзнайте подробнее о ‘Как включить режим «Сон» или «Театре» на Galaxy Watch’ с помощью службы поддержки Samsung. Часто задаваемые вопросы о мобильных устройствах Samsung.
-
Использование
Как почистить ваше устройство Samsung GalaxyУчитывая, как грязь и микробы скапливаются на устройствах, которыми мы пользуемся каждый день, разумно научиться чистить устройство Samsung Galaxy.
-
Использование
Как правильно носить и ухаживать за Galaxy Watch/FitСледуя этому руководству по правильному ношению и обслуживанию устройства, убедитесь, что ваше устройство Galaxy Watch/Fit находится в хорошем состоянии.
-
Использование
Как поменять амбушюры у наушников GalaxyУзнайте, как легко заменить насадки для наушников Galaxy, с помощью нашего подробного руководства.
-
Samsung Apps
Используйте приложение Samsung Find, чтобы найти потерянное устройствоУзнайте, как использовать приложение Samsung Find для поиска утерянных устройств и отслеживания Samsung SmartTags.
-
Samsung Apps
Возможности приложения Samsung FindОткройте для себя различные функции приложения Samsung Find.
-
Настройка
Используйте беззвучные режимы на своих Samsung Galaxy WatchУзнайте, как использовать различные беззвучные режимы на часах Galaxy.
-
Samsung Apps
Просмотр количества шагов в Samsung HealthНаучитесь использовать устройства Galaxy для отслеживания количества шагов в приложении Samsung Health.
-
Обновление
Как обновить программное обеспечение и приложения на Samsung Galaxy WatchУзнайте, как обновить программное обеспечение и приложения ваших часов Samsung Galaxy.
-
Использование
Что делать, если приложение Samsung Galaxy Watch выходит из строя, зависает или не отвечаетУзнайте, что делать, если приложение на ваших часах Samsung Watch выходит из строя, зависает или не отвечает.
-
Использование
Как подключить часы Galaxy Watch к устройству Samsung GalaxyУзнайте, как подключить Galaxy Watch к устройству Samsung Galaxy, с помощью этого пошагового руководства.
-
Настройка
Как использовать телефон или часы Samsung Galaxy для управления уведомлениями на носимом устройствеУзнайте, как использовать телефон Galaxy и Galaxy Watch для включения и отключения уведомлений на носимом устройстве.
-
Питание / Зарядка
Что делать, если наушники Samsung Galaxy не включаются и не заряжаютсяУзнайте, что делать, если наушники Samsung Galaxy не включаются и не заряжаются.
-
Использование
Как установить или обновить приложение на устройстве с операционной системой Wear OSУзнай подробнее Как установить или обновить приложение на устройстве с операционной системой Wear OS с помощью службы поддержки Samsung. Часто задаваемые вопросы о мобильных устройствах Samsung Galaxy.
-
Обновление
Что делать, если на экране Galaxy Fit появляется восклицательный знак?Что делать, если на экране Galaxy Fit появляется восклицательный знак?
-
{{file.description}}
- Версия {{file.fileVersion}}
- {{file.fileSize}} MB
- {{file.fileModifiedDate}}
- {{file.osNames}}
Полезные ссылки
Другие программные инструменты и сервисы
Kies
Программа для создания резервных копий. Подойдет для всех смартфонов и планшетов Galaxy на Android от 2.3 до 4.3 и смартфонов Wave (Bada)
Читать дальше
Smart View
Приложение для просмотра мультимедийного контента с мобильного устройства или компьютера на телевизоре Samsung Smart TV
Читать дальше
Smart Switch
Программа для обновления прошивки и создания резервных копий. Подойдет для всех смартфонов и планшетов Galaxy на Android 4.3 и новее
Читать дальше
ДОПОЛНИТЕЛЬНАЯ ИНФОРМАЦИЯ
Информация о гарантии
Узнайте, что входит в гарантийные обязательства
Индивидуальная поддержка
Получите помощь от официальных центров поддержки
Новости и уведомления
Обьявления о важных продуктах и услугах
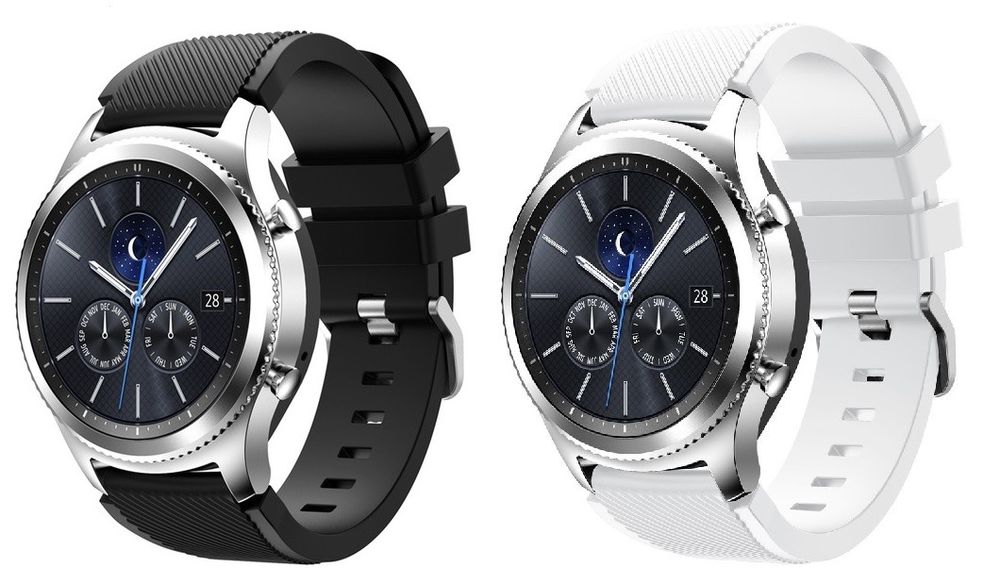
Смарт-часы Samsung Gear S3 Classic имеют широкий функционал. Но многие не пользуются даже половиной всех их возможностей, так как не любят разбираться в длинных руководствах. Поэтому мы собрали в этой инструкции все самое необходимое для начальной настройки часов, а также пояснили те пункты, которые могут вызвать затруднения.
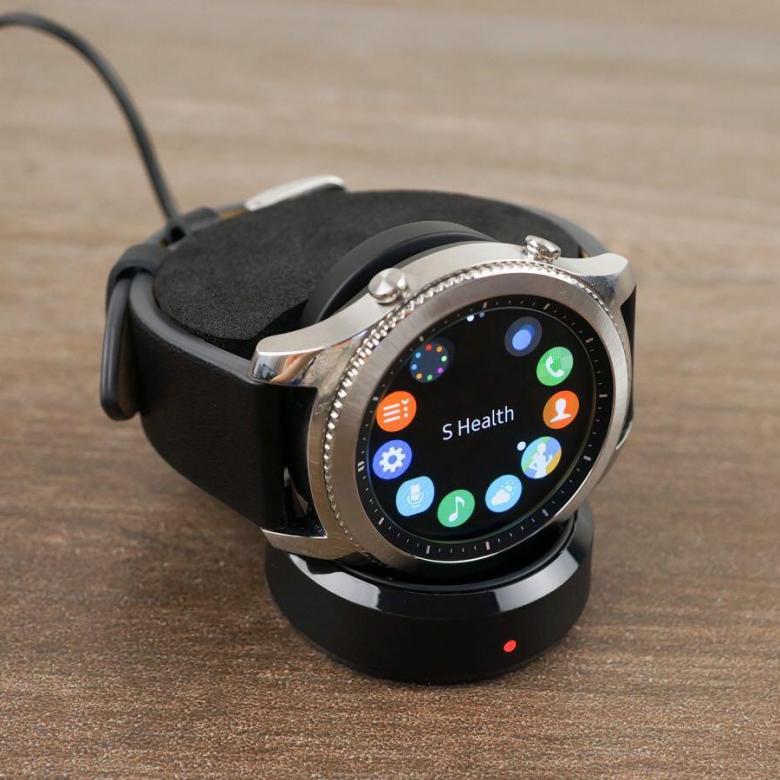
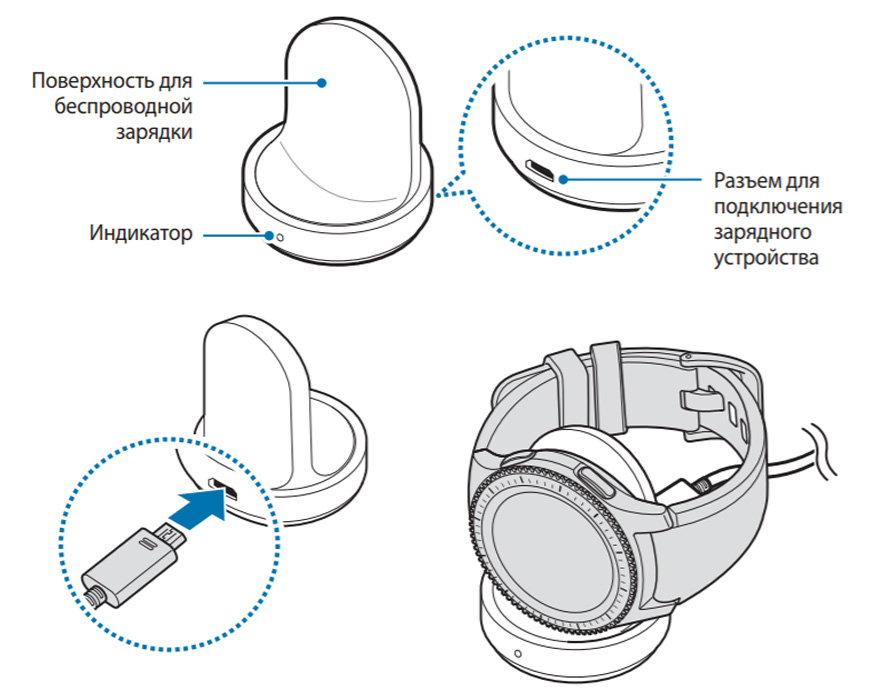
Для зарядки Samsung Gear S3 используйте док-станцию беспроводной зарядки, идущую в комплекте. Для этого вставьте в разъем док-станции штекер зарядного кабеля и подключите его к бытовой розетке. Положите на площадку док-станции умные часы, зарядка пойдет автоматически. Красный индикатор известит вас о том, что идет зарядка, а зеленый — о ее окончании. Мигание красного индикатора говорит о неполадках в док-станции. Попробуйте переподключить станцию и часы. При отсутствии изменений обратитесь в сервисный центр. Если вы подключите зарядный кабель с низким напряжением, док-станция известит вас об этом оранжевым индикатором.
Производитель рекомендует использовать только фирменную зарядку для часов или такую, которая одобрена компанией Samsung. В противном случае могут возникнуть сбои и поломки, которые производитель не будет устранять по гарантии. Если вы нашли подходящее стороннее устройство, то не забывайте о времени зарядки. При заряде от ПК или в мультизарядке совместно с другими гаджетами часы Gear S3 могут заряжаться дольше, чем от идущей в комплекте док-станции. Во время зарядки часов вы можете просматривать на них необходимую информацию, но тогда процесс пополнения энергии затянется. Если вы разрядите аккумулятор часов в ноль, то они сразу не включатся даже на док-станции. Вам придется несколько минут ждать, пока часы не оживут.
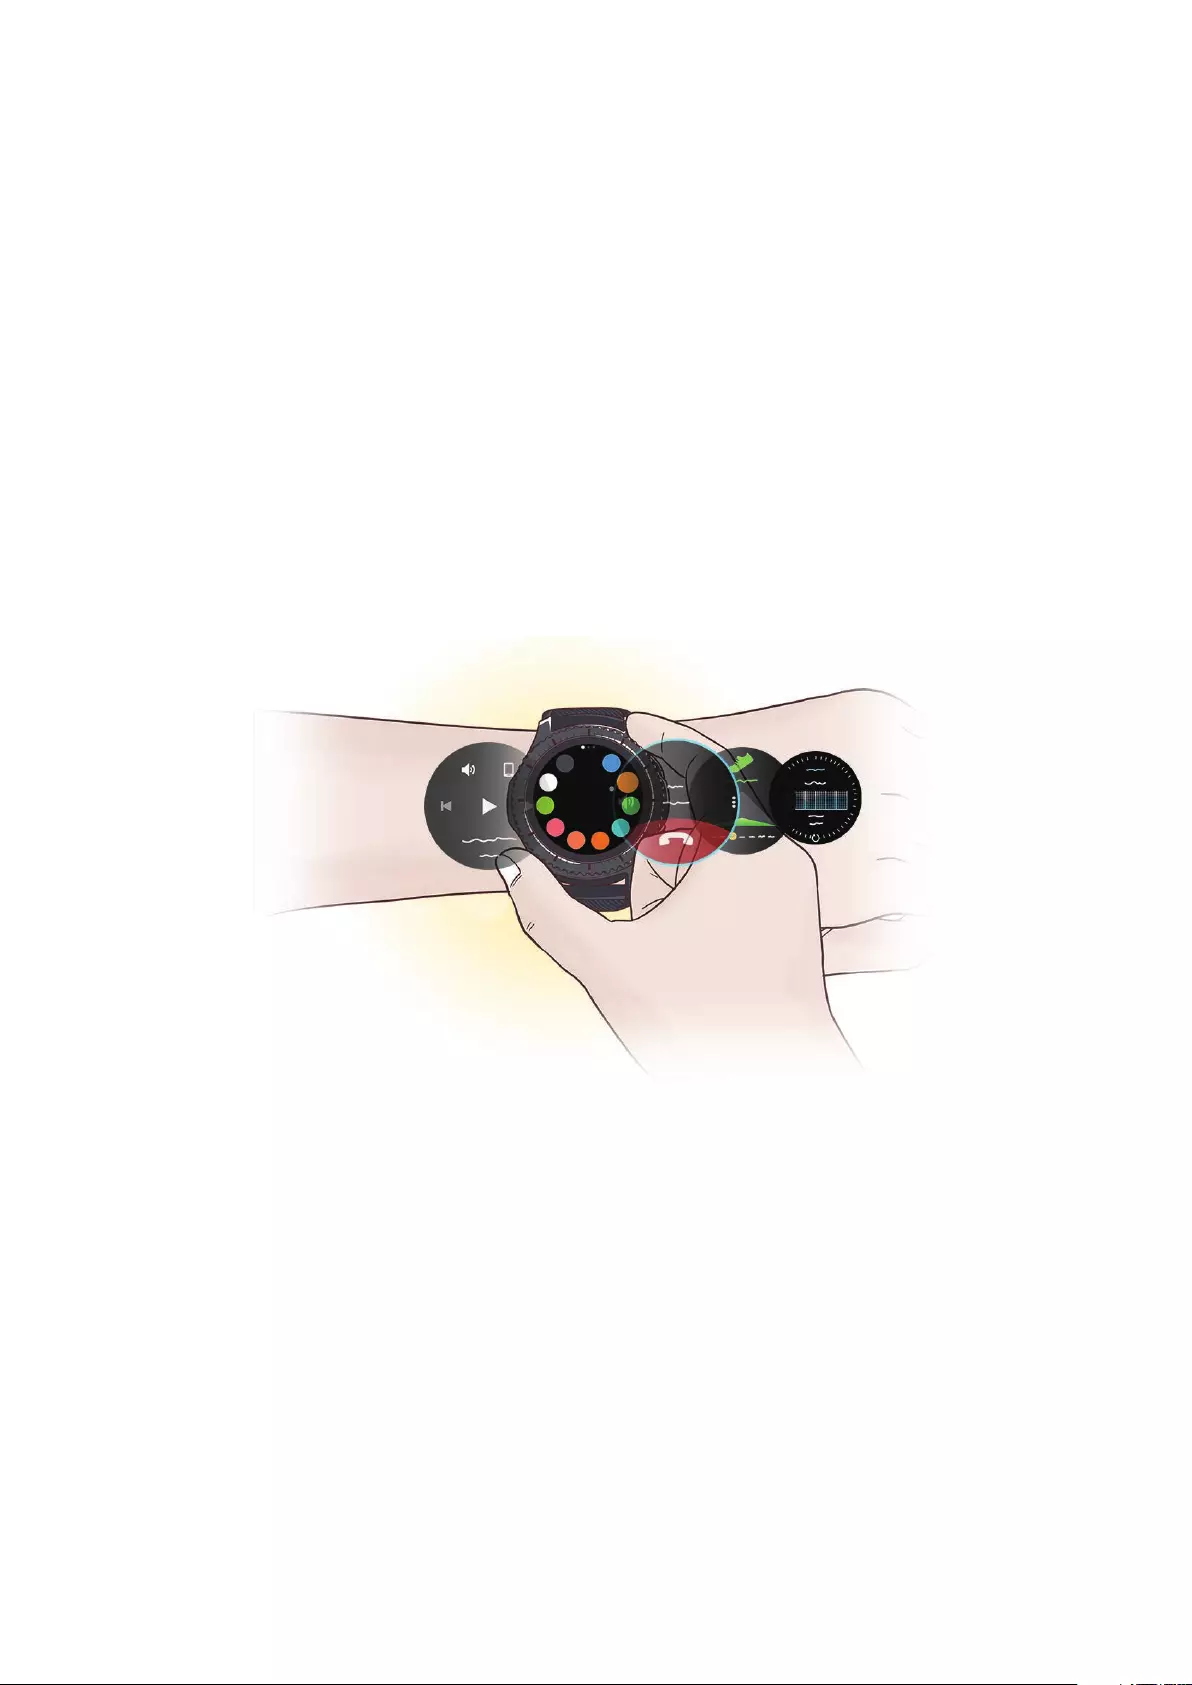
Как управлять часами
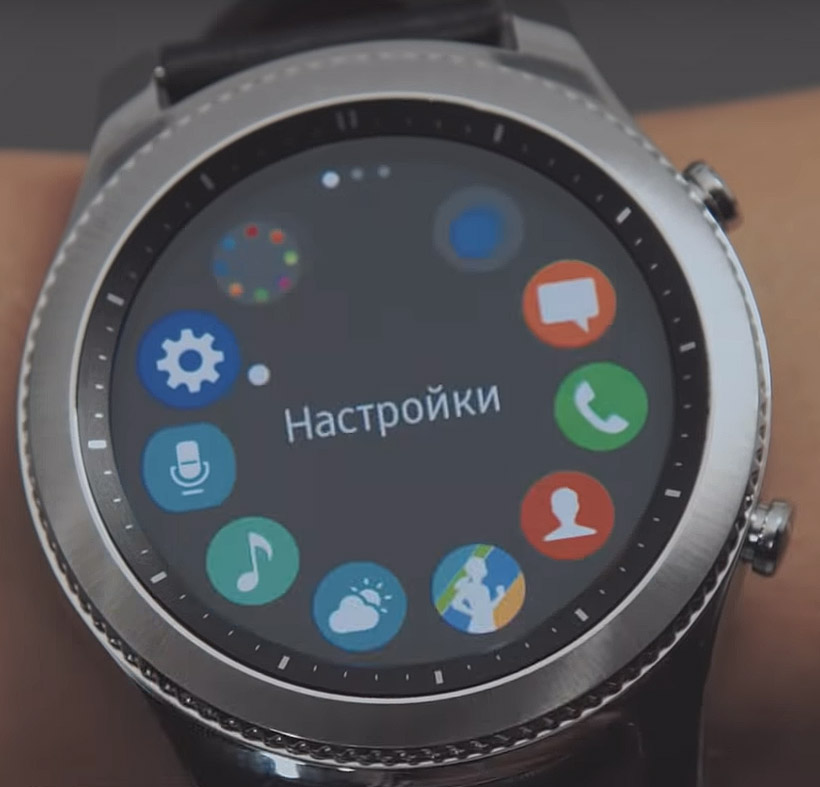
Управление часами происходит при помощи двух боковых кнопок, сенсорного экрана, безеля, жестов и голоса. Верхняя кнопка отвечает только за возврат на предыдущий экран. На нижнюю кнопку приходится несколько функций. Первым делом она отвечает за включение часов (для включения удерживайте ее несколько секунд) и включение экрана. С ее помощью вы сумеете перезагрузить гаджет при его зависании (для перезагрузки кнопку удерживают более семи секунд), перейти на экран приложений или экран часов.
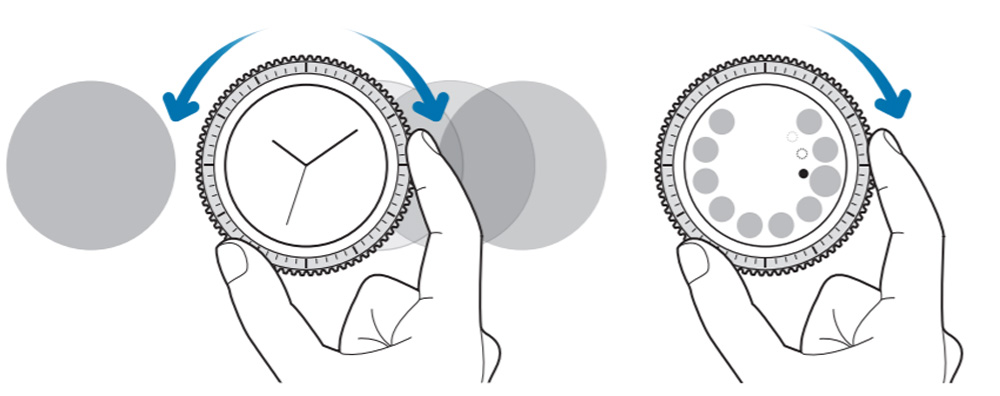
Безель (крутящееся кольцо на часах) помогает перемещаться между экранами или выбирать нужный пункт. Если вы находитесь на экране часов, то поворот безеля поможет листать экраны, просматривая их содержимое. Если с экрана часов повернуть безель влево (против часовой стрелки), будут видны уведомления. Он же поможет выбрать нужный объект, настроить уровень громкости, яркости, отклонить или принять входящий звонок. Сам безель содержит внутри себя магниты, поэтому не рекомендуется использовать его возле магнитных полей. Это может привести к его поломке.
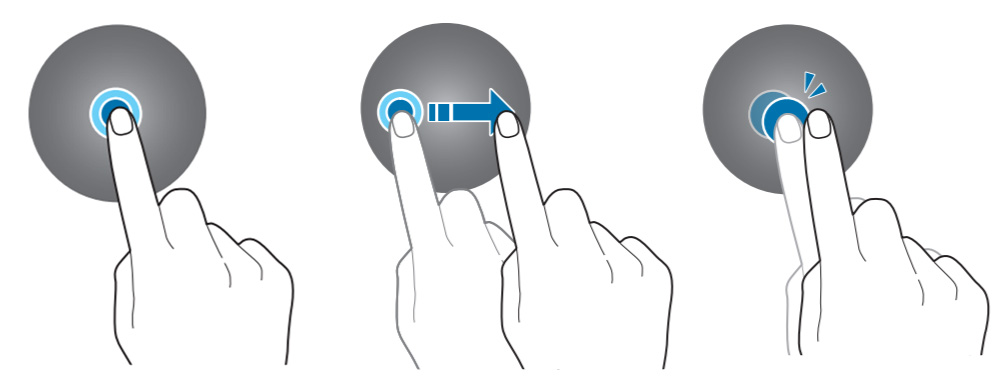
Управлять сенсорным экраном вы можете при помощи традиционных касаний: одно касание выделяет объект, касание с удержанием позволит редактировать его, удержание с перемещением переместит объект в новое место, двойное касание изменит масштаб, свайпы вправо, влево, вверх или вниз помогут перемещаться между экранами, открыть дополнительные настройки и пр. Сам экран оберегайте от соприкосновения с острыми предметами, сильного нажатия и электростатических разрядов. Часы не будут реагировать на касания, если вы касаетесь экрана слишком близко к краям, то есть за пределами области действия сенсора.
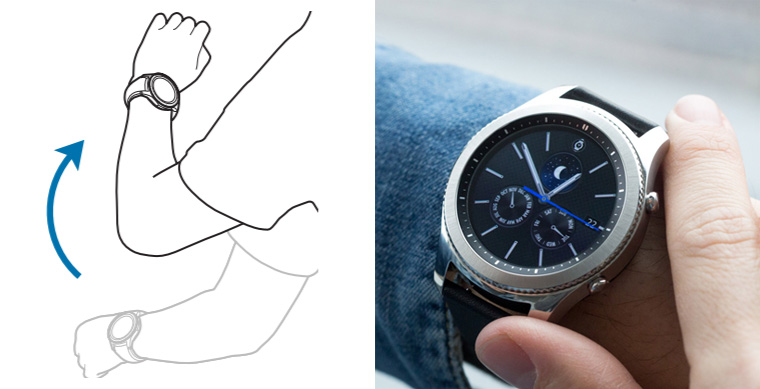
Жесты используются в смарт-часах Samsung Gear S3 Classic для включения и выключения экрана. Если вы хотите выключить экран, просто накройте его ладонью. А для включения поднимите запястье так, как будто вы собираетесь посмотреть время на наручных часах. Функция включения от такого жеста будет работать только в том случае, если вы включите ее в разделе «Настроек», категории «Устройство» и строке «Жест включения».
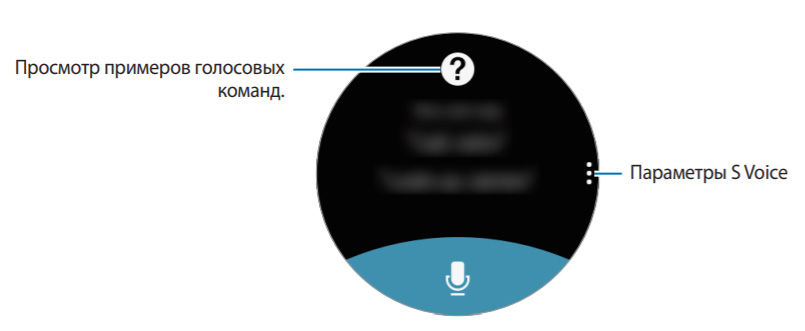
Голосовое управление используется для некоторых команд. Например, вы можете принять вызов, произнеся слово «Ответить» или отклонить его при помощи слова «Отклонить». Для записи команд, которые способны распознать часы, используется приложение S Voice. Разработчик предупреждает, что этот вариант управления можно использовать не во всех регионах, а само распознавание зависит от четкости и громкости произносимых команд. Разрешение на голосовое управление настраивается в конкретных меню. Например, в случае вызовов нужно перейти в раздел настроек, найти там раздел «Вызовы» и включить «Голосовой ответ». С помощью голоса также можно вводить текст.
Как подключить Samsung Gear S3 к телефону
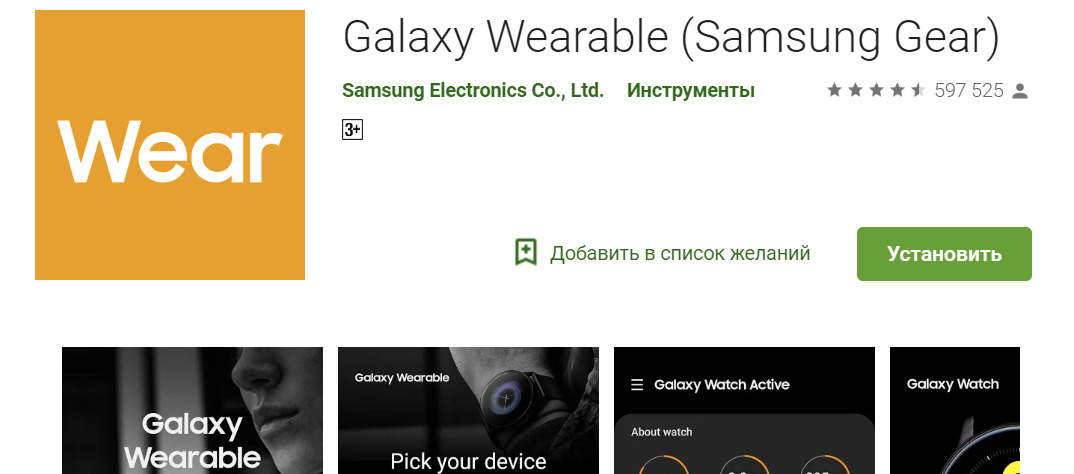
Для настроек часов через телефон скачайте на него мобильное приложение Samsung Gear (другое название Galaxy Wearable). Сделать это вы можете через приложение Play Market (для телефонов на ОС Android), в App Store (для телефонов на iOS) или в Galaxy Apps (для телефонов Samsung Android).
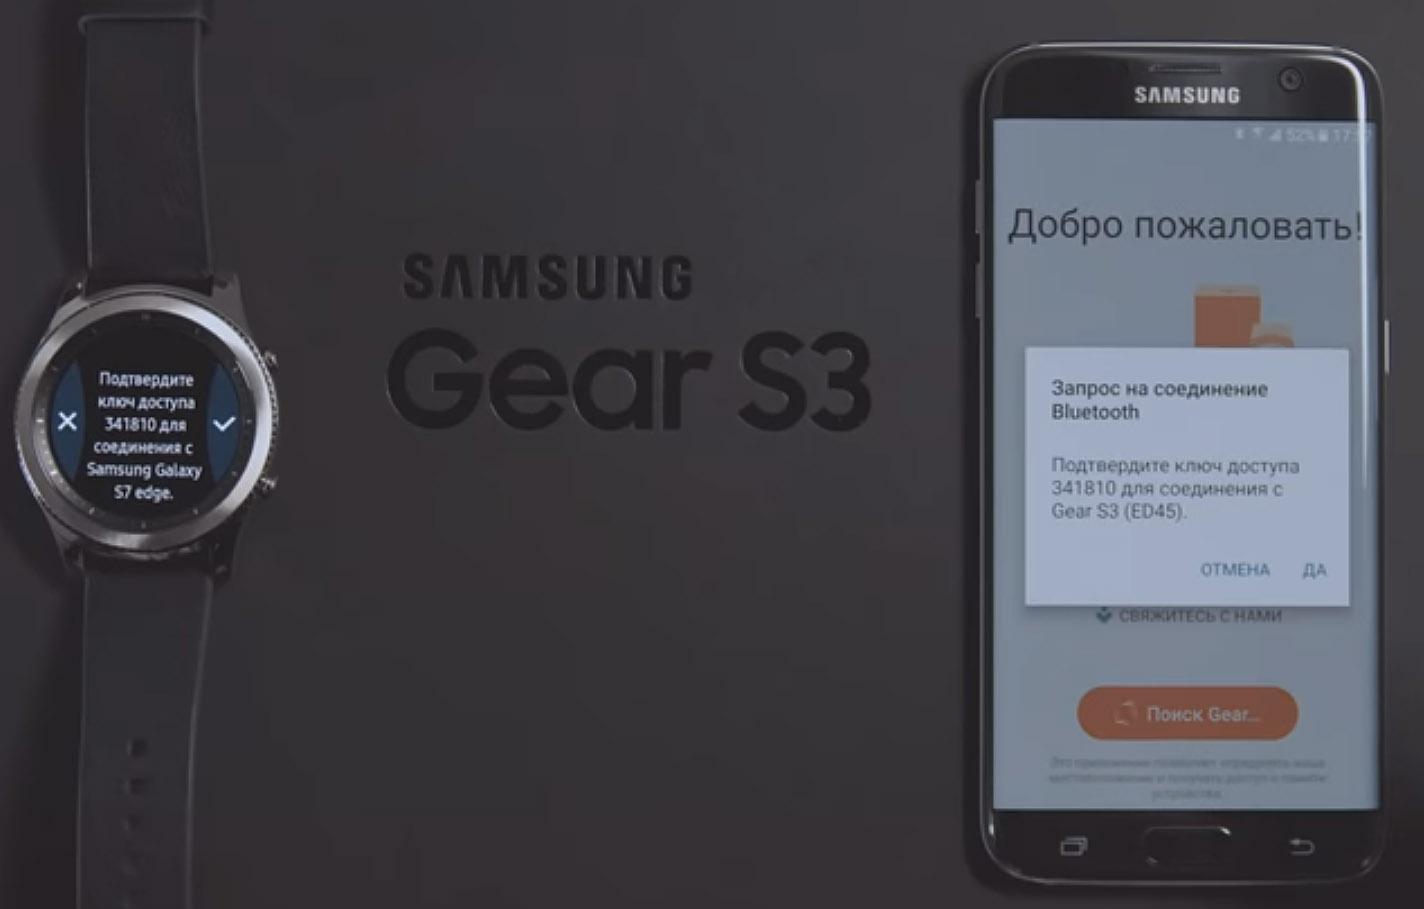
После скачивания приложения Samsung Gear включите часы и запустите приложение на вашем телефоне. В нем выберите строку «Подключение к Gear» и подтвердите запрос на подключение Bluetooth. После этого проделайте все указанные на экране шаги. При правильном подключении Samsung Gear S3 к телефону на часах появится инструкция, описывающая их базовые возможности. При синхронизации устройств на часах автоматически установится тот язык, который вы используете в телефоне.
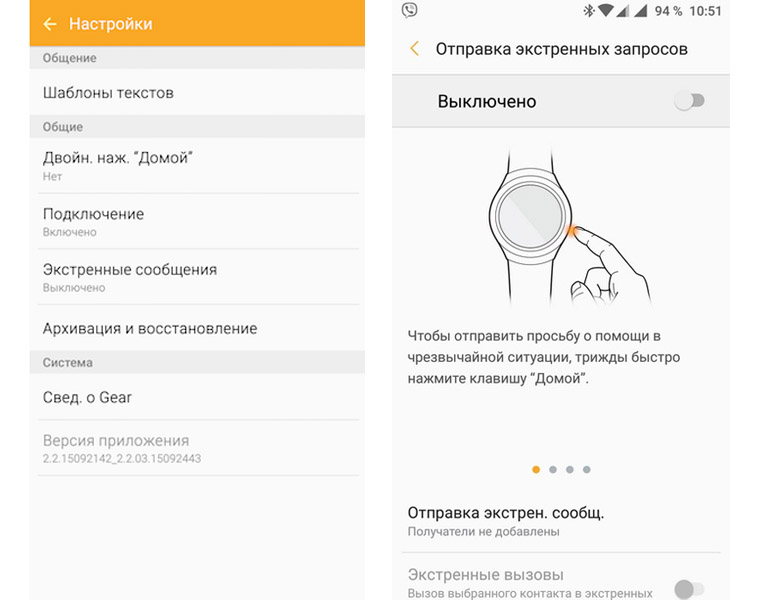
Вы можете по этому же алгоритму подключить часы к другому телефону, но для этого вначале их нужно отвязать от предыдущего девайса. Так как при этом произойдет сброс настроек часов, перед этим рекомендуется сделать резервное копирование данных, хранящихся в часах (если они для вас важны). Оно делается в меню «Настройки» в разделе «Сведения о Gear» в строке «Архивация и восстановление». Для подключения часов Samsung Gear S3 к телефону перейдите в раздел «Настройки» и выберите пункт о подключении к новому телефону. После этого запустите приложение Samsung Gear на новом телефоне и проделайте шаги, описанные выше. Телефон не даст подключить умные часы, если до этого к нему уже были привязаны часы Gear. В этом случае вначале нужно отключить первые часы, затем привязывать вторые. Смарт-часы подключаются к телефону не только при помощи Bluetooth. Сопряжение выполняется и по Wi-Fi через учетную запись Samsung, что заметно расширяет диапазон взаимодействия обоих устройств. Настройка подключения по Wi-Fi ведется в меню «Настройки», в разделе «Подключение Gear», в строке «Удаленное подключение».

Инструкция по настройке часов Samsung Gear S3
Рассмотрим настройки, которые помогут вам персонализировать часы по своему вкусу. Первым делом вы можете настроить внешний вид часов. Циферблаты меняются как в мобильном приложении, так и в самих часах. В первом случае запустите приложение Samsung Gear, перейдите в раздел «Настройки» и выберите пункт «Циферблаты часов» или загрузите их через Galaxy Apps в разделе «Информация». Во втором случае удерживайте палец на экране часов (если вы находитесь на других экранах, нажмите нижнюю кнопку часов) и выберите циферблат из списка или воспользуйтесь пунктом «Другие циферблаты».

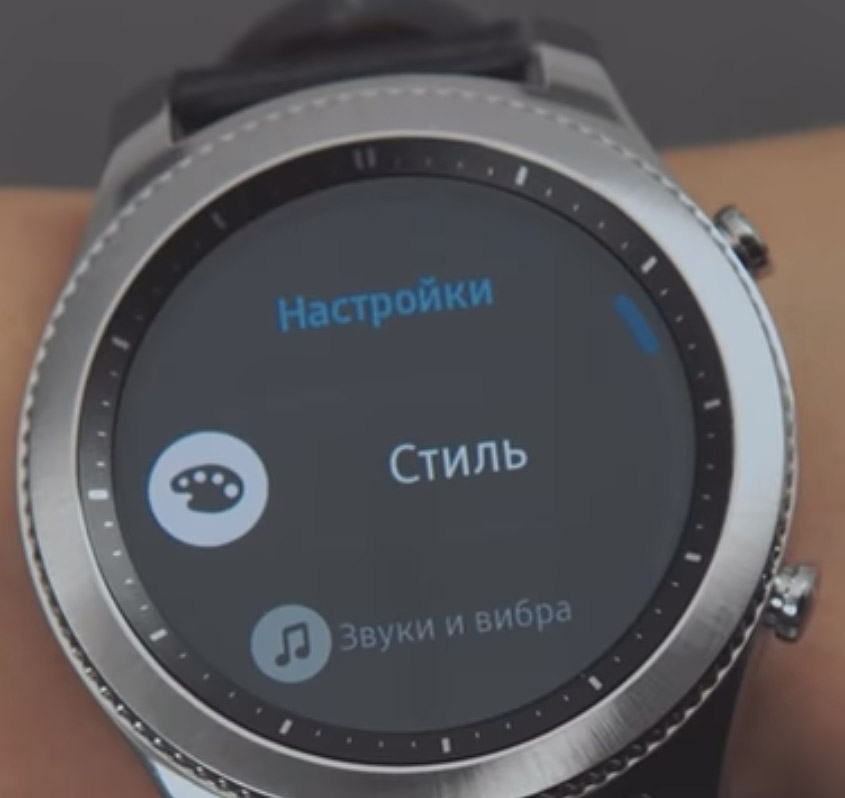
В разделе «Настройки» и меню «Стиль» доступна функция отображения времени даже на погашенном экране. Также вы можете настроить режим выключения питания часов. В нем умные часы отключат все функции, кроме отображения времени, если разряд будет критически низким. Это позволит вам пользоваться гаджетом как обычными часами в энергосберегающем режиме.
Следующая настройка касается управления уведомлениями. Если вы хотите получать уведомления с телефона на смарт-часы Gear, в приложении Samsung Gear откройте раздел «Настройки», передвиньте переключатель в нужную позицию в разделе «Уведомления» и выберите необходимые приложения. Если вы хотите, чтобы в экстренном случае можно было просмотреть медицинскую информацию о вас (например, группу крови или наличие хронических заболеваний), откройте раздел «Контакты» в мобильном приложении, выберите свой профиль и вбейте медицинские сведения о себе. В критической ситуации нажмите нижнюю кнопку на часах и выберите пункт о медицинских данных для экстренных случаев.
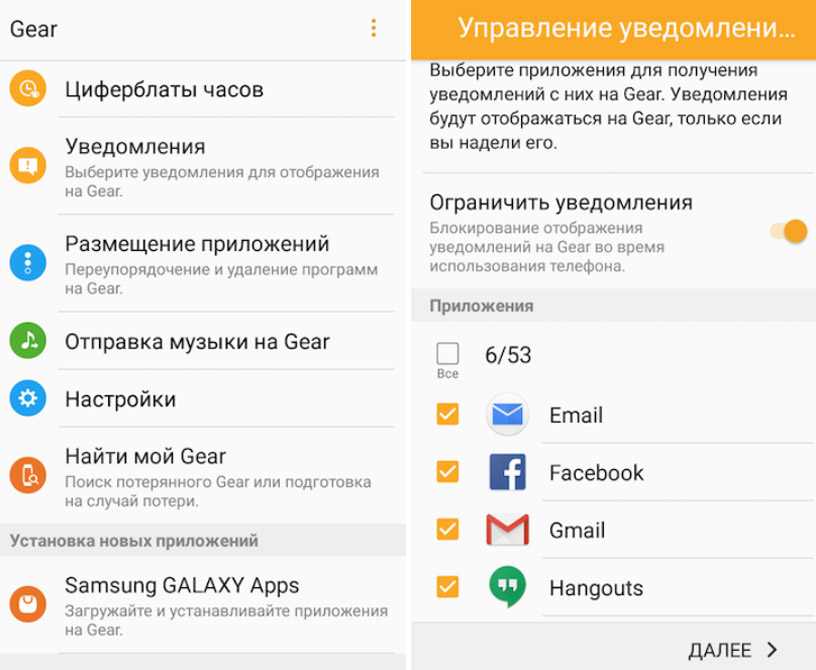
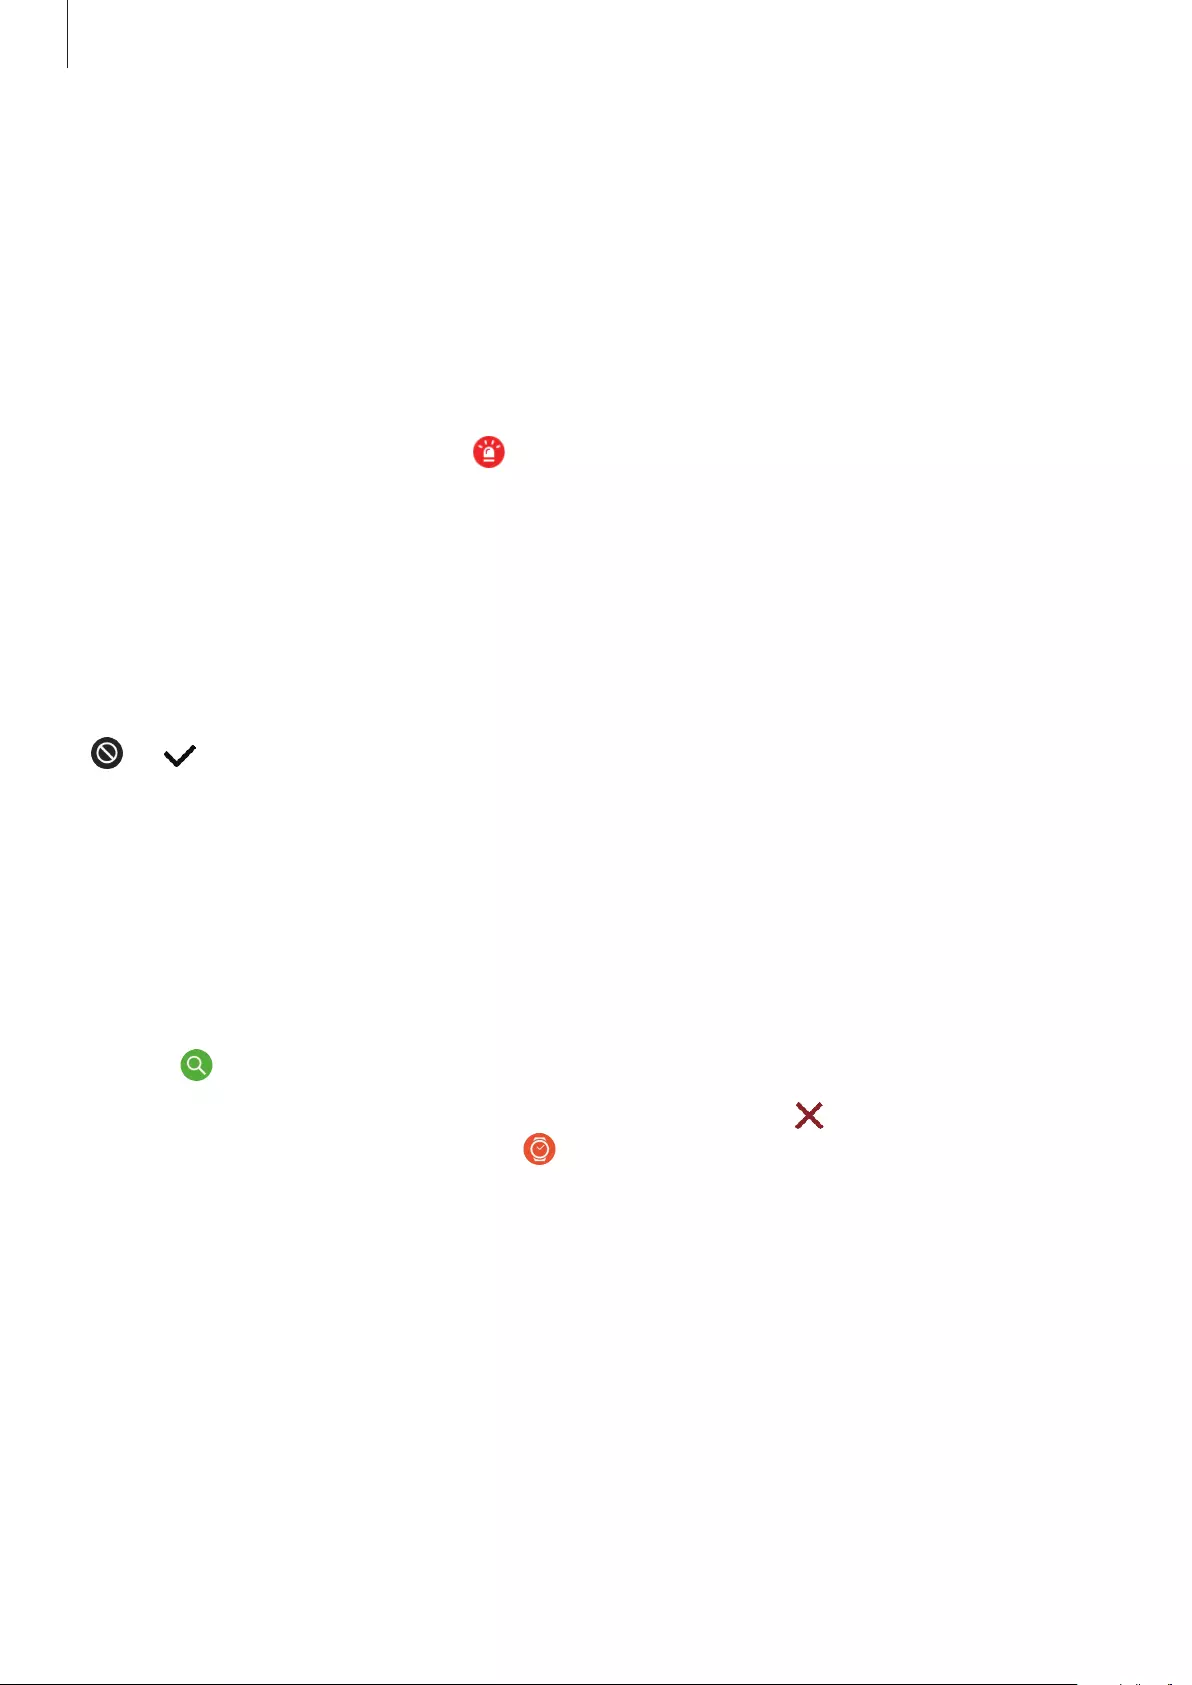
Для экстренных ситуаций предусмотрена еще одна функция. В приложении Samsung Gear откройте раздел «Настройки» и выберите строку «Отправка экстренных запросов». Далее сделайте все необходимые настройки и добавьте контакты, с которыми свяжутся часы в критической ситуации. Когда вы трижды быстро нажмете на часах нижнюю кнопку, они отправят экстренное сообщение всем внесенным в список контактам. В сообщении адресаты получат ссылку на ваше местоположение, которое они смогут наблюдать в течение часа в режиме онлайн. При желании можно прекратить передачу информации о местоположении (для этого экран часов прокручивается вниз и нажимается значок перечеркнутого круга). Если вы хотите, чтобы в экстренном случае часы совершили звонок, поставьте переключатель в нужную позицию в разделе «Экстренные вызовы» и выберите из списка один контакт.
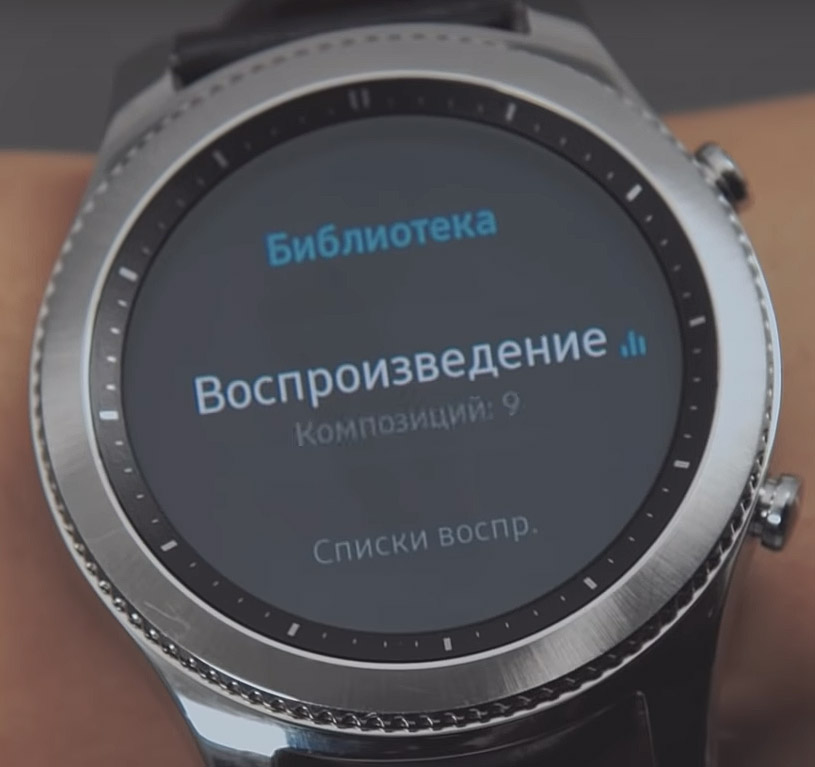
Чтобы импортировать музыкальные файлы с вашего телефона на умные часы, выберите раздел «Настройки» в мобильном приложении Samsung Gear, строку «Отправить содержимое на Gear», «Выбор композиций» и отметьте композиции для экспорта. При выборе автосинхронизации музыкальные альбомы на обоих устройствах будут синхронизированы при условии достаточного уровня заряда часов. Аналогичным образом экспортируйте на часы желаемые фотографии с телефона. Для этого в разделе отправки содержимого на Gear выберите пункт «Выбор фотографий».
Настройка правильной даты и времени ведется в меню «Настройки» на экране приложений часов. С помощью раздела «Дата и время» вы сможете настроить дату и время, когда гаджет не подключен к телефону. Доступен этот пункт тоже только вне связи с телефоном. Есть возможность настройки и мирового времени также на экране приложений часов, но уже в разделе «Мировое время». Для выбора часового пояса используйте безель или в пункте «Все города» найдите ближайший к вам город из списка.
В часах есть и другие настройки, доступные в одноименном разделе мобильного приложения. В них можно тонко настроить стиль часов, отрегулировать звуковые сигналы и вибрацию, настроить по своему вкусу кнопки, жесты, чувствительность экрана, язык, яркость экрана, вызовы, сообщения, варианты подключений и другое. Все настройки интуитивно понятны и требуют лишь небольших экспериментов с вашей стороны, которые помогут вам оценить их необходимость.
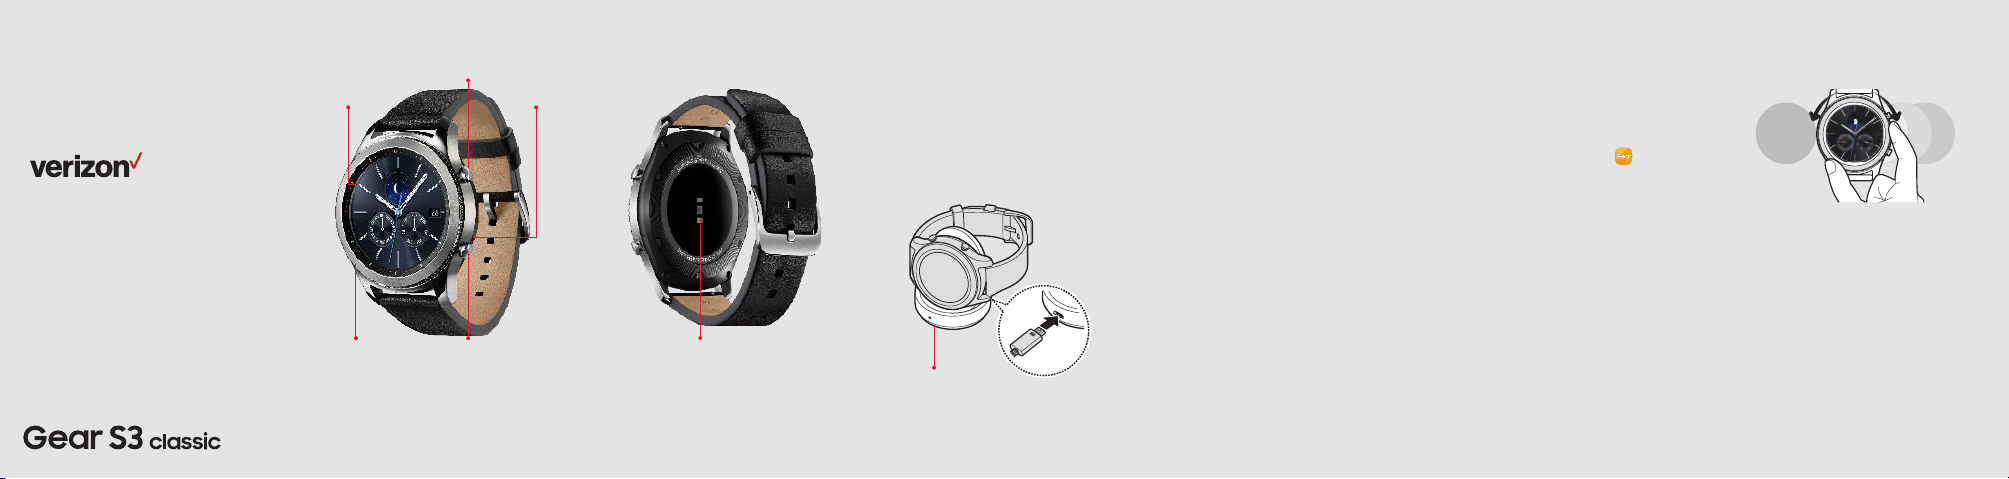
Meet your
Gear S3.
Para la versión en español, visite
verizonwireless.com/Support
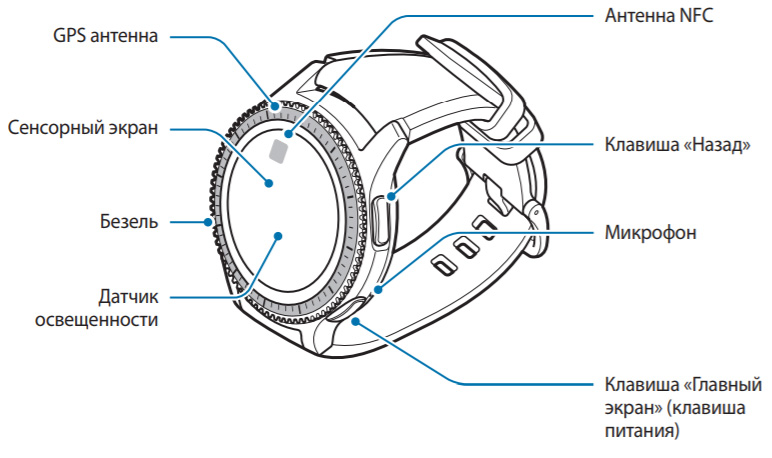
About your Gear S3
Back button
MicrophoneTouch screen
Home/Power buttonBezel
NOTE: Devices and software are constantly
evolving—the screen images and icons you see
here are for reference only.
Heart rate sensor
Caution: Use only charging devices and
batteries that are approved by Samsung.
Samsung accessories are designed for your
device to maximize battery life. Using other
accessories may void your warranty and may
cause damage.
Setting up your Gear S3
Your Gear S3 already has a SIM card
installed.
Step 1. Charge your Gear S3
Before turning on your Gear S3, charge
it fully.
Wireless charger dock
NOTE: Your Gear S3 is equipped with a
nonremovable SIM card. You should never attempt
to open or disassemble your Gear S3. Doing so may
cause damage that voids your warranty.
Step 2. Turn your Gear S3 on/off
To turn ON your Gear S3, press and
hold the Home/Power button.
To turn it OFF, press and hold the
Home/Power button, and then tap
Power off.
Step 3. Activate your Gear S3
Tap Activate on your Gear S3 and
follow the instructions to set it up for
standalone use.
Step 4. Download and connect
Download the Samsung Gear app
Download the Samsung Gear app from
Galaxy Apps, or the Play Store or visit
Samsung.com/Gear.
Pair your Gear S3 with your
smartphone
1. Turn on Bluetooth o n both your
smartphone and Gear S3.
2. Open the Samsung Gear app on
your smartphone.
3. Tap CONNECT TO GE AR.
4. Confirm th e Bluetooth pas skey on both
devices , and then ta p OK.
5. Follow the instructions to complete
set up.
Compatible with select devices using Android 4.4
and later or iOS 9.0 and later, with at least 1.5 GB
RAM. Supported devices may vary by carrier and
device. Some features may not be available. For best
results, connect with compatible Samsung Galaxy
devices. For a list of compatible smartphones,
please visit Samsung.com/GearS3.
Using your Gear S3
Navigating on your Gear S3
From the Home screen:
• Swipe left or turn the bezel
clockwise to scroll through your
widgets.
• Swipe right or turn the bezel
counter-clockwise to scroll through
your notifications.
• Swipe or turn in the opposite
direction to scroll back through
the screens.
From a widget or notification, tap to open
its app.

Using your Gear S3
Making a call
1. From the Home s creen, pre ss the Home
button, th en tap Phone .
2. Enter a numb er using the keyp ad, and
then tap .
Receiving a call
To answer an incoming call, turn the
bezel clockwise or swipe the right.
Ending a call
To end a call, tap .
Text messaging
1. From the Home s creen, pre ss the Home
button, and the n tap Messages .
2. Tap a message to view a nd to rep ly
You can reply with o ne of the followin g
options:
• Preloaded messages
• Voice Input
• Emoticons
• Handwriting and keyboard
Downloading apps
From the Home s creen, pre ss the Home
button, a nd then tap G et more apps + to v iew
and downl oad apps for th e Gear S3 .
Replacing the wristband
1. To remove, push the
pin tab inwa rd to
release th e strap.
2. To connect, push
the pin tab i nward
while aligning the
strap with the p in
holes.
Support and more
Using the Gear Manager app
on your phone
1
Open the Gear Manager on your
smartphone to quickly check your
Gear S3’s status, download
recommended Gear faces and apps,
and get help.
You can also customize your
Gear S3’s various settings, such as
Managing your account
My Verizon Mobile app
Use the My Verizon Mobile app
on your smartphone to manage
your account, track your usage,
edit account information, pay
your bill and more.
From your computer, visit
verizonwireless.com/Support.
your notification settings.
Download a User Guide from
1
verizonwireless.com/Support
or call 888.987.HELP to order
a copy.
2
Customer service
Additional information
Your wireless device and third-party ser vices
Verizon Wireless is the mobile carrier associated with
this wireless device, but many services and features
offered through this device are provided by or in
conjunction with third parties. Verizon Wireless is not
responsible for your use of this device or any nonVerizon Wireless applications, services and products,
including any personal information you choose to use,
submit or share with others. Specific third-party terms
and conditions, terms of use and privacy policies apply.
Please review carefully all applicable terms, conditions
and policies prior to using this wireless device and any
associated application, product or service.
Hearing aid compatibility information
This phone has been tested and rated for use with
hearing aids for some of the wireless technologies
that it uses. However, there may be some newer
technologies that have not been tested yet for use with
hearing aids. It is important to try the different features
of this phone thoroughly and in different locations, using
your hearing aid or cochlear implant to determine if you
hear any interfering noise. Ask your service provider
or the manufacturer of this phone for information on
hearing aid compatibility. If you have questions about
return or exchange policies, ask your service provider
or phone retailer.
Call 800.922.0204
Twitter @VZWSupport
Printed in Vietnam GH68-47575A
© 2017 Verizon Wireless. All Rights Reserved.

www.samsung.com
User Manual
English (EU). 10/2016. Rev.1.0
SM-R760
SM-R770

2
Table of Contents
Getting Started
5 About the Gear S3
6 Read me first
7 Maintaining water and dust
resistance
8 Device layout
8 Package contents
9 Gear
11 Wireless charging dock
12 Battery
12 Charging the battery
14 Battery charging tips and
precautions
15 Power saving mode
16 Wearing the Gear
16 Putting on the Gear
16 Band tips and precautions
17 Replacing the band
19 Turning the Gear on and off
20 Connecting the Gear to a mobile
device
20 Installing the Samsung Gear app
20 Connecting the Gear to a mobile
device via Bluetooth
22 Remote connection
22 Using the Gear without a mobile
device
Basics
24 Controlling the screen
24 Screen composition
25 Turning the screen on and off
25 Navigating the screen
27 Using the bezel
29 Touchscreen
32 Status panel
34 Watch
34 Watch screen
34 Changing the watch face
35 Using the Watch always on feature
35 Power-off watch mode
35 Notifications
35 Notification panel
36 Viewing incoming notifications
37 Sending app notifications to the
Gear
37 Entering text
37 Introduction
38 Using the voice input
38 Using emoticons
39 Using handwriting input mode or
the keyboard
40 GPS
41 SOS messages
42 Finding my Gear

Table of Contents
3
67 S Voice
67 Introduction
67 Setting a wake-up command
68 Using S Voice
69 Setting the language
69 Weather
69 Alarm
70 World Clock
71 Gallery
71 Importing and exporting images
72 Viewing images
72 Deleting images
73 News Briefing
73 Find My Phone
74 Email
74 Get more apps
75 Settings
75 Introduction
75 Style
75 Sounds and vibration
76 Device
77 Display
77 Call
77 Messages
78 Connections
81 Security
81 Accessibility
81 Input
81 Power saving
82 Gear info
82 Connect to new phone
82 Connect to phone
83 Updating the Gear
Applications
43 Messages
44 Phone
44 Introduction
44 Receiving calls
46 Making calls
46 Options during calls
47 Contacts
48 S Health
48 Introduction
51 24-hour Log
52 Steps
53 Floors
54 Exercise
56 Heart rate
58 Water
58 Caffeine
59 Together
60 Additional information
61 Alti-Barometer
64 Music Player
64 Introduction
64 Playing music
64 Importing music
65 Playing music on the Gear
65 Playing music from your mobile
device
65 Standalone music
66 Reminders
67 Schedule

Table of Contents
4
Samsung Gear app
84 Introduction
85 INFO
86 SETTINGS
86 Watch faces
86 Notifications
87 Apps
87 Send content to Gear
88 Send SOS requests
88 Find My Gear
89 Gear connection
89 Quick messages
89 Social network sharing
89 S Health
90 Samsung Galaxy Apps
90 About Gear
91 About Samsung Gear app
Appendix
92 Troubleshooting
96 Removing the battery
5
Getting Started
About the Gear S3
The Gear S3 is a smartwatch that works as a traditional watch and allows you to use a variety
of convenient apps for making phone calls, playing music, and managing your health. By
rotating the bezel, you can access convenient features quickly and easily. You can also change
the watch face and band to your taste.
Connect your Gear S3 to your mobile device to expand your mobile device experience, or use
the Gear S3 by itself, without connecting to a mobile device.

Getting Started
6
Read me first
Please read this manual before using this device to ensure safe and proper use.
•
Descriptions are based on the device’s default settings.
•
Some content may differ from your device depending on the region, service provider,
model specifications, or device’s software.
•
Content (high quality content) that requires high CPU and RAM usage will affect the
overall performance of the device. Apps related to the content may not work properly
depending on the device’s specifications and the environment that it is used in.
•
Samsung is not liable for performance issues caused by apps supplied by providers other
than Samsung.
•
Samsung is not liable for performance issues or incompatibilities caused by edited
registry settings or modified operating system software. Attempting to customise the
operating system may cause the Gear or apps to work improperly.
•
Software, sound sources, wallpapers, images, and other media provided with this Gear
are licensed for limited use. Extracting and using these materials for commercial or other
purposes is an infringement of copyright laws. Users are entirely responsible for illegal
use of media.
•
Default apps that come with the Gear are subject to updates and may no longer be
supported without prior notice. If you have questions about an app provided with
the Gear, contact a Samsung Service Centre. For user-installed apps, contact service
providers.
•
Modifying the Gear’s operating system or installing softwares from unofficial sources may
result in Gear malfunctions and data corruption or loss. These actions are violations of
your Samsung licence agreement and will void your warranty.
•
The images in this manual are based on the SM-R760 model.
•
Some functions may not work as described in this manual depending on the maker and
model of the mobile device you connect to the Gear.

Getting Started
7
Instructional icons
Warning: situations that could cause injury to yourself or others
Caution: situations that could cause damage to your device or other equipment
Notice: notes, usage tips, or additional information
Maintaining water and dust resistance
Your device supports water- and dust-resistance. Follow these tips carefully to maintain the
water— and dust-resistance of your device. Failure to do so may result in damage to your
device.
•
Do not immerse the device in water deeper than 1.5 m or keep it submerged for more
than 30 minutes.
•
Do not expose the device to water moving with force.
•
When you are wearing the device, avoid taking a shower or going swimming.
•
If the device or your hands are wet, dry them thoroughly before handling the device.
•
If the device is exposed to clean water, dry it thoroughly with a clean, soft cloth. If
the device is exposed to other liquids, such as salt water, ionised water, or alcoholic
beverage, rinse it with clean water and dry it thoroughly with a clean, soft cloth. If you
do not follow these instructions, the device’s performance and appearance may be
affected.
•
If the device is dropped or receives an impact, the water- and dust-resistant features of
the device may be damaged.
•
If the device has been immersed in water or the microphone or speaker is wet,
sound may not be heard clearly during a call. Wipe the device with a dry cloth or dry it
thoroughly before using it.

Getting Started
8
•
The touchscreen and other features may not work properly if the device is used in water.
•
Your device has been tested in a controlled environment and certified to be water-
and dust-resistant in specific situations (meets requirements of classification IP68 as
described by the international standard IEC 60529 — Degrees of Protection provided
by Enclosures [IP Code]; test conditions: 15 — 35°C, 86 — 106 kPa, 1.5 metre, 30 minutes).
Despite this classification, it is still possible for your device to be damaged in certain
situations.
Device layout
Package contents
Check the product box for the following items:
•
Gear
•
Wireless charging dock
•
Band
•
Quick start guide
•
If the connected band is too large for your wrist, change it to a small one.
•
The items supplied with the Gear and any available accessories may vary
depending on the region or service provider.
•
The supplied items are designed only for this Gear and may not be compatible
with other devices.
•
Appearances and specifications are subject to change without prior notice.
•
You can purchase additional accessories from your local Samsung retailer. Make
sure they are compatible with the Gear before purchase.
•
Some accessories, such as docking devices, may not have the same water- and
dust-resistance certification.
•
Use only Samsung-approved accessories. Using unapproved accessories may cause
the performance problems and malfunctions that are not covered by the warranty.
•
Availability of all accessories is subject to change depending entirely on
manufacturing companies. For more information about available accessories, refer
to the Samsung website.
Getting Started
9
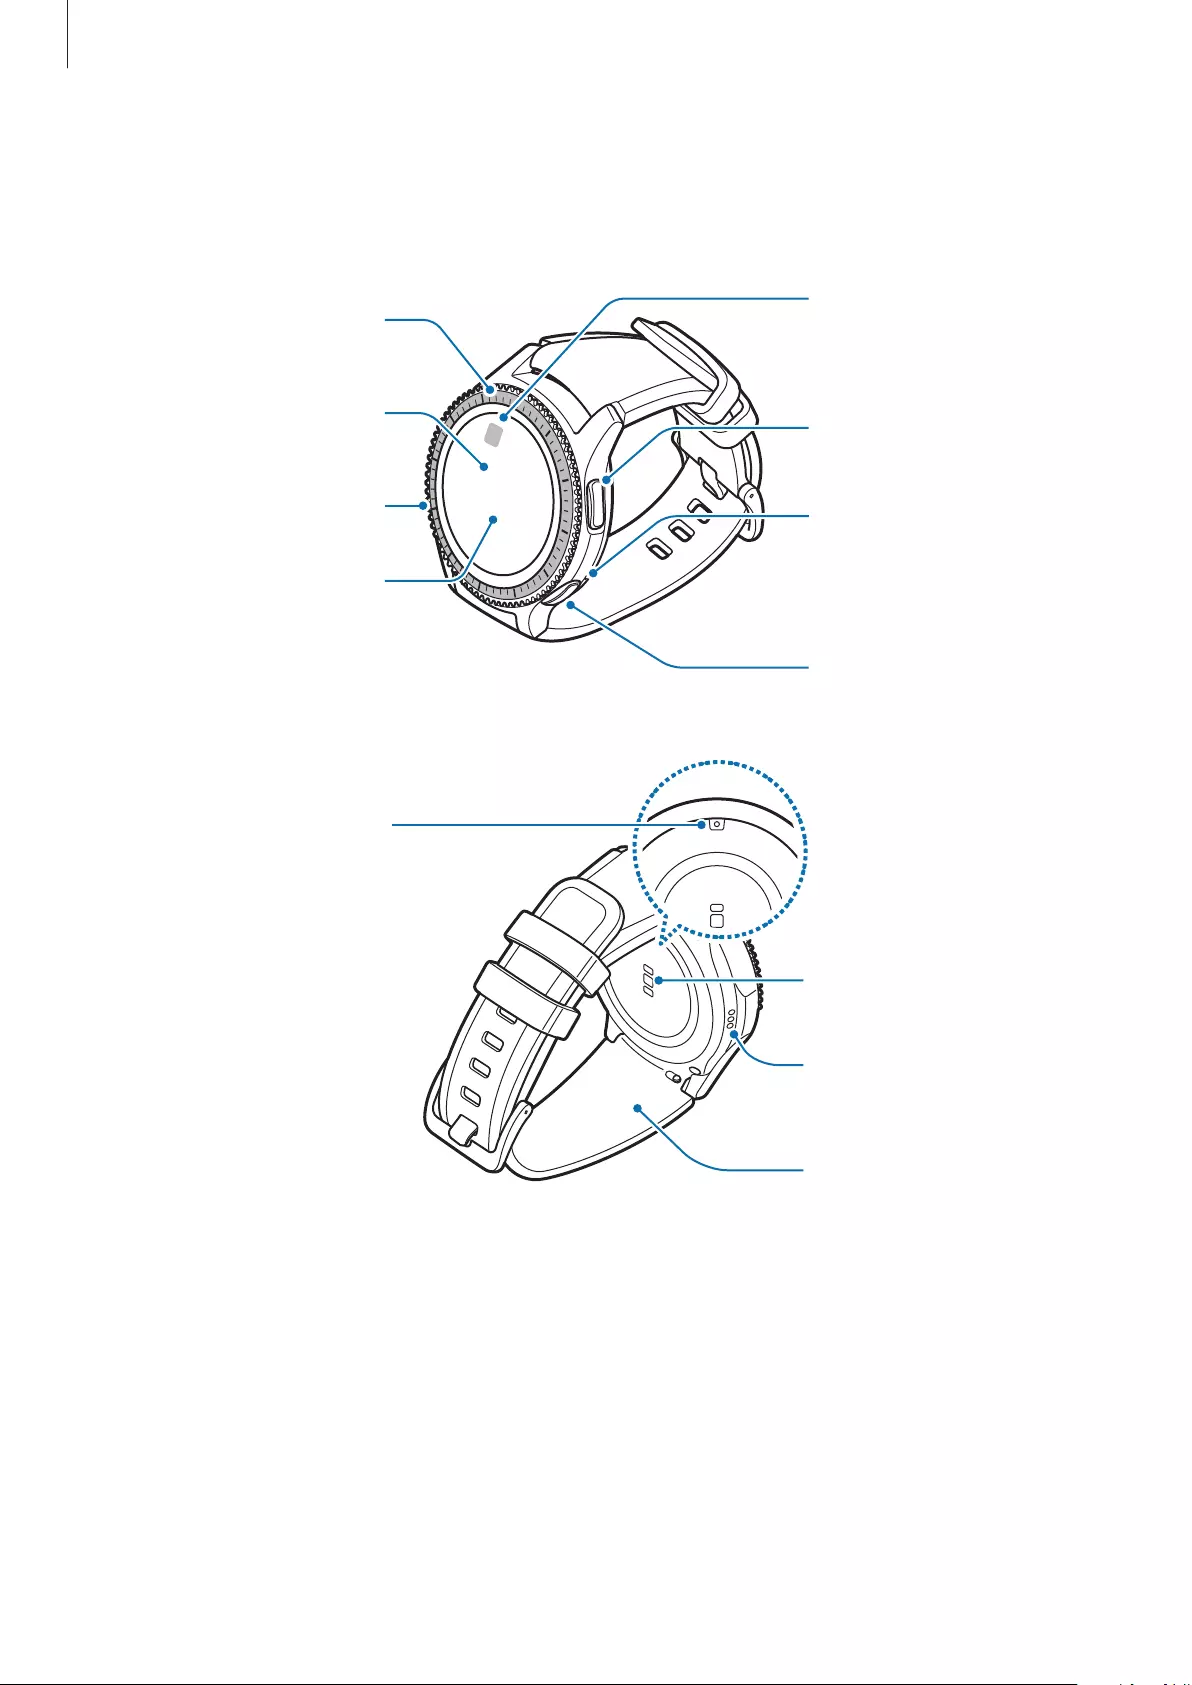
Gear
►
SM-R760
Bezel
Back key
Home key (Power
key)
Microphone
Touchscreen
GPS antenna
Light sensor
Heart rate sensor
Pressure relief vent
(Atmospheric
pressure sensor)
Speaker
Getting Started
10
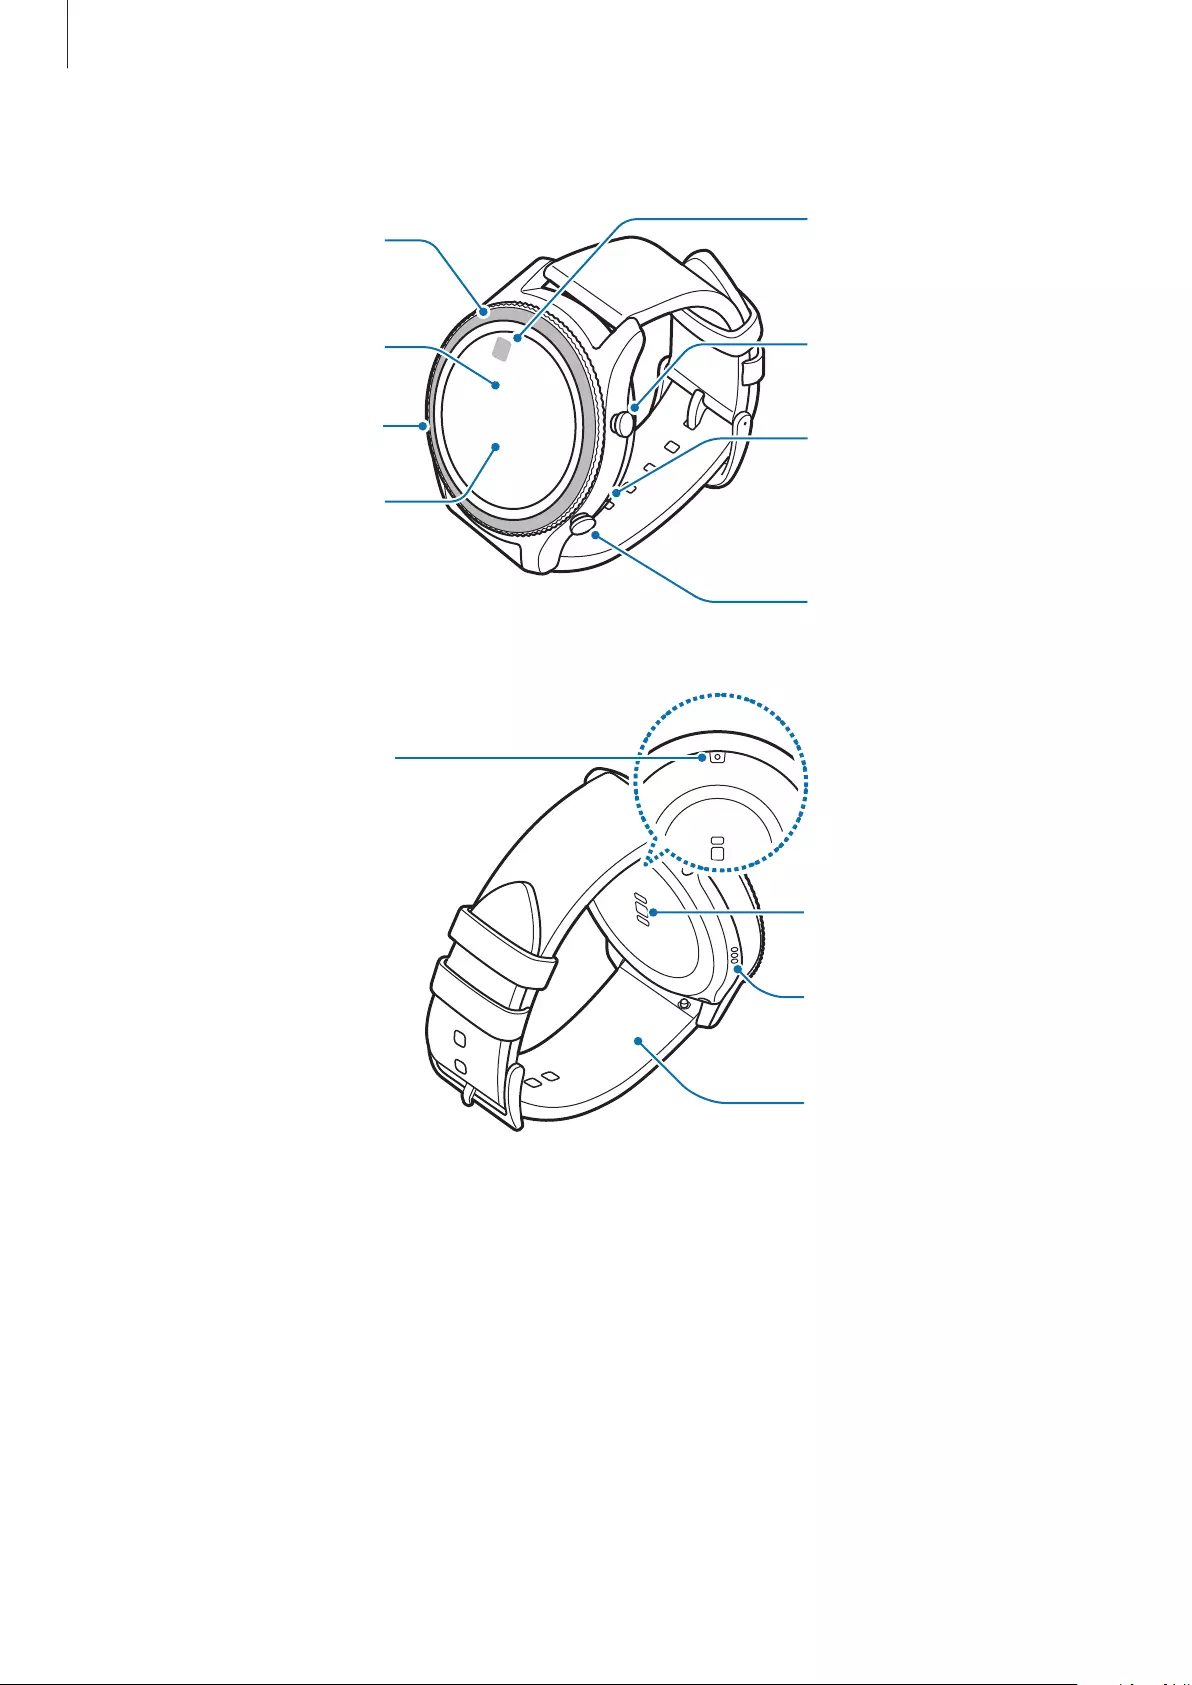
►
SM-R770
Bezel
Light sensor
Back key
Home key (Power
key)
Microphone
Touchscreen
GPS antenna
Heart rate sensor
Speaker
Pressure relief vent
(Atmospheric
pressure sensor)
Band
Getting Started
11
Keys
Key Function
/ Home/Power
•
Press and hold to turn the Gear on or off.
•
Press to turn on the screen.
•
Press and hold for more than 7 seconds to restart the Gear.
•
Press to open the Apps screen when you are on the Watch
screen.
•
Press to open the Watch screen when you are on any
other screen.
/ Back
•
Press to return to the previous screen.
Ensure that the band is kept clean. Contact with contaminants, such as dust and dye,
can cause stains on the band that may not be fully removed.
•
If the loud speaker is wet, sound may be distorted. Ensure that the loud speaker is
dry.
•
Make sure the Gear’s microphone is not obstructed when you are speaking into it.
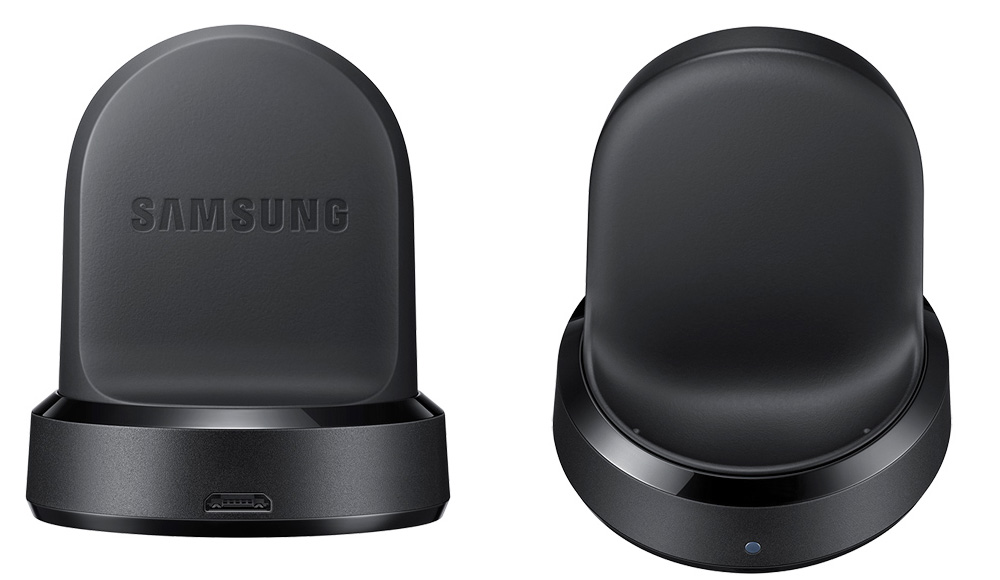
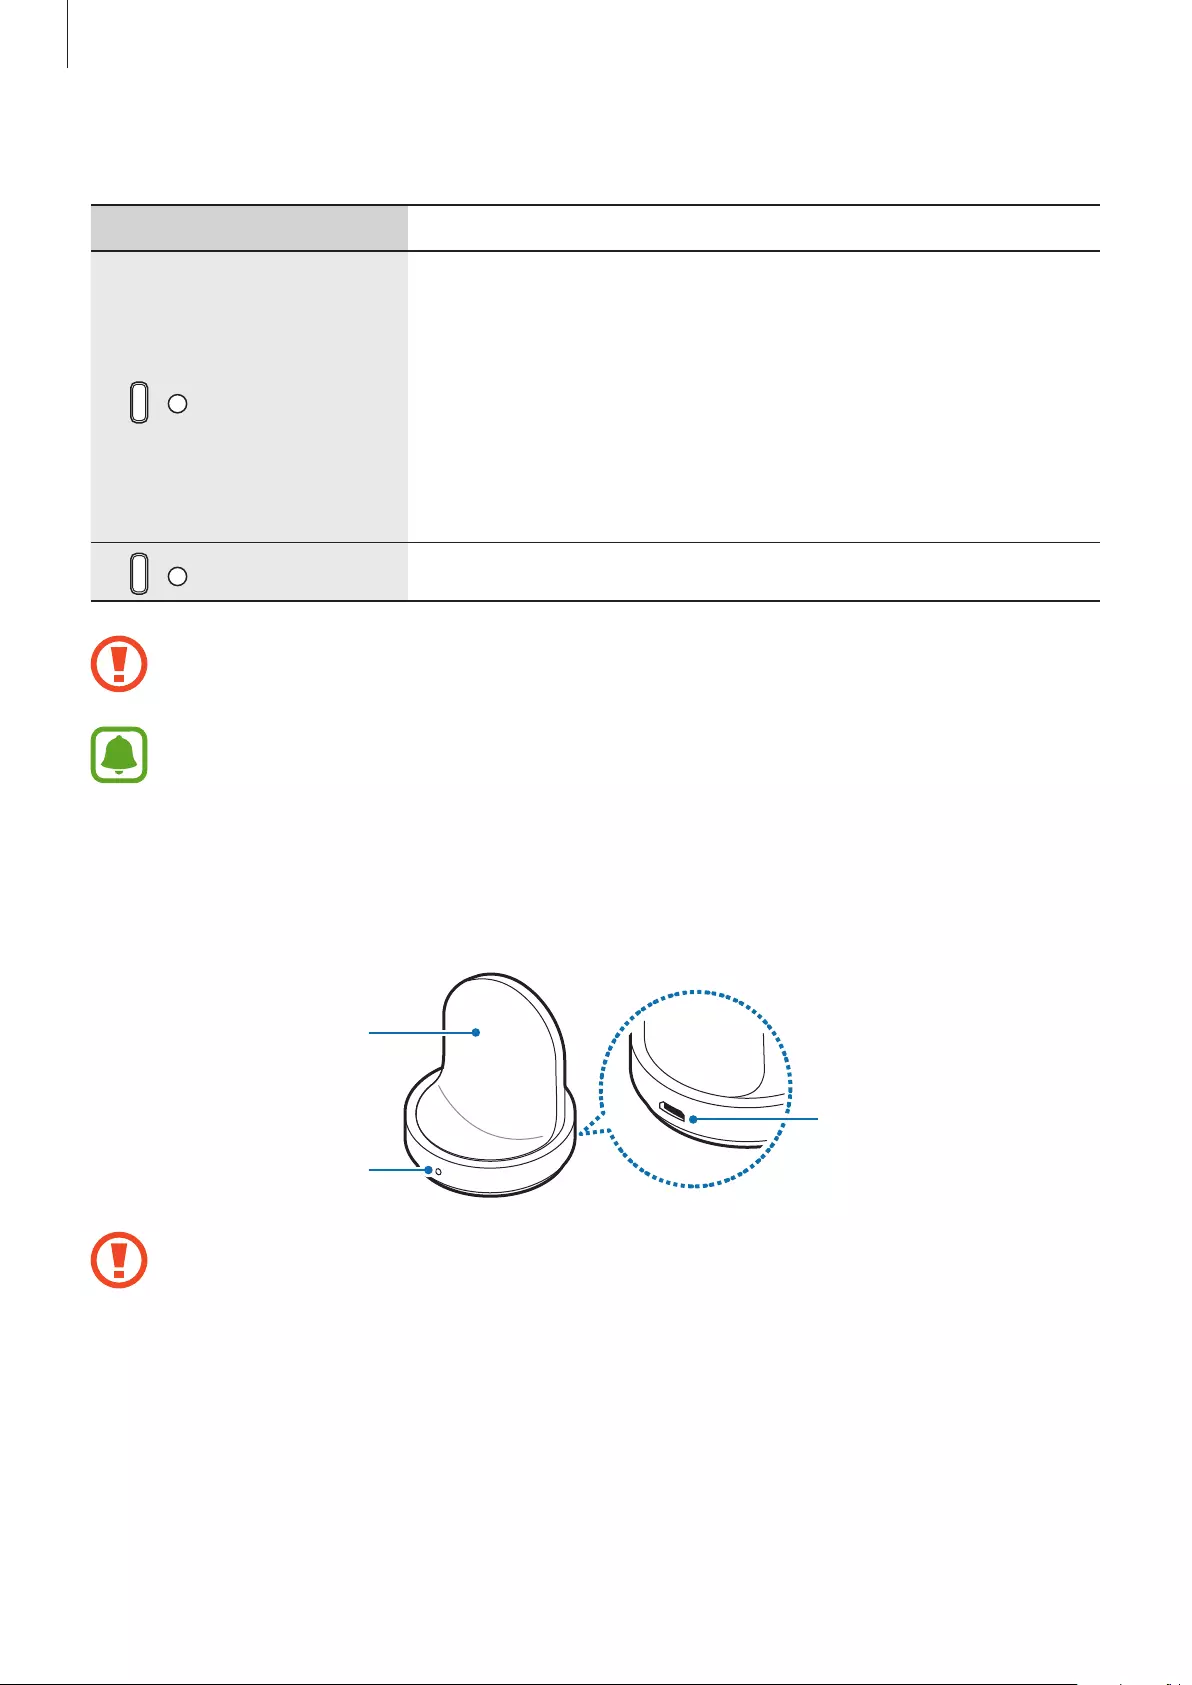
Wireless charging dock
Charger port
LED indicator
Wireless
charging surface
Do not expose the wireless charging dock to water.
Getting Started
12
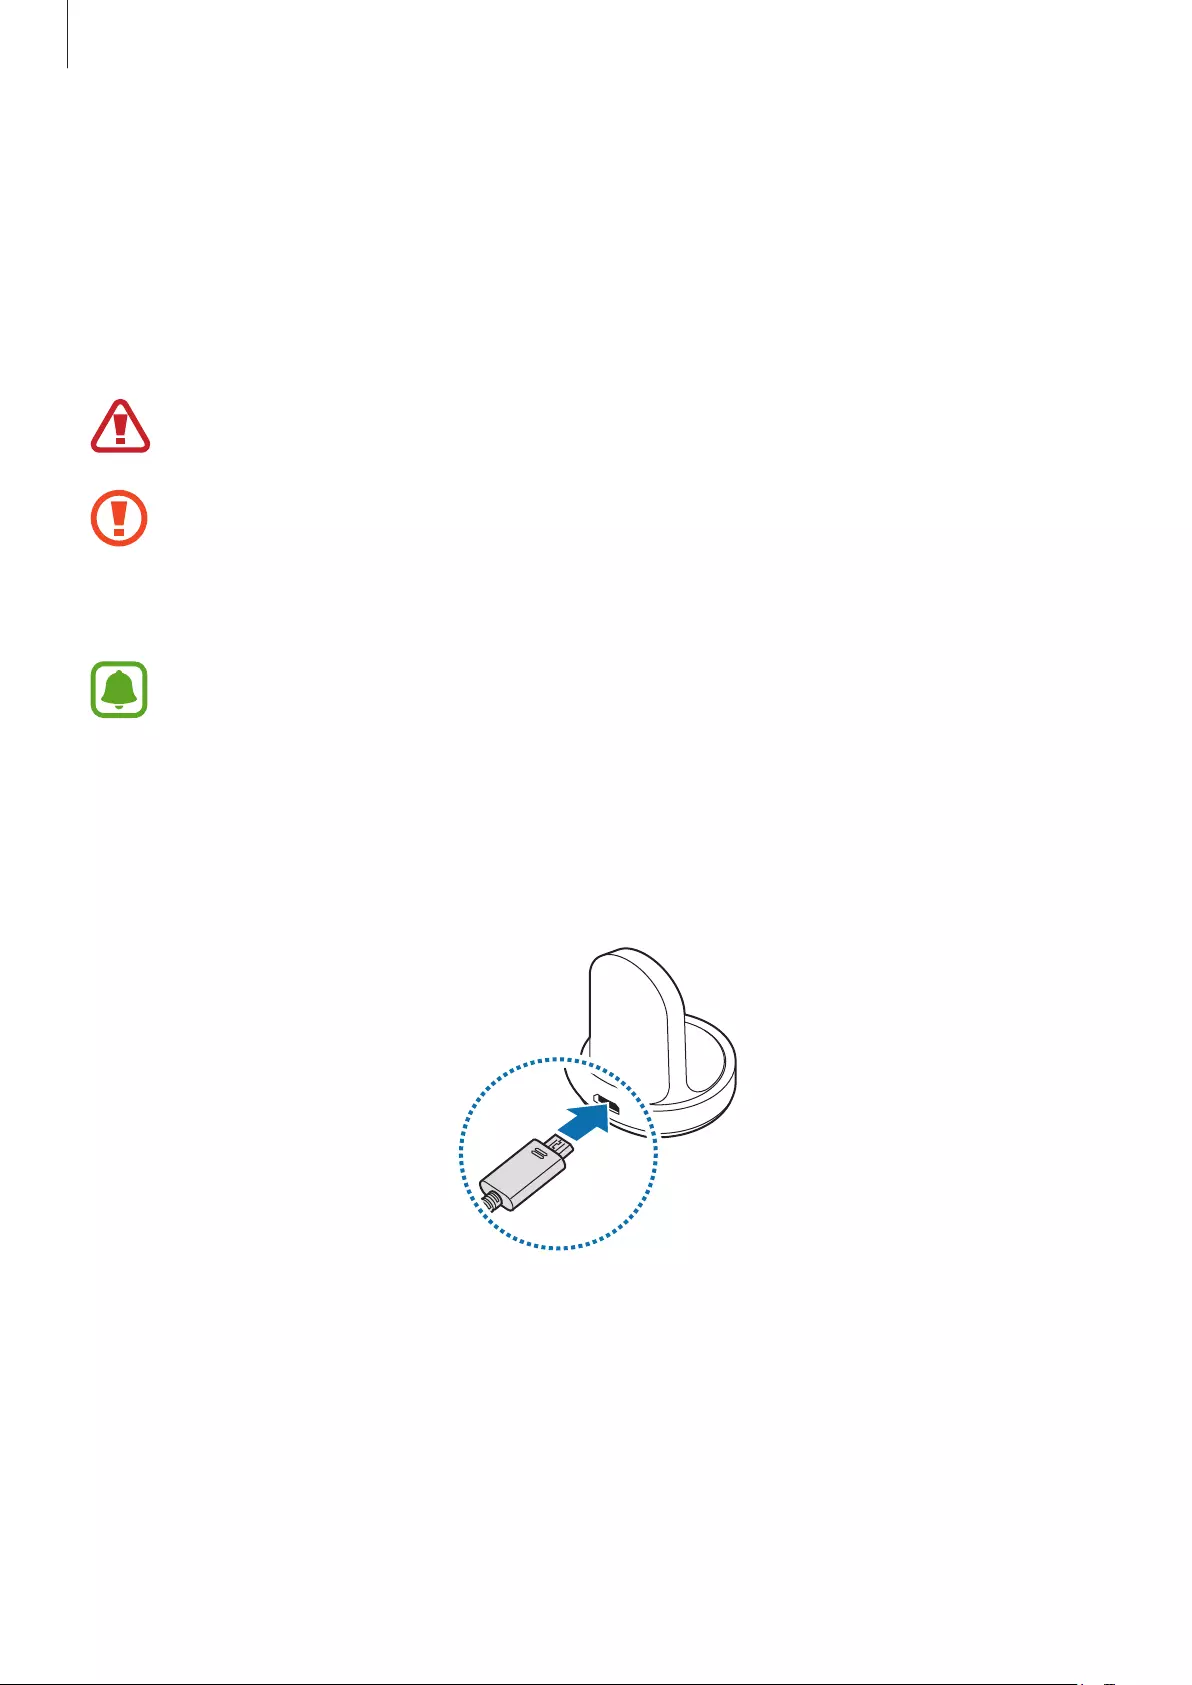
Battery
Charging the battery
Charge the battery before using it for the first time or when it has been unused for extended
periods.
Use only Samsung-approved chargers, batteries, and cables. Unapproved chargers or
cables can cause the battery to explode or damage the Gear.
•
Use the supplied wireless charging dock and charger. The Gear cannot be charged
properly with a third-party charger.
•
Connecting the charger improperly may cause serious damage to the device. Any
damage caused by misuse is not covered by the warranty.
To save energy, unplug the charger when not in use. The charger does not have a
power switch, so you must unplug the charger from the electric socket when not in
use to avoid wasting power. The charger should remain close to the electric socket
and be easily accessible while charging.
1 Plug the small end of the charger into the multipurpose jack of the wireless charging
dock and plug the large end of the charger into an electric socket.
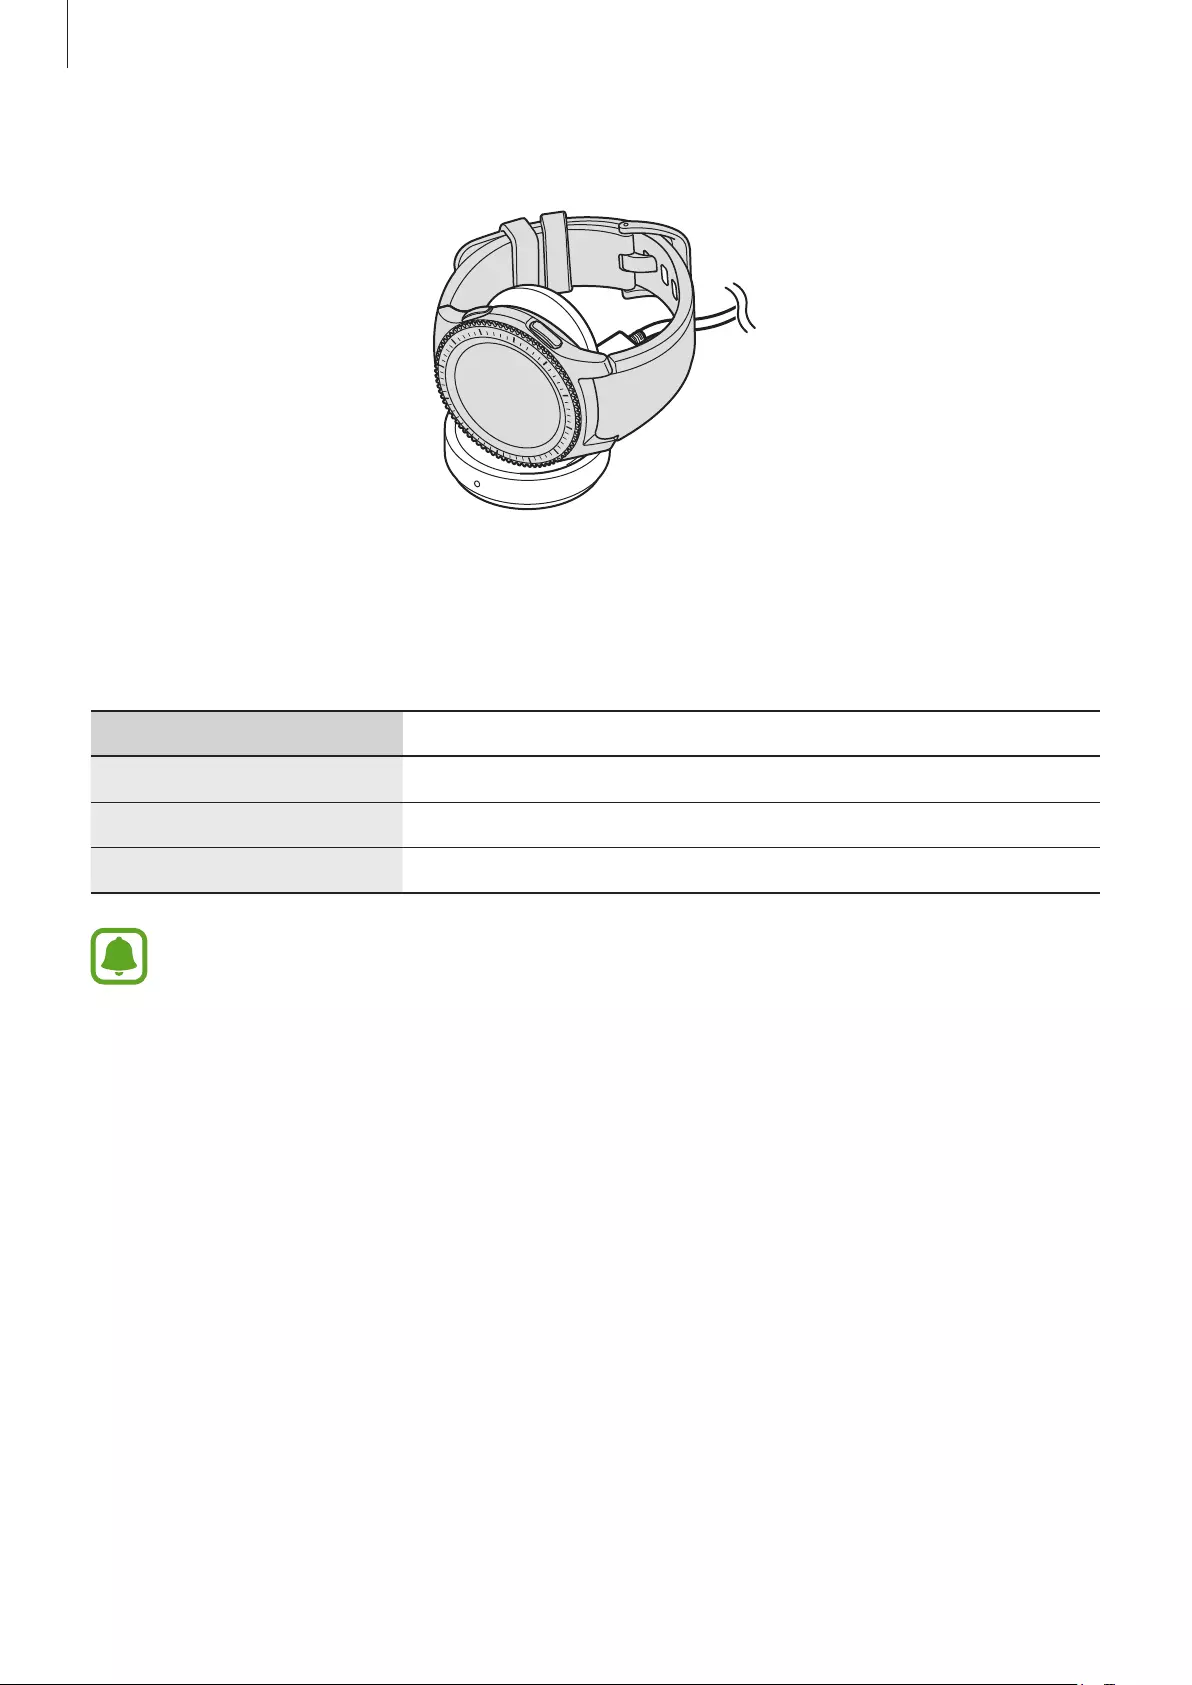
Getting Started
13
2 Place the Gear into the wireless charging dock.
Checking the charging status
When you connect the Gear and the wireless charging dock, the wireless charging dock’s LED
indicator flashes certain colours to indicate the battery level.
Colour Charging status
Red Charging
Green Fully charged
Orange Connected to a low-power adaptor
When a wireless charging dock error occurs, the LED indicator flashes red. Disconnect
the Gear from the wireless charging dock and reconnect them. If the error occurs
again, contact a Samsung Service Centre for service support.

Getting Started
14
Reducing the battery consumption
Your Gear provides various options that help you conserve battery power.
•
When you are not using the Gear, turn off the screen by covering the screen with your
palm.
•
Activate power saving mode.
•
Close unnecessary apps.
•
Deactivate the Bluetooth feature when not in use.
•
Deactivate the Wi-Fi feature when not in use.
•
Decrease the screen brightness.
•
Deactivate the watch always on feature.
•
Deactivate the voice wake-up feature in
S Voice
.
•
Customise the notification settings in
Samsung Gear
on the mobile device.
Battery charging tips and precautions
•
If there are obstructions between the Gear and the wireless charging dock, the Gear may
not charge properly. Prevent the Gear and the wireless charger from coming into contact
with sweat, liquids, or dust.
•
When the battery power is low, the battery icon appears empty.
•
If the battery is completely discharged, the Gear cannot be turned on immediately when
the charger is connected. Allow a depleted battery to charge for a few minutes before
turning on the Gear.
•
If you use multiple apps at once, the battery will drain quickly. To avoid losing power
during a data transfer, always use these apps after fully charging the battery.
•
Using a power source other than the charger, such as a computer, may result in a slower
charging speed due to a lower electric current.
•
If the Gear is being charged with other devices via a multicharger, charging may take
longer.
Getting Started
15
•
The Gear can be used while it is charging, but it may take longer to fully charge the
battery.
•
If the Gear receives an unstable power supply while charging, the touchscreen may not
function. If this happens, disconnect the Gear from the wireless charging dock.
•
While charging, the Gear may heat up. This is normal and should not affect the Gear’s
lifespan or performance. If the battery gets hotter than usual, the charger may stop
charging.
•
If the Gear is not charging properly, take the Gear to a Samsung Service Centre.
•
Avoid using a bent or damaged USB cable.
Power saving mode
Activate power saving mode to extend the battery’s usage time.
•
Displays colours on the screen as grey tones.
•
Deactivates features, excluding phone, messages, and notifications.
•
Deactivates the Wi-Fi feature.
•
Limits the performance of the Gear’s CPU.
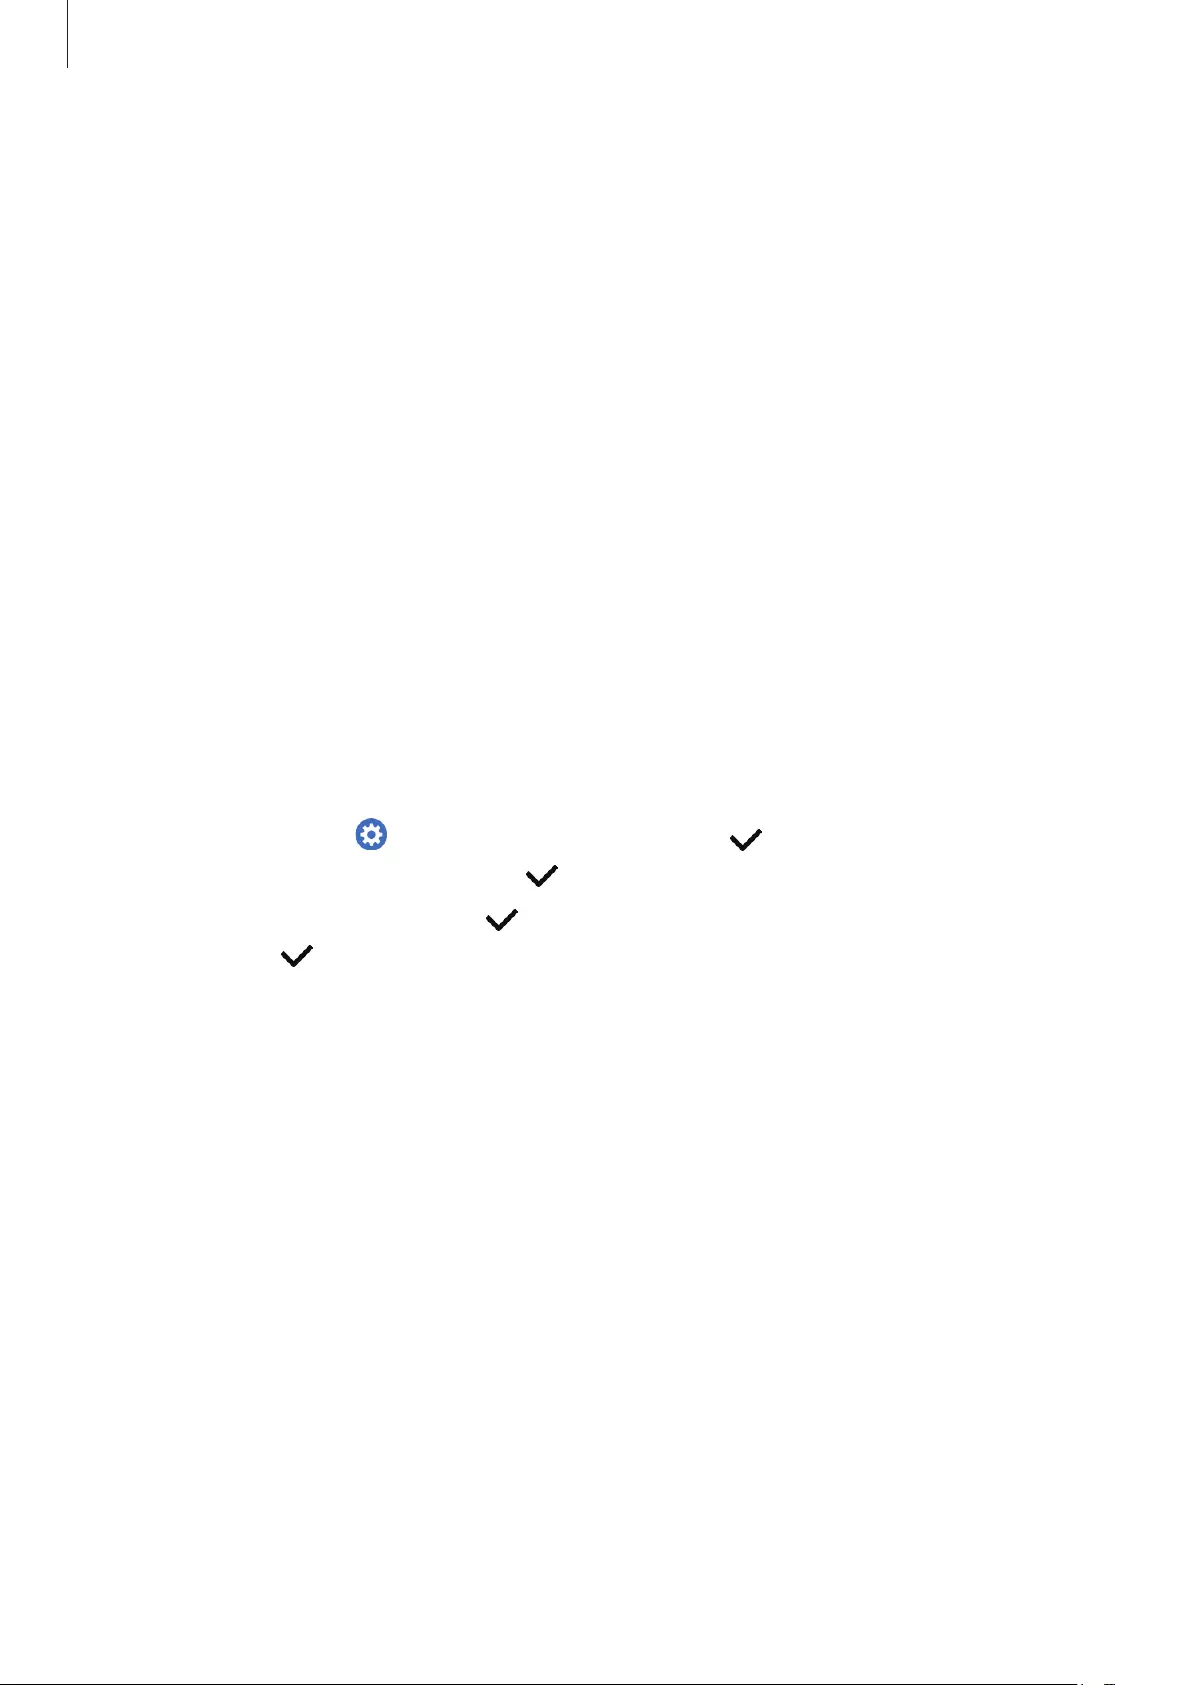
On the Apps screen, tap (
Settings
)
→
Power saving
→
. Alternatively, press and hold
the Home key and tap
Power saving
→
.
To deactivate this mode, tap
OFF
→
. Alternatively, press and hold the Home key and tap
Power saving
→
.
Getting Started
16
Wearing the Gear
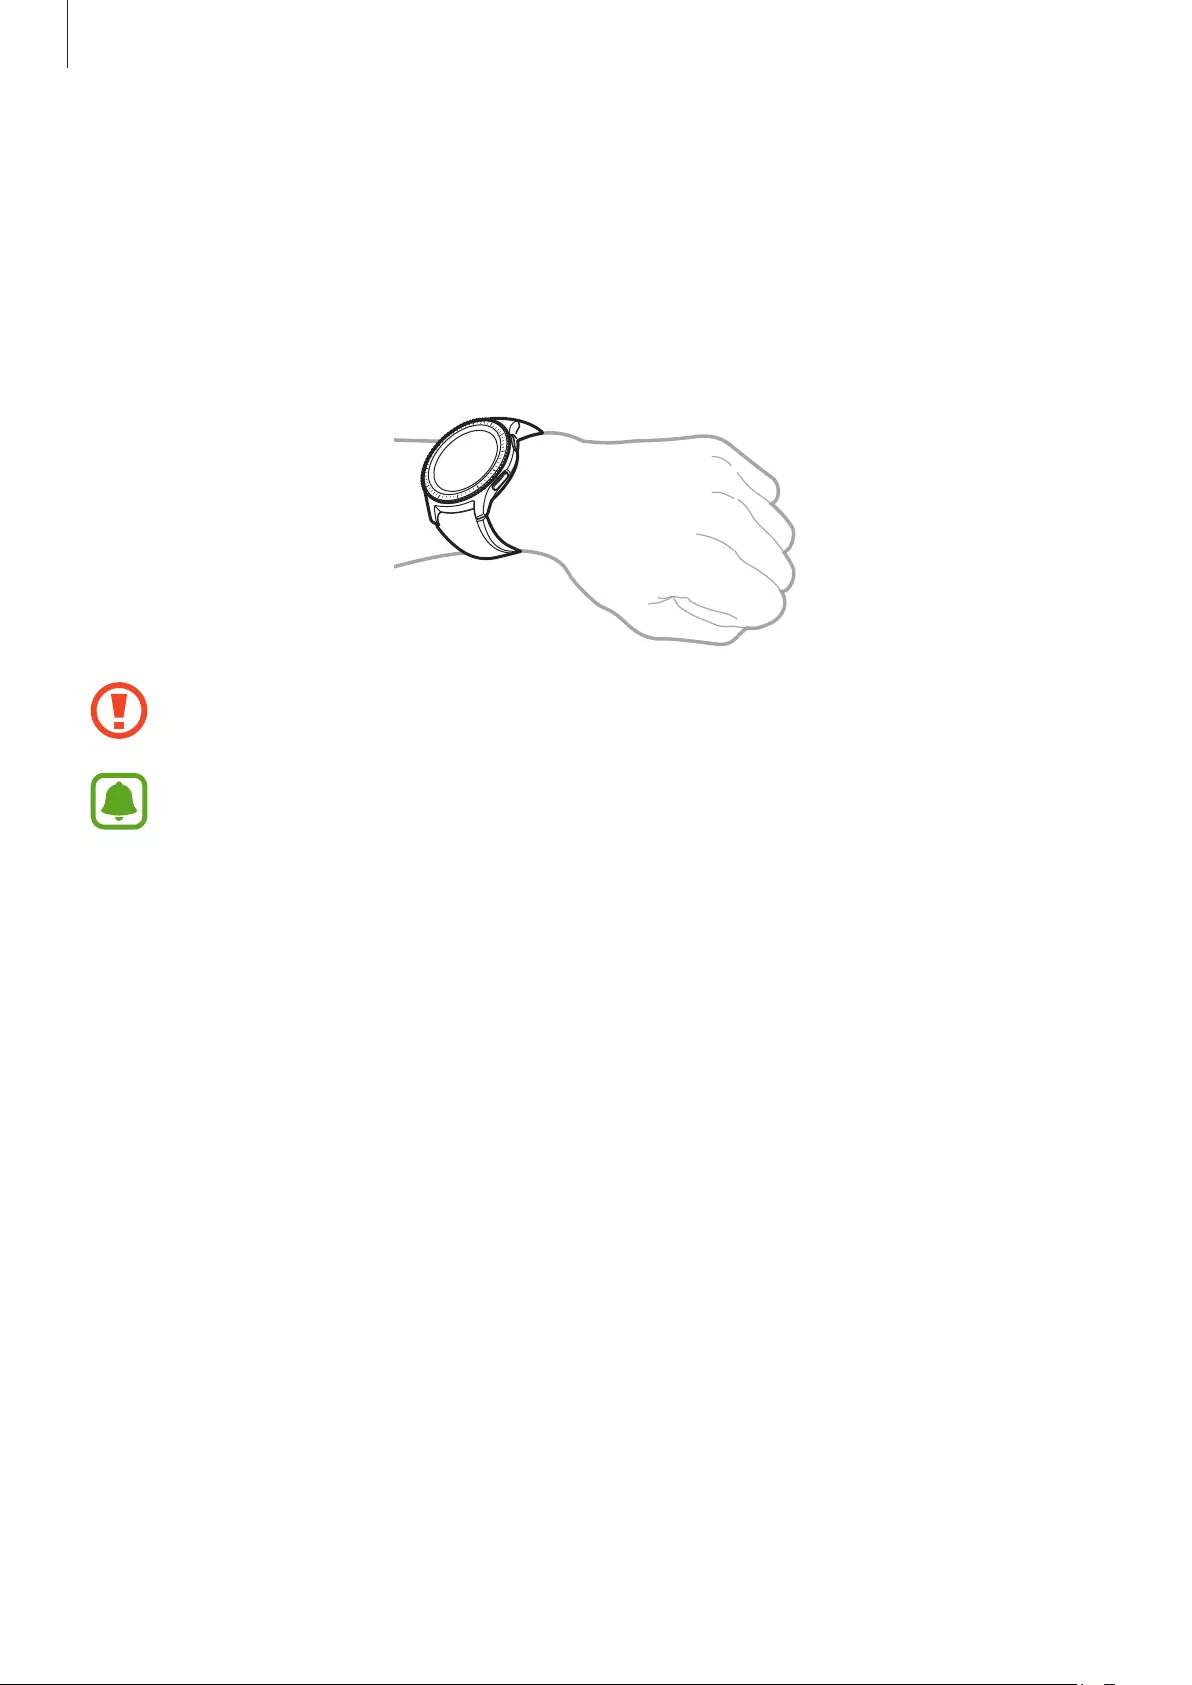
Putting on the Gear
Open the buckle and place the band around your wrist. Fit the band to your wrist, insert the
pin into an adjustment hole, and then secure the buckle to close it.
Do not bend the band excessively. Doing so may damage the Gear.
To measure your heart rate more accurately with the Gear, wear the Gear firmly
around your lower arm just above the wrist. Refer to Wearing the Gear correctly for
details.
Band tips and precautions
•
Be cautious when wearing the Gear. If you have sensitive skin or fasten the Gear too
tightly, you may feel some discomfort.
•
Some people may experience discomfort when wearing the Gear for prolonged periods.
•
Skin irritation may occur if the band is exposed to soap, sweat, allergens, or pollutants for
long periods.
•
Do not wear the device too tightly. Make sure to keep the device clean and dry. Though
this device has met international safety standards, some people may experience skin
irritation if they are allergic to certain substances.
Getting Started
17
•
Keep in mind the followings to protect the leather band.
–
Avoid exposing the leather band to direct sunlight, water, and hot or humid
environments. The leather band can become discoloured or deformed.
–
The leather is permeable so it can be contaminated by oil and cosmetics. Avoid
exposing the leather band to these products.
•
Using a metal band is not recommended. Metal bands may cause connectivity problems
in areas with weak signals or poor reception.
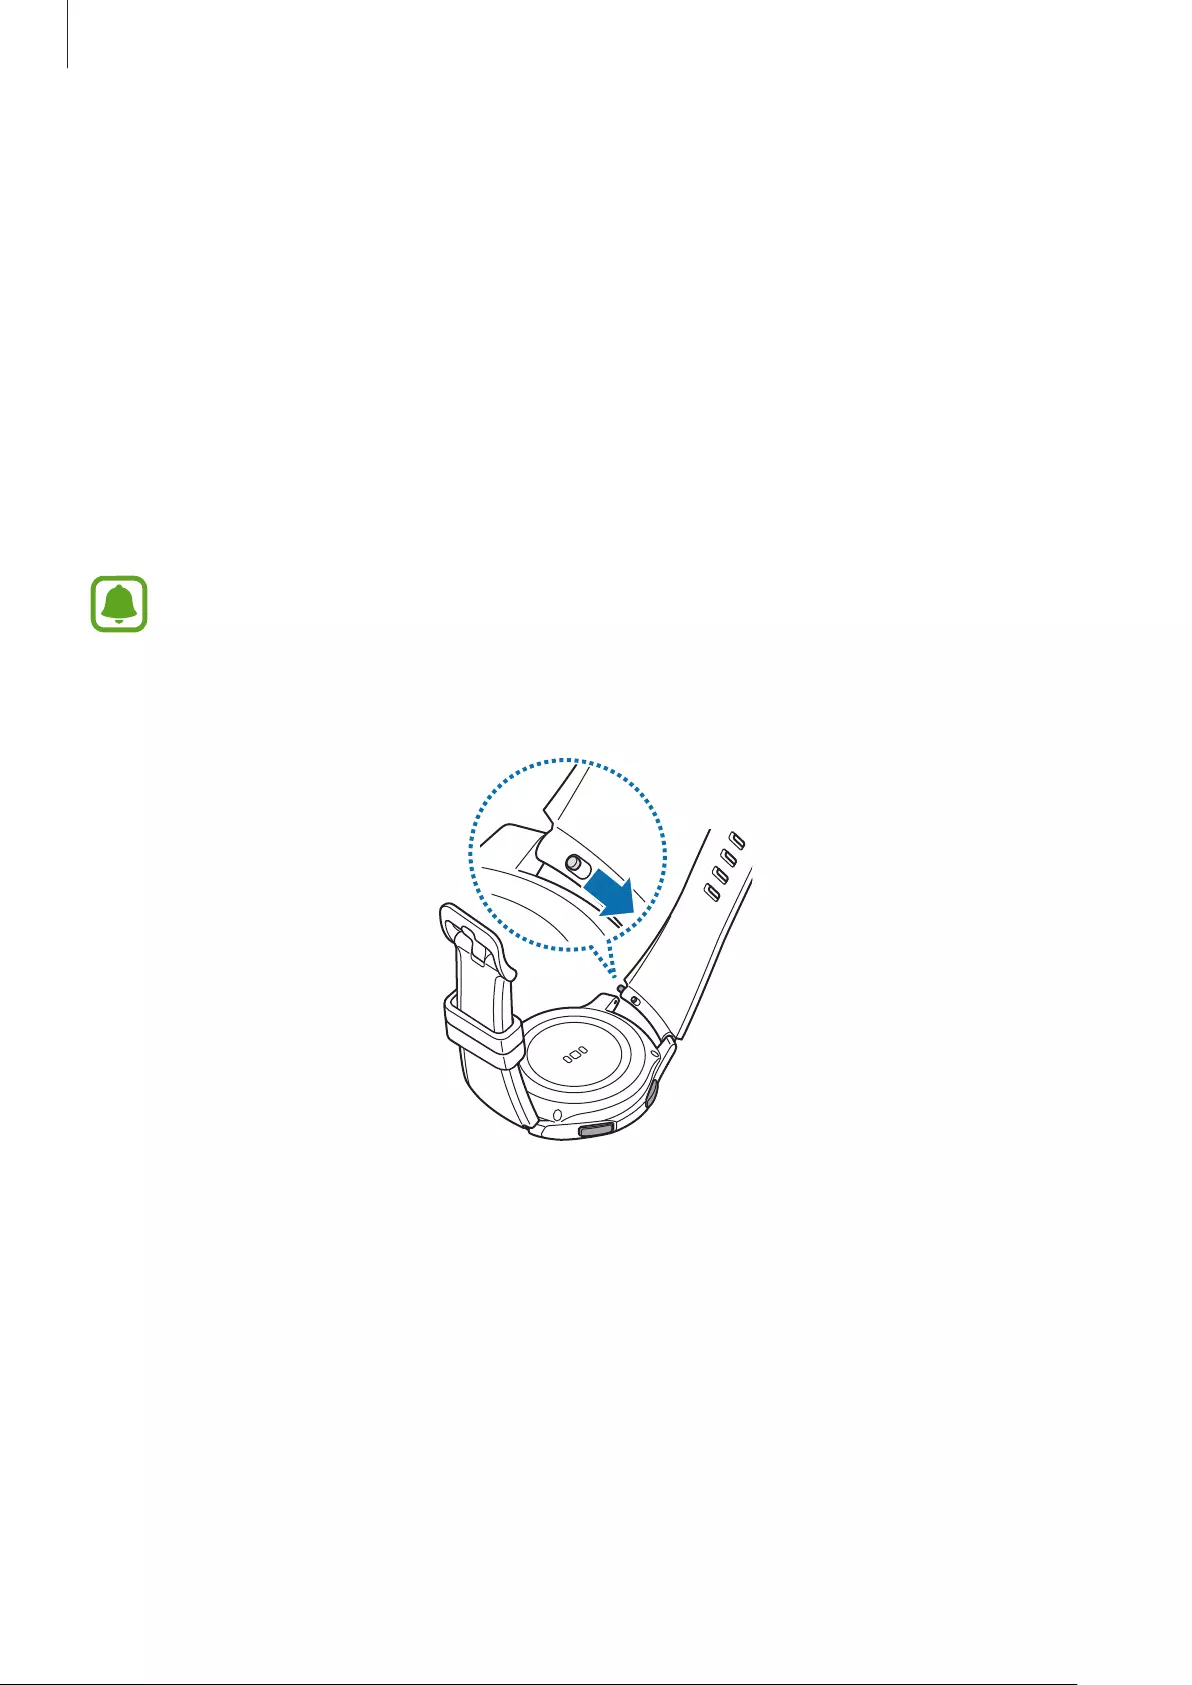
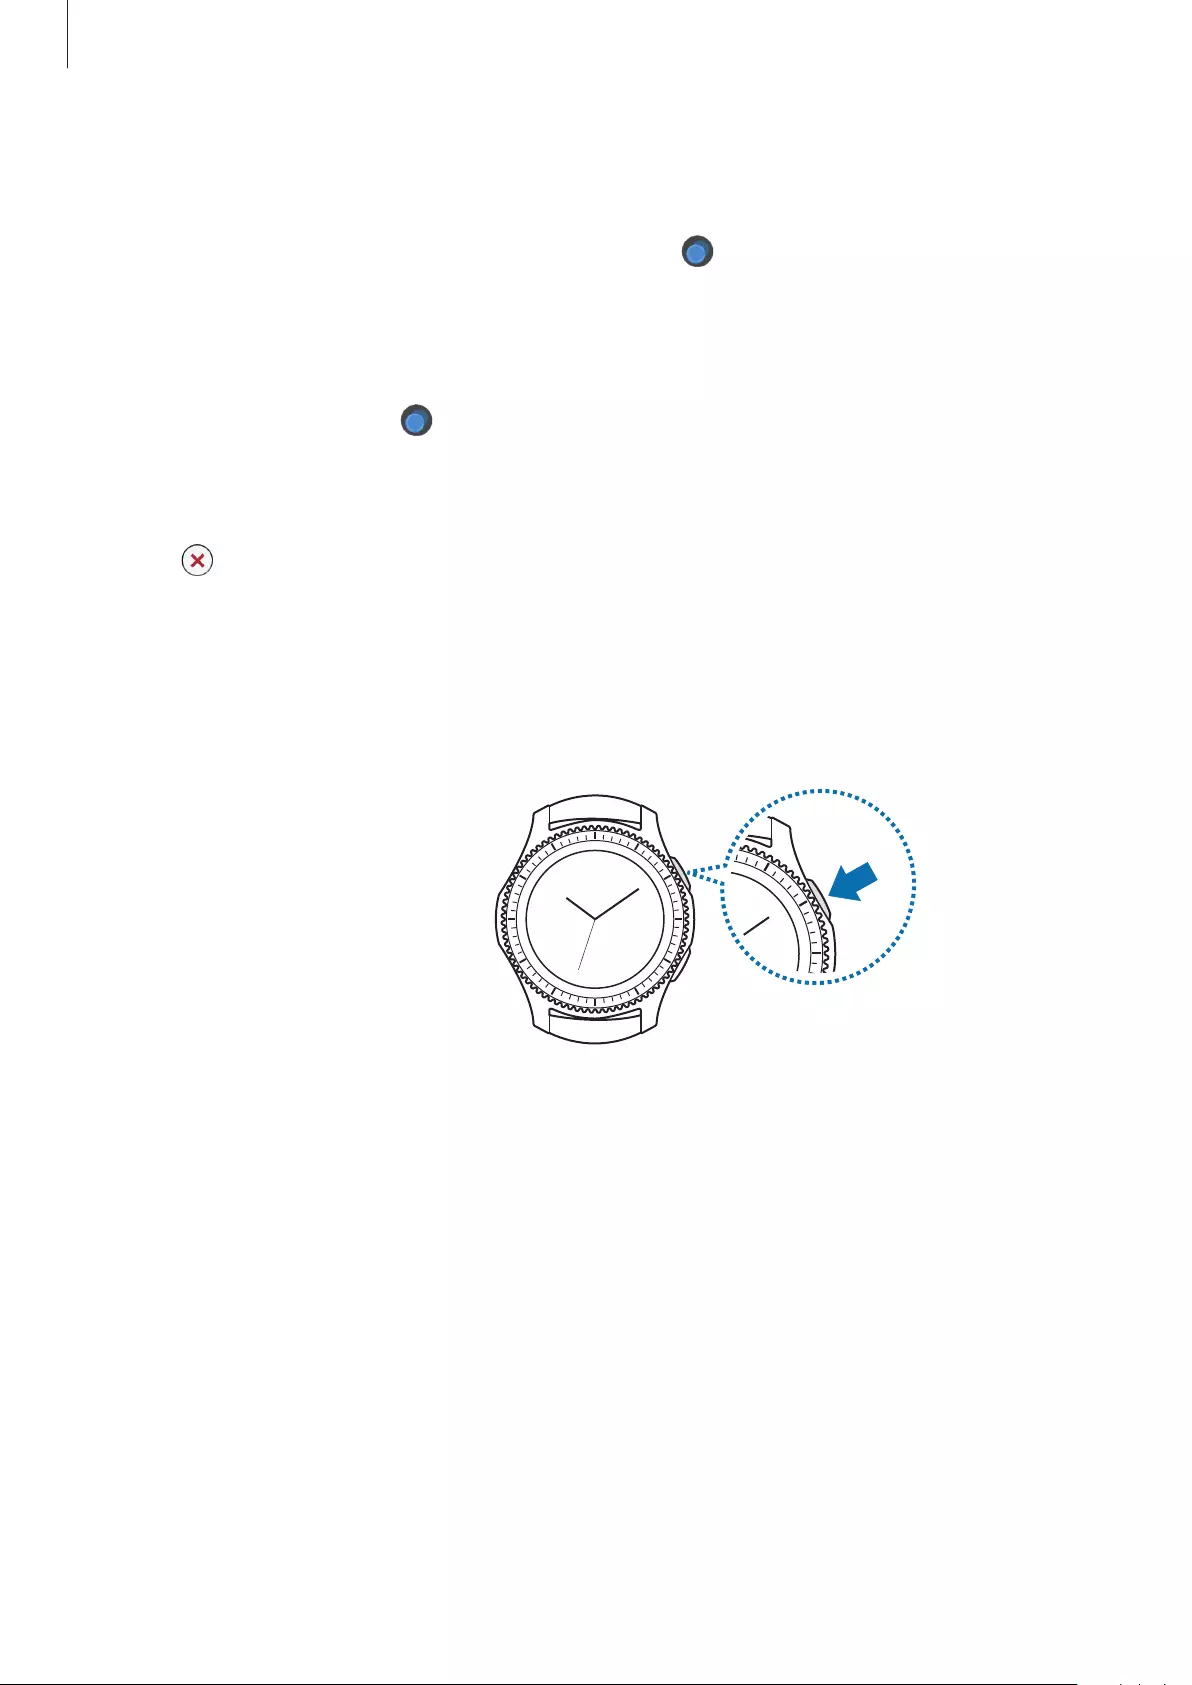
Replacing the band
Detach the band from the Gear to replace it with a new one.
The band’s appearance may vary depending on your model.
1 Slide the band’s spring bar inwards.
Getting Started
18
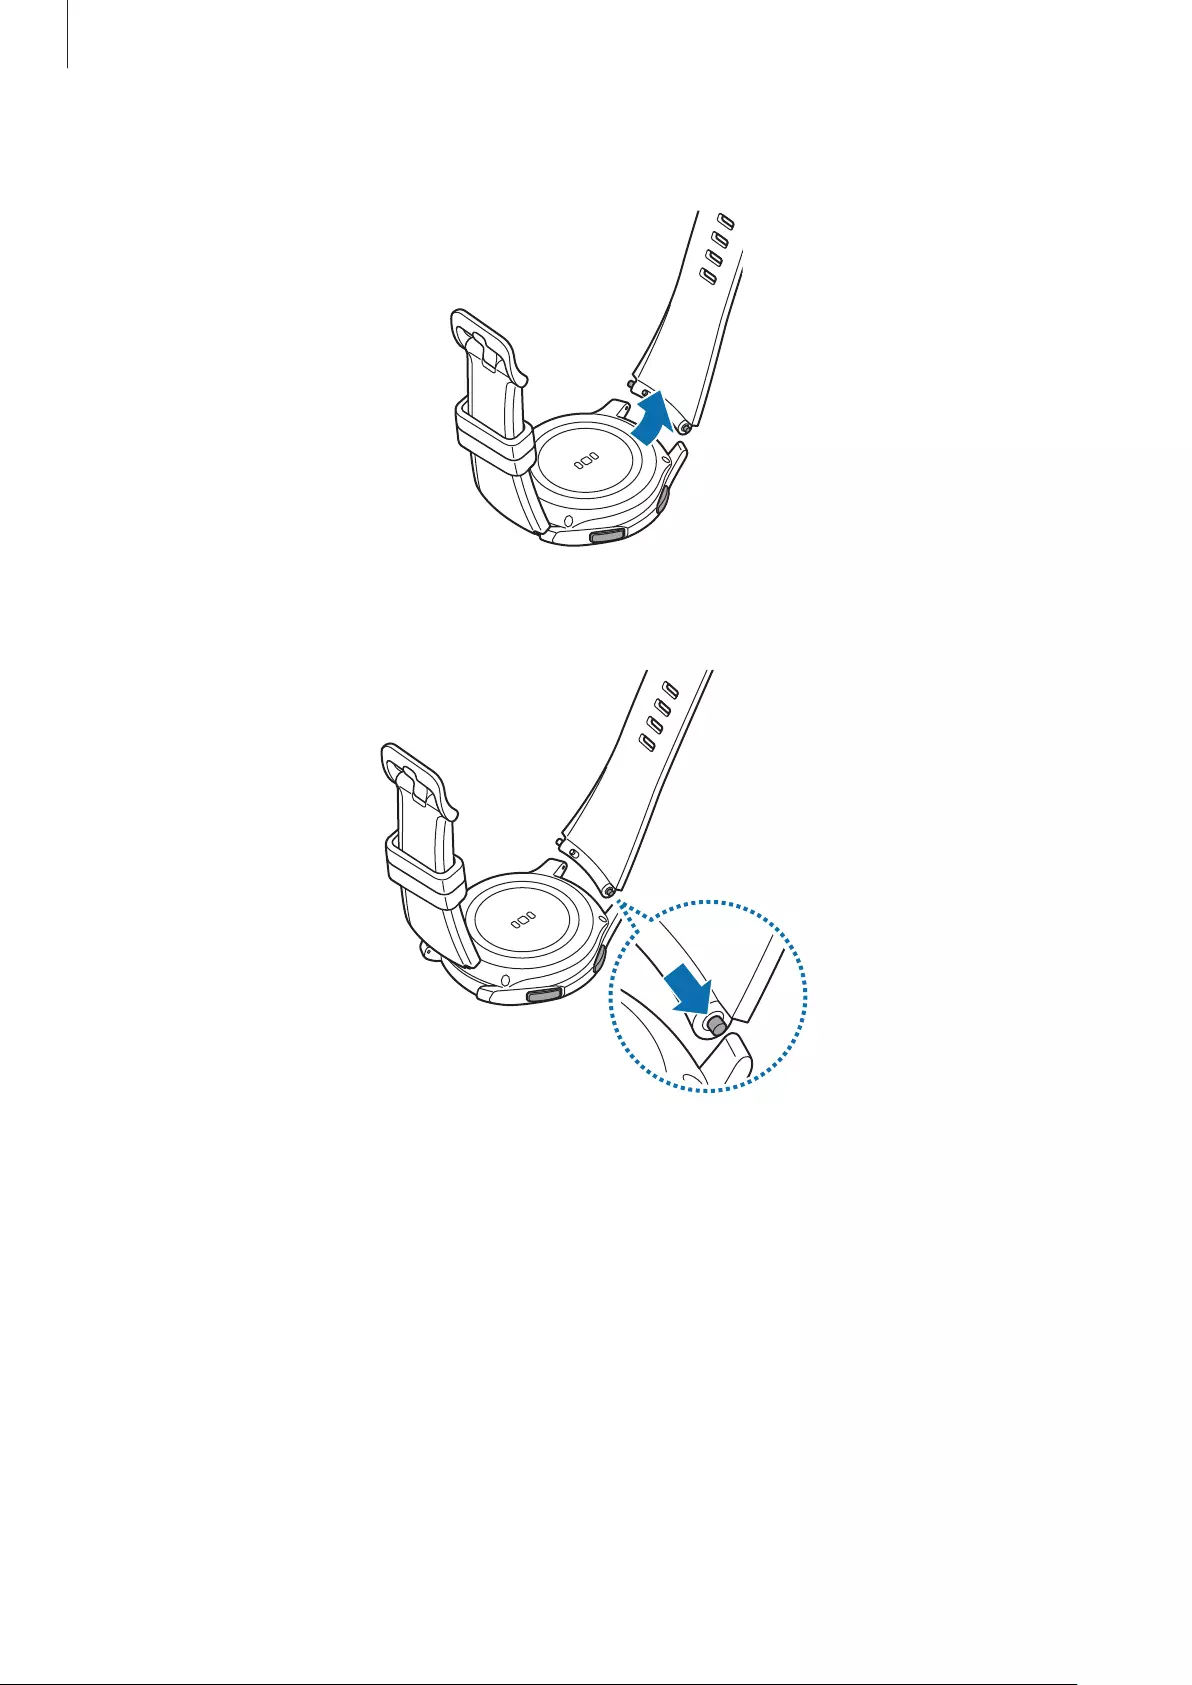
2 Pull the band away from the Gear’s body.
3 Insert one end of the spring bar into the Gear’s lug.
Getting Started
19
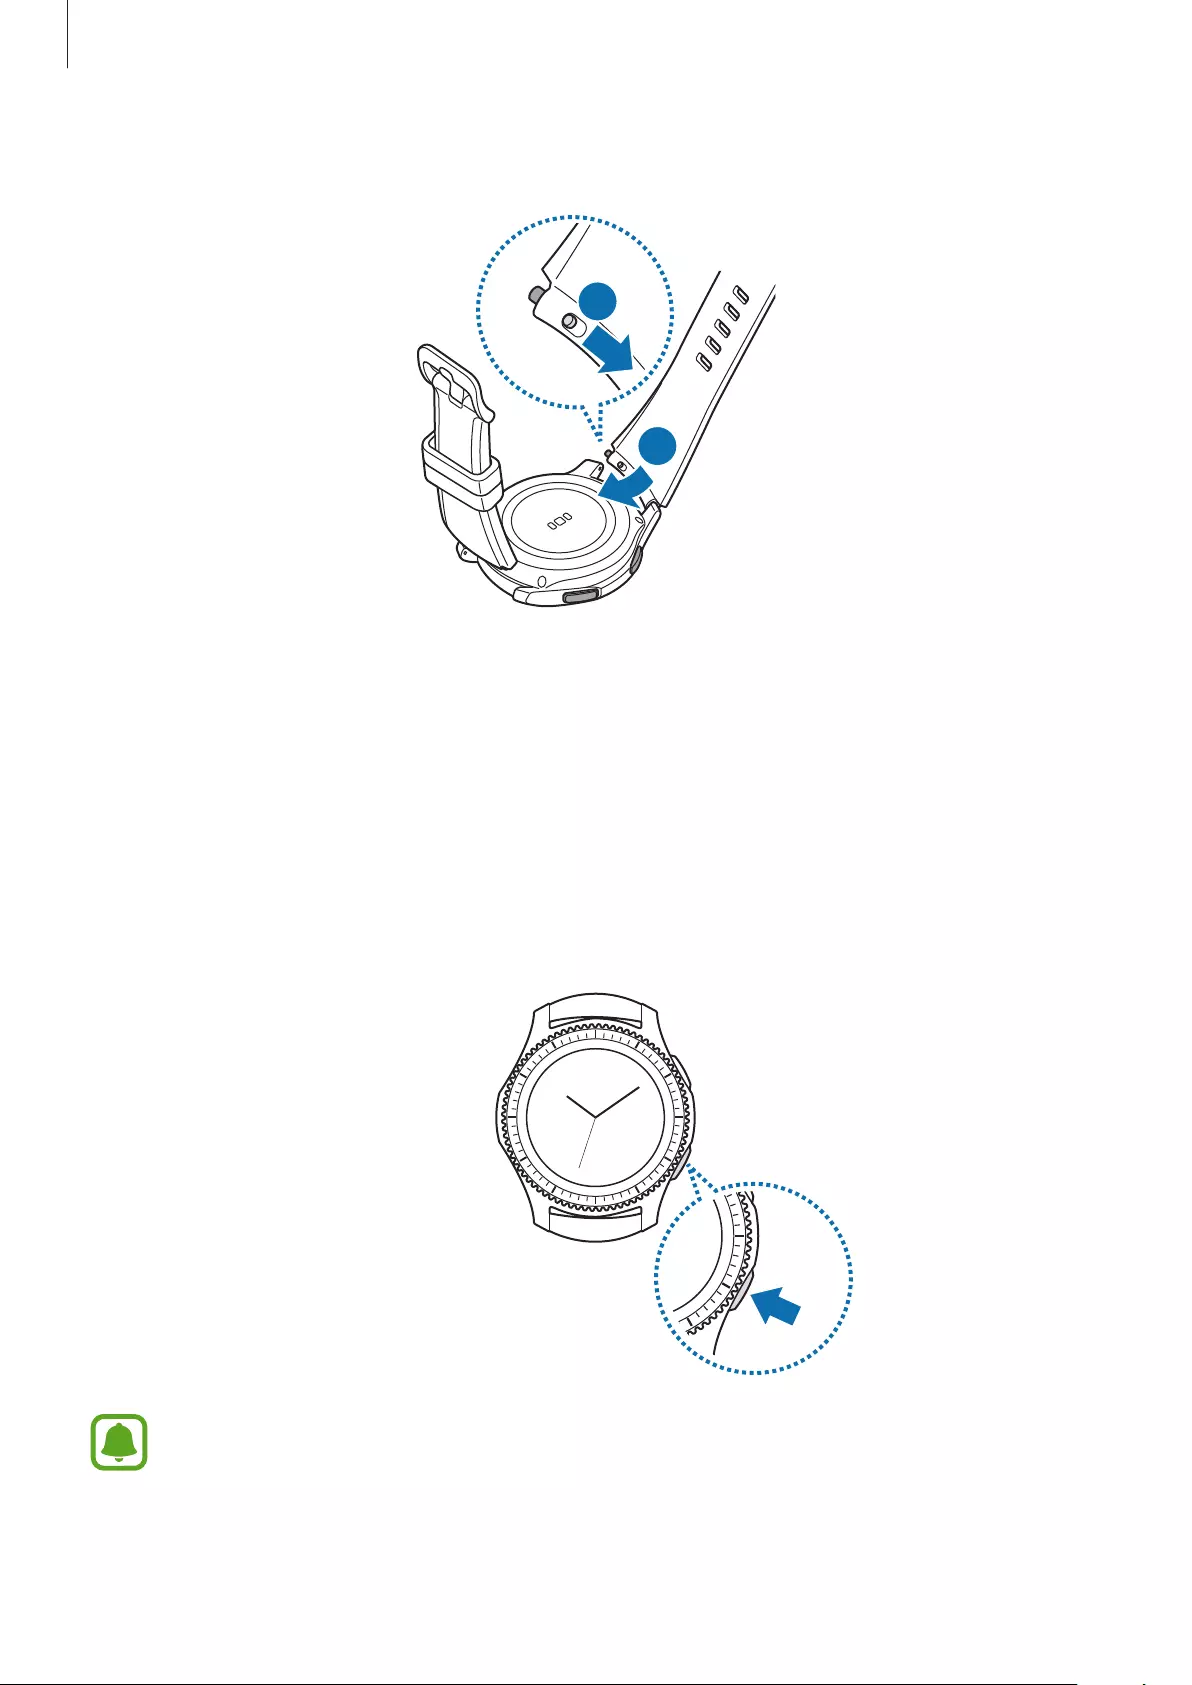
4 Slide the spring bar inwards and connect the band.
1
2
Turning the Gear on and off
Press and hold the Home key (Power key) for a few seconds to turn on the Gear. When you
turn on the Gear for the first time or reset it, a pop-up window will appear. Follow the on-
screen instructions to download and install the Samsung Gear app on your mobile device.
Refer to Connecting the Gear to a mobile device for details.
To turn off the Gear, press and hold the Home key (Power key), and then tap
Power off
.
Follow all posted warnings and directions from authorised personnel in areas where
the use of wireless devices is restricted, such as aeroplanes and hospitals.
Getting Started
20
Restarting the Gear
If your Gear is frozen and unresponsive, press and hold the Home key (Power key) for more
than 7 seconds to restart it.
Connecting the Gear to a mobile device
Installing the Samsung Gear app
To connect your Gear to a mobile device, install the Samsung Gear app on the mobile device.
You can download the app from
Galaxy Apps
,
Play Store
, or apps.samsung.com/gear.
You cannot install the Samsung Gear app on the mobile devices that do not support
Gear syncing. Ensure that your mobile device is compatible with a Gear.
Connecting the Gear to a mobile device via Bluetooth
Gear
1 Turn on the Gear.
When you turn on the Gear, a pop-up window will appear about downloading and
installing the Samsung Gear app on your mobile device.
Mobile device
2 On your mobile device, launch
Samsung Gear
.
3 Tap
CONNECT TO GEAR
.
4 Tap
OK
when the Bluetooth activation request window appears.
Getting Started
21
5 Follow the on-screen instructions to complete the connection.
When the devices are connected, an on-screen tutorial will appear on the Gear’s screen.
Follow the on-screen instructions to learn the Gear’s basic controls.
•
Connection methods and screenshots may vary depending on your device and
software version.
•
When connected, the Gear’s battery may drain more quickly while syncing data,
such as contacts.
•
Supported mobile devices and features may vary depending on your region,
service provider, and device manufacturer. Visit www.samsung.com to see a list of
compatible devices.
Connecting the Gear to a new mobile device
When you connect the Gear to another mobile device, a pop-up window will ask you to
reset the Gear. Make sure you back up any important data stored in your Gear. For more
information about backing up your Gear, refer to Backing up and restoring data.
1 On your Gear, open the Apps screen, tap (
Settings
)
→
Connect to new phone
.
The connection between your Gear and your mobile device will end. After a light reset, it
will automatically enter Bluetooth pairing mode.
2 On another mobile device, launch
Samsung Gear
to connect to your Gear.
If the mobile device you want to connect to is already connected to another Gear,
your Gear cannot establish a connection. Disconnect your mobile device from the
previous Gear to connect to your current Gear.
Getting Started
22
Remote connection
Your Gear and mobile device are connected via Bluetooth. When a Bluetooth connection
is not available, you can remotely connect the Gear to your mobile device by using your
Samsung account via Wi-Fi network. This allows you to continue receiving notifications from
your mobile device.
This feature is automatically activated when you connect to your mobile device via Bluetooth
for the first time.
If this feature is not turned on, launch
Samsung Gear
on your mobile device, tap
SETTINGS
→
Gear connection
, and then tap the
Remote connection
switch.
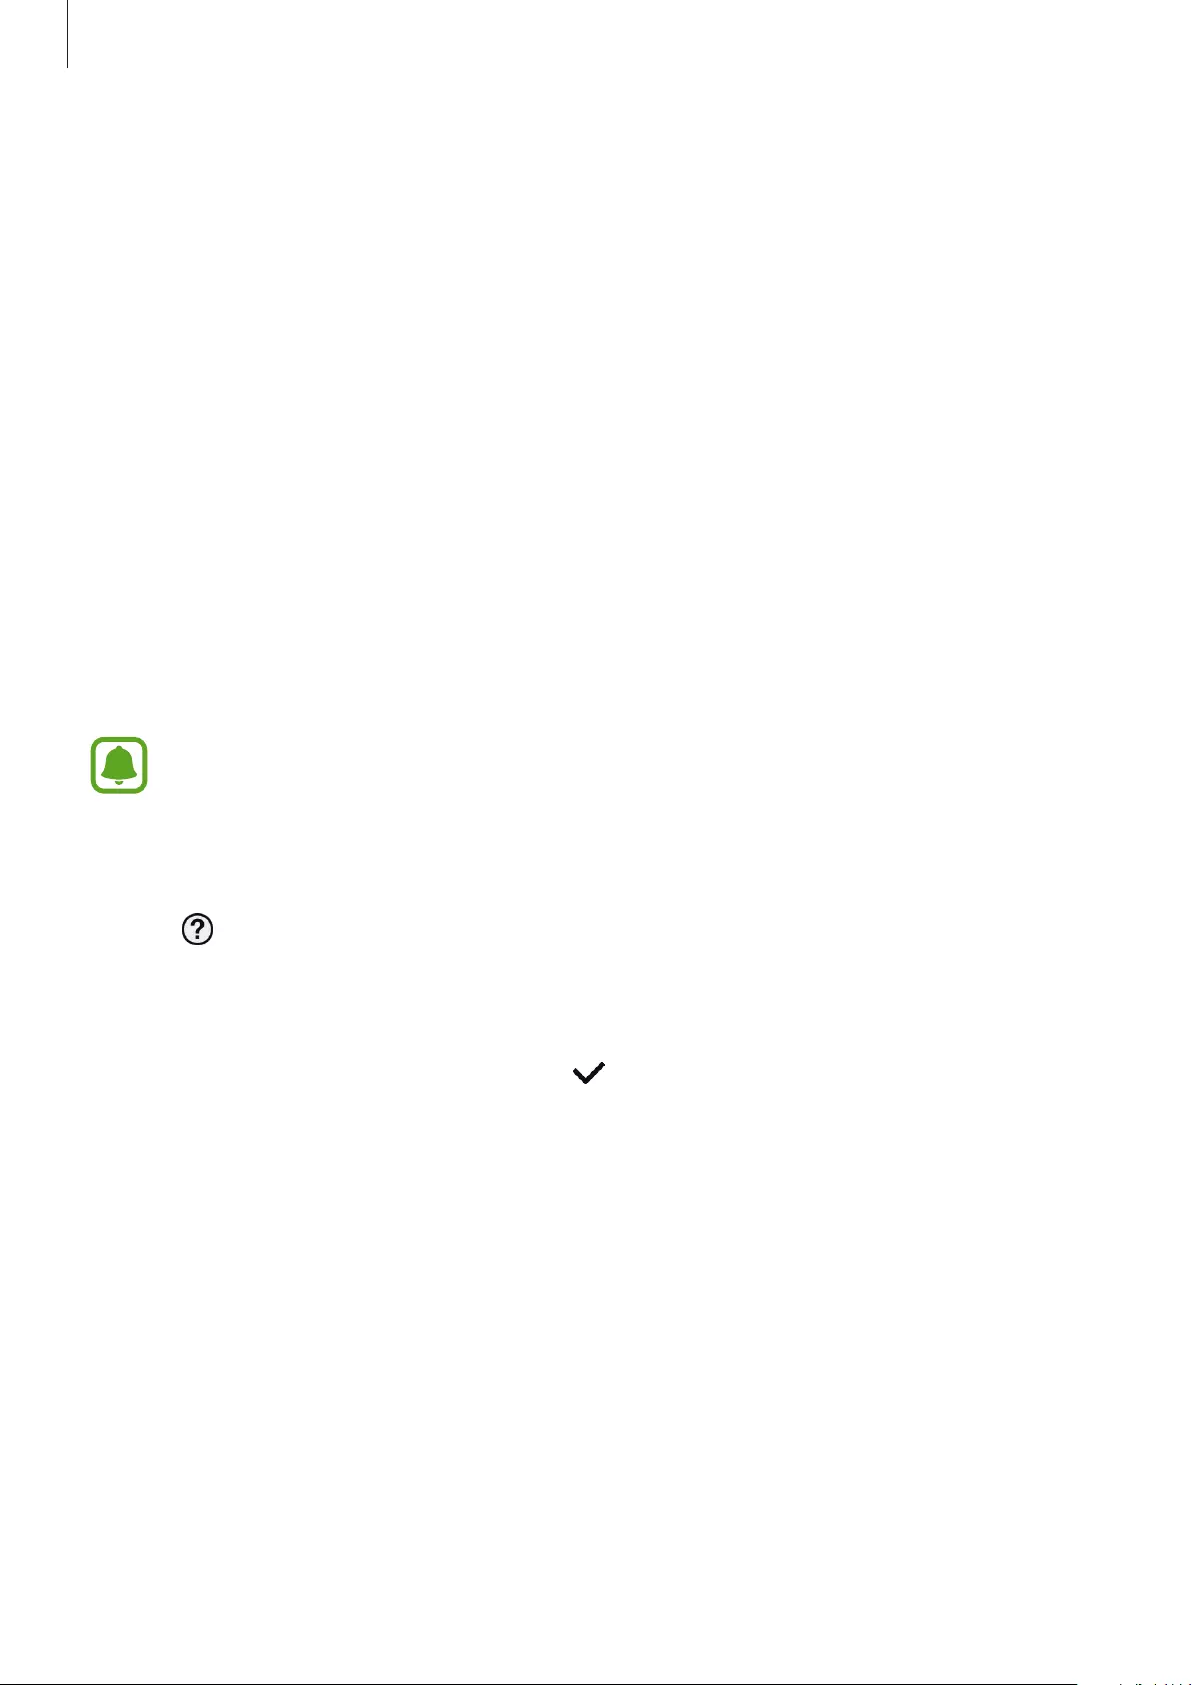
Using the Gear without a mobile device
You can use the Gear without connecting it to a mobile device. You can set to use the Gear
without a mobile device when you turn on the Gear for the first time or you reset it.
Some features are not available.
1 Turn on the Gear.
2 Tap , scroll down the screen, and tap
here
.
3 Select a language.
4 Read the on-screen instructions and tap .

Getting Started
23
5 Read the terms and conditions, and then agree to them.
6 Follow the PIN setting instructions to protect your personal information.
7 Create a PIN to use when backing up and restoring data.
8 Set the date and time.
On the Gear, open the Apps screen, tap (
Settings
)
→
Connect to phone
→
OK
to
connect the Gear to a mobile device while using the Gear without a mobile device.
24
Basics
Controlling the screen
Screen composition
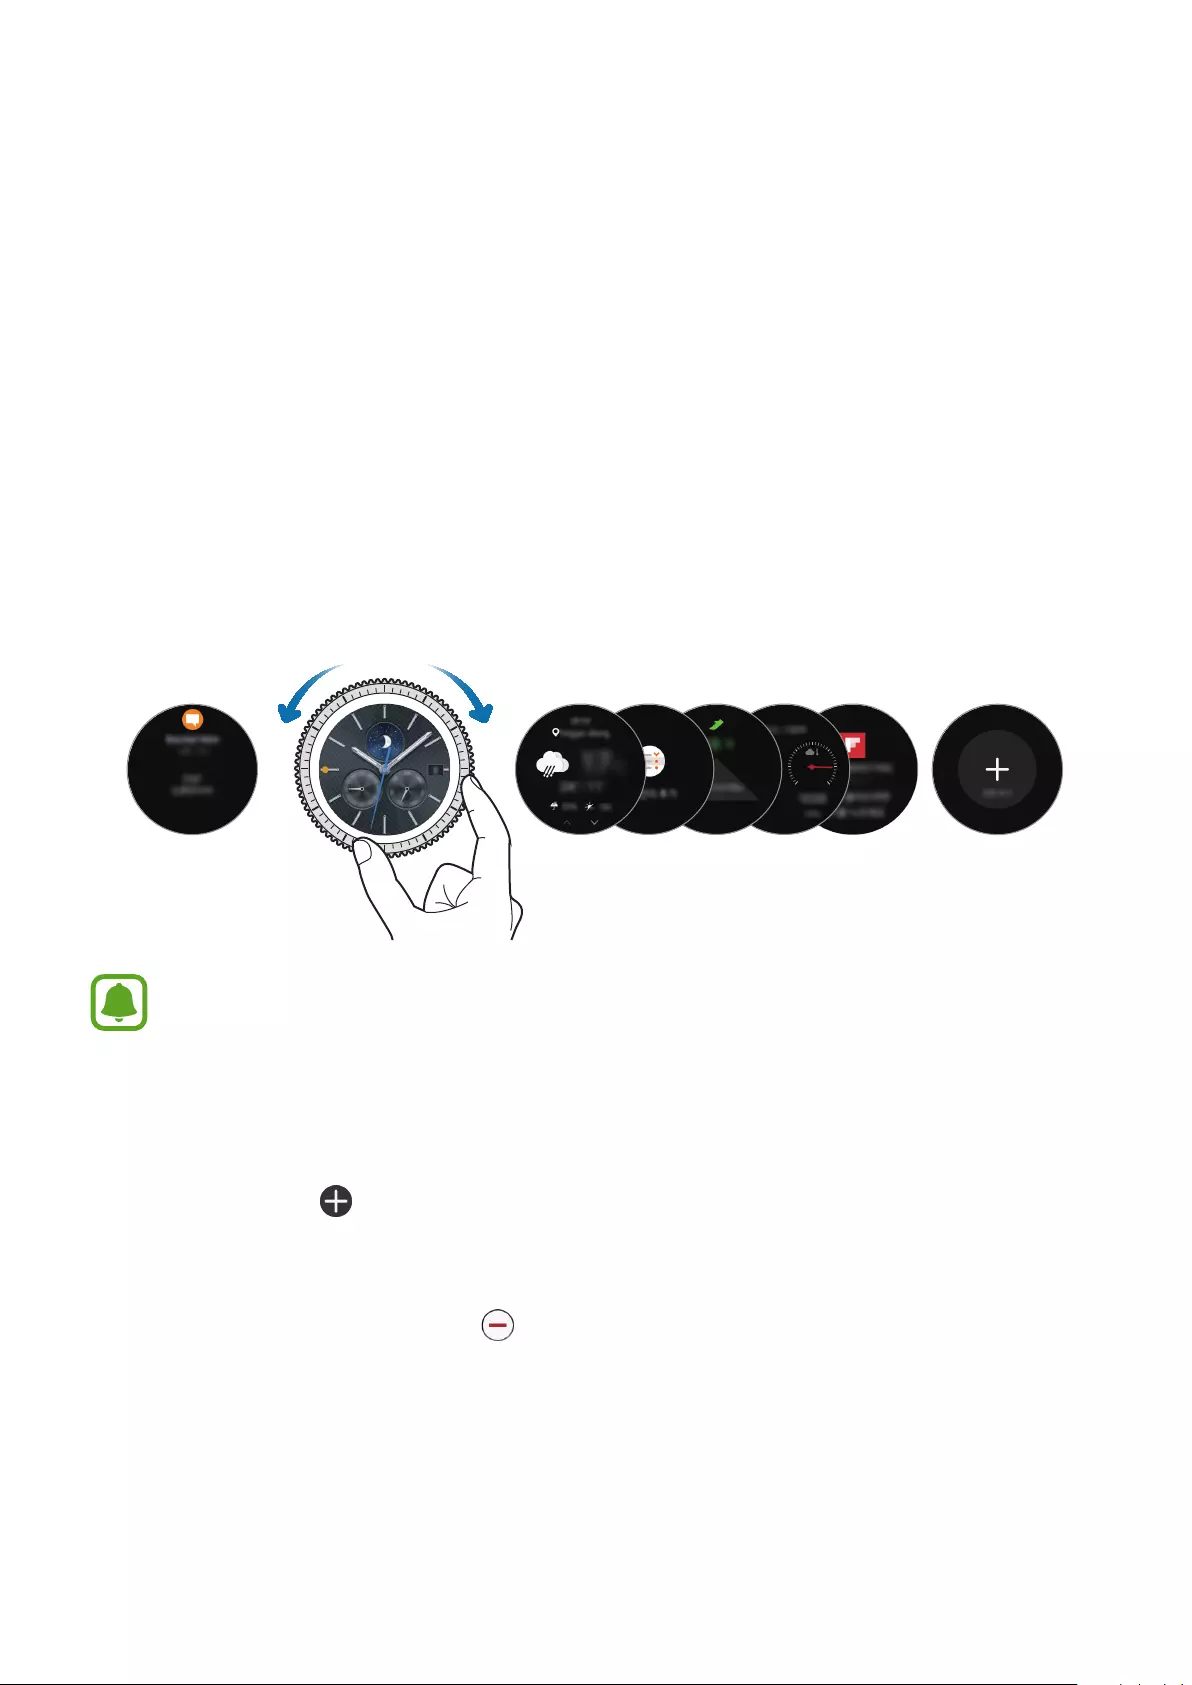
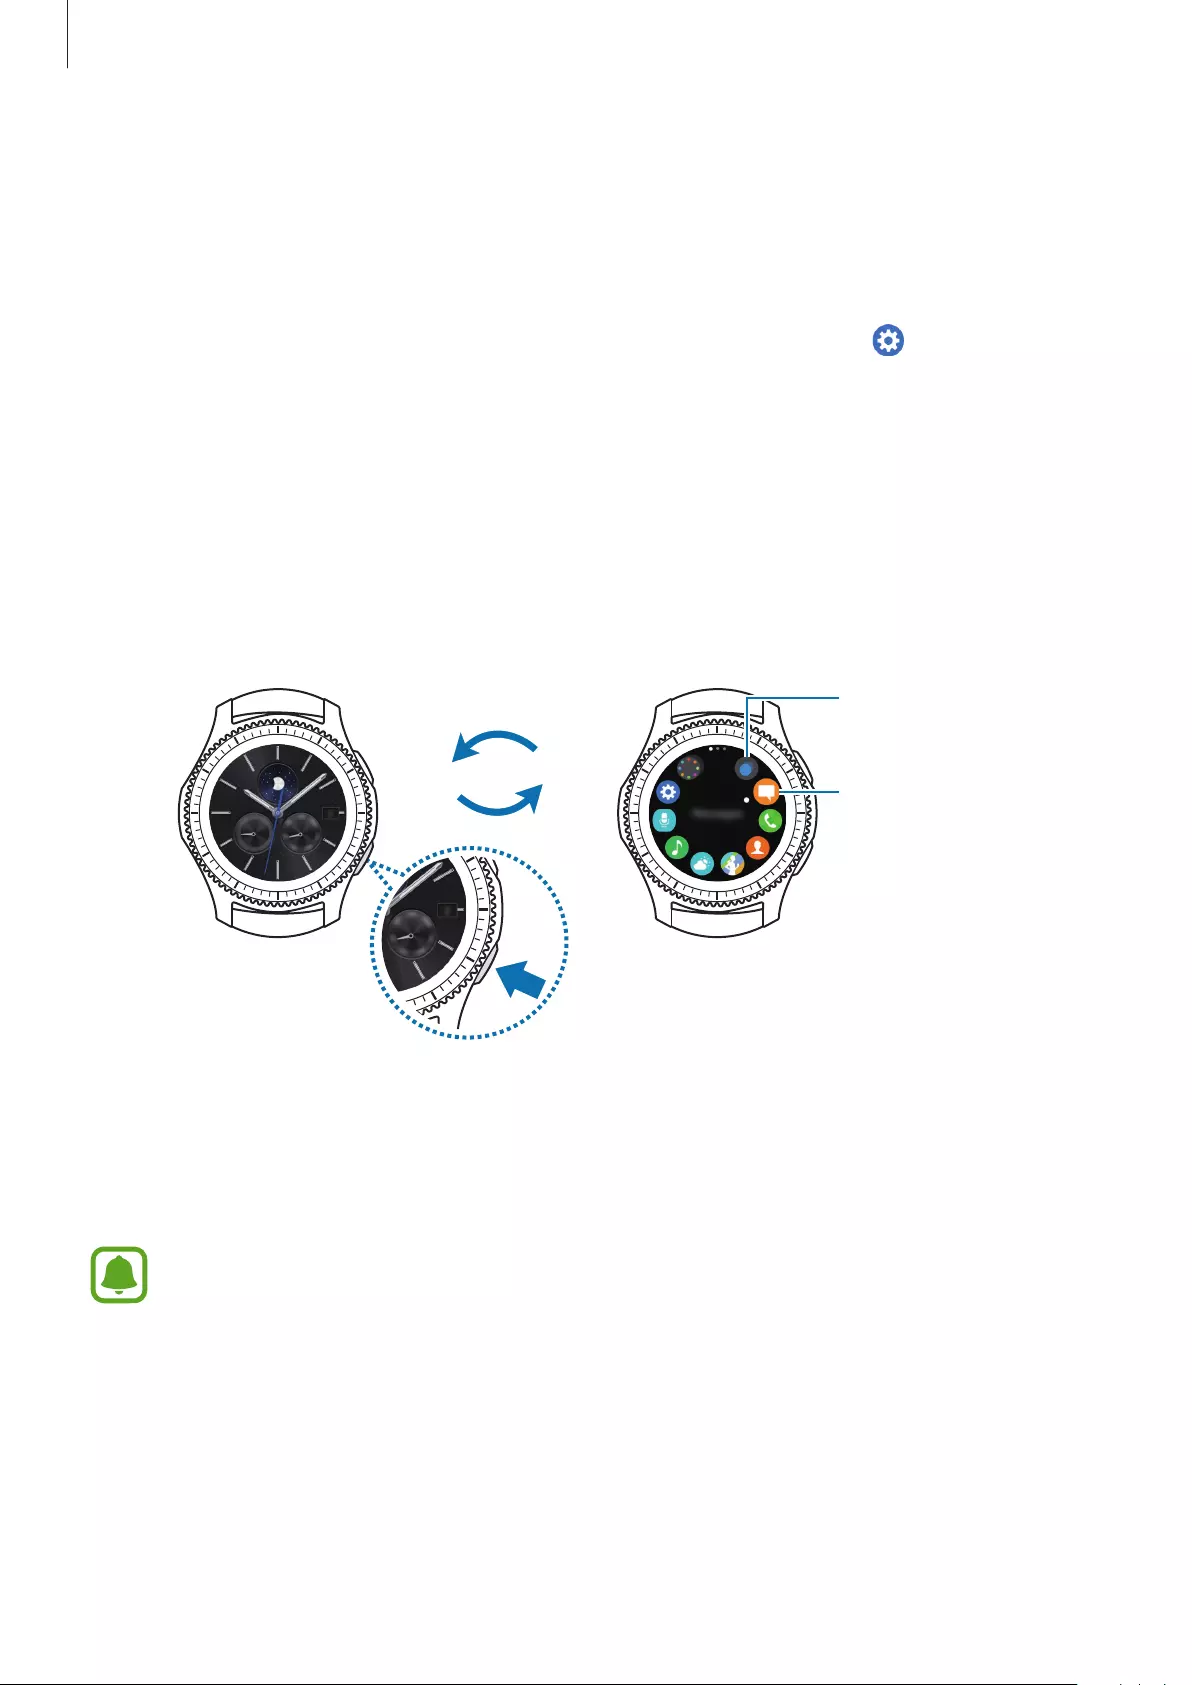
The Watch screen is the starting point for accessing all of the Gear’s many screens.
You can view other screens by pressing the button, rotating the bezel, or swiping your finger
on the screen.
Notifications
Widgets Add widgets.
Available widgets, notifications, and their arrangement may vary depending on the
model and the software version.
Adding widgets
You can add more widgets on the Home screen.
Scroll the screen, tap , and select a widget. The selected widget will appear in a new panel.
Removing widgets
Tap and hold a widget and then tap .
Basics
25
Turning the screen on and off
To turn on the screen, rotate the bezel. Or, press the Home key or the Back key.
To turn off the screen, cover it with your palm. Also, the screen will turn off if the Gear is not
used for a specified period.
You can also turn on the screen using a gesture. On the Apps screen, tap (
Settings
)
→
Device
→
Wake-up gesture
and then tap the
Wake-up gesture
switch to activate it.
Navigating the screen
Switching between the Watch and Apps screen
To open the Apps screen, press the Home key on the Watch screen.
To return to the Watch screen, press the Home key.
An app
Watch screen Apps screen
Apps screen
The Apps screen displays icons for all apps.
To view other panels, rotate the bezel. You can also tap or swipe the screen to the left or right.
The available apps may vary depending on the model and the software version.
Basics
26
Opening apps
On the Apps screen, tap an app icon to open the app.
To open an app from the list of recently used apps, tap (
Recent apps
) on the Apps screen
and select the recent app window.
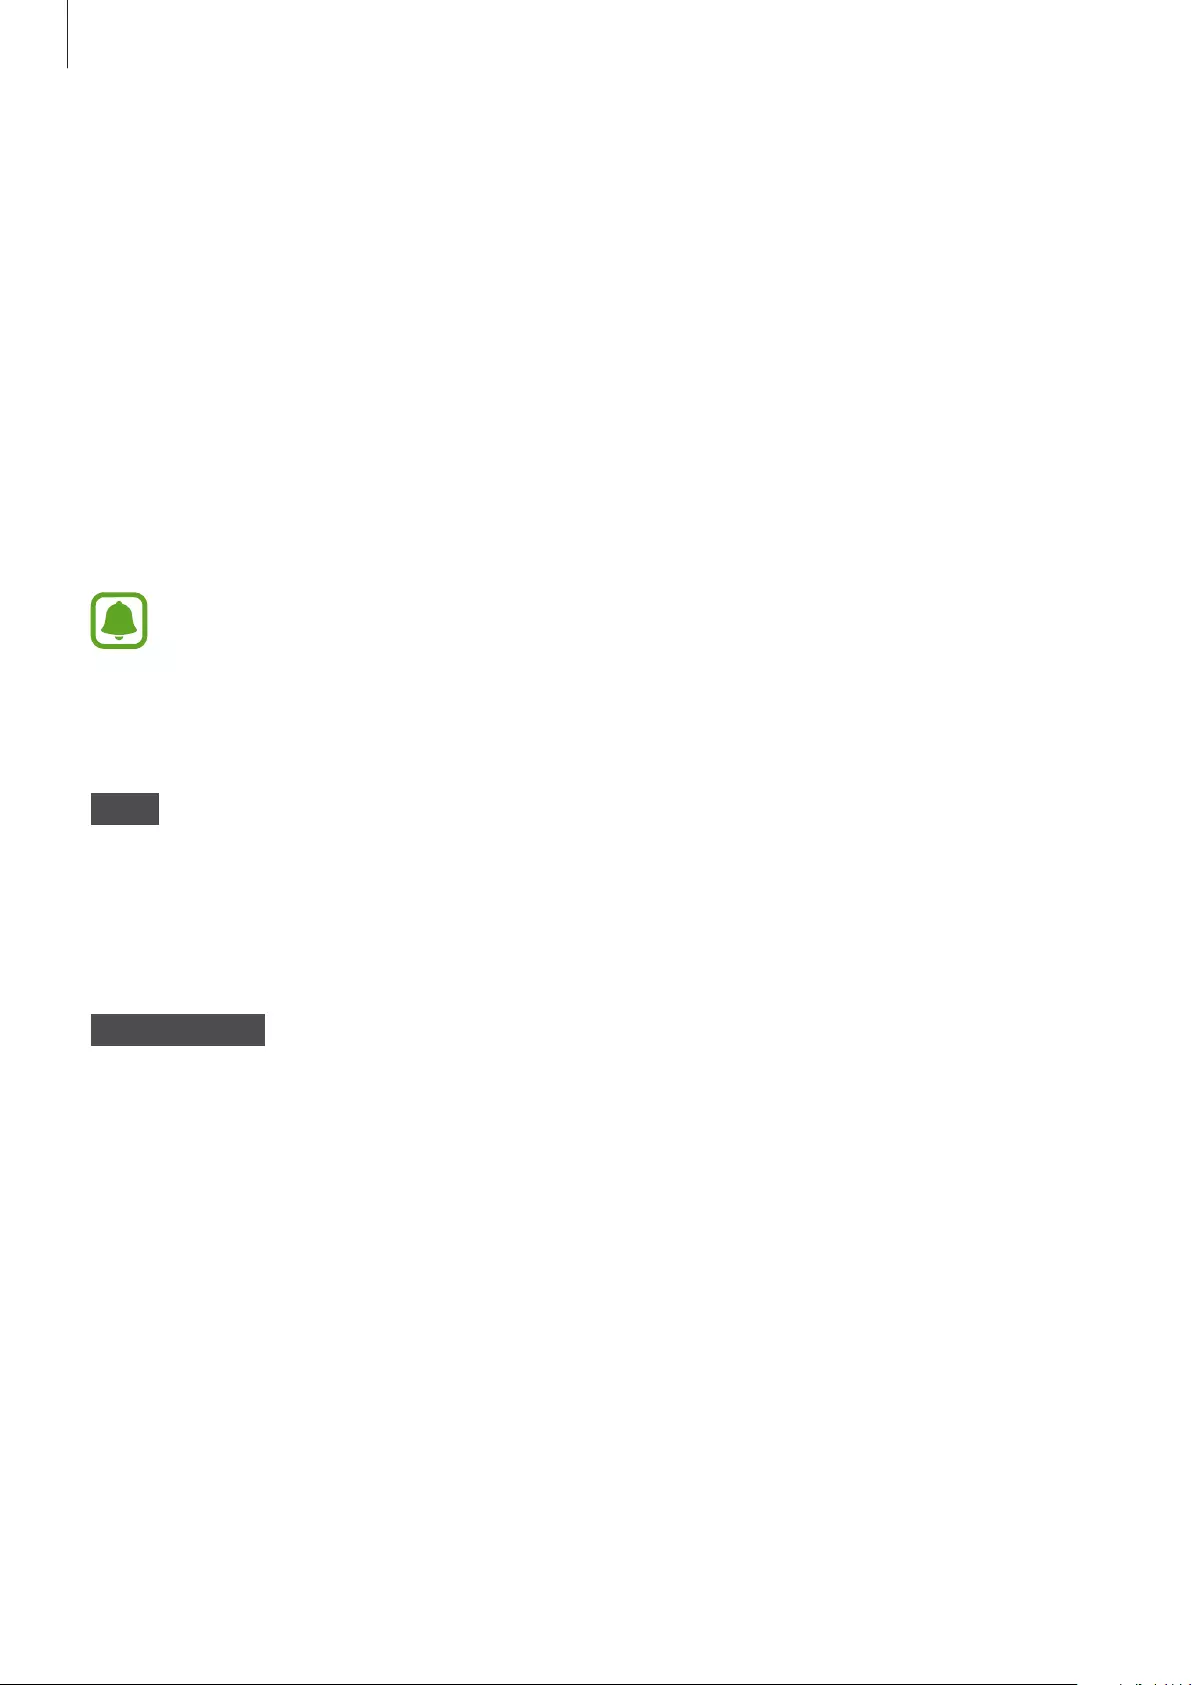
Closing apps
1 On the Apps screen, tap (
Recent apps
).
2 Rotate the bezel to highlight the app you want to close.
3 Tap .
To close all running apps, tap
CLOSE ALL
.
Returning to the previous screen
Press the Back key. You can also swipe down from the top edge of the screen.
Basics
27
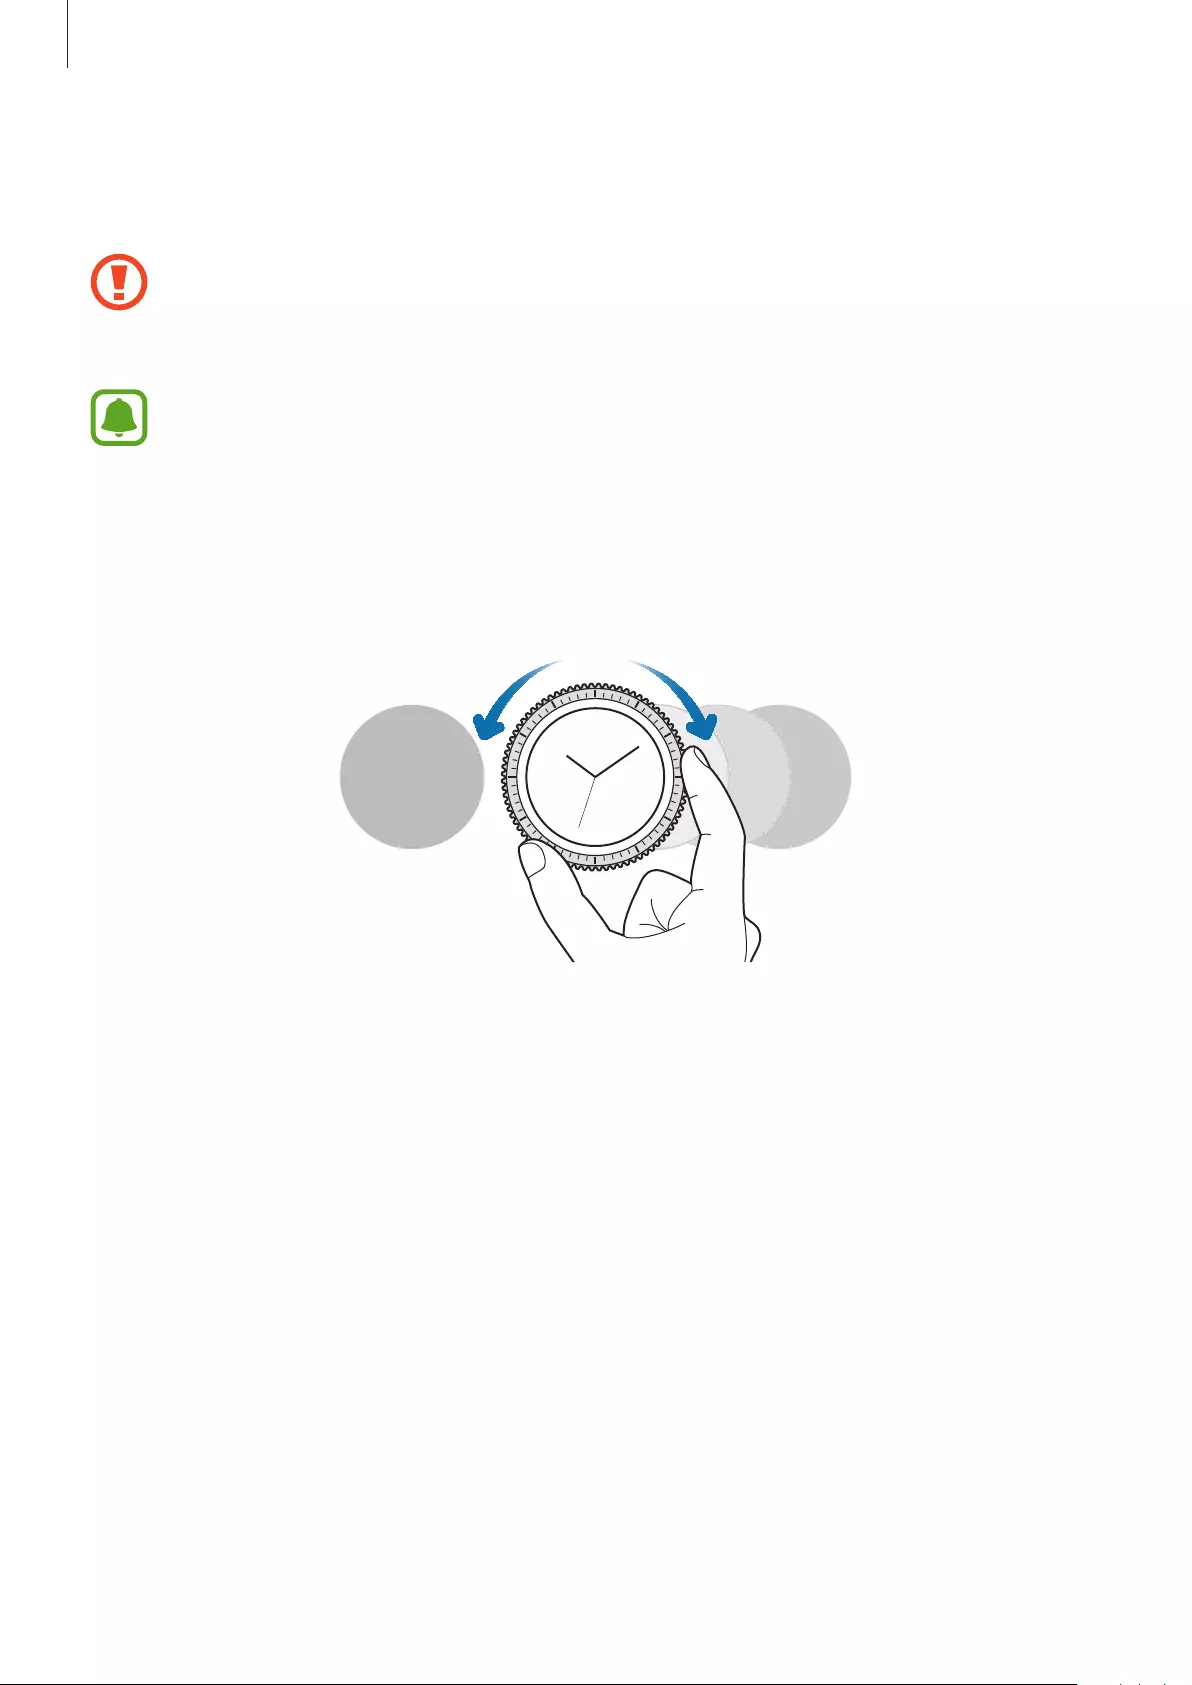
Using the bezel
Rotate the bezel to easily control the Gear’s various functions.
•
Make sure the bezel area is free from the foreign materials.
•
Do not use the bezel near magnetic fields as they may interfere with the bezel’s
internal magnets and cause it to malfunction.
If the bezel does not rotate, take it to a Samsung Service Centre. Do not disassemble
the Gear.
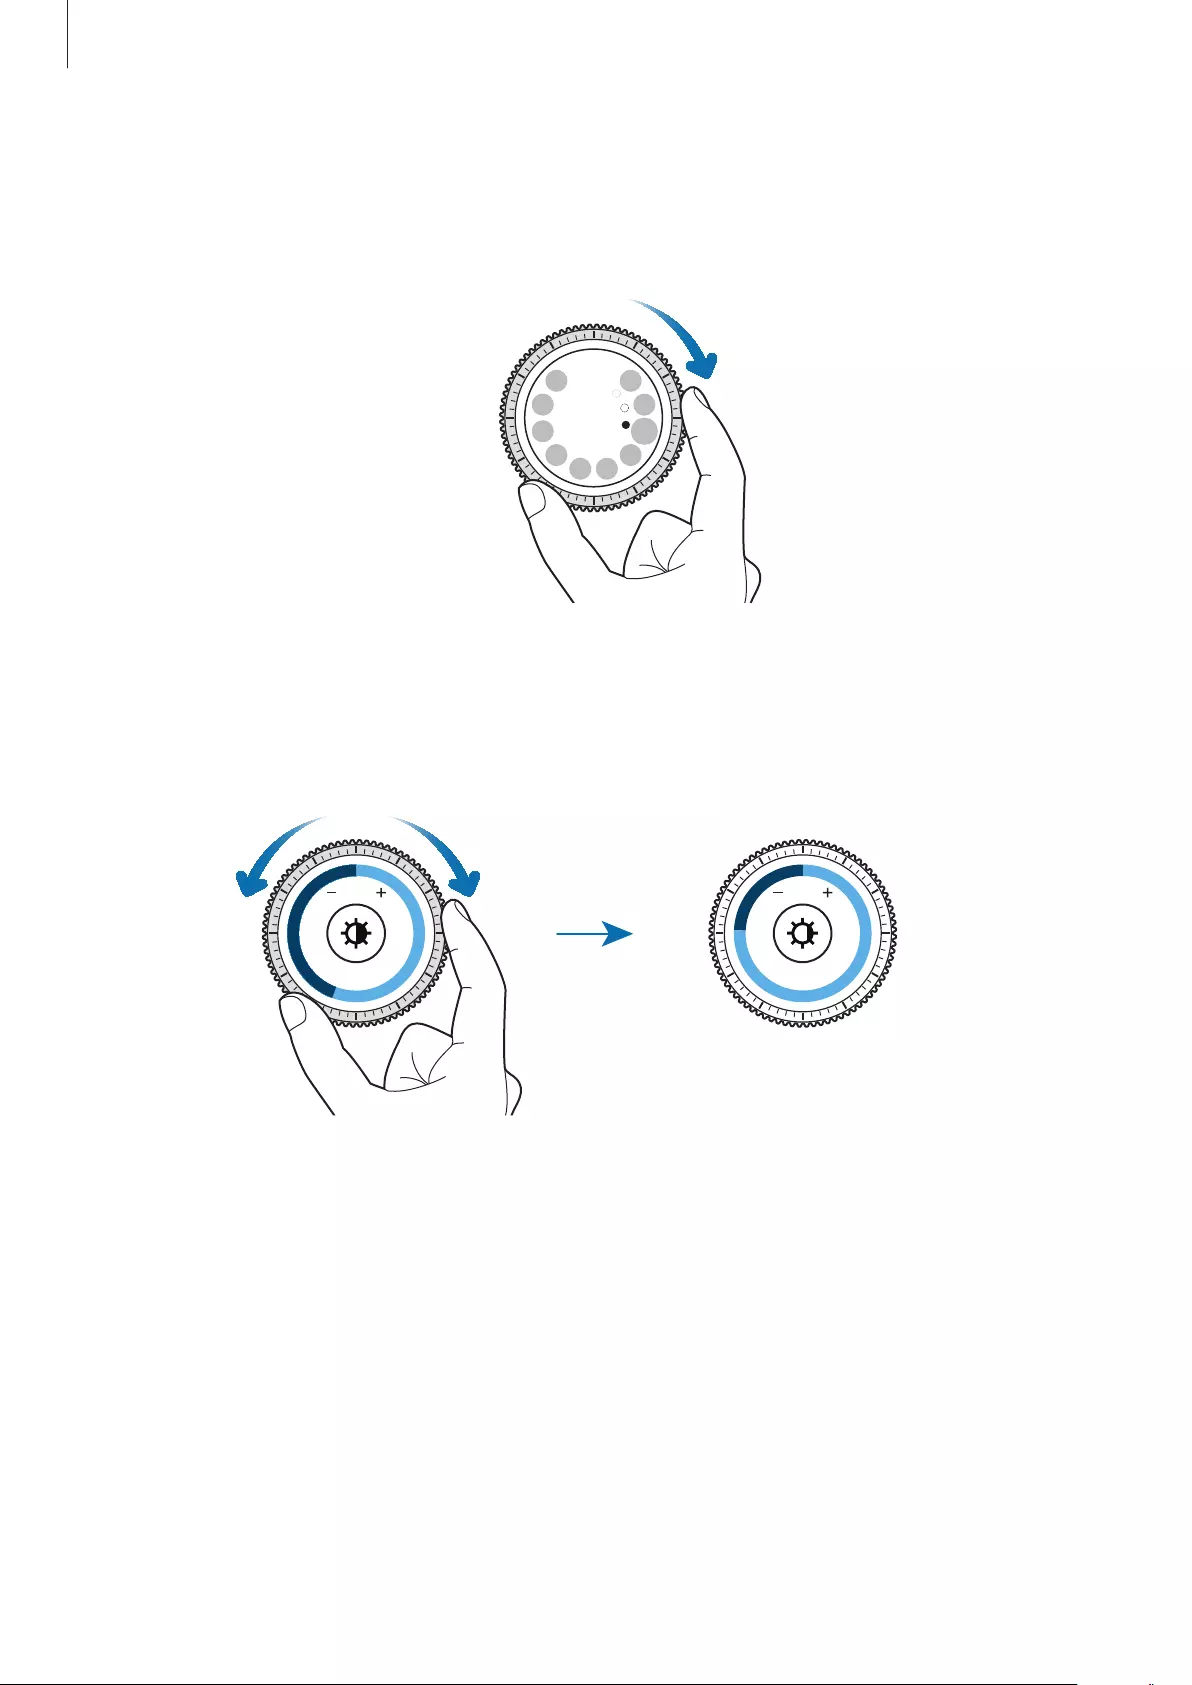
Scrolling through screens
Rotate the bezel to view other screens. On the Watch screen, rotate the bezel anticlockwise to
view notifications.
Basics
28
Selecting an item
Rotate the bezel to highlight the item you want to select and then tap the item. When you
rotate the bezel, the highlight indicator will move in the same direction.
Adjusting the input value
Rotate the bezel to adjust the volume or brightness. When adjusting the brightness, rotate
the bezel clockwise to make the screen brighter.
6
8
Basics
29
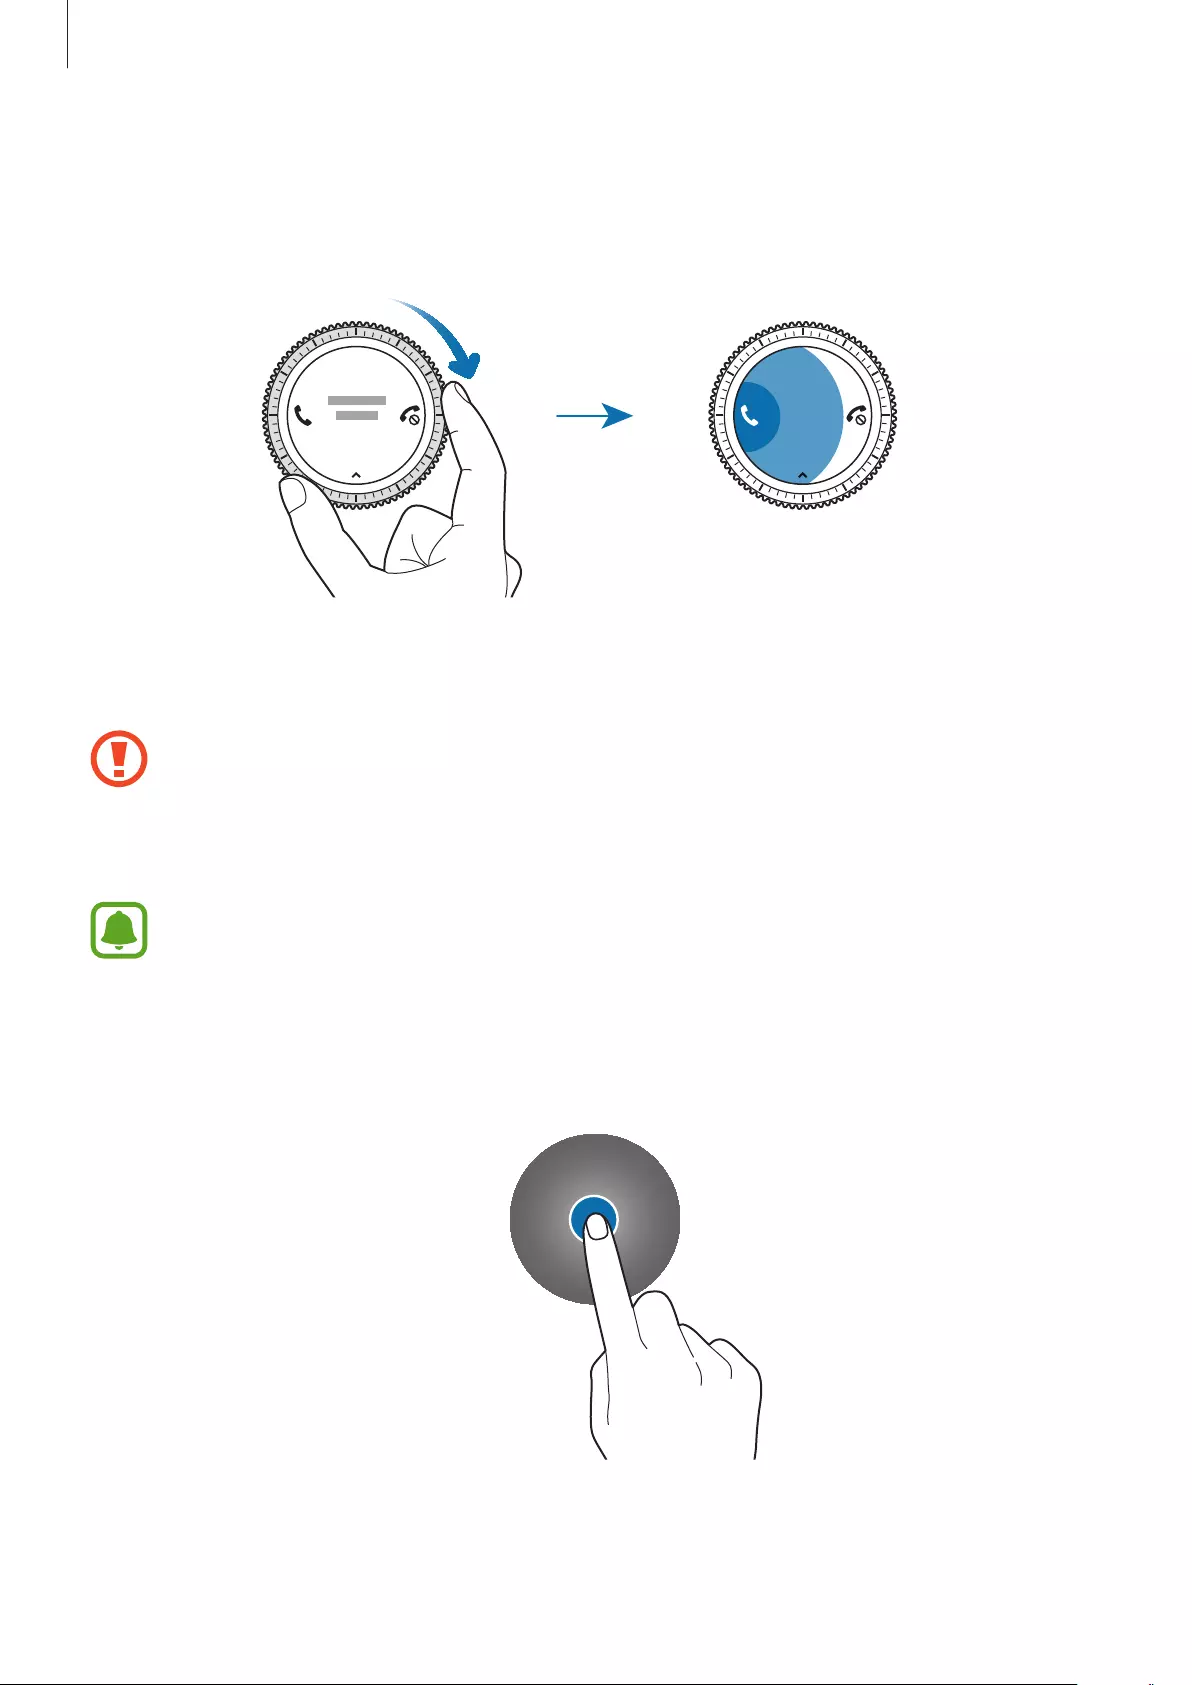
Receiving or rejecting incoming calls
Rotate the bezel clockwise to receive an incoming call or to dismiss an alarm. Rotate the bezel
anticlockwise to reject an incoming call or to activate the snooze feature for an alarm.
Touchscreen
•
Do not allow the touchscreen to come into contact with other electrical devices.
Electrostatic discharges can cause the touchscreen to malfunction.
•
To avoid damaging the touchscreen, do not tap it with anything sharp or apply
excessive pressure to it with your fingertips.
The Gear may not recognise touch inputs close to the edges of the screen, which are
outside of the touch input area.
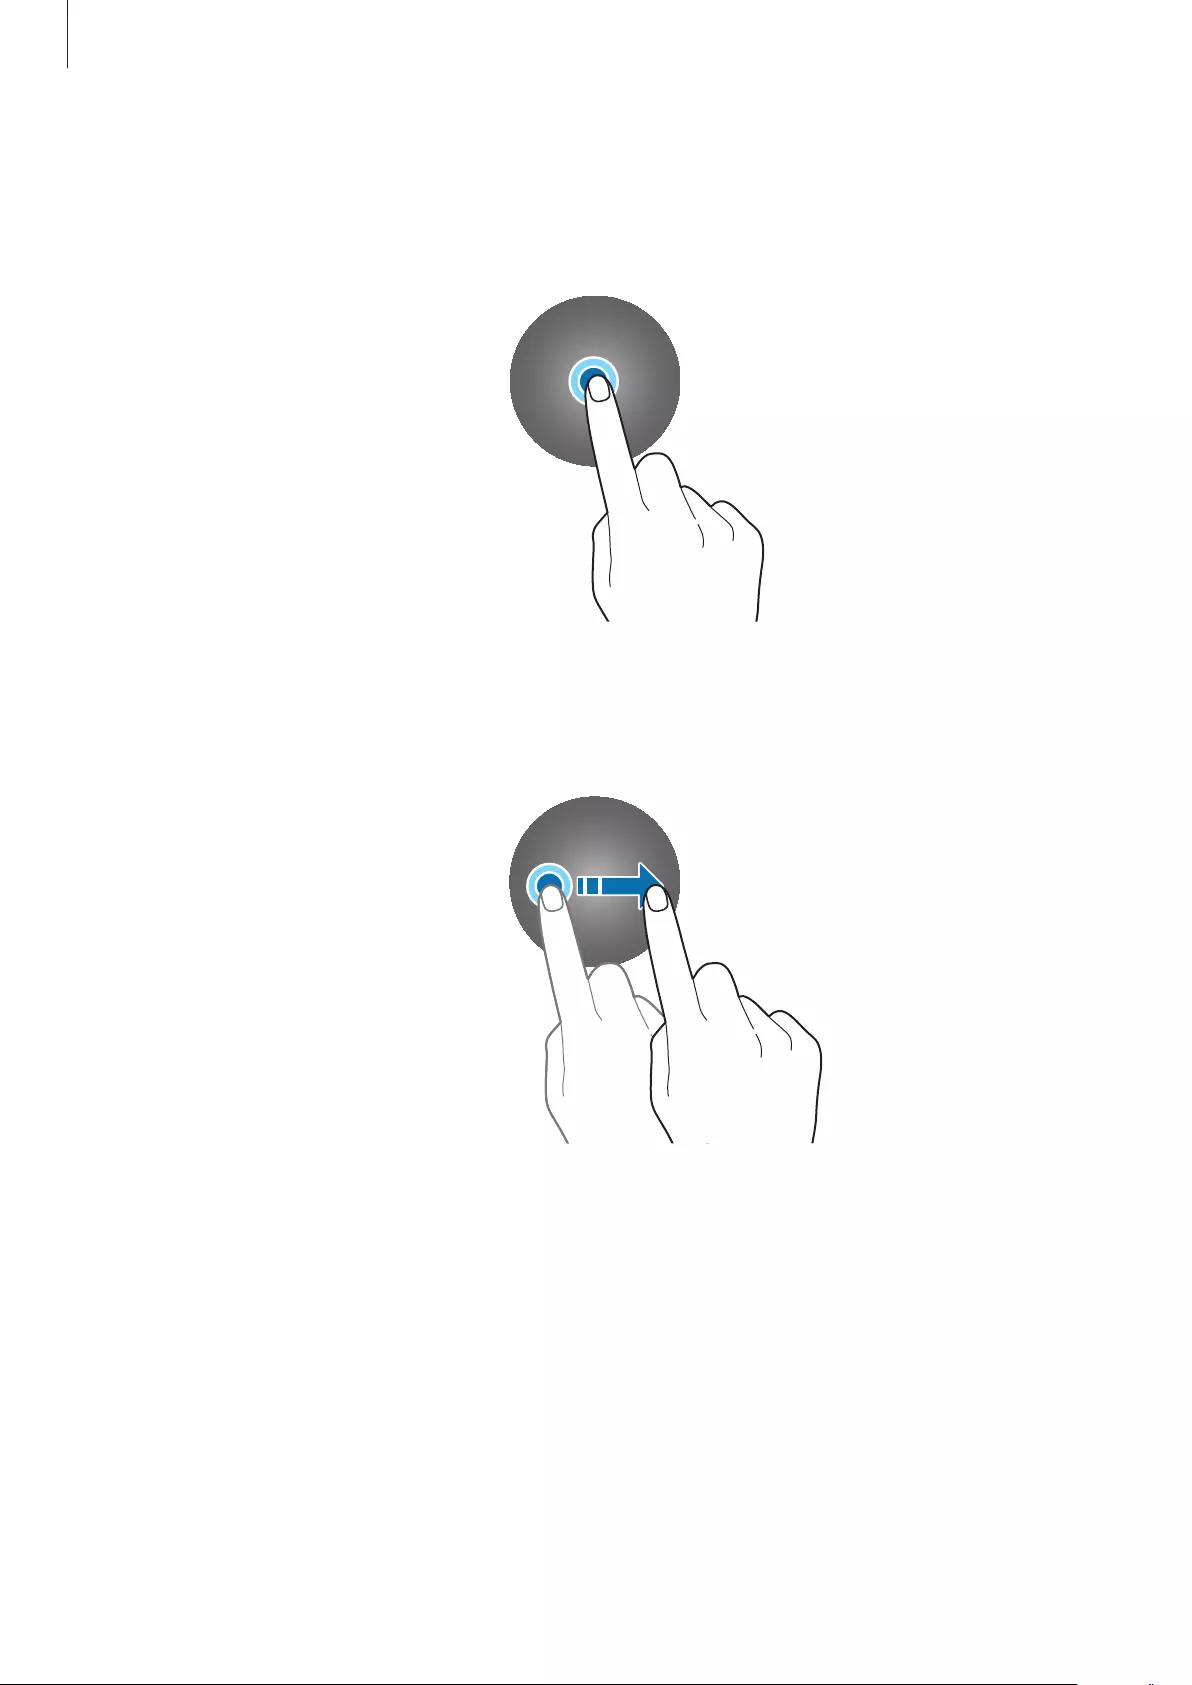
Tapping
To open an app, to select a menu item, or to press an on-screen button, tap it with your finger.
Basics
30
Tapping and holding
Tap and hold the screen for two or more seconds to access the Edit mode or to view available
options.
Dragging
To move an item, tap and hold it and drag it to the target position.
Basics
31
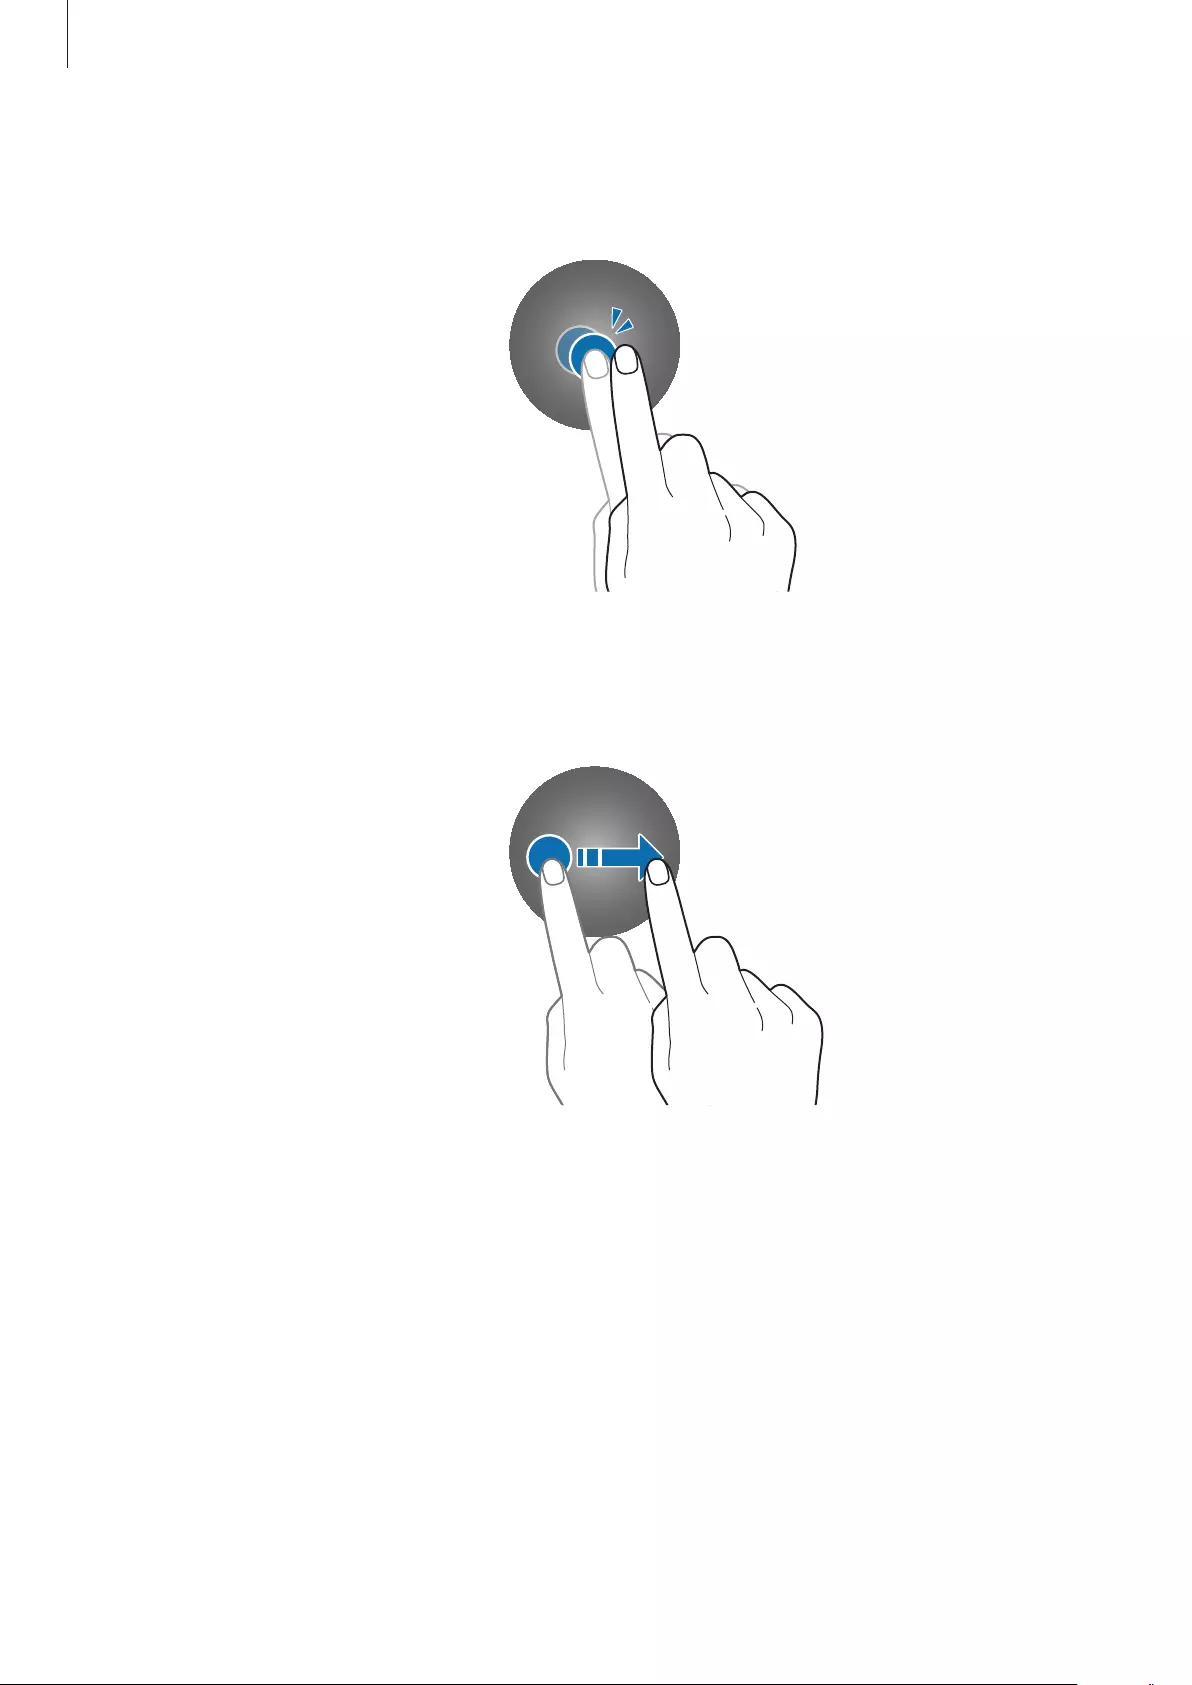
Double-tapping
Double-tap on an image or text to zoom in. Double-tap again to return.
Swiping
Swipe to the left or right to view other panels.
Basics
32
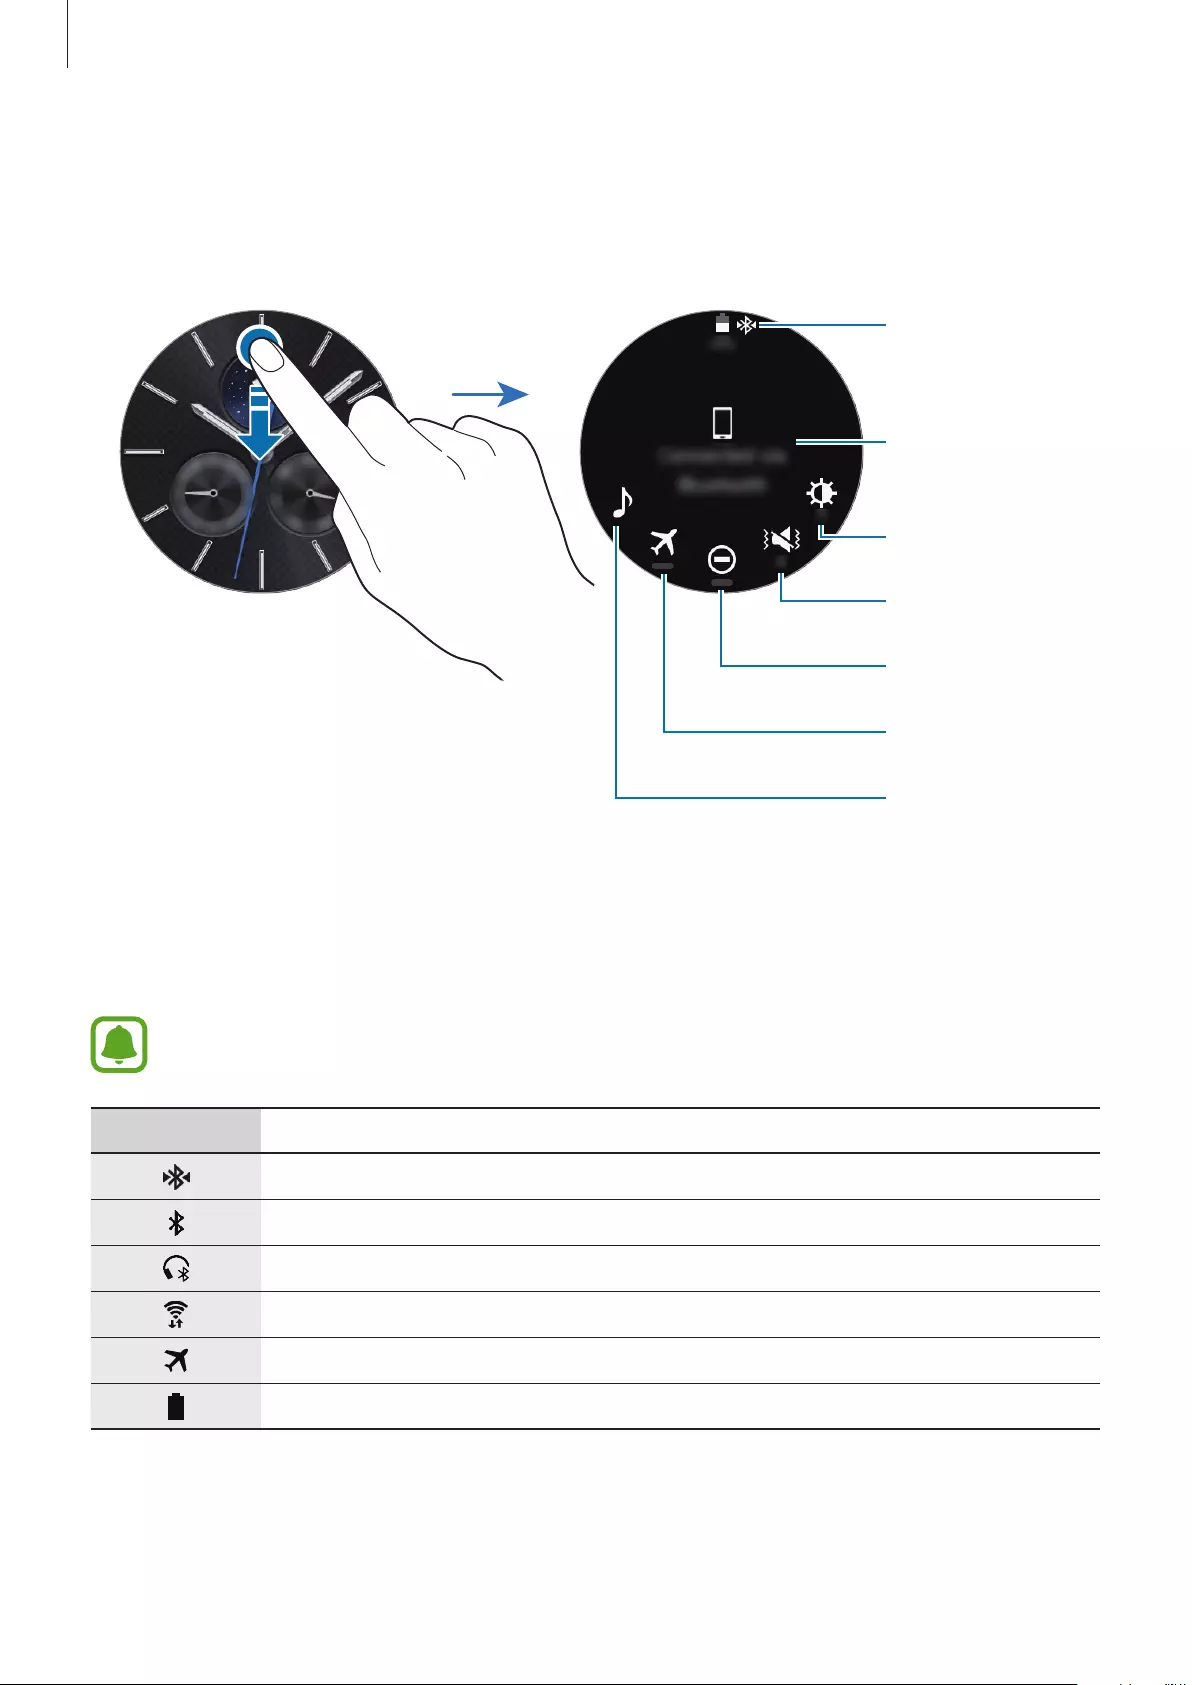
Status panel
This panel allows you to view the current status and configure basic settings.
On the Watch screen, swipe downwards from the top edge of the screen.
Gear’s connection
status
Indicator icons
Volume
Brightness
Do not disturb
Flight mode
Music Player
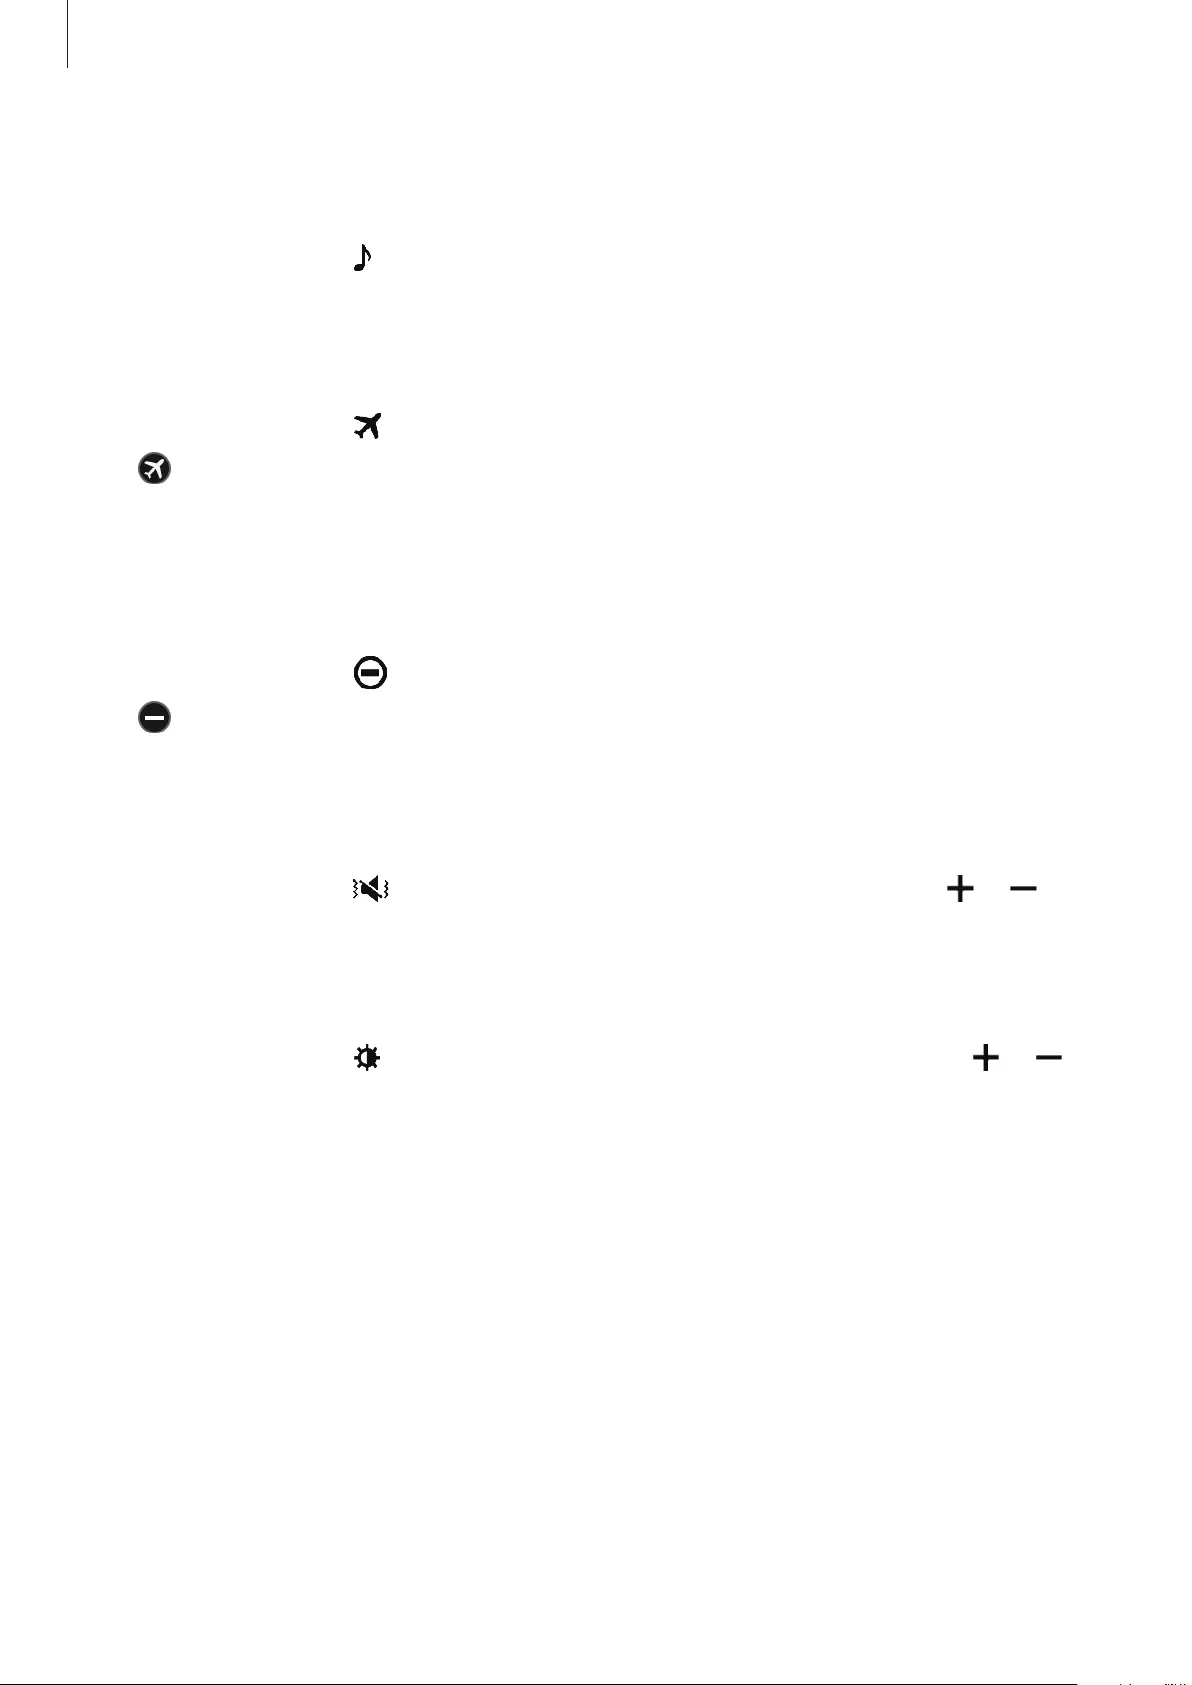
Indicator icons
Indicator icons appear at the top of the screen. The icons listed in the table below are most
common.
The indicator icons shown may vary depending on the region.
Icon Meaning
Bluetooth connected
Bluetooth disconnected
Bluetooth headset connected
Wi-Fi connected
Flight mode activated
Battery power level
Basics
33
Playing music
You can play music saved in the Gear or mobile device.
On the status panel, tap .
Flight mode
You can activate or deactivate the flight mode.
On the status panel, tap .
The icon will appear at the top of the Watch screen.
Do not disturb mode
You can mute the Gear and set the screen not to turn on when a notification is received.
Alarms will still function normally.
On the status panel, tap .
The icon will appear at the top of the Watch screen.
Adjusting the volume
You can adjust the volume level for various sounds.
On the status panel, tap and adjust the volume by rotating the bezel, or tap or .
Adjusting the brightness
You can adjust the Gear’s display brightness to suit the environment.
On the status panel, tap and adjust the brightness by rotating the bezel, or tap or .
Basics
34
Watch
Watch screen
View the current time. When you are not on the Watch screen, press the Home key to return
to the Watch screen.
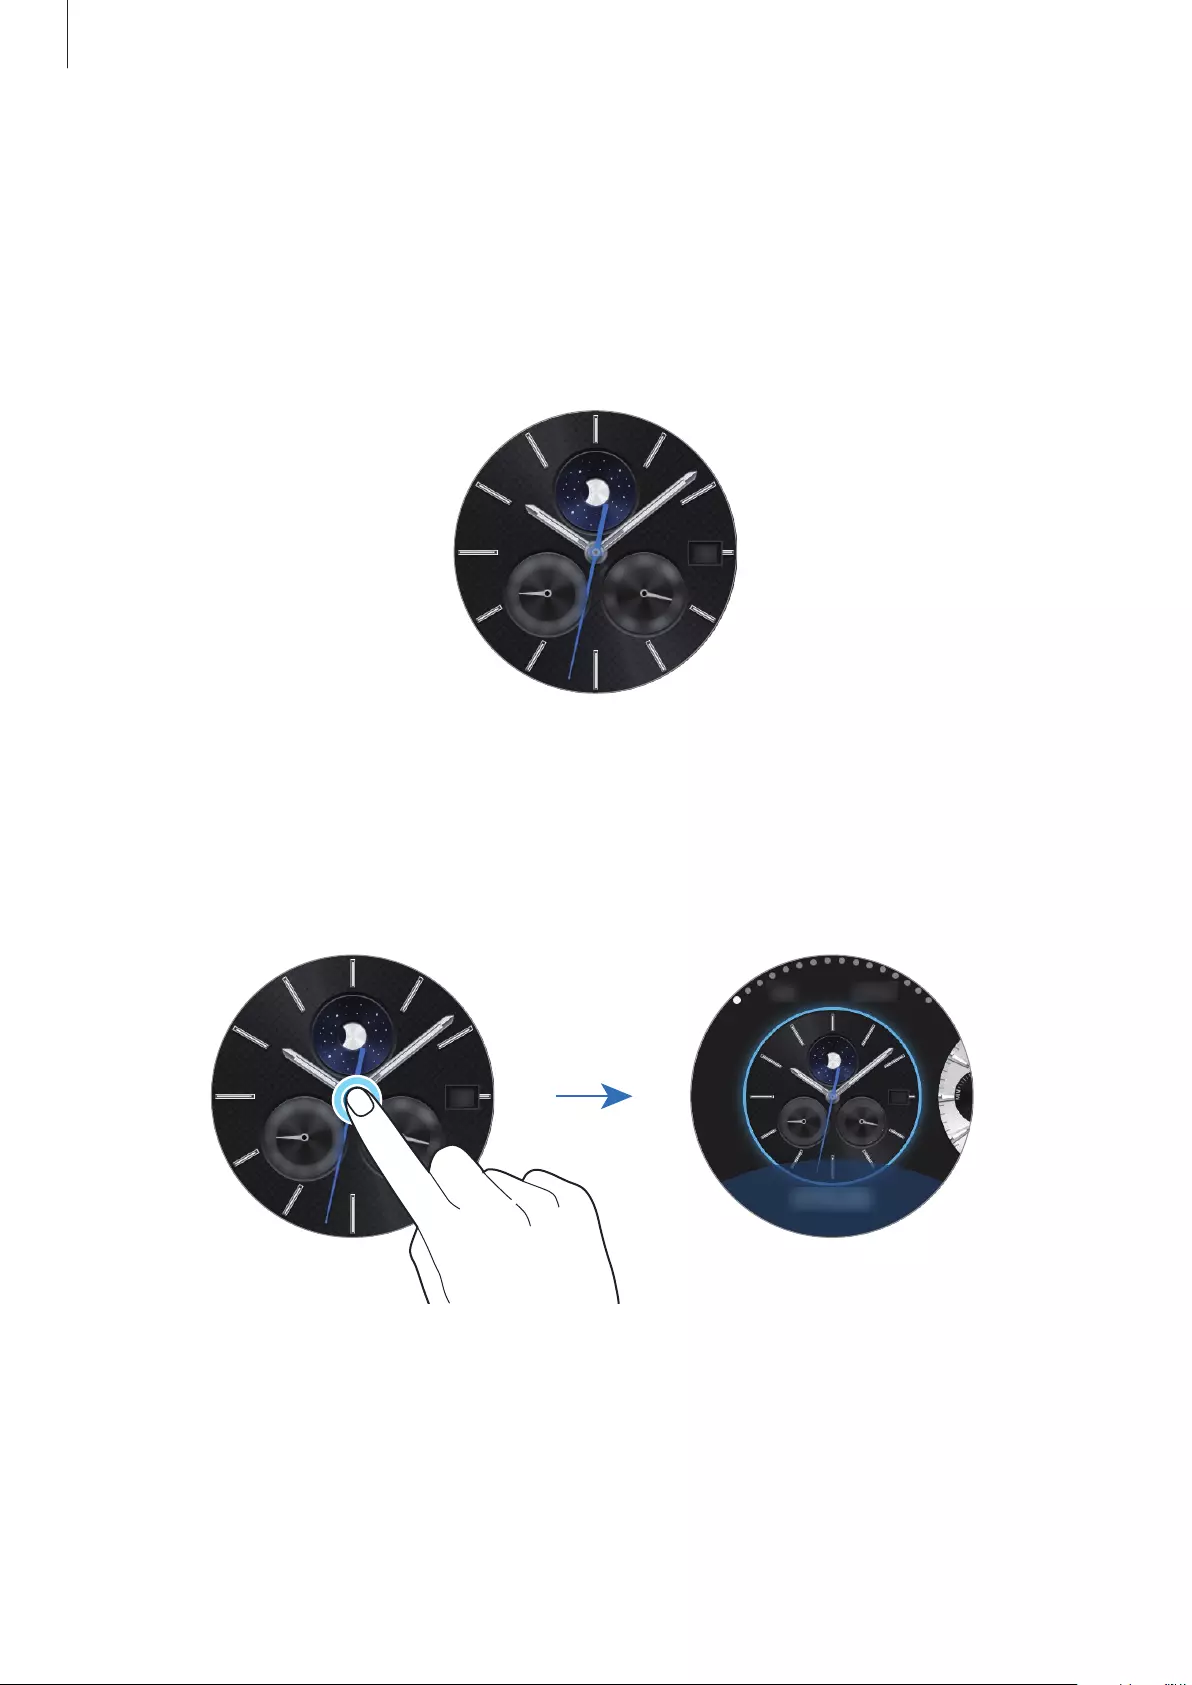
Changing the watch face
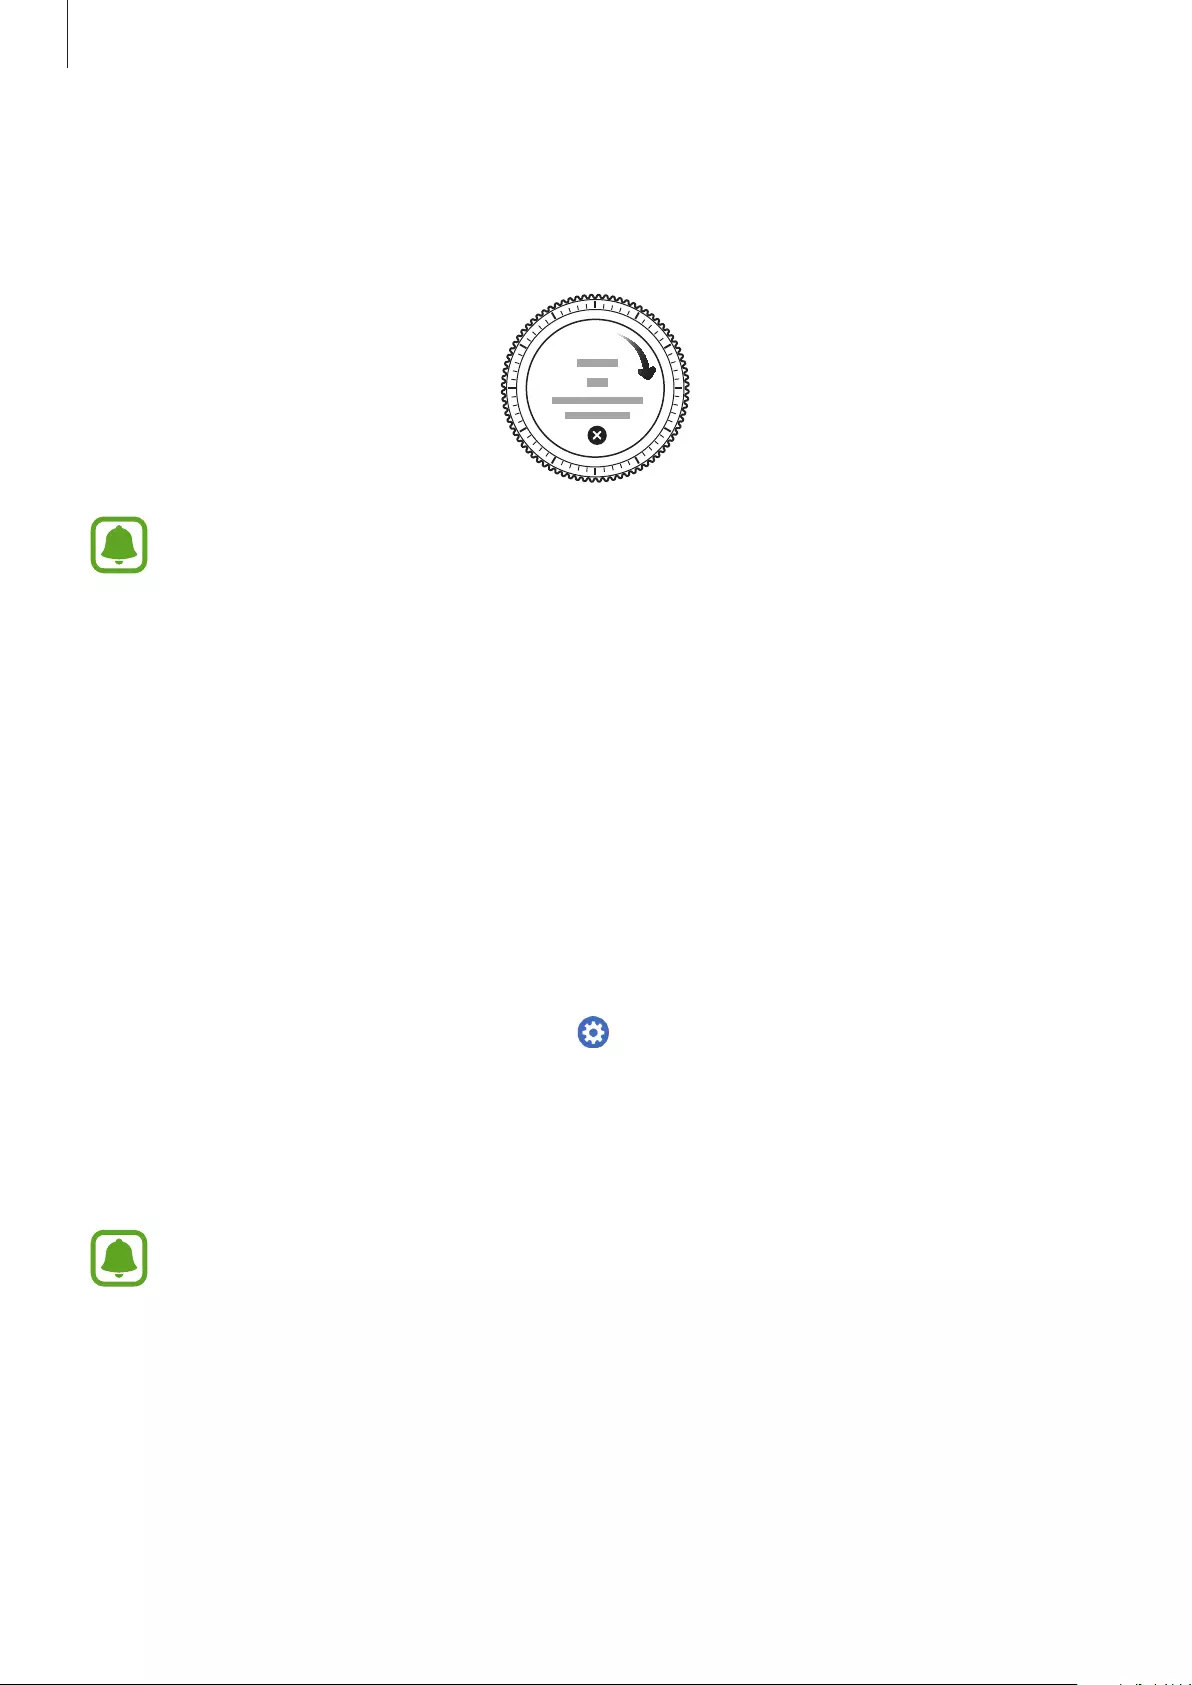
Tap and hold the Watch screen, scroll through the list and select a watch face. You can also
customise the watch by tapping
STYLISE
. To download more watch faces from
Galaxy Apps
,
tap
Get more watch faces
.
You can also change the Gear’s watch face from your mobile device. Launch
Samsung Gear
on your mobile device and tap
SETTINGS
→
Watch faces
. To download more watch faces
from
Galaxy Apps
, tap
INFO
→
VIEW MORE WATCH FACES
.
Basics
35
Using the Watch always on feature
You can set the Gear to display the time when the screen is turned off.
On the Apps screen, tap (
Settings
)
→
Style
and tap the
Watch always on
switch to
activate it.
Power-off watch mode
When the Gear’s battery is too low, it will ask you to activate Power-off watch mode to
conserve battery power and continue working as a watch.
In Power-off watch mode, all the functions of the Gear are turned off, and the watch will
display in power saving mode.
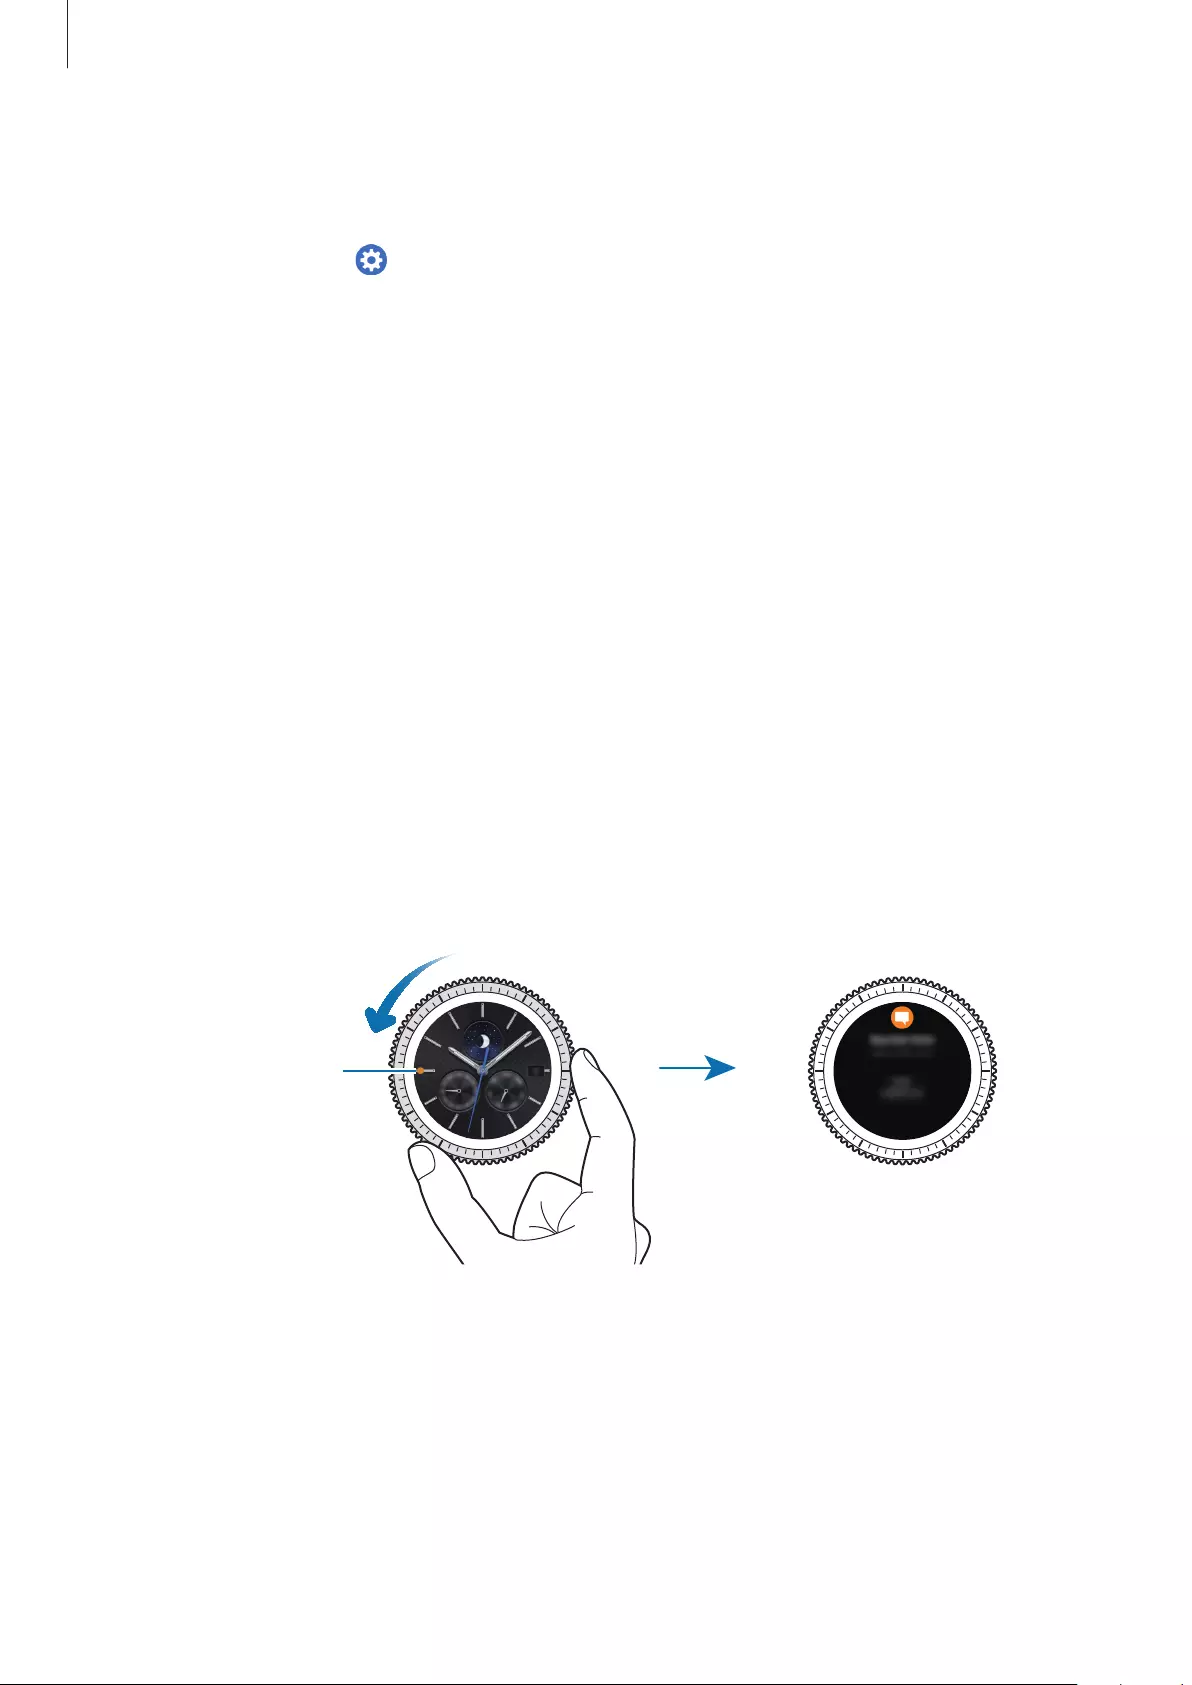
Notifications
Notification panel
Stay up to date with events, notifications, and messages from your mobile device and Gear.
On the Watch screen, rotate the bezel anticlockwise to open the notification panel. When
there are unchecked notifications, a yellow dot will be visible on the screen.
Notification indicator
Basics
36
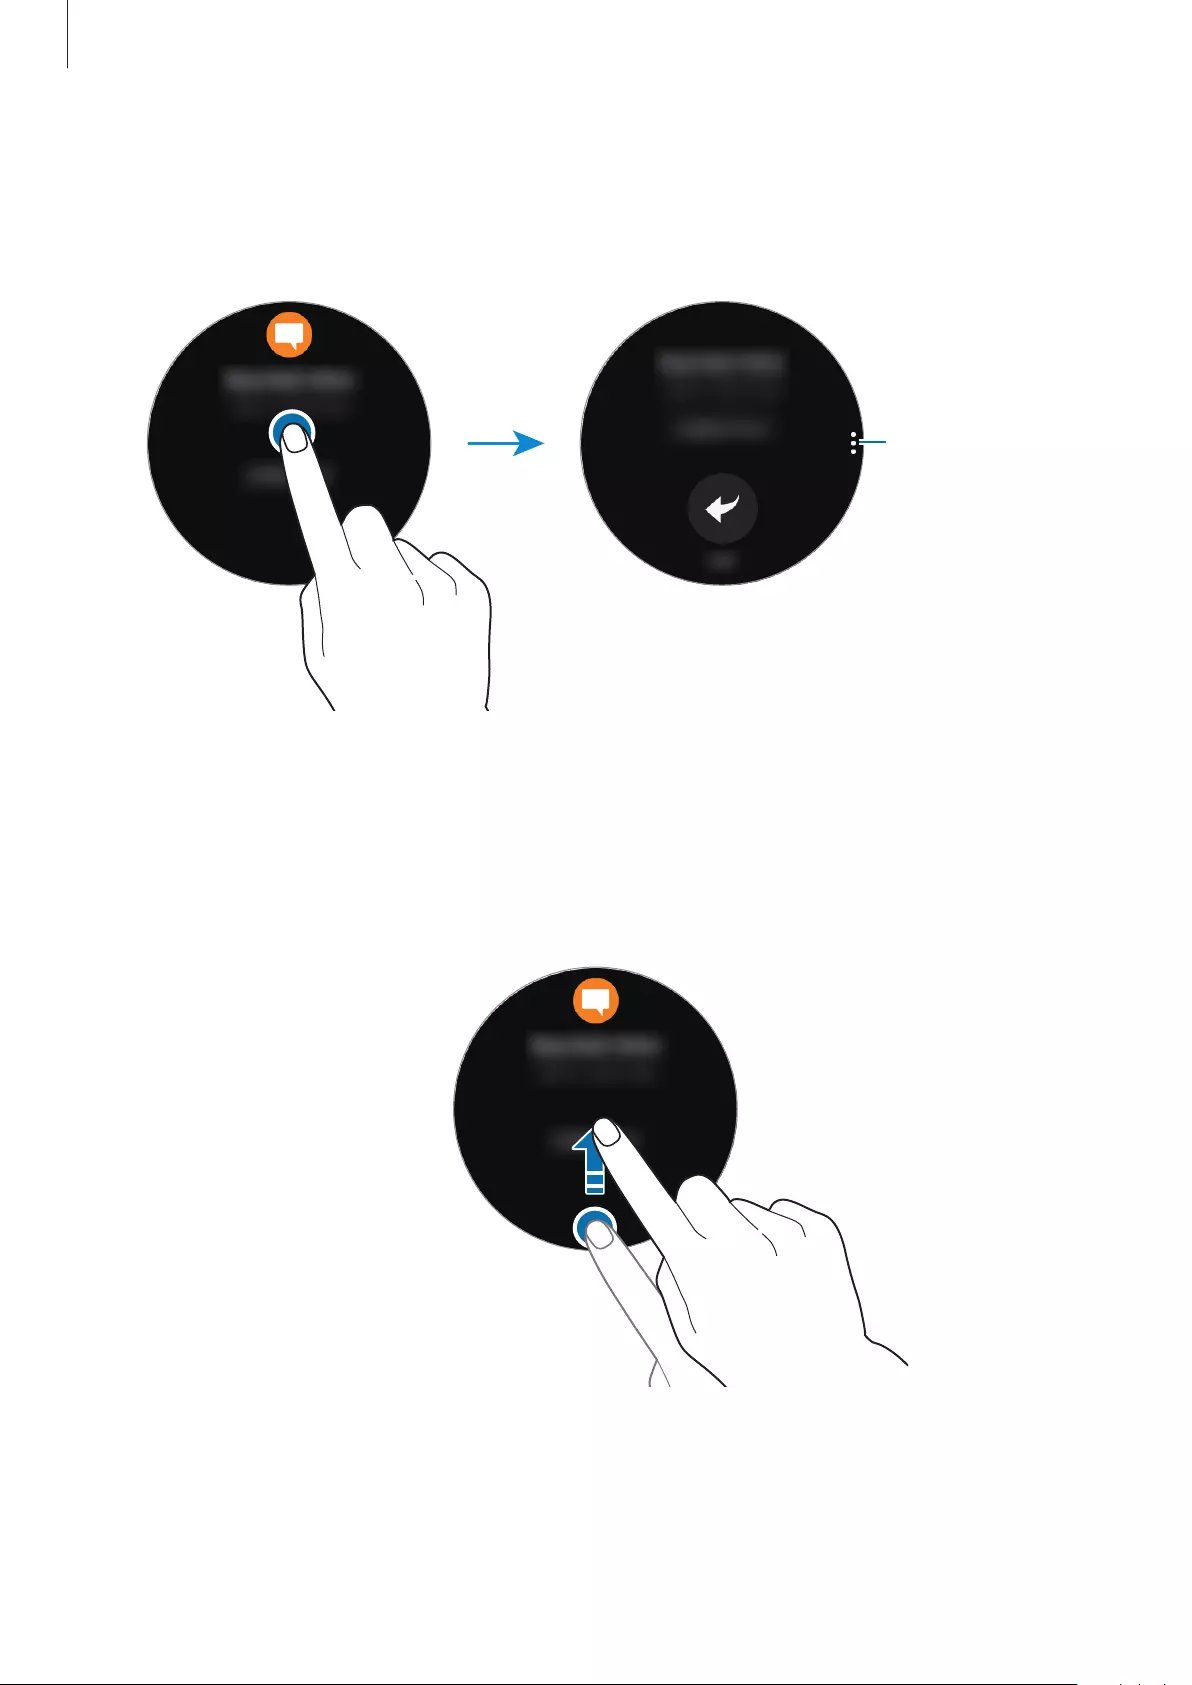
Viewing incoming notifications
When you receive a notification, information about the notification, such as its type, will
appear on the screen. Tap the notification to view details.
Access additional
options.
To view notifications received from other apps, rotate the bezel anticlockwise.
Deleting notifications
Delete a notification by swiping upwards from the bottom edge of the screen while viewing a
notification.
Basics
37
Sending app notifications to the Gear
Set your mobile device to send app notifications to the Gear.
1 Launch
Samsung Gear
on your mobile device and tap
SETTINGS
→
Notifications
, and
tap the switch.
2 Tap
Manage notifications
and tap the switch next to apps to receive notifications from
them on your Gear.
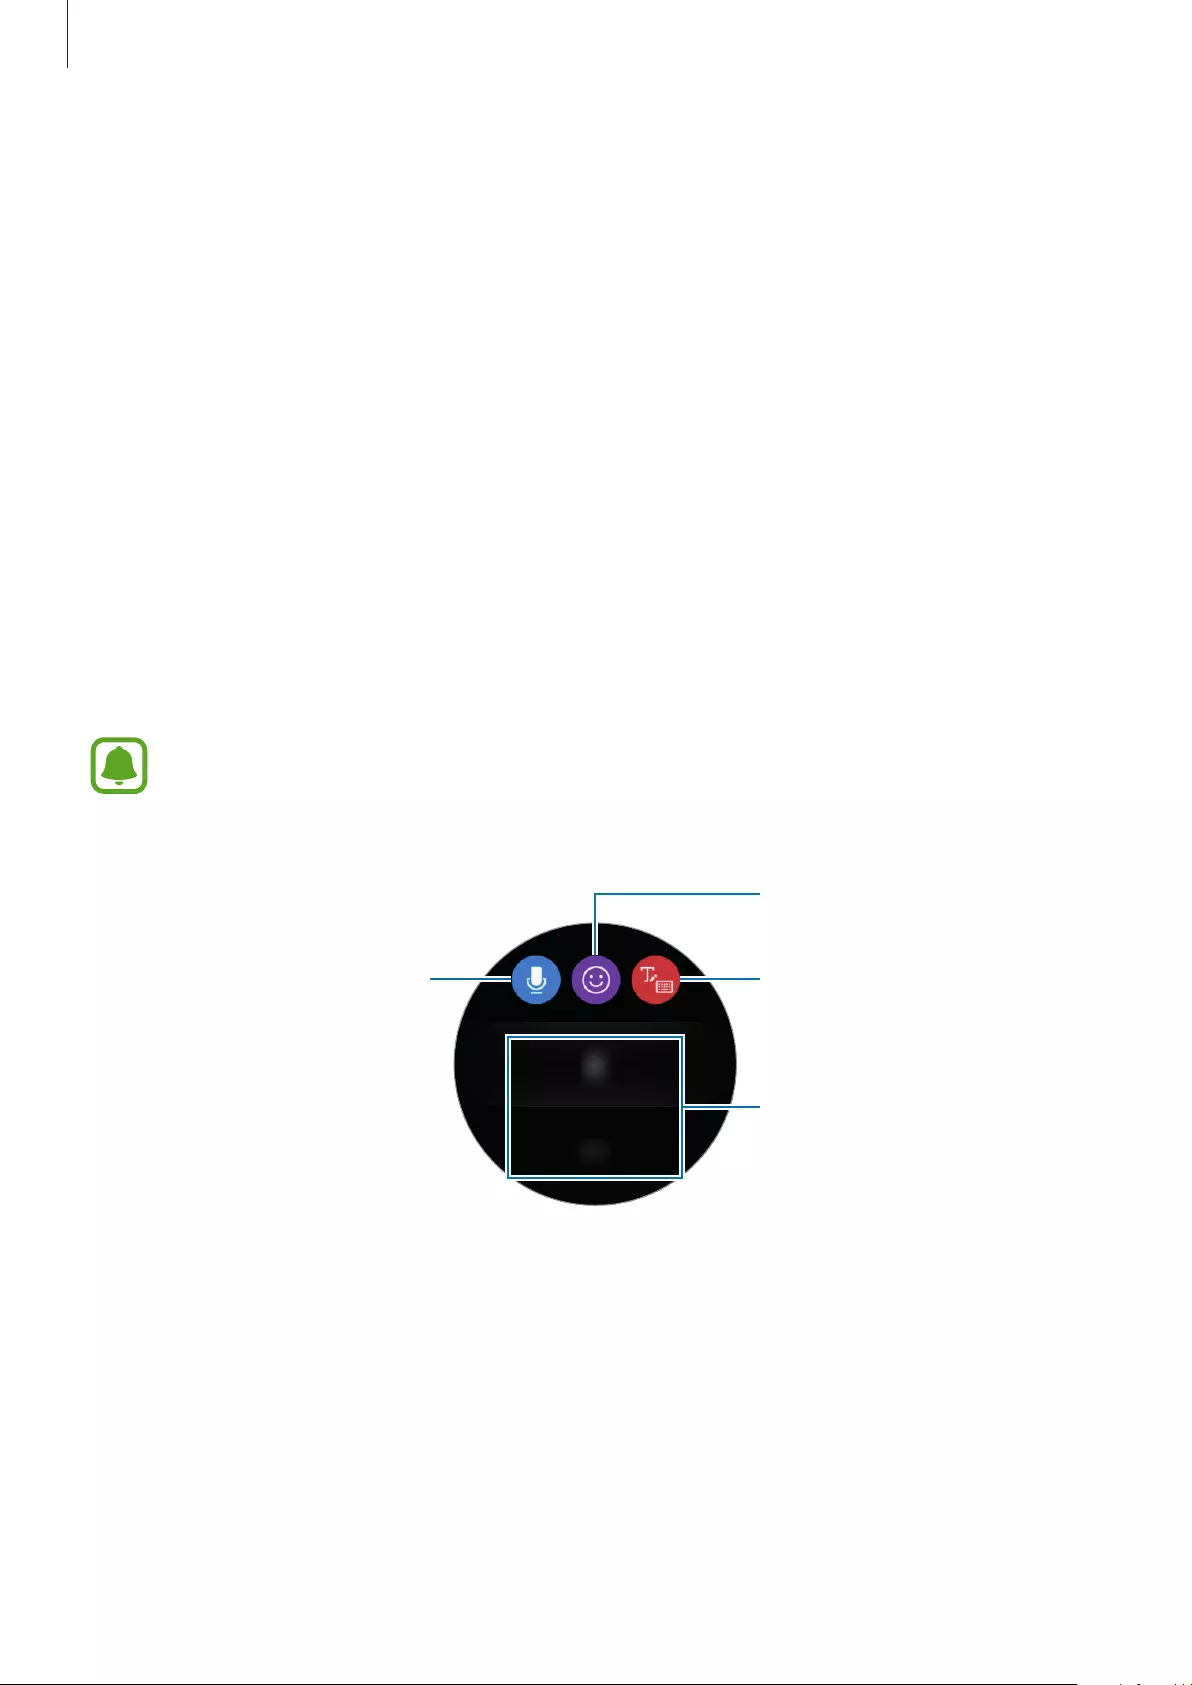
Entering text
Introduction
A text input screen will appear when you are able to enter text.
•
The screen layout may be different depending on the app you launch.
•
When the Gear is connected to a mobile device via Bluetooth, the language
settings applied on the mobile device are applied to the Gear.
Use speech-to-text.
Insert a text template.
Open handwriting input mode
or the keyboard.
Basics
38
Using the voice input
Tap and speak to enter your message.
To change the language recognised, tap
→
Input languages
.
•
This feature is not supported in some languages.
•
Tips for better voice recognition
–
Speak clearly.
–
Speak in quiet places.
–
Do not use offensive or slang words.
–
Avoid speaking in dialectal accents.
The Gear may not recognise your spoken message depending on your
surroundings or how you speak.
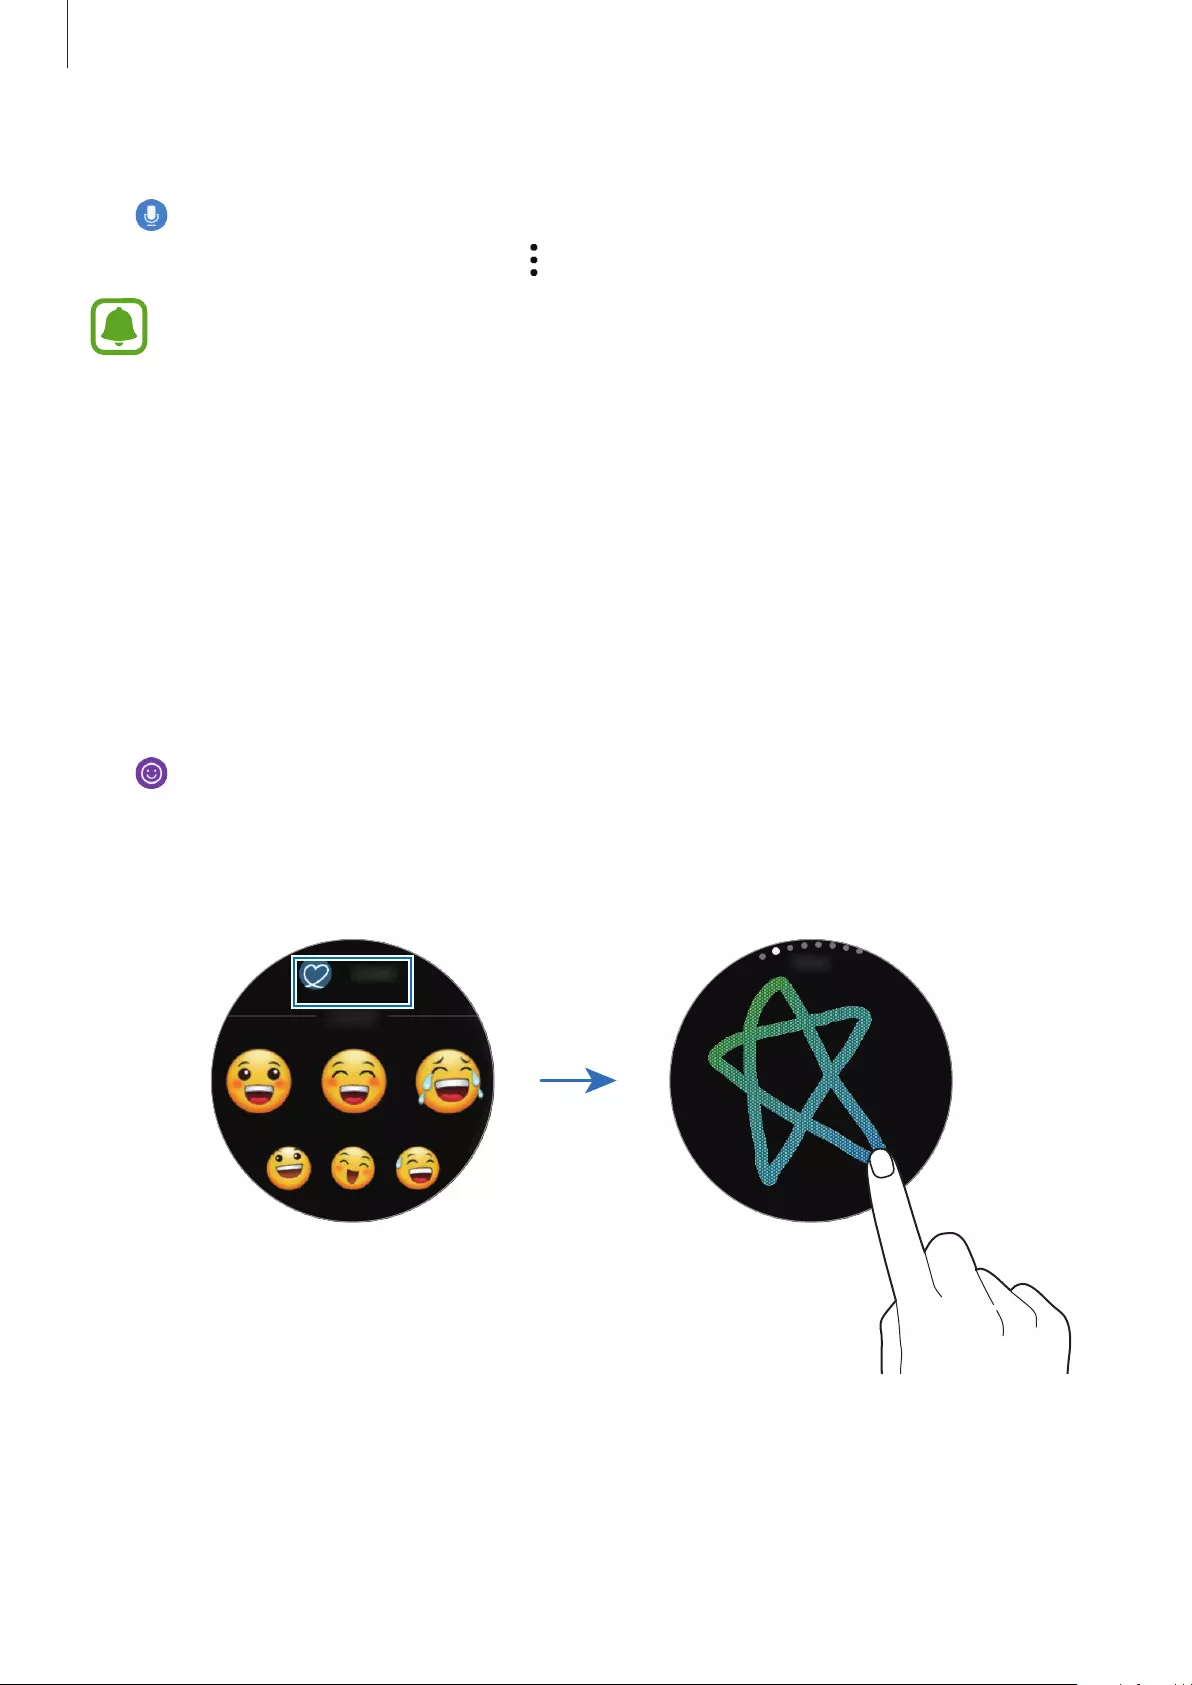
Using emoticons
Tap and select the emoticon you want to send. To draw a picture, tap
Doodle
at the top of
the screen, and draw your message.
Rotate the bezel anticlockwise to delete the input stroke by stroke. To recover a stroke, rotate
the bezel clockwise.
Basics
39
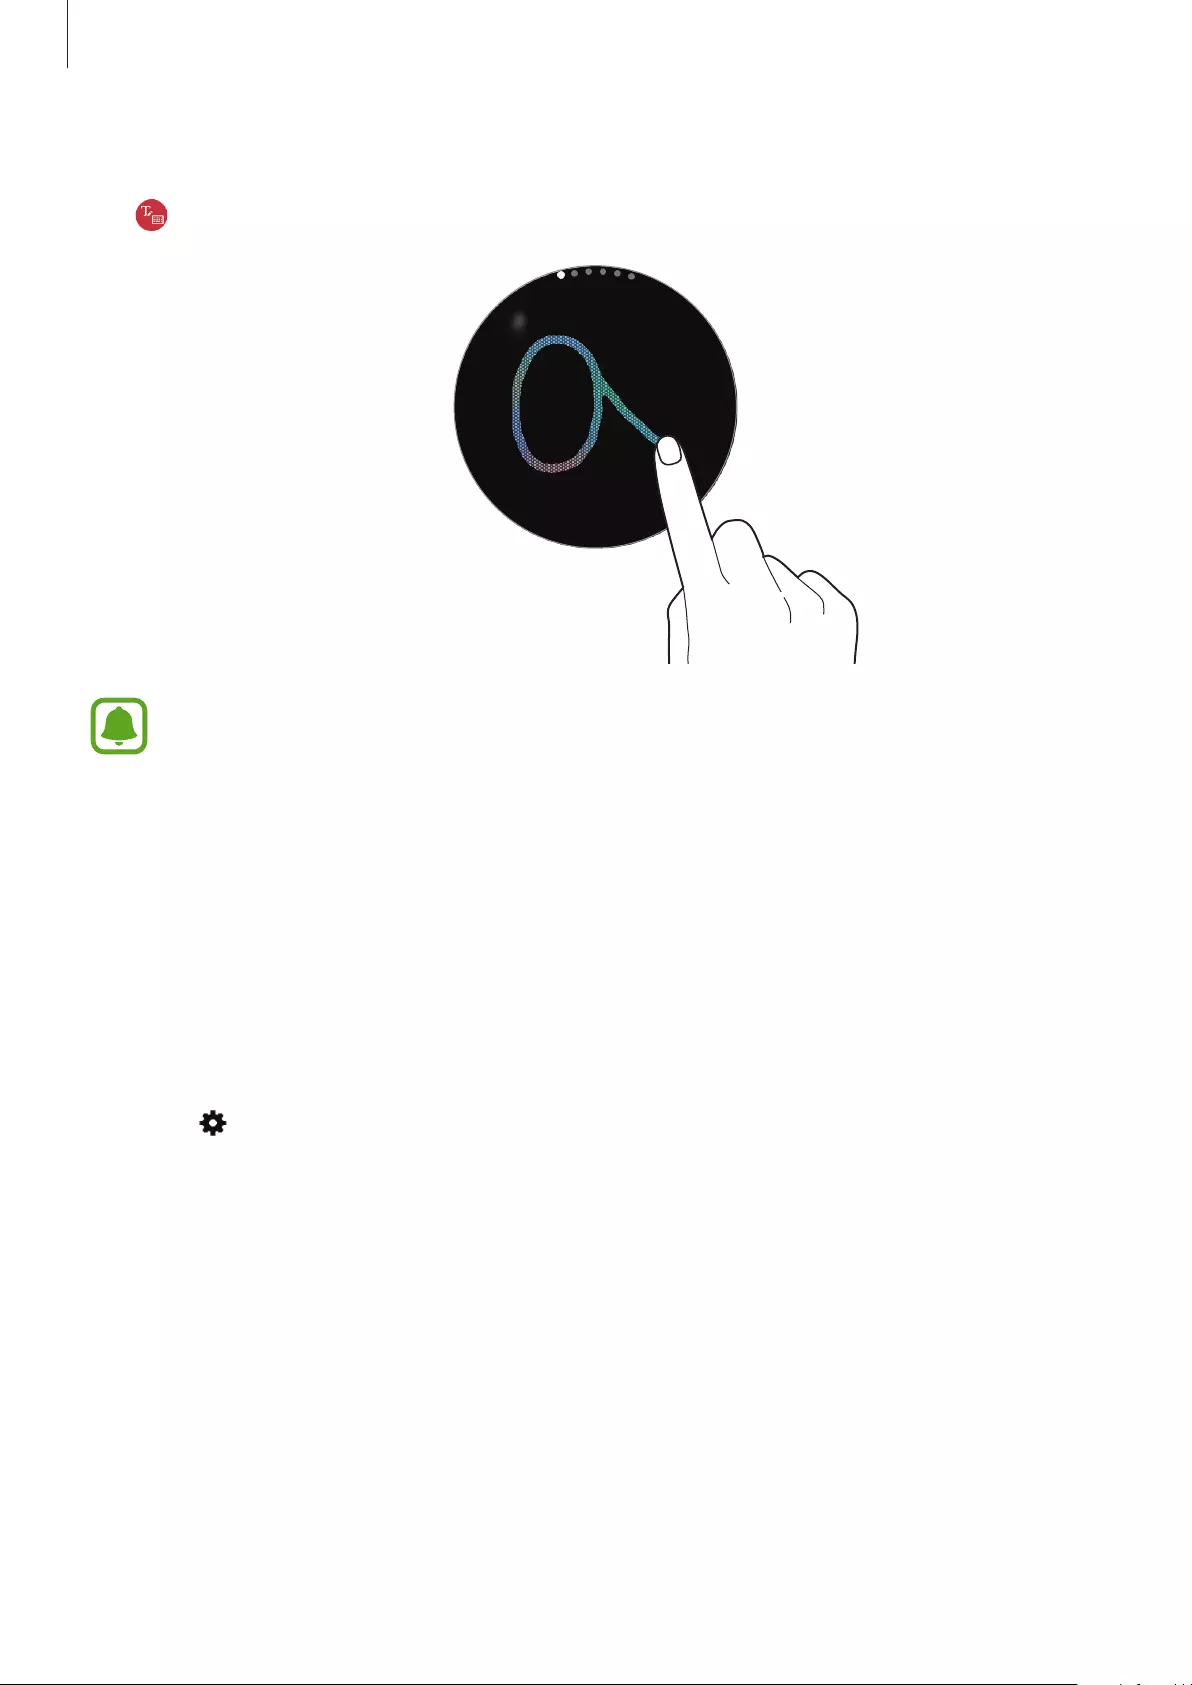
Using handwriting input mode or the keyboard
Tap and open handwriting mode and write on the screen.
This feature may not be available depending on the region or service provider.
Changing the input mode
Rotate the bezel to change the input mode. You can switch between handwriting mode,
character mode, number mode, punctuation mode, emoticon mode, and voice input mode.
Changing the input language
Slide the space key left or right.
To add more languages, switch to number mode, punctuation mode, or emoticon mode.
Then, tap
→
Select input languages
and select a language to add. You can use up to two
languages.
Basics
40
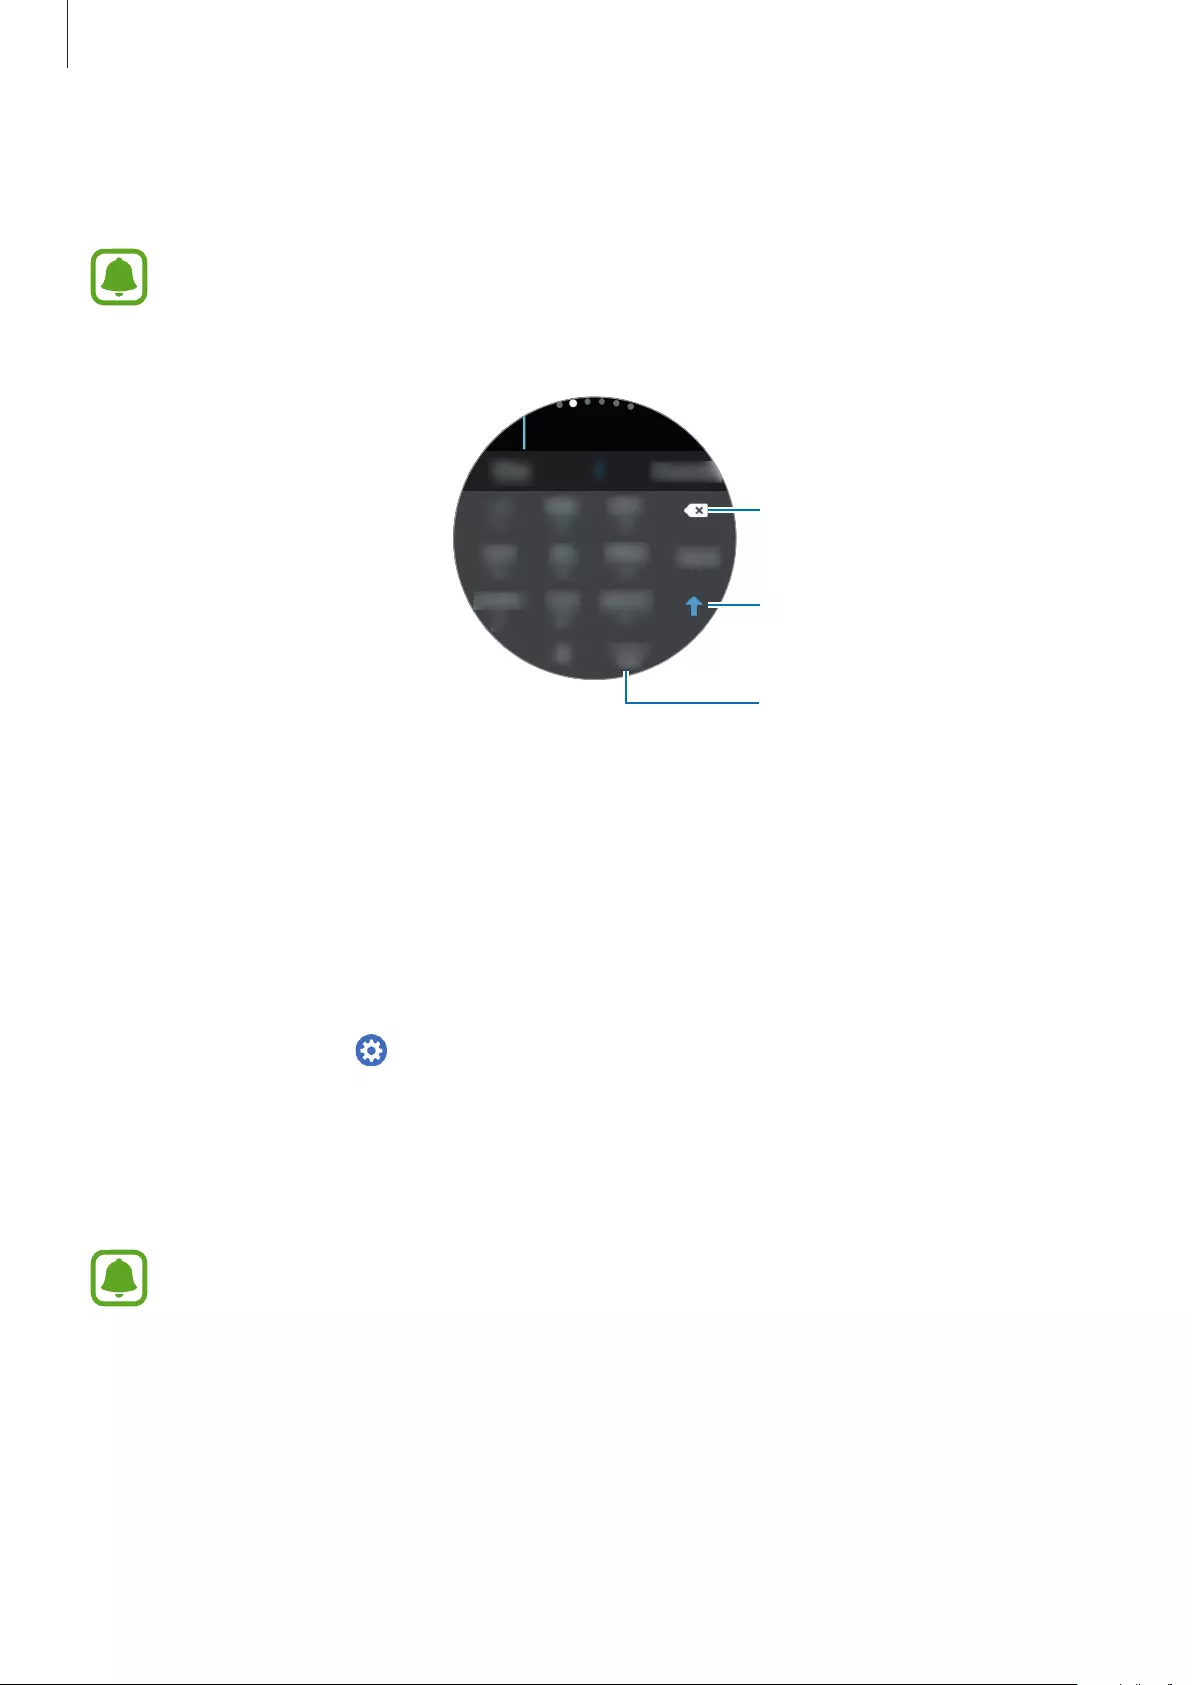
Using the keyboard
Rotate the bezel to enter text using the keyboard.
•
Text entry is not supported in some languages. To enter text, you must change the
input language to one of the supported languages.
•
The keyboard layout may differ depending on the region.
Delete a preceding character.
Enter uppercase. For all caps, tap
it twice.
Enter a space.
GPS
The Gear has a GPS sensor so that you can check your real-time location information without
connecting to a mobile device. You can also use apps which require your location information
such as
Alti-Barometer
, and allow others to track your location by sending an SOS message
in an emergency.
On the Apps screen, tap (
Settings
)
→
Connections
→
Location
, and tap the
Location
switch to activate it.
To select a method to use for locating, scroll down the screen and select an option.
When your Gear and mobile device are connected, this feature uses your mobile device’s
location information. Activate the mobile device’s location feature to use the GPS sensor.
GPS signal strength may decrease in locations where the signal is obstructed, such as
between buildings or in low-lying areas, or in poor weather conditions.

Basics
41
SOS messages
In an emergency situation, you can send an SOS message by quickly pressing the Gear’s
Home key three times. You can also set the Gear to automatically call your emergency
contacts.
Setting up SOS messages
1 Launch
Samsung Gear
on your mobile device and tap
SETTINGS
→
Send SOS requests
,
and tap the switch to activate it.
2 Follow the on-screen instructions to add emergency contacts if you have not already
done so.
Adding emergency contacts
Launch
Samsung Gear
on your mobile device and tap
SETTINGS
→
Send SOS requests
→
Send SOS messages to
→
ADD
.
Tap
Create contact
and enter the contact information or tap
Select from Contacts
to add an
existing contact as an emergency contact.
Activating SOS calls
Set the Gear to automatically call your emergency contact after sending an SOS message. You
can only call one of your emergency contacts.
Launch
Samsung Gear
on your mobile device and tap
SETTINGS
→
Send SOS requests
. Tap
the
Make SOS calls to
switch to activate it and select an emergency contact.
Setting the SOS message delay
Set the Gear to send an SOS message five seconds after you quickly press the Gear’s Home
key three times.
Launch
Samsung Gear
on your mobile device and tap
SETTINGS
→
Send SOS requests
. Tap
the
Count down before sending
switch to activate it.
Basics
42
Sending SOS messages
In an emergency situation, quickly press the Gear’s Home key three times.
The Gear will send SOS messages to your emergency contacts. The messages will include
your current location information and a link to track your real-time location information for
60 minutes.
If the
Make SOS calls to
feature is activated, the Gear will automatically call the selected
emergency contact.
After sending an SOS message, the icon will display on the Watch screen. Swipe to the
right to view the result of your SOS request.
Viewing my location
After sending an SOS message which includes your location information, you can view your
location on the notification panel. On the Watch screen, swipe to the right to the notification
panel and tap the screen to view your current location.
To finish sharing your location with your emergency contacts, scroll down the screen, and tap
→
.
Finding my Gear
If you misplace your Gear, use the Samsung Gear app on your mobile device to find it.
1 Launch
Samsung Gear
on your mobile device and tap
SETTINGS
→
Find My Gear
.
2 Tap .
The Gear will make a sound and the screen will turn on. Drag to the right on the Gear,
or rotate the bezel clockwise, or tap on the mobile device.
When your Gear is lost or stolen, you can control it remotely. Launch
Samsung Gear
on
your mobile device and tap
SETTINGS
→
Find My Gear
→
Control remotely
, and tap
the switch to activate it.
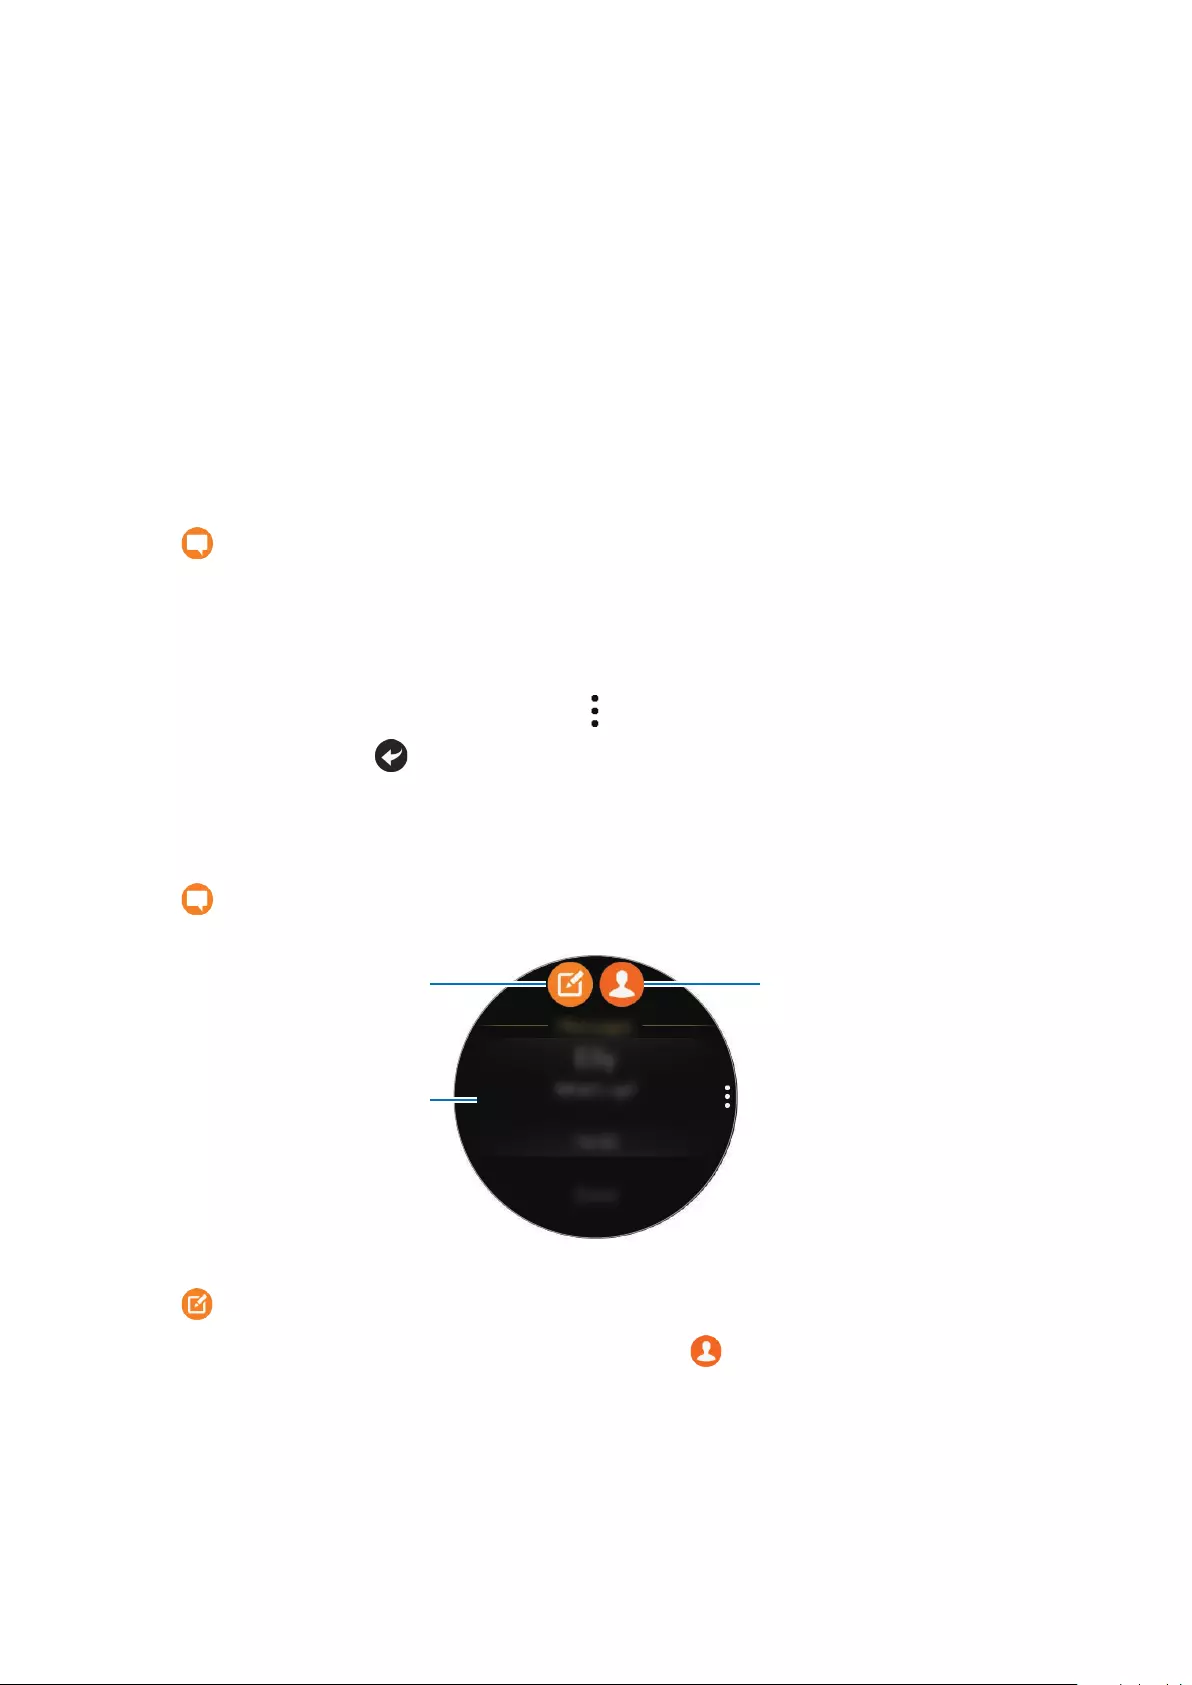
43
Applications
Messages
View messages and reply to using the Gear.
Viewing messages
1 Tap (
Messages
) on the Apps screen.
Or, swipe to the right on the Watch screen when you receive a new message notification.
2 Scroll through the message list, and then select a contact to view your conversations.
To view a message on your mobile device, tap , rotate the bezel and tap
Show on phone
.
To reply to a message, tap and enter your message.
Sending messages
1 Tap (
Messages
) on the Apps screen.
Create a new message.
Messages list
Contacts
2 Tap .
Or, you can choose a message recipient by tapping or selecting a contact from a
contact on the messages list.
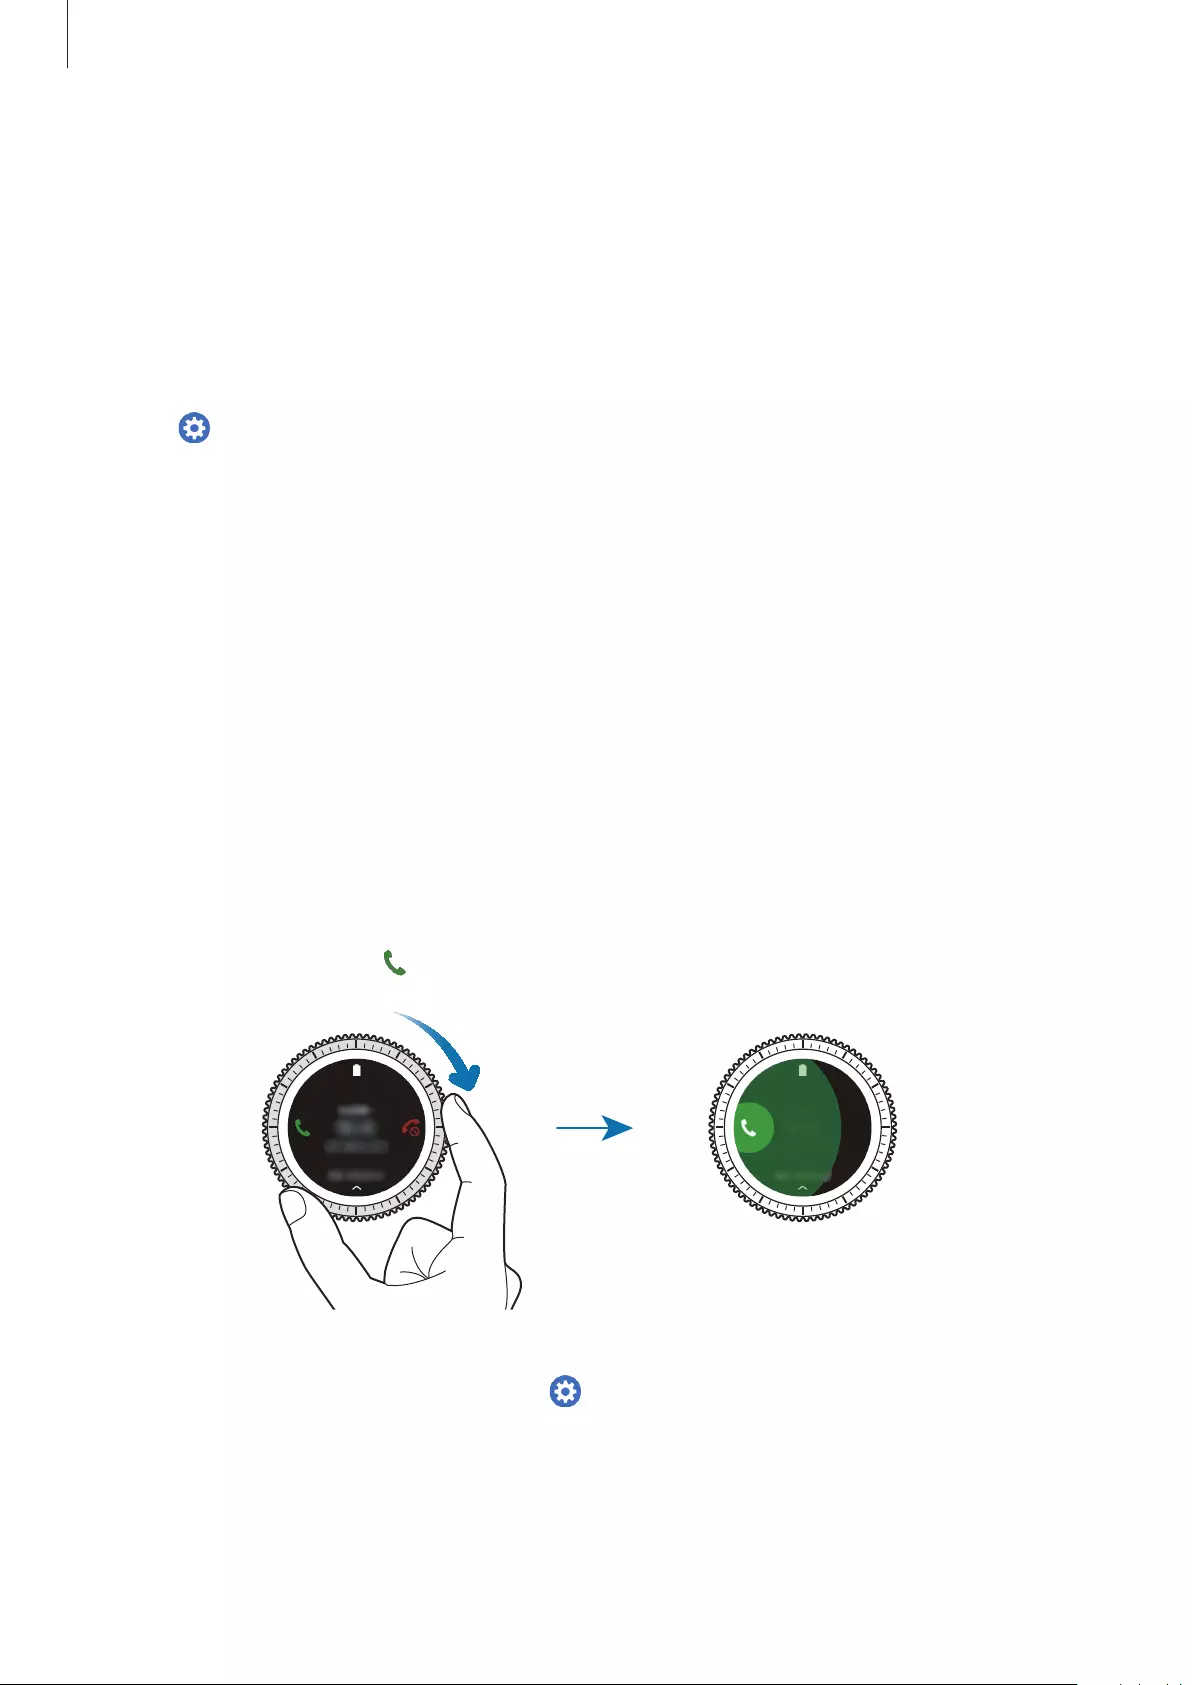
Applications
44
3 Add a recipient and tap
NEXT
.
4 Enter text using one of available methods and tap an icon to send the message.
When you select a text template or an emoticon, the message will automatically be sent
to the recipients.
When you enter text by voice, you can select between text and audio for the message
format. If the message format selection screen does not appear, open the Apps screen,
tap (
Settings
)
→
Messages
, and tap the
Send as audio
switch to activate it.
Phone
Introduction
On your Gear, directly make or receive calls. You can have phone conversations via the
internal microphone.
Receiving calls
Answering a call
When a call comes in, drag outside the large circle. Alternatively, rotate the bezel clockwise.
If the voice control feature is activated, say “Answer” to answer the call. To activate the voice
control feature, open the Apps screen, tap (
Settings
)
→
Call
and tap the
Voice answer
switch.

Applications
45
Rejecting a call
Reject an incoming call and send a rejection message to the caller.
When a call comes in, drag outside the large circle. Alternatively, rotate the bezel
anticlockwise.
To send a message when rejecting an incoming call, swipe upwards from the bottom edge of
the screen.
If the voice control feature is activated, say “Reject” to reject the call. To activate the voice
control feature, open the Apps screen, tap (
Settings
)
→
Call
and tap the
Voice answer
switch.
Missed calls
If a call is missed, a notification appears on the screen. On the Watch screen, rotate the bezel
anticlockwise to view missed call notifications. Alternatively, tap (
Phone
) on the Apps
screen to view missed calls.
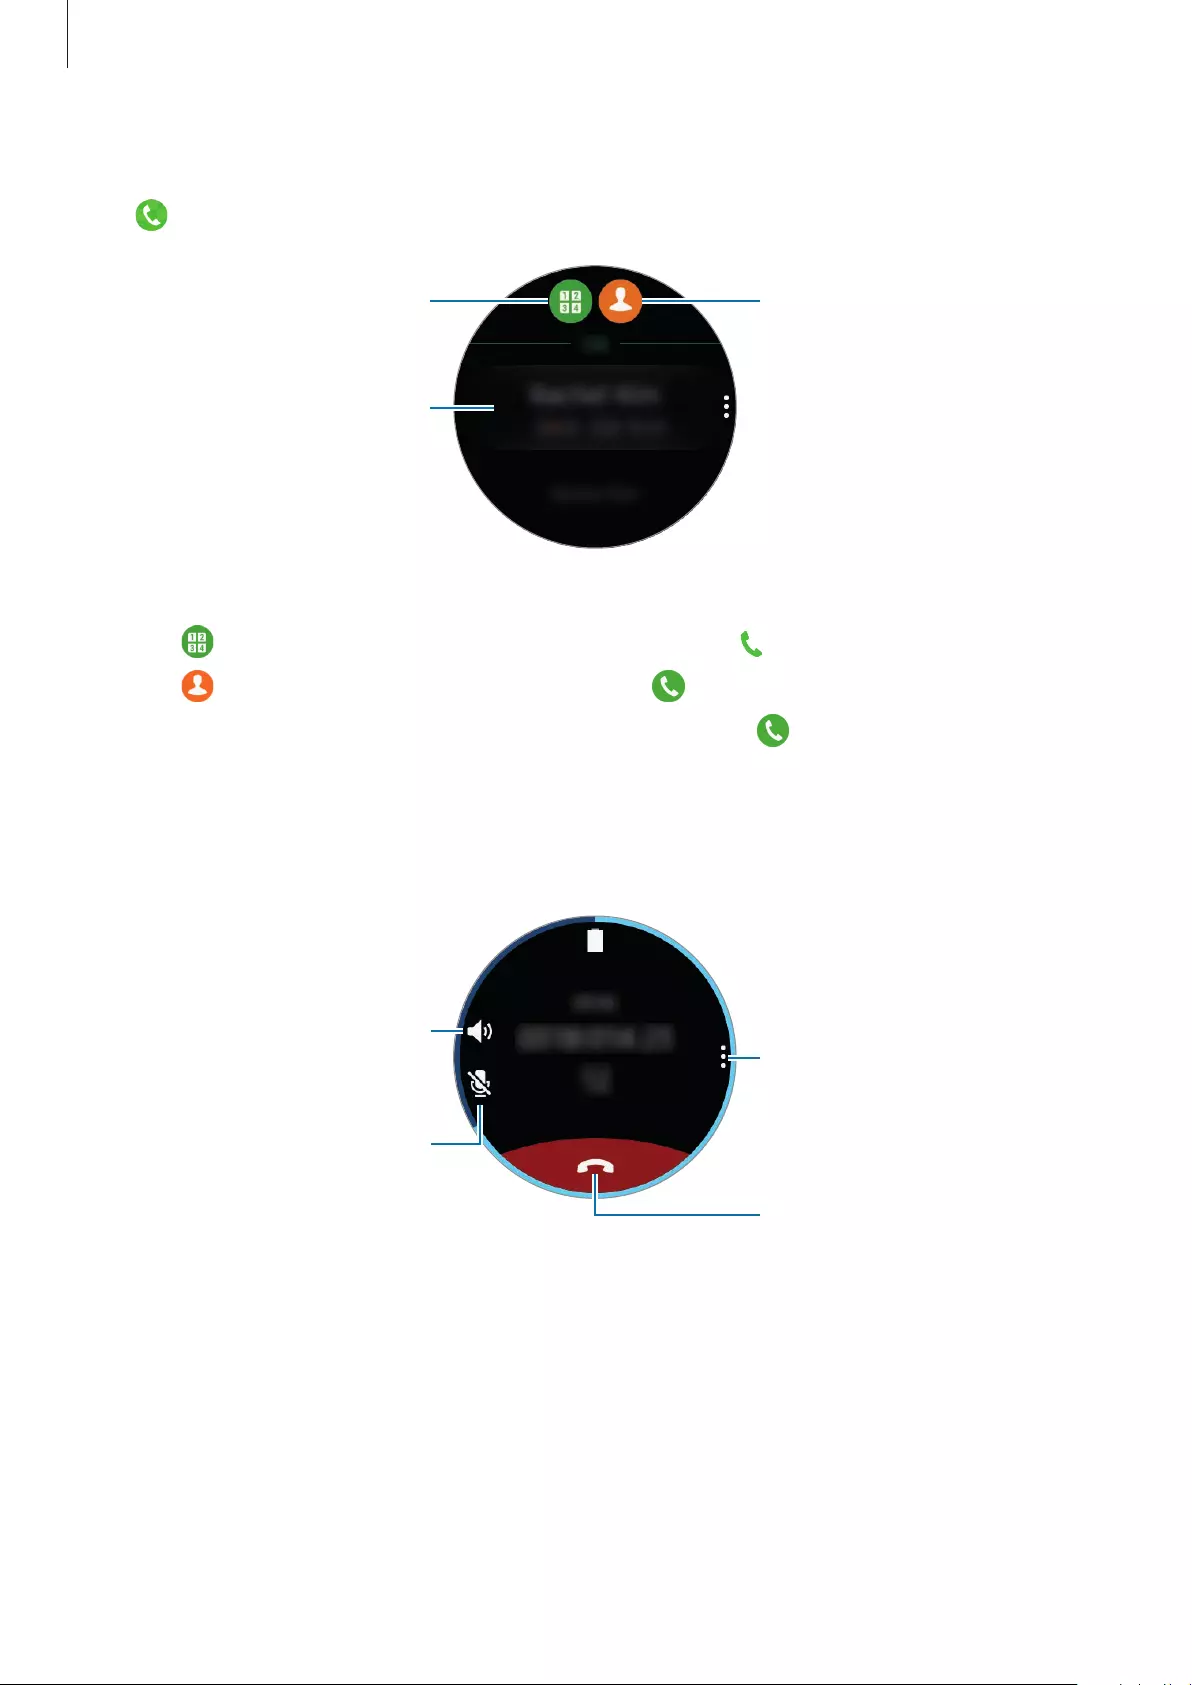
Applications
46
Making calls
Tap (
Phone
) on the Apps screen.
Keypad Contacts
Log list
Use one of the followings methods:
•
Tap , enter a number using the keypad, and then tap .
•
Tap , search or select a contact, and then tap .
•
Scroll through the log list, select a log entry, and then tap .
Options during calls
The following actions are available:
Turn off the microphone so that
the other party cannot hear you.
Adjust the volume.
Access additional options.
Applications
47
Transferring calls to the mobile device
You can continue calls on the mobile device.
Tap
→
Phone
.
Opening the keypad
Tap
→
Keypad
.
Contacts
View your mobile device’s contacts list. You can make a call or send a message to the contact.
Tap (
Contacts
) on the Apps screen.
The favourites list contacts on the mobile device and the frequently used contacts on
the Gear will display on the top of the contacts list.
Use one of the following search methods:
•
Tap
Search
and enter the search criteria.
•
Scroll through the contacts list.
•
Rotate the bezel. When you rotate the bezel quickly, the list scrolls by the alphabet of the
first letter.
Once a contact is selected, take one of the following actions:
•
: Make a voice call.
•
: Compose a message.
Applications
48
Adding medical information to my profile
Add medical information to my profile for the rescuer to quickly see it in an emergency
situation.
On your mobile device, tap
Contacts
, select your profile and enter your medical information.
To view your medical information, on the Apps screen tap (
Contacts
)
→
your profile and
swipe upwards from the bottom edge of the screen.
In an emergency situation, press and hold the Gear’s Home key (Power key) and tap
Emergency medical info
.
You may not use this feature depending on the mobile device that you connect to the
Gear.
S Health
Introduction
S Health encourages you to have a healthy life by tracking your activity 24 hours a day and
letting you set goals.
When you exercise for more than 10 minutes while wearing the Gear, it will display an
encouraging message. When the Gear recognises inactivity for more than one hour, it will
notify you and show you some stretching motions to follow.
Tap (
S Health
) on the Apps screen.
•
When running this app for the first time or after performing a data reset, tap
START
.
•
S Health features are intended only for leisure, well-being, and fitness purposes.
They are not intended for medical use. Before using these features, read the
instructions carefully.
•
Any information that is obtained from use of the Gear or the Fit Software or any
application preloaded within may not be suitable, accurate, complete or reliable.
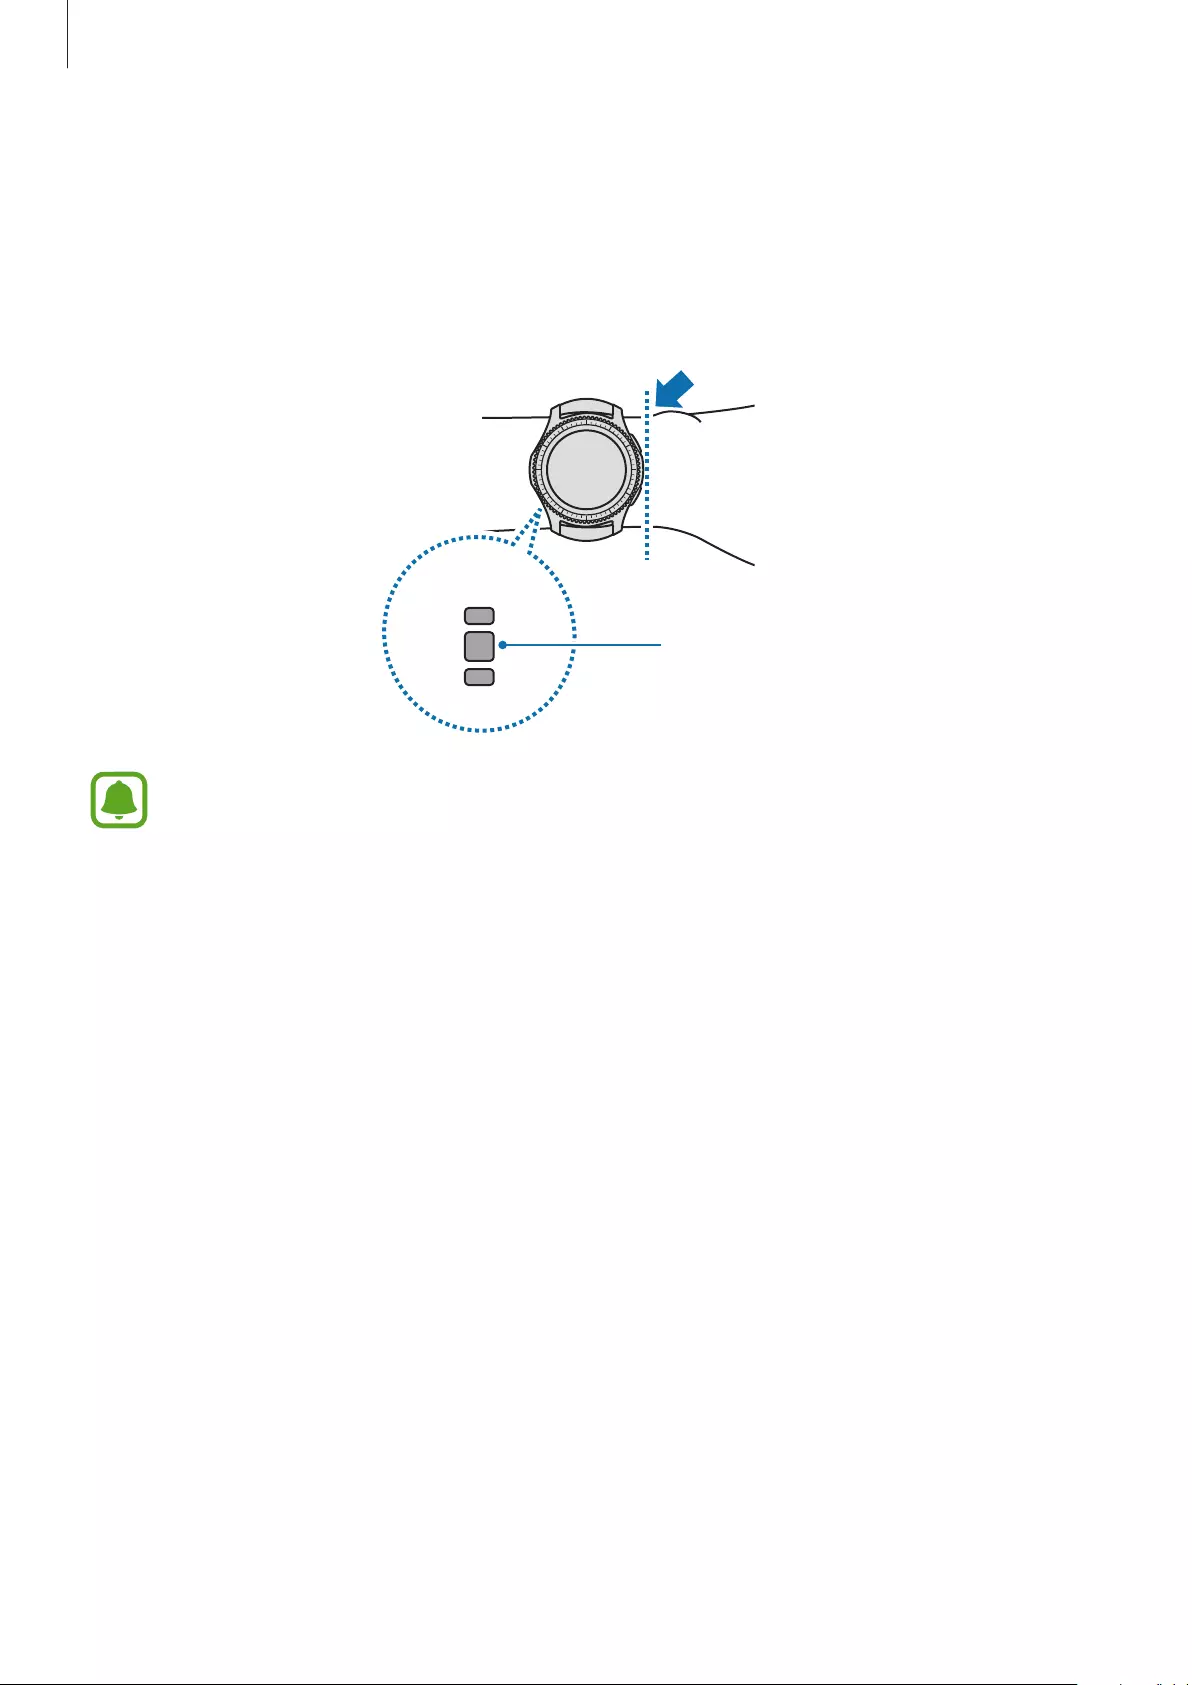
Applications
49
Wearing the Gear correctly
When you activate the auto heart rate tracking feature, or when the Gear recognises your
exercise, the Gear will automatically track your heart rate. When measuring your heart rate,
wear the Gear snugly on your arm above your wrist as shown in the figure below. Do not
fasten the Gear too tightly.
Heart rate sensor
<Rear>
•
The accuracy of the heart rate sensor may be diminished depending on
measurement conditions and surroundings.
•
Use the HR feature only for measuring your heart rate.
•
Do not look directly at the heart rate sensor’s lights. Doing so may impair your
vision. Make sure children do not look directly at the lights.
•
Cold ambient temperatures may affect your measurement; during winter or cold
weather, keep yourself warm when checking your heart rate.
•
Take heart rate measurements when you are seated and relaxed. Do not move your
body while taking heart rate measurements. Doing so may cause your heart rate to
be recorded inaccurately.

Applications
50
•
If you receive a reading that is very different from your expected heart rate, rest for
30 minutes and then measure again.
•
Smoking or consuming alcohol before taking measurements may cause your heart
rate to be different from your normal heart rate.
•
Do not talk, yawn, or breathe deeply while taking heart rate measurements. Doing
so may cause your heart rate to be recorded inaccurately.
•
Because the heart rate sensor uses light to approximate heart rate, its accuracy
may vary due to physical factors that affect light absorption and reflection, such as
blood circulation/blood pressure, skin condition and location and concentration of
blood vessels. In addition, if your heart rate is extremely high or low, measurements
may be inaccurate.
•
Users with thin wrists may receive inaccurate heart rate measurements when
the device is loose, causing the light to be reflected unevenly. If heart rate
measurement is not working properly, adjust the position of the device’s heart rate
sensor to the right, left, up, or down on your wrist, or turn the device so the heart
rate sensor sits firmly against the inside of your wrist.
•
If the heart rate sensor is dirty, wipe the sensor and try again. Obstructions
between the device’s band and your wrist, such as body hair, dirt, or other objects
may prevent the light from reflecting evenly. Please make sure you remove such
obstructions before use.
•
If your device becomes hot to the touch, remove it until it cools. Exposing skin to a
hot surface of the device for a long time may cause skin burn.
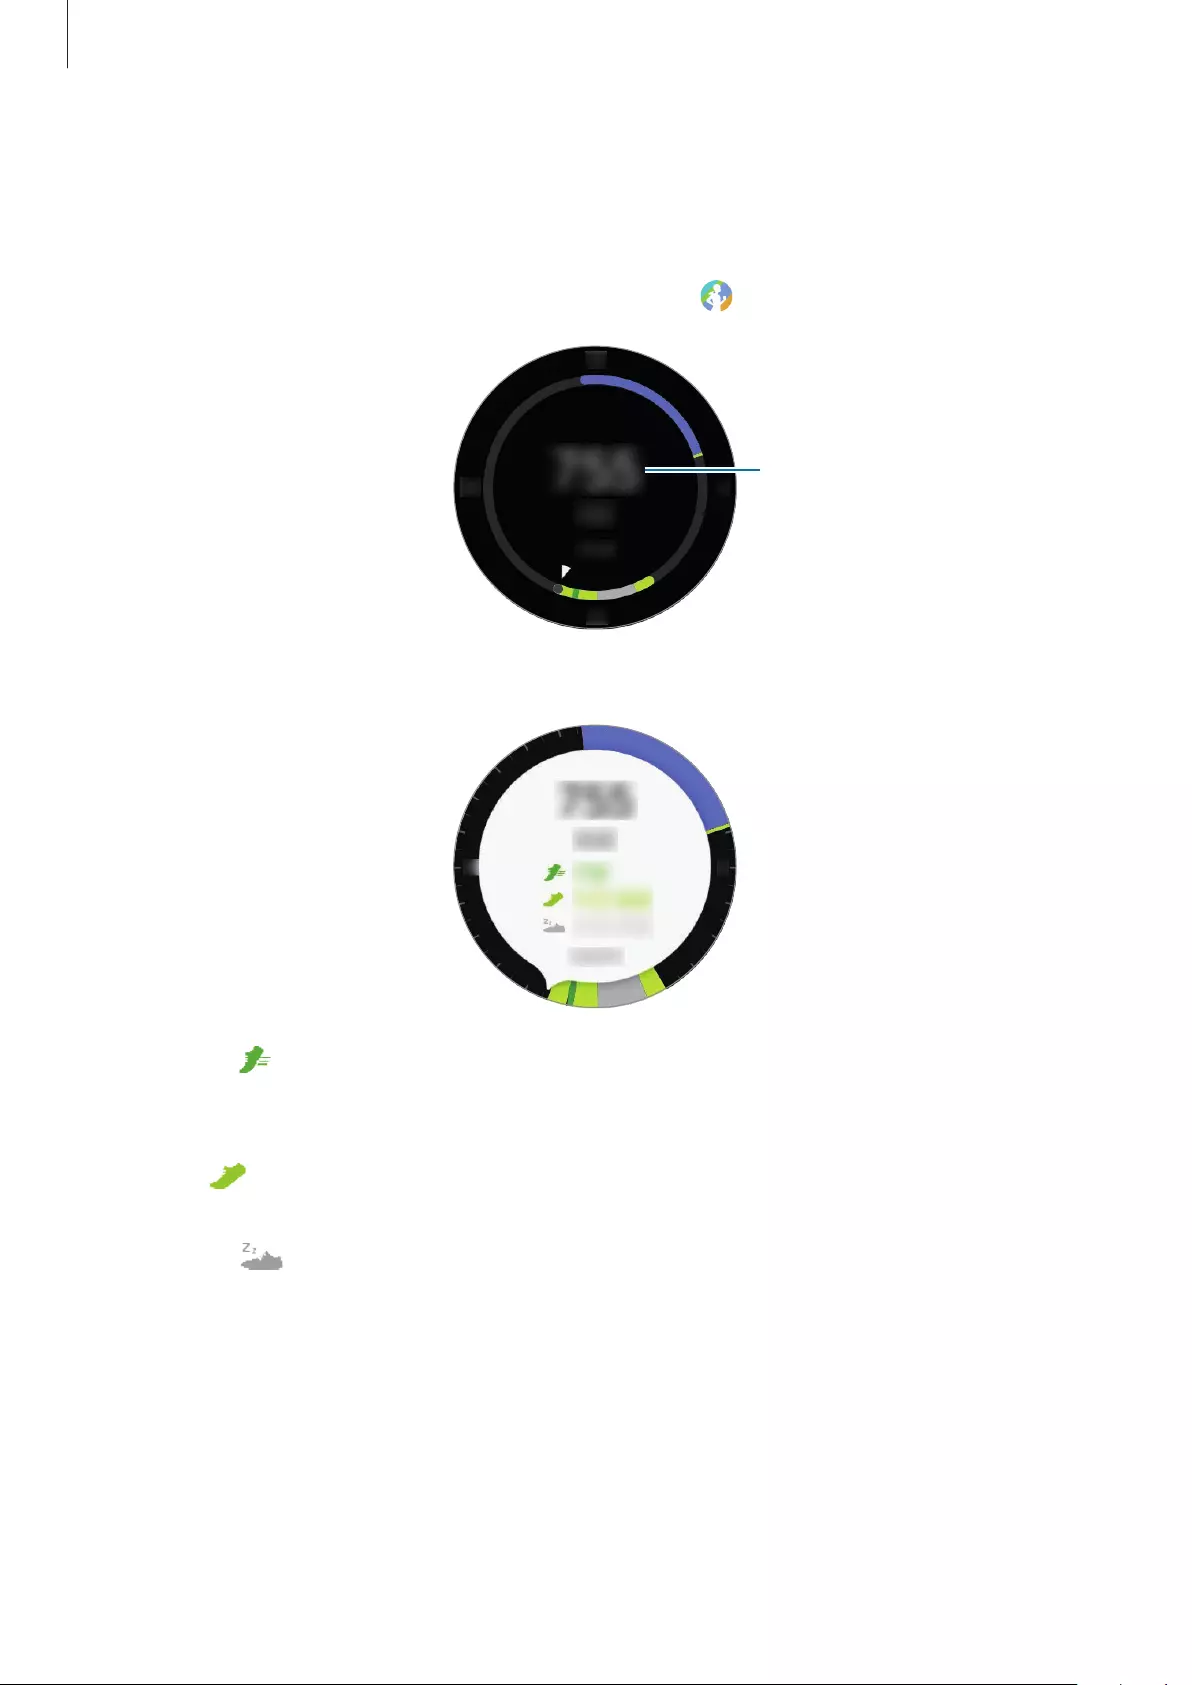
Applications
51
24-hour Log
Based on your profile, you can view your basal metabolic rate (BMR) and activity for the day at
a glance. You can also view your activity level and calories burned.
On the widget panel, select
24-hour Log
widget. Or, tap (
S Health
) on the Apps screen.
Basal metabolic rate
Tap the screen and rotate the bezel to view the details of your activity log.
•
Healthy
( ) : It indicates whether you are walking or running. If you have made more
than 100 steps per minute for at least 10 consecutive minutes, the Gear will encourage
you to keep going.
•
Light
( ) : This indicates the time spent doing light activity, but not hard exercise or
inactivity.
•
Inactive
( ) : This indicates the time spent not moving for one hour or more. To help
you stay active, the Gear will prompt you to move after 50 minutes of inactivity.
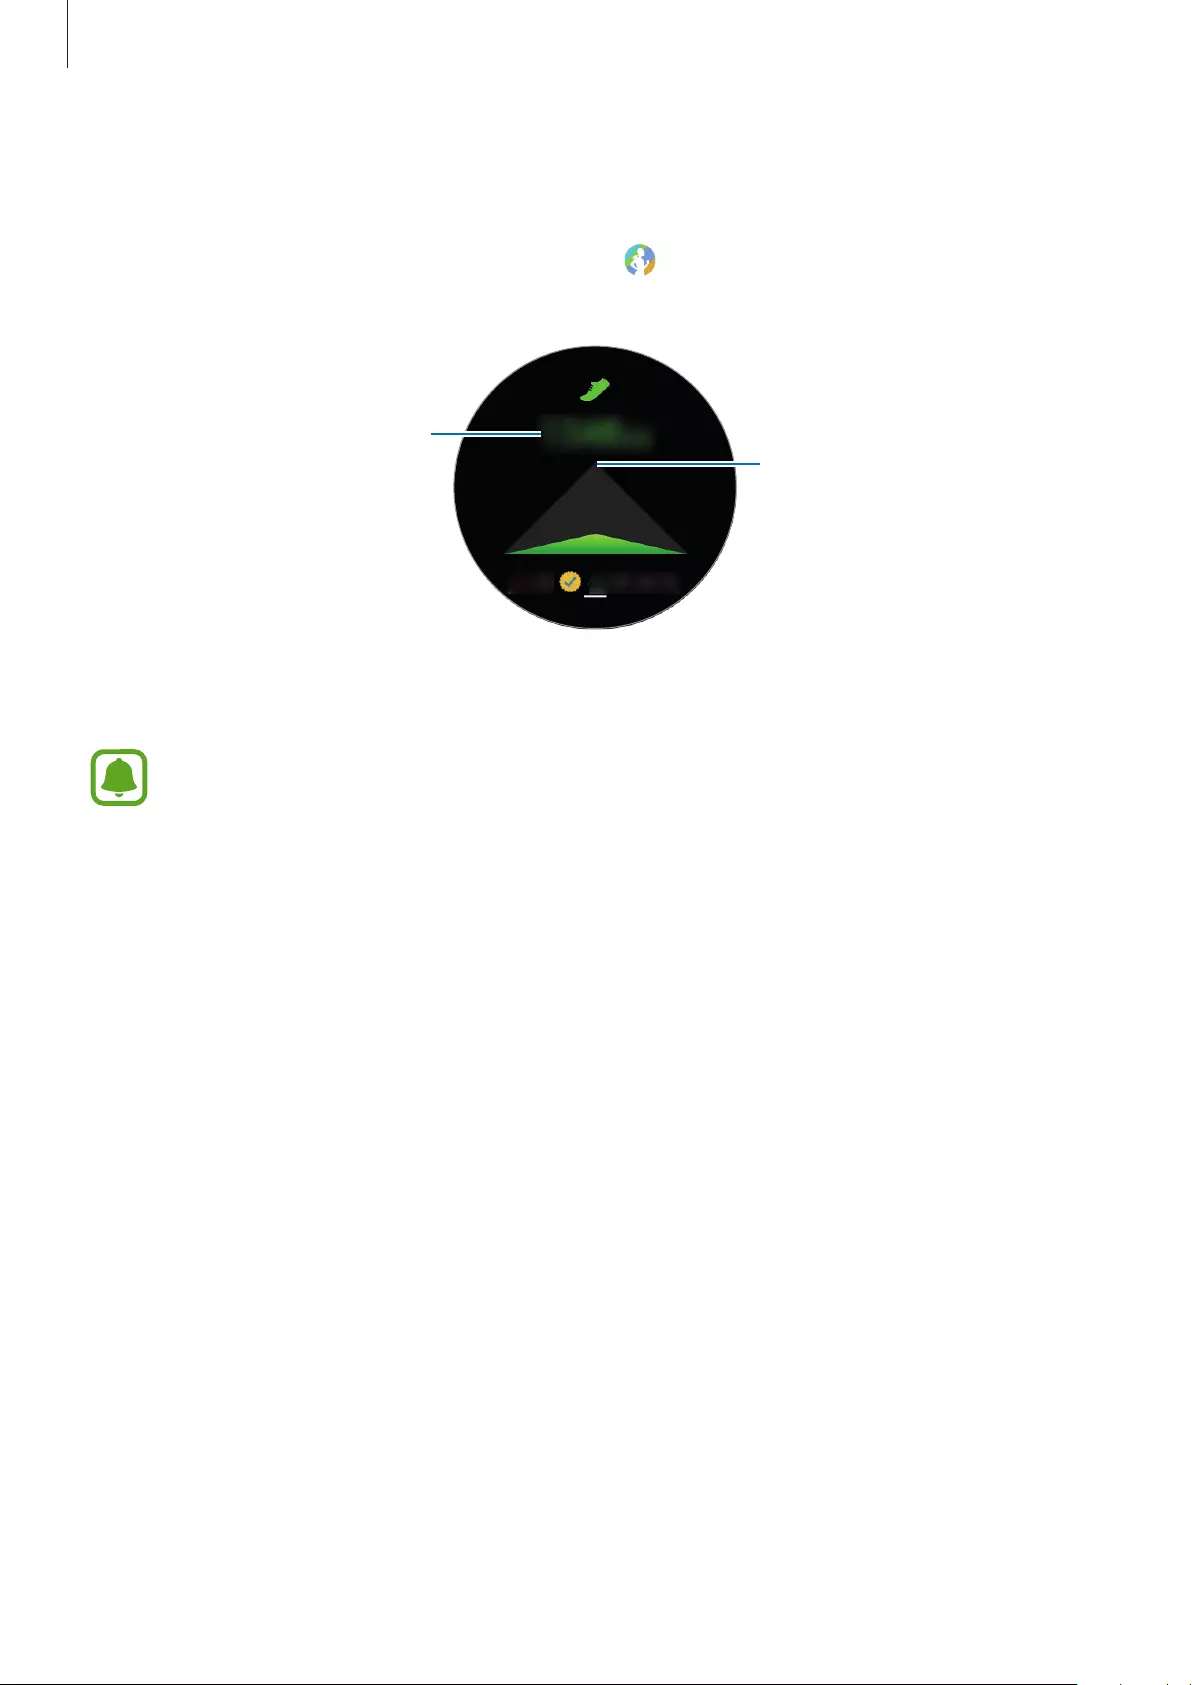
Applications
52
Steps
The Gear counts the number of steps you have taken and measures the distance travelled.
On the widget panel, select
Steps
widget. Or, tap (
S Health
) on the Apps screen, rotate
the bezel clockwise, and open the steps tracker panel.
Target
Current step total
Tap the screen to view a graph of your step count records. To view records by day, rotate the
bezel.
•
You may experience a brief delay while the steps tracker monitors your steps and
then displays your step count. You may also experience a brief delay before the
pop-up window indicates that your goal has been reached.
•
If you use the steps tracker while travelling by car or train, vibration may affect your
step count.
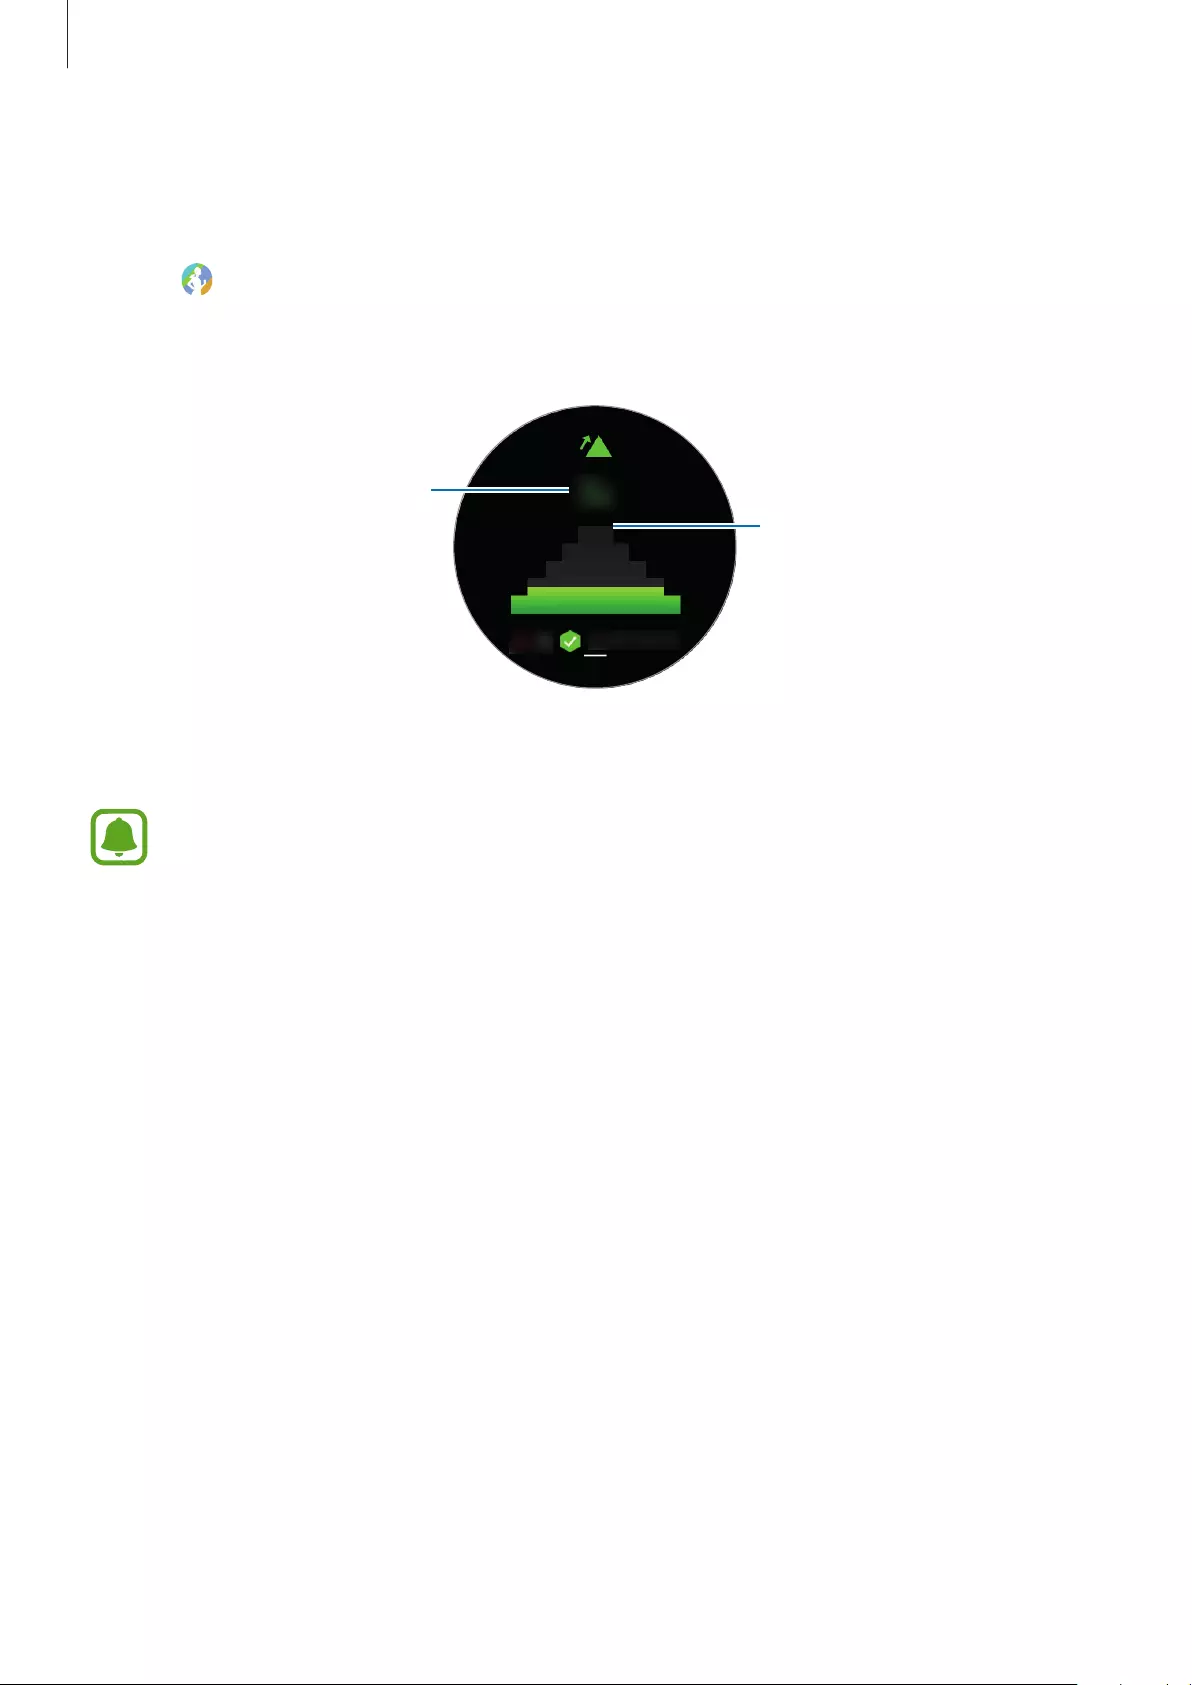
Applications
53
Floors
Record and track how many floors you climb.
1 Tap (
S Health
) on the Apps screen.
2 Rotate the bezel clockwise and open the floors tracker panel.
Target
Current floors total
Tap the screen to view a graph of your climbing records. To view records by day, rotate the
bezel.
•
One floor is calculated as approximately 3 metres. The floors measured may not
match the actual floors you climb.
•
The floors measured may not be accurate depending on the environment, the
user’s movements, and the conditions of buildings.
•
The floors measured may not be accurate if water or foreign materials enter the
pressure relief vent (atmospheric pressure sensor). If there is any detergent, sweat,
or raindrops on the Gear, rinse it with clean water and dry the pressure relief vent
(atmospheric pressure sensor) thoroughly before use.

Applications
54
Exercise
Record your exercise information and calories burned using S Health’s exercise feature.
•
Before using this feature, pregnant women, the elderly, and young children, users
suffering from conditions, such as chronic heart disease or high blood pressure, are
recommended to seek the advice of a licensed medical professional.
•
If you feel dizzy, experience pain, or have difficulty breathing during exercise, stop
using this feature and seek the advice of a licensed medical professional.
Be aware of following conditions before exercising in cold weather conditions:
•
Avoid using the device in cold weather. If possible, use the device indoors.
•
If you use the device outside in cold weather, cover the Gear with your sleeves before
using it.
•
If you have just purchased or have reset the Gear, read the on-screen information about
the app and create your profile.
Setting the exercise
1 Tap (
S Health
) on the Apps screen.
2 Rotate the bezel clockwise and open the exercise tracker screen.
3 Tap the screen and tap
Activity type
to select the type of exercise you want to monitor.
4 Tap
Target
to select a target type.
5 Set the target.
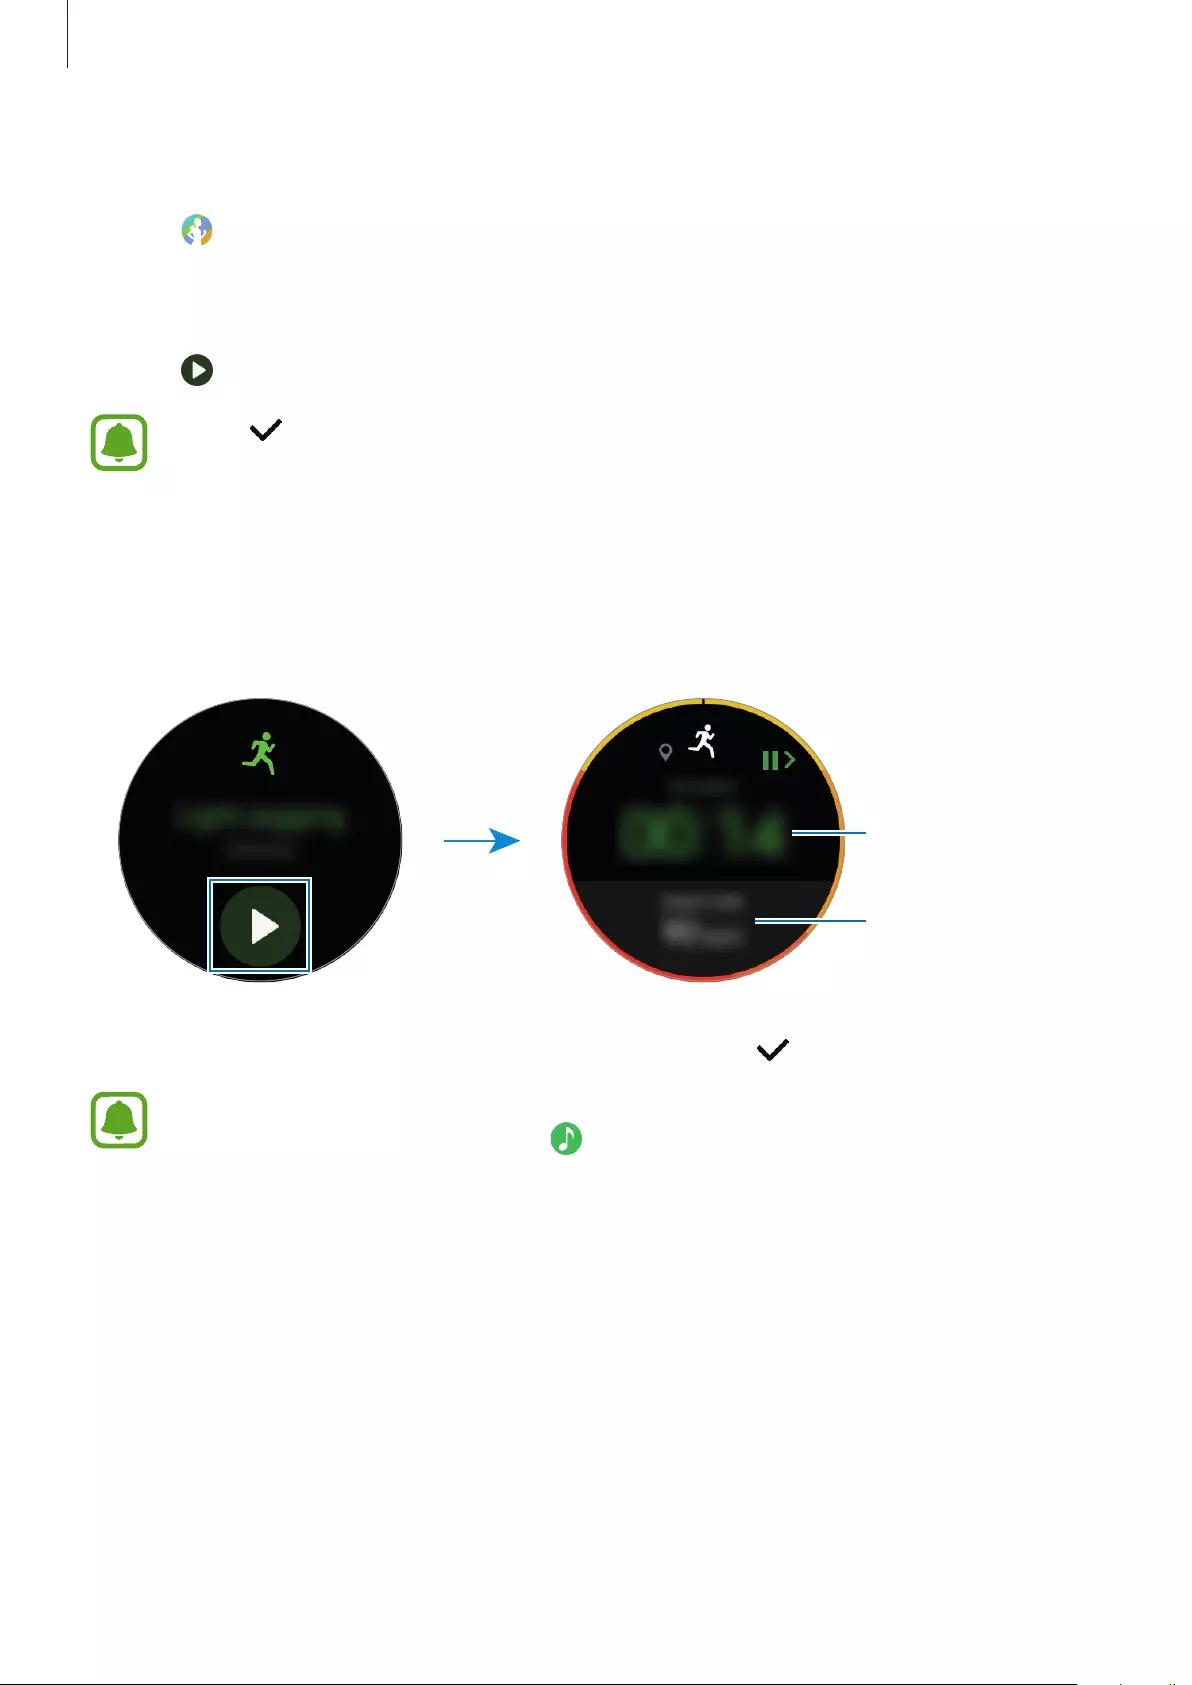
Applications
55
Exercising with the Gear
1 Tap (
S Health
) on the Apps screen.
2 Rotate the bezel clockwise and open the exercise tracker screen.
3 Tap to start exercising.
•
Tap to allow this app to use your location information while exercising. Your
location information sharing preference will be saved as the default.
•
To set your exercise again, tap the exercise tracker screen.
You can view exercise information, such as calories burned and current speed, when you
rotate the bezel or tap the bottom of the screen.
To listen to music, rotate the bezel anticlockwise.
Exercise time
Heart rate
4 To finish exercising, press the Back key and tap
FINISH
→
.
The music will continue to play even if you finish exercising. Stop playing music
before finish exercising. Or, launch (
Music Player
) to stop playing music.
Automatic exercise recognition
Once you have exercised for 10 minutes while wearing the Gear, it automatically recognises
that you are exercising and records the exercise type and duration.
When you stop exercising for more than one minute, the Gear automatically recognises that
you have stopped exercising and this feature is deactivated.

Applications
56
•
Among the various exercise types, only walking, running, elliptical workouts,
rowing, and cycling can be measured.
•
The automatic exercise recognition feature measures the distance travelled and
calories burnt using the acceleration sensor. The measurements may not be
accurate depending on your walking and exercise routines.
Heart rate
Measure and record your heart rate.
•
The Gear’s heart rate tracker is intended for fitness and informational purposes
only and is not intended for use in the diagnosis of disease or other conditions, or
in the cure, mitigation, treatment, or prevention of disease.
•
To measure your heart rate more accurately with the Gear, wear the Gear firmly
around your lower arm just above the wrist. Refer to Wearing the Gear correctly for
details.
Be aware of following conditions before measuring your heart rate:
•
Rest for 5 minutes before taking measurements.
•
If the measurement is very different from the expected heart rate, rest for 30 minutes and
then measure it again.
•
During winter or in cold weather, keep yourself warm when measuring your heart rate.
•
Smoking or consuming alcohol before taking measurements may cause your heart rate
to be different from your normal heart rate.
•
Do not talk, yawn, or breathe deeply while taking heart rate measurements. Doing so
may cause your heart rate to be recorded inaccurately.
•
Heart rate measurements may vary depending on the measurement method and the
environment they are taken in.
•
If the heart rate sensor is not working, check the Gear’s position on your wrist and make
sure nothing is obstructing the sensor. If the heart rate sensor continues to have the same
problem, visit a Samsung Service Centre.
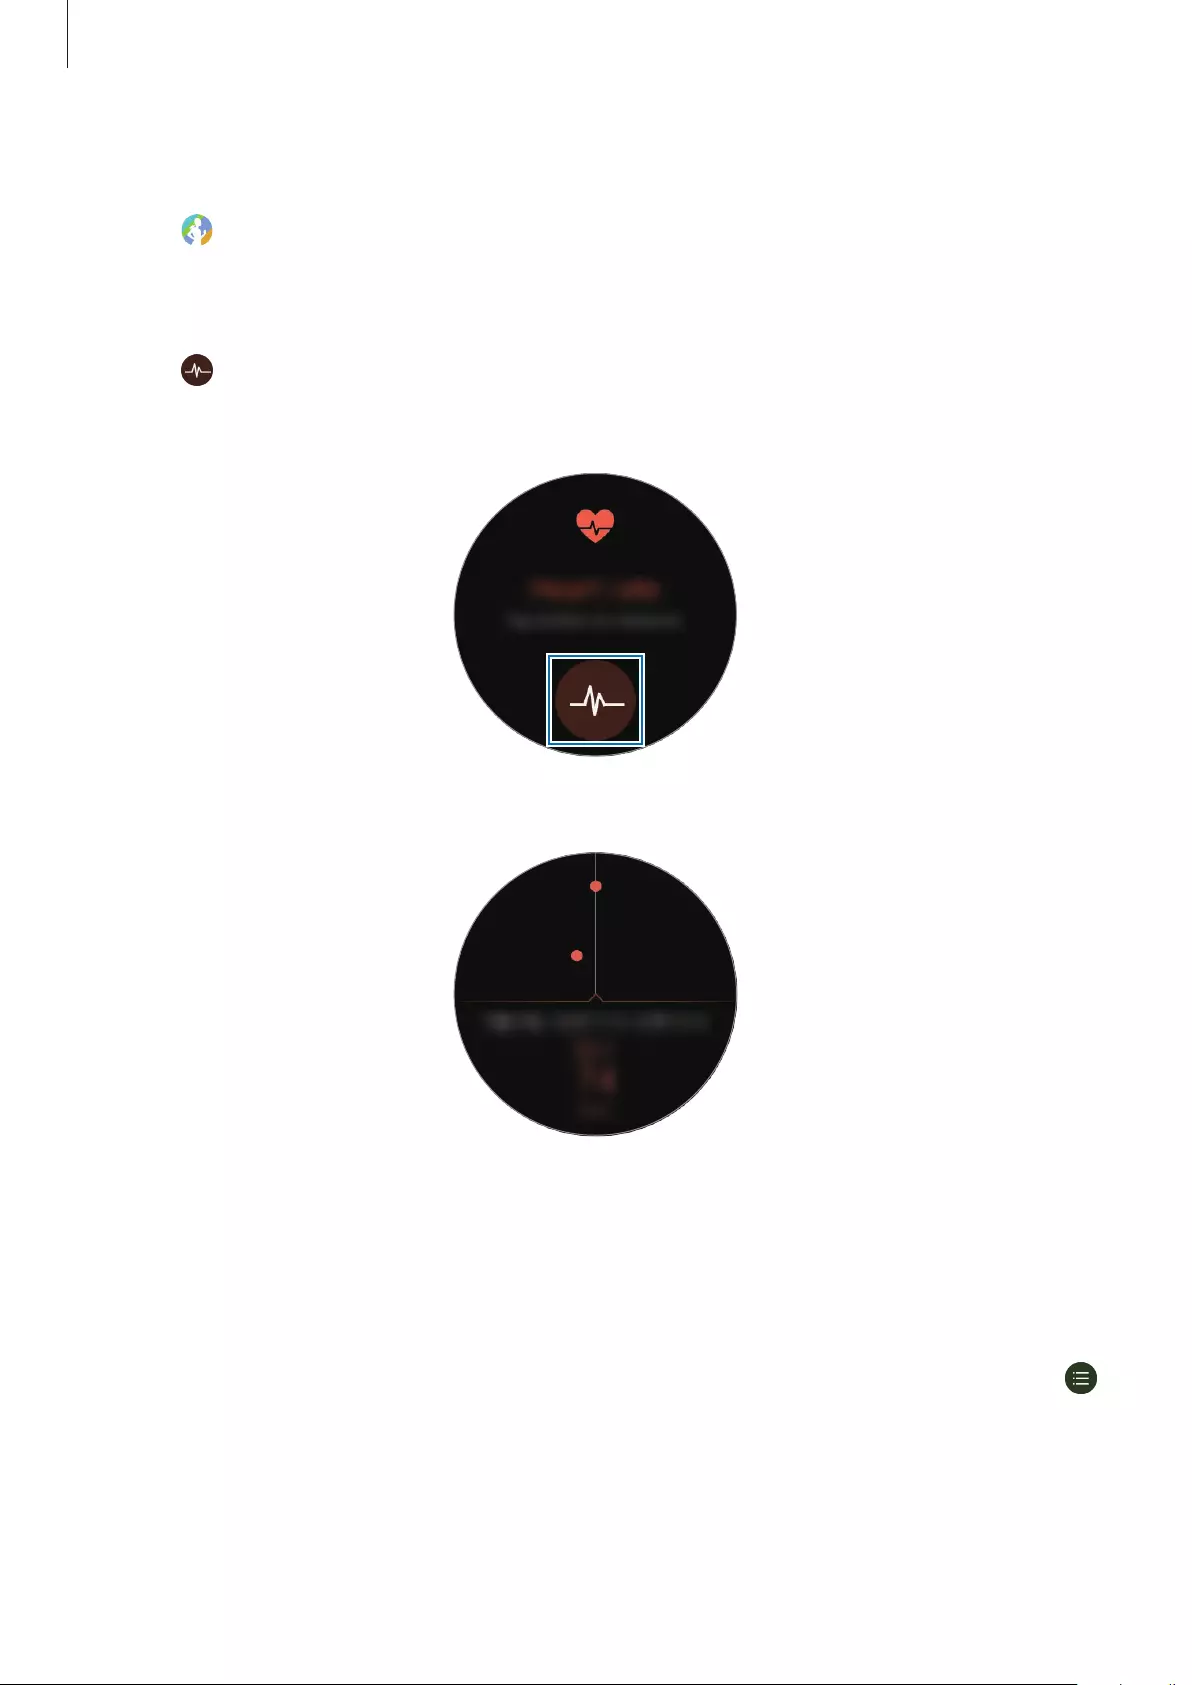
Applications
57
Measuring your heart rate
1 Tap (
S Health
) on the Apps screen.
2 Rotate the bezel clockwise and open the heart rate tracker screen.
3 Tap to begin measuring your heart rate.
After a moment, your current heart rate will be displayed on the screen.
Tap the screen to view a graph of your records. To view records by hour, rotate the bezel.
Tracking your heart rate
The Gear can automatically measure and track your heart rate. Your Gear will measure your
heart rate at regular intervals. This feature may not function properly while you are moving.
Your heart rate is automatically measured when you are using the Exercise app.
To track your heart rate, rotate the bezel clockwise and open the settings screen. Then, tap
→
Auto HR
and tap the
Auto HR
switch to activate it.
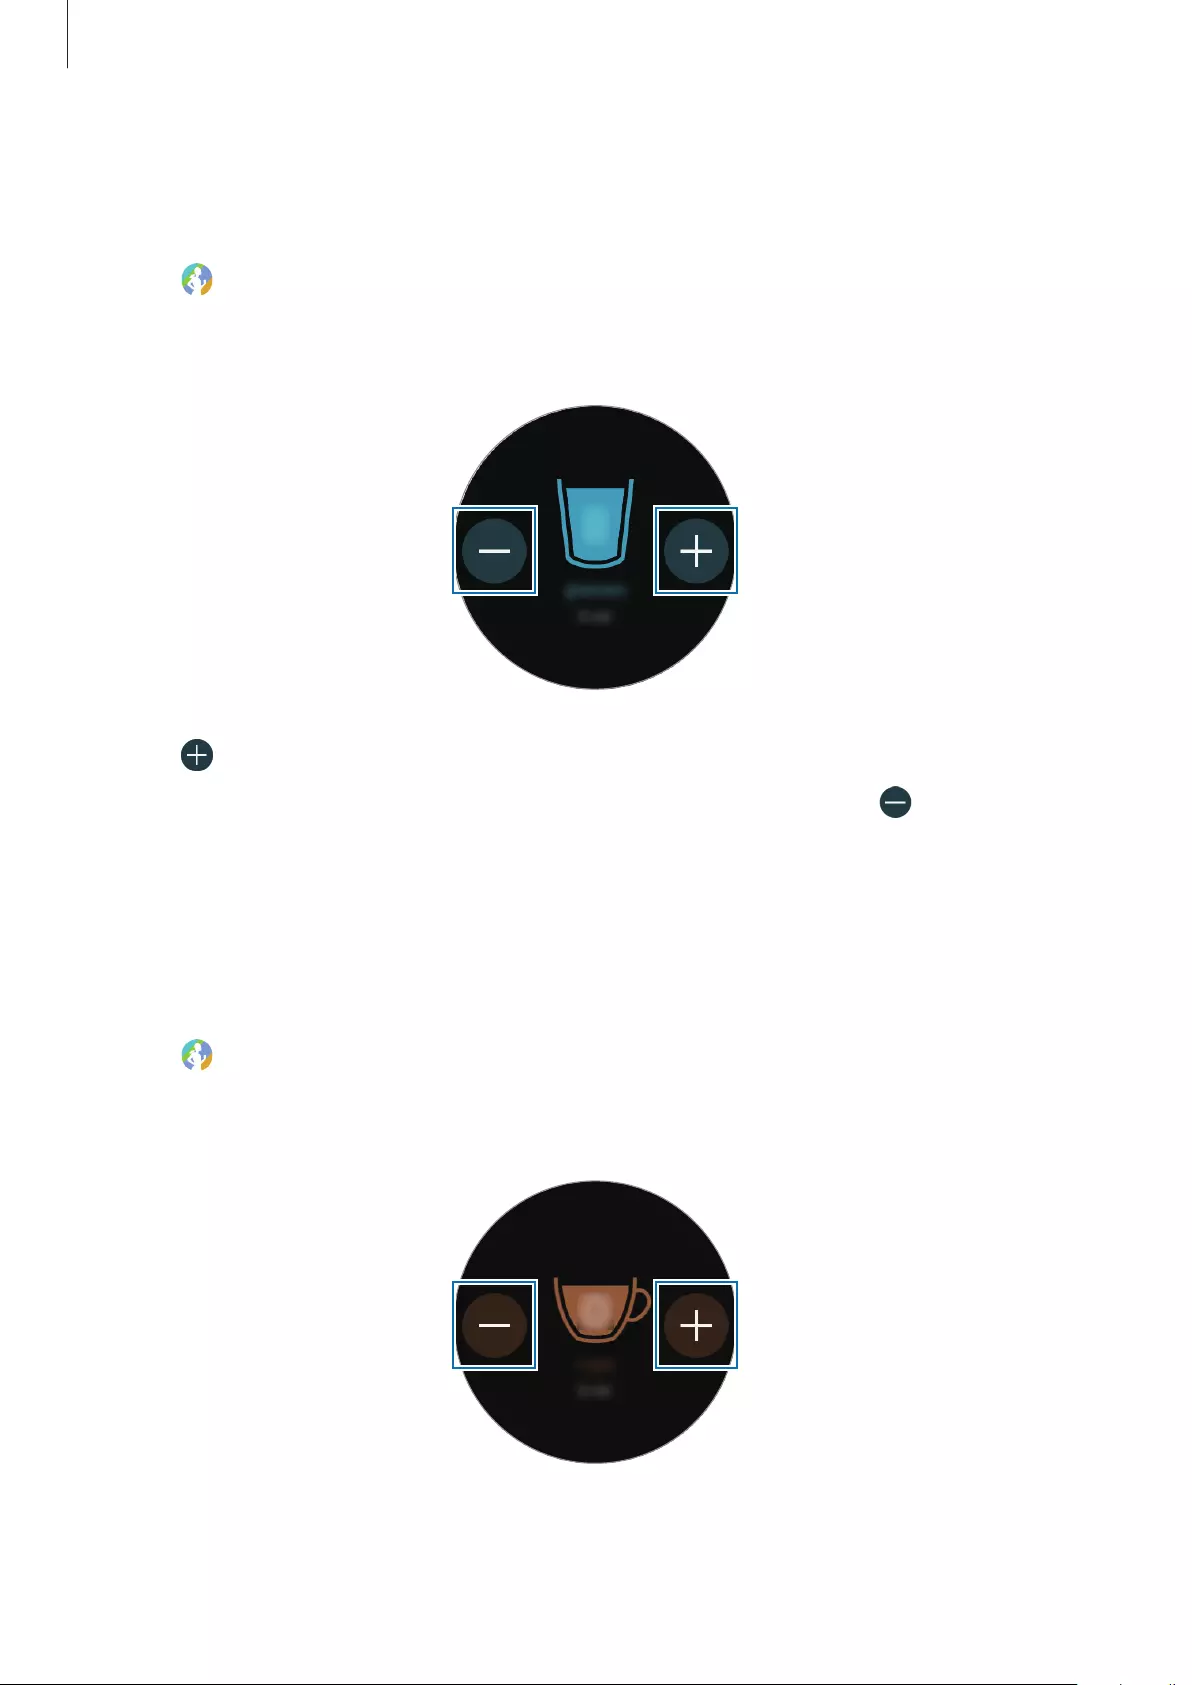
Applications
58
Water
Record and track how many glasses of water you drink.
1 Tap (
S Health
) on the Apps screen.
2 Rotate the bezel clockwise and open the water tracker screen.
3 Tap when you drink a glass of water.
If you accidentally added an incorrect value, you can fix it by tapping .
Tap the screen to view a graph of your records. To view records by day, rotate the bezel.
Caffeine
Record and track how many cups of coffee you drink.
1 Tap (
S Health
) on the Apps screen.
2 Rotate the bezel clockwise and open the caffeine tracker screen.
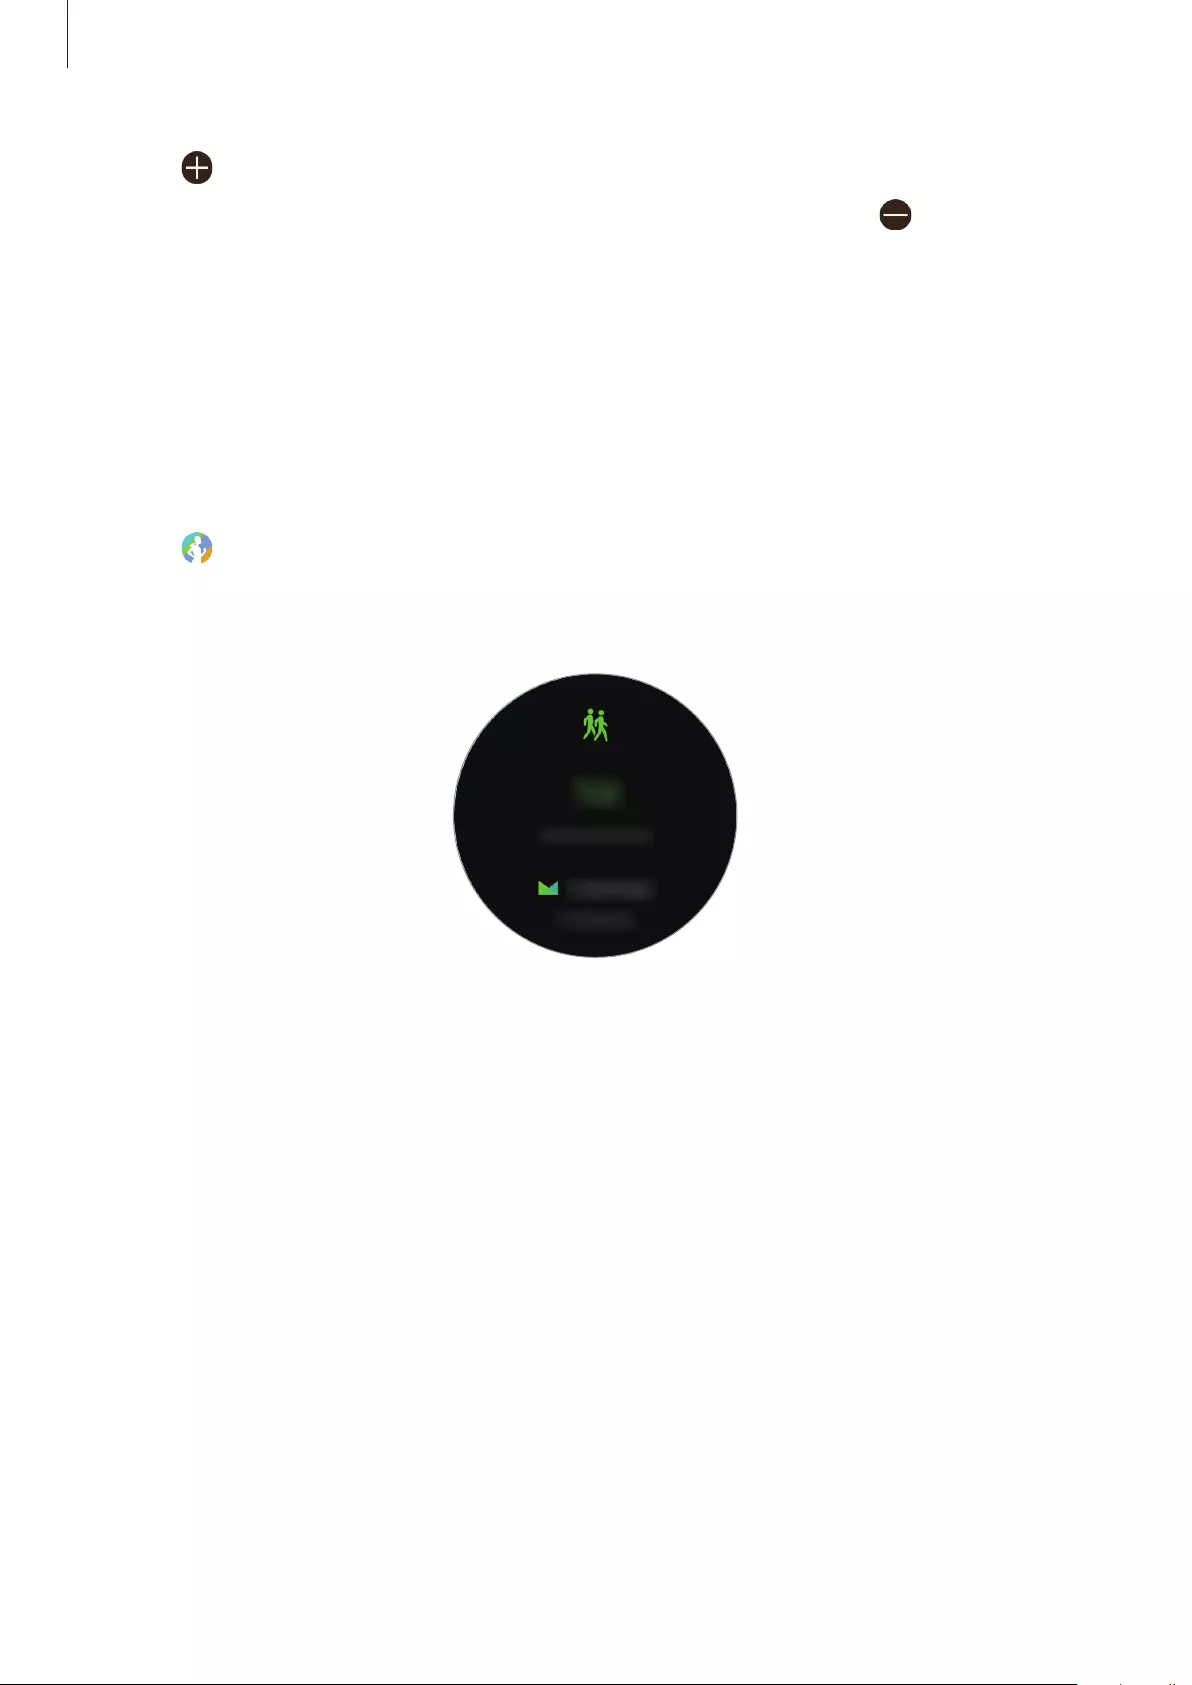
Applications
59
3 Tap when you drink a cup of coffee.
If you accidentally added an incorrect value, you can fix it by tapping .
Tap the screen to view a graph of your records. To view records by day, rotate the bezel.
Together
Compare your step count records with other S Health users. You can set a goal, compete with
your friends, and view the challenge status.
Activate the together feature in the S Health app on your mobile device.
1 Tap (
S Health
) on the Apps screen.
2 Rotate the bezel clockwise and open the together screen.
Tap the screen to view the challenge status and the leaderboard.

Applications
60
Additional information
•
The purpose for such data collection is limited to providing the service that you have
requested, including providing additional information to enhance your wellness, back
up/sync data, data analysis and statistics or to develop and provide better services.
(But if you sign in to your Samsung account from S Health, your data may be saved on
the server for data backup purposes.) Personal information may be stored until the
completion of such purposes. To delete any data you have shared with social networks or
transferred to storage devices, you must delete them separately.
•
You assume full responsibility for the inappropriate use of data shared on social networks
or transmitted to others. Use caution when sharing your personal data with others.
•
If the Gear is connected to a mobile device, verify the communication protocol to confirm
proper operation. If you use a wireless connection, such as Bluetooth, the Gear may be
affected by electronic interference from other devices. Avoid using the Gear near other
devices that transmit radio waves.
•
The content used in the S Health app may vary depending on the software version of
the app. The services provided with the app are subject to change or the cancellation of
support without prior notice.
•
Available S Health functions and services may vary depending on the local laws and
regulations in your region.
•
Some functions of S Health may not be provided depending on your region.
•
S Health functions are intended for fitness and informational purposes only and is not
intended for use in the diagnosis of disease or other conditions, or in the cure, mitigation,
treatment, or prevention of disease.
•
Measured distance may differ from the actual distance due to uneven strides,
walking in place, and pacing around.
•
Only records from the past thirty days are saved. You can view previous data on the
mobile device where the S Health app is installed.
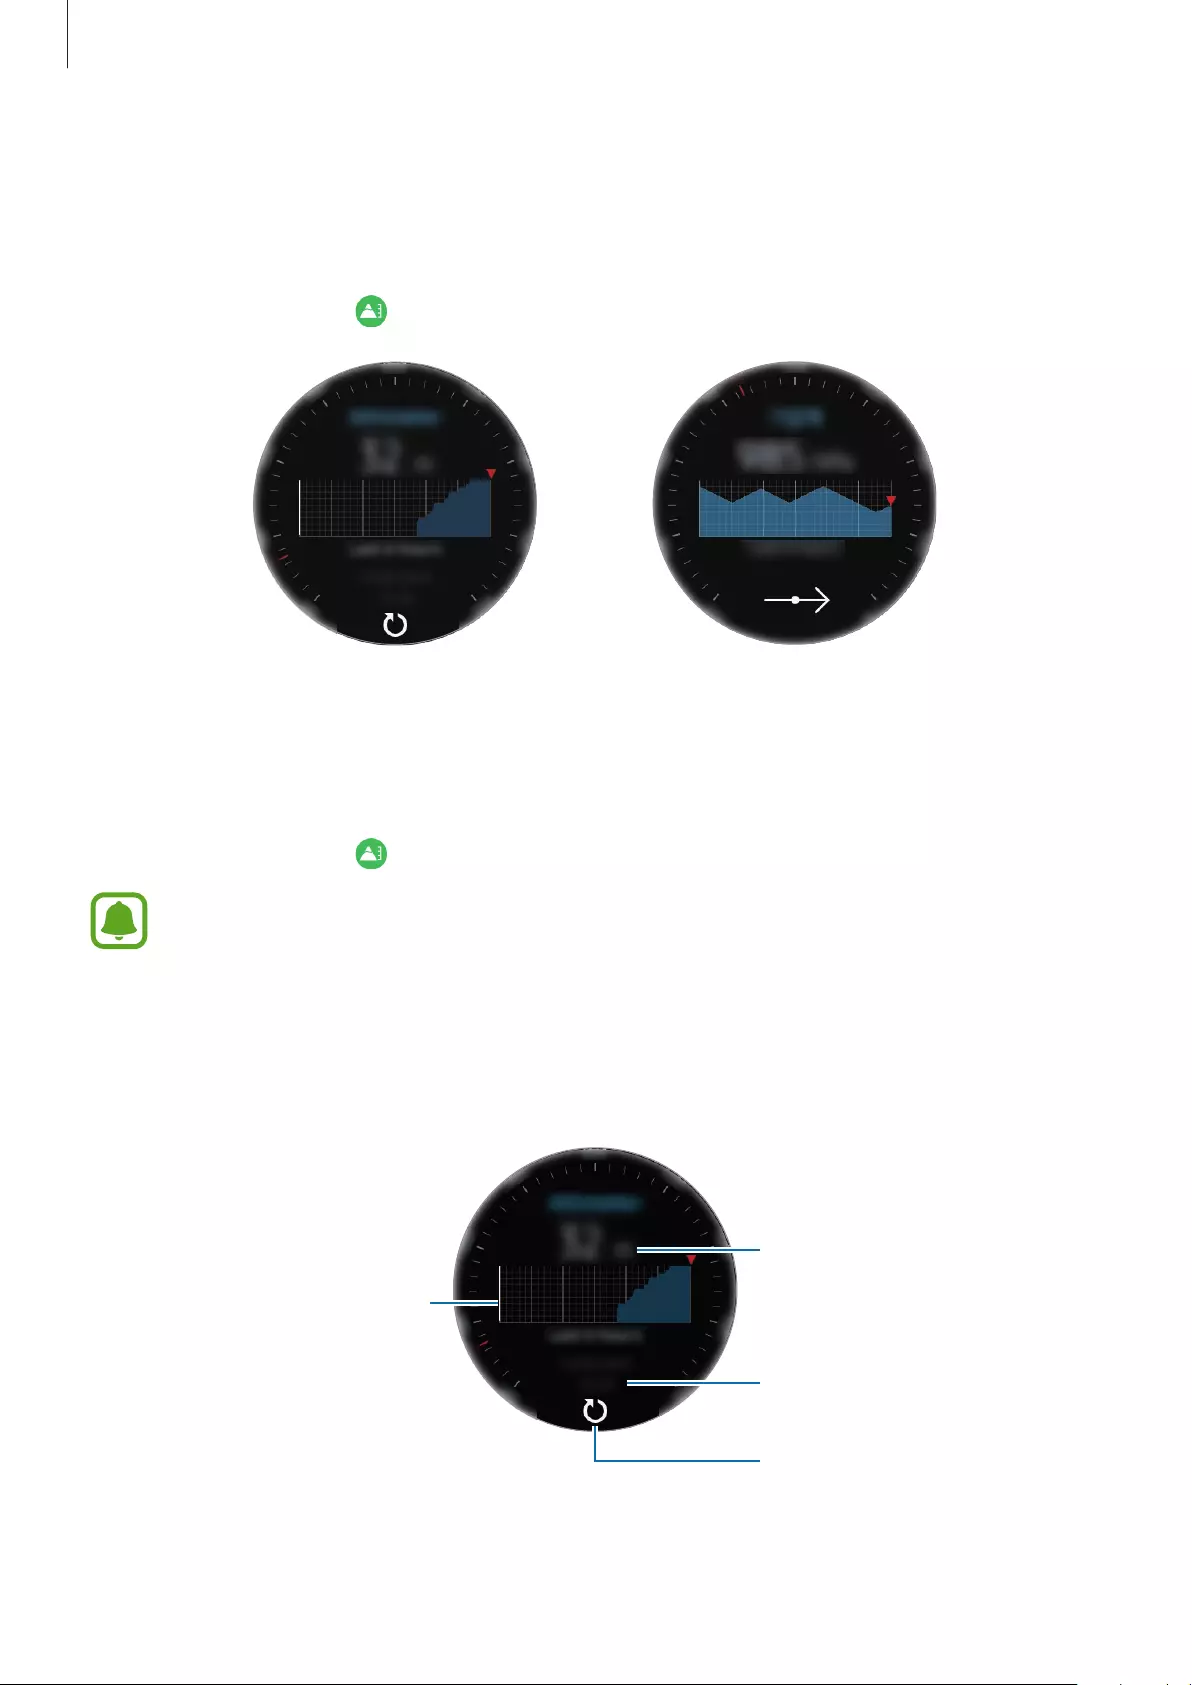
Applications
61
Alti-Barometer
Measure the altitude and atmospheric pressure of your current location using the internal
atmospheric sensor.
On the Apps screen, tap (
Alti-Barometer
). To view the barometer, swipe to the left.
Altimeter Barometer
Measuring your altitude
Measure your current altitude and view a graph of changes over the last 6 hours.
On the Apps screen, tap (
Alti-Barometer
).
•
If you have recently purchased or reset the Gear, tap
GO
to activate the Gear’s GPS
feature.
•
The altitude measured may not be accurate if water or foreign materials enter the
pressure relief vent (atmospheric pressure sensor). If there is any detergent, sweat,
or raindrops on the Gear, rinse it with clean water and dry the pressure relief vent
(atmospheric pressure sensor) thoroughly before use.
Change in altitude
Time of last calibration
Current altitude
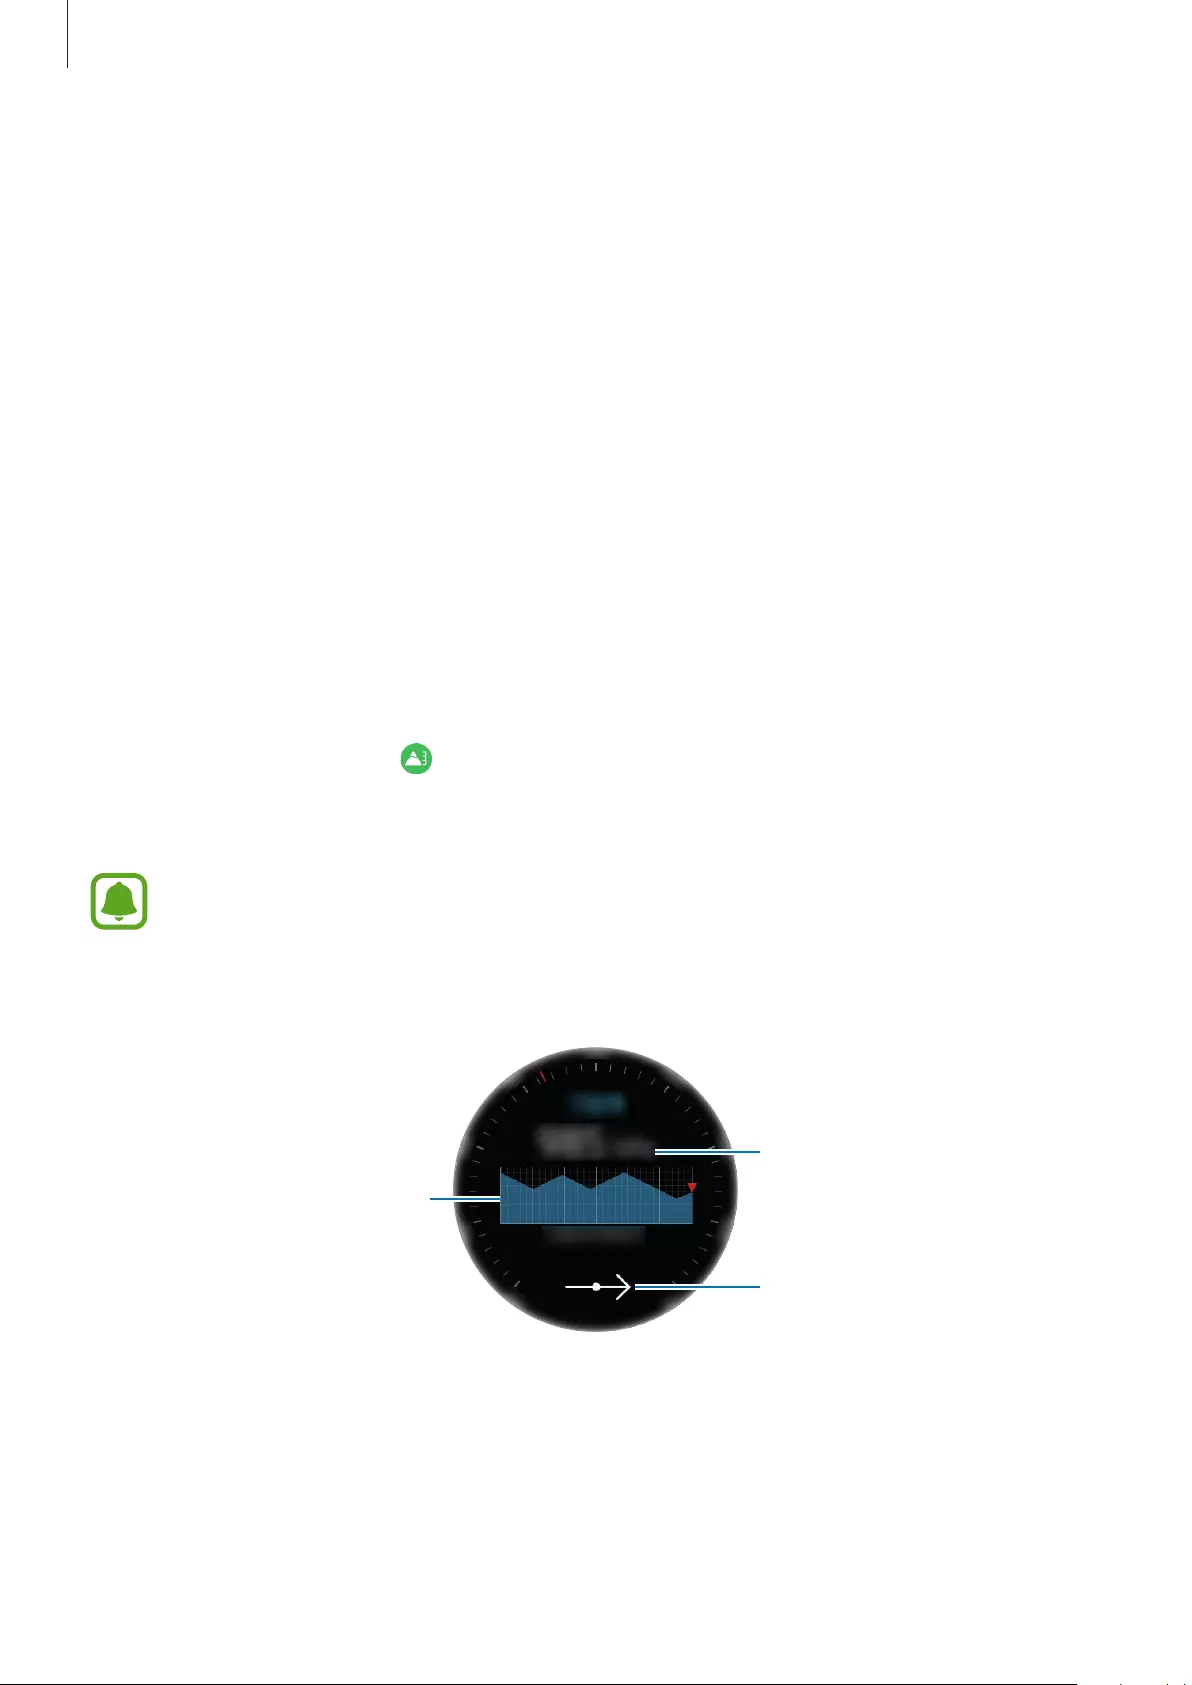
Applications
62
Manually calibrating the altitude
You can manually calibrate the measured altitude.
1 Swipe to the left to open the settings screen.
2 Tap
CHANGE >
.
3 Tap
Manual calibration
and tap the
Manual calibration
switch to activate it.
4 Tap
Altitude
and set the reference value.
The altitude is calibrated based on the entered reference value.
Measuring the atmospheric pressure
Measure the current atmospheric pressure and view a graph of changes over the last 6 hours.
You can anticipate any changes to the weather using the pressure prediction gauge.
1 On the Apps screen, tap (
Alti-Barometer
).
2 Swipe to the left to open the barometer screen.
The atmospheric pressure measured may not be accurate if water or foreign materials
enter the pressure relief vent (atmospheric pressure sensor). If there is any detergent,
sweat, or raindrops on the Gear, rinse it with clean water and dry the pressure relief
vent (atmospheric pressure sensor) thoroughly before use.
Changes in atmospheric
pressure
Current atmospheric pressure
Pressure prediction

Applications
63
Manually calibrating the atmospheric pressure
You can manually calibrate the measured atmospheric pressure.
1 Swipe to the left to open the settings screen.
2 Tap
CHANGE >
.
3 Tap
Manual calibration
and tap the
Manual calibration
switch to activate it.
4 Tap
Sea level pressure
and set the reference value.
The atmospheric pressure is calibrated based on the entered reference value.
Configuring the alti-barometer
Scroll the screen to open the settings screen and tap
CHANGE >
to use the following options.
•
Manual calibration
: Calibrate the altimeter and the atmospheric pressure based on the
entered reference value.
•
Pressure alerts
: Set to notify you of rapid changes of atmospheric pressure.
•
Distance unit
: Change the height unit.
•
Pressure unit
: Change the pressure unit.
•
Help
: View information about using the alti-barometer.
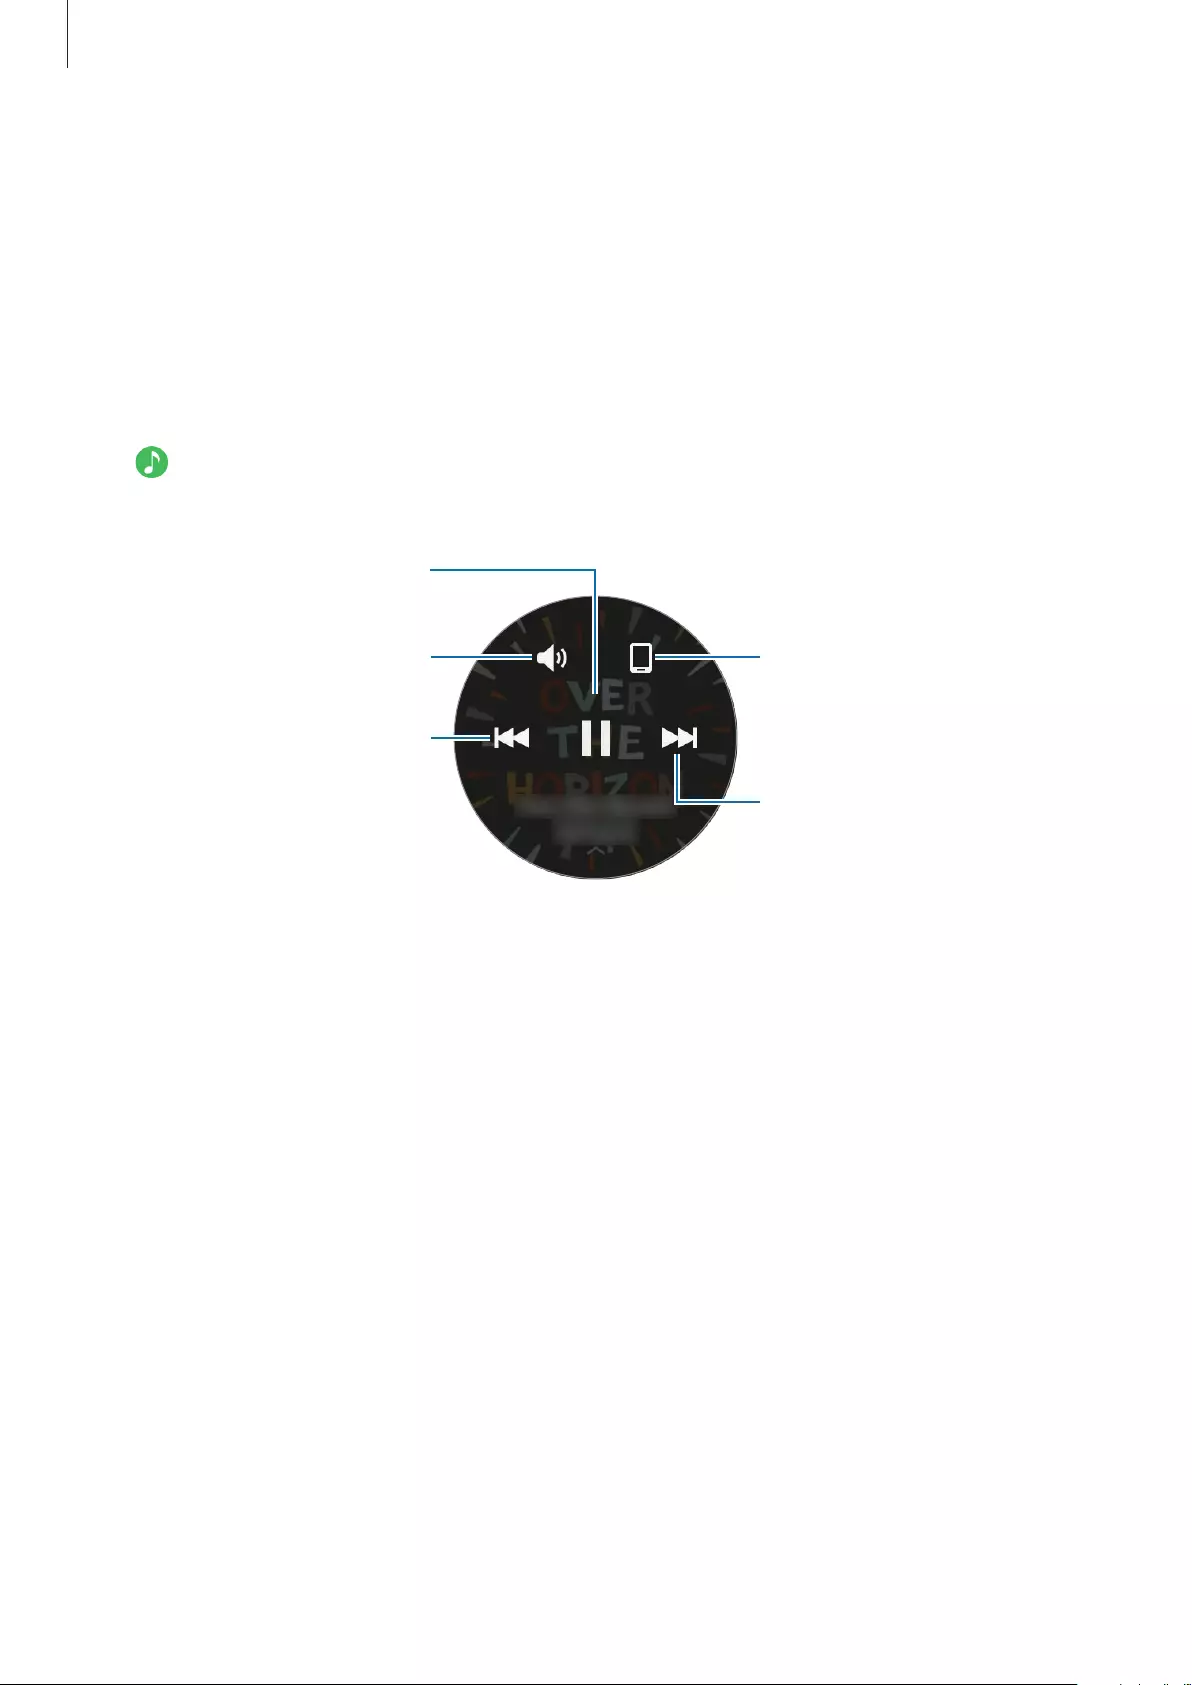
Applications
64
Music Player
Introduction
Listen to music saved in the Gear and in the mobile device.
Playing music
Tap (
Music Player
) on the Apps screen.
To open the playlist, swipe upwards from the bottom edge of the screen.
Skip to the next file. Tap and
hold to move forwards quickly.
Change the device used to play
music.
Adjust the volume.
Restart the currently playing file
or skip to the previous file. Tap
and hold to move backwards
quickly.
Pause and resume playback.
Importing music
Import music saved in your device to your Gear.
1 Launch
Samsung Gear
on your mobile device.
2 Tap
SETTINGS
→
Send content to Gear
.
3 Tap
Select tracks
.
4 Select files and tap
DONE
.
To sync music in your mobile device with your Gear, tap the
Auto sync
switch under
Music
.
The music in your mobile device will be synced with your Gear when it is charging and when
it has more than 15 % of remaining battery power.
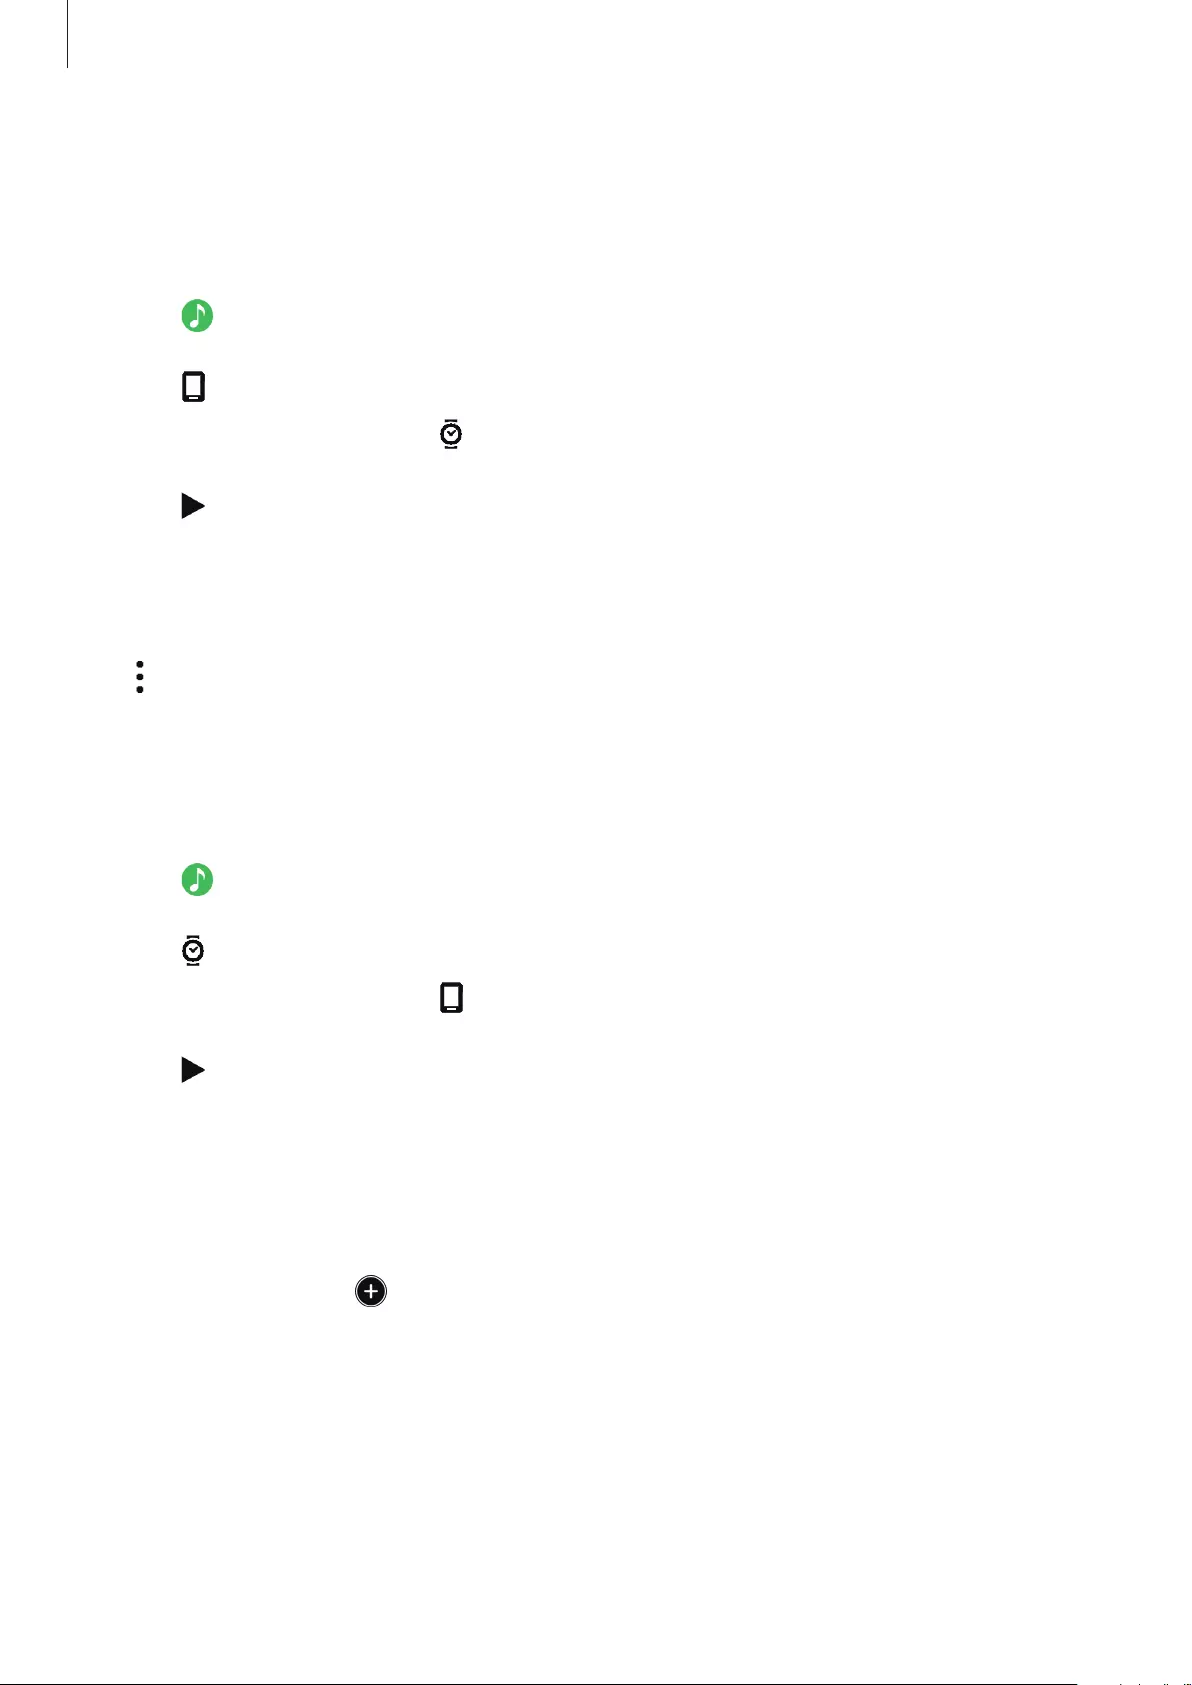
Applications
65
Playing music on the Gear
Play music saved in your Gear via the internal speaker. You can also play music via a
connected Bluetooth headset.
1 Tap (
Music Player
).
2 Tap to play the music saved in your Gear.
The icon will be changed to .
3 Tap .
Playing music via a Bluetooth headset
You can listen to music saved in the Gear via a Bluetooth headset.
Tap , rotate the bezel, and tap
Listen via BT
. Select a headset from the detected devices list.
Playing music from your mobile device
Play music saved on your mobile device and control it with your Gear.
1 Tap (
Music Player
).
2 Tap to play the music saved in your mobile device.
The icon will be changed to .
3 Tap .
Standalone music
Listen to music or radio using the Gear by itself. You must download music or a radio
streaming app on the Gear.
On the Apps screen, tap (
Get more apps
)
→
Show on phone
. Browse and download
music or a radio streaming app in
Galaxy Apps
.
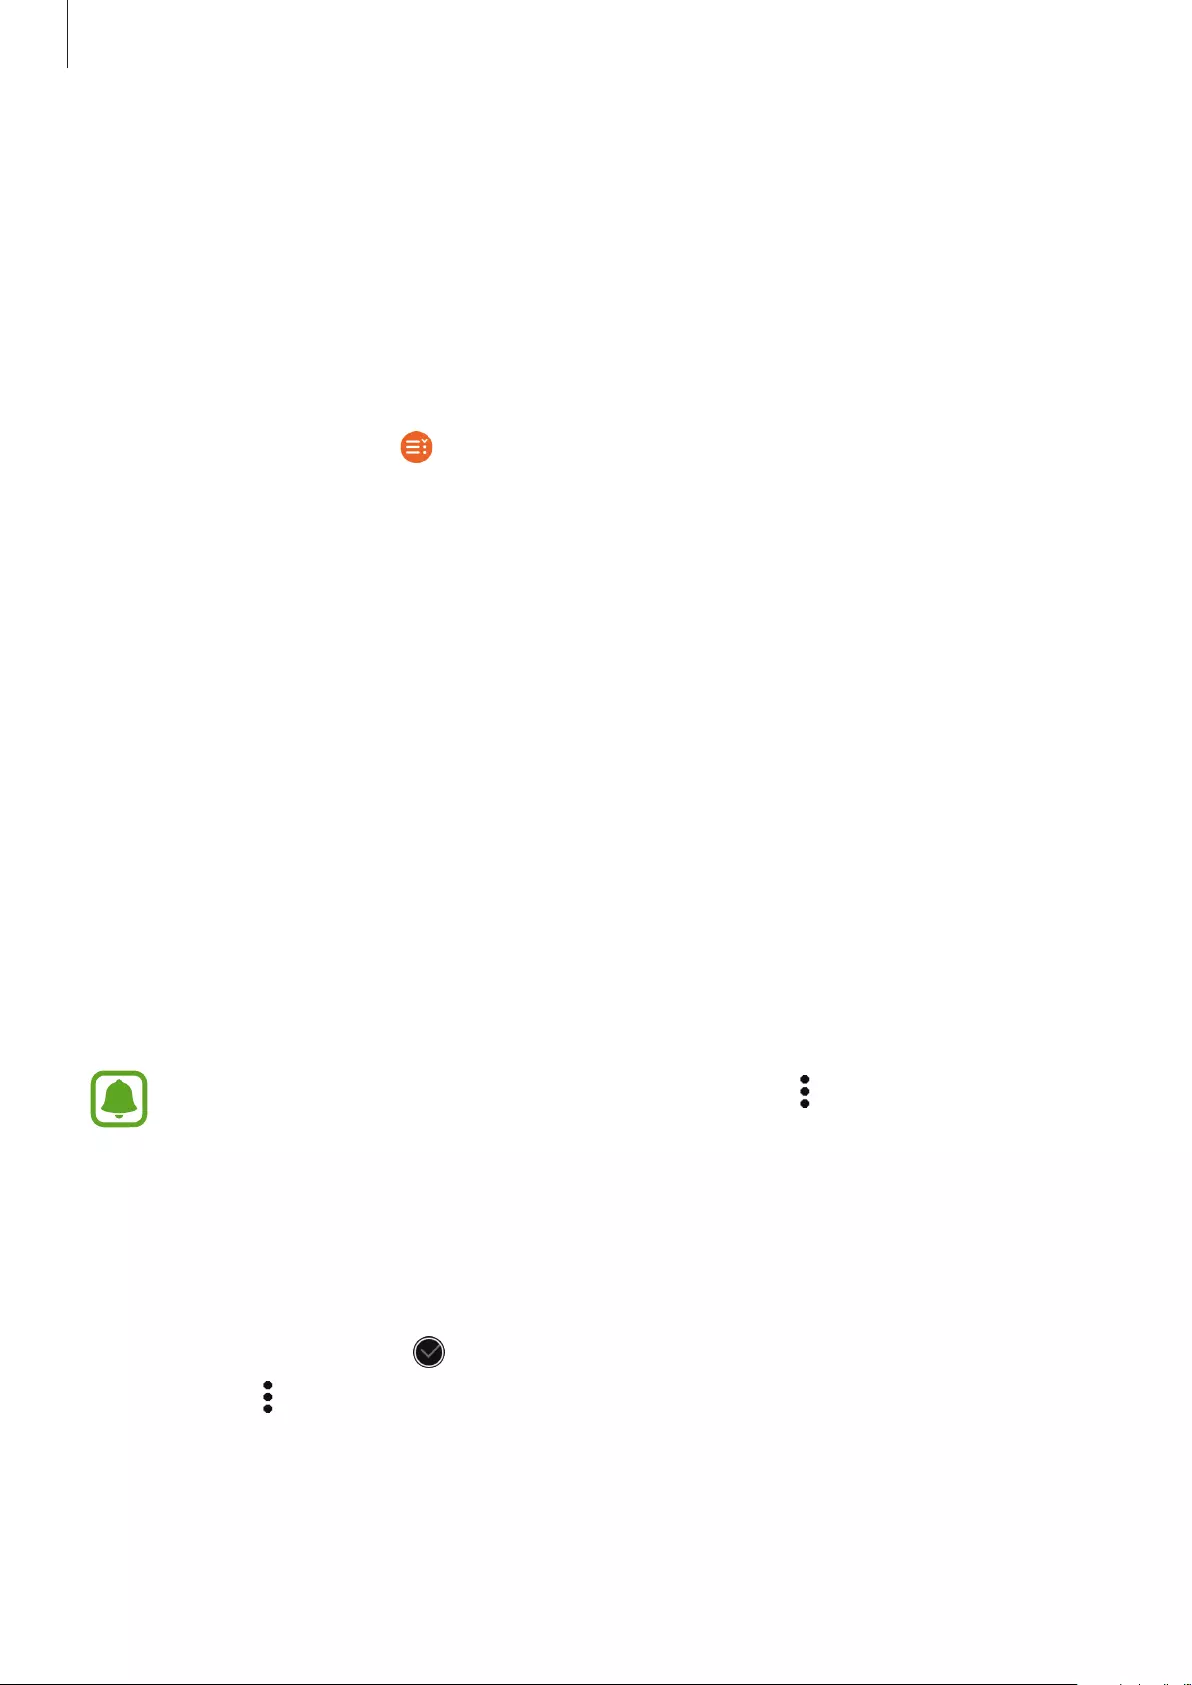
Applications
66
Reminders
Add reminders for events such as buying tickets, going to the laundromat, or taking
medicine, without using your calendar app. You can set alarms to receive reminders at
specified times.
Creating a reminder
1 On the Apps screen, tap (
Reminders
).
2 Tap
Create reminder
.
If you have a saved reminder, tap
Create
on the list.
3 Speak to create a reminder. When you are finished, tap
DONE
.
Or, tap
KEYBOARD >
to enter text and tap
Done
.
4 To set an alarm, tap
SET TIME >
, set the alarm time by rotating the bezel, and then tap
DONE
.
5 Tap
SAVE
.
Viewing the reminder alarm
When an alarm sounds, tap the notification to view the reminder details.
You can also rotate the bezel anticlockwise on the Watch screen to view reminders.
•
To delete a reminder or to use the snooze function, tap .
•
You can view all your reminders, including deleted reminders, in the
Reminders
app.
Completing or deleting the reminder
When you have finished your task, you can set the reminder as completed or delete it.
On the reminder’s details, tap to complete it.
To delete it, tap , rotate the bezel, and tap
Delete
.
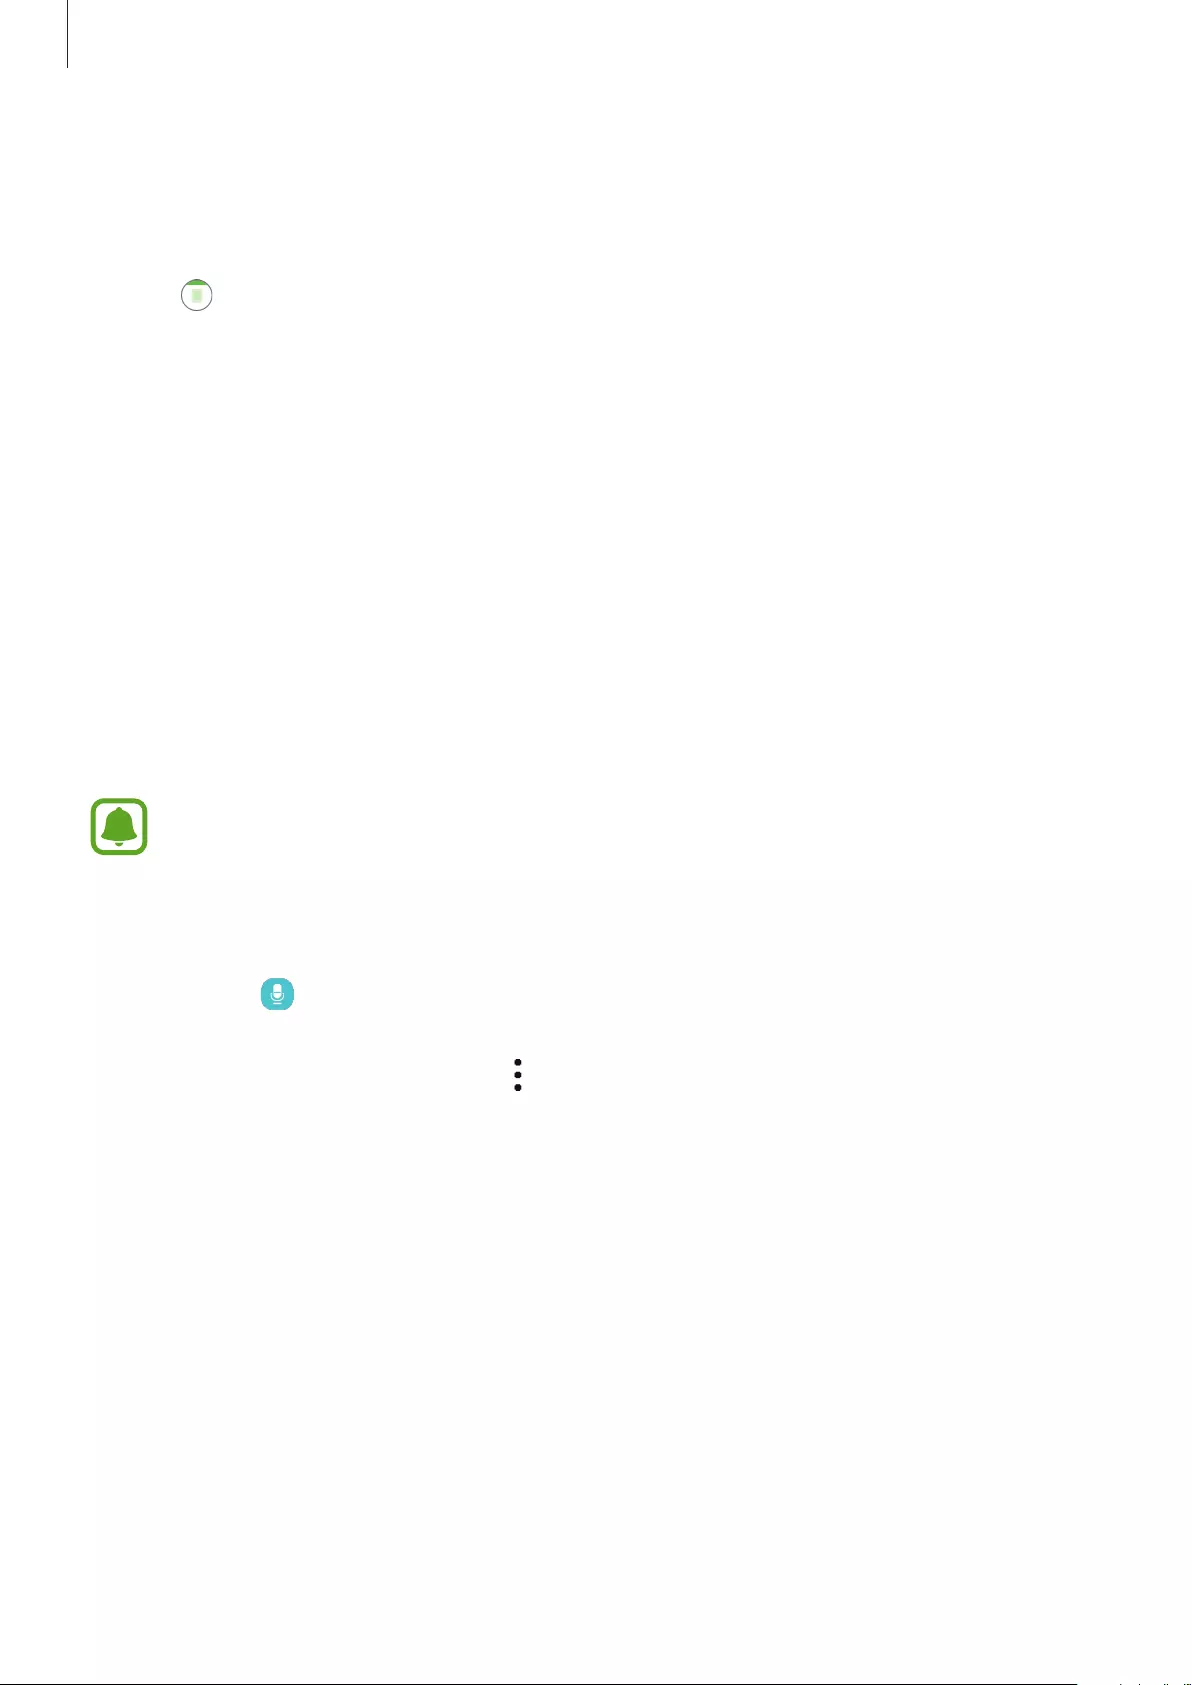
Applications
67
Schedule
View the events scheduled on the mobile device.
1 Tap (
Schedule
) on the Apps screen.
2 Tap anywhere on the monthly calendar.
The current day’s events list will be shown.
3 To view upcoming events, rotate the bezel to clockwise.
S Voice
Introduction
Perform various tasks simply by speaking.
Make sure the Gear’s microphone is not obstructed when you are speaking into it.
Setting a wake-up command
You can launch (
S Voice
) using your own wake-up command. You can only use this
feature when your Gear’s screen is turned on.
To change the wake-up command, tap , rotate the bezel and tap
Set wake-up command
.
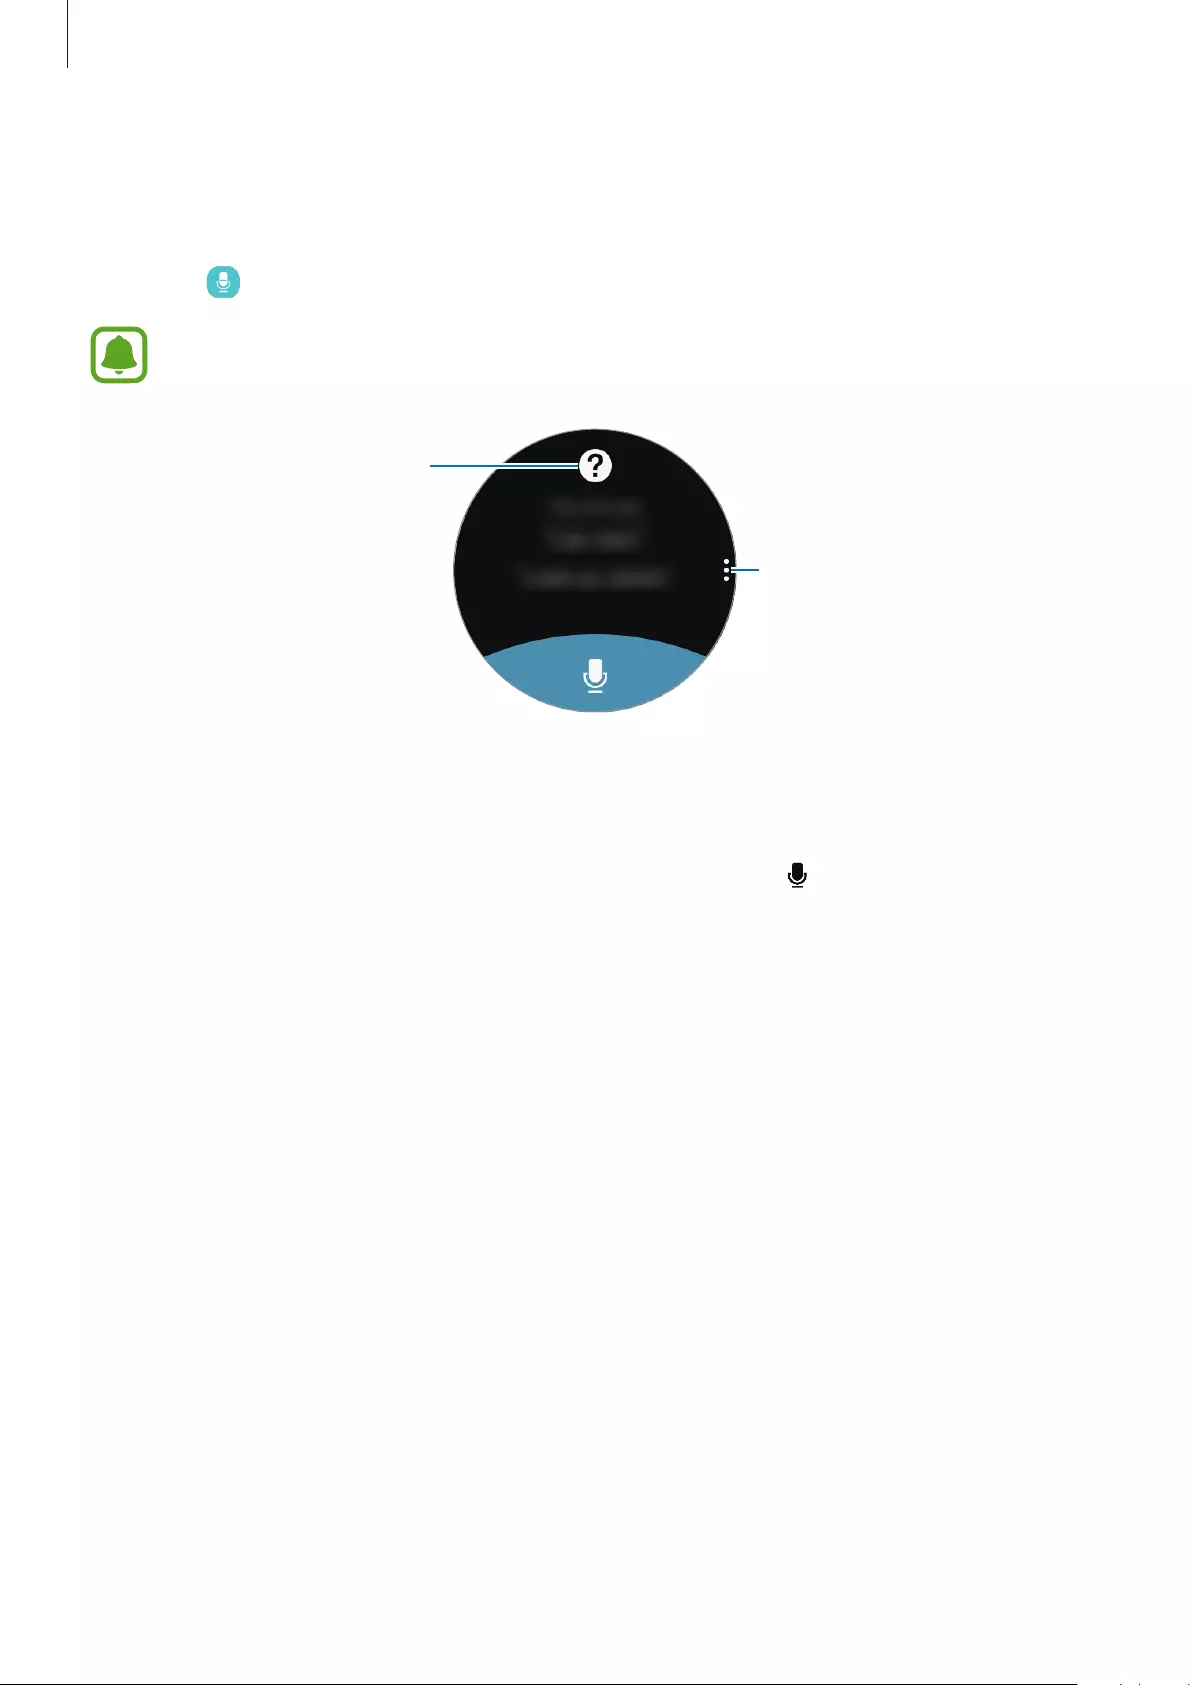
Applications
68
Using S Voice
1 Say the preset wake-up command. Alternatively, tap
S Voice
on the Apps screen.
When (
S Voice
) is launched, the Gear begins voice recognition.
This app may not be available depending on the region or service provider.
S Voice settings
View examples of voice
commands.
2 Say a voice command.
If the Gear recognises the command, the Gear will perform the corresponding action.
To repeat a voice command or say a different command, tap .
Tips for better voice recognition
•
Speak clearly.
•
Speak in quiet places.
•
Do not use offensive or slang words.
•
Avoid speaking in dialectal accents.
The Gear may not recognise your commands or may perform unwanted commands
depending on your surroundings or how you speak.
Applications
69
Setting the language
On the Apps screen, tap (
S Voice
)
→
, rotate the bezel, tap
Language
, and then select a
language.
The selected language is applied to
S Voice
only, not to the language displayed on
the Gear.
Weather
View weather information on the Gear for locations set on the mobile device when the
devices are connected.
Tap (
Weather
) on the Apps screen.
To view the current day’s weather information, tap the screen and rotate the bezel.
To add other cities’ weather information, rotate the bezel clockwise.
Alarm
Set alarms and manage them. When an alarm is set on your connected mobile device, your
Gear will also alert you.
Setting alarms
1 Tap (
Alarm
) on the Apps screen.
2 Tap
Add alarm
.
If you have a saved alarm, tap
Add
on the alarms list.
3 Set the alarm time by rotating the bezel and tap
NEXT
.
4 Select the days for the alarm to repeat and tap
NEXT
.

Applications
70
5 Select an alarm notification type and tap
SAVE
.
The saved alarm is added to the alarms list.
On the alarms list, tap to activate the alarm or tap to deactivate the alarm.
Stopping alarms
Drag to the right to stop an alarm. Alternatively, rotate the bezel clockwise.
If you want to use the snooze function, drag to the left to repeat the alarm after
5 minutes. Alternatively, rotate the bezel anticlockwise.
Deleting alarms
In the alarms list, tap and hold and alarm, and then tap
DELETE
.
World Clock
Creating clocks
1 Tap (
World Clock
) on the Apps screen.
2 Tap
Add city
.
If you have a saved world clock, tap
Add
on the clocks list.
3 Rotate the bezel to select a time zone on the globe.
You can also tap
ALL CITIES >
and search for a city or select a city from the list.
4 Tap the city name representing the selected time zone.
5 Rotate the bezel to the city you want and tap it.
Deleting clocks
On the clocks list, tap and hold a clock, and then tap
DELETE
.

Applications
71
Gallery
Importing and exporting images
Importing images from your mobile device
1 Launch
Samsung Gear
on your mobile device.
2 Tap
SETTINGS
→
Send content to Gear
.
3 Tap
Select photos
.
4 Select files and tap
DONE
.
To sync images in your mobile device with your Gear, tap the
Auto sync
switch under
Photo
,
tap
Albums to sync
, and then select albums to import to the Gear. The selected albums will
be synced with your Gear when it is charging and when it has more than 15 % of remaining
battery power.
Exporting images to your mobile device
1 Tap (
Gallery
) on the Apps screen.
2 Tap an image.
3 Tap and hold the image to export.
4 Rotate the bezel and select any images to export.
5 Tap
→
Send to phone
.
You can view the exported images in Gallery app on your mobile device.
Applications
72
Viewing images
1 Tap (
Gallery
) on the Apps screen.
2 Rotate the bezel to scroll through the image list and select an image.
Zooming in or out
While viewing an image, double-tap the image to zoom in or out.
When an image is magnified, you can view the rest of the image by scrolling around the
screen.
Deleting images
1 Tap (
Gallery
) on the Apps screen.
2 Tap an image.
3 Tap and hold an image to delete.
4 Rotate the bezel and select any images you want to delete.
5 Tap
DELETE
→
.
Applications
73
News Briefing
View the latest articles in various categories. You can catch up on news categories that
interest you.
1 Tap (
News Briefing
) on the Apps screen.
2 Rotate the bezel to select an article from a specific category.
To edit categories, tap , rotate the bezel, tap
Select topic
, and then tick categories.
3 Tap an article to read it.
To read the full article, tap and read it on your mobile device.
Find My Phone
If you misplace the mobile device, the Gear can help you find it.
1 Tap (
Find My Phone
) on the Apps screen.
2 Tap .
The mobile device emits sounds and turns on the screen.
Drag outside the large circle on the mobile device, or tap on the Gear.
Viewing the location of your mobile device
Tap , rotate the bezel, and tap
Locate phone
.
The Gear will display your mobile device’s location.

Applications
74
View emails received on the mobile device and reply to them.
Reading emails
1 On the Apps screen, tap (
).
2 Select an email to open the email screen.
To view an email on the mobile device, tap , rotate the bezel, and tap
Show on phone
.
To reply to a message, tap and enter your message.
You may not be able to reply emails depending on the mobile device that you
connect to the Gear.
Get more apps
Download specialised apps on your Gear, not through the connected mobile device.
On the Apps screen, tap (
Get more apps
). Scroll through the list and select an app to
download.
Tap
Show on phone
to launch
Galaxy Apps
on your mobile device. Then, browse and select
an app to download.

Applications
75
Settings
Introduction
Customise settings for functions and apps. You can make your Gear more personalised by
configuring various setting options.
Tap (
Settings
) on the Apps screen.
Style
Customise the watch face and the Apps screen.
On the Settings screen, tap
Style
.
•
Watch faces
: Select a watch type. You can also select items to display on the watch face
and download more watch faces from
Galaxy Apps
.
•
Watch always on
: Set the Gear to display a watch when the screen is turned off.
This feature only works while you are wearing the Gear.
•
Notification indicator
: Set the Gear to display a yellow dot on the Watch screen to alert
you to notifications that you have not checked.
•
Background style
: Change the Apps screen’s wallpaper.
•
Font
: Change the font type and size.
Sounds and vibration
Change settings for various sounds.
On the Settings screen, tap
Sounds and vibration
.
•
Sound mode
: Set the Gear to use sound mode or silent mode.
•
Vibrate with sound
: Set the Gear to vibrate and play a ringtone for incoming calls and
notifications.
•
Volume
: Adjust the volume level for various sounds.
•
Vibration intensity
: Adjust the force of the vibration notification.
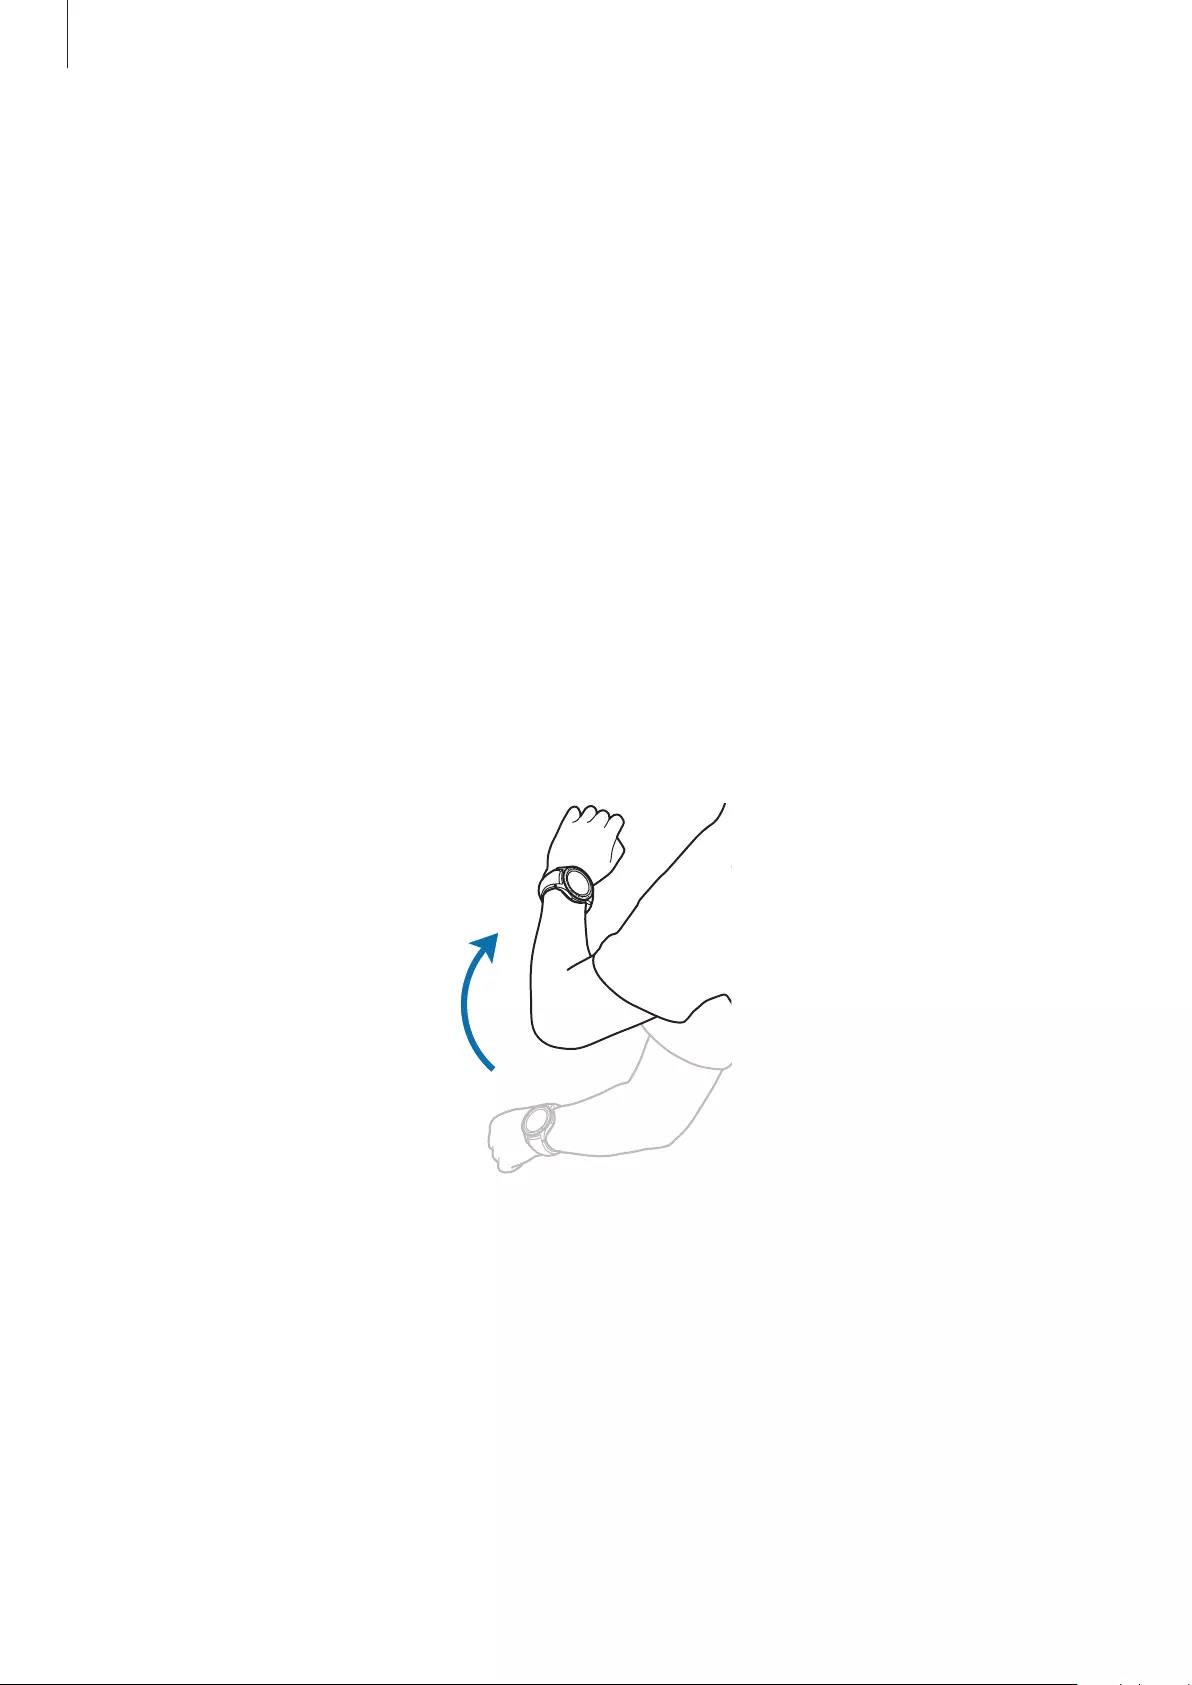
Applications
76
•
Long buzz
: Set the Gear to vibrate longer for incoming calls and notifications.
•
Ringtones
: Change the ringtone.
•
Ringtone vibration
: Select a vibration pattern for incoming calls.
•
Notification sound
: Change the notification ringtone.
•
Notification vibration
: Select a vibration pattern for notifications.
•
Touch sounds
: Set the Gear to make a sound when apps or options are selected on the
touchscreen.
Device
Change the Gear’s interaction settings.
On the Settings screen, tap
Device
.
•
Double press Home key
: Select an action to perform when you press the Gear’s Home
key twice.
•
Wake-up gesture
: Set the Gear to turn on the screen when you raise your wrist that is
wearing the Gear.

Applications
77
•
Touch sensitivity
: Set the Gear to allow use of the touch screen with gloves on.
•
Do not disturb
: Set the device to mute incoming calls and notification sounds.
•
Auto open apps
: Set the Gear to automatically open an app when it is highlighted.
•
Date and time
: Set the Gear’s date and time when it is not connected to the mobile
device.
•
Language
: Select the Gear’s display language.
The
Date and time
and
Language
options are available when your Gear is not
connected to your mobile device.
Display
Change the display settings.
On the Settings screen, tap
Display
.
•
Brightness
: Adjust the brightness for the display.
•
Auto low brightness
: Set the Gear to automatically adjust the brightness depending on
the ambient light conditions.
•
Screen timeout
: Set the length of time the Gear waits before turning off the display’s
backlight.
Call
Change the call feature settings.
On the Settings screen, tap
Call
.
•
Voice answer
: Set the Gear to answer or reject calls using voice commands.
Messages
Change the message feature settings.
On the Settings screen, tap
Messages
.
•
Send as audio
: Set the Gear to send a voice message as an audio file.

Applications
78
Connections
Bluetooth
Connect to a mobile device via Bluetooth. You can also connect a Bluetooth headset to your
Gear.
•
Samsung is not responsible for the loss, interception, or misuse of data sent or
received via Bluetooth.
•
Always ensure that you share and receive data with devices that are trusted
and properly secured. If there are obstacles between the devices, the operating
distance may be reduced.
•
Some devices, especially those that are not tested or approved by the Bluetooth
SIG, may be incompatible with your device.
•
Do not use the Bluetooth feature for illegal purposes (for example, pirating copies
of files or illegally tapping communications for commercial purposes).
Samsung is not responsible for the repercussion of illegal use of the Bluetooth
feature.
On the Settings screen, tap
Connections
→
Bluetooth
.
•
Bluetooth
: Turn the Bluetooth feature on or off.
•
BT headset
: Search for Bluetooth headsets and connect them to the Gear.
Wi—Fi
Activate the Wi-Fi feature to connect to a Wi-Fi network.
This feature is available when the Gear is not connected to the mobile device via Bluetooth.
1 On the Settings screen, tap
Connections
→
Wi—Fi
, and then tap
Wi—Fi
switch to activate
it.
2 Select a network from the Wi-Fi networks list.
Networks that require a password appear with a lock icon.
3 Tap
CONNECT
.
Applications
79
•
Once the Gear connects to a Wi-Fi network, the Gear will reconnect to that
network each time it is available without requiring a password. To prevent the Gear
connecting to the network automatically, select it from the list of networks and tap
FORGET
.
•
If you cannot connect to a Wi-Fi network properly, restart your device’s Wi-Fi feature
or the wireless router.
•
Turn off Wi-Fi to save the battery when not in use.
NFC
The Gear allows you to make payments and buy tickets for transportation or events after
downloading the required apps.
On the Settings screen, tap
Connections
→
NFC
.
The Gear contains a built-in NFC antenna. Handle the Gear carefully to avoid
damaging the NFC antenna.
•
NFC
: Activate the NFC feature to link your Gear to your credit or debit card.
•
Tap and pay
: Set the default payment app for mobile payments.
This feature may not be available depending on the region or service provider.
Making payments with the NFC feature
Before you can use the NFC feature to make payments, you must register for the mobile
payment service. To register or get more information about the service, contact your service
provider.
1 On the Settings screen, tap
Connections
→
NFC
and then tap the
NFC
switch to activate
it.
2 Touch the NFC antenna area at the top of the Gear’s touchscreen to the NFC card reader.
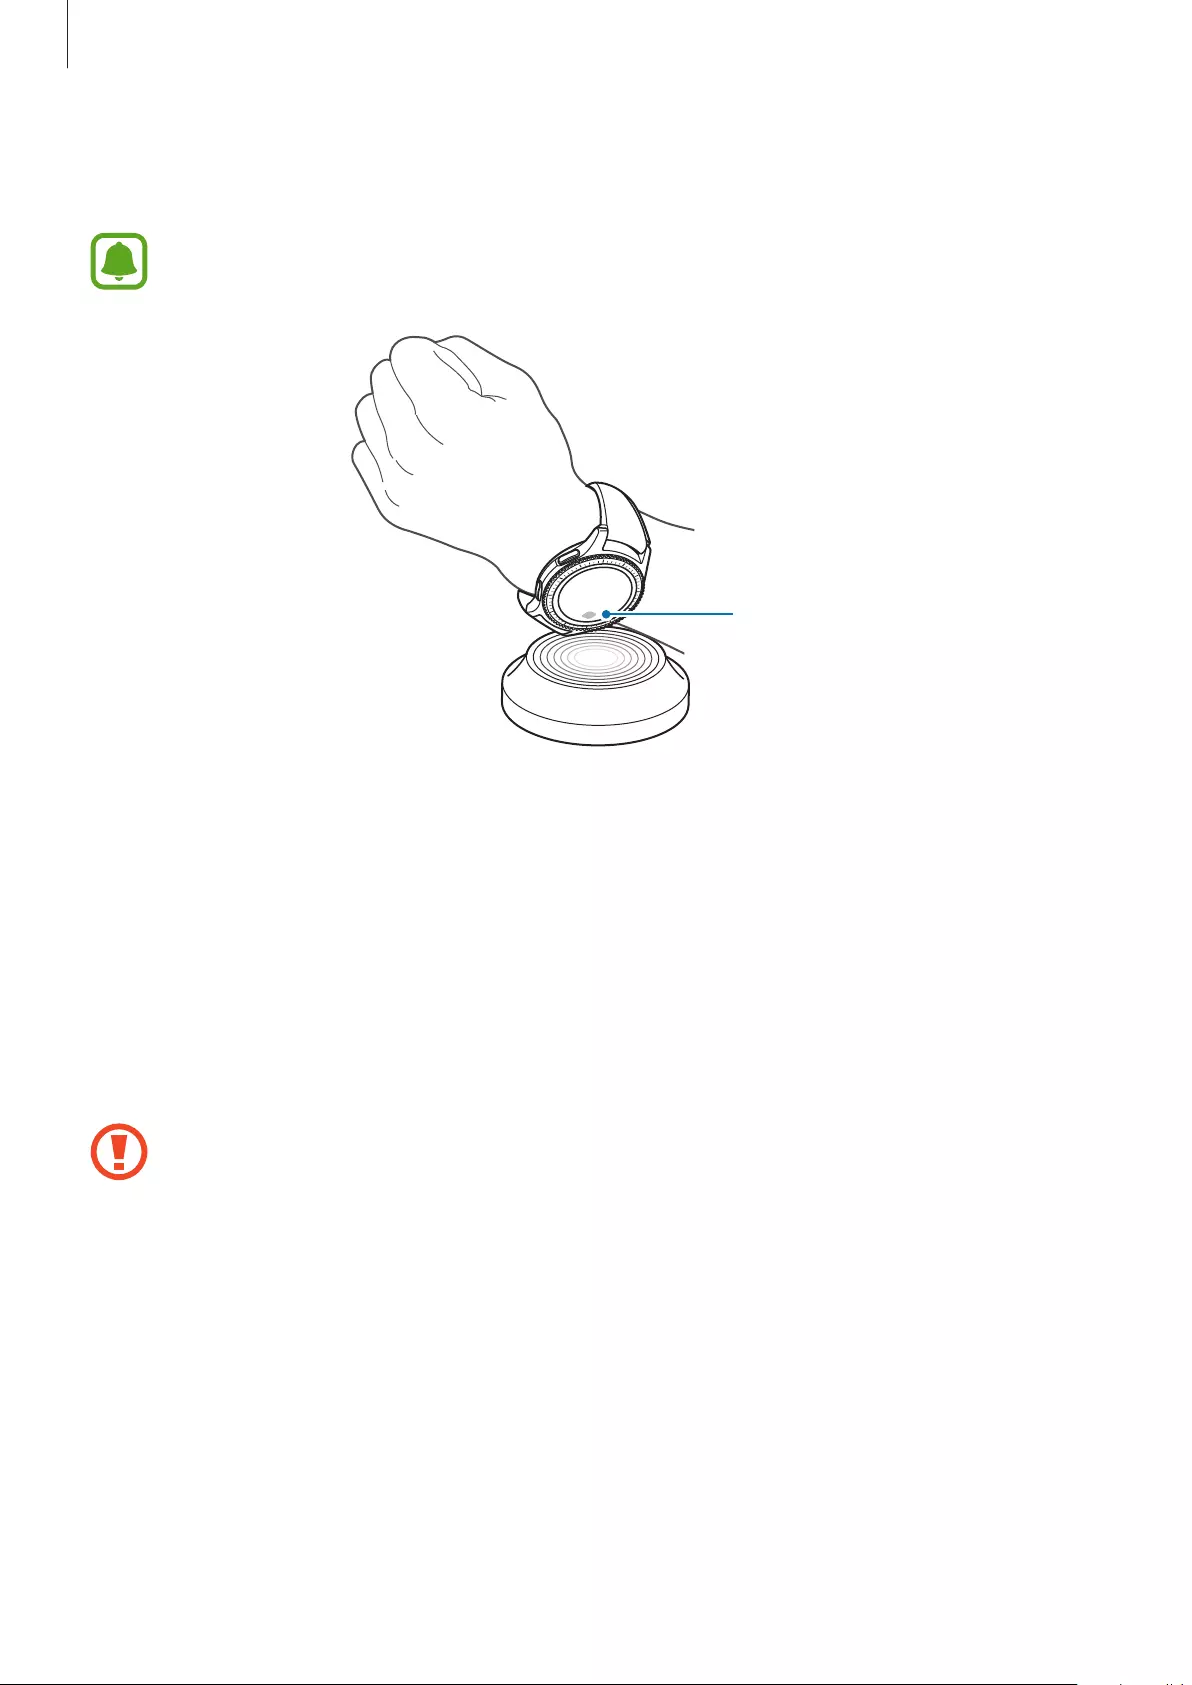
Applications
80
To set the default payment app, open the settings screen and tap
Connections
→
NFC
→
Tap and pay
, and then select an app.
The payment services list may not include all available payment apps.
NFC antenna
Alerts
Set the Gear to vibrate when it is disconnected from your mobile device.
On the Settings screen, tap
Connections
→
Alerts
.
Flight mode
This disables all wireless functions on your device. You can use only non-network services.
On the Settings screen, tap
Connections
→
Flight mode
.
Make sure the device is turned off during takeoff and landing. After takeoff, you can
use the device in flight mode if allowed by aircraft personnel.
Location
Set the Gear to allow apps to use your current location information.
On the Settings screen, tap
Connections
→
Location
.
Tap the
Location
switch to activate it and then select a method to collect your location data.

Applications
81
Security
Change the settings for securing the Gear.
On the Settings screen, tap
Security
.
•
Screen lock
: Activate or deactivate the screen lock feature. When the screen lock feature
is activated, the Gear prevents others from accessing the personal information saved in
your Gear.
Accessibility
Configure various settings to improve accessibility to the Gear.
On the Settings screen, tap
Accessibility
.
•
Vision
: Customise the settings to improve accessibility for visually impaired users.
•
Hearing
: Customise the settings to improve accessibility for users with hearing
impairment.
•
Direct access
: Set the Gear to activate the screen reader feature when you tap the screen
three times with two fingers.
Input
Change the text input settings.
On the Settings screen, tap
Input
.
•
Default keyboard
: Select a default keyboard type for text input.
•
Keyboard settings
: Change the Samsung keyboard settings.
Power saving
Activate power saving mode to save battery power by limiting the Gear’s functions.
On the Settings screen, tap
Power saving
.
Applications
82
Gear info
View the Gear’s information.
On the Settings screen, tap
Gear info
.
•
Update Gear software
: Update your Gear to the latest software.
•
Auto update apps
: Change the auto update settings for apps on your Gear.
•
About device
: Access information about the Gear.
•
Report diagnostic and usage info
: Set the Gear to automatically send the device’s
diagnostic and usage information to Samsung.
•
Reset Gear
: Reset settings to the factory default values and delete all data.
•
Debugging
: Activate or deactivate debugging mode when developing apps for the Gear.
The
Update Gear software
and
Auto update apps
options are available when your
Gear is not connected to your mobile device.
Connect to new phone
Connect your Gear to a new mobile device. The Gear can connect to another mobile device
after performing a light reset to delete data except media files and personal data.
On the Settings screen, tap
Connect to new phone
.
This feature is available when the Gear is connected to a mobile device.
Connect to phone
Connect to a mobile device while you are using the Gear by itself. You can select whether to
restore the Gear’s data that is saved on the mobile device.
On the Settings screen, tap
Connect to phone
→
OK
.
•
: Connect your Gear to a mobile device and sync your health information, setting
values, and contacts information saved in the Gear.
•
: Connect your Gear to a mobile device after resetting all the data saved in the Gear.
This feature is available when your Gear is not connected to your mobile device.
Applications
83
Updating the Gear
The Gear can be updated to the latest software.
Updating via the Gear
The Gear can be updated without connecting it to your mobile device.
On your Gear, open the Apps screen, tap (
Settings
)
→
Gear info
→
Update Gear
software
.
This feature is available when your Gear is not connected to your mobile device.
Updating software via the Samsung Gear app
The Gear can be directly updated to the latest software by the firmware over-the-air (FOTA)
service.
1 Launch
Samsung Gear
on your mobile device.
2 Tap
SETTINGS
→
About Gear
→
Update Gear software
→
Download updates
manually
.
3 Read the on-screen information and tap
DOWNLOAD
.
The Gear will copy the updated software from your mobile device and restart.
To automatically check for available updates, tap the
Download updates
automatically
switch to activate it. Updates will be downloaded only when the
device is connected to a Wi-Fi network.
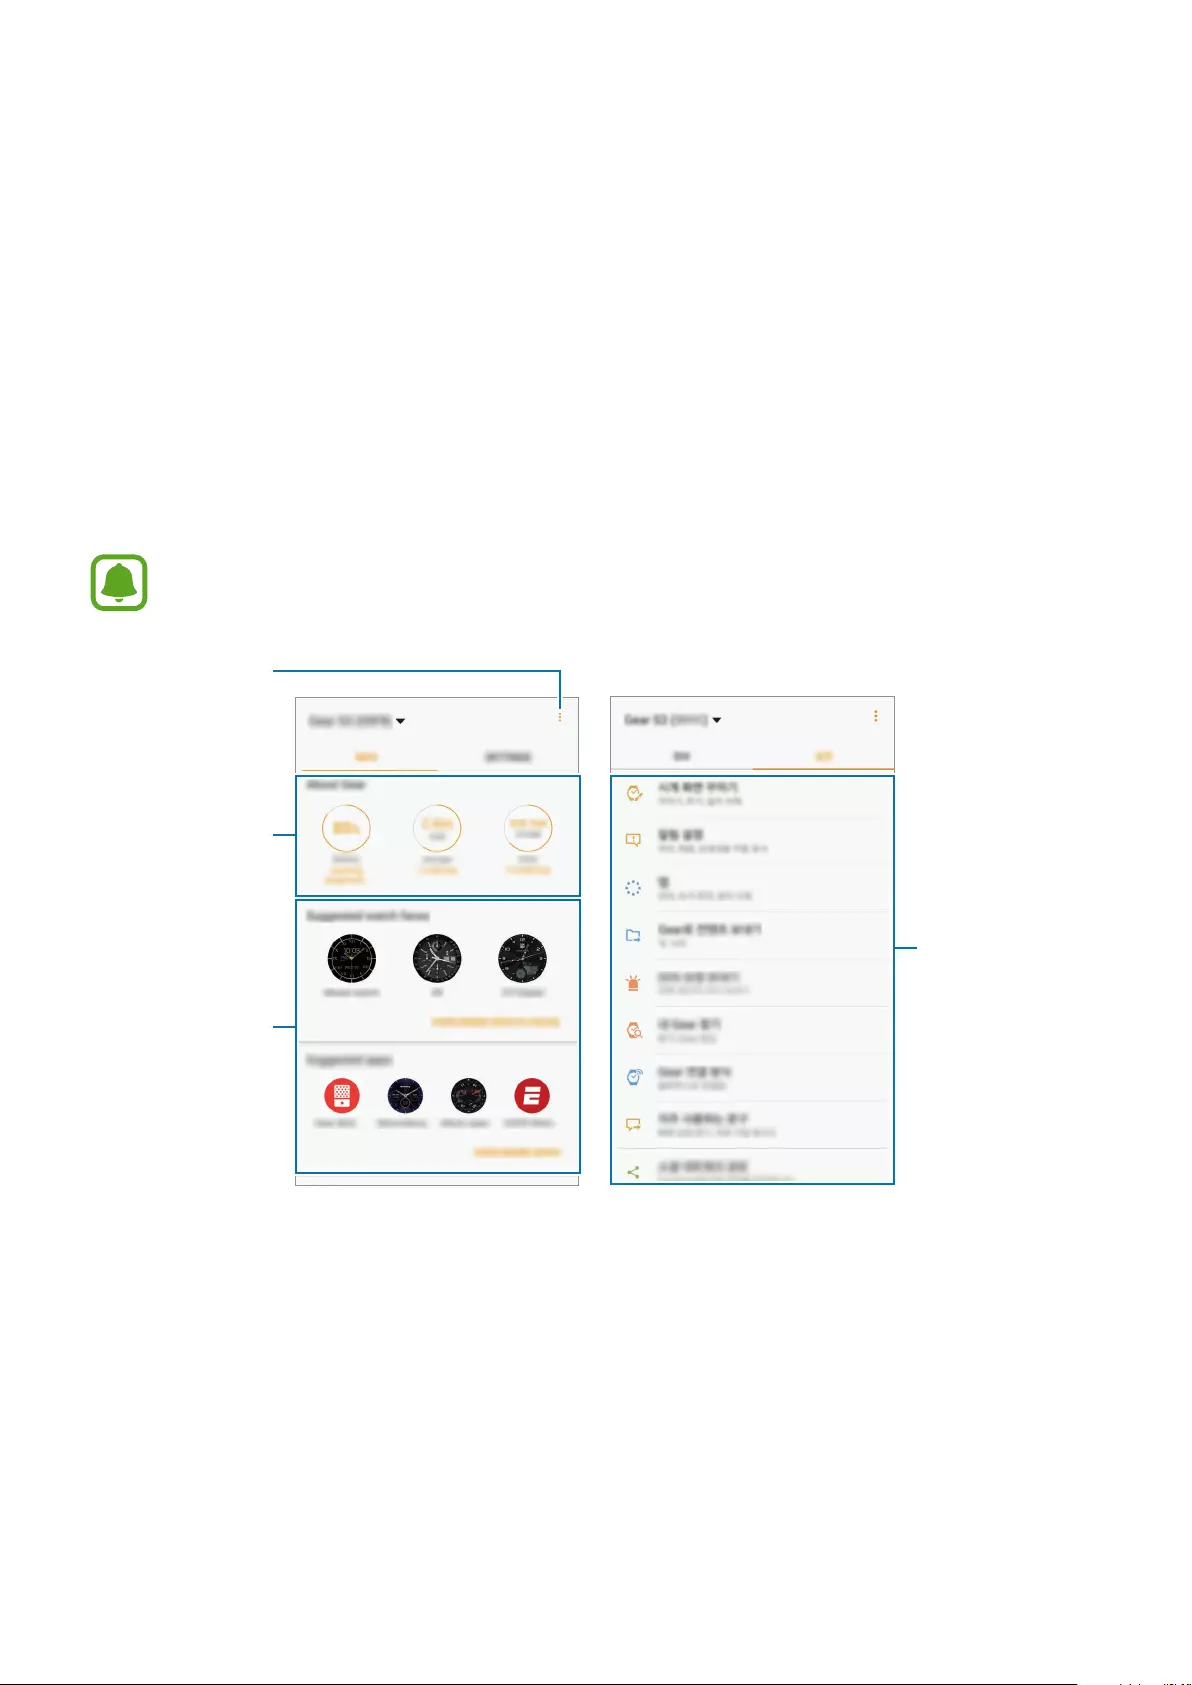
84
Samsung Gear app
Introduction
To connect your Gear to a mobile device, you must install the Samsung Gear app on your
mobile device. You can check the Gear’s status and download recommended watch faces and
apps. You can also customise your Gear’s various settings, such as your notification settings.
Launch
Samsung Gear
on your mobile device.
Some features may not be available depending on the type of connected mobile
device.
additional
options.
Customise your
Gear settings.
Gear’s status
Recommended
watch faces
and apps

Samsung Gear app
85
Tap to use the following options:
•
Disconnect
: Disconnect your Gear from the currently connected mobile device.
•
Connect new Gear
: Disconnect your Gear from the currently connected mobile device
and connect a new Gear. Tap
SCAN
to find a new Gear. To reconnect to a previously
connected Gear, select one from the
Paired devices
list.
•
Auto switch device
: Set your mobile device to remember the previously connected Gear
and automatically connect to it when you wear it.
•
Help
: Ask questions or view frequently asked questions.
•
User manual
: View the user manual to learn how to use your Gear.
•
Contact us
:
Samsung Members
offers support services to customers, such as device
problem diagnosis, and lets users submit questions and error reports. You can also share
information with others in the Galaxy users’ community or view the latest Galaxy news
and tips.
Samsung Members
can help you solve any problems you might encounter
while using your device.
This feature may not be available depending on the region or service provider.
INFO
View your Gear’s status, S Health data, and download recommended watch faces and apps.
Launch
Samsung Gear
on your mobile device and tap
INFO
.
About Gear
Provide a status overview of your Gear’s battery, storage, and RAM.
Select an item to view its details.
Suggested watch faces
You can download recommended watch faces from
Galaxy Apps
.
Select a suggested watch face to download it. To view more watch faces, tap
VIEW MORE
WATCH FACES
.

Samsung Gear app
86
Suggested apps
You can download recommended apps from
Galaxy Apps
.
Select a suggested app to download it. To view more apps, tap
VIEW MORE APPS
.
Health
View S Health’s saved data.
Tap
OPEN S HEALTH
.
SETTINGS
Watch faces
You can change the type of watch to be displayed on the Watch screen.
Launch
Samsung Gear
on your mobile device, tap
SETTINGS
→
Watch faces
, and select a
desired watch type. The watch face you selected will be applied on the Watch screen.
Tap
STYLISE
to select background and items to display on the watch face.
Notifications
Change settings for the notification feature. Stay up to date with a variety of events, such as
new messages received on the mobile device.
Launch
Samsung Gear
on your mobile device, tap
SETTINGS
→
Notifications
, tap the switch
to activate it, and then activate items.
•
Manage notifications
: Select apps on the mobile device to send notifications to the Gear.
•
Show only while wearing Gear
: Set the Gear to show notifications only while you are
wearing it.
•
Show while using phone
: Set the Gear to show notifications while using your mobile
device.
Samsung Gear app
87
•
Turn on screen
: Set the Gear to turn on the screen when the notification is received.
•
Auto show details
: Set the Gear to show details for notifications when they are received.
•
Notification indicator
: Set the Gear to display a yellow dot on the Watch screen to alert
you to notifications that you have not checked.
•
Smart relay
: Set the mobile device to display notification information that is displayed on
the Gear when you pick up the mobile device.
•
This feature is only available when the Gear’s screen is turned on.
•
Some mobile devices do not support this feature.
•
The mobile device must be unlocked first to view details when the screen is locked.
Apps
Customise the Gear’s Apps screen. You can select and rearrange apps.
Launch
Samsung Gear
on your mobile device and tap
SETTINGS
→
Apps
.
Uninstalling apps
Tap
→
Uninstall
and tap next to the apps you want to remove from the Gear.
Reordering apps
Tap
→
Reorder
and tap next to an app and drag it up or down to another position.
Send content to Gear
Transfer saved audio or image files from your mobile device to your Gear.
Launch
Samsung Gear
on your mobile device and tap
SETTINGS
→
Send content to Gear
.
When the Gear does not have enough available memory, it deletes files that you have
not set as your favourites in order from oldest to newest.
•
Select tracks
: Select audio files and manually send them from the mobile device to the
Gear.

Samsung Gear app
88
•
Auto sync
: Set the device to sync audio files with the Gear while the Gear is charging.
•
Select photos
: Select images and manually send them from the mobile device to the
Gear.
•
Auto sync
: Set the device to sync images with the Gear while the Gear is charging.
•
Albums to sync
: Select an image folder to sync with the Gear.
Send SOS requests
Set the device to send help messages by pressing the Gear’s Home key three times. You can
also set it to automatically call your emergency contacts.
Launch
Samsung Gear
on your mobile device, tap
SETTINGS
→
Send SOS requests
, and tap
the switch to activate it. Refer to SOS messages for more information.
Find My Gear
Remotely control your Gear when it is lost or misplaced.
Launch
Samsung Gear
on your mobile device and tap
SETTINGS
→
Find My Gear
.
•
Reactivation lock
: Set the Gear to require your Samsung account information after the
device has been reset. This prevents others from reactivating your device if it is lost or
stolen.
•
Control remotely
:
–
Locate Gear
: View the location of your Gear.
–
Lock Gear
: Remotely lock the Gear to prevent unauthorised access. This feature can be
activated when the Bluetooth connection between the Gear and mobile device ends
while a remote connection is activated.
–
Reset Gear
: Remotely delete all personal information stored in the Gear. After the
Gear is reset, you cannot restore the information or use the Find My Gear feature.

Samsung Gear app
89
Gear connection
Customise your Gear’s wireless connection settings.
Launch
Samsung Gear
on your mobile device, tap
SETTINGS
→
Gear connection
, and tap
the switch to activate it.
•
Remote connection
: Set the Gear to remotely connect to the mobile device when a
Bluetooth connection between the devices is not available.
•
Sync Wi-Fi profiles
: Set the device to sync the list of saved Wi-Fi networks with your Gear.
Quick messages
Edit or add templates used for replying to messages.
1 Launch
Samsung Gear
on your mobile device and tap
SETTINGS
→
Quick messages
.
2 Tap
Quick responses
or
Call-decline messages
.
3 Select a template to edit.
To create additional templates, tap .
4 Edit the template and tap
SAVE
.
Social network sharing
Share your exercise achievements in S Health with your friends on social media.
Launch
Samsung Gear
on your mobile device and tap
SETTINGS
→
Social network sharing
.
Select a social network service and sign in to it.
When you select the share option in S Health on your Gear or your mobile device, your
exercise information will be posted on your selected social network service.
S Health
View the data saved in the S Health app.
Launch
Samsung Gear
on your mobile device and tap
SETTINGS
→
S Health
.

Samsung Gear app
90
Samsung Galaxy Apps
Purchase and download apps that are specialised for the Gear.
Launch
Samsung Gear
on your mobile device and tap
SETTINGS
→
Samsung Galaxy Apps
.
Browse by category and select an app to download.
About Gear
View your Gear’s status, back up or restore data, or update the Gear’s software.
Launch
Samsung Gear
on your mobile device and tap
SETTINGS
→
About Gear
.
•
Battery
: Check the remaining battery power and time to use the Gear.
The usage time left shows the time remaining before the battery power runs
out. Usage time left may vary depending on your device settings and operating
conditions.
•
Storage
: Check the status of the used and available memory. To delete unnecessary files,
tap
CLEAN NOW
.
The actual available capacity of the internal memory is less than the specified
capacity because the operating system and default apps occupy part of the memory.
The available capacity may change when you update the device.
•
RAM
: Check the status of the used and available RAM. To speed up your Gear by reducing
the amount of RAM you are using, tick apps from the apps list, and tap
CLEAN NOW
.
•
Update Gear software
: Update the Gear to the latest software.
•
Back up and restore
: Back up the Gear’s data on the Samsung Gear app or restore
backup data.
•
Legal information
: View the legal information for the Gear.
•
Unknown sources
: Set the Gear to allow the installation of apps from unknown sources.
•
Samsung account
: View the Samsung account information.
•
Device name
: Change the Gear’s name.

Samsung Gear app
91
Backing up and restoring data
Keep the Gear’s settings data and other app settings and restore them later.
To back up data, launch
Samsung Gear
on your mobile device and tap
SETTINGS
→
About
Gear
→
Back up and restore
→
Back up data
. The data will be saved in Samsung Cloud.
•
Music and images saved on the Gear will not be backed up.
•
S Health app data will be automatically saved on the connected mobile device’s S
Health app.
To restore, launch Samsung Gear on your mobile device and tap
SETTINGS
→
About Gear
→
Back up and restore
→
Restore data
. The latest backup data will be restored.
About Samsung Gear app
View version information of the Samsung Gear app.
Launch
Samsung Gear
on your mobile device and tap
SETTINGS
→
About Samsung Gear
app
.

92
Appendix
Troubleshooting
Before contacting a Samsung Service Centre, please attempt the following solutions. Some
situations may not apply to your Gear.
Your Gear does not turn on
When the battery is completely discharged, your Gear will not turn on. Charge the battery
completely before turning on the Gear.
Your Gear displays network or service error messages
•
When you are in areas with weak signals or poor reception, you may lose reception. Move
to another area and try again. While moving, error messages may appear repeatedly.
•
You cannot access some options without a subscription. For more information, contact
your service provider.
The touchscreen responds slowly or improperly
•
If you attach a screen protector or optional accessories to the touchscreen, the
touchscreen may not function properly.
•
If you are wearing gloves, if your hands are not clean while touching the touchscreen,
or if you tap the screen with sharp objects or your fingertips, the touchscreen may
malfunction.
•
The touchscreen may malfunction in humid conditions or when exposed to water.
•
Restart your Gear to clear any temporary software bugs.
•
Ensure that your Gear software is updated to the latest version.
•
If the touchscreen is scratched or damaged, visit a Samsung Service Centre.

Appendix
93
Your Gear freezes or has fatal errors
Try the following solutions. If the problem is still not resolved, contact a Samsung Service
Centre.
Restarting the device
If your Gear freezes or hangs, you may need to close apps or turn off the device and turn it on
again.
Forcing restart
If your Gear is frozen and unresponsive, press and hold the Home key (Power key) for more
than 7 seconds to restart it.
Resetting the device
If the methods above do not solve your problem, perform a factory data reset.
On the Apps screen, tap (
Settings
)
→
Gear info
→
Reset Gear
. Before performing the
factory data reset, remember to make backup copies of all important data stored in the Gear.
Another Bluetooth device cannot locate your Gear
•
Ensure that the Bluetooth wireless feature is activated on your Gear.
•
Reset your Gear and try again.
•
Ensure that your Gear and the other Bluetooth device are within the Bluetooth
connection range (10 m). The distance may vary depending on the environment the
devices are used in.
If the tips above do not solve the problem, contact a Samsung Service Centre.

Appendix
94
A Bluetooth connection is not established or your Gear and the
mobile device are disconnected
•
Ensure that the Bluetooth feature on both devices is activated.
•
Ensure there are no obstacles, such as walls or electrical equipment, between the devices.
•
Ensure that the latest version of the Samsung Gear app is installed on the mobile device.
•
Ensure that your Gear and the other Bluetooth device are within the Bluetooth
connection range (10 m). The distance may vary depending on the environment the
devices are used in.
•
Restart both devices and launch the Samsung Gear app on the mobile device again.
Calls are not connected
•
Ensure that your Gear is connected to a mobile device.
•
Ensure that your mobile device has accessed the right cellular network.
•
Ensure that you have not set call barring for the phone number you are dialling on the
mobile device.
•
Ensure that you have not set call barring for the incoming phone number on the mobile
device.
Others cannot hear you speaking on a call
•
Ensure that you are not covering the built-in microphone.
•
Ensure that the microphone is close to your mouth.
Sound echoes during a call
Adjust the volume or move to another area.

Appendix
95
A cellular network or the Internet is often disconnected or audio
quality is poor
•
Ensure that you are not blocking the Gear’s antenna area.
•
When you are in areas with weak signals or poor reception, you may lose reception. You
may have connectivity problems due to issues with the service provider’s base station.
Move to another area and try again.
•
When using the Gear while moving, wireless network services may be disabled due to
issues with the service provider’s network.
The battery icon is empty
Your battery is low. Charge the battery.
The battery does not charge properly (For Samsung-approved
chargers)
•
Ensure that you connect the Gear to the wireless charging dock and connect the dock to
the charger properly.
•
Visit a Samsung Service Centre and have the battery replaced.
The battery depletes faster than when first purchased
•
When you expose the Gear or the battery to very cold or very hot temperatures, the
useful charge may be reduced.
•
Battery consumption increases when you use some apps.
•
The battery is consumable and the useful charge will get shorter over time.
Your Gear is hot to the touch
When you use apps that require more power or use apps on your Gear for an extended period
of time, your Gear may feel hot to the touch. This is normal and should not affect your Gear’s
lifespan or performance.
If the device overheats or feels hot for a prolonged period, do not use it for a while. If the
device continues to overheat, contact a Samsung Service Centre.

Appendix
96
Your Gear cannot find your current location
The Gear uses your mobile device’s location information. GPS signals may be obstructed
in some locations, such as indoors. Set the mobile device to use Wi-Fi to find your current
location.
Data stored in the Gear has been lost
Always make backup copies of all important data stored in the Gear through the Samsung
Gear app. Otherwise, you cannot restore data if it is corrupted or lost. Samsung is not
responsible for the loss of data stored in the Gear.
A small gap appears around the outside of the Gear case
•
This gap is a necessary manufacturing feature and some minor rocking or vibration of
parts may occur.
•
Over time, friction between parts may cause this gap to expand slightly.
Removing the battery
•
To remove the battery, contact an authorised service centre. To obtain battery
removal instructions, please visit www.samsung.com/global/ecodesign_energy.
•
For your safety, you must not attempt to remove the battery. If the battery is not
properly removed, it may lead to damage to the battery and device, cause personal
injury, and/or result in the device being unsafe.
•
Samsung does not accept liability for any damage or loss (whether in contract or tort,
including negligence) which may arise from failure to precisely follow these warnings and
instructions, other than death or personal injury caused by Samsung’s negligence.

Copyright
Copyright © 2016 Samsung Electronics
This manual is protected under international copyright laws.
No part of this manual may be reproduced, distributed, translated, or transmitted in any form
or by any means, electronic or mechanical, including photocopying, recording, or storing
in any information storage and retrieval system, without the prior written permission of
Samsung Electronics.
Trademarks
•
SAMSUNG and the SAMSUNG logo are registered trademarks of Samsung Electronics.
•
Bluetooth® is a registered trademark of Bluetooth SIG, Inc. worldwide.
•
Wi-Fi®, Wi-Fi Protected Setup™, Wi-Fi Direct™, Wi-Fi CERTIFIED™, and the Wi-Fi logo are
registered trademarks of the Wi-Fi Alliance.
•
All other trademarks and copyrights are the property of their respective owners.
Скачать
www.samsung.com
Russian. 03/2017. Rev.1.3
Руководство
пользователя
SM-R760
SM-R770