
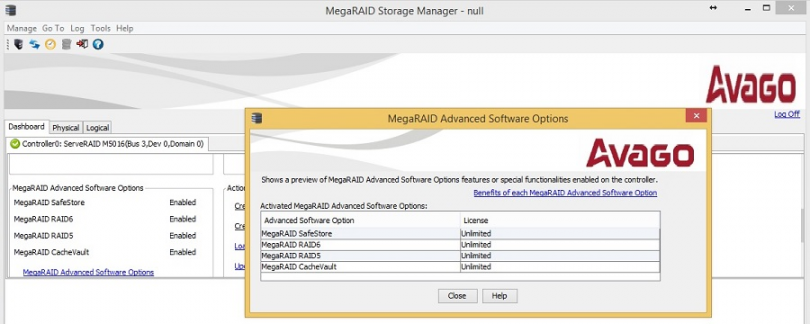
MegaRAID Storage Manager мне нужен для того, чтобы воткнуть в свой комп RAID контроллер и прошить его перед установкой в сервер. Прикрепляю к статье интерактивное руководство. MegaRAID Storage Manager есть под разные операционные системы. Будем устанавливать версию для Windows.
Ссылки
Интерактивное руководство В хроме подглючивает, открываете через Firefox.
Avago MegaRAID SAS 9380-8i8e
Более новая софтина: LSI Storage Authority Software
Установка MegaRAID Storage Manager
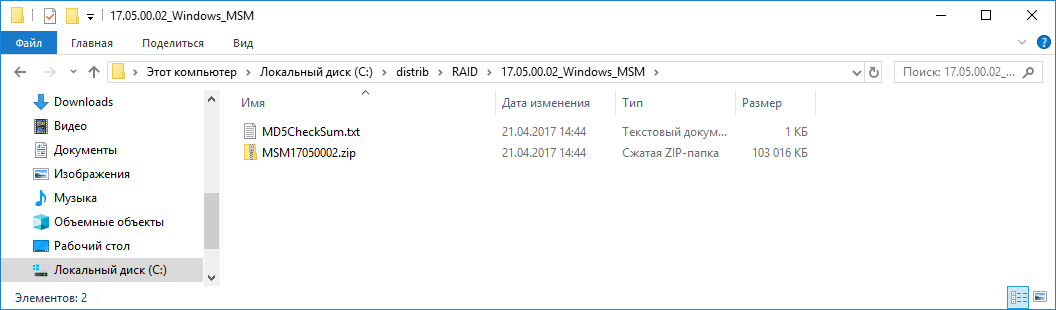
Качаем MegaRAID Storage Manager.
https://www.broadcom.com/products/storage/raid-controllers/megaraid-sas-9380-8i8e#downloads
Я скачал версию 7.05.00.02.

Данная версия поддерживает контроллеры:
- RAID
- MegaRAID SAS 9362-4i
- MegaRAID SAS 9362-8i
- MegaRAID SAS 9361-4i
- MegaRAID SAS 9361-8i
- MegaRAID SAS 9363-4i
- MegaRAID SAS 9380-8e
- MegaRAID SAS 9381-4i4e
- MegaRAID SAS 9361-8iCC
- MegaRAID SAS 9380-8eCC
- MegaRAID SAS 9364-8i
- MegaRAID SAS 9340-8i
- MegaRAID SAS 9341-8i
- MegaRAID SAS 9341-4i
- MegaRAID SAS 9270-8i
- MegaRAID SAS 9271-4i
- MegaRAID SAS 9271-8i
- MegaRAID SAS 9271-8iCC
- MegaRAID SAS 9286-8e
- MegaRAID SAS 9286CV-8e
- MegaRAID SAS 9286CV-8eCC
- MegaRAID SAS 9265-8i
- MegaRAID SAS 9285-8e
- MegaRAID SAS 9240-4i
- MegaRAID SAS 9240-8i
- MegaRAID SAS 9260-4i
- MegaRAID SAS 9260CV-4i
- MegaRAID SAS 9260-8i
- MegaRAID SAS 9260CV-8i
- MegaRAID SAS 9260DE-8i
- MegaRAID SAS 9261-8i
- MegaRAID SAS 9280-4i4e
- MegaRAID SAS 9280-8e
- MegaRAID SAS 9280DE-8e
- MegaRAID SAS 9280-24i4e
- MegaRAID SAS 9280-16i4e
- MegaRAID SAS 9260-16i
- MegaRAID SAS 9266-4i
- MegaRAID SAS 9266-8i
- MegaRAID SAS 9285CV-8e
- MegaRAID SAS 8704ELP
- MegaRAID SAS 8704EM2
- MegaRAID SAS 8708ELP
- MegaRAID SAS 8708EM2
- MegaRAID SAS 8880EM2
- MegaRAID SAS 8888ELP
- MegaRAID SAS 8308ELP*
- MegaRAID SAS 8344ELP*
- MegaRAID SAS 84016E*
- MegaRAID SAS 8408E*
- MegaRAID SAS 8480E*
- MegaRAID SATA 300-8ELP*
- HBA
- LSI SAS 9211
- LSI SAS 9212
- LSI SAS3041E-R
- LSI SAS3041X-R
- LSI SAS3080X-R,
- LSI SAS3081E-R
- LSI SAS3442E-R
- LSI SAS3442X-R
- LSI WarpDrive SLP-300
- 9212 4i4e-R spec
- 9211-8i/4i-R spec
- LSI Nytro WarpDrive WLP4-200
- LSI Nytro WarpDrive WLP4-400
- LSI Nytro WarpDrive BLP4-400
- LSI Nytro WarpDrive BLP4-800
- LSI Nytro WarpDrive BLP4-1600
- LSI Nytro XD BLP4-400
- LSI Nytro XD BLP4-800
- LSI SAS 9207-4i4e
- LSI SAS 9217-4i4e
- LSI SAS 9207-8i
- LSI SAS 9217-8i
- LSI SAS 9207-8e
- LSI SAS 9201-16e
- LSI SAS 9200-8e
* Контроллеры предыдущих версий должны работать, но не тестировались.
Работает в ОС 32 и 64 бит:
- Windows* 2000
- Windows* 2003
- Windows* XP
- Windows* Vista
- Windows* 2008
- Windows* 7
- Windows* 8
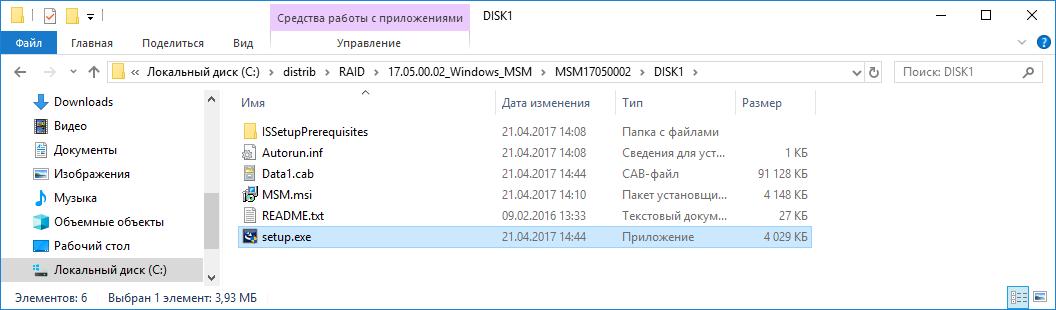
Распаковываем архив:
Запускаем setup.exe.
Запускается инсталлятор.
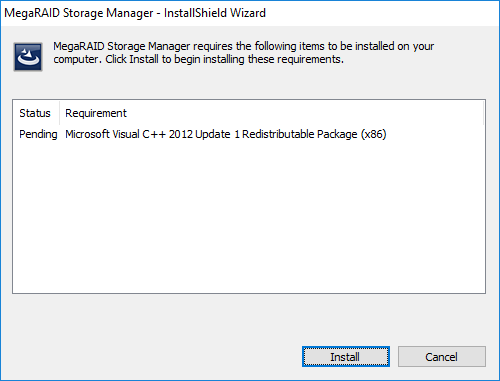
Install. Требуется C++ пакет.
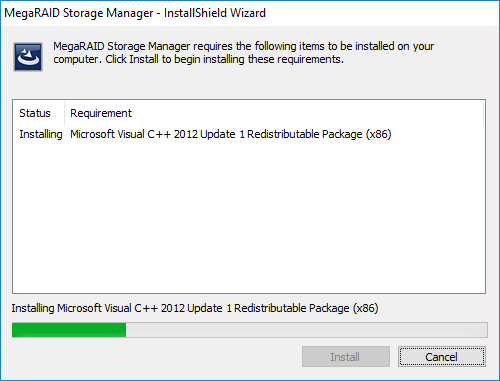
Условия установки соблюдены. Открывается окно мастера установки.
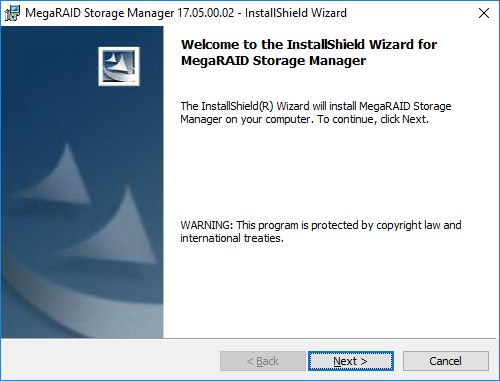
Next.
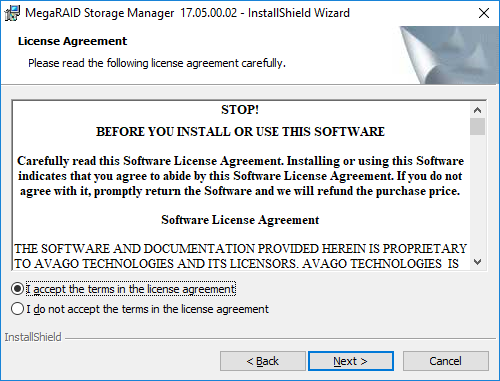
Принимаем лицензионное соглашение. Next.
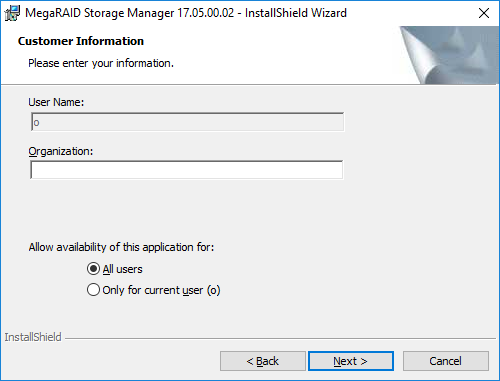
Я выбираю установку для всех пользователей. Next.
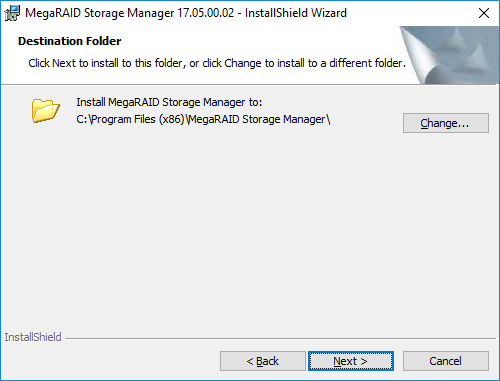
Можно сменить папку установки. Next.
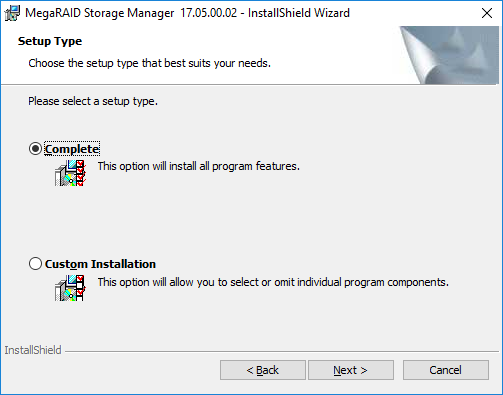
Выбираю обычную установку. Next.
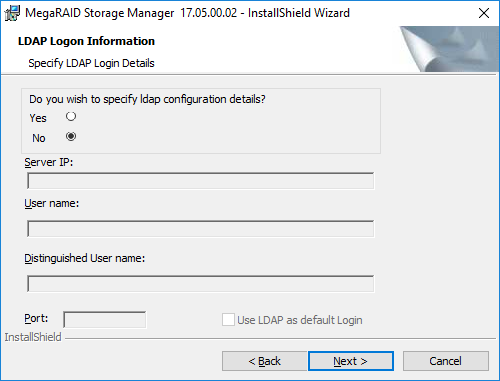
Предлагают настроить LDAP, забиваю. Next.
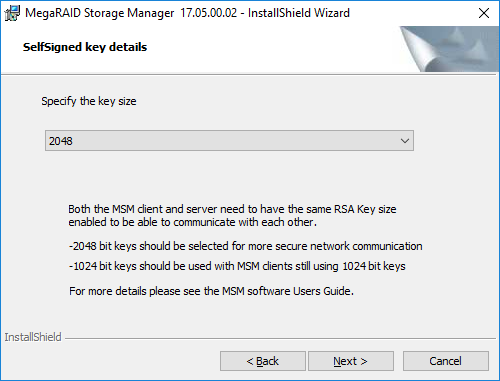
Указываем размер ключа. Поскольку я на своей же машине буду шить контроллер, то эта опция — по барабану. Next.
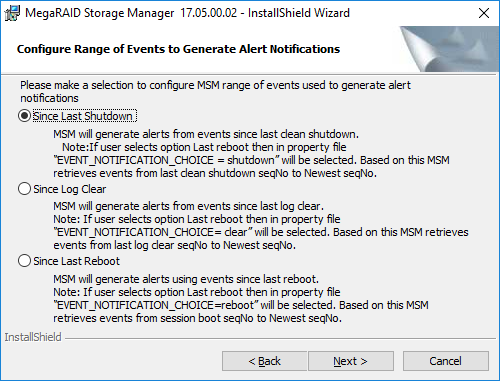
Вот тут я подвис и оставил значение по умолчанию. Это настройка диапазона времени, за которое выводить уведомления. Мне оно не нужно. Next.
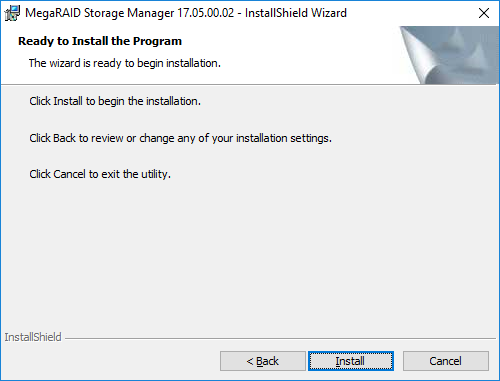
Эта страница предназначена только для того, чтобы нажать кнопку Install или не нажать. Идиотизм.
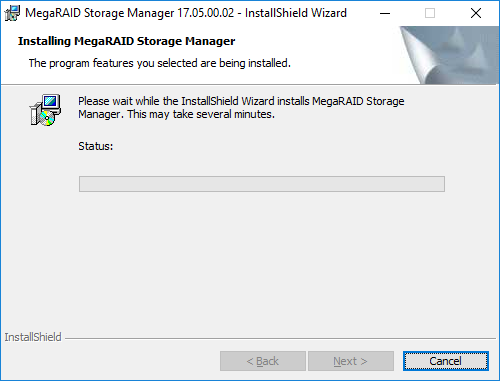
Начинается установка.
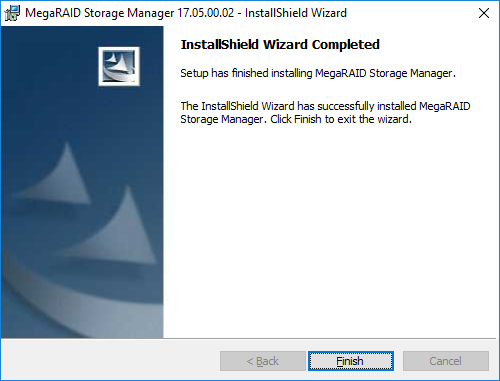
Установка завершена. Finish.
На рабочем столе появляется иконка MegaRAID Storage Manager. Для работу нужна java.
В этом видеоуроке показана последовательность действий для создания из дисков стандарта SATA/ SAS, подключенных к контроллеру LSI/ Avago, RAID-массива уровня RAID-10 с помощью MSM
Контроллеры фирмы LSI/ Avago поддерживают создание RAID-массивов из подключенных к ним SSD или HDD дисков с интерфейсом SATA или SAS.
Рассмотрим создание RAID-массива через приложение MegaRAID Storage Manager под Windows.
- Запустим инсталляцию программы. Согласимся на установку расширения Visual C++ Redistributable Manager
- В дальнейшем процессе все предлагаемые параметры оставляем по умолчанию, кроме раздела LDAP Logon Information — выбираем No.
- Откроем MegaRAID Storage Manager. Он обнаружит контроллер в списке Remote Servers с локальным адресом 127.0.0.1.
- Для входа в него используем тот же User Name/Password, что и для самого Windows Server.
- На закладке DashBoard выберем Create Virtual Drive. Выберем вариант Advanced, затем — RAID 10.
- В правом меню Drive groups возникнет Spanned Drive Group 1 и под ней — Span 0
- С помощью Add >> перенесем туда два диска, создадим еще один Span 1 кнопкой Create Span и добавим в него оставшиеся два диска.
- Нажмем на кнопку Create Drive Group. Выберем Next.
- На последнем шаге поправим прочие параметры нового массива, поменяем, при необходимости, имя, размер сектора, политику записи, и окончательно закрепим созаднное кнопкой Create Virtual Drive.
- Массив необходимо инициализировать. Выберите в закладке Logical по имени только что созданный RAID массив, правой кнопочкой мыши выведите контекстное меню и задайте команду Start Initialization.
- Прогресс будет виден либо в DashBoard, либо в отдельном окошке, которое открывается по ссылке More details.
Все модели серверов WIT VV | Конфигурация сервера из этого видеоурока | Консоль MegaRAID Storage Manager для Windows Server

MegaRAID®
SAS Software
User Guide
51530-00
Rev. B
July 2011

Revision History
Version and Date Description of Changes
51530-00, Rev B, July 2011 • Updated the guide with VMware 5.0 information.
51530-00A, Rev A, May 2011 • Updated screen shots wherever required in the document.
• Updated the guide with CacheCade Pro 2.0 SSD Read/Write Caching software content.
• Added around 53 events from 0x0189 to 0x01bd in Appendix A.
• Updated the content in the Section 5.15.15, Download Firmware to the Physical Devices.
• Modified content in Chapter 4, WebBIOS Configuration Utility.
• Updated content in Chapter 5, MegaRAID Command Tool.
• Updated content in Chapter 6, MegaRAID Storage Manager Overview and Installation.
• Updated content in Chapter 7, MegaRAID Storage Manager Window and Menus.
• Updated content in Chapter 8, Configuration.
• Updated content in Chapter 9, Monitoring Controllers and Its Attached Devices.
• Updated content in Chapter 10, Maintaining and Managing Storage Configurations.
• Updated content in Chapter 11, Using MegaRAID Advanced Software.
• Updated content in Appendix A, Events and Messages.
• Created a new appendix — Appendix D, History of Technical Changes.
• Updated the name of the CacheCade SSD Caching software.
NOTE: For a history of all technical changes made to this guide for the previous releases, refer to
Appendix D, History of Technical Changes.
LSI and the LSI logo are trademarks or registered trademarks of LSI Corporation or its subsidiaries. All other brand and product names may be trademarks of their respective companies.
LSI Corporation reserves the right to make changes to the product(s) or information disclosed herein at any time without notice. LSI Corporation does not assume any responsibility or liability arising
out of the application or use of any product or service described herein, except as expressly agreed to in writing by LSI Corporation; nor does the purchase, lea se, or use of a prod uct o r servi ce f rom
LSI Corporation convey a license under any patent rights, copyrights, trademark rights, or any other of the intellectual property rights of LSI Corporation or of third parties.
This document contains proprietary information of LSI Corporation. The information contained herein is not to be used by or disclosed to third parties without the express written permission of LSI
Corporation.
Corporate Headquarters Email Website
Milpitas, CA globalsupport@lsi.com www.lsi.com
800-372-2447
Document Number: 51530-00, Rev. B
Copyright © 2011 LSI Corporation
All Rights Reserved

MegaRAID SAS Software User Guide Table of Contents
Table of Contents
Chapter 1: Overview . . . . . . . . . . . . . . . . . . . . . . . . . . . . . . . . . . . . . . . . . . . . . . . . . . . . . . . . . . . . . . . . . . . . . . . . . . . . . . . . . . . . . . . . . . . . . . . . . . . . . . . . . . . . . . . . . . . . . . .13
1.1 SAS Technology . . . . . . . . . . . . . . . . . . . . . . . . . . . . . . . . . . . . . . . . . . . . . . . . . . . . . . . . . . . . . . . . . . . . . . . . . . . . . . . . . . . . . . . . . . . . . . . . . . . . . . . . . . . . . . .13
1.2 Serial-Attached SCSI Device Interface . . . . . . . . . . . . . . . . . . . . . . . . . . . . . . . . . . . . . . . . . . . . . . . . . . . . . . . . . . . . . . . . . . . . . . . . . . . . . . . . . . . . . . . . . . .14
1.3 Serial ATA III Features . . . . . . . . . . . . . . . . . . . . . . . . . . . . . . . . . . . . . . . . . . . . . . . . . . . . . . . . . . . . . . . . . . . . . . . . . . . . . . . . . . . . . . . . . . . . . . . . . . . . . . . . . .15
1.4 Solid State Drive Features . . . . . . . . . . . . . . . . . . . . . . . . . . . . . . . . . . . . . . . . . . . . . . . . . . . . . . . . . . . . . . . . . . . . . . . . . . . . . . . . . . . . . . . . . . . . . . . . . . . . . .15
1.4.1 SSD Guard . . . . . . . . . . . . . . . . . . . . . . . . . . . . . . . . . . . . . . . . . . . . . . . . . . . . . . . . . . . . . . . . . . . . . . . . . . . . . . . . . . . . . . . . . . . . . . . . . . . . . . . . . .16
1.5 Dimmer Switch Features . . . . . . . . . . . . . . . . . . . . . . . . . . . . . . . . . . . . . . . . . . . . . . . . . . . . . . . . . . . . . . . . . . . . . . . . . . . . . . . . . . . . . . . . . . . . . . . . . . . . . . .16
1.6 UEFI 2.0 Support . . . . . . . . . . . . . . . . . . . . . . . . . . . . . . . . . . . . . . . . . . . . . . . . . . . . . . . . . . . . . . . . . . . . . . . . . . . . . . . . . . . . . . . . . . . . . . . . . . . . . . . . . . . . . . .16
1.7 Configuration Scenarios . . . . . . . . . . . . . . . . . . . . . . . . . . . . . . . . . . . . . . . . . . . . . . . . . . . . . . . . . . . . . . . . . . . . . . . . . . . . . . . . . . . . . . . . . . . . . . . . . . . . . . . .16
1.7.1 Valid Drive Mix Configurations with HDDs and SSDs . . . . . . . . . . . . . . . . . . . . . . . . . . . . . . . . . . . . . . . . . . . . . . . . . . . . . . . . . . . . . . . . .18
1.8 Technical Support . . . . . . . . . . . . . . . . . . . . . . . . . . . . . . . . . . . . . . . . . . . . . . . . . . . . . . . . . . . . . . . . . . . . . . . . . . . . . . . . . . . . . . . . . . . . . . . . . . . . . . . . . . . . .19
Chapter 2: Introduction to RAID . . . . . . . . . . . . . . . . . . . . . . . . . . . . . . . . . . . . . . . . . . . . . . . . . . . . . . . . . . . . . . . . . . . . . . . . . . . . . . . . . . . . . . . . . . . . . . . . . . . . . . . . . . .21
2.1 RAID Description . . . . . . . . . . . . . . . . . . . . . . . . . . . . . . . . . . . . . . . . . . . . . . . . . . . . . . . . . . . . . . . . . . . . . . . . . . . . . . . . . . . . . . . . . . . . . . . . . . . . . . . . . . . . . . .21
2.2 RAID Benefits . . . . . . . . . . . . . . . . . . . . . . . . . . . . . . . . . . . . . . . . . . . . . . . . . . . . . . . . . . . . . . . . . . . . . . . . . . . . . . . . . . . . . . . . . . . . . . . . . . . . . . . . . . . . . . . . . .21
2.3 RAID Functions . . . . . . . . . . . . . . . . . . . . . . . . . . . . . . . . . . . . . . . . . . . . . . . . . . . . . . . . . . . . . . . . . . . . . . . . . . . . . . . . . . . . . . . . . . . . . . . . . . . . . . . . . . . . . . . .21
2.4 Components and Features . . . . . . . . . . . . . . . . . . . . . . . . . . . . . . . . . . . . . . . . . . . . . . . . . . . . . . . . . . . . . . . . . . . . . . . . . . . . . . . . . . . . . . . . . . . . . . . . . . . . .22
2.4.1 Drive Group . . . . . . . . . . . . . . . . . . . . . . . . . . . . . . . . . . . . . . . . . . . . . . . . . . . . . . . . . . . . . . . . . . . . . . . . . . . . . . . . . . . . . . . . . . . . . . . . . . . . . . . .22
2.4.2 Virtual Drive . . . . . . . . . . . . . . . . . . . . . . . . . . . . . . . . . . . . . . . . . . . . . . . . . . . . . . . . . . . . . . . . . . . . . . . . . . . . . . . . . . . . . . . . . . . . . . . . . . . . . . . .22
2.4.3 Fault Tolerance . . . . . . . . . . . . . . . . . . . . . . . . . . . . . . . . . . . . . . . . . . . . . . . . . . . . . . . . . . . . . . . . . . . . . . . . . . . . . . . . . . . . . . . . . . . . . . . . . . . . .22
2.4.4 Consistency Check . . . . . . . . . . . . . . . . . . . . . . . . . . . . . . . . . . . . . . . . . . . . . . . . . . . . . . . . . . . . . . . . . . . . . . . . . . . . . . . . . . . . . . . . . . . . . . . . . .23
2.4.5 Copyback . . . . . . . . . . . . . . . . . . . . . . . . . . . . . . . . . . . . . . . . . . . . . . . . . . . . . . . . . . . . . . . . . . . . . . . . . . . . . . . . . . . . . . . . . . . . . . . . . . . . . . . . . .23
2.4.6 Background Initialization . . . . . . . . . . . . . . . . . . . . . . . . . . . . . . . . . . . . . . . . . . . . . . . . . . . . . . . . . . . . . . . . . . . . . . . . . . . . . . . . . . . . . . . . . . .24
2.4.7 Patrol Read . . . . . . . . . . . . . . . . . . . . . . . . . . . . . . . . . . . . . . . . . . . . . . . . . . . . . . . . . . . . . . . . . . . . . . . . . . . . . . . . . . . . . . . . . . . . . . . . . . . . . . . . .25
2.4.8 Disk Striping . . . . . . . . . . . . . . . . . . . . . . . . . . . . . . . . . . . . . . . . . . . . . . . . . . . . . . . . . . . . . . . . . . . . . . . . . . . . . . . . . . . . . . . . . . . . . . . . . . . . . . . .25
2.4.9 Disk Mirroring . . . . . . . . . . . . . . . . . . . . . . . . . . . . . . . . . . . . . . . . . . . . . . . . . . . . . . . . . . . . . . . . . . . . . . . . . . . . . . . . . . . . . . . . . . . . . . . . . . . . . .26
2.4.10 Parity . . . . . . . . . . . . . . . . . . . . . . . . . . . . . . . . . . . . . . . . . . . . . . . . . . . . . . . . . . . . . . . . . . . . . . . . . . . . . . . . . . . . . . . . . . . . . . . . . . . . . . . . . . . . .26
2.4.11 Disk Spanning . . . . . . . . . . . . . . . . . . . . . . . . . . . . . . . . . . . . . . . . . . . . . . . . . . . . . . . . . . . . . . . . . . . . . . . . . . . . . . . . . . . . . . . . . . . . . . . . . . . . .27
2.4.12 Hot Spares . . . . . . . . . . . . . . . . . . . . . . . . . . . . . . . . . . . . . . . . . . . . . . . . . . . . . . . . . . . . . . . . . . . . . . . . . . . . . . . . . . . . . . . . . . . . . . . . . . . . . . . .28
2.4.13 Disk Rebuilds . . . . . . . . . . . . . . . . . . . . . . . . . . . . . . . . . . . . . . . . . . . . . . . . . . . . . . . . . . . . . . . . . . . . . . . . . . . . . . . . . . . . . . . . . . . . . . . . . . . . . .29
2.4.14 Rebuild Rate . . . . . . . . . . . . . . . . . . . . . . . . . . . . . . . . . . . . . . . . . . . . . . . . . . . . . . . . . . . . . . . . . . . . . . . . . . . . . . . . . . . . . . . . . . . . . . . . . . . . . .30
2.4.15 Hot Swap . . . . . . . . . . . . . . . . . . . . . . . . . . . . . . . . . . . . . . . . . . . . . . . . . . . . . . . . . . . . . . . . . . . . . . . . . . . . . . . . . . . . . . . . . . . . . . . . . . . . . . . . .30
2.4.16 Drive States . . . . . . . . . . . . . . . . . . . . . . . . . . . . . . . . . . . . . . . . . . . . . . . . . . . . . . . . . . . . . . . . . . . . . . . . . . . . . . . . . . . . . . . . . . . . . . . . . . . . . . .30
2.4.17 Virtual Drive States . . . . . . . . . . . . . . . . . . . . . . . . . . . . . . . . . . . . . . . . . . . . . . . . . . . . . . . . . . . . . . . . . . . . . . . . . . . . . . . . . . . . . . . . . . . . . . . .31
2.4.18 Beep Codes . . . . . . . . . . . . . . . . . . . . . . . . . . . . . . . . . . . . . . . . . . . . . . . . . . . . . . . . . . . . . . . . . . . . . . . . . . . . . . . . . . . . . . . . . . . . . . . . . . . . . . .31
2.4.19 Enclosure Management . . . . . . . . . . . . . . . . . . . . . . . . . . . . . . . . . . . . . . . . . . . . . . . . . . . . . . . . . . . . . . . . . . . . . . . . . . . . . . . . . . . . . . . . . . .32
2.5 RAID Levels . . . . . . . . . . . . . . . . . . . . . . . . . . . . . . . . . . . . . . . . . . . . . . . . . . . . . . . . . . . . . . . . . . . . . . . . . . . . . . . . . . . . . . . . . . . . . . . . . . . . . . . . . . . . . . . . . . . .32
2.5.1 Summary of RAID Levels . . . . . . . . . . . . . . . . . . . . . . . . . . . . . . . . . . . . . . . . . . . . . . . . . . . . . . . . . . . . . . . . . . . . . . . . . . . . . . . . . . . . . . . . . . . .32
2.5.2 Selecting a RAID Level . . . . . . . . . . . . . . . . . . . . . . . . . . . . . . . . . . . . . . . . . . . . . . . . . . . . . . . . . . . . . . . . . . . . . . . . . . . . . . . . . . . . . . . . . . . . . .33
2.5.3 RAID 0 . . . . . . . . . . . . . . . . . . . . . . . . . . . . . . . . . . . . . . . . . . . . . . . . . . . . . . . . . . . . . . . . . . . . . . . . . . . . . . . . . . . . . . . . . . . . . . . . . . . . . . . . . . . . . .33
2.5.4 RAID 1 . . . . . . . . . . . . . . . . . . . . . . . . . . . . . . . . . . . . . . . . . . . . . . . . . . . . . . . . . . . . . . . . . . . . . . . . . . . . . . . . . . . . . . . . . . . . . . . . . . . . . . . . . . . . . .34
2.5.5 RAID 5 . . . . . . . . . . . . . . . . . . . . . . . . . . . . . . . . . . . . . . . . . . . . . . . . . . . . . . . . . . . . . . . . . . . . . . . . . . . . . . . . . . . . . . . . . . . . . . . . . . . . . . . . . . . . . .34
2.5.6 RAID 6 . . . . . . . . . . . . . . . . . . . . . . . . . . . . . . . . . . . . . . . . . . . . . . . . . . . . . . . . . . . . . . . . . . . . . . . . . . . . . . . . . . . . . . . . . . . . . . . . . . . . . . . . . . . . . .35
2.5.7 RAID 00 . . . . . . . . . . . . . . . . . . . . . . . . . . . . . . . . . . . . . . . . . . . . . . . . . . . . . . . . . . . . . . . . . . . . . . . . . . . . . . . . . . . . . . . . . . . . . . . . . . . . . . . . . . . .36
2.5.8 RAID 10 . . . . . . . . . . . . . . . . . . . . . . . . . . . . . . . . . . . . . . . . . . . . . . . . . . . . . . . . . . . . . . . . . . . . . . . . . . . . . . . . . . . . . . . . . . . . . . . . . . . . . . . . . . . .37
2.5.9 RAID 50 . . . . . . . . . . . . . . . . . . . . . . . . . . . . . . . . . . . . . . . . . . . . . . . . . . . . . . . . . . . . . . . . . . . . . . . . . . . . . . . . . . . . . . . . . . . . . . . . . . . . . . . . . . . .38
2.5.10 RAID 60 . . . . . . . . . . . . . . . . . . . . . . . . . . . . . . . . . . . . . . . . . . . . . . . . . . . . . . . . . . . . . . . . . . . . . . . . . . . . . . . . . . . . . . . . . . . . . . . . . . . . . . . . . . .39
LSI Corporation Confidential | July 2011 Page 3

MegaRAID SAS Software User GuideTable of Contents
2.6 RAID Configuration Strategies . . . . . . . . . . . . . . . . . . . . . . . . . . . . . . . . . . . . . . . . . . . . . . . . . . . . . . . . . . . . . . . . . . . . . . . . . . . . . . . . . . . . . . . . . . . . . . . . . .40
2.6.1 Maximizing Fault Tolerance . . . . . . . . . . . . . . . . . . . . . . . . . . . . . . . . . . . . . . . . . . . . . . . . . . . . . . . . . . . . . . . . . . . . . . . . . . . . . . . . . . . . . . . . .41
2.6.2 Maximizing Performance . . . . . . . . . . . . . . . . . . . . . . . . . . . . . . . . . . . . . . . . . . . . . . . . . . . . . . . . . . . . . . . . . . . . . . . . . . . . . . . . . . . . . . . . . . .42
2.6.3 Maximizing Storage Capacity . . . . . . . . . . . . . . . . . . . . . . . . . . . . . . . . . . . . . . . . . . . . . . . . . . . . . . . . . . . . . . . . . . . . . . . . . . . . . . . . . . . . . . .43
2.7 RAID Availability . . . . . . . . . . . . . . . . . . . . . . . . . . . . . . . . . . . . . . . . . . . . . . . . . . . . . . . . . . . . . . . . . . . . . . . . . . . . . . . . . . . . . . . . . . . . . . . . . . . . . . . . . . . . . . .44
2.7.1 RAID Availability Concept . . . . . . . . . . . . . . . . . . . . . . . . . . . . . . . . . . . . . . . . . . . . . . . . . . . . . . . . . . . . . . . . . . . . . . . . . . . . . . . . . . . . . . . . . . .44
2.8 Configuration Planning . . . . . . . . . . . . . . . . . . . . . . . . . . . . . . . . . . . . . . . . . . . . . . . . . . . . . . . . . . . . . . . . . . . . . . . . . . . . . . . . . . . . . . . . . . . . . . . . . . . . . . . .45
2.9 Number of Drives . . . . . . . . . . . . . . . . . . . . . . . . . . . . . . . . . . . . . . . . . . . . . . . . . . . . . . . . . . . . . . . . . . . . . . . . . . . . . . . . . . . . . . . . . . . . . . . . . . . . . . . . . . . . . .45
2.9.1 Drive Group Purpose . . . . . . . . . . . . . . . . . . . . . . . . . . . . . . . . . . . . . . . . . . . . . . . . . . . . . . . . . . . . . . . . . . . . . . . . . . . . . . . . . . . . . . . . . . . . . . .45
Chapter 3: SafeStore Disk Encryption . . . . . . . . . . . . . . . . . . . . . . . . . . . . . . . . . . . . . . . . . . . . . . . . . . . . . . . . . . . . . . . . . . . . . . . . . . . . . . . . . . . . . . . . . . . . . . . . . . . . .47
3.1 Overview . . . . . . . . . . . . . . . . . . . . . . . . . . . . . . . . . . . . . . . . . . . . . . . . . . . . . . . . . . . . . . . . . . . . . . . . . . . . . . . . . . . . . . . . . . . . . . . . . . . . . . . . . . . . . . . . . . . . . .47
3.2 Purpose and Benefits . . . . . . . . . . . . . . . . . . . . . . . . . . . . . . . . . . . . . . . . . . . . . . . . . . . . . . . . . . . . . . . . . . . . . . . . . . . . . . . . . . . . . . . . . . . . . . . . . . . . . . . . . .47
3.3 Terminology . . . . . . . . . . . . . . . . . . . . . . . . . . . . . . . . . . . . . . . . . . . . . . . . . . . . . . . . . . . . . . . . . . . . . . . . . . . . . . . . . . . . . . . . . . . . . . . . . . . . . . . . . . . . . . . . . . .48
3.4 Workflow . . . . . . . . . . . . . . . . . . . . . . . . . . . . . . . . . . . . . . . . . . . . . . . . . . . . . . . . . . . . . . . . . . . . . . . . . . . . . . . . . . . . . . . . . . . . . . . . . . . . . . . . . . . . . . . . . . . . . .48
3.4.1 Enable Security . . . . . . . . . . . . . . . . . . . . . . . . . . . . . . . . . . . . . . . . . . . . . . . . . . . . . . . . . . . . . . . . . . . . . . . . . . . . . . . . . . . . . . . . . . . . . . . . . . . . .48
3.4.2 Change Security . . . . . . . . . . . . . . . . . . . . . . . . . . . . . . . . . . . . . . . . . . . . . . . . . . . . . . . . . . . . . . . . . . . . . . . . . . . . . . . . . . . . . . . . . . . . . . . . . . . .49
3.4.3 Create Secure Virtual Drives . . . . . . . . . . . . . . . . . . . . . . . . . . . . . . . . . . . . . . . . . . . . . . . . . . . . . . . . . . . . . . . . . . . . . . . . . . . . . . . . . . . . . . . . .50
3.4.4 Import a Foreign Configuration . . . . . . . . . . . . . . . . . . . . . . . . . . . . . . . . . . . . . . . . . . . . . . . . . . . . . . . . . . . . . . . . . . . . . . . . . . . . . . . . . . . . .50
3.5 Instant Secure Erase . . . . . . . . . . . . . . . . . . . . . . . . . . . . . . . . . . . . . . . . . . . . . . . . . . . . . . . . . . . . . . . . . . . . . . . . . . . . . . . . . . . . . . . . . . . . . . . . . . . . . . . . . . . .50
Chapter 4: WebBIOS Configuration Utility . . . . . . . . . . . . . . . . . . . . . . . . . . . . . . . . . . . . . . . . . . . . . . . . . . . . . . . . . . . . . . . . . . . . . . . . . . . . . . . . . . . . . . . . . . . . . . . . .53
4.1 Overview . . . . . . . . . . . . . . . . . . . . . . . . . . . . . . . . . . . . . . . . . . . . . . . . . . . . . . . . . . . . . . . . . . . . . . . . . . . . . . . . . . . . . . . . . . . . . . . . . . . . . . . . . . . . . . . . . . . . . .53
4.2 Starting the WebBIOS configuration utility . . . . . . . . . . . . . . . . . . . . . . . . . . . . . . . . . . . . . . . . . . . . . . . . . . . . . . . . . . . . . . . . . . . . . . . . . . . . . . . . . . . . . .53
4.3 WebBIOS configuration utility Main Dialog Options . . . . . . . . . . . . . . . . . . . . . . . . . . . . . . . . . . . . . . . . . . . . . . . . . . . . . . . . . . . . . . . . . . . . . . . . . . . . .54
4.4 Managing Software Licensing . . . . . . . . . . . . . . . . . . . . . . . . . . . . . . . . . . . . . . . . . . . . . . . . . . . . . . . . . . . . . . . . . . . . . . . . . . . . . . . . . . . . . . . . . . . . . . . . . .56
4.4.1 Managing MegaRAID Advanced Software Options . . . . . . . . . . . . . . . . . . . . . . . . . . . . . . . . . . . . . . . . . . . . . . . . . . . . . . . . . . . . . . . . . . .56
4.4.2 Reusing the Activation Key . . . . . . . . . . . . . . . . . . . . . . . . . . . . . . . . . . . . . . . . . . . . . . . . . . . . . . . . . . . . . . . . . . . . . . . . . . . . . . . . . . . . . . . . . .60
4.4.3 Managing Advanced Software Summary . . . . . . . . . . . . . . . . . . . . . . . . . . . . . . . . . . . . . . . . . . . . . . . . . . . . . . . . . . . . . . . . . . . . . . . . . . . .60
4.4.4 Activating an Unlimited Key Over a Trial Key . . . . . . . . . . . . . . . . . . . . . . . . . . . . . . . . . . . . . . . . . . . . . . . . . . . . . . . . . . . . . . . . . . . . . . . . .61
4.4.5 Activating a Trial Software . . . . . . . . . . . . . . . . . . . . . . . . . . . . . . . . . . . . . . . . . . . . . . . . . . . . . . . . . . . . . . . . . . . . . . . . . . . . . . . . . . . . . . . . . .61
4.4.6 Activating an Unlimited Key . . . . . . . . . . . . . . . . . . . . . . . . . . . . . . . . . . . . . . . . . . . . . . . . . . . . . . . . . . . . . . . . . . . . . . . . . . . . . . . . . . . . . . . .62
4.4.7 Securing MegaRAID Advanced Software . . . . . . . . . . . . . . . . . . . . . . . . . . . . . . . . . . . . . . . . . . . . . . . . . . . . . . . . . . . . . . . . . . . . . . . . . . . .63
4.4.8 Confirm Re-hosting Process . . . . . . . . . . . . . . . . . . . . . . . . . . . . . . . . . . . . . . . . . . . . . . . . . . . . . . . . . . . . . . . . . . . . . . . . . . . . . . . . . . . . . . . . .63
4.4.9 Re-hosting Process Complete . . . . . . . . . . . . . . . . . . . . . . . . . . . . . . . . . . . . . . . . . . . . . . . . . . . . . . . . . . . . . . . . . . . . . . . . . . . . . . . . . . . . . . .65
4.5 Creating a Storage Configuration . . . . . . . . . . . . . . . . . . . . . . . . . . . . . . . . . . . . . . . . . . . . . . . . . . . . . . . . . . . . . . . . . . . . . . . . . . . . . . . . . . . . . . . . . . . . . . .66
4.5.1 Using Automatic Configuration . . . . . . . . . . . . . . . . . . . . . . . . . . . . . . . . . . . . . . . . . . . . . . . . . . . . . . . . . . . . . . . . . . . . . . . . . . . . . . . . . . . . .69
4.5.2 Using Manual Configuration . . . . . . . . . . . . . . . . . . . . . . . . . . . . . . . . . . . . . . . . . . . . . . . . . . . . . . . . . . . . . . . . . . . . . . . . . . . . . . . . . . . . . . . .69
4.6 CacheCade Configuration . . . . . . . . . . . . . . . . . . . . . . . . . . . . . . . . . . . . . . . . . . . . . . . . . . . . . . . . . . . . . . . . . . . . . . . . . . . . . . . . . . . . . . . . . . . . . . . . . . . . 111
4.6.1 Creating a CacheCade 2.0 SSD Read Caching Configuration . . . . . . . . . . . . . . . . . . . . . . . . . . . . . . . . . . . . . . . . . . . . . . . . . . . . . . . . 111
4.6.2 Creating a CacheCade Pro 2.0 SSD Read/Write Caching Configuration . . . . . . . . . . . . . . . . . . . . . . . . . . . . . . . . . . . . . . . . . . . . . . 117
4.7 Selecting SafeStore Encryption Services Security Options . . . . . . . . . . . . . . . . . . . . . . . . . . . . . . . . . . . . . . . . . . . . . . . . . . . . . . . . . . . . . . . . . . . . . 126
4.7.1 Enabling the Security Key Identifier, Security Key, and Password . . . . . . . . . . . . . . . . . . . . . . . . . . . . . . . . . . . . . . . . . . . . . . . . . . . 126
4.7.2 Enabling Drive Security using EKM . . . . . . . . . . . . . . . . . . . . . . . . . . . . . . . . . . . . . . . . . . . . . . . . . . . . . . . . . . . . . . . . . . . . . . . . . . . . . . . . 132
4.7.3 Changing the Security Key Identifier, Security Key, and Pass Phrase . . . . . . . . . . . . . . . . . . . . . . . . . . . . . . . . . . . . . . . . . . . . . . . . . 133
4.7.4 Change Security from EKM to LKM . . . . . . . . . . . . . . . . . . . . . . . . . . . . . . . . . . . . . . . . . . . . . . . . . . . . . . . . . . . . . . . . . . . . . . . . . . . . . . . . 134
4.7.5 Changing Security from LKM to EKM . . . . . . . . . . . . . . . . . . . . . . . . . . . . . . . . . . . . . . . . . . . . . . . . . . . . . . . . . . . . . . . . . . . . . . . . . . . . . . 139
4.7.6 Disabling the Drive Security Settings . . . . . . . . . . . . . . . . . . . . . . . . . . . . . . . . . . . . . . . . . . . . . . . . . . . . . . . . . . . . . . . . . . . . . . . . . . . . . . 140
4.8 Viewing and Changing Device Properties . . . . . . . . . . . . . . . . . . . . . . . . . . . . . . . . . . . . . . . . . . . . . . . . . . . . . . . . . . . . . . . . . . . . . . . . . . . . . . . . . . . . . 142
4.8.1 Viewing Controller Properties . . . . . . . . . . . . . . . . . . . . . . . . . . . . . . . . . . . . . . . . . . . . . . . . . . . . . . . . . . . . . . . . . . . . . . . . . . . . . . . . . . . . . 142
4.8.2 Viewing Virtual Drive Properties, Policies, and Operations . . . . . . . . . . . . . . . . . . . . . . . . . . . . . . . . . . . . . . . . . . . . . . . . . . . . . . . . . . 149
4.8.3 Viewing Drive Properties . . . . . . . . . . . . . . . . . . . . . . . . . . . . . . . . . . . . . . . . . . . . . . . . . . . . . . . . . . . . . . . . . . . . . . . . . . . . . . . . . . . . . . . . . . 150
Page 4 LSI Corporation Confidential | July 2011

MegaRAID SAS Software User Guide Table of Contents
4.8.4 Shield State . . . . . . . . . . . . . . . . . . . . . . . . . . . . . . . . . . . . . . . . . . . . . . . . . . . . . . . . . . . . . . . . . . . . . . . . . . . . . . . . . . . . . . . . . . . . . . . . . . . . . . 152
4.8.5 Viewing and Changing Battery Backup Unit Information . . . . . . . . . . . . . . . . . . . . . . . . . . . . . . . . . . . . . . . . . . . . . . . . . . . . . . . . . . . 155
4.8.6 Managing Link Speed . . . . . . . . . . . . . . . . . . . . . . . . . . . . . . . . . . . . . . . . . . . . . . . . . . . . . . . . . . . . . . . . . . . . . . . . . . . . . . . . . . . . . . . . . . . . . 160
4.8.7 Viewing Enclosure Properties . . . . . . . . . . . . . . . . . . . . . . . . . . . . . . . . . . . . . . . . . . . . . . . . . . . . . . . . . . . . . . . . . . . . . . . . . . . . . . . . . . . . . 162
4.8.8 SSD Disk Cache Policy . . . . . . . . . . . . . . . . . . . . . . . . . . . . . . . . . . . . . . . . . . . . . . . . . . . . . . . . . . . . . . . . . . . . . . . . . . . . . . . . . . . . . . . . . . . . 167
4.8.9 Emergency Hotspare . . . . . . . . . . . . . . . . . . . . . . . . . . . . . . . . . . . . . . . . . . . . . . . . . . . . . . . . . . . . . . . . . . . . . . . . . . . . . . . . . . . . . . . . . . . . . 167
4.8.10 Emergency Hotspare for Controllers . . . . . . . . . . . . . . . . . . . . . . . . . . . . . . . . . . . . . . . . . . . . . . . . . . . . . . . . . . . . . . . . . . . . . . . . . . . . . 168
4.9 Viewing and Expanding a Virtual Drive . . . . . . . . . . . . . . . . . . . . . . . . . . . . . . . . . . . . . . . . . . . . . . . . . . . . . . . . . . . . . . . . . . . . . . . . . . . . . . . . . . . . . . . 172
4.10 Suspending and Resuming Virtual Drive Operations . . . . . . . . . . . . . . . . . . . . . . . . . . . . . . . . . . . . . . . . . . . . . . . . . . . . . . . . . . . . . . . . . . . . . . . . . 173
4.11 Using MegaRAID Recovery . . . . . . . . . . . . . . . . . . . . . . . . . . . . . . . . . . . . . . . . . . . . . . . . . . . . . . . . . . . . . . . . . . . . . . . . . . . . . . . . . . . . . . . . . . . . . . . . . . 175
4.11.1 Recovery Scenarios . . . . . . . . . . . . . . . . . . . . . . . . . . . . . . . . . . . . . . . . . . . . . . . . . . . . . . . . . . . . . . . . . . . . . . . . . . . . . . . . . . . . . . . . . . . . . . 175
4.11.2 Enabling the Recovery Advanced Software . . . . . . . . . . . . . . . . . . . . . . . . . . . . . . . . . . . . . . . . . . . . . . . . . . . . . . . . . . . . . . . . . . . . . . . 176
4.11.3 Creating Snapshots and Views . . . . . . . . . . . . . . . . . . . . . . . . . . . . . . . . . . . . . . . . . . . . . . . . . . . . . . . . . . . . . . . . . . . . . . . . . . . . . . . . . . . 178
4.11.4 Creating Concurrent Snapshots . . . . . . . . . . . . . . . . . . . . . . . . . . . . . . . . . . . . . . . . . . . . . . . . . . . . . . . . . . . . . . . . . . . . . . . . . . . . . . . . . . 182
4.11.5 Selecting the Snapshot Settings . . . . . . . . . . . . . . . . . . . . . . . . . . . . . . . . . . . . . . . . . . . . . . . . . . . . . . . . . . . . . . . . . . . . . . . . . . . . . . . . . 184
4.11.6 Viewing Snapshot Properties . . . . . . . . . . . . . . . . . . . . . . . . . . . . . . . . . . . . . . . . . . . . . . . . . . . . . . . . . . . . . . . . . . . . . . . . . . . . . . . . . . . . 186
4.11.7 Restoring a Virtual Drive by Rolling Back to a Snapshot . . . . . . . . . . . . . . . . . . . . . . . . . . . . . . . . . . . . . . . . . . . . . . . . . . . . . . . . . . . 187
4.11.8 Cleaning Up a Snapshot Repository . . . . . . . . . . . . . . . . . . . . . . . . . . . . . . . . . . . . . . . . . . . . . . . . . . . . . . . . . . . . . . . . . . . . . . . . . . . . . . 189
4.12 Non-SED Secure Erase . . . . . . . . . . . . . . . . . . . . . . . . . . . . . . . . . . . . . . . . . . . . . . . . . . . . . . . . . . . . . . . . . . . . . . . . . . . . . . . . . . . . . . . . . . . . . . . . . . . . . . 191
4.12.1 Erasing a Non — SED Physical Drive . . . . . . . . . . . . . . . . . . . . . . . . . . . . . . . . . . . . . . . . . . . . . . . . . . . . . . . . . . . . . . . . . . . . . . . . . . . . . . . 191
4.12.2 Virtual Drive Erase . . . . . . . . . . . . . . . . . . . . . . . . . . . . . . . . . . . . . . . . . . . . . . . . . . . . . . . . . . . . . . . . . . . . . . . . . . . . . . . . . . . . . . . . . . . . . . . 195
4.13 Viewing System Event Information . . . . . . . . . . . . . . . . . . . . . . . . . . . . . . . . . . . . . . . . . . . . . . . . . . . . . . . . . . . . . . . . . . . . . . . . . . . . . . . . . . . . . . . . . . 198
4.14 Managing Configurations . . . . . . . . . . . . . . . . . . . . . . . . . . . . . . . . . . . . . . . . . . . . . . . . . . . . . . . . . . . . . . . . . . . . . . . . . . . . . . . . . . . . . . . . . . . . . . . . . . . 199
4.14.1 Running a Consistency Check . . . . . . . . . . . . . . . . . . . . . . . . . . . . . . . . . . . . . . . . . . . . . . . . . . . . . . . . . . . . . . . . . . . . . . . . . . . . . . . . . . . . 199
4.14.2 Deleting a Virtual Drive . . . . . . . . . . . . . . . . . . . . . . . . . . . . . . . . . . . . . . . . . . . . . . . . . . . . . . . . . . . . . . . . . . . . . . . . . . . . . . . . . . . . . . . . . . 199
4.14.3 Importing or Clearing a Foreign Configuration . . . . . . . . . . . . . . . . . . . . . . . . . . . . . . . . . . . . . . . . . . . . . . . . . . . . . . . . . . . . . . . . . . . 200
4.14.4 Importing Foreign Configurations . . . . . . . . . . . . . . . . . . . . . . . . . . . . . . . . . . . . . . . . . . . . . . . . . . . . . . . . . . . . . . . . . . . . . . . . . . . . . . . 204
4.14.5 Import Foreign Drives in EKM/EKM Secured Locked Drives . . . . . . . . . . . . . . . . . . . . . . . . . . . . . . . . . . . . . . . . . . . . . . . . . . . . . . . . 204
4.14.6 Importing Foreign Drives for LKM-Secured Locked Drives . . . . . . . . . . . . . . . . . . . . . . . . . . . . . . . . . . . . . . . . . . . . . . . . . . . . . . . . . 205
4.14.7 Importing Foreign Drives in LKM Mode EKM-Secured Locked Drives . . . . . . . . . . . . . . . . . . . . . . . . . . . . . . . . . . . . . . . . . . . . . . 205
4.14.8 Migrating the RAID Level of a Virtual Drive . . . . . . . . . . . . . . . . . . . . . . . . . . . . . . . . . . . . . . . . . . . . . . . . . . . . . . . . . . . . . . . . . . . . . . . 206
4.14.9 New Drives Attached to a MegaRAID Controller . . . . . . . . . . . . . . . . . . . . . . . . . . . . . . . . . . . . . . . . . . . . . . . . . . . . . . . . . . . . . . . . . . 208
4.15 WebBIOS Dimmer Switch . . . . . . . . . . . . . . . . . . . . . . . . . . . . . . . . . . . . . . . . . . . . . . . . . . . . . . . . . . . . . . . . . . . . . . . . . . . . . . . . . . . . . . . . . . . . . . . . . . . 208
4.15.1 Power-Save Mode . . . . . . . . . . . . . . . . . . . . . . . . . . . . . . . . . . . . . . . . . . . . . . . . . . . . . . . . . . . . . . . . . . . . . . . . . . . . . . . . . . . . . . . . . . . . . . . 214
4.15.2 Power Save Settings-Advanced . . . . . . . . . . . . . . . . . . . . . . . . . . . . . . . . . . . . . . . . . . . . . . . . . . . . . . . . . . . . . . . . . . . . . . . . . . . . . . . . . . 215
4.15.3 Power-Save While Creating Virtual Drives . . . . . . . . . . . . . . . . . . . . . . . . . . . . . . . . . . . . . . . . . . . . . . . . . . . . . . . . . . . . . . . . . . . . . . . . 216
Chapter 5: MegaRAID Command Tool . . . . . . . . . . . . . . . . . . . . . . . . . . . . . . . . . . . . . . . . . . . . . . . . . . . . . . . . . . . . . . . . . . . . . . . . . . . . . . . . . . . . . . . . . . . . . . . . . . . 217
5.1 Product Overview . . . . . . . . . . . . . . . . . . . . . . . . . . . . . . . . . . . . . . . . . . . . . . . . . . . . . . . . . . . . . . . . . . . . . . . . . . . . . . . . . . . . . . . . . . . . . . . . . . . . . . . . . . . . 217
5.2 Novell NetWare, SCO, Solaris, FreeBSD, and MS-DOS Operating System Support . . . . . . . . . . . . . . . . . . . . . . . . . . . . . . . . . . . . . . . . . . . . . . . 218
5.3 Command Line Abbreviations and Conventions . . . . . . . . . . . . . . . . . . . . . . . . . . . . . . . . . . . . . . . . . . . . . . . . . . . . . . . . . . . . . . . . . . . . . . . . . . . . . . 219
5.3.1 Abbreviations Used in the Command Line . . . . . . . . . . . . . . . . . . . . . . . . . . . . . . . . . . . . . . . . . . . . . . . . . . . . . . . . . . . . . . . . . . . . . . . . . 219
5.3.2 Conventions . . . . . . . . . . . . . . . . . . . . . . . . . . . . . . . . . . . . . . . . . . . . . . . . . . . . . . . . . . . . . . . . . . . . . . . . . . . . . . . . . . . . . . . . . . . . . . . . . . . . . . 219
5.4 Pre-boot MegaCLI . . . . . . . . . . . . . . . . . . . . . . . . . . . . . . . . . . . . . . . . . . . . . . . . . . . . . . . . . . . . . . . . . . . . . . . . . . . . . . . . . . . . . . . . . . . . . . . . . . . . . . . . . . . 220
5.5 CacheCade Related Options . . . . . . . . . . . . . . . . . . . . . . . . . . . . . . . . . . . . . . . . . . . . . . . . . . . . . . . . . . . . . . . . . . . . . . . . . . . . . . . . . . . . . . . . . . . . . . . . . . 221
5.5.1 Create a Solid State Drive Cache Drive to Use as Secondary Cache . . . . . . . . . . . . . . . . . . . . . . . . . . . . . . . . . . . . . . . . . . . . . . . . . . 222
5.5.2 Delete a Solid State Drive Cache Drive . . . . . . . . . . . . . . . . . . . . . . . . . . . . . . . . . . . . . . . . . . . . . . . . . . . . . . . . . . . . . . . . . . . . . . . . . . . . . 222
5.5.3 Associate/Disassociate Virtual Drives . . . . . . . . . . . . . . . . . . . . . . . . . . . . . . . . . . . . . . . . . . . . . . . . . . . . . . . . . . . . . . . . . . . . . . . . . . . . . . 222
5.5.4 Display CacheCade Pro 2.0 Configurations on a Controller . . . . . . . . . . . . . . . . . . . . . . . . . . . . . . . .
. . . . . . . . . . . . . . . . . . . . . . . . . 222
5.5.5 Create a RAID Drive Group for CacheCade Pro 2.0 from All Unconfigured Good Drives . . . . . . . . . . . . . . . . . . . . . . . . . . . . . . 223
LSI Corporation Confidential | July 2011 Page 5

MegaRAID SAS Software User GuideTable of Contents
5.5.6 Remove Blocked Access on a Virtual Drive . . . . . . . . . . . . . . . . . . . . . . . . . . . . . . . . . . . . . . . . . . . . . . . . . . . . . . . . . . . . . . . . . . . . . . . . . 224
5.5.7 Create RAID 0 Configuration with SSD Caching . . . . . . . . . . . . . . . . . . . . . . . . . . . . . . . . . . . . . . . . . . . . . . . . . . . . . . . . . . . . . . . . . . . . 224
5.5.8 Create a RAID Level 10, 50, 60 (spanned) Configuration with SSD Caching . . . . . . . . . . . . . . . . . . . . . . . . . . . . . . . . . . . . . . . . . . 225
5.5.9 Delete Virtual Drives with SSD Caching . . . . . . . . . . . . . . . . . . . . . . . . . . . . . . . . . . . . . . . . . . . . . . . . . . . . . . . . . . . . . . . . . . . . . . . . . . . . 226
5.5.10 Clear Configurations on CacheCade Pro 2.0 Virtual Drives . . . . . . . . . . . . . . . . . . . . . . . . . . . . . . . . . . . . . . . . . . . . . . . . . . . . . . . . . 226
5.5.11 Create a CacheCade Pro 2.0 Virtual Drive with RAID level and Write Policy . . . . . . . . . . . . . . . . . . . . . . . . . . . . . . . . . . . . . . . . . 226
5.6 Software License Key . . . . . . . . . . . . . . . . . . . . . . . . . . . . . . . . . . . . . . . . . . . . . . . . . . . . . . . . . . . . . . . . . . . . . . . . . . . . . . . . . . . . . . . . . . . . . . . . . . . . . . . . . 226
5.7 SafeStore Security Options . . . . . . . . . . . . . . . . . . . . . . . . . . . . . . . . . . . . . . . . . . . . . . . . . . . . . . . . . . . . . . . . . . . . . . . . . . . . . . . . . . . . . . . . . . . . . . . . . . . 227
5.7.1 Use Instant Secure Erase on a Physical Drive . . . . . . . . . . . . . . . . . . . . . . . . . . . . . . . . . . . . . . . . . . . . . . . . . . . . . . . . . . . . . . . . . . . . . . . 228
5.7.2 Secure Data on a Virtual Drive . . . . . . . . . . . . . . . . . . . . . . . . . . . . . . . . . . . . . . . . . . . . . . . . . . . . . . . . . . . . . . . . . . . . . . . . . . . . . . . . . . . . . 228
5.7.3 Destroy the Security Key . . . . . . . . . . . . . . . . . . . . . . . . . . . . . . . . . . . . . . . . . . . . . . . . . . . . . . . . . . . . . . . . . . . . . . . . . . . . . . . . . . . . . . . . . . 228
5.7.4 Create a Security Key . . . . . . . . . . . . . . . . . . . . . . . . . . . . . . . . . . . . . . . . . . . . . . . . . . . . . . . . . . . . . . . . . . . . . . . . . . . . . . . . . . . . . . . . . . . . . 229
5.7.5 Create a Drive Security Key . . . . . . . . . . . . . . . . . . . . . . . . . . . . . . . . . . . . . . . . . . . . . . . . . . . . . . . . . . . . . . . . . . . . . . . . . . . . . . . . . . . . . . . . 229
5.7.6 Change the Security Key . . . . . . . . . . . . . . . . . . . . . . . . . . . . . . . . . . . . . . . . . . . . . . . . . . . . . . . . . . . . . . . . . . . . . . . . . . . . . . . . . . . . . . . . . . 230
5.7.7 Get the Security Key ID . . . . . . . . . . . . . . . . . . . . . . . . . . . . . . . . . . . . . . . . . . . . . . . . . . . . . . . . . . . . . . . . . . . . . . . . . . . . . . . . . . . . . . . . . . . . 230
5.7.8 Set the Security Key ID . . . . . . . . . . . . . . . . . . . . . . . . . . . . . . . . . . . . . . . . . . . . . . . . . . . . . . . . . . . . . . . . . . . . . . . . . . . . . . . . . . . . . . . . . . . . 230
5.7.9 Verify the Security Key . . . . . . . . . . . . . . . . . . . . . . . . . . . . . . . . . . . . . . . . . . . . . . . . . . . . . . . . . . . . . . . . . . . . . . . . . . . . . . . . . . . . . . . . . . . . 231
5.8 Controller Property-Related Options . . . . . . . . . . . . . . . . . . . . . . . . . . . . . . . . . . . . . . . . . . . . . . . . . . . . . . . . . . . . . . . . . . . . . . . . . . . . . . . . . . . . . . . . . . 231
5.8.1 Display Controller Properties . . . . . . . . . . . . . . . . . . . . . . . . . . . . . . . . . . . . . . . . . . . . . . . . . . . . . . . . . . . . . . . . . . . . . . . . . . . . . . . . . . . . . . 231
5.8.2 Display Number of Controllers Supported . . . . . . . . . . . . . . . . . . . . . . . . . . . . . . . . . . . . . . . . . . . . . . . . . . . . . . . . . . . . . . . . . . . . . . . . . 231
5.8.3 Enable or Disable Automatic Rebuild . . . . . . . . . . . . . . . . . . . . . . . . . . . . . . . . . . . . . . . . . . . . . . . . . . . . . . . . . . . . . . . . . . . . . . . . . . . . . . 231
5.8.4 Flush Controller Cache . . . . . . . . . . . . . . . . . . . . . . . . . . . . . . . . . . . . . . . . . . . . . . . . . . . . . . . . . . . . . . . . . . . . . . . . . . . . . . . . . . . . . . . . . . . . 232
5.8.5 Set Controller Properties . . . . . . . . . . . . . . . . . . . . . . . . . . . . . . . . . . . . . . . . . . . . . . . . . . . . . . . . . . . . . . . . . . . . . . . . . . . . . . . . . . . . . . . . . . 232
5.8.6 Display Specified Controller Properties . . . . . . . . . . . . . . . . . . . . . . . . . . . . . . . . . . . . . . . . . . . . . . . . . . . . . . . . . . . . . . . . . . . . . . . . . . . . 234
5.8.7 Set Factory Defaults . . . . . . . . . . . . . . . . . . . . . . . . . . . . . . . . . . . . . . . . . . . . . . . . . . . . . . . . . . . . . . . . . . . . . . . . . . . . . . . . . . . . . . . . . . . . . . 234
5.8.8 Set SAS Address . . . . . . . . . . . . . . . . . . . . . . . . . . . . . . . . . . . . . . . . . . . . . . . . . . . . . . . . . . . . . . . . . . . . . . . . . . . . . . . . . . . . . . . . . . . . . . . . . . 234
5.8.9 Set Time and Date on Controller . . . . . . . . . . . . . . . . . . . . . . . . . . . . . . . . . . . . . . . . . . . . . . . . . . . . . . . . . . . . . . . . . . . . . . . . . . . . . . . . . . 235
5.8.10 Display Time and Date on Controller . . . . . . . . . . . . . . . . . . . . . . . . . . . . . . . . . . . . . . . . . . . . . . . . . . . . . . . . . . . . . . . . . . . . . . . . . . . . . 235
5.8.11 Get Connector Mode . . . . . . . . . . . . . . . . . . . . . . . . . . . . . . . . . . . . . . . . . . . . . . . . . . . . . . . . . . . . . . . . . . . . . . . . . . . . . . . . . . . . . . . . . . . . 235
5.8.12 Set Connector Mode . . . . . . . . . . . . . . . . . . . . . . . . . . . . . . . . . . . . . . . . . . . . . . . . . . . . . . . . . . . . . . . . . . . . . . . . . . . . . . . . . . . . . . . . . . . . 235
5.9 Patrol Read-Related Controller Properties . . . . . . . . . . . . . . . . . . . . . . . . . . . . . . . . . . . . . . . . . . . . . . . . . . . . . . . . . . . . . . . . . . . . . . . . . . . . . . . . . . . . . 236
5.9.1 Set Patrol Read Options . . . . . . . . . . . . . . . . . . . . . . . . . . . . . . . . . . . . . . . . . . . . . . . . . . . . . . . . . . . . . . . . . . . . . . . . . . . . . . . . . . . . . . . . . . . 236
5.9.2 Set Patrol Read Delay Interval . . . . . . . . . . . . . . . . . . . . . . . . . . . . . . . . . . . . . . . . . . . . . . . . . . . . . . . . . . . . . . . . . . . . . . . . . . . . . . . . . . . . . 237
5.10 BIOS-Related Properties . . . . . . . . . . . . . . . . . . . . . . . . . . . . . . . . . . . . . . . . . . . . . . . . . . . . . . . . . . . . . . . . . . . . . . . . . . . . . . . . . . . . . . . . . . . . . . . . . . . . . 237
5.10.1 Set or Display Bootable Virtual Drive ID . . . . . . . . . . . . . . . . . . . . . . . . . . . . . . . . . . . . . . . . . . . . . . . . . . . . . . . . . . . . . . . . . . . . . . . . . . 237
5.10.2 Select BIOS Status Options . . . . . . . . . . . . . . . . . . . . . . . . . . . . . . . . . . . . . . . . . . . . . . . . . . . . . . . . . . . . . . . . . . . . . . . . . . . . . . . . . . . . . . . 237
5.11 Battery Backup Unit-Related Properties . . . . . . . . . . . . . . . . . . . . . . . . . . . . . . . . . . . . . . . . . . . . . . . . . . . . . . . . . . . . . . . . . . . . . . . . . . . . . . . . . . . . . . 238
5.11.1 Display BBU Information . . . . . . . . . . . . . . . . . . . . . . . . . . . . . . . . . . . . . . . . . . . . . . . . . . . . . . . . . . . . . . . . . . . . . . . . . . . . . . . . . . . . . . . . . 238
5.11.2 Display BBU Status Information . . . . . . . . . . . . . . . . . . . . . . . . . . . . . . . . . . . . . . . . . . . . . . . . . . . . . . . . . . . . . . . . . . . . . . . . . . . . . . . . . . 239
5.11.3 Display BBU Capacity . . . . . . . . . . . . . . . . . . . . . . . . . . . . . . . . . . . . . . . . . . . . . . . . . . . . . . . . . . . . . . . . . . . . . . . . . . . . . . . . . . . . . . . . . . . . 240
5.11.4 Display BBU Design Parameters . . . . . . . . . . . . . . . . . . . . . . . . . . . . . . . . . . . . . . . . . . . . . . . . . . . . . . . . . . . . . . . . . . . . . . . . . . . . . . . . . . 240
5.11.5 Display Current BBU Properties . . . . . . . . . . . . . . . . . . . . . . . . . . . . . . . . . . . . . . . . . . . . . . . . . . . . . . . . . . . . . . . . . . . . . . . . . . . . . . . . . . 241
5.11.6 Start BBU Learning Cycle . . . . . . . . . . . . . . . . . . . . . . . . . . . . . . . . . . . . . . . . . . . . . . . . . . . . . . . . . . . . . . . . . . . . . . . . . . . . . . . . . . . . . . . . 241
5.11.7 Place Battery in Low-Power Storage Mode . . . . . . . . . . . . . . . . . . . . . . . . . . . . . . . . . . . . . . . . . . . . . . . . . . . . . . . . . . . . . . . . . . . . . . . 241
5.11.8 Set BBU Properties . . . . . . . . . . . . . . . . . . . . . . . . . . . . . . . . . . . . . . . . . . . . . . . . . . . . . . . . . . . . . . . . . . . . . . . . . . . . . . . . . . . . . . . . . . . . . . 242
5.12 Options for Displaying Logs Kept at the Firmware Level . . . . . . . . . . . . . . . . . . . . . . . . . . . . . . . . . . . . . . . . . . . . . . . . . . . . . . . . . . . . . . . . . . . . . . 242
5.12.1 Event Log Management . . . . . . . . . . . . . . . . . . . . . . . . . . . . . . . . . . . . . . . . . . . . . . . . . . . . . . . . . . . . . . . . . . . . . . . . . . . . . . . . . . . . . . . . . 242
5.12.2 Set BBU Terminal Logging . . . . . . . . . . . . . . . . . . . . . . . . . . . . . . . . . . . . . . . . . . . . . . . . . . . . . . . . . . . . . . . . . . . . . . . . . . . . . . . . . . . . . . . 243
5.13 Configuration-Related Options . . . . . . . . . . . . . . . . . . . . . . . . . . . . . . . . . . . . . . . . . . . . . . . . . . . . . . . . . . . . . . . . . . . . . . . . . . . . . . . . . . . . . . . . . . . . . . 243
5.13.1 Create a RAID Drive Group from All Unconfigured-Good Drives . . . . . . . . . . . . . . . . . . . . . . . . . . . . . . . . . . . . . . . . . . . . . . . . . . . 243
5.13.2 Add RAID 0, 1, 5, or 6 Configuration . . . . . . . . . . . . . . . . . . . . . . . . . . . . . . . . . . . . . . . . . . . . . . . . . . . . . . . . . . . . . . . . . . . . . . . . . . . . . . 245
5.13.3 Add RAID 10, 50, or 60 Configuration . . . . . . . . . . . . . . . . . . . . . . . . . . . . . . . . . . . . . . . . . . . . . . . . . . . . . . . . . . . . . . . . . . . . . . . . . . . . . 246
5.13.4 Clear the Existing Configuration . . . . . . . . . . . . . . . . . . . . . . . . . . . . . . . . . . . . . . . . . . . . . . . . . . . . . . . . . . . . . . . . . . . . . . . . . . . . . . . . . 246
Page 6 LSI Corporation Confidential | July 2011

MegaRAID SAS Software User Guide Table of Contents
5.13.5 Save the Configuration on the Controller . . . . . . . . . . . . . . . . . . . . . . . . . . . . . . . . . . . . . . . . . . . . . . . . . . . . . . . . . . . . . . . . . . . . . . . . . 246
5.13.6 Restore the Configuration Data from File . . . . . . . . . . . . . . . . . . . . . . . . . . . . . . . . . . . . . . . . . . . . . . . . . . . . . . . . . . . . . . . . . . . . . . . . . 247
5.13.7 Manage Foreign Configuration Information . . . . . . . . . . . . . . . . . . . . . . . . . . . . . . . . . . . . . . . . . . . . . . . . . . . . . . . . . . . . . . . . . . . . . . 247
5.13.8 Delete Specified Virtual Drives . . . . . . . . . . . . . . . . . . . . . . . . . . . . . . . . . . . . . . . . . . . . . . . . . . . . . . . . . . . . . . . . . . . . . . . . . . . . . . . . . . . 247
5.13.9 Display the Free Space . . . . . . . . . . . . . . . . . . . . . . . . . . . . . . . . . . . . . . . . . . . . . . . . . . . . . . . . . . . . . . . . . . . . . . . . . . . . . . . . . . . . . . . . . . . 248
5.14 Virtual Drive-Related Options . . . . . . . . . . . . . . . . . . . . . . . . . . . . . . . . . . . . . . . . . . . . . . . . . . . . . . . . . . . . . . . . . . . . . . . . . . . . . . . . . . . . . . . . . . . . . . . 248
5.14.1 Display Virtual Drive Information . . . . . . . . . . . . . . . . . . . . . . . . . . . . . . . . . . . . . . . . . . . . . . . . . . . . . . . . . . . . . . . . . . . . . . . . . . . . . . . . . 248
5.14.2 Change the Virtual Drive Cache and Access Parameters . . . . . . . . . . . . . . . . . . . . . . . . . . . . . . . . . . . . . . . . . . . . . . . . . . . . . . . . . . . 248
5.14.3 Display the Virtual Drive Cache and Access Parameters . . . . . . . . . . . . . . . . . . . . . . . . . . . . . . . . . . . . . . . . . . . . . . . . . . . . . . . . . . . 249
5.14.4 Manage Virtual Drives Initialization . . . . . . . . . . . . . . . . . . . . . . . . . . . . . . . . . . . . . . . . . . . . . . . . . . . . . . . . . . . . . . . . . . . . . . . . . . . . . . 249
5.14.5 Manage a Consistency Check . . . . . . . . . . . . . . . . . . . . . . . . . . . . . . . . . . . . . . . . . . . . . . . . . . . . . . . . . . . . . . . . . . . . . . . . . . . . . . . . . . . . 249
5.14.6 Schedule a Consistency Check . . . . . . . . . . . . . . . . . . . . . . . . . . . . . . . . . . . . . . . . . . . . . . . . . . . . . . . . . . . . . . . . . . . . . . . . . . . . . . . . . . . 250
5.14.7 Manage a Background Initialization . . . . . . . . . . . . . . . . . . . . . . . . . . . . . . . . . . . . . . . . . . . . . . . . . . . . . . . . . . . . . . . . . . . . . . . . . . . . . . 250
5.14.8 Perform a Virtual Drive Reconstruction . . . . . . . . . . . . . . . . . . . . . . . . . . . . . . . . . . . . . . . . . . . . . . . . . . . . . . . . . . . . . . . . . . . . . . . . . . . 251
5.14.9 Display Information about Virtual Drives and Drives . . . . . . . . . . . . . . . . . . . . . . . . . . . . . . . . . . . . . . . . . . . . . . . . . . . . . . . . . . . . . . 252
5.14.10 Display the Bad Block Table . . . . . . . . . . . . . . . . . . . . . . . . . . . . . . . . . . . . . . . . . . . . . . . . . . . . . . . . . . . . . . . . . . . . . . . . . . . . . . . . . . . . 252
5.14.11 Display the Number of Virtual Drives . . . . . . . . . . . . . . . . . . . . . . . . . . . . . . . . . . . . . . . . . . . . . . . . . . . . . . . . . . . . . . . . . . . . . . . . . . . . 252
5.14.12 Clear the LDBBM Table Entries . . . . . . . . . . . . . . . . . . . . . . . . . . . . . . . . . . . . . . . . . . . . . . . . . . . . . . . . . . . . . . . . . . . . . . . . . . . . . . . . . . 253
5.14.13 Display the List of Virtual Drives with Preserved Cache . . . . . . . . . . . . . . . . . . . . . . . . . . . . . . . . . . . . . . . . . . . . . . . . . . . . . . . . . . . 253
5.14.14 Discard the Preserved Cache of a Virtual Drives . . . . . . . . . . . . . . . . . . . . . . . . . . . . . . . . . . . . . . . . . . . . . . . . . . . . . . . . . . . . . . . . . . 253
5.14.15 Expand a Virtual Drive . . . . . . . . . . . . . . . . . . . . . . . . . . . . . . . . . . . . . . . . . . . . . . . . . . . . . . . . . . . . . . . . . . . . . . . . . . . . . . . . . . . . . . . . . . 253
5.15 Drive-Related Options . . . . . . . . . . . . . . . . . . . . . . . . . . . . . . . . . . . . . . . . . . . . . . . . . . . . . . . . . . . . . . . . . . . . . . . . . . . . . . . . . . . . . . . . . . . . . . . . . . . . . . 254
5.15.1 Display Drive Information . . . . . . . . . . . . . . . . . . . . . . . . . . . . . . . . . . . . . . . . . . . . . . . . . . . . . . . . . . . . . . . . . . . . . . . . . . . . . . . . . . . . . . . . 254
5.15.2 Set the Drive State to Online . . . . . . . . . . . . . . . . . . . . . . . . . . . . . . . . . . . . . . . . . . . . . . . . . . . . . . . . . . . . . . . . . . . . . . . . . . . . . . . . . . . . . 254
5.15.3 Set the Drive State to Offline . . . . . . . . . . . . . . . . . . . . . . . . . . . . . . . . . . . . . . . . . . . . . . . . . . . . . . . . . . . . . . . . . . . . . . . . . . . . . . . . . . . . . 254
5.15.4 Change the Drive State to Unconfigured-Good . . . . . . . . . . . . . . . . . . . . . . . . . . . . . . . . . . . . . . . . . . . . . . . . . . . . . . . . . . . . . . . . . . . 255
5.15.5 Change the Drive State . . . . . . . . . . . . . . . . . . . . . . . . . . . . . . . . . . . . . . . . . . . . . . . . . . . . . . . . . . . . . . . . . . . . . . . . . . . . . . . . . . . . . . . . . . 255
5.15.6 Manage a Drive Initialization . . . . . . . . . . . . . . . . . . . . . . . . . . . . . . . . . . . . . . . . . . . . . . . . . . . . . . . . . . . . . . . . . . . . . . . . . . . . . . . . . . . . . 256
5.15.7 Rebuild a Drive . . . . . . . . . . . . . . . . . . . . . . . . . . . . . . . . . . . . . . . . . . . . . . . . . . . . . . . . . . . . . . . . . . . . . . . . . . . . . . . . . . . . . . . . . . . . . . . . . . 256
5.15.8 Locate the Drives and Activate LED . . . . . . . . . . . . . . . . . . . . . . . . . . . . . . . . . . . . . . . . . . . . . . . . . . . . . . . . . . . . . . . . . . . . . . . . . . . . . . 257
5.15.9 Mark the Configured Drive as Missing . . . . . . . . . . . . . . . . . . . . . . . . . . . . . . . . . . . . . . . . . . . . . . . . . . . . . . . . . . . . . . . . . . . . . . . . . . . . 257
5.15.10 Display the Drives in Missing Status . . . . . . . . . . . . . . . . . . . . . . . . . . . . . . . . . . . . . . . . . . . . . . . . . . . . . . . . . . . . . . . . . . . . . . . . . . . . . 257
5.15.11 Replace the Configured Drives and Start an Automatic Rebuild . . . . . . . . . . . . . . . . . . . . . . . . . . . . . . . . . . . . . . . . . . . . . . . . . . 258
5.15.12 Prepare the Unconfigured Drive for Removal . . . . . . . . . . . . . . . . . . . . . . . . . . . . . . . . . . . . . . . . . . . . . . . . . . . . . . . . . . . . . . . . . . . . 258
5.15.13 Display Total Number of Drives . . . . . . . . . . . . . . . . . . . . . . . . . . . . . . . . . . . . . . . . . . . . . . . . . . . . . . . . . . . . . . . . . . . . . . . . . . . . . . . . . 258
5.15.14 Display List of Physical Devices . . . . . . . . . . . . . . . . . . . . . . . . . . . . . . . . . . . . . . . . . . . . . . . . . . . . . . . . . . . . . . . . . . . . . . . . . . . . . . . . . 259
5.15.15 Download Firmware to the Physical Devices . . . . . . . . . . . . . . . . . . . . . . . . . . . . . . . . . . . . . . . . . . . . . . . . . . . . . . . . . . . . . . . . . . . . 259
5.15.16 Configure All Free Drives into a RAID 0, 1, 5, or 6 Configuration for a Specific Controller . . . . . . . . . . . . . . . . . . . . . . . . . . . 260
5.15.17 Set the Mapping Mode of the Drives to the Selected Controllers . . . . . . . . . . . . . . . . . . . . . . . . . . . . . . . . . . . . . . . . . . . . . . . . . 261
5.15.18 Secure Erase for Virtual Drives and Physical Drives . . . . . . . . . . . . . . . . . . . . . . . . . . . . . . . . . . . . . . . . . . . . . . . . . . . . . . . . . . . . . . . 261
5.15.19 Perform the Copyback Operation on the Selected Drive . . . . . . . . . . . . . . . . . . . . . . . . . . . . . . . . . . . . . . . . . . . . . . . . . . . . . . . . . 261
5.16 Enclosure-Related Options . . . . . . . . . . . . . . . . . . . . . . . . . . . . . . . . . . . . . . . . . . . . . . . . . . . . . . . . . . . . . . . . . . . . . . . . . . . . . . . . . . . . . . . . . . . . . . . . . . 262
5.16.1 Display Enclosure Information . . . . . . . . . . . . . . . . . . . . . . . . . . . . . . . . . . . . . . . . . . . . . . . . . . . . . . . . . . . . . . . . . . . . . . . . . . . . . . . . . . . 262
5.16.2 Display Enclosure Status . . . . . . . . . . . . . . . . . . . . . . . . . . . . . . . . . . . . . . . . . . . . . . . . . . . . . . . . . . . . . . . . . . . . . . . . . . . . . . . . . . . . . . . . . 263
5.16.3 Upgrading the Firmware without Restarting . . . . . . . . . . . . . . . . . . . . . . . . . . . . . . . . . . . . . . . . . . . . . . . . . . . . . . . . . . . . . . . . . . . . . 263
5.17 Flashing the Firmware . . . . . . . . . . . . . . . . . . . . . . . . . . . . . . . . . . . . . . . . . . . . . . . . . . . . . . . . . . . . . . . . . . . . . . . . . . . . . . . . . . . . . . . . . . . . . . . . . . . . . . 263
5.17.1 Flash the Firmware with the ROM File . . . . . . . . . . . . . . . . . . . . . . . . . . . . . . . . . . . . . . . . . .
. . . . . . . . . . . . . . . . . . . . . . . . . . . . . . . . . . 263
5.17.2 Flash the Firmware in Mode 0 with the ROM File . . . . . . . . . . . . . . . . . . . . . . . . . . . . . . . . . . . . . . . . . . . . . . . . . . . . . . . . . . . . . . . . . . 264
5.18 SAS Topology . . . . . . . . . . . . . . . . . . . . . . . . . . . . . . . . . . . . . . . . . . . . . . . . . . . . . . . . . . . . . . . . . . . . . . . . . . . . . . . . . . . . . . . . . . . . . . . . . . . . . . . . . . . . . . 264
5.19 Diagnostic-Related Options . . . . . . . . . . . . . . . . . . . . . . . . . . . . . . . . . . . . . . . . . . . . . . . . . . . . . . . . . . . . . . . . . . . . . . . . . . . . . . . . . . . . . . . . . . . . . . . . . 264
5.19.1 Start Controller Diagnostics . . . . . . . . . . . . . . . . . . . . . . . . . . . . . . . . . . . . . . . . . . . . . . . . . . . . . . . . . . . . . . . . . . . . . . . . . . . . . . . . . . . . . . 264
5.19.2 Perform a Full Stroke Seek Test . . . . . . . . . . . . . . . . . . . . . . . . . . . . . . . . . . . . . . . . . . . . . . . . . . . . . . . . . . . . . . . . . . . . . . . . . . . . . . . . . . 265
LSI Corporation Confidential | July 2011 Page 7

MegaRAID SAS Software User GuideTable of Contents
5.19.3 Start Battery Test . . . . . . . . . . . . . . . . . . . . . . . . . . . . . . . . . . . . . . . . . . . . . . . . . . . . . . . . . . . . . . . . . . . . . . . . . . . . . . . . . . . . . . . . . . . . . . . . 265
5.20 Recovery (Snapshot)-Related Options . . . . . . . . . . . . . . . . . . . . . . . . . . . . . . . . . . . . . . . . . . . . . . . . . . . . . . . . . . . . . . . . . . . . . . . . . . . . . . . . . . . . . . . 265
5.20.1 Enable the Snapshot Feature . . . . . . . . . . . . . . . . . . . . . . . . . . . . . . . . . . . . . . . . . . . . . . . . . . . . . . . . . . . . . . . . . . . . . . . . . . . . . . . . . . . . 265
5.20.2 Disable the Snapshot Feature . . . . . . . . . . . . . . . . . . . . . . . . . . . . . . . . . . . . . . . . . . . . . . . . . . . . . . . . . . . . . . . . . . . . . . . . . . . . . . . . . . . . 266
5.20.3 Take a Snapshot of a Volume . . . . . . . . . . . . . . . . . . . . . . . . . . . . . . . . . . . . . . . . . . . . . . . . . . . . . . . . . . . . . . . . . . . . . . . . . . . . . . . . . . . . 266
5.20.4 Set the Snapshot Properties . . . . . . . . . . . . . . . . . . . . . . . . . . . . . . . . . . . . . . . . . . . . . . . . . . . . . . . . . . . . . . . . . . . . . . . . . . . . . . . . . . . . . 266
5.20.5 Delete a Snapshot . . . . . . . . . . . . . . . . . . . . . . . . . . . . . . . . . . . . . . . . . . . . . . . . . . . . . . . . . . . . . . . . . . . . . . . . . . . . . . . . . . . . . . . . . . . . . . . 267
5.20.6 Create a View . . . . . . . . . . . . . . . . . . . . . . . . . . . . . . . . . . . . . . . . . . . . . . . . . . . . . . . . . . . . . . . . . . . . . . . . . . . . . . . . . . . . . . . . . . . . . . . . . . . 267
5.20.7 Delete a View . . . . . . . . . . . . . . . . . . . . . . . . . . . . . . . . . . . . . . . . . . . . . . . . . . . . . . . . . . . . . . . . . . . . . . . . . . . . . . . . . . . . . . . . . . . . . . . . . . . 267
5.20.8 Roll back to an Older Snapshot . . . . . . . . . . . . . . . . . . . . . . . . . . . . . . . . . . . . . . . . . . . . . . . . . . . . . . . . . . . . . . . . . . . . . . . . . . . . . . . . . . 268
5.20.9 Display Snapshot and View Information . . . . . . . . . . . . . . . . . . . . . . . . . . . . . . . . . . . . . . . . . . . . . . . . . . . . . . . . . . . . . . . . . . . . . . . . . . 268
5.20.10 Clean the Recoverable Free Space on the Drives in a Virtual Drive . . . . . . . . . . . . . . . . . . . . . . . . . . . . . . . . . . . . . . . . . . . . . . . . 268
5.20.11 Display the Information for a Specific View . . . . . . . . . . . . . . . . . . . . . . . . . . . . . . . . . . . . . . . . . . . . . . . . . . . . . . . . . . . . . . . . . . . . . . 269
5.20.12 Enable the Snapshot Scheduler . . . . . . . . . . . . . . . . . . . . . . . . . . . . . . . . . . . . . . . . . . . . . . . . . . . . . . . . . . . . . . . . . . . . . . . . . . . . . . . . . 269
5.21 FastPath-Related Options . . . . . . . . . . . . . . . . . . . . . . . . . . . . . . . . . . . . . . . . . . . . . . . . . . . . . . . . . . . . . . . . . . . . . . . . . . . . . . . . . . . . . . . . . . . . . . . . . . . 269
5.22 Dimmer Switch-Related Options . . . . . . . . . . . . . . . . . . . . . . . . . . . . . . . . . . . . . . . . . . . . . . . . . . . . . . . . . . . . . . . . . . . . . . . . . . . . . . . . . . . . . . . . . . . . 270
5.22.1 Display Selected Adapter Properties . . . . . . . . . . . . . . . . . . . . . . . . . . . . . . . . . . . . . . . . . . . . . . . . . . . . . . . . . . . . . . . . . . . . . . . . . . . . . 270
5.22.2 Sets the Properties on the Selected Adapter . . . . . . . . . . . . . . . . . . . . . . . . . . . . . . . . . . . . . . . . . . . . . . . . . . . . . . . . . . . . . . . . . . . . . . 271
5.22.3 Displays the Power-Saving Level on the Virtual Disk . . . . . . . . . . . . . . . . . . . . . . . . . . . . . . . . . . . . . . . . . . . . . . . . . . . . . . . . . . . . . . 271
5.22.4 Displays about Adding a RAID Level to a Specified Adapter . . . . . . . . . . . . . . . . . . . . . . . . . . . . . . . . . . . . . . . . . . . . . . . . . . . . . . . 272
5.22.5 Create a RAID Level . . . . . . . . . . . . . . . . . . . . . . . . . . . . . . . . . . . . . . . . . . . . . . . . . . . . . . . . . . . . . . . . . . . . . . . . . . . . . . . . . . . . . . . . . . . . . . 273
5.22.6 Add the Unconfigured Drive to a Specified Adapter . . . . . . . . . . . . . . . . . . . . . . . . . . . . . . . . . . . . . . . . . . . . . . . . . . . . . . . . . . . . . . 274
5.22.7 Displays the Cache and Access Policies . . . . . . . . . . . . . . . . . . . . . . . . . . . . . . . . . . . . . . . . . . . . . . . . . . . . . . . . . . . . . . . . . . . . . . . . . . . 275
5.23 Performance Monitoring Options . . . . . . . . . . . . . . . . . . . . . . . . . . . . . . . . . . . . . . . . . . . . . . . . . . . . . . . . . . . . . . . . . . . . . . . . . . . . . . . . . . . . . . . . . . . 275
5.23.1 Starting Performance Data Collection . . . . . . . . . . . . . . . . . . . . . . . . . . . . . . . . . . . . . . . . . . . . . . . . . . . . . . . . . . . . . . . . . . . . . . . . . . . . 275
5.23.2 Stopping Performance Data Collection . . . . . . . . . . . . . . . . . . . . . . . . . . . . . . . . . . . . . . . . . . . . . . . . . . . . . . . . . . . . . . . . . . . . . . . . . . . 276
5.23.3 Saving Performance Data . . . . . . . . . . . . . . . . . . . . . . . . . . . . . . . . . . . . . . . . . . . . . . . . . . . . . . . . . . . . . . . . . . . . . . . . . . . . . . . . . . . . . . . . 276
5.24 Miscellaneous Commands . . . . . . . . . . . . . . . . . . . . . . . . . . . . . . . . . . . . . . . . . . . . . . . . . . . . . . . . . . . . . . . . . . . . . . . . . . . . . . . . . . . . . . . . . . . . . . . . . . 276
5.24.1 Display the Version . . . . . . . . . . . . . . . . . . . . . . . . . . . . . . . . . . . . . . . . . . . . . . . . . . . . . . . . . . . . . . . . . . . . . . . . . . . . . . . . . . . . . . . . . . . . . . 276
5.24.2 Display the MegaCLI Version . . . . . . . . . . . . . . . . . . . . . . . . . . . . . . . . . . . . . . . . . . . . . . . . . . . . . . . . . . . . . . . . . . . . . . . . . . . . . . . . . . . . . 276
5.24.3 Display Help for MegaCLI . . . . . . . . . . . . . . . . . . . . . . . . . . . . . . . . . . . . . . . . . . . . . . . . . . . . . . . . . . . . . . . . . . . . . . . . . . . . . . . . . . . . . . . . 277
5.24.4 Display Summary Information . . . . . . . . . . . . . . . . . . . . . . . . . . . . . . . . . . . . . . . . . . . . . . . . . . . . . . . . . . . . . . . . . . . . . . . . . . . . . . . . . . . 277
Chapter 6: MegaRAID Storage Manager Overview and Installation . . . . . . . . . . . . . . . . . . . . . . . . . . . . . . . . . . . . . . . . . . . . . . . . . . . . . . . . . . . . . . . . . . . . . 279
6.1 Overview . . . . . . . . . . . . . . . . . . . . . . . . . . . . . . . . . . . . . . . . . . . . . . . . . . . . . . . . . . . . . . . . . . . . . . . . . . . . . . . . . . . . . . . . . . . . . . . . . . . . . . . . . . . . . . . . . . . . 279
6.1.1 Creating Storage Configurations . . . . . . . . . . . . . . . . . . . . . . . . . . . . . . . . . . . . . . . . . . . . . . . . . . . . . . . . . . . . . . . . . . . . . . . . . . . . . . . . . . 279
6.1.2 Monitoring Storage Devices . . . . . . . . . . . . . . . . . . . . . . . . . . . . . . . . . . . . . . . . . . . . . . . . . . . . . . . . . . . . . . . . . . . . . . . . . . . . . . . . . . . . . . 279
6.1.3 Maintaining Storage Configurations . . . . . . . . . . . . . . . . . . . . . . . . . . . . . . . . . . . . . . . . . . . . . . . . . . . . . . . . . . . . . . . . . . . . . . . . . . . . . . . 279
6.2 Hardware and Software Requirements . . . . . . . . . . . . . . . . . . . . . . . . . . . . . . . . . . . . . . . . . . . . . . . . . . . . . . . . . . . . . . . . . . . . . . . . . . . . . . . . . . . . . . . . 280
6.3 Prerequisites to Running MegaRAID Storage Manager Remote Administration . . . . . . . . . . . . . . . . . . . . . . . . . . . . . . . . . . . . . . . . . . . . . . . . . 280
6.4 Installing MegaRAID Storage Manager . . . . . . . . . . . . . . . . . . . . . . . . . . . . . . . . . . . . . . . . . . . . . . . . . . . . . . . . . . . . . . . . . . . . . . . . . . . . . . . . . . . . . . . . 281
6.4.1 Prerequisite for MegaRAID Storage Manager Installation . . . . . . . . . . . . . . . . . . . . . . . . . . . . . . . . . . . . . . . . . . . . . . . . . . . . . . . . . . . 281
6.4.2 Installing MegaRAID Storage Manager Software on Microsoft Windows . . . . . . . . . . . . . . . . . . . . . . . . . . . . . . . . . . . . . . . . . . . . 281
6.4.3 Installing MegaRAID Storage Manager for the Solaris SPARC Operating System . . . . . . . . . . . . . . . . . . . . . . . . . . . . . . . . . . . . . 286
6.4.4 Uninstalling MegaRAID Storage Manager Software for Solaris SPARC Operating System . . . . . . . . . . . . . . . . . . . . . . . . . . . . 286
6.4.5 Installing MegaRAID Storage Manager for Linux Operating System . . . . . . . . . . . . . . . . . . . . . . . . . . . . . . . . . . . . . . . . . . . . . . . . . 287
6.4.6 Prerequisites for Installing MegaRAID Storage Manager on the RHEL6.0 x64 Operating System . . . . . . . . . . . . . . . .
. . . . . . 288
6.4.7 Linux Error Messages . . . . . . . . . . . . . . . . . . . . . . . . . . . . . . . . . . . . . . . . . . . . . . . . . . . . . . . . . . . . . . . . . . . . . . . . . . . . . . . . . . . . . . . . . . . . . 288
6.4.8 Kernel Upgrade . . . . . . . . . . . . . . . . . . . . . . . . . . . . . . . . . . . . . . . . . . . . . . . . . . . . . . . . . . . . . . . . . . . . . . . . . . . . . . . . . . . . . . . . . . . . . . . . . . . 289
6.4.9 Uninstalling MegaRAID Storage Manager Software on Linux . . . . . . . . . . . . . . . . . . . . . . . . . . . . . . . . . . . . . . . . . . . . . . . . . . . . . . . 289
6.4.10 MegaRAID Storage Manager Customization . . . . . . . . . . . . . . . . . . . . . . . . . . . . . . . . . . . . . . . . . . . . . . . . . . . . . . . . . . . . . . . . . . . . . . 290
6.5 MegaRAID Storage Manager Support and Installation on VMware . . . . . . . . . . . . . . . . . . . . . . . . . . . . . . . . . . . . . . . . . . . . . . . . . . . . . . . . . . . . . 291
6.5.1 Pre-requisites for Installing MegaRAID Storage Manager for VMware . . . . . . . . . . . . . . . . . . . . . . . . . . . . . . . . . . . . . . . . . . . . . . . 291
Page 8 LSI Corporation Confidential | July 2011

MegaRAID SAS Software User Guide Table of Contents
6.5.2 Installing MegaRAID Storage Manager on VMware ESX (VMware Classic) . . . . . . . . . . . . . . . . . . . . . . . . . . . . . . . . . . . . . . . . . . . 291
6.5.3 Uninstalling MegaRAID Storage Manager for VMware . . . . . . . . . . . . . . . . . . . . . . . . . . . . . . . . . . . . . . . . . . . . . . . . . . . . . . . . . . . . . . 291
6.5.4 MegaRAID Storage Manager Support on the VMware ESXi Operating System . . . . . . . . . . . . . . . . . . . . . . . . . . . . . . . . . . . . . . . 292
6.5.5 Limitations . . . . . . . . . . . . . . . . . . . . . . . . . . . . . . . . . . . . . . . . . . . . . . . . . . . . . . . . . . . . . . . . . . . . . . . . . . . . . . . . . . . . . . . . . . . . . . . . . . . . . . . 292
6.6 Installing and Configuring a CIM Provider . . . . . . . . . . . . . . . . . . . . . . . . . . . . . . . . . . . . . . . . . . . . . . . . . . . . . . . . . . . . . . . . . . . . . . . . . . . . . . . . . . . . . 294
6.6.1 Installing a CIM SAS Storage Provider on the Linux Operating System . . . . . . . . . . . . . . . . . . . . . . . . . . . . . . . . . . . . . . . . . . . . . . 294
6.6.2 Installing a CIM SAS Storage Provider on Windows . . . . . . . . . . . . . . . . . . . . . . . . . . . . . . . . . . . . . . . . . . . . . . . . . . . . . . . . . . . . . . . . . 295
6.7 Installing and Configuring an SNMP Agent . . . . . . . . . . . . . . . . . . . . . . . . . . . . . . . . . . . . . . . . . . . . . . . . . . . . . . . . . . . . . . . . . . . . . . . . . . . . . . . . . . . . 295
6.7.1 Prerequisite for LSI SNMP Agent RPM Installation . . . . . . . . . . . . . . . . . . . . . . . . . . . . . . . . . . . . . . . . . . . . . . . . . . . . . . . . . . . . . . . . . . 296
6.7.2 Prerequisite for Installing SNMP Agent on Linux Server . . . . . . . . . . . . . . . . . . . . . . . . . . . . . . . . . . . . . . . . . . . . . . . . . . . . . . . . . . . . 296
6.7.3 Installing and Configuring an SNMP Agent on a Linux Operating System . . . . . . . . . . . . . . . . . . . . . . . . . . . . . . . . . . . . . . . . . . . 296
6.7.4 Installing and Configuring an SNMP Agent on the Solaris Operating System . . . . . . . . . . . . . . . . . . . . . . . . . . . . . . . . . . . . . . . . 298
6.7.5 Installing an SNMP Agent on the Windows Operating System . . . . . . . . . . . . . . . . . . . . . . . . . . . . . . . . . . . . . . . . . . . . . . . . . . . . . . 300
6.8 MegaRAID Storage Manager Support and Installation on the Solaris 10 Operating System . . . . . . . . . . . . . . . . . . . . . . . . . . . . . . . . . . . . . . 302
6.8.1 Installing MegaRAID Storage Manager Software for the Solaris 10 Operating System . . . . . . . . . . . . . . . . . . . . . . . . . . . . . . . . 302
6.8.2 Uninstalling MegaRAID Storage Manager Software for the Solaris 10 Operating System . . . . . . . . . . . . . . . . . . . . . . . . . . . . . 302
6.9 Installing MegaCLI for VMware 5.0 . . . . . . . . . . . . . . . . . . . . . . . . . . . . . . . . . . . . . . . . . . . . . . . . . . . . . . . . . . . . . . . . . . . . . . . . . . . . . . . . . . . . . . . . . . . . 302
6.10 MegaRAID Storage Manager Remotely Connecting to VMware ESX . . . . . . . . . . . . . . . . . . . . . . . . . . . . . . . . . . . . . . . . . . . . . . . . . . . . . . . . . . . 303
6.11 Prerequisites to Running MegaRAID Storage Manager Remote Administration . . . . . . . . . . . . . . . . . . . . . . . . . . . . . . . . . . . . . . . . . . . . . . . 303
Chapter 7: MegaRAID Storage Manager Window and Menus . . . . . . . . . . . . . . . . . . . . . . . . . . . . . . . . . . . . . . . . . . . . . . . . . . . . . . . . . . . . . . . . . . . . . . . . . . . 305
7.1 Starting the MegaRAID Storage Manager Software . . . . . . . . . . . . . . . . . . . . . . . . . . . . . . . . . . . . . . . . . . . . . . . . . . . . . . . . . . . . . . . . . . . . . . . . . . . . 305
7.2 MegaRAID Storage Manager Main Menu . . . . . . . . . . . . . . . . . . . . . . . . . . . . . . . . . . . . . . . . . . . . . . . . . . . . . . . . . . . . . . . . . . . . . . . . . . . . . . . . . . . . . . 309
7.2.1 Dashboard, Physical View, Logical View . . . . . . . . . . . . . . . . . . . . . . . . . . . . . . . . . . . . . . . . . . . . . . . . . . . . . . . . . . . . . . . . . . . . . . . . . . . 310
7.2.2 Shield State . . . . . . . . . . . . . . . . . . . . . . . . . . . . . . . . . . . . . . . . . . . . . . . . . . . . . . . . . . . . . . . . . . . . . . . . . . . . . . . . . . . . . . . . . . . . . . . . . . . . . . 314
7.2.3 Shield State Physical View . . . . . . . . . . . . . . . . . . . . . . . . . . . . . . . . . . . . . . . . . . . . . . . . . . . . . . . . . . . . . . . . . . . . . . . . . . . . . . . . . . . . . . . . . 314
7.2.4 Logical View Shield State . . . . . . . . . . . . . . . . . . . . . . . . . . . . . . . . . . . . . . . . . . . . . . . . . . . . . . . . . . . . . . . . . . . . . . . . . . . . . . . . . . . . . . . . . 315
7.2.5 Viewing the Physical Drive Properties . . . . . . . . . . . . . . . . . . . . . . . . . . . . . . . . . . . . . . . . . . . . . . . . . . . . . . . . . . . . . . . . . . . . . . . . . . . . . 315
7.2.6 Viewing Server Profile of a Drive in Shield State . . . . . . . . . . . . . . . . . . . . . . . . . . . . . . . . . . . . . . . . . . . . . . . . . . . . . . . . . . . . . . . . . . . . 316
7.2.7 Displaying the Virtual Drive Properties . . . . . . . . . . . . . . . . . . . . . . . . . . . . . . . . . . . . . . . . . . . . . . . . . . . . . . . . . . . . . . . . . . . . . . . . . . . . 317
7.2.8 Emergency HotSpare Support . . . . . . . . . . . . . . . . . . . . . . . . . . . . . . . . . . . . . . . . . . . . . . . . . . . . . . . . . . . . . . . . . . . . . . . . . . . . . . . . . . . . . 320
7.2.9 SSD Disk Cache Policy . . . . . . . . . . . . . . . . . . . . . . . . . . . . . . . . . . . . . . . . . . . . . . . . . . . . . . . . . . . . . . . . . . . . . . . . . . . . . . . . . . . . . . . . . . . . 322
7.2.10 Non-SED Secure Erase Support . . . . . . . . . . . . . . . . . . . . . . . . . . . . . . . . . . . . . . . . . . . . . . . . . . . . . . . . . . . . . . . . . . . . . . . . . . . . . . . . . . 324
7.2.11 Rebuild Write Cache . . . . . . . . . . . . . . . . . . . . . . . . . . . . . . . . . . . . . . . . . . . . . . . . . . . . . . . . . . . . . . . . . . . . . . . . . . . . . . . . . . . . . . . . . . . . . 329
7.2.12 Background Suspend or Resume Support . . . . . . . . . . . . . . . . . . . . . . . . . . . . . . . . . . . . . . . . . . . . . . . . . . . . . . . . . . . . . . . . . . . . . . . . 330
7.2.13 Enclosure Properties . . . . . . . . . . . . . . . . . . . . . . . . . . . . . . . . . . . . . . . . . . . . . . . . . . . . . . . . . . . . . . . . . . . . . . . . . . . . . . . . . . . . . . . . . . . . . 331
7.3 Monitoring Battery Backup Units . . . . . . . . . . . . . . . . . . . . . . . . . . . . . . . . . . . . . . . . . . . . . . . . . . . . . . . . . . . . . . . . . . . . . . . . . . . . . . . . . . . . . . . . . . . . . 331
7.3.1 Properties and Graphical View Tabs . . . . . . . . . . . . . . . . . . . . . . . . . . . . . . . . . . . . . . . . . . . . . . . . . . . . . . . . . . . . . . . . . . . . . . . . . . . . . . . 334
7.3.2 Event Log Panel . . . . . . . . . . . . . . . . . . . . . . . . . . . . . . . . . . . . . . . . . . . . . . . . . . . . . . . . . . . . . . . . . . . . . . . . . . . . . . . . . . . . . . . . . . . . . . . . . . 335
7.3.3 Menu Bar . . . . . . . . . . . . . . . . . . . . . . . . . . . . . . . . . . . . . . . . . . . . . . . . . . . . . . . . . . . . . . . . . . . . . . . . . . . . . . . . . . . . . . . . . . . . . . . . . . . . . . . . . 335
Chapter 8: Configuration . . . . . . . . . . . . . . . . . . . . . . . . . . . . . . . . . . . . . . . . . . . . . . . . . . . . . . . . . . . . . . . . . . . . . . . . . . . . . . . . . . . . . . . . . . . . . . . . . . . . . . . . . . . . . . . . 337
8.1 Creating a New Storage Configuration . . . . . . . . . . . . . . . . . . . . . . . . . . . . . . . . . . . . . . . . . . . . . . . . . . . . . . . . . . . . . . . . . . . . . . . . . . . . . . . . . . . . . . . . 337
8.1.1 Selecting Virtual Drive Settings . . . . . . . . . . . . . . . . . . . . . . . . . . . . . . . . . . . . . . . . . . . . . . . . . . . . . . . . . . . . . . . . . . . . . . . . . . . . . . . . . . . . 337
8.1.2 Optimum Controller Settings for CacheCade . . . . . . . . . . . . . . . . . . . . . . . . . . . . . . . . . . . . . . . . . . . . . . . . . . . . . . . . . . . . . . . . . . . . . . 339
8.1.3 Optimum Controller Settings for FastPath . . . . . . . . . . . . . . . . . . . . . . . . . . . . . . . . . . . . . . . . . . . . . . . . . . . . . . . . . . . . . . . . . . . . . . . . . 339
8.1.4 Creating a Virtual Drive Using Simple Configuration . . . . . . . . . . . . . . . . . . . . . . . . . . . . . . . . . . . . . . . . . . . . . . . . . . . . . . . . . . . . . . . 339
8.1.5 Creating a Virtual Drive using Advanced Configuration . . . . . . . . . . . . . . . . . . . . . . . . . . . . . . . . . . . . . . . . . . . . . . . . . . . . . . . . . . . . 344
8.2 Converting JBOD Drives to Unconfigured Good . . . . . . . . . . . . . . . . . . . . . . . . . . . . . . . . . . . . . . . . . . . . . . . . . . . . . . . . . . . . . . . . . . . . . . . . . . . . . . . 350
8.2.1 Converting JBOD to Unconfigured Good from the MegaRAID Storage Manager Window . . . . . . . . . . . . . . . . . . . . . . . . . . . . 351
LSI Corporation Confidential | July 2011 Page 9

MegaRAID SAS Software User GuideTable of Contents
8.3 Adding Hot Spare Drives . . . . . . . . . . . . . . . . . . . . . . . . . . . . . . . . . . . . . . . . . . . . . . . . . . . . . . . . . . . . . . . . . . . . . . . . . . . . . . . . . . . . . . . . . . . . . . . . . . . . . 352
8.4 Changing Adjustable Task Rates . . . . . . . . . . . . . . . . . . . . . . . . . . . . . . . . . . . . . . . . . . . . . . . . . . . . . . . . . . . . . . . . . . . . . . . . . . . . . . . . . . . . . . . . . . . . . . 353
8.5 Changing Power Settings . . . . . . . . . . . . . . . . . . . . . . . . . . . . . . . . . . . . . . . . . . . . . . . . . . . . . . . . . . . . . . . . . . . . . . . . . . . . . . . . . . . . . . . . . . . . . . . . . . . . 355
8.5.1 Enhanced Dimmer Switch Power Settings . . . . . . . . . . . . . . . . . . . . . . . . . . . . . . . . . . . . . . . . . . . . . . . . . . . . . . . . . . . . . . . . . . . . . . . . . 356
8.5.2 Power Save Settings — Advanced . . . . . . . . . . . . . . . . . . . . . . . . . . . . . . . . . . . . . . . . . . . . . . . . . . . . . . . . . . . . . . . . . . . . . . . . . . . . . . . . . . 358
8.5.3 Automatically Spin Up Drives . . . . . . . . . . . . . . . . . . . . . . . . . . . . . . . . . . . . . . . . . . . . . . . . . . . . . . . . . . . . . . . . . . . . . . . . . . . . . . . . . . . . . 359
8.5.4 Power-Save Mode . . . . . . . . . . . . . . . . . . . . . . . . . . . . . . . . . . . . . . . . . . . . . . . . . . . . . . . . . . . . . . . . . . . . . . . . . . . . . . . . . . . . . . . . . . . . . . . . 360
8.5.5 Power Save Mode — SSD Drives . . . . . . . . . . . . . . . . . . . . . . . . . . . . . . . . . . . . . . . . . . . . . . . . . . . . . . . . . . . . . . . . . . . . . . . . . . . . . . . . . . . . 361
8.6 Changing Virtual Drive Properties . . . . . . . . . . . . . . . . . . . . . . . . . . . . . . . . . . . . . . . . . . . . . . . . . . . . . . . . . . . . . . . . . . . . . . . . . . . . . . . . . . . . . . . . . . . . 361
8.7 Changing a Virtual Drive Configuration . . . . . . . . . . . . . . . . . . . . . . . . . . . . . . . . . . . . . . . . . . . . . . . . . . . . . . . . . . . . . . . . . . . . . . . . . . . . . . . . . . . . . . . 363
8.7.1 Accessing the Modify Drive Group Wizard . . . . . . . . . . . . . . . . . . . . . . . . . . . . . . . . . . . . . . . . . . . . . . . . . . . . . . . . . . . . . . . . . . . . . . . . . 363
8.7.2 Adding a Drive or Drives to a Configuration . . . . . . . . . . . . . . . . . . . . . . . . . . . . . . . . . . . . . . . . . . . . . . . . . . . . . . . . . . . . . . . . . . . . . . . 365
8.7.3 Removing a Drive from a Configuration . . . . . . . . . . . . . . . . . . . . . . . . . . . . . . . . . . . . . . . . . . . . . . . . . . . . . . . . . . . . . . . . . . . . . . . . . . . 367
8.7.4 Replacing a Drive . . . . . . . . . . . . . . . . . . . . . . . . . . . . . . . . . . . . . . . . . . . . . . . . . . . . . . . . . . . . . . . . . . . . . . . . . . . . . . . . . . . . . . . . . . . . . . . . . 367
8.7.5 Migrating the RAID Level of a Virtual Drive . . . . . . . . . . . . . . . . . . . . . . . . . . . . . . . . . . . . . . . . . . . . . . . . . . . . . . . . . . . . . . . . . . . . . . . . 368
8.7.6 New Drives Attached to a MegaRAID Controller . . . . . . . . . . . . . . . . . . . . . . . . . . . . . . . . . . . . . . . . . . . . . . . . . . . . . . . . . . . . . . . . . . . 370
8.8 Deleting a Virtual Drive . . . . . . . . . . . . . . . . . . . . . . . . . . . . . . . . . . . . . . . . . . . . . . . . . . . . . . . . . . . . . . . . . . . . . . . . . . . . . . . . . . . . . . . . . . . . . . . . . . . . . . 371
Chapter 9: Monitoring Controllers and Its Attached Devices . . . . . . . . . . . . . . . . . . . . . . . . . . . . . . . . . . . . . . . . . . . . . . . . . . . . . . . . . . . . . . . . . . . . . . . . . . . . 373
9.1 Alert Delivery Methods . . . . . . . . . . . . . . . . . . . . . . . . . . . . . . . . . . . . . . . . . . . . . . . . . . . . . . . . . . . . . . . . . . . . . . . . . . . . . . . . . . . . . . . . . . . . . . . . . . . . . . . 373
9.1.1 Vivaldi Log / MegaRAID Storage Manager Log . . . . . . . . . . . . . . . . . . . . . . . . . . . . . . . . . . . . . . . . . . . . . . . . . . . . . . . . . . . . . . . . . . . . . 374
9.1.2 System Log . . . . . . . . . . . . . . . . . . . . . . . . . . . . . . . . . . . . . . . . . . . . . . . . . . . . . . . . . . . . . . . . . . . . . . . . . . . . . . . . . . . . . . . . . . . . . . . . . . . . . . . 375
9.1.3 Pop-up Notification . . . . . . . . . . . . . . . . . . . . . . . . . . . . . . . . . . . . . . . . . . . . . . . . . . . . . . . . . . . . . . . . . . . . . . . . . . . . . . . . . . . . . . . . . . . . . . . 375
9.1.4 E-mail Notification . . . . . . . . . . . . . . . . . . . . . . . . . . . . . . . . . . . . . . . . . . . . . . . . . . . . . . . . . . . . . . . . . . . . . . . . . . . . . . . . . . . . . . . . . . . . . . . . 375
9.2 Configuring Alert Notifications . . . . . . . . . . . . . . . . . . . . . . . . . . . . . . . . . . . . . . . . . . . . . . . . . . . . . . . . . . . . . . . . . . . . . . . . . . . . . . . . . . . . . . . . . . . . . . . 376
9.3 Editing Alert Delivery Methods . . . . . . . . . . . . . . . . . . . . . . . . . . . . . . . . . . . . . . . . . . . . . . . . . . . . . . . . . . . . . . . . . . . . . . . . . . . . . . . . . . . . . . . . . . . . . . . 378
9.4 Changing Alert Delivery Methods for Individual Events . . . . . . . . . . . . . . . . . . . . . . . . . . . . . . . . . . . . . . . . . . . . . . . . . . . . . . . . . . . . . . . . . . . . . . . . 379
9.5 Changing the Severity Level for Individual Events . . . . . . . . . . . . . . . . . . . . . . . . . . . . . . . . . . . . . . . . . . . . . . . . . . . . . . . . . . . . . . . . . . . . . . . . . . . . . 380
9.6 Rollback to Default Individual Event Configuration . . . . . . . . . . . . . . . . . . . . . . . . . . . . . . . . . . . . . . . . . . . . . . . . . . . . . . . . . . . . . . . . . . . . . . . . . . . . 381
9.7 Entering or Editing the Sender Email Address and SMTP Server . . . . . . . . . . . . . . . . . . . . . . . . . . . . . . . . . . . . . . . . . . . . . . . . . . . . . . . . . . . . . . . . 381
9.8 Authenticating the SMTP Server . . . . . . . . . . . . . . . . . . . . . . . . . . . . . . . . . . . . . . . . . . . . . . . . . . . . . . . . . . . . . . . . . . . . . . . . . . . . . . . . . . . . . . . . . . . . . . 382
9.9 Adding Email Addresses of Recipients of Alert Notifications . . . . . . . . . . . . . . . . . . . . . . . . . . . . . . . . . . . . . . . . . . . . . . . . . . . . . . . . . . . . . . . . . . . 383
9.10 Testing Email Addresses of Recipients of Alert Notifications . . . . . . . . . . . . . . . . . . . . . . . . . . . . . . . . . . . . . . . . . . . . . . . . . . . . . . . . . . . . . . . . . . 383
9.11 Removing Email Addresses of Recipients of Alert Notifications . . . . . . . . . . . . . . . . . . . . . . . . . . . . . . . . . . . . . . . . . . . . . . . . . . . . . . . . . . . . . . . 384
9.12 Saving Backup Configurations . . . . . . . . . . . . . . . . . . . . . . . . . . . . . . . . . . . . . . . . . . . . . . . . . . . . . . . . . . . . . . . . . . . . . . . . . . . . . . . . . . . . . . . . . . . . . . 384
9.13 Loading Backup Configurations . . . . . . . . . . . . . . . . . . . . . . . . . . . . . . . . . . . . . . . . . . . . . . . . . . . . . . . . . . . . . . . . . . . . . . . . . . . . . . . . . . . . . . . . . . . . . 384
9.14 Monitoring Server Events . . . . . . . . . . . . . . . . . . . . . . . . . . . . . . . . . . . . . . . . . . . . . . . . . . . . . . . . . . . . . . . . . . . . . . . . . . . . . . . . . . . . . . . . . . . . . . . . . . . 385
9.15 Monitoring Controllers . . . . . . . . . . . . . . . . . . . . . . . . . . . . . . . . . . . . . . . . . . . . . . . . . . . . . . . . . . . . . . . . . . . . . . . . . . . . . . . . . . . . . . . . . . . . . . . . . . . . . . 385
9.16 Monitoring Drives . . . . . . . . . . . . . . . . . . . . . . . . . . . . . . . . . . . . . . . . . . . . . . . . . . . . . . . . . . . . . . . . . . . . . . . . . . . . . . . . . . . . . . . . . . . . . . . . . . . . . . . . . . 386
9.17 Running a Patrol Read . . . . . . . . . . . . . . . . . . . . . . . . . . . . . . . . . . . . . . . . . . . . . . . . . . . . . . . . . . . . . . . . . . . . . . . . . . . . . . . . . . . . . . . . . . . . . . . . . . . . . . 387
9.18 Monitoring Virtual Drives . . . . . . . . . . . . . . . . . . . . . . . . . . . . . . . . . . . . . . . . . . . . . . . . . . . . . . . . . . . . . . . . . . . . . . . . . . . . . . . . . . . . . . . . . . . . . . . . . . . 389
9.19 Monitoring Enclosures . . . . . . . . . . . . . . . . . . . . . . . . . . . . . . . . . . . . . . . . . . . . . . . . . . . . . . . . . . . . . . . . . . . . . . . . . . . . . . . . . . . . . . . . . . . . . . . . . . . . . . 390
9.19.1 Monitoring Battery Backup Units . . . . . . . . . . . . . . . . . . . . . . . . . . . . . . . . . . . . . . . . . . . . . . . . . . . . . . . . . . . . . . . . . . . . . . . . . . . . . . . . . 391
9.20 Battery Learn Cycle . . . . . . . . . . . . . . . . . . . . . . . . . . . . . . . . . . . . . . . . . . . . . . . . . . . . . . . . . . . . . . . . . . . . . . . . . . . . . . . . . . . . . . . . . . . . . . . . . . . . . . . . . 392
9.20.1 Setting Learn Cycle Properties . . . . . . . . . . . . . . . . . . . . . . . . . . . . . . . . . . . . . . . . . . . . . . . . . . . . . . . . . . . . . . . . . . . . . . . . . . . . . . . . . . . 392
9.20.2 Starting a Learn Cycle Manually . . . . . . . . . . . . . . . . . . . . . . . . . . . . . . . . . . . . . . . . . . . . . . . . . . . . . . . . . . . . . . . . . . . . . . . . . . . . . . . . . . 393
9.21 Monitoring Rebuilds and Other Processes . . . . . . . . . . . . . . . . . . . . . . . . . . . . . . . . . . . . . . . . . . . . . . . . . . . . . . . . . . . . . . . . . . . . . . . . . . . . . . . . . . . 394
Page 10 LSI Corporation Confidential | July 2011

MegaRAID SAS Software User Guide Table of Contents
Chapter 10: Maintaining and Managing Storage Configurations . . . . . . . . . . . . . . . . . . . . . . . . . . . . . . . . . . . . . . . . . . . . . . . . . . . . . . . . . . . . . . . . . . . . . . . . 397
10.1 Initializing a Virtual Drive . . . . . . . . . . . . . . . . . . . . . . . . . . . . . . . . . . . . . . . . . . . . . . . . . . . . . . . . . . . . . . . . . . . . . . . . . . . . . . . . . . . . . . . . . . . . . . . . . . . 397
10.1.1 Running a Group Initialization . . . . . . . . . . . . . . . . . . . . . . . . . . . . . . . . . . . . . . . . . . . . . . . . . . . . . . . . . . . . . . . . . . . . . . . . . . . . . . . . . . . 398
10.2 Running a Consistency Check . . . . . . . . . . . . . . . . . . . . . . . . . . . . . . . . . . . . . . . . . . . . . . . . . . . . . . . . . . . . . . . . . . . . . . . . . . . . . . . . . . . . . . . . . . . . . . . 398
10.2.1 Setting the Consistency Check Settings . . . . . . . . . . . . . . . . . . . . . . . . . . . . . . . . . . . . . . . . . . . . . . . . . . . . . . . . . . . . . . . . . . . . . . . . . . 399
10.2.2 Scheduling a Consistency Check . . . . . . . . . . . . . . . . . . . . . . . . . . . . . . . . . . . . . . . . . . . . . . . . . . . . . . . . . . . . . . . . . . . . . . . . . . . . . . . . . 400
10.2.3 Running a Group Consistency Check . . . . . . . . . . . . . . . . . . . . . . . . . . . . . . . . . . . . . . . . . . . . . . . . . . . . . . . . . . . . . . . . . . . . . . . . . . . . . 402
10.3 Scanning for New Drives . . . . . . . . . . . . . . . . . . . . . . . . . . . . . . . . . . . . . . . . . . . . . . . . . . . . . . . . . . . . . . . . . . . . . . . . . . . . . . . . . . . . . . . . . . . . . . . . . . . . 403
10.4 Rebuilding a Drive . . . . . . . . . . . . . . . . . . . . . . . . . . . . . . . . . . . . . . . . . . . . . . . . . . . . . . . . . . . . . . . . . . . . . . . . . . . . . . . . . . . . . . . . . . . . . . . . . . . . . . . . . . 403
10.4.1 New Drives Attached to a MegaRAID Controller . . . . . . . . . . . . . . . . . . . . . . . . . . . . . . . . . . . . . . . . . . . . . . . . . . . . . . . . . . . . . . . . . . 404
10.5 Making a Drive Offline or Missing . . . . . . . . . . . . . . . . . . . . . . . . . . . . . . . . . . . . . . . . . . . . . . . . . . . . . . . . . . . . . . . . . . . . . . . . . . . . . . . . . . . . . . . . . . . 405
10.6 Removing a Drive . . . . . . . . . . . . . . . . . . . . . . . . . . . . . . . . . . . . . . . . . . . . . . . . . . . . . . . . . . . . . . . . . . . . . . . . . . . . . . . . . . . . . . . . . . . . . . . . . . . . . . . . . . . 405
10.7 Upgrading the Firmware . . . . . . . . . . . . . . . . . . . . . . . . . . . . . . . . . . . . . . . . . . . . . . . . . . . . . . . . . . . . . . . . . . . . . . . . . . . . . . . . . . . . . . . . . . . . . . . . . . . . 406
Chapter 11: Using MegaRAID Advanced Software . . . . . . . . . . . . . . . . . . . . . . . . . . . . . . . . . . . . . . . . . . . . . . . . . . . . . . . . . . . . . . . . . . . . . . . . . . . . . . . . . . . . . . . 407
11.1 MegaRAID Advanced Software . . . . . . . . . . . . . . . . . . . . . . . . . . . . . . . . . . . . . . . . . . . . . . . . . . . . . . . . . . . . . . . . . . . . . . . . . . . . . . . . . . . . . . . . . . . . . . 407
11.2 Recovery Advanced Software . . . . . . . . . . . . . . . . . . . . . . . . . . . . . . . . . . . . . . . . . . . . . . . . . . . . . . . . . . . . . . . . . . . . . . . . . . . . . . . . . . . . . . . . . . . . . . . 407
11.2.1 MegaRAID Software Licensing . . . . . . . . . . . . . . . . . . . . . . . . . . . . . . . . . . . . . . . . . . . . . . . . . . . . . . . . . . . . . . . . . . . . . . . . . . . . . . . . . . . 407
11.2.2 Managing MegaRAID Advanced Software . . . . . . . . . . . . . . . . . . . . . . . . . . . . . . . . . . . . . . . . . . . . . . . . . . . . . . . . . . . . . . . . . . . . . . . . 408
11.2.3 Activation Key . . . . . . . . . . . . . . . . . . . . . . . . . . . . . . . . . . . . . . . . . . . . . . . . . . . . . . . . . . . . . . . . . . . . . . . . . . . . . . . . . . . . . . . . . . . . . . . . . . . 410
11.2.4 Advanced MegaRAID Software Status Summary . . . . . . . . . . . . . . . . . . . . . . . . . . . . . . . . . . . . . . . . . . . . . . . . . . . . . . . . . . . . . . . . . . 411
11.2.5 Application Scenarios and Messages . . . . . . . . . . . . . . . . . . . . . . . . . . . . . . . . . . . . . . . . . . . . . . . . . . . . . . . . . . . . . . . . . . . . . . . . . . . . . 412
11.2.6 Activating an Unlimited Key Over a Trial Key . . . . . . . . . . . . . . . . . . . . . . . . . . . . . . . . . . . . . . . . . . . . . . . . . . . . . . . . . . . . . . . . . . . . . 413
11.2.7 Configuring Key Vault (Re-hosting process) . . . . . . . . . . . . . . . . . . . . . . . . . . . . . . . . . . . . . . . . . . . . . . . . . . . . . . . . . . . . . . . . . . . . . . 416
11.2.8 Re-hosting Complete . . . . . . . . . . . . . . . . . . . . . . . . . . . . . . . . . . . . . . . . . . . . . . . . . . . . . . . . . . . . . . . . . . . . . . . . . . . . . . . . . . . . . . . . . . . . 418
11.2.9 Deactivate Trial Software . . . . . . . . . . . . . . . . . . . . . . . . . . . . . . . . . . . . . . . . . . . . . . . . . . . . . . . . . . . . . . . . . . . . . . . . . . . . . . . . . . . . . . . . 419
11.2.10 MegaRAID Recovery . . . . . . . . . . . . . . . . . . . . . . . . . . . . . . . . . . . . . . . . . . . . . . . . . . . . . . . . . . . . . . . . . . . . . . . . . . . . . . . . . . . . . . . . . . . . 420
11.2.11 Recovery Scenarios . . . . . . . . . . . . . . . . . . . . . . . . . . . . . . . . . . . . . . . . . . . . . . . . . . . . . . . . . . . . . . . . . . . . . . . . . . . . . . . . . . . . . . . . . . . . . 420
11.2.12 Enabling the Recovery Advanced Software . . . . . . . . . . . . . . . . . . . . . . . . . . . . . . . . . . . . . . . . . . . . . . . . . . . . . . . . . . . . . . . . . . . . . . 421
11.2.13 Snapshot Repository . . . . . . . . . . . . . . . . . . . . . . . . . . . . . . . . . . . . . . . . . . . . . . . . . . . . . . . . . . . . . . . . . . . . . . . . . . . . . . . . . . . . . . . . . . . 422
11.2.14 Selecting the Virtual Drive . . . . . . . . . . . . . . . . . . . . . . . . . . . . . . . . . . . . . . . . . . . . . . . . . . . . . . . . . . . . . . . . . . . . . . . . . . . . . . . . . . . . . . 424
11.2.15 Scheduling Snapshots . . . . . . . . . . . . . . . . . . . . . . . . . . . . . . . . . . . . . . . . . . . . . . . . . . . . . . . . . . . . . . . . . . . . . . . . . . . . . . . . . . . . . . . . . . 425
11.2.16 Editing Snapshots . . . . . . . . . . . . . . . . . . . . . . . . . . . . . . . . . . . . . . . . . . . . . . . . . . . . . . . . . . . . . . . . . . . . . . . . . . . . . . . . . . . . . . . . . . . . . . 427
11.2.17 Snapshot Base Details . . . . . . . . . . . . . . . . . . . . . . . . . . . . . . . . . . . . . . . . . . . . . . . . . . . . . . . . . . . . . . . . . . . . . . . . . . . . . . . . . . . . . . . . . . 429
11.2.18 Manage Snapshots . . . . . . . . . . . . . . . . . . . . . . . . . . . . . . . . . . . . . . . . . . . . . . . . . . . . . . . . . . . . . . . . . . . . . . . . . . . . . . . . . . . . . . . . . . . . . 430
11.2.19 Editing Schedule . . . . . . . . . . . . . . . . . . . . . . . . . . . . . . . . . . . . . . . . . . . . . . . . . . . . . . . . . . . . . . . . . . . . . . . . . . . . . . . . . . . . . . . . . . . . . . . 431
11.2.20 Advanced Settings . . . . . . . . . . . . . . . . . . . . . . . . . . . . . . . . . . . . . . . . . . . . . . . . . . . . . . . . . . . . . . . . . . . . . . . . . . . . . . . . . . . . . . . . . . . . . 432
11.2.21 Create View Using Manage Snapshots Wizard . . . . . . . . . . . . . . . . . . . . . . . . . . . . . . . . . . . . . . . . . . . . . . . . . . . . . . . . . . . . . . . . . . . 433
11.2.22 Viewing Snapshot Details . . . . . . . . . . . . . . . . . . . . . . . . . . . . . . . . . . . . . . . . . . . . . . . . . . . . . . . . . . . . . . . . . . . . . . . . . . . . . . . . . . . . . . 434
11.2.23 No View Details for Snapshot . . . . . . . . . . . . . . . . . . . . . . . . . . . . . . . . . . . . . . . . . . . . . . . . . . . . . . . . . . . . . . . . . . . . . . . . . . . . . . . . . . . 435
11.2.24 No Snapshot Schedule . . . . . . . . . . . . . . . . . . . . . . . . . . . . . . . . . . . . . . . . . . . . . . . . . . . . . . . . . . . . . . . . . . . . . . . . . . . . . . . . . . . . . . . . . 436
11.2.25 Graphical Representation of Repository Virtual Drive . . . . . . . . . . . . . . . . . . . . . . . . . . . . . . . . . . . . . . . . . . . . . . . . . . . . . . . . . . . . 437
11.2.26 Deleting a Snapshot . . . . . . . . . . . . . . . . . . . . . . . . . . . . . . . . . . . . . . . . . . . . . . . . . . . . . . . . . . . . . . . . . . . . . . . . . . . . . . . . . . . . . . . . . . . . 437
11.3 Disabling MegaRAID Recovery . . . . . . . . . . . . . . . . . . . . . . . . . . . . . . . . . . . . . . . . . . . . . . . . . . . . . . . . . . . . . . . . . . . . . . . . . . . . . . . . . . . . . . . . . . . . . . 438
11.4 CacheCade Advanced Software . . . . . . . . . . . . . . . . . . . . . . . . . . . . . . . . . . . . . . . . . . . . . . . . . . . . . . . . . . . . . . . . . . . . . . . . . . . . . . . . . . . . . . . . . . . . . 438
11.4.1 Using the CacheCade 2.0 SSD Read Caching Advanced Software . . . . . . . . . . . . . . . . . . . . . . . . . . . . . . . . . . . . . . . . . . . . . . . . . . 439
11.4.2 Using the CacheCade Pro 2.0 SSD Read/Write Caching Software . . . . . . . . . . . . . . . . . . . . . . . . . . . . . . . . . . . . . . . . . . . . . . . . . . 442
11.5 FastPath Advanced Software . . . . . . . . . . . . . . . . . . . . . . . . . . . . . . . . . . . . . . . . . . . . . . . . . . . . . . . . . . . . . . . . . . . . . . . . . . . . . . . . . . . . . . . . . . . . . . . . 451
11.5.1 Setting FastPath Options . . . . . . . . . . . . . . . . . . . . . . . . . . . . . . . . . . . . . . . . . . . . . . . . . . . . . . . . . . . . . . . . . . . . . . . . . . . . . . . . . . . . . . . . 451
11.6 LSI SafeStore Encryption Services . . . . . . . . . . . . . . . . . . . . . . . . . . . . . . . . . . . . . . . . . . . . . . . . . . . . . . . . . . . . . . . . . . . . . . . . . . . . . . . . . . . . . . . . . . . 452
LSI Corporation Confidential | July 2011 Page 11

MegaRAID SAS Software User GuideTable of Contents
11.6.1 Enabling Drive Security using EKM . . . . . . . . . . . . . . . . . . . . . . . . . . . . . . . . . . . . . . . . . . . . . . . . . . . . . . . . . . . . . . . . . . . . . . . . . . . . . . . 452
11.6.2 Supporting EKM Mode . . . . . . . . . . . . . . . . . . . . . . . . . . . . . . . . . . . . . . . . . . . . . . . . . . . . . . . . . . . . . . . . . . . . . . . . . . . . . . . . . . . . . . . . . . 453
11.6.3 Change Security Settings- LKM . . . . . . . . . . . . . . . . . . . . . . . . . . . . . . . . . . . . . . . . . . . . . . . . . . . . . . . . . . . . . . . . . . . . . . . . . . . . . . . . . . 455
11.6.4 Change Security Settings — EKM . . . . . . . . . . . . . . . . . . . . . . . . . . . . . . . . . . . . . . . . . . . . . . . . . . . . . . . . . . . . . . . . . . . . . . . . . . . . . . . . . . 457
11.6.5 Importing Foreign Drives . . . . . . . . . . . . . . . . . . . . . . . . . . . . . . . . . . . . . . . . . . . . . . . . . . . . . . . . . . . . . . . . . . . . . . . . . . . . . . . . . . . . . . . . 458
11.6.6 Importing Foreign Drives to LKM . . . . . . . . . . . . . . . . . . . . . . . . . . . . . . . . . . . . . . . . . . . . . . . . . . . . . . . . . . . . . . . . . . . . . . . . . . . . . . . . . 459
11.6.7 Importing Foreign Drives to EKM . . . . . . . . . . . . . . . . . . . . . . . . . . . . . . . . . . . . . . . . . . . . . . . . . . . . . . . . . . . . . . . . . . . . . . . . . . . . . . . . . 459
11.6.8 Importing Foreign Drives to EKM . . . . . . . . . . . . . . . . . . . . . . . . . . . . . . . . . . . . . . . . . . . . . . . . . . . . . . . . . . . . . . . . . . . . . . . . . . . . . . . . . 460
11.6.9 Enabling Drive Security using LKM . . . . . . . . . . . . . . . . . . . . . . . . . . . . . . . . . . . . . . . . . . . . . . . . . . . . . . . . . . . . . . . . . . . . . . . . . . . . . . . 461
11.6.10 Changing the Drive Security Settings . . . . . . . . . . . . . . . . . . . . . . . . . . . . . . . . . . . . . . . . . . . . . . . . . . . . . . . . . . . . . . . . . . . . . . . . . . . 465
11.6.11 Disabling Drive Security . . . . . . . . . . . . . . . . . . . . . . . . . . . . . . . . . . . . . . . . . . . . . . . . . . . . . . . . . . . . . . . . . . . . . . . . . . . . . . . . . . . . . . . . 466
11.6.12 Importing or Clearing a Foreign Configuration . . . . . . . . . . . . . . . . . . . . . . . . . . . . . . . . . . . . . . . . . . . . . . . . . . . . . . . . . . . . . . . . . . 468
11.7 Managing Link Speed . . . . . . . . . . . . . . . . . . . . . . . . . . . . . . . . . . . . . . . . . . . . . . . . . . . . . . . . . . . . . . . . . . . . . . . . . . . . . . . . . . . . . . . . . . . . . . . . . . . . . . . 471
Appendix A: Events and Messages . . . . . . . . . . . . . . . . . . . . . . . . . . . . . . . . . . . . . . . . . . . . . . . . . . . . . . . . . . . . . . . . . . . . . . . . . . . . . . . . . . . . . . . . . . . . . . . . . . . . . . 473
A.1 Error Levels . . . . . . . . . . . . . . . . . . . . . . . . . . . . . . . . . . . . . . . . . . . . . . . . . . . . . . . . . . . . . . . . . . . . . . . . . . . . . . . . . . . . . . . . . . . . . . . . . . . . . . . . . . . . . . . . . . 473
A.2 Event Messages . . . . . . . . . . . . . . . . . . . . . . . . . . . . . . . . . . . . . . . . . . . . . . . . . . . . . . . . . . . . . . . . . . . . . . . . . . . . . . . . . . . . . . . . . . . . . . . . . . . . . . . . . . . . . 473
Appendix B: MegaCLI Error Messages . . . . . . . . . . . . . . . . . . . . . . . . . . . . . . . . . . . . . . . . . . . . . . . . . . . . . . . . . . . . . . . . . . . . . . . . . . . . . . . . . . . . . . . . . . . . . . . . . . . 487
B.1 Error Messages and Descriptions . . . . . . . . . . . . . . . . . . . . . . . . . . . . . . . . . . . . . . . . . . . . . . . . . . . . . . . . . . . . . . . . . . . . . . . . . . . . . . . . . . . . . . . . . . . . . 487
Appendix C: Glossary . . . . . . . . . . . . . . . . . . . . . . . . . . . . . . . . . . . . . . . . . . . . . . . . . . . . . . . . . . . . . . . . . . . . . . . . . . . . . . . . . . . . . . . . . . . . . . . . . . . . . . . . . . . . . . . . . . . . 491
Appendix D: History of Technical Changes . . . . . . . . . . . . . . . . . . . . . . . . . . . . . . . . . . . . . . . . . . . . . . . . . . . . . . . . . . . . . . . . . . . . . . . . . . . . . . . . . . . . . . . . . . . . . . 499
Page 12 LSI Corporation Confidential | July 2011

MegaRAID SAS Software User Guide Chapter 1: Overview
Chapter 1
Overview
This chapter provides an overview of this guide, which documents the utilities used to
configure, monitor, and maintain MegaRAID® Serial-attached SCSI (SAS) RAID
controllers with RAID control capabilities and the storage-related devices connected to
them.
This guide describes how to use the MegaRAID Storage Manager™ software, the
WebBIOS™ configuration utility, and the MegaRAID command line interface (CLI).
This chapter documents the SAS technology, Serial ATA (SATA) t echnology, M egaRAID
CacheCade™ 2.0 SSD Read Caching software, SSD Guard™, Dimmer Switch™, UEFI 2.0,
configuration scenarios, and drive types. Other features such as FastPath and SafeStore
are described in other chapters of this guide.
| SAS Technology
NOTE: This guide does not include the latest CacheCade and Enterprise Key
Management System (EKMS) features.
1.1 SAS Technology The MegaRAID 6Gb/s SAS RAID controllers are high-performance intelligent PCI
Express-to-SAS/Serial ATA II controllers with RAID control capabilities. MegaRAID 6Gb/s
SAS RAID controllers provide reliability, high performance, and fault-tolerant disk
subsystem management. They are an ideal RAID solution for the internal storage of
workgroup, departmental, and enterprise systems. MegaRAID 6Gb/s SAS RAID
controllers offer a cost-effective way to implement RAID in a server.
SAS technology brings a wealth of options and flexibility with the use of SAS devices,
Serial ATA (SATA) II devices, and CacheCade 2.0 SSD Read Caching software devices
within the same storage infrastructure. These devices bring individual characteristics
that make each of these more suitable choice depending on your storage needs.
MegaRAID gives you the flexibility to combine these two similar technologies on the
same controller, within the same enclosure, and in the same virtual drive.
NOTE: LSI® recommends that you carefully assess any decision to combine SAS drives
and SATA drives within the same virtual drives. Although you can mix drives, LSI strongly
discourages this practice; this applies to both HDDs and CacheCade 2.0 SSD Read
Caching software.
LSI Corporation Confidential | July 2011 Page 13

| Serial-Attached SCSI Device Interface
MegaRAID SAS Software User GuideChapter 1: Overview
MegaRAID 6Gb/s SAS RAID controllers are based on the LSI first-to-market SAS IC
technology and proven MegaRAID technology. As second-generation PCI Express RAID
controllers, the MegaRAID SAS RAID controllers address the growing demand for
increased data throughput and scalability requirements across midrange and
enterprise-class server platforms. LSI offers a family of MegaRAID SAS RAID controllers
addressing the needs for both internal and external solutions.
The SAS controllers support the ANSI Serial Attached SCSI standard, version 2.1. In
addition, the controller supports the SATA II protocol defined by the Serial ATA
specification, version 3.0. Supporting both the SAS and SATA II interfaces, the SAS
controller is a versatile controller that provides the backbone of both server
environments and high-end workstation environments.
Each port on the SAS RAID controller supports SAS devices or SATA III devices using the
following protocols:
SAS Serial SCSI Protocol (SSP), which enables communication with other SAS
devices
SATA III, which enables communication with other SATA III devices
Serial Management Protocol (SMP), which communicates topology management
information directly with an attached SAS expander device
Serial Tunneling Protocol (STP), which enables communication with a SATA III device
through an attached expander
1.2 Serial-Attached SCSI
Device Interface
SAS is a serial, point-to-point, enterprise-level device interface that leverages the
proven SCSI protocol set. SAS is a convergence of the advantages of SATA II, SCSI, and
Fibre Channel, and is the future mainstay of the enterprise and high-end workstation
storage markets. SAS offers a higher bandwidth per pin than parallel SCSI, and it
improves the signal and data integrity.
The SAS interface uses the proven SCSI command set to ensure reliable data transfers,
while providing the connectivity and flexibility of point-to-point serial data transfers.
The serial transmission of SCSI commands eliminates clock-skew challenges. The SAS
interface provides improved performance, simplified cabling, smaller connectors, lower
pin count, and lower power requirements when compared to parallel SCSI.
SAS controllers leverage a common electrical and physical connection interface that is
compatible with Serial ATA technology. The SAS and SATA II protocols use a thin, 7-wire
connector instead of the 68-wire SCSI cable or 26-wire ATA cable. The SAS/SATA II
connector and cable are easier to manipulate, allow connections to smaller devices,
and do not inhibit airflow. The point-to-point SATA II architecture eliminates inherent
difficulties created by the legacy ATA master-slave architecture, while maintaining
compatibility with existing ATA firmware.
Page 14 LSI Corporation Confidential | July 2011

MegaRAID SAS Software User Guide Chapter 1: Overview
| Serial ATA III Features
1.3 Serial ATA III Features The SATA bus is a high-speed, internal bus that provides a low pin count (LPC), low
voltage level bus for device connections between a host controller and a SATA device.
The following list describes the SATA III features of the RAID controllers:
Supports SATA III data transfers of 6Gb/s
Supports STP data transfers of 6Gb/s
Provides a serial, point-to-point storage interface
Simplifies cabling between devices
Eliminates the master-slave construction used in parallel ATA
Allows addressing of multiple SATA II targets through an expander
Allows multiple initiators to address a single target (in a fail-over configuration)
through an expander
1.4 Solid State Drive Features The MegaRAID firmware supports the use of SSDs as standard drives and/or additional
controller cache, referred to as CacheCade 2.0 SSD Read Caching software. SSD drives
are expected to behave like SATA or SAS HDDs except for the following:
High random read speed (because there is no read-write head to move)
High performance-to-power ratio, as these drives have very low power
consumption compared to HDDs
Low latency
High mechanical reliability
Lower weight and size
NOTE: Support for SATA SSD drives applies only to those drives that support ATA-8 ACS
compliance.
You can choose whether to allow a virtual drive to consist of both CacheCade 2.0 SSD
Read Caching software devices and HDDs. For a virtual drive that consists of CacheCade
2.0 SSD Read Caching software only, you can choose whether to allow SAS CacheCade
2.0 SSD Read Caching software drives and SATA CacheCade 2.0 SSD Read Caching
software drives in that virtual drive. For virtual drives that have both CacheCade 2.0 SSD
Read Caching software and HDDs, you can choose whether to mix SAS and SATA HDD
drives with SAS and SATA CacheCade 2.0 SSD Read Caching software devices in various
combinations.l
NOTE: Support for SATA SDD drives applies only to those drives that support ATA-8 ACS
compliance.
LSI Corporation Confidential | July 2011 Page 15

| Dimmer Switch Features
1.4.1 SSD Guard SSD Guard, a feature that is unique to MegaRAID, increases the reliability of SSDs by
MegaRAID SAS Software User GuideChapter 1: Overview
automatically copying data from a drive with potential to fail to a designated hot spare
or newly inserted drive. Because SSDs are more reliable than hard disk drives (HDDs),
non-redundant RAID 0 configurations are much more common than in the past. SSD
Guard offers added data protection for RAID 0 configurations.
SSD Guard works by looking for a predictive failure while monitoring the SDD
Self-Monitoring, Analysis, and Reporting Technology (S.M.A.R.T.) error log. If errors
indicate that a SSD failure is imminent, the MegaRAID software starts a rebuild to
preserve the data on the SSD and sends appropriate warning event notifications.
1.5 Dimmer Switch Features Powering drives and cooling drives represent a major cost for data centers. The
MegaRAID Dimmer Switch feature set reduces the power consumption of the devices
connected to a MegaRAID controller. This helps to share resources more efficiently and
lowers the cost.
Dimmer Switch I — Spin down unconfigured disks. This feature is configurable and can
be disabled.
Dimmer Switch II — Spin down Hot Spares. This feature is configurable and can be
disabled.
Dimmer Switch III — This new feature spins down any Logical Disk after 30 minutes of
inactivity, by default, if the array can be spun up within 60 seconds. This feature is
configurable and can be disabled.
1.6 UEFI 2.0 Support UEFI 2.0 provides MegaRAID customers with expanded platform support. The
MegaRAID UEFI 2.0 driver, a boot service device driver, handles block IO requests and
SCSI pass-through (SPT) commands, and offers the ability to launch pre-boot
MegaRAID management applications through a driver configuration protocol (DCP).
The UEFI driver also supports driver diagnostic protocol, which allows administrators to
access pre-boot diagnostics.
1.7 Configuration Scenarios You can use the SAS RAID controllers in three scenarios:
Low-end, Internal SATA II Configurations
In these configurations, use the RAID controller as a high-end SATA II-compatible
controller that connects up to 8 disks either directly or through a port expander.
These configurations are mostly for low-end or entry servers. Enclosure
management is provided through out-of-band Inter-IC (I2C) bus. Side bands of both
types of internal SAS connectors support the SFF-8485 (SGPIO) interface.
Midrange Internal SAS Configurations
These configurations are like the internal SATA II configurations, but with high-end
disks. These configurations are more suitable for low-range to midrange servers.
High-end External SAS/SATA II Configurations
These configurations are for both internal connectivity and external connectivity,
using SATA II drives, SAS drives, or both. External enclosure management is
supported through in-band, SCSI-enclosed storage. The configuration must
support STP and SMP.
Page 16 LSI Corporation Confidential | July 2011

MegaRAID SAS Software User Guide Chapter 1: Overview
Flash ROM/
SAS
PCI Express
RAID Controller
SAS/SATA II Device
32-Bit Memory
Address/Data
Bus
PSBRAM/
I2C
SAS/SATA II Device
SAS/SATA II Device
SAS/SATA II Device
PCI Express Interface
NVSRAM
I
2
C
Interface
LSISASx12
Flash ROM/
NVSRAM/
SRAM
I
2
C/UART
LSISASx12
SAS/SATA II
Drives
PCI Express Interface
SAS/SATA
Drives
SAS/SATA II
Drives
SAS/SATA II
Drives
SAS/SATA II
Drives
8
SRAM
SRAMSDRAM
Peripheral
Bus
72-bit DDR/DDR2
with ECC
Interface
LSISAS1078
PCI Express to SAS ROC
SAS
RAID Controller
Expander
Expander
Figure1 shows a direct-connect configuration. The Inter-IC (I2C) interface
communicates with peripherals. The external memory bus provides a 32-bit memory
bus, parity checking, and chip select signals for pipelined synchronous burst static
random access memory (PSBRAM), nonvolatile static random access memory
(NVSRAM), and Flash ROM.
NOTE: The external memory bus is 32-bit for the SAS 8704ELP and the SAS 8708ELP,
and 64-bit for the SAS 8708EM2, the SAS 8880EM2, and the SAS 8888ELP.
| Configuration Scenarios
LSI Corporation Confidential | July 2011 Page 17
Figure 1: Example of an LSI SAS Direct-Connect Application
Figure2 shows an example of a SAS RAID controller configured with an LSISASx12
expander that is connected to SAS disks, SATA II disks, or both.
Figure 2: Example of an LSI SAS RAID Controller Configured with an LSISASx12
Expander

| Configuration Scenarios
MegaRAID SAS Software User GuideChapter 1: Overview
1.7.1 Valid Drive Mix Configurations
with HDDs and SSDs
You can allow a virtual drive to consist of both SSDs and HDDs. For virtual drives that
have both SSDs and HDDs, you can choose whether to mix SAS drives and SATA drives
on the CacheCade 2.0 SSD Read Caching software devices.
You can choose whether to allow a virtual drive to consist of both CacheCade 2.0 SSD
Read Caching software devices and HDDs. For a virtual drive that consists of CacheCade
2.0 SSD Read Caching software only, you can choose whether to allow SAS CacheCade
2.0 SSD Read Caching software drives and SATA CacheCade 2.0 SSD Read Caching
software drives in that virtual drive. For virtual drives that have both CacheCade 2.0 SSD
Read Caching software and HDDs, you can choose whether to mix SAS and SATA HDD
drives with SAS and SATA CacheCade 2.0 SSD Read Caching software devices in various
combinations.
Tab le 1 lists the valid drive mix configurations you can use when you create virtual
drives and allow HDD and CacheCade 2.0 SSD Read Caching software mixing. The valid
drive mix configurations are based on manufacturer settings.
Table 1: Valid Drive Mix Configurations
# Valid Drive Mix Configurations
1. SAS HDD with SAS SDD (SAS-only configuration)
2. SATA HDD with SATA CacheCade 2.0 SSD Read Caching software (SATA-only configuration)
3. SAS HDD with a mix of SAS and SATA CacheCade 2.0 SSD Read Caching software (a SATA
HDD cannot be added)
4. SATA HDD with a mix of SAS and SATA CacheCade 2.0 SSD Read Caching software (a SAS
HDD cannot be added)
5. SAS CacheCade 2.0 SSD Read Caching software with a mix of SAS and SATA HDD (a SATA
CacheCade 2.0 SSD Read Caching software cannot be added)
6. SATA CacheCade 2.0 SSD Read Caching software with a mix of SAS and SATA HDD (a SAS
CacheCade 2.0 SSD Read Caching software cannot be added)
7. A mix of SAS and SATA HDD with a mix of SAS and SATA CacheCade 2.0 SSD Read Caching
software
8. A CacheCade 2.0 SSD Read Caching software cannot be added to a HDD, but a SAS/SATA
mix is allowed.
NOTE: Only one of the valid configurations listed in Table 1 is allowed based on your
controller card manufacturing settings.
NOTE: The valid drive mix also applies to hot spares. For hot spare information, see
Section2.4.12, Hot Spares, on page28.
Page 18 LSI Corporation Confidential | July 2011

MegaRAID SAS Software User Guide Chapter 1: Overview
| Technical Support
1.8 Technical Support For assistance with installing, configuring, or running your MegaRAID 6Gb/s SAS RAID
controllers, contact an LSI Technical Support representative.
Click the following link to access the LSI Technical Support page for storage and board
support:
http://www.lsi.com/support/storage/tech_support/index.html
From this page, you can send an e-mail or call a Technical Support representative, or
submit a new service request and view its status.
E-mail:
http://www.lsi.com/support/support_form.html
Phone Support:
http://www.lsi.com/support/storage/phone_tech_support/index.html
1-800-633-4545 (North America)
00-800-5745-6442 (International)
LSI Corporation Confidential | July 2011 Page 19

| Technical Support
MegaRAID SAS Software User GuideChapter 1: Overview
Page 20 LSI Corporation Confidential | July 2011

MegaRAID SAS Software User Guide Chapter 2: Introduction to RAID
| RAID Description
Chapter 2
Introduction to RAID
This chapter describes Redundant Array of Independent Disks (RAID), RAID functions
and benefits, RAID components, RAID levels, and configuration strategies. In addition, it
defines the RAID availability concept, and offers tips for configuration planning.
2.1 RAID Description RAID is an array, or group, of multiple independent physical drives that provide high
performance and fault tolerance. A RAID drive group improves I/O (input/output)
performance and reliability. The RAID drive group appears to the host computer as a
single storage unit or as multiple virtual units. I/O is expedited because several drives
can be accessed simultaneously.
2.2 RAID Benefits RAID drive groups improve data storage reliability and fault tolerance compared to
single-drive storage systems. Data loss resulting from a drive failure can be prevented
by reconstructing missing data from the remaining drives. RAID has gained popularity
because it improves I/O performance and increases storage subsystem reliability.
2.3 RAID Functions Virtual drives are drive groups or spanned drive groups that are available to the
operating system. The storage space in a virtual drive is spread across all of the drives in
the drive group.
Your drives must be organized into virtual drives in a drive group, and they must be
able to support the RAID level that you select. Some common RAID functions follow:
Creating hot spare drives
Configuring drive groups and virtual drives
Initializing one or more virtual drives
Accessing controllers, virtual drives, and drives individually
Rebuilding failed drives
Verifying that the redundancy data in virtual drives using RAID level 1, 5, 6, 10, 50, or
60 is correct
Reconstructing virtual drives after changing RAID levels or adding a drive to a drive
group
Selecting a host controller on which to work
LSI Corporation Confidential | July 2011 Page 21

| Components and Features
MegaRAID SAS Software User GuideChapter 2: Introduction to RAID
2.4 Components and
Features
RAID levels describe a system for ensuring the availability and redundancy of data
stored on large disk subsystems. See Section2.5, RAID Levels for detailed information
about RAID levels. The following subsections describes the components of RAID drive
groups and RAID levels.
2.4.1 Drive Group A drive group is a group of physical drives. These drives are managed in partitions
known as virtual drives.
2.4.2 Virtual Drive A virtual drive is a partition in a drive group that is made up of contiguous data
segments on the drives. A virtual drive can consist of an entire drive group, more than
one entire drive group, a part of a drive group, parts of more than one drive group, or a
combination of any two of these conditions.
2.4.3 Fault Tolerance Fault tolerance is the capability of the subsystem to undergo a drive failure or failures
without compromising data integrity, and processing capability. The RAID controller
provides this support through redundant drive groups in RAID levels 1, 5, 6, 10, 50, and
60. The system can still work properly even with drive failure in a drive group, though
performance can be degraded to some extent.
In a span of RAID 1 drive groups, each RAID 1 drive group has two drives and can
tolerate one drive failure. The span of RAID 1 drive groups can contain up to 32 drives,
and tolerate up to 16 drive failures — one in each drive group. A RAID 5 drive group can
tolerate one drive failure in each RAID 5 drive group. A RAID 6 drive group can tolerate
up to two drive failures.
Each spanned RAID 10 virtual drive can tolerate multiple drive failures, as long as each
failure is in a separate drive group. A RAID 50 virtual drive can tolerate two drive
failures, as long as each failure is in a separate drive group. RAID 60 drive groups can
tolerate up to two drive failures in each drive group.
NOTE: RAID level 0 is not fault tolerant. If a drive in a RAID 0 drive group fails, the entire
virtual drive (all drives associated with the virtual drive) fails.
Fault tolerance is often associated with system availability because it allows the system
to be available during the failures. However, fault tolerance means that it is also
important for the system to be available during the repair of the problem.
A hot spare is an unused drive that, in case of a disk failure in a redundant RAID drive
group, can be used to rebuild the data and re-establish redundancy. After the hot spare
is automatically moved into the RAID drive group, the data is automatically rebuilt on
the hot spare drive. The RAID drive group continues to handle requests while the
rebuild occurs.
Auto-rebuild allows a failed drive to be replaced and the data automatically rebuilt by
“hot-swapping” the drive in the same drive bay. The RAID drive group continues to
handle requests while the rebuild occurs.
Page 22 LSI Corporation Confidential | July 2011

MegaRAID SAS Software User Guide Chapter 2: Introduction to RAID
2.4.3.1 Multipathing The firmware provides support for detecting and using multiple paths from the RAID
| Components and Features
controllers to the SAS devices that are in enclosures. Devices connected to enclosures
have multiple paths to them. With redundant paths to the same port of a device, if one
path fails, another path can be used to communicate between the controller and the
device. Using multiple paths with load balancing, instead of a single path, can increase
reliability through redundancy.
Applications show the enclosures and the drives connected to the enclosures. The
firmware dynamically recognizes new enclosures added to a configuration along with
their contents (new drives). In addition, the firmware dynamically adds the enclosure
and its contents to the management entity currently in use.
Multipathing provides the following features:
Support for failover, in the event of path failure
Auto-discovery of new or restored paths while the system is online, and reversion to
system load-balancing policy
Measurable bandwidth improvement to the multi-path device
Support for changing the load-balancing path while the system is online
The firmware determines whether enclosure modules (ESMs) are part of the same
enclosure. When a new enclosure module is added (allowing multi-path) or removed
(going single path), an Asynchronous Event Notification (AEN) is generated. AENs
about drives contain correct information about the enclosure, when the drives are
connected by multiple paths. The enclosure module detects partner ESMs and issues
events appropriately.
In a system with two ESMs, you can replace one of the ESMs without affecting the
virtual drive availability. For example, the controller can run heavy I/Os, and when you
replace one of the ESMs, I/Os should not stop. The controller uses different paths to
balance the load on the entire system.
In the MegaRAID Storage Manager utility, when multiple paths are available to a drive,
the drive information shows only one enclosure. The utility shows that a redundant
path is available to a drive. All drives with a redundant path display this information.
The firmware supports online replacement of enclosure modules.
2.4.4 Consistency Check The consistency check operation verifies correctness of the data in virtual drives that
use RAID levels 1, 5, 6, 10, 50, and 60. (RAID 0 does not provide data redundancy.) For
example, in a system with parity, checking consistency means computing the data on
one drive and comparing the results to the contents of the parity drive.
NOTE: It is recommended that you perform a consistency check at least once a month.
2.4.5 Copyback The copyback feature allows you to copy data from a source drive of a virtual drive to a
destination drive that is not a part of the virtual drive. Copyback is often used to create
or restore a specific physical configuration for a drive group (for example, a specific
arrangement of drive group members on the device I/O buses). Copyback can be run
automatically or manually.
LSI Corporation Confidential | July 2011 Page 23

| Components and Features
MegaRAID SAS Software User GuideChapter 2: Introduction to RAID
Typically, when a drive fails or is expected to fail, the data is rebuilt on a hot spare. The
failed drive is replaced with a new disk. Then the data is copied from the hot spare to
the new drive, and the hot spare reverts from a rebuild drive to its original hot spare
status. The copyback operation runs as a background activity, and the virtual drive is
still available online to the host.
Copyback is also initiated when the first Self-Monitoring Analysis and Reporting
Technology (SMART) error occurs on a drive that is part of a virtual drive. The
destination drive is a hot spare that qualifies as a rebuild drive. The drive with the
SMART error is marked as “failed” only after the successful completion of the copyback.
This situation avoids putting the drive group in Degraded status.
NOTE: During a copyback operation, if the drive group involved in the copyback is
deleted because of a virtual drive deletion, the destination drive reverts to an
Unconfigured Good state or hot spare state.
Order of Precedence.
In the following scenarios, rebuild takes precedence over the copyback operation:
If a copyback operation is already taking place to a hot spare drive, and any virtual
drive on the controller degrades, the copyback operation aborts, and a rebuild
starts. The rebuild changes the virtual drive to the Optimal state.
The rebuild operation takes precedence over the copyback operation when the
conditions exist to start both operations. For example:
— The hot spare is not configured (or unavailable) in the system.
— Two drives (both members of virtual drives) exist, with one drive exceeding the
SMART error threshold, and the other failed.
— If you add a hot spare (assume a global hot spare) during a copyback operation,
the copyback is aborted, and the rebuild operation starts on the hot spare.
2.4.6 Background Initialization Background initialization is a check for media errors on the drives when you create a
virtual drive. It is an automatic operation that starts five minutes after you create the
virtual drive. This check ensures that striped data segments are the same on all of the
drives in the drive group.
Background initialization is similar to a consistency check. The difference between the
two is that a background initialization is forced on new virtual drives and a consistency
check is not.
New RAID 5 virtual drives and new RAID 6 virtual drives require a minimum number of
drives for a background initialization to start. If there are fewer drives, the background
initialization does not start. The background initialization needs to be started manually.
The following number of drives are required:
— New RAID 5 virtual drives must have at least five drives for background
initialization to start.
— New RAID 6 virtual drives must have at least seven drives for background
initialization to start.
Page 24 LSI Corporation Confidential | July 2011

MegaRAID SAS Software User Guide Chapter 2: Introduction to RAID
Segment 1
Segment 5
Segment 9
Segment 2
Segment 6
Segment 10
Segment 3
Segment 7
Segment 11
Segment 4
Segment 8
Segment 12
| Components and Features
The default and recommended background initialization rate is 30 percent. Before you
change the rebuild rate, you must stop the background initialization or the rate change
will not affect the background initialization rate. After you stop background
initialization and change the rebuild rate, the rate change takes effect when you restart
background initialization.
2.4.7 Patrol Read Patrol read involves the review of your system for possible drive errors that could lead
to drive failure and then action to correct errors. The goal is to protect data integrity by
detecting drive failure before the failure can damage data. The corrective actions
depend on the drive group configuration and the type of errors.
Patrol read starts only when the controller is idle for a defined period of time and no
other background tasks are active, though it can continue to run during heavy I/O
processes.
You can use the MegaRAID Command Tool or the MegaRAID Storage Manager software
to select the patrol read options, which you can use to set automatic or manual
operation, or disable patrol read. See Section5.8, Controller Property-Related Options
and Section9.17, Running a Patrol Read.
2.4.8 Disk Striping Disk striping allows you to write data across multiple drives instead of just one drive.
Disk striping involves partitioning each drive storage space into stripes that can vary in
size from 8 KB to 1024 KB. These stripes are interleaved in a repeated sequential
manner. The combined storage space is composed of stripes from each drive. It is
recommended that you keep stripe sizes the same across RAID drive groups.
For example, in a four-disk system using only disk striping (used in RAID level 0),
segment 1 is written to disk 1, segment 2 is written to disk 2, and so on. Disk striping
enhances performance because multiple drives are accessed simultaneously, but disk
striping does not provide data redundancy.
Figure 3: Example of Disk Striping (RAID 0)
2.4.8.1 Stripe Width
Stripe width is the number of drives involved in a drive group where striping is
implemented. For example, a four-disk drive group with disk striping has a stripe width
of four.
2.4.8.2 Stripe Size The stripe size is the length of the interleaved data segments that the RAID controller
writes across multiple drives, not including parity drives. For example, consider a stripe
that contains 64 KB of disk space and has 16 KB of data residing on each disk in the
stripe. In this case, the stripe size is 64 KB, and the strip size is 16 KB.
2.4.8.3 Strip Size The strip size is the portion of a stripe that resides on a single drive.
LSI Corporation Confidential | July 2011 Page 25

| Components and Features
Segment 1
Segment 2
Segment 3
Segment 1 Duplicated
Segment 2 Duplicated
Segment 3 Duplicated
Segment 4 Segment 4 Duplicated
2.4.9 Disk Mirroring With mirroring (used in RAID 1 and RAID 10), data written to one drive is simultaneously
MegaRAID SAS Software User GuideChapter 2: Introduction to RAID
written to another drive. The primary advantage of disk mirroring is that it provides 100
percent data redundancy. Because the contents of the disk are completely written to a
second disk, data is not lost if one disk fails. In addition, both drives contain the same
data at all times, so either disk can act as the operational disk. If one disk fails, the
contents of the other disk can be used to run the system and reconstruct the failed disk.
Disk mirroring provides 100 percent redundancy, but it is expensive because each drive
in the system must be duplicated. Figure4 shows an example of disk mirroring.
Figure 4: Example of Disk Mirroring (RAID 1)
2.4.10 Parity Parity generates a set of redundancy data from two or more parent data sets. The
redundancy data can be used to reconstruct one of the parent data sets in the event of
a drive failure. Parity data does not fully duplicate the parent data sets, but parity
generation can slow the write process. In RAID, this method is applied to entire drives
or stripes across all of the drives in a drive group. The types of parity are described in
Tab le 2 .
Table 2: Types of Parity
Parity Type Description
Dedicated The parity data on two or more drives is stored on an additional disk.
Distributed The parity data is distributed across more than one drive in the system.
Page 26 LSI Corporation Confidential | July 2011

MegaRAID SAS Software User Guide Chapter 2: Introduction to RAID
Segment 1
Segment 7
Segment 2
Segment 8
Segment 3
Segment 9
Segment 4
Segment 10
Segment 5
Parity (6-10)
Parity (11–15)
Parity (1-5)
Segment 6
Note: Parity is distributed across all drives in the drive group.
Segment 12
Segment 15
Segment 11
Segment 14
Segment 13
Segment 19
Segment 25
Segment 20
Segment 23
Segment 18
Segment 21
Segment 16
Segment 22
Segment 17
Parity (21-25)
Parity (26–30)
Parity (16-20)
Segment 24
Segment 30
Segment 27 Segment 29
Segment 26
Segment 28
60 GB 60 GB
Can Be Accessed as
One 120-GB Drive
60 GB 60 GB
Can Be Accessed as
One 120-GB Drive
RAID 5 combines distributed parity with disk striping. If a single drive fails, it can be
rebuilt from the parity and the data on the remaining drives. An example of a RAID 5
drive group is shown in Figure5. RAID 5 uses parity to provide redundancy for one
drive failure without duplicating the contents of entire drives. RAID 6 uses distributed
parity and disk striping, also, but adds a second set of parity data so that it can survive
up to two drive failures.
Figure 5: Example of Distributed Parity (RAID 5)
| Components and Features
2.4.11 Disk Spanning Disk spanning allows multiple drives to function like one big drive. Spanning
overcomes lack of disk space and simplifies storage management by combining
existing resources or adding relatively inexpensive resources. For example, four 20-GB
drives can be combined to appear to the operating system as a single 80-GB drive.
Spanning alone does not provide reliability or performance enhancements. Spanned
virtual drives must have the same stripe size and must be contiguous. In Figure6, RAID
1 drive groups are turned into a RAID 10 drive group.
NOTE: Make sure that the spans are in different backplanes, so that if one span fails, you
do not lose the whole drive group.
Figure 6: Example of Disk Spanning
Spanning two contiguous RAID 0 virtual drives does not produce a new RAID level or
add fault tolerance. It does increase the capacity of the virtual drive and improves
performance by doubling the number of spindles.
LSI Corporation Confidential | July 2011 Page 27

| Components and Features
MegaRAID SAS Software User GuideChapter 2: Introduction to RAID
2.4.11.1 Spanning for RAID 00,
RAID 10, RAID 50, and RAID 60
Tab le 3 describes how to configure RAID 00, RAID 10, RAID 50, and RAID 60 by
spanning. The virtual drives must have the same stripe size and the maximum number
of spans is 8. The full drive capacity is used when you span virtual drives; you cannot
specify a smaller drive capacity.
See Chapter8, Configuration for detailed procedures for configuring drive groups and
virtual drives, and spanning the drives.
Table 3: Spanning for RAID 10, RAID 50, and RAID 60
Level Description
00 Configure RAID 00 by spanning two contiguous RAID 0 virtual drives, up to
the maximum number of supported devices for the controller.
10 Configure RAID 10 by spanning two contiguous RAID 1 virtual drives, up to
the maximum number of supported devices for the controller. RAID 10
supports a maximum of 8 spans. You must use an even number of drives in
each RAID virtual drive in the span. The RAID 1 virtual drives must have the
same stripe size.
50 Configure RAID 50 by spanning two contiguous RAID 5 virtual drives. The
RAID 5 virtual drives must have the same stripe size.
60 Configure RAID 60 by spanning two contiguous RAID 6 virtual drives. The
RAID 6 virtual drives must have the same stripe size.
NOTE: In a spanned virtual drive (R10, R50, R60) the span numbering starts from Span
0, Span 1, Span 2, and so on.
2.4.12 Hot Spares A hot spare is an extra, unused drive that is part of the disk subsystem. It is usually in
Standby mode, ready for service if a drive fails. Hot spares permit you to replace failed
drives without system shutdown or user intervention. MegaRAID SAS RAID controllers
can implement automatic and transparent rebuilds of failed drives using hot spare
drives, providing a high degree of fault tolerance and zero downtime.
The RAID management software allows you to specify drives as hot spares. When a hot
spare is needed, the RAID controller assigns the hot spare that has a capacity closest to
and at least as great as that of the failed drive to take the place of the failed drive. The
failed drive is removed from the virtual drive and marked ready awaiting removal after
the rebuild to a hot spare begins. You can make hot spares of the drives that are not in a
RAID virtual drive.
You can use the RAID management software to designate the hot spare to have
enclosure affinity, meaning that if drive failures are present on a split backplane
configuration, the hot spare will be used first on the backplane side in which it resides.
If the hot spare is designated as having enclosure affinity, it attempts to rebuild any
failed drives on the backplane in which it resides before rebuilding any other drives on
other backplanes.
NOTE: If a rebuild to a hot spare fails for any reason, the hot spare drive is marked as
failed. If the source drive fails, both the source drive and the hot spare drive are marked
as failed.
Page 28 LSI Corporation Confidential | July 2011

MegaRAID SAS Software User Guide Chapter 2: Introduction to RAID
| Components and Features
The hot spare can be of two types:
Global hot spare
Dedicated hot spare
2.4.12.1 Global Hot Spare Use a global hot spare drive to replace any failed drive in a redundant drive group as
long as its capacity is equal to or larger than the coerced capacity of the failed drive. A
global hot spare defined on any channel should be available to replace a failed drive on
both channels.
2.4.12.2 Dedicated Hot Spare Use a dedicated hot spare to replace a failed drive only in a selected drive group. One or
more drives can be designated as a member of a spare drive pool. The most suitable
drive from the pool is selected for failover. A dedicated hot spare is used before one
from the global hot spare pool.
Hot spare drives can be located on any RAID channel. Standby hot spares (not being
used in RAID drive group) are polled every 60 seconds at a minimum, and their status
made available in the drive group management software. RAID controllers offer the
ability to rebuild with a disk that is in a system but not initially set to be a hot spare.
Observe the following parameters when using hot spares:
Hot spares are used only in drive groups with redundancy: RAID levels 1, 5, 6, 10, 50,
and 60.
A hot spare connected to a specific RAID controller can be used to rebuild a drive
that is connected only to the same controller.
You must assign the hot spare to one or more drives through the controller BIOS or
use drive group management software to place it in the hot spare pool.
A hot spare must have free space equal to or greater than the drive it replaces. For
example, to replace an 500-GB drive, the hot spare must be 500-GB or larger.
2.4.13 Disk Rebuilds When a drive in a RAID drive group fails, you can rebuild the drive by re-creating the
data that was stored on the drive before it failed. The RAID controller re-creates the
data using the data stored on the other drives in the drive group. Rebuilding can be
done only in drive groups with data redundancy, which includes RAID 1, 5, 6, 10, 50,
and 60 drive groups.
The RAID controller uses hot spares to rebuild failed drives automatically and
transparently, at user-defined rebuild rates. If a hot spare is available, the rebuild can
start automatically when a drive fails. If a hot spare is not available, the failed drive must
be replaced with a new drive so that the data on the failed drive can be rebuilt.
The failed drive is removed from the virtual drive and marked ready awaiting removal
when the rebuild to a hot spare begins. If the system goes down during a rebuild, the
RAID controller automatically resumes the rebuild after the system reboots.
NOTE: When the rebuild to a hot spare begins, the failed drive is often removed from
the virtual drive before management applications detect the failed drive. When this
occurs, the events logs show the drive rebuilding to the hot spare without showing the
failed drive. The formerly failed drive will be marked as “ready” after a rebuild begins to
a hot spare.
LSI Corporation Confidential | July 2011 Page 29

| Components and Features
MegaRAID SAS Software User GuideChapter 2: Introduction to RAID
NOTE: If a source drive fails during a rebuild to a hot spare, the rebuild fails, and the
failed source drive is marked as offline. In addition, the rebuilding hot spare drive is
changed back to a hot spare. After a rebuild fails because of a source drive failure, the
dedicated hot spare is still dedicated and assigned to the correct drive group, and the
global hot spare is still global.
An automatic drive rebuild will not start if you replace a drive during a RAID-level
migration. The rebuild must be started manually after the expansion or migration
procedure is complete. (RAID-level migration changes a virtual drive from one RAID
level to another.)
2.4.14 Rebuild Rate The rebuild rate is the percentage of the compute cycles dedicated to rebuilding failed
drives. A rebuild rate of 100 percent means that the system gives priority to rebuilding
the failed drives.
The rebuild rate can be configured between 0 percent and 100 percent. At 0 percent,
the rebuild is done only if the system is not doing anything else. At 100 percent, the
rebuild has a higher priority than any other system activity. Using 0 percent or 100
percent is not recommended. The default rebuild rate is 30 percent.
2.4.15 Hot Swap A hot swap is the manual replacement of a defective drive unit while the computer is
still running. When a new drive has been installed, a rebuild occurs automatically if
these situation occurs:
The newly inserted drive is the same capacity as or larger than the failed drive.
The newly inserted drive is placed in the same drive bay as the failed drive it is
replacing.
The RAID controller can be configured to detect the new drives and rebuild the
contents of the drive automatically.
2.4.16 Drive States A drive state is a property indicating the status of the drive. The drive states are
described in Tab le 4 .
Table 4: Drive States
State Description
Online A drive that can be accessed by the RAID controller and is part of the virtual
drive.
Unconfigured
Good
Hot Spare A drive that is powered up and ready for use as a spare in case an online
Fai led A drive that was originally configured as Online or Hot Spare, but on which
Rebuild A drive to which data is being written to restore full redundancy for a virtual
A drive that is functioning normally but is not configured as a part of a
virtual drive or as a hot spare.
drive fails.
the firmware detects an unrecoverable error.
drive.
Page 30 LSI Corporation Confidential | July 2011
Loading…
MegaRAID Storage Manager (MSM) – это мощный инструмент для управления и мониторинга системы хранения данных на основе контроллеров MegaRAID от компании LSI Logic. MSM предоставляет пользователям интуитивно понятный интерфейс для управления RAID-массивами, мониторинга состояния дисков и управления конфигурациями хранилищ.
С помощью MegaRAID Storage Manager пользователи могут выполнять такие задачи, как создание, изменение и удаление RAID-массивов, добавление и замена дисков, а также просмотр статуса каждого диска в системе. Программа поддерживает различные типы RAID, включая RAID 0, RAID 1, RAID 5 и RAID 10, что позволяет пользователям выбирать оптимальную конфигурацию для своих бизнес-приложений.
MSM также предоставляет возможность настройки оповещений для предупреждения пользователей о потенциальных проблемах с дисками и производительностью системы. Система может уведомлять администраторов о критических событиях, таких как сбой диска, что позволяет быстро реагировать и минимизировать риск потери данных. Кроме того, одно из ключевых преимуществ MSM – это возможность дистанционного управления, позволяющая администраторам управлять хранилищем из любой точки, что особенно полезно для больших организаций с распределенными дата-центрами.
Rukovodstvo-megaraid-storage-manager
Rukovodstvo по MegaRAID Storage Manager (MSM) представляет собой руководство, которое поможет пользователям понять и эффективно использовать программное обеспечение для управления RAID-массивами. Программа используется для контроля и настройки различных аспектов хранения данных, что позволяет оптимизировать производительность и защиту данных.
В этом руководстве мы рассмотрим основные функции MegaRAID Storage Manager, а также предоставим пошаговые инструкции по установке и настройке программного обеспечения.
Основные функции MegaRAID Storage Manager
- Мониторинг статуса хранилища и RAID-массивов
- Настройка RAID-массивов
- Управление дисками и контроллерами
- Обеспечение уведомлений о событиях и ошибках
- Управление резервированием и восстановлением данных
Установка MegaRAID Storage Manager
- Загрузите установочный файл с официального сайта производителя.
- Запустите установщик и следуйте инструкциям на экране.
- После завершения установки запустите программу.
Настройка RAID-массива
Чтобы настроить RAID-массив, выполните следующие шаги:
- Запустите MegaRAID Storage Manager.
- Выберите контроллер, который хотите настроить.
- Перейдите в раздел «Настройка RAID».
- Выберите тип RAID-массива, который вы хотите создать.
- Выберите диски для включения в массив и подтвердите настройки.
Заключение
MegaRAID Storage Manager является мощным инструментом для управления RAID-массивами и обеспечивает надежность и производительность систем хранения данных. Следуя этому руководству, пользователи смогут эффективно установить и настроить данный программный продукт.
Rukovodstvo-megaraid-storage-manager
Rukovodstvo по использованию Megaraid Storage Manager (MSM) предоставляет информацию о том, как управлять и контролировать RAID-массиовые конфигурации с помощью программного обеспечения от компании Broadcom. Это руководство охватывает все аспекты функционала MSM, включая установку, настройку и управление массивами.
Megaraid Storage Manager позволяет пользователям легко управлять хранилищами данных, следить за состоянием дисков и выполнять задачи по их настройке. Это позволяет оптимизировать производительность систем хранения данных и гарантировать высокую доступность данных.
Основные возможности Megaraid Storage Manager
- Управление RAID-массива
- Мониторинг состояния дисков
- Настройка параметров производительности
- Обновление микропрограммного обеспечения контроллеров
- Создание и управление логическими дисками
Установка и настройка
- Скачайте последний версию MSM с официального сайта.
- Запустите установочный файл и следуйте инструкциям на экране.
- После установки откройте программу и подключитесь к контроллеру RAID.
- Настройте параметры соединения, если это необходимо.
- Проверьте статус массивов и выполните необходимые настройки.
Рекомендуемые практики
Для обеспечения надежности работы системы хранения данных рекомендуется:
- Регулярно обновлять ПО MSM и микропрограммы контроллеров.
- Проверять состояние дисков не реже одного раза в месяц.
- Создавать резервные копии важных данных.
Таблица поддерживаемых контроллеров
| Модель контроллера | Поддержка RAID | Объем памяти |
|---|---|---|
| LSI 2208 | 0, 1, 5, 6, 10, 50, 60 | 256 MB |
| LSI 3008 | 0, 1, 5, 6, 10, 50, 60 | 512 MB |
| LSI SAS 9300 | 0, 1, 5, 6, 10, 50, 60 | 2 GB |
Rukovodstvo-megaraid-storage-manager
В данном руководстве описаны основные функции Megaraid Storage Manager, а также шаги по его установке и настройке.
Основные функции Megaraid Storage Manager
- Мониторинг состояния RAID-массивов и дисков
- Управление конфигурацией RAID
- Поддержка горячей замены дисков
- Создание и удаление логических томов
Установка Megaraid Storage Manager
- Скачайте последнюю версию MSM с официального сайта.
- Запустите установочный файл и следуйте инструкциям на экране.
- После завершения установки перезагрузите систему.
Настройка RAID через Megaraid Storage Manager
После установки MSM вы сможете выполнять следующие действия:
- Запустите Megaraid Storage Manager.
- Выберите контроллер RAID в списке доступных устройств.
- Откройте вкладку с конфигурацией RAID и выберите нужные параметры.
- Сохраните изменения и перезапустите контроллер при необходимости.
Требования к системе
| Компонент | Минимальные требования |
|---|---|
| Операционная система | Windows, Linux |
| Процессор | 1 ГГц и выше |
| Оперативная память | 512 МБ |
Rukovodstvo Megaraid Storage Manager
Rukovodstvo Megaraid Storage Manager (MSM) представляет собой важный инструмент для управления RAID-контроллерами и хранения данных. Это программное обеспечение позволяет администраторам эффективно контролировать состояние хранилищ, управлять массивами дисков и обеспечивать надежность и безопасность данных.
Данное руководство охватывает основные функции, настройки и типовые операции MSM, что делает его незаменимым для системных администраторов и технических специалистов.
Основные функции Megaraid Storage Manager
- Мониторинг состояния RAID-массивов
- Управление логическими и физическими дисками
- Создание и удаление RAID-массивов
- Настройка уведомлений и отчетов о состоянии системы
- Обновление прошивок контроллеров
Процесс установки
- Скачать последний дистрибутив Megaraid Storage Manager с официального сайта.
- Запустить установочный файл и следовать инструкциям на экране.
- После завершения установки перезагрузить систему.
- Запустить Megaraid Storage Manager и выполнить первоначальную настройку.
Пример конфигурации RAID массива
| Тип RAID | Количество дисков | Емкость массива |
|---|---|---|
| RAID 0 | 2 | 500 ГБ |
| RAID 1 | 2 | 250 ГБ |
| RAID 5 | 3 | 1 ТБ |
Rukovodstvo Megaraid Storage Manager
Данная инструкция охватывает основные функции и возможности MSM, а также пошаговое руководство по его использованию.
Основные функции Megaraid Storage Manager
- Мониторинг состояния массивов и дисков.
- Конфигурация RAID-уровней.
- Управление горячей заменой дисков.
- Создание и удаление логических дисков.
- Получение уведомлений о проблемах с оборудованием.
Установка Megaraid Storage Manager
- Скачайте последнюю версию MSM с официального сайта.
- Запустите установочный файл и следуйте инструкциям на экране.
- После установки откройте приложение для начала работы.
Мониторинг и управление массивами
Основной интерфейс MSM позволяет видеть текущее состояние дисков и массивов. Для доступа к информации о состоянии выполните следующие шаги:
- Запустите Megaraid Storage Manager.
- Выберите ваш контроллер в главном окне.
- Просмотрите статус дисков и массивов в соответствующем разделе.
Создание RAID-массивов
Для создания RAID-массива выполните следующие действия:
- Выберите раздел «Создание массива».
- Укажите необходимые диски для объединения.
- Выберите уровень RAID и его параметры.
- Подтвердите создание массива.
| Уровень RAID | Описание |
|---|---|
| RAID 0 | Стрипинг. Повышает скорость, но не обеспечивает надежности. |
| RAID 1 | Зеркалирование. Обеспечивает высокую надежность данных. |
| RAID 5 | Шпаргалка с распределением четности. Баланс между производительностью и надежностью. |
Используя Megaraid Storage Manager, вы можете эффективно управлять вашим хранилищем данных и гарантировать его надежность и производительность.
Rukovodstvo-megaraid-storage-manager
Rukovodstvo-megaraid-storage-manager представляет собой руководство пользователя для работы с утилитой MegaRAID Storage Manager, предназначенной для управления RAID-контроллерами и хранилищами данных. Это руководство охватывает основные функции, конфигурацию и эксплуатацию системы, что позволяет пользователям эффективно использовать технологии хранения данных.
В данном документе вы найдете описания интерфейса, пошаговые инструкции по настройке, а также советы по устранению неполадок. Таким образом, пользователи смогут быстро освоить все необходимые операции и повысить эффективность своей работы с RAID-массивами.
Основные возможности MegaRAID Storage Manager
- Мониторинг состояния RAID-массивов.
- Настройка конфигураций RAID.
- Управление физическими и логическими накопителями.
- Обновление прошивки контроллеров.
- Создание отчетов о производительности системы.
Процесс установки
- Скачайте последнюю версию MegaRAID Storage Manager с официального сайта LSI.
- Запустите установочный файл.
- Следуйте инструкциям установщика, принимая условия лицензионного соглашения.
- Завершите установку и перезагрузите систему.
Таблица поддерживаемых операционных систем
| Операционная система | Версия |
|---|---|
| Windows Server | 2016, 2019 |
| Linux | CentOS, RedHat (7 и выше) |
| VMware | 6.x, 7.x |
Устранение неполадок
Если у вас возникли проблемы с MegaRAID Storage Manager, попробуйте выполнить следующие действия:
- Проверьте подключение контроллера: Убедитесь, что RAID-контроллер правильно установлен и работает.
- Проверьте обновления: Убедитесь, что у вас установлена последняя версия программного обеспечения.
- Перезапустите приложение: Иногда простая перезагрузка может решить проблему.